
Don't wanna be here? Send us removal request.
Statistics
We looked inside some of the posts by liam0001 and here's what we found interesting.
Average Info
Notes Per Post
2
Likes Per Post
2
Reblog Per Post
0
Reply Per Post
0
Time Between Posts
3 days
Number of Posts By Type
Text
17
Last Seen Tumblr Blogs


Fun Fact
Tumblr.com is the 103rd most visited website in the world.
Text
How to Fix Commercial Dishwasher Impeller Problems
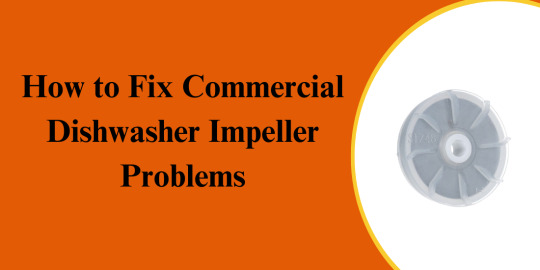
In a high-demand commercial kitchen, a malfunctioning dishwasher can disrupt workflow and compromise cleanliness. One often-overlooked yet essential component is the impeller, which creates the water pressure needed for effective cleaning. When it fails, dishwashing performance suffers, leading to delays and hygiene concerns. Understanding how to identify and fix impeller issues can help restaurant staff minimize downtime, reduce repair costs, and keep operations running smoothly. This guide covers the most common impeller problems in commercial dishwashers and practical steps to resolve them efficiently.
Common Commercial Dishwasher Impeller Problems and How to Fix Them
Here are the most common commercial dishwasher impeller problems and practical steps to fix them.
Clogged or Obstructed Impeller
One of the most frequent issues with dishwasher impellers is clogging due to debris. In commercial environments where dishes may not be pre-rinsed, bits of food, broken glass, labels, or grease can become lodged in or around the impeller, restricting its movement and reducing water pressure.
Symptoms:
Spray arms are not spinning or moving sluggishly
Dishes coming out dirty or still greasy
A humming sound without active spraying
Slower cycle times due to inefficient cleaning
How to Fix:
Disconnect Power and Water: Safety first — switch off the dishwasher at the breaker and shut off the water valve.
Remove Lower Rack and Filters: Gain access to the sump and impeller by removing the bottom rack, spray arms, and mesh filters.
Access the Impeller Chamber: Depending on the make and model (e.g., Hobart, CMA, or Jackson), you may need to remove additional panels or covers inside the tub.
Clean the Impeller and Housing: Use a soft brush or cloth to remove food particles and debris. For mineral buildup, apply a descaler or white vinegar. Inspect surrounding seals for signs of wear.
Reassemble and Test: Reinstall all components and run a test cycle to ensure full spray coverage and proper operation.
Preventive Tip: Encourage staff to scrape off excess food and avoid loading items with paper labels that can dislodge and clog the pump.
Damaged or Broken Impeller Blades
Impeller blades can crack or break due to prolonged wear, manufacturing defects, or contact with hard objects like broken dishware. Even minor blade damage can significantly reduce water flow and prevent the spray arms from functioning effectively.
Symptoms:
Loud banging or rattling during wash cycles
Low water pressure or no water reaching the upper racks
Water pools inside the chamber after a cycle
Repeated cleaning cycles with unsatisfactory results
How to Fix:
Turn Off the Dishwasher: Disconnect power and water to avoid electrical hazards.
Access and Inspect the Impeller: Remove panels and components to visually inspect the impeller. Look for chips, bends, or missing pieces.
Remove the Broken Impeller: Loosen the fastener or locking nut holding the impeller to the motor shaft. Gently pull it off — some models may require a special tool for removal.
Install a Replacement Impeller: Ensure you use an OEM part compatible with your dishwasher. Position it properly on the shaft and tighten the fastener securely.
Run a Diagnostic Cycle: After reassembly, test for smooth operation. Make sure the spray arms rotate freely and the dishwasher completes a full cleaning cycle.
Note: A cracked impeller can also be a sign of pump motor misalignment or vibration — inspect the entire pump housing to avoid repeated damage.
Loose or Misaligned Impeller
Over time, impellers can become loose or misaligned due to vibration, thermal expansion, or worn-out fasteners. A loose impeller will not generate enough pressure, resulting in reduced wash efficiency.
Symptoms:
Spray arms sputter or stop intermittently
Clicking or clanking noise during operation
Inconsistent cleaning results
The impeller visibly wobbles when touched
How to Fix:
Power Off the Machine: Always ensure the dishwasher is fully powered down before repair.
Inspect Mounting Hardware: Open the pump assembly and check the impeller’s retaining nut or screw. Look for stripped threads, broken washers, or damaged gaskets.
Re-tighten or Realign: Secure the impeller to the shaft using the correct torque and alignment. Apply thread locker if recommended by the manufacturer.
Replace Damaged Hardware: If bolts or nuts are worn out, replace them with appropriate OEM parts.
Verify Movement: Manually spin the impeller to ensure it rotates smoothly without lateral play.
Test for Stability: After reassembly, run a test cycle and listen for unusual noises or performance drops.
Maintenance Tip: During monthly maintenance checks, include inspection of the impeller for signs of loosening, corrosion, or off-center rotation.
Worn-Out Seals or Bearings Affecting the Impeller
The impeller is usually connected to the motor shaft, which is supported by bearings and protected by seals. In high-use commercial environments, these parts can degrade due to heat, detergent, and moisture. When bearings wear out or seals fail, the shaft may wobble, reducing the impeller’s effectiveness and potentially causing leaks.
Symptoms:
Squealing or grinding noise
The motor feels hot or emits a burning odor
Water is leaking from the motor or pump base
Dishes remain dirty after multiple cycles
How to Fix:
Shut Down the Dishwasher: Disconnect power and water, and allow the unit to cool.
Disassemble the Pump Housing: Remove the impeller and check the shaft for smooth rotation. Inspect bearings for rust, grinding, or excess movement.
Replace Seals and Bearings: Use a seal and bearing kit designed for your dishwasher model. Follow the manufacturer’s installation procedures closely.
Lubricate If Necessary: Apply food-grade lubricant to the bearing shaft (if allowed).
Reinstall and Test: Reassemble the pump, reinstall the impeller, and check for smooth and silent operation during a full cycle.
Pro Tip: Always replace both the bearing and seal together to ensure maximum performance and prevent premature failure.
Impeller Not Spinning Due to Motor or Electrical Issues
Sometimes the issue isn’t mechanical but electrical. If the motor that drives the impeller isn’t receiving power or has failed internally, the impeller won’t spin. This renders the dishwasher inoperative despite filling with water.
Symptoms:
Dishwasher fills but doesn’t wash
The motor is completely silent during operation
The control board flashes error codes
The impeller spins manually but doesn’t engage during cycles
How to Fix It:
Check the Power Supply: Confirm that the dishwasher is receiving power. Test the outlet and circuit breaker.
Use a Multimeter: Inspect continuity and voltage on the motor, wiring harness, and capacitor.
Test the Control Board: Ensure that the control panel is sending power to the motor. Some machines have diagnostic modes or error code references.
Replace Faulty Components: If the motor is burnt out or the capacitor is faulty, replace the component. Always use commercial-grade, compatible parts.
Re-Test Electrical System: After installation, run a test cycle and monitor impeller movement and motor performance.
Safety Note: Electrical repairs should be performed by a certified technician or a trained maintenance professional. Never attempt live diagnostics without proper tools and knowledge.
Impeller Wear Due to Corrosion or Chemical Damage
In commercial kitchens where harsh detergents, sanitizers, or hard water are frequently used, the impeller may degrade over time due to chemical corrosion or mineral buildup. This reduces blade efficiency and may lead to cracks or blade erosion.
Symptoms:
Rough or pitted impeller surface
Reduced cleaning performance despite intact motor
White mineral deposits on or near the pump
Deterioration of nearby rubber seals or gaskets
How to Fix:
Inspect for Corrosion: Check for discoloration, pitting, or signs of chemical damage on the impeller and surrounding parts.
Remove Buildup: If the buildup is light, use a food-safe descaler or soak the impeller in diluted vinegar to dissolve mineral deposits.
Replace if Necessary: Severely corroded impellers must be replaced. Continued use can cause unbalanced operation and damage the pump.
Water Treatment: Install a commercial water softener or filtration system to reduce scale and mineral damage.
Maintenance Advice: Include descaling and chemical inspection as part of your quarterly maintenance plan.
Excessive Vibration Leading to Impeller Wear
Heavy vibrations in a commercial dishwasher can cause significant wear on the impeller over time. These vibrations typically stem from an improperly leveled dishwasher or uneven load distribution. Over time, the constant shaking can lead to misalignment, which puts strain on the impeller, potentially causing it to fail prematurely.
Symptoms:
Excessive Noise or Shaking
Water Splashing or Pooling
Misaligned or Unstable Impeller
How to Fix:
Check Dishwasher Leveling: Use a level tool to ensure the dishwasher is sitting evenly on the floor. If the dishwasher is not level, adjust the feet at the bottom to balance it out.
Inspect Floor Stability: Ensure the floor under the dishwasher is solid and stable. A weak or uneven floor can amplify vibrations. If needed, place a vibration-absorbing mat under the dishwasher to help reduce movement.
Avoid Overloading: Do not overload the dishwasher with too many dishes, as this can cause uneven weight distribution and lead to increased vibrations. Make sure dishes are placed properly and evenly spaced on the racks.
Distribute Dishes Evenly: Load dishes in a way that balances the load on both sides of the dishwasher. Avoid concentrating heavy items in one area.
Check for Faulty Mountings or Legs: Examine the dishwasher’s mounting brackets and legs for any loose or worn-out parts. Tighten or replace them if necessary.
Impeller problems in commercial dishwashers may seem daunting, but with the right knowledge and tools, most issues can be resolved efficiently. Prioritizing maintenance and early intervention not only saves time and money but also keeps your kitchen operations seamless. A well-maintained commercial dishwasher ensures your team can serve guests quickly and safely, day after day.
Written by Allen Rode for PartsFeUK, your trusted source for various high-quality commercial restaurant equipment, including dishwasher and oven parts, and more.
1 note
·
View note
Text
How to Clean a Commercial Dishwasher Drain Hose
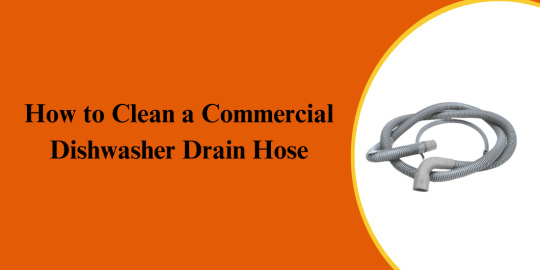
In a commercial kitchen, the dishwasher is a critical part of daily operations, ensuring a steady flow of clean, sanitized dishes. To keep it running efficiently, regular maintenance is essential, especially when it comes to the drain hose. Often overlooked, this component plays a key role in the machine’s performance and overall hygiene. In this guide, you’ll learn how to properly clean a commercial dishwasher drain hose, why it’s important, and how to prevent future buildup to maintain smooth, reliable kitchen operations.
What Drain Hose in Commercial Dishwashers?
A drain hose is a flexible, reinforced tube responsible for carrying dirty, used water from the dishwasher's tub to the building’s drainage system. In a commercial dishwasher, the drain hose operates under much more demanding conditions than its residential counterpart. It handles higher volumes of water, faster drain cycles, and hotter temperatures, all while maintaining sanitation standards critical to the food service industry.
Commercial dishwashers can be under-counter units, door-type machines, or conveyor-style models. Regardless of the type, they all use a drain hose to expel wastewater at the end of each wash and rinse cycle. This seemingly simple component is vital for:
Ensuring fast turnover by removing water between cycles
Preventing contamination by expelling dirty water
Protecting kitchen infrastructure by directing water safely to the drainage system
Simple Steps to Clean Your Commercial Dishwasher Drain Hose
Here is a detailed, step-by-step guide to help you properly clean the drain hose and keep your dishwasher working efficiently.
Step 1: Turn Off the Power and Water Supply
Before doing any kind of cleaning or repair work, always prioritize safety. Commercial dishwashers run on either hardwired electricity or a dedicated power cord, so you’ll need to disconnect the power by unplugging the unit or turning off the circuit breaker. This prevents accidental electric shocks and ensures no cycle starts during cleaning.
Next, turn off the water supply connected to the dishwasher. This will minimize the risk of water spills while removing the hose. These precautions may seem simple, but skipping them can lead to unnecessary hazards or damage to your equipment.
Step 2: Locate and Detach the Drain Hose
Once the unit is safe to work on, locate the drain hose. In most commercial dishwashers, it’s positioned at the rear of the unit or underneath near the base. The hose typically runs from the drain pump to the waste line or floor drain.
To remove it:
Move the dishwasher slightly away from the wall to access the rear panel if necessary.
Place a bucket or shallow tray under the hose connection to catch any standing water inside the hose.
Using a screwdriver or adjustable wrench, loosen the clamps or fasteners that secure the hose to the dishwasher and the drain outlet.
Gently detach the hose from both ends.
Take care not to yank or bend the hose forcefully, especially if it's older or made of flexible plastic that may have become brittle.
Step 3: Inspect the Hose for Clogs or Damage
Now that the hose is detached, examine it thoroughly under good lighting. A flashlight can help you spot issues inside and along the entire length of the hose.
Look for the following:
Buildup of grease, soap scum, or food particles
Mold or slimy residue inside the walls of the hose
Kinks, flattened areas, or sharp bends that could restrict flow
Any visible cracks, holes, or signs of wear and tear
If the hose has significant damage or has hardened due to age or heat exposure, replacing it is the safer choice. However, if it’s structurally sound, you can proceed with a thorough cleaning.
Step 4: Flush the Hose with Warm Water
Start by giving the hose a rinse with warm (not boiling) water. This helps loosen any grime or residue clinging to the inside. Ideally, perform this task over a utility sink or outdoors using a garden hose.
Hold one end of the hose up and pour warm water through, allowing it to run out the opposite side. Squeeze the hose gently to help push water through and loosen the buildup. This initial flush helps soften residue before scrubbing.
Step 5: Scrub the Interior Using a Flexible Brush
Once the hose has been rinsed, the next step is to clean the interior more aggressively. Use a long, flexible brush such as a pipe brush or bottle brush with a long handle—tools designed specifically for cleaning narrow tubing.
Insert the brush into the hose and scrub back and forth, working through the entire length. If buildup is heavy or sticky, soak the hose in a mixture of warm water and mild dish detergent for 15 to 20 minutes. After soaking, scrub again and flush with warm water.
For stubborn spots, repeat the process or gently twist the brush to increase scrubbing effectiveness. Avoid using metal or abrasive materials that could damage the hose lining.
Step 6: Use Baking Soda and Vinegar for Odor Control (Optional)
If the hose has developed unpleasant odors or signs of bacterial buildup, you can treat it naturally using baking soda and vinegar:
Pour ½ cup of baking soda into one end of the hose.
Slowly add 1 cup of white vinegar to activate a foaming reaction.
Let the mixture fizz and sit inside the hose for 10 to 15 minutes.
After the reaction settles, flush the hose thoroughly with warm water.
This not only removes odor but also helps clean any remaining residue and prevent microbial growth inside the hose.
Step 7: Reattach the Hose and Secure It Properly
Once the hose is clean and rinsed, it’s time to put everything back together:
Reconnect the hose to the dishwasher’s drain outlet and the building drain or floor trap.
Use stainless steel clamps or hose fittings to secure both ends tightly.
Make sure there are no sharp bends or kinks in the hose, as this could affect drainage.
The hose should have a gradual downward slope to allow gravity-assisted water flow and prevent backups.
Double-check all clamps and connections for a secure fit.
Step 8: Restore Power and Water, Then Test
After Reassembly:
Restore the dishwasher’s power supply and turn the water back on.
Run a full cleaning cycle or test cycle.
Watch the hose and the surrounding areas for any signs of leaking.
Confirm that water is draining freely and that no odors persist.
If the unit runs smoothly, your drain hose is successfully cleaned, and your dishwasher is back in optimal working condition.
Maintenance Tips to Keep the Commercial Dishwasher Drain Hose Clean
To avoid frequent clogs and ensure efficient dishwasher operation, follow these best practices:
Pre-Rinse Dishes Before Loading
While commercial dishwashers are built to handle heavy-duty cleaning, excess food particles and grease can still cause blockages in the drain hose over time. Make it a standard practice for kitchen staff to scrape off and lightly rinse dishes before placing them into the dishwasher. This simple habit significantly reduces the amount of debris entering the system and helps prevent build-up in the hose and filters.
Clean Filters and Screens Weekly
The internal filters and spray arm screens of your commercial dishwasher act as the first line of defense against clogs. If these become coated with grease or food particles, debris is more likely to bypass the filter and accumulate in the drain hose. Cleaning these components every week ensures proper water flow and minimizes the risk of hose contamination.
Flush the Drain Line Monthly
At least once a month, it's a good idea to flush the dishwasher drain line using hot water or a vinegar solution. This helps dissolve grease, clear minor residue, and maintain smooth water flow through the hose. For a natural cleaning method, pour a solution of 1 cup white vinegar and 1 cup hot water into the drain, let it sit for 10–15 minutes, and then run a rinse cycle to flush the line.
Schedule Professional Maintenance Every 6–12 Months
For high-volume kitchens, routine professional maintenance is highly recommended. Trained technicians can inspect not only the hose but also the pump, seals, and electrical components. Scheduling a service visit every 6 to 12 months helps catch minor issues before they become costly problems and ensures compliance with health and safety standards.
Inspect the Hose Quarterly
Lastly, make it a point to check the condition of the drain hose every three months. Look for signs of wear such as cracking, kinks, or restricted flow. Early detection of damage allows you to repair or replace the hose before it causes major drainage problems or a shutdown during peak hours.
By implementing these maintenance tips, you’ll protect your investment, prevent downtime, and keep your kitchen operations running smoothly.
Cleaning the drain hose of your commercial dishwasher might not be glamorous, but it's one of the most important maintenance tasks to ensure smooth, efficient kitchen operations. Neglecting this step can lead to clogged drains, bad odors, and even equipment failure—all of which can slow down your service and impact your bottom line. With routine cleaning and periodic inspection, your dishwasher will continue running at peak performance, keeping your kitchen clean, compliant, and ready for business.
Written by Allen Rode for PartsFeUK, your trusted source for various high-quality commercial restaurant equipment, including dishwasher and oven parts, and more.
1 note
·
View note
Text
Keating Fryer Problems and Simple Ways to Fix Them

In any busy commercial kitchen, deep fryers are essential for efficient food preparation. Among the many brands available, Keating fryers are known for their reliability, performance, and energy efficiency, especially with their innovative instant recovery technology. However, like all kitchen equipment, Keating parts are subject to wear and tear over time. If not properly maintained, issues can arise, leading to costly repairs and operational downtime. This article will guide restaurant owners, chefs, and technicians through common Keating fryer problems and provide effective solutions to ensure your fryer remains in top working condition.
Common Keating Fryer Problems and How to Fix Them
Here are some common Keating fryer problems and simple solutions to keep your fryer running smoothly and efficiently.
Fryer Doesn’t Heat Up
When your deep fryer doesn't heat up, it's one of the most frustrating issues. Especially at busy times, a fryer that refuses to heat up can seriously interfere with kitchen operations.
How to Fix It:
Check Power Supply: Ensure that the fryer is plugged into a functional outlet (for electric fryers) or the gas line is properly connected (for gas fryers).
Reset the Hi-Limit Switch: Press the reset button on the hi-limit switch located on the back or control panel. If the issue recurs, consider replacing this Keating part.
Inspect the Thermostat: Use a multimeter to test the thermostat for functionality. If it's malfunctioning, replacing it will restore heating.
Ensure Drain Valve is Closed: Double-check that the fryer’s drain valve is securely closed. If left open, the fryer may not heat properly.
Inconsistent Oil Temperature
A fryer that can’t maintain a consistent oil temperature leads to poor cooking results—either undercooked food or excessively greasy dishes. This is a common problem in high-demand kitchens.
How to Fix It:
Adjust the Thermostat: Adjust the thermostat if the temperature readings are not consistent. Use an external thermometer to compare readings and adjust accordingly.
Clean the Temperature Sensors: Over time, sensors can become dirty or covered in grease, leading to inaccurate temperature readings. Clean the sensors regularly to maintain precise control.
Replace Faulty Parts: If recalibration and cleaning don’t work, it may be time to replace the thermostat or temperature sensors.
Install a New Control Board if Necessary: The digital control board regulates temperature. If the board is sending erratic signals, temperature control may fail. Swap it with a compatible Keating part
Pilot Light Won’t Stay Lit
For gas-powered Keating fryers, a pilot light that won’t stay lit is a significant problem that can prevent the fryer from operating entirely.
How to Fix It:
Clean the Pilot Orifice: If the pilot orifice is clogged with grease or debris, it will make it difficult to keep the light lit. Use compressed air or a small brush to clean it.
Replace the Thermocouple: The thermocouple detects the flame from the pilot light and keeps the gas valve open. A malfunctioning thermocouple will result in the pilot light going out. It can be replaced to restore functionality.
Verify Gas Pressure: The pilot light may go out due to low gas pressure. See an expert to adjust the pressure if it is too low.
Inspect the Gas Valve: A faulty or partially open valve can disrupt pilot function. Ensure the valve is fully operational and not blocked.
Excessive Smoking or Foul Smell
A fryer emitting excessive smoke or a foul smell is a sign of deteriorating oil or improper use. Not only does this affect the food’s flavor, but it can also create an unpleasant work environment.
How to Fix It:
Maintain Oil Temperature: Ensure that the oil is not overheated. Overheated oil degrades its quality, which can lead to smoke and bad smells. Always cook at the recommended temperature.
Replace Old Oil: Regularly filter and change the oil. If the oil has developed an unpleasant odor or darkened in color, replace it with fresh oil.
Avoid Oil Contamination: Be cautious not to add water, salt, or other contaminants to the oil, as these can cause the oil to break down and emit smoke or odors.
Fryer Takes Too Long to Recover Heat
If your fryer struggles to recover heat after food is added, it will cause delays in cooking time. Slow heat recovery affects food quality and efficiency in high-volume kitchens.
How to Fix It:
Clean the Heat Exchanger: Over time, grease and carbon build-up can obstruct the heat exchanger tubes. Clean the heat exchanger regularly to ensure optimal heat transfer.
Check the Burners: Dirty or damaged burners can hinder heat recovery. Clean or replace the burners to improve heat distribution.
Inspect Gas or Electrical Supply: Ensure the fryer is receiving the correct amount of gas or electricity. If the supply is inadequate, the fryer will struggle to recover heat effectively.
Consider Upgrading to Instant Recovery Technology: Keating offers Instant Recovery fryers specifically designed to maintain consistent performance under pressure. If your kitchen is growing, this upgrade may save long-term costs.
Use a Digital Thermometer for Monitoring: This allows you to precisely track heat recovery and spot potential lag early.
Oil Leaks
Oil leaks are a serious problem that can lead to wasted oil and unsafe working conditions. Leaks can occur at various points in the fryer, including the drain valve, fry pot, and seals.
How to Fix It:
Tighten or Replace the Drain Valve: If oil is leaking from the drain valve, ensure it is tightly closed after each use. If it’s still leaking, replace the valve with a new one.
Inspect the Fry Pot: Cracks in the fry pot can cause oil to leak. If you find any cracks, it’s usually best to replace the fry pot rather than attempt a repair.
Replace Worn Seals or Gaskets: The seals and gaskets around the fryer may wear out over time. Inspect these components and replace any that are damaged to prevent oil leaks.
The Fryer Won’t Turn On
When a fryer refuses to turn on, it can halt kitchen operations entirely. A fryer that doesn’t start is usually linked to electrical or wiring issues.
How to Fix It:
Check the Circuit Breaker: For electric fryers, ensure the circuit breaker hasn’t tripped. If it has, reset it and check the fryer again.
Inspect Wiring and Control Board: Faulty wiring or a malfunctioning control board can prevent the fryer from turning on. If necessary, have the wiring or control board inspected and replaced.
Replace the Fuse: If the fryer uses a fuse and it’s blown, replacing the fuse should restore power to the unit.
Noisy Operation
Unusual sounds coming from the fryer can indicate underlying issues with the heating elements, burners, or gas lines.
How to Fix It:
Inspect the Heating Element: A faulty heating element may produce strange noises. Check the element for wear and replace it if necessary.
Purge the Gas Line: If there is air trapped in the gas line, it can cause the fryer to operate noisily. Purging the gas line can eliminate the noise.
Tighten Loose Parts: Over time, screws and bolts may loosen due to regular fryer operation. Inspect the fryer for any loose parts and tighten them to reduce noise.
Fryer Is Overheating
An overheating fryer can cause damage to both the fryer and the food being prepared. It can also lead to safety hazards if not addressed promptly.
How to Fix It:
Check the Thermostat: The fryer may overheat if the thermostat isn't working properly. If the thermostat has to be replaced, test it first.
Avoid Overfilling the Fry Pot: Ensure the fry pot is not overfilled. Overfilling the fryer with oil or food can cause the fryer to overheat and make cooking unsafe.
Clean Air Vents: Blocked air vents can restrict airflow, causing the fryer to overheat. Regularly cleaning the air vents will provide adequate ventilation.
Uneven Cooking Results
When the fryer produces unevenly cooked food, it can indicate that the oil is not circulating properly or the fryer isn’t maintaining an even temperature.
How to Fix It:
Clean the Fryer Thoroughly: Regularly clean the fryer, especially the fry pot and heat exchanger, to ensure proper oil circulation and temperature distribution.
Check the Oil Level: Uneven cooking can result from low oil levels. Ensure the fryer is filled with the appropriate amount of oil to allow for consistent cooking.
Check the Oil Quality: Old or contaminated oil can affect cooking results. Replace the oil as needed to ensure even cooking.
Burnt or Undercooked Food
If food is either burnt or undercooked, the fryer is likely not maintaining the correct temperature, which can result in undesirable results.
How to Fix It:
Recalibrate the Thermostat: If the fryer’s temperature is inaccurate, recalibrate the thermostat or replace it if necessary.
Check the Frying Basket: Sometimes, packing the fryer basket too full can hinder even frying. Avoid overloading the basket to ensure the food cooks evenly.
Ensure Consistent Oil Quality: Old oil or contaminated oil can affect the frying process. Replace the oil regularly for better cooking performance.
Keating fryers are a trusted and efficient choice for many commercial kitchens, but like all equipment, they require proper maintenance and timely repairs to ensure smooth operation. By understanding these common problems and how to fix them, restaurant owners, chefs, and technicians can keep their fryers in peak condition, minimize downtime, and avoid costly repairs. Regular cleaning, calibration, and replacing worn-out Keating parts will not only extend the lifespan of your fryer but also ensure that it continues to perform at the high standards your kitchen demands.
Written by Allen Rode for PartsFeUK, your trusted source for a variety of high-quality commercial restaurant equipment, including fryer and oven parts.
#Keatingfryerparts#commercialrestaurantparts#replacementparts#kitchenequipmentparts#foodserviceparts
0 notes
Text
Imperial Commercial & Convection Oven Parts| PartsFe UK

Imperial ovens are widely used in commercial kitchens because of their efficiency and sturdiness of the appliances. When you want to ensure that your Imperial oven works properly, it is advisable to use original Imperial oven spares for normal, professional, or convection ovens. Imperial commercial oven parts are made for the tough environment of a kitchen to provide even heat distribution and durability. Convection ovens, for instance, must have well-calibrated parts in order to function well; getting the correct parts will help to prevent costly repairs and equipment down time. Imperial ovens require regular servicing, and any worn out part should be replaced in order to ensure that the oven serves you for a long time. Thus, only buying genuine Imperial convection oven parts guarantees that the oven will keep operating at the level required in the kitchen.
To keep your restaurant running smoothly, it's crucial to invest on Imperial Oven Parts that ensure long-lasting performance
#Imperial#ImperialOvenParts#PartsFeUK#PartsFeUKbuzz#cateringparts#restaurantowner#restaurantequipmentparts#kitchenequipmentparts
0 notes
Text
Nieco 9056 Grease Collection Box | PartsFe UK

The Nieco 9056 Grease Collection Box is a durable and essential component designed for efficient grease management in Nieco broilers and cooking equipment. Built from high-quality materials, it effectively collects and contains excess grease, promoting a cleaner and safer kitchen environment. Its sturdy construction ensures long-lasting performance, even under high-heat and heavy-use conditions. Easy to remove and clean, this grease box helps maintain hygiene standards and reduces maintenance time. Ideal for commercial kitchens, it enhances equipment efficiency. Available at PartsFe UK, this collection box supports smooth and sanitary cooking operations in busy food service settings.
To keep your restaurant running smoothly, it's crucial to invest on Nieco Grease Collection Box that ensure long-lasting performance
#9056#Nieco#GreaseCollectionBox#PartsFeUK#PartsFeUKbuzz#cateringparts#restaurantowner#restaurantequipmentparts#kitchenequipmentparts
0 notes
Text
Hobart Commercial Slicer Parts & Accessories| PartsFe UK

Hobart slicers are standard equipment in today’s food service operations; the specialty equipment is necessary for slicing meats, vegetables and other products. Regardless of whether you are operating a Hobart meat slicer or a vegetable slicer – these are machines that can give you that perfect slice effortlessly. To ensure that your Hobart slicer is in its best condition, then it is important to use genuine Hobart slicer parts. These parts are made to fit in Hobart slicers so that the slicers can still function in delivering quality slicing services.Hobart vegetable slicer parts include blades, gears, motors, and slicer covers. They all have their functions in the functionality of the slicer; it could be to ensure clean and smooth cuts, adherence to safety measures or for simple usability. If you are using genuine Hobart meat slicer parts you can avoid problems like poor cutting, blunt blades, or working troubles.
To keep your restaurant running smoothly, it's crucial to invest on Hobart Slicer Parts that ensure long-lasting performance
#Hobart#HobartSlicerParts#PartsFeUK#PartsFeUKbuzz#cateringparts#restaurantowner#restaurantequipmentparts#kitchenequipmentparts
0 notes
Text
Hobart Commercial Dishwasher Parts & Accessories| PartsFe UK

Hobart dishwashers are a necessity in any working kitchen because they offer the fast and effective washing that is required to make dishes, flatware, glassware, and pots and pans clean and ready for use. Both standard and commercial models of dishwashers are built to withstand the tough work schedules of a food establishment. Thus for your dishwasher to work as required it is very important to use genuine Hobart dishwasher replacement parts only. These parts are manufactured to fit Hobart dishwashers, therefore; they will continue to deliver efficient and effective cleaning.
To keep your restaurant running smoothly, it's crucial to invest on Hobart Dishwasher Parts that ensure long-lasting performance
#Hobart#HobartDishwasherParts#PartsFeUK#PartsFeUKbuzz#cateringparts#restaurantowner#restaurantequipmentparts#kitchenequipmentparts
0 notes
Text
Manitowoc Ice Machine Ice Thickness Probes | PartsFe UK

In Manitowoc ice machines, probes play an essential role as they help check for the thickness of ice and the level of water in the machine. These probes guarantee that ice produced is of the right size and that the machine contains enough water for ice making. Some of the problems include variations in the thickness of the ice which the probe is expected to maintain, the quality of the ice or in the extreme even a machine failure. To ensure you get the best and accurate ice machine, always use genuine Manitowoc probes.Ice thickness probes and water level probes used in Manitowoc are designed with accuracy and ruggedness features that make it possible to measure the ice in the challenging environment of ice making for commercial use.
To keep your restaurant running smoothly, it's crucial to invest on Manitowoc Ice Thickness Probes that ensure long-lasting performance
#Manitowoc#ManitowocIcethicknessProbes#PartsFeUK#PartsFeUKbuzz#cateringparts#restaurantowner#restaurantequipmentparts#kitchenequipmentparts
0 notes
Text
True Bearings for Commercial Refrigerators| PartsFe UK

Bearings are used in the running of refrigeration units so that fans, motors and compressors are in proper working condition. These parts are made to rotate smoothly and with little or no friction and therefore bearings minimize wear and heat. If the bearing is worn or damaged, it’s able to produce more noise, less efficient and could cause equipment failure. To ensure high performance of your refrigeration unit, it is recommended that you use genuine True bearings that are manufactured to fit your unit.Original bearings are designed to be strong and dependable, able to meet the rigors of the commercial refrigeration applications. By using authentic True bearings, you can be sure that your refrigeration unit will not break down frequently and the life span of the equipment is also prolonged. Daily check and replacement of the worn bearings should be done to avoid large problems like motor failure or high energy usage.
To keep your restaurant running smoothly, it's crucial to invest on True Bearings that ensure long-lasting performance
#True#TrueBearings#PartsFeUK#PartsFeUKbuzz#cateringparts#restaurantowner#restaurantequipmentparts#kitchenequipmentparts
0 notes
Text
True Brackets for Commercial Refrigerator | PartsFe UK

True brackets are a critical part of the construction and erection of commercial refrigeration equipment. These brackets afford the required support and rigidity of the different parts of the refrigeration system, including shelves, motors, and evaporators. A bent or an incorrectly fixed bracket will cause the equipment to wobble, perform poorly or even affect the refrigeration equipment. To avoid such problems, genuine True brackets that are appropriate for your equipment.
To keep your restaurant running smoothly, it's crucial to invest on True Brackets and Accessories that ensure long-lasting performance
#True#TrueBracketsandAccessories#PartsFeUK#PartsFeUKbuzz#cateringparts#restaurantowner#restaurantequipmentparts#kitchenequipmentparts
0 notes
Text
True Door Gaskets for Commercial Refrigerators | PartsFe UK

True door gaskets are an essential part of the commercial refrigerator since they are charged with making a close fit when the door is shut. This seal is critical in keeping the cold air locked inside and to making sure that the refrigeration unit is running properly. Damage to door gasket may cause problems like fluctuation in temperature, high energy consumption and poor hygiene standards. To counteract these issues, it is recommended that only original True door gaskets should be used for your specific refrigeration. It is therefore important to check the door gasket frequently and replace it as soon as it is worn out. Replacing a true door gasket is not very complicated, but you have to make sure that you get the right gasket for your refrigerator.
To keep your restaurant running smoothly, it's crucial to invest on True Door Gaskets that ensure long-lasting performance
#true#TrueDoorGaskets#PartsFeUK#PartsFeUKbuzz#cateringparts#restaurantowner#restaurantequipmentparts#kitchenequipmentparts
0 notes
Text
True Refrigeration Parts for Commercial Units| PartsFe UK

True walk-in refrigeration systems are perhaps the most popular and reliable in commercial applications in the UK. These are widely acclaimed for their energy saving, reliability and long lasting features which serve a vital purpose of maintaining the food and beverages at appropriate temperature. For True refrigeration equipment to keep on working efficiently, it is important to use genuine True refrigeration parts. These parts are designed to True standards so that they will both fit, perform and last as required. From the compressor, evaporator, fan, and control board etc, all of them play an important role in the operation of the refrigeration unit and contribute to temperature regulation, protection against frost, and energy saving. When employing original True refrigeration parts, you can overcome some of the issues that are normal, including; fluctuating temperatures, high energy consumption, and early product breakdown.
To keep your restaurant running smoothly, it's crucial to invest on True Refrigeration Parts that ensure long-lasting performance
#True#TrueRefrigerationParts#PartsFeUK#PartsFeUKbuzz#cateringparts#restaurantowner#restaurantequipmentparts#kitchenequipmentparts
0 notes
Text
Middleby Marshall 35000-1103P304 Conveyor End Stop , 29-1/4" | PartsFe UK

The Middleby Marshall 35000-1103P304 Conveyor End Stop is a durable and essential component designed for Middleby Marshall conveyor ovens. Measuring 29-1/4 inches, it helps ensure smooth and controlled movement of food items along the conveyor, preventing spillage and misalignment. Made from high-quality materials, it offers long-lasting performance in high-temperature environments. This end stop enhances efficiency in commercial kitchens by maintaining consistent cooking operations. Ideal for bakeries, pizzerias, and food service establishments, it supports seamless workflow. Available at PartsFe UK, this reliable replacement part helps keep your conveyor oven functioning optimally for continuous food production.
To keep your restaurant running smoothly, it's crucial to invest on Middleby Marshall Conveyor that ensure long-lasting performance
#35000-1103P304#MiddlebyMarshall#Conveyor#PartsFeUK#PartsFeUKbuzz#cateringparts#restaurantowner#restaurantequipmentparts#kitchenequipmentparts
0 notes
Text
Koala Kare Products 889-KIT Vert strap Assembly For Baby Chng Station | PartsFe UK

The Koala Kare Products 889-KIT Vertical Strap Assembly is a high-quality replacement part designed for Koala Kare baby changing stations. This durable safety strap ensures secure and comfortable restraint for infants during diaper changes. Made from strong, easy-to-clean materials, it enhances safety and reliability in commercial restrooms. Simple to install, it helps maintain compliance with hygiene and safety standards. Available at PartsFe UK, this strap assembly keeps your baby changing station functional and safe for everyday use.
To keep your restaurant running smoothly, it's crucial to invest on Koala Kare Products strap Assembly that ensure long-lasting performance
#889-KIT#KoalaKareProducts#strap Assembly#PartsFeUK#PartsFeUKbuzz#cateringparts#restaurantowner#restaurantequipmentparts#kitchenequipmentparts
0 notes
Text
Turbo Air Commercial Cooler Parts & Accessories| PartsFe UK

Turbo Air coolers are used in commercial premises to store and cool products such as beverages and other perishable goods. These units are highly prized for their energy efficiency, durability and reliability of cooling, making them popular in restaurants and bars, as well as retail shops. For your cooler to be as reliable and as good as it was when it was newly bought, then the Turbo Air cooler parts that should be used are genuine ones. These parts are intended to have the best fit and performance so that your cooler will keep on delivering the best cooling as expected.
To keep your restaurant running smoothly, it's crucial to invest on Turbo Air Cooler Parts that ensure long-lasting performance
#TurboAir#TurboAirCoolerParts#PartsFeUK#PartsFeUKbuzz#cateringparts#restaurantowner#restaurantequipmentparts#kitchenequipmentparts
0 notes
Text
Turbo Air Freezer Replacement Parts& Accessories | PartsFe UK

Turbo Air freezers are very important in food storage in restaurants, cafes, supermarkets, and other related businesses. These units are intended to store products at extremely low temperatures so that frozen products are safe and of high quality. There are various Turbo Air freezer spares which include compressors, thermostats, door gasket and evaporator coils. All of these parts have their specific functions to provide and maintain steady temperature, avoid formation of frost, and save energy. With genuine Turbo Air freezer spare parts, you can avoid typical problems like erratic temperature, excessive icing, and high energy usage
To keep your restaurant running smoothly, it's crucial to invest on Turbo Air Freezer Parts that ensure long-lasting performance
#TurboAir#TurboAirFreezerParts#PartsFeUK#PartsFeUKbuzz#cateringparts#restaurantowner#restaurantequipmentparts#kitchenequipmentparts
0 notes
Text
Turbo Air Compressor Parts For Refrigerators & Freezers| PartsFe UK

The compressor is the most important component of any refrigeration system as it circulates the refrigerant and ensures that the low temperatures required for storing food and drinks are achieved. Compressor problems can range from minor ones such as inadequate cooling, high energy use to severe ones like system failure. In order to avoid such issues it is highly recommended to purchase only genuine Turbo Air compressor parts that are compatible with your equipment only. This is why it is important to perform routine maintenance and replace parts of the compressor as and when due to avoid a system breakdown of the refrigeration equipment.
To keep your restaurant running smoothly, it's crucial to invest on Turbo Air Compressor Parts that ensure long-lasting performance
#TurboAir#TurboAirCompressorParts#PartsFeUK#PartsFeUKbuzz#cateringparts#restaurantowner#restaurantequipmentparts#kitchenequipmentparts
0 notes