
Last Seen Blogs

manifestingkai
kai🪷 law of assumption

digitalriyasaga
Riya's RPG Side Blog

caos-gefuehle
WeLcOmE

d0wn-in-the-morgue
ready, set, go!

dm7th
Untitled
Text
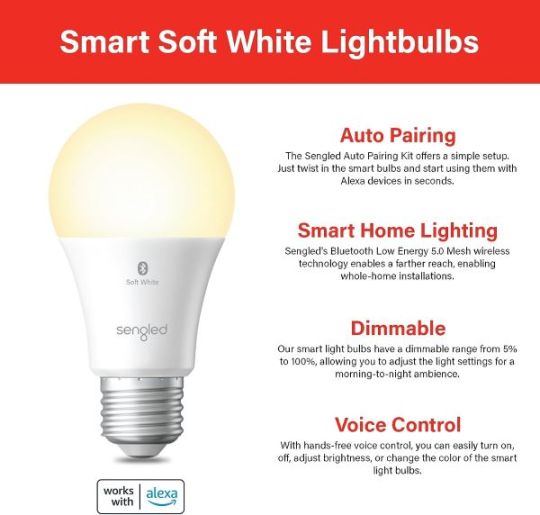
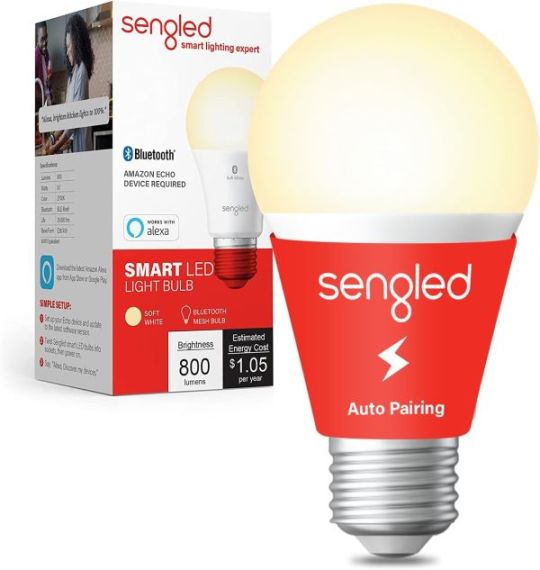
How To Reset SengLED Light Bulb In Just A Few Minutes
Is your SengLED light bulb not responding? And you don’t know how to reset SengLED light bulb. I can help you fix that issue.
In addition, if you are facing issues with Alexa Connect, I can also help you with how to connect SengLED Bluetooth bulb to Alexa. As well, I will guide you on how to connect SengLED bluetooth bulb to Google Home.
How To Reset SengLED Light Bulb: A Step-By-Step Guide
Make sure that the bulb is in a standard on-off fixture. No dimmers, variable power setting switches such as low, medium, or high switches, or ceiling fans of any kind can be used with these bulbs. The inconsistent flow of electricity that such fixtures supply is damaging to the bulbs.
Turn the bulb off.
Wait 5 seconds.
Turn the bulb on.
Wait 5 seconds.
Repeat steps 4 and 5 five times.
Bulbs blink twice after three flashes. The bulb has reset.
Why Are Sengled Bulbs Special?
There are several reasons why stranded light bulbs vary. Here are some popular ones:
Sengled light bulbs provide connection choices such as Bluetooth, Wi-Fi, and Zigbee. Bluetooth lamps need a direct smartphone connection, but Wi-Fi bulbs may be operated from anywhere with an internet connection. If you have several smart home devices, Zigbee lights can establish a mesh network with a hub.
Sengled light bulbs provide functions such as dimming, color change, and scheduling. Voice control and motion detection are available on certain lamps.
The lumen output of a light bulb measures its brightness. Sengled smart light bulbs have different lumen outputs, so you may select the best one.
The color temperature of a light bulb indicates its warmth or coldness. Sengled light bulbs come in several color temperatures, so you can pick the right environment.
The lifetime of a light bulb is the number of hours it is predicted to endure. Sengled light bulbs last 25,000 hours, longer than incandescent lights.
Price: Seungled light bulbs cost around $10 to $50. The bulb’s features, connection, and lumen output determine its pricing.
How To Connect To The Sengled Home App?
Get Sengled Home on iTunes or Google Play. To add Wi-Fi LEDs and accessories to the app, click the “+” button in the upper right and open the app.
Make sure that your bulb is in pairing mode. To do this, turn the bulb on and off quickly five times.
The bulb will appear in the list of devices. Tap on it. Select “Next” after entering your Wi-Fi password.
When you do that, the bulb will join your home’s wireless network.
You can follow the in-app prompts to add your bulb to a room.
Some additional considerations:
Use the same Wi-Fi network as the one on your phone or tablet.
For bulb connection issues, restart your phone or tablet, network, and bulb.
You may manage many Sengled bulbs at once by grouping them.
The Sengled Home App allows scene creation. A scenario pre-programs bulb brightness, color, and on/off status.

When To Reset Your Sengled Light Bulbs
There are a few reasons why you might need to reset your Sengled bulbs.
Smart bulbs may experience unresponsiveness issues when connected to virtual assistants like Alexa, Google Assistant, or Siri. The bulb can be reset to fix software issues.
Your Wi-Fi network is changing. You must reset your lights to connect them to a new Wi-Fi network.
Issues with the bulb. Sometimes smart lights switch on unexpectedly or flicker continually. The bulb may be reset to solve these issues and enhance the user experience.
You’re providing bulbs. Before gifting your Sengled bulbs to a friend or family member, reset them. This will make putting up the bulbs easy for the future owner.
READ ALSO: How To Brighten Up Your Home With LED Magic Light Bulbs In 2023
How To Connect Sengled Bluetooth Bulb To Alexa?
Turn on and link your Sengled Bluetooth light. Press and hold the bulb reset button for 10 seconds. The light blinks twice after flashing three times to signal coupling.
Launch Alexa and hit “Devices”.
Use the top-left “+” button.
Tap “Skills & Games”.
Find and tap “Sengled” under skills.
Tap “Enable Skill”.
Log in to Sengled.
Alexa will find your Sengled Bluetooth light when you sign in.
Tap the bulb to pick it up.
Tap “Pair”.
The bulb will be added to Alexa.

How To Connect Sengled Bluetooth Bulb To Google Home
A Sengled Bluetooth bulb can be paired with Google Home by pressing and holding the reset button for 10 seconds. The next step is to launch the Google Home app, tap the “+” icon, choose “Set up device,” and finally choose “Bluetooth.” The bulb will appear in the list of devices.
Tap on it and enter the passcode that appears on the bulb. The bulb will be added to your Google Home devices. Once the bulb is connected, you can control it with your voice.
READ ALSO: Dimmable LED Flashing: Why And How To Fix It?
Bottom Line
I think you have enough ideas about how to reset your SengLED light bulb.
It’s easy to reset your Sengled light bulb to fix connectivity issues or set it up. These instructions may vary slightly depending on your Sengled model, so consult the manufacturer’s instructions.
0 notes
Text
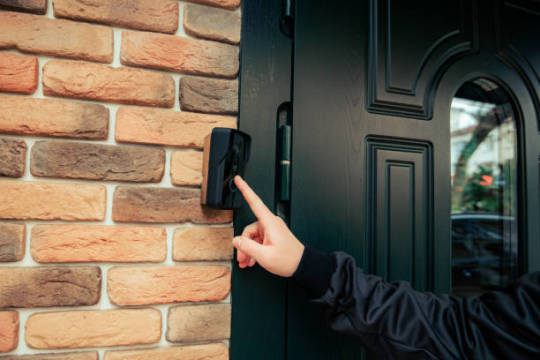
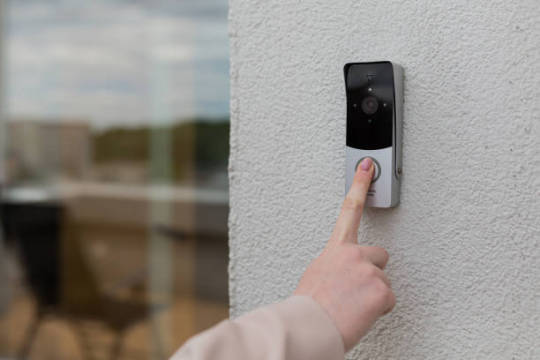
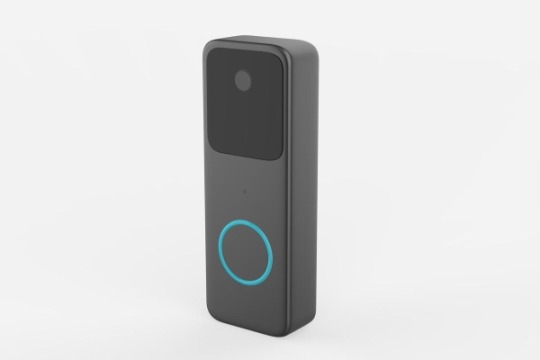
Blink Doorbell Not Working: How To Get It Working Again
Blink Doorbell functions like a personal doorman for your home—smart, efficient, and hassle-free. It eliminates hardwiring and offers live video, HD audio, and interactive notifications, making it a DIYer’s dream. But what should you do when the Blink doorbell not working after a reset?
If you encounter the frustrating situation of your Blink doorbell not working, then this blog will help you! We’ll help you fix it with simple troubleshooting. These simple solutions will restore your Blink Doorbell’s benefits without a techie.
Blink Doorbell Not Working
Why Is Your Blink Doorbell Not Working?
Incompatibility with the Blink System:
One potential issue arises when the chime isn’t compatible or blink doorbell light not working with the Blink system. To keep your system running smoothly, replace the chime.
Improper Plugging:
To ensure your Blink Doorbell Chime functions correctly, it must be appropriately connected to an alternating current (AC) transformer.
Additionally, the doorbell should have a jumper contact that matches the transformer. If your doorbell doesn’t ring as expected, consider replacing or adjusting the jumper contact.
Lack of Internet Connection: Blink doorbell not connecting to WIFI
The Blink Doorbell Chime relies on a stable Wi-Fi connection to send alerts and update settings. If it’s not working, it may be due to an absence of internet connectivity.
Low Battery:
If your Blink doorbell not working after battery change, it’s crucial to check their condition and ensure they are fully charged. A low battery can lead to malfunctions or a complete loss of functionality.
Interference or signal issues:
Wireless devices like doorbell chimes can encounter interference from other electronic devices or obstructions that weaken the signal between the chime and the doorbell. Investigate potential sources of interference and consider relocating the chime for improved connectivity.
Firmware or software updates:
Blink Doorbell Not Working
App Settings:
Blink doorbell not connecting to app. The configuration settings within the Blink app can impact your chime’s functionality. Ensure the app settings are correctly configured and notifications are enabled.
If the chime isn’t working as expected, check for any misconfigurations or disabled notifications within the app settings.
These factors can help you diagnose and fix your Blink Doorbell Chime by restoring its functionality.
How To Fix A Blink Doorbell Chime That’s Not Working
Blink doorbell not working? Try installing the latest Blink app on your phone to fix a broken doorbell chime. For testing, press the app’s “Done” button and listen to the chime. Keep your phone and doorbell on the same network.
Blink Mechanical Chime
1. Compatibility Check: Ensure that your mechanical chime is compatible with the Blink system. If it’s not, you may need to replace it with a compatible one.
2. Proper Wiring: Check if the mechanical chime is correctly wired to the Blink doorbell. Incorrect wiring can lead to malfunctions. Refer to the installation guide for the correct wiring configuration.
3. Transformer Connection: The mechanical chime should be connected to an AC transformer. Check that everything is safe and working properly with the connection.

Blink Doorbell Not Working
Blink Digital Chime
1. Internet Connection: Ensure that your Blink Digital Chime is connected to the internet. It relies on Wi-Fi to receive alerts and updates. Check your Wi-Fi connection and reconnect if necessary.
2. App Settings: Double-check the settings within the Blink app to confirm that the digital chime is correctly configured. Verify that notifications are enabled.
3. Firmware Updates: Keep the Blink Doorbell and the digital chime’s firmware up-to-date. Outdated software can cause compatibility issues.
4. Battery Status: If your Blink Digital Chime uses batteries, check their status. If the supplies are running low, replace them.
Your Blink doorbell chime will be back up and running in no time. If you follow the troubleshooting steps that are specific to your chime’s model,
How To Make Your Blink Doorbell Ring Inside The House
There are two ways to hear your Blink doorbell inside your home. Follow them step-by-step:
Use a chime box with your Blink doorbell.
Locate the silver pins. First, find the silver pins on the back of your Blink doorbell.
Connect the wires. Attach the wires from your chime box to these silver pins. Ensure that the voltage falls between 16 and 24 volts at 10 amps. It’s crucial to verify that the wires carry an AC voltage within this range.
0 notes
Text


How To Fix A Blink Doorbell Chime That’s Not Working
Blink doorbell not working? Try installing the latest Blink app on your phone to fix a broken doorbell chime. For testing, press the app’s “Done” button and listen to the chime. Keep your phone and doorbell on the same network.
Blink Mechanical Chime
1. Compatibility Check: Ensure that your mechanical chime is compatible with the Blink system. If it’s not, you may need to replace it with a compatible one.
2. Proper Wiring: Check if the mechanical chime is correctly wired to the Blink doorbell. Incorrect wiring can lead to malfunctions. Refer to the installation guide for the correct wiring configuration.
3. Transformer Connection: The mechanical chime should be connected to an AC transformer. Check that everything is safe and working properly with the connection.
4. Check for Damage: Inspect the mechanical chime for any physical damage or loose components. Damaged parts may need to be repaired or replaced.
0 notes
Text


How To Reset SengLED Light Bulb: A Step-By-Step Guide
Make sure that the bulb is in a standard on-off fixture. No dimmers, variable power setting switches such as low, medium, or high switches, or ceiling fans of any kind can be used with these bulbs. The inconsistent flow of electricity that such fixtures supply is damaging to the bulbs.
Turn the bulb off.
Wait 5 seconds.
Turn the bulb on.
Wait 5 seconds.
Repeat steps 4 and 5 five times.
Bulbs blink twice after three flashes. The bulb has reset.
0 notes


Text
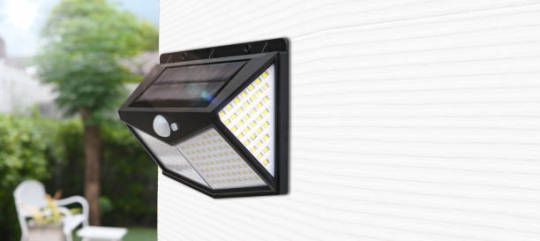
How To Fix Solar Light Sensor: A 5-Minute Fix For Most Issues
Are solar lights not working? Find out how to fix solar light sensor easily! Sometimes, the sensor stops working because the solar panel is old or has been bumped. You can take the device apart and change the sensor to fix it. To clean it:
Take it apart and remove the battery.
Cover the panel to test the light.
Use a wet cloth to wipe the sensor clean. Please don’t use chemicals or soap; they’ll harm the sensor. If it’s really dirty, you can use a car light cleaner.
After cleaning, put it back together and check it in a dark room.
Test with alkaline batteries if possible.
Turn it off and allow it to charge for 48–72 hours.
Another common problem is dirt blocking the sensor. But you can clean it easily.
In this guide, we will also cover how to fix solar light sensor, FAQs, etc. These troubleshooting steps will fix your solar light sensor and bring your lights back online quickly.
Before We Learn How To Fix Solar Light Sensor Problem. Let’s Find Out What Issues You Face Below.

how to fix solar light sensor
How Do I Diagnose Solar Light Issues?
This may be difficult to diagnose and fix with little knowledge and troubleshooting. You can rapidly restore solar lights. Some sun-light warning signs: The light turns on throughout the day due to a malfunctioning sensor. The light’s atom dies after one hour of darkness.
The light stays on during the day due to a sensor malfunction.
The light’s battery dies after just one hour of darkness.
If your solar light is flashing, it could indicate a wiring or LED problem. Check for loose or broken connections in the wiring.
When the seasons change, the solar system doesn’t get enough sunlight. Try to place the lamp in direct sunlight and adjust it if needed.
Your solar light may not turn on at night due to LED, sensor, or battery issues. Check the batteries for rust and clean the solar panel.
If you follow manufacturer or expert instructions, you may detect and solve solar light problems with minimal knowledge and troubleshooting. Understanding warning indicators like dim or flashing lights helps detect and fix issues.
How To Fix Solar Light Sensor?
If your solar light sensor fails, your lights may not turn on or shine brightly at night. How to fix solar light sensor? Let’s repair it and find the cause. Your lights will operate again when we inspect and fix your solar light sensor.
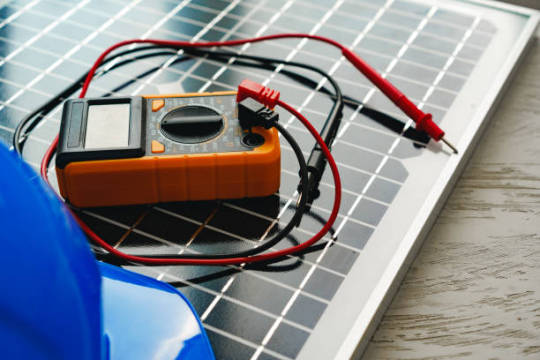
Check the battery. Make sure the pull tab is off and the battery is alive. Check the solar light’s battery level indication, or remove and test the battery with a multimeter. Replace a dead battery.
Reset the microprocessor. Turn off and on the solar light after a few minutes. This may fix minor software glitches.
Make sure the solar lights are getting enough light. They require a minimum of 6–8 hours of sunlight per day. Solar lights cannot charge their batteries and will not function at night without adequate sunshine. Install the solar lights where they will get full sun all day. Move or use a solar light booster if the solar lights don’t receive direct sunlight.
Check the solar panel cables. Make sure they are tightly connected to the solar panel and the battery. Loose or disconnected cables can prevent the solar light from charging properly. Check the cables for damage. It is necessary to change the cables if there is any damage.
Move the solar lights away from nearby light sources. These may have an impact on the light sensor and prevent it from detecting darkness. Place solar lights away from streetlights and porch lights.
Adjust the PIR dials (if applicable).Make sure they are set to the right sensitivity level. The motion detector may not detect movement properly if the sensitivity level is too low. If the sensitivity level is too high, animals or objects that are not close enough to the solar light may trigger the motion detector. To fix this, adjust the PIR dials’ sensitivity.
Solar light sensor replacement. If it’s broken, it may not detect darkness. Replace the light sensor if the solar light still doesn’t work after checking for all other causes.
Replace the batteries. Solar lights will not function properly if they are not able to maintain a charge. Repair or replace old or damaged batteries.
The solar panel and the light sensor both need cleaning. They can malfunction due to dirt and debris. Clean the solar panel or light sensor with a soft cloth and gentle cleaner.
Replace the LEDs. Damaged ones may not emit enough light. Replace the LEDs if the solar lights are on but not bright enough.

how to fix solar light sensor
Additional Tips: How To Fix Solar Light Sensor
Select a solar light with a reliable sensor. Some solar lamps feature superior light sensors. Select a solar lamp with a dependable light sensor.
Install the solar light appropriately. Install the solar lamp where it will get most of the day’s direct sunlight. The solar panel should also be free of sunlight-blocking obstacles.
Regularly maintain sunlight. Check the solar light for damage and clean the solar panel periodically. Solar lights should be repaired or replaced if damaged.
0 notes


Text
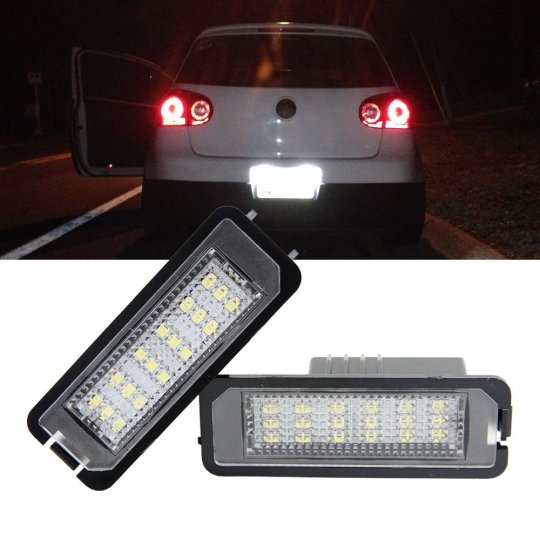
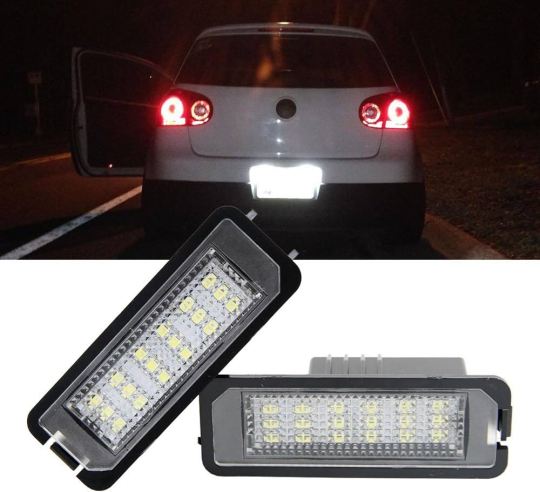
How To Replace Your License Plate Light Bulb
Have you ever been stopped because of a malfunctioning license plate light bulb? License plate light bulbs are sometimes ignored but are vital to your vehicle’s lighting system. They make your license plate visible and readable, per legislation.
This blog post will help you change your license plate light bulb law legally. We’ll also explore how to spot a bad bulb and what to do if the replacement bulb doesn’t work. Let’s begin!
Importance Of License Plate Light
License plate lights must work properly for traffic safety and compliance. In low-light settings, these lights help other drivers see your car. Functional license plate lights aren’t simply convenient—many jurisdictions need them.
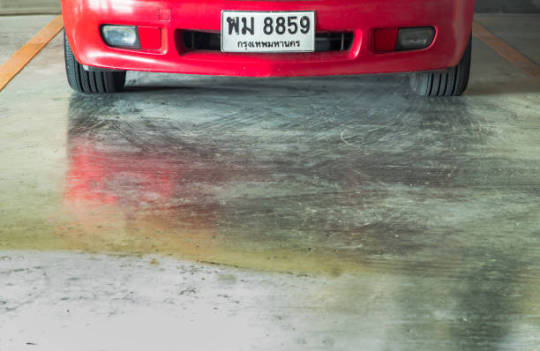
License Plate
How To Replace Your License Plate Light Bulb
Screwdriver: replace your license plate light bulb. Find the license plate light housing on your car.
Remove the housing screws or clips using the screwdriver.
Loosen the housing, gently remove the old bulb, and replace it. Ensure the replacement bulb is secure. Back the housing using screws or clips.
Finally, verify the new bulb’s operation. This easy DIY will keep your license plate visible and legal.
Remove The Bulb.
Find the license plate light assembly and remove any screws or clips to remove the bulb. Remove the light assembly from the car gently to access the bulb. Twist the bulb counterclockwise to remove it from the socket.
Remove the old bulb and replace it with a similar-wattage one. Turn on your headlights and check the license plate lighting to test the new bulb.
If everything appears fine, reconnect the light assembly and secure any removed screws or clips. Take the next step by changing your license plate light bulb.
Replacing Lights From The Outside
Some tools are needed to change the license plate light bulb from the exterior. Get a bulb and a flat screwdriver. The license plate light is normally on the car’s outside.
Carefully remove the license plate light cover with the screwdriver. Carefully remove the old bulb and replace it with the new one. Once the bulb is firmly installed, test it for functionality.
Finally, reinstall the cover to finish. This simple method will light up your license plate, keeping you safe on the road.
Accessing The Lights From Inside The Trunk
Locate the trunk light assembly to access the license plate lights. Remove any screws or clips holding the assembly. Pull the assembly carefully away from the vehicle to reach the bulb.
The light bulb can be easily changed by twisting it counterclockwise out of the socket. Replace the light bulb and tighten it by turning it clockwise.
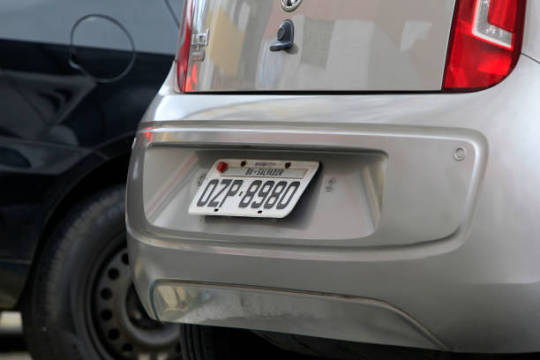
License Plate
Installing the New License Plate Light Bulb
They require tools to install replacements. License plate light bulb, Toyota Corolla 2007. Gather them before starting. Retrieve the license plate light assembly and replace the bulb once everything is ready.
Take care when doing so to avoid any damage. After that, insert the new bulb into the assembly and make sure it is securely in place.
To make sure the replacement bulb works, test it before reassembling. Make sure the light works and the assembly is secure beforehand. Finally, properly dispose of the old bulb.
Identifying A Faulty License Plate Light Bulb
Dim license plate lights may signal bulb failure. If your license plate lights don’t work, the bulb may have burned out. Note that if just one license plate light works, the other may have a bulb issue.
Checking license plate lights regularly helps detect bulb concerns. Remove the license plate light cover with a screwdriver and examine the bulb. Simple steps may ensure your license plate lights function properly and keep you safe.
Signs that Your License Plate Light Bulb Needs Replacement
If you notice that your license plate light does not turn on when the headlights are on, it could be a sign that your license plate light bulb needs replacement.
Another indication is when the license plate light appears dimmer than usual. The license plate light flickers occasionally, indicating the bulb needs replacing.
Replace a burned-out or damaged license plate light bulb during a regular checkup.
Another clue that your light bulb license plate needs replacing is when other drivers notice it’s broken.
To keep your license plate light functional, watch for these indicators.
What To Do If The New Bulb Doesn’t Work
If the new License plate light bulb Toyota Corolla 2016 doesn’t function, examine its installation. Ensure that socket rust is absent. Check the circuit using a multimeter for electrical faults. If the condition continues, see a doctor.
Troubleshooting Guide for License Plate Light Issues
You can start troubleshooting by checking the license plate light fuse.
Check for loose connections and broken wiring. Cleaning the license plate light socket may remove dirt and rust that may be impacting its performance.
To guarantee correct operation, test the license plate light switch. If difficulties persist, examine your vehicle’s handbook.
Remember, fixing license plate light problems quickly might save your automobile and prevent legal complications.
When Should You Get Expert Help?
If you’re uncertain about changing the license plate light bulb or troubleshooting fails, get expert aid. A technician may fix electrical faults and install and work on the license plate light. Trust the pros when in doubt.
Knowing when to contact a technician
For sophisticated electrical license plate light issues, see a professional.
Cost Involved In License Plate Light Bulb Replacement
The license plate light bulb is inexpensive to replace. The cost depends on the bulb type and car model. DIY replacements may save on labor charges.
Before doing anything yourself, analyze the job’s difficulty. Buying a new bulb or tools may cost more. Compare estimates from various mechanics to obtain the best pricing.
This lets you choose the most affordable license plate light bulb replacement.
Factors Influencing the Cost of Replacement
The cost of replacing your license plate light bulb can vary depending on several factors. One important factor is the type of bulb required for the job. Selecting the proper bulb might affect the whole cost. High-quality bulbs may cost more initially, but they last longer and save money.
The brand and model of your car might also affect pricing. Access to the license plate light bulb might make replacement easier or harder. This might affect labor prices, depending on the technician or service provider.
Additional repairs or maintenance during replacement might raise the cost. It’s best to be prepared for unexpected costs like this.
These considerations may explain why license plate light bulb replacement costs differ. Understanding these impacts helps you choose replacements.
DIY Vs. Professional Services: What’s More Beneficial?
When it comes to replacing your license plate light bulb, you might be torn between doing it yourself or hiring a professional.
DIY replacement can save you money and allow for personal customization, but professionals ensure proper installation and have the necessary tools and expertise. Consider your skill level and time availability when deciding what’s more beneficial for you.
Pros and cons of DIY replacement
The advantages and drawbacks of replacing your license plate light bulb yourself should be examined before starting. Doing it yourself may save you money on expert services.
Screwdrivers are generally enough for this basic procedure. Performing the replacement yourself offers hands-on learning and skill development. However, downsides must be considered.
Lack of competence may cause blunders or harm, increasing expenditures. Professional replacement is quicker, while DIY replacement requires more study and step-by-step instructions. Consider your skills and availability before taking on this work.
How Often Should You Check Your License Plate Light Bulb?
License Plate
Regular Maintenance Tips For Your Vehicle’s Lighting System
Regularly maintaining your vehicle’s lighting system is crucial for optimal visibility and safety on the road.
To ensure your license plate light bulb and other exterior lights are functioning properly, follow these maintenance tips. Regularly clean the license plate light housing to prevent dirt buildup, which can affect the brightness of the light. Check the electrical connections for any corrosion or loose wires, as this can lead to flickering lights or complete failure.
Check the headlights and taillights for brightness and operation. Replace bulbs immediately if they show indications of wear or burnout to maintain appropriate lighting.
Finally, follow the manufacturer’s maintenance schedule to maintain your vehicle’s lighting system.
Does The Weather Affect Your License Plate Light Bulb?
Extreme weather may damage license plate light bulbs. Moisture exposure can lead to corrosion, while freezing temperatures and extreme heat can affect its performance.The light’s longevity greatly increases if it is shielded from the elements.
Protecting Your License Plate Light From Extreme Weather
Your license plate light may be damaged or burned out in extreme weather. To protect your license plate light from these weather-related issues, there are a few steps you can take.
First, consider installing a weatherproof housing for your license plate light.
This adds protection from rain, snow, and other harsh conditions. For further weather protection, seal the housing edges with silicone sealant.
Clean the housing regularly and check for cracks or loose fittings. High-quality weatherproof bulbs may extend license plate light life.
Finally, park your car in covered or shaded places during severe weather to reduce exposure. These procedures help keep your license plate light operating in bad weather.
Could a burned-out license plate light bulb drain your battery?
You may not drain your battery if you have other electrical issues, but a burned-out license plate light bulb may. Regular maintenance and inspections can help prevent battery drain, so address any electrical problems promptly.
What If You Don’t Replace Your License Plate Light Bulb?
FAQ
What are license plate bulbs called?
License plate bulbs are commonly referred to as license plate lights or number plate lights. These small bulbs, usually halogen or LED, provide illumination for the license plate. It’s important to check your owner’s manual for the specific type of bulb required for your vehicle. Some common types include festoon, wedge, and bayonet bulbs.
Does AutoZone change the tag lights?
AutoZone offers a range of services, including tag light bulb replacement. You can purchase the bulb from them or bring your own. If you’re unsure how to replace it yourself, AutoZone employees can assist you. The cost will vary based on the type of bulb and labor charges.
Is it easy to change a license plate light bulb?
Changing a license plate light bulb is easy. Locate the license plate light component on your car. Twist or take out the old bulb counterclockwise. Twist or push the new bulb in clockwise until it clicks.
Are all license plate lights the same?
License plate lights vary in shape and size depending on your vehicle. Some may require specific bulbs, while others can use standard ones. To avoid electrical problems and ensure safety, consult your vehicle’s manual or a mechanic to determine the correct bulb type for your license plate light.
READ ALSO : S14 Tail Lights: How To Makeover With These Stunning Tail Lights
Are these plate lights from Molded Innovations too bright?
In order to prevent glare and distractions for other drivers, most nations have laws regulating the brightness of license plate light bulbs. Molded Innovations offers a range of license plate light bulbs with different brightness levels. Before purchasing, always check local laws regarding license plate light bulb brightness.
In conclusion, it is essential to check the functionality of your license plate light. Not only is it legal, but it also improves traffic safety. This article shows how to repair a damaged license plate light bulb. Always seek expert guidance if you run into problems or are unclear about the procedure.
Regularly testing and maintaining your license plate light bulb helps avoid troubles and keeps your car noticeable. Don’t overlook this modest but crucial car lighting component. Drive safely and confidently!
READ ALSO: Our Guide For You To Understand Dodge Ram Tail Light Circuit Board Is
0 notes


Text
Troubleshooting Solar Panels On Tile Roof Problems
Solar panels are an excellent investment for carbon reduction and energy savings. But how do solar panels on tile roofs work? Basically, tile roofs are harder to put solar panels on.
We will cover solar panels on tile roofs, including which roofs are suitable and their advantages. We’ll also discuss tile roof solar panel leaks, structural damage, and performance difficulties.
Learn how to fix solar panel on Tile Roof issues with regular maintenance and expert fixes.
What Are Solar Panels On Tile Roofs?
Solar panels can be installed on various types of tile roofs, but this requires careful consideration and expertise.
The installation process involves drilling into the tiles and using flashing and mounting brackets to secure the solar panels. It’s important to have a professional solar electrician do the job to make sure it’s done right and prevent any damage to the roof.
Solar Panels on Tile Roof
Types of tile roofs compatible with solar panels
Solar panels may be installed on clay, slate, metal, and concrete tile roofs, among others. Tile-mounted solar panels are one option, but solar arrays may also be put on the roof.
Solar-compatible tile roofs may replace asphalt roofs.
Solar panels on tile roofs depend on the strength and integrity of the tiles. Solar installation professionals may assess the tile roof’s potential for compliant solar panels.
Benefits Of Installing Solar Panels On Tile Roofs
Lower your energy costs. Solar panels may create electricity for your house, reducing grid power use and energy costs.
Add value to your house. Studies demonstrate that solar-paneled houses sell for more.
Protect your roof. Solar panels protect roofs from hail, wind, and rain.
Cut your carbon footprint. Solar panels create clean, sustainable power. This can lower your carbon footprint and improve the environment.
Increase household energy independence. In a power outage, solar panels may make you more energy independent.
What Are The Common Issues With Solar Panels On Tile Roofs
Solar Panels on Tile Roof
Water Damage And Leaks
Solar panels installed improperly on tile roofs might leak and cause water damage. Water may leak through tile gaps or fractures while drilling. Leaks and water damage may be detected and repaired with regular maintenance.
Get a skilled solar installer to guarantee correct installation and avoid such issues. Proper flashing may also reduce water damage on tile roofs with solar panels.
Tile Structural Damage
Solar panels atop tile rooftops might affect the tiles’ structure. Avoiding problems requires care and experience. Improper drilling during installation might shatter or damage tiles.
Solar panel installation damage should be inspected and repaired regularly.
Poor Solar Panel Performance
Solar Panels on Tile Roof
How Do I Solve These Solar Panel Problems?
Solar panel roofing tiles require regular maintenance and inspection. Expert installation and repair may also fix difficulties. Solar installation companies may advise on particular issues. Solar panels and tile roofs need water flow control and corrosion prevention.
Regular Maintenance And Inspection
Solar panels on tile roofs need regular maintenance and inspection to work well. Regular panel cleaning boosts efficiency and electricity output. Inspections are crucial to finding and fixing panel faults. A skilled solar installation firm can advise on maintenance and inspection frequency and scope. Monitoring panel energy output helps identify performance concerns early. Regular maintenance and inspection may keep tile roof solar panels working.
Professional Installation And Repairs
Professional installation and maintenance are essential for tile roof solar panel effectiveness and lifespan. Proper alignment and damage prevention require experienced solar installation. They can handle unique tile roof concerns due to their competence. Professional repairs can keep your solar panels working. A reputable solar installer offers quality work and warranties.
Are There Specific Solar Panels Best Suited For Tile Roofs?
Solar panels designed for tile roofs ensure a seamless installation process, requiring special flashing and brackets. Installation can be challenging due to the need for drilling and mounting brackets. Experienced solar installers are crucial for a leak-free and efficient system. Good news: there are specific solar panels designed to integrate seamlessly with your tile roof.
Solar Panels on Tile Roof
How To Install Solar Panels On A Tile Roof?
Tile roof solar panel installation has two major methods:
The direct mount technique involves drilling holes in tiles and installing solar panels directly onto the roof sheathing. This is the most usual way, but it may harm tiles.
Rack mounting involves attaching brackets to tiles without drilling holes. This approach is more costly but less likely to harm tiles.
The ideal technique to put solar panels on a tile roof depends on its kind, condition, and price.
Direct-mount solar panel installation on a tile roof involves these steps:
Clean and debris-free the roof.
Locate the roof solar panels.
Inject holes into the roof sheathing and tiles.
Mount solar panel brackets to the roof sheathing.
Mount solar panels on brackets.
Link the inverter to the solar panels.
Check the installation for security and weatherproofing.
Rack-mounted solar panel installation on a tile roof follows these steps:
Clean and debris-free the roof.
Tie the solar panel rack to the tiles.
Attach solar panels to the rack.
Install solar panels on the inverter.
Check the installation for security and weatherproofing.
Solar Panels on Tile Roof
FAQ About Solar Panels On Tile Roofs
What type of roof is not good for solar panels?
Tile roofs can pose challenges for installing solar panels. Additionally, slate and cedar shake roofs may be difficult to install panels on. Flat roofs are easy to build. Check with a professional installer to see if your roof can support solar panels.
Can you put solar panels on a tile roof?
Solar panels may go on a tile roof. There are several considerations:
Your tile roof type Concrete tiles are stronger than clay tiles and may hold solar panels.
Roof condition. Solar panels may need to be put on a repaired or rebuilt roof.
The roof pitch Solar panels work best on 15-degree roof pitches.
Why not roof solar panels?
Solar Panels on Tile Roof
What are the cons of solar tiles?
Solar tiles have a few drawbacks to consider. First, they cost more than conventional solar panels. Installation may also be complicated and time-consuming. They create less energy per unit area, making solar tiles less efficient. Finally, changing or repairing solar tiles is difficult and expensive.
READ ALSO : Solar Lights Not Working! Here Are Some Simple Solar Light Replacement Solutions:
Can installing solar panels cause roof leaks?
Installing solar panels properly should not cause roof leaks. Reputable installers ensure proper sealing before installation. However, incorrect installation can lead to leaks. Regular maintenance and inspections of both the panels and the roof can help prevent issues.
How do you install solar panels on tile roofs?
Installing solar panels on tile roofs requires careful planning and preparation. The roof’s strength must be assessed to ensure it can support the panels. Tiles need to be removed with caution, and flashing should be installed to prevent leaks. Finally, the solar panels are securely mounted onto the flashing.
What’s the best tile roof solar installation method?
Solar Panels on Tile Roof
How effective are white roof tiles at reducing heat?
White roof tiles can significantly reduce heat absorption by up to 50%, leading to lower energy consumption and cooling costs. They reflect sunlight and minimize heat gain. However, the tiles must be durable and weatherproof.
How do you maintain your tile roof after the installation of solar panels, and what precautions should you take?
Maintaining your tile roof after installing solar panels is crucial for their optimal performance. To avoid debris accumulation, examine the roof for damage and cracks and clean the panels and surroundings. If repairs are required, have a professional remove and replace the panels. Always take safety measures for roof maintenance.
Can solar panels be installed on any type of tile roof, or are there certain limitations?
Solar panels can typically be installed on most tile roofs, but there are limitations to consider. The weight of the panels may require additional structural support, and flat tiles are easier to work with than curved ones. It’s important to consult a professional installer for guidance on your specific type of tile roof.
READ ALSO: How To Make A Solar Panel With Aluminum Foil: Simple Steps Want To Try It At Home?
0 notes