
Don't wanna be here? Send us removal request.
Statistics
We looked inside some of the posts by loadbags846 and here's what we found interesting.
Average Info
Notes Per Post
1
Likes Per Post
1
Reblog Per Post
0
Reply Per Post
0
Time Between Posts
18 days
Number of Posts By Type
Text
9
Last Seen Tumblr Blogs


Fun Fact
In 2020, 44% of users from Denmark used Tumblr daily.
Text
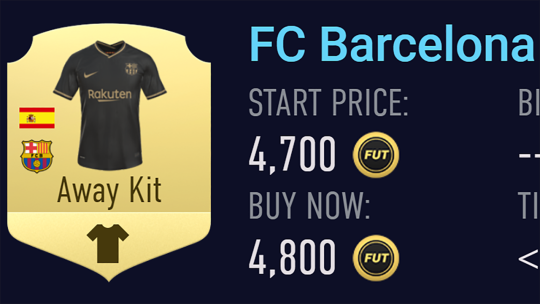
Cool Kits Fifa 21

Many of you may already know what FIFA mods and patches are and how to play with them, but for those that have no idea, this article will sort the matter for you. It is no secret that FIFA titles severely lack in certain departments and the focus is normally on features most players don’t want to use or see. So, how do you get the features you want in your favourite FIFA game? Simple, you add them! Thanks to the magic of modding, it is super easy to play FIFA exactly the way you want. Here’s why mods and patches are the way to play FIFA, and any other game if possible, and how to go about it.

What is a Mod/Patch?
A game mod is, simply put, a package/file that modifies the vanilla game. It can be anything, from gameplay to graphical changes and the idea of mods is to enhance the gameplay experiences. Graphics can include kits, player faces, banners, balls, boots, adboards or 2D faces aka minifaces.
Patches are essentially the same thing with just minor changes in what they do and are also a part of mods. These mods are created by modders of the gaming community who pursue modding as a hobby and do it out of the love of the game and the fanbase.
FCB17 Facepack #4 🔥
Fifa 21 Best Jerseys
The best kits in FIFA 14. We brought you them in 12 and 13 in FIFA 14 we have gone even bigger and better. A massive 251 of the best kits in FIFA 14 across all the leagues and classic kits. All available in Ultimate team which is why we create it so you can look for the best FUT14 kits to use. We decided these by playing with the kits in the game. League: International. This is one for the ice-cold finishers out there.
Includes all previous face updates + 18 re-added EA faces 😁🙌https://t.co/LL1eu40xuJ#FIFA21#genericgenocidepic.twitter.com/zEowLU8qxs Dropbox pricing canada.
— FCB17 (@FCB175) February 15, 2021
How Do They Work?
Mods can either improve the mechanics of the game or provide visual enhancements. Take FIFA for example. There are gameplay mods out there that help in improving the AI level and creating a more natural flowing match. Some mods focus on the mechanics and help tweak the AI for the boardroom, players, youth academy, etc. You can also find mods that do it all in one single package.
Then you have the visual mods that help give you skins, overlays, tournament themes and more. You can even get player faces, boots, kits, etc. to make your gameplay more immersive. Installing mods is super easy and all you need is some basic knowledge in how they work and how to install them. Please note that mods can be used only on PCs and do not work on consoles.
Mods are script and data files that are installed into the game so that the game can read them and change the way it works. You need a software to install and run mods and that is Paulv2k4 Modding Tool. Install the software and link it to your FIFA application and you’re good to go! Each mod needs to be installed by the software before you can run your game and that will take some time to occur. Let’s just say, the installation is long enough for you to go spend some time over at luckynuggetcasino.com, but hopefully your computer is kind to you!
FIFA 21 Mods You Must Try Out
Now that you know the basics, it’s time for some of our top recommendations. Here are a few mods/patches we think you should definitely use for FIFA 21:
Perhaps THE most essential mod for any FIFA title, Aranaktu’ Live Editor is a blessing in disguise for the hardcore FIFA players. Using his Live Editor and Cheat Table, players can virtually change anything and everything in the game, from player stats to player bios and even add tattoos and new faces to the game with the correct files. Make sure you download this now!
This is for all you career mode fans out there. Paul is a modding veteran in the FIFA community and his latest iteration for FIFA 21 promises to improve Career Mode to great lengths. Paul’s mod helps improve transfers, contracts, youth academy and much more. Definitely give it a try if you wish to have a better career mode experience.
The other extension of Paul’s mod, the gameplay mod focuses on the match AI explicitly rather than game mechanics. The mod helps improve player/AI movement, improves AI decision making, enhances the outcomes of shooting, blocking and intercepting as well as improve player roles such as goalkeepers and centre-backs. If sliders just don’t cut for you or if you want a more natural football experience, do check this mod out.

The FIFA 21 National and Club patch is designed to add new teams and competitions. The mod adds 77 new national teams from many zones with their kits and banners and also adds prestigious competitions into the game, including the Club World Cup!
The Unlock, Expansion & Licensing Mod is a mod primarily created by SomersGaming in collaboration with others. This mod is paradise for RTG Lovers as it brings the Vanarama National League to FIFA 21 (replacing the Argentine league) as well as a few unlicensed teams getting properly licensed along with the pre-season tournaments. Go give it a shot right now!
For European league fans, and more specifically the German ones, you can try EEP 21! The mod will add Regionalliga (4th German division) in FIFA 21 and includes many graphic updates like new kits, banners, adboards or minifaces for the rest of European leagues. Serie B is also fully included and you can start a new Career Mode save from the bottom and work your way up to Serie A.
BONUS: FIFA 21 Nintendo Switch Patch by diazjesux
If you’re playing FIFA 21 on Nintendo Switch, fear not as there’s something for you as well! Thanks to diazjesux and the modding community, you can now download and install his patch that includes various updates to unlicensed teams like Juventus or AS Roma. Also Serie B has been added and a full realistic Brasileirao Serie A. Moreover, hundreds of banners, kits and minifaces have been added!
We hope you have fun trying out these mods for FIFA 21. If you are still playing older titles, worry not! There are mods out there for most of the past titles! Head on over to our Download Centre and browse through our collection!

Download DLS 21 Mod FIFA 21 Offline - A new android soccer game that is cool and has good graphics. Very good graphics quality and satisfying gameplay, suitable for Android who like soccer games. This game does not require high Android specifications, so many people like to play DLS 21 Mod on their smartphones. Here I share the download link for you. Mod features in this game have updated transfers, kits, leagues and others. You can download DLS 21 Mod FIFA 21 Offline on this page.
Have this game right now. This android mod game apk you can have for free. There are many games like this, but not all are good, to prove it you have to try it. Enjoy the excitement of DLS 21 Mod FIFA 21 Offline on your mobile and if you are satisfied, tell your friends that they are also happy. Have fun playing the DLS Mod android game.
Info
Category : DLS
Team : Embuh Droid
Other Post : FTS 21 Mod PES 2021 Android Offline
How to Install
Before you start the installation step, one thing you have to prepare and thirst for you has, namely the extract application. There are lots of extract applications for Android, one of the best is ZArchiver. The application is very friendly and how to use it is easy. I used to use this.
1. Download the required file first
3. Install the APK file until it's finished, but don't open it first
4. Extract Data files to Internal / Android / Data / Here ..
Best Kits Fifa 21 Reddit
5. Extract Obb files to Internal / Android / Obb / Here ..
Best Kits Fifa 21 Career Mode
0 notes
Text
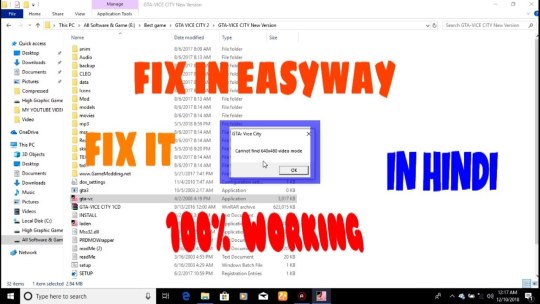
Download 640x480 Video Mode For Windows 10

La plupart des nouvelles versions sont 10.2.2, 10.2.0 et 11 Final Version. 2.1 FINAL (Office And Win 10 Activator) 64 Bit microsoft office 2019 activator final download by kmspico, download kmspico 10.2.0. F4fa99c75c 640x480 video mode free download for gta vice city windows 8.
So, there are two clear solutions to this problem; either change the game’s compatibility mode to be compatible with the Windows version or change the laptop’s resolution to 640×480 pixels. But, changing the laptop’s resolution to 640×480 might cause many issues. For HiRes Mode you have to connect Sense Line 0 to ground and leave Sense Line 1 and 2 unconnected. I will describe them in the two options in the bottom. The wiring of the Lines can be done in any position of the wires which are connected to the logic board because we have to let the logic board know which resolution it should display.
Increase the screen resolution to 640x480
The Color Classic is brought to us by Apple with a native screen resolution of 512x384 and a 60Hz refresh rate. To get the better resolution it's not very hard, but you should decide very wise because there is more than one way to get 640x480. For me it was the hardest part to get all these information together because doing a 640x480 mod is a little bit of a faith ask. To give you a little more information and a better understanding what is happening when you do the different mods is a very useful knowledge when you want to do further steps, for example, the Takky Upgrade to the Mystic Upgrade. In all different mods, the horizontal deflection voltage of the CRT will be changed this is achieved by changing on the analog board. One way is to change the horizontal deflection voltage to 68,4V this is ending up with a refresh rate of 60Hz in the CRT - the so-called VGA Mod. The second way is to increase the horizontal deflection voltage to 84V which ends in 67Hz refresh rate in the CRT - the so call Hi-Res or 13' Mod. Some of you will now say: 'nice, lets max it out and take the 67Hz because it has not so much flicker'. That's correct but increasing the horizontal deflection voltage to 84V will put more stress on the logic board. The logic board of the color classic is a very weak one out of stock and that's why it recommended putting not so much stress on it. There is one new way to get 67Hz with 640x480 which puts not so much stress on the analog board but that I will explain later. To give you a quick overview, the CCSCC(which pages are unfortunately down) has created the following table to get a better understanding what possible:
your mod.resultnoticehor. defl. volt.sense lineresol.analog board burden60V12'512x384original configoriginal config68.4V13'(HiRes)Don´t workslightNot recommended68.4VVGA640x480lightOption 1 below - Recomended84V13'(HiRes)640x480heavyOption 2 below - For standard analog board84VVGA640x480heavyNot recommended
For more background information you have to know how the screen gets the new resolution. Changing the horizontal deflection voltage is part 1. Part 2 of every mod is to change the so-called 'sense lining' which you already mentioned in the table. In the years the color classic was introduced apple is working with sense lining to let the connected monitor know which resolutions the CRT can work with - this Part 2 of every mod: we have to tell the CRT wich resolution and refresh rate it should display. Apple is doing this by using three unused lines in the standard DB-15 VGA Connector. For all who want to learn more about sense lining, Apple is providing a good technical description which can be found here. Sense Lining is a binary code on three physical lines - you reach '0' by connecting the line to ground or '1' by leaving the line unconnected. For us, interesting are the two described sense line codes for VGA or the HiRes(13') Mode. For VGA Mode you have to connect Sense Line 0 and Sense Line 1 to each other, while Sense Line 2 is left unconnected. For HiRes Mode you have to connect Sense Line 0 to ground and leave Sense Line 1 and 2 unconnected. I will describe them in the two options in the bottom. The wiring of the Lines can be done in any position of the wires which are connected to the logic board because we have to let the logic board know which resolution it should display. If you are doing a Takky Upgrade I recommend to do it in the wires of the harness because you have to rewire them anyway. If you do a Mystic Upgrade or use the stock color classic logic board I recommend to do it on the analog board because you can change the logic board and keep the modification if you want to change the logic boards. or use the stock color classic logic board I recommend to do it on the analog board because you can change the logic board and keep the modification if you want to change the logic boards. Important: The original color classic logic board is not obtained to use 640x480 with 68,4V you have to do the HiRes Mod. But now: lets go to do it!
Option 1: 68,4 V - VGA Mod
Step 1: Increase the Voltage
Isolate Pin 8 (left of pin 7) on the power transformer. Use a file or even better a dremel.
Solder a jumper from pin 8 to pin 12 - please use isolated cable. Use a standard cross-section 0,75qmm electric cable.

First remove the jumper at J78
If you don't have J78 you have to disconnect (isolate) pin 20 with the Dremel or a file.
Disconnect (isolate) pin 25 with the Dremel or a file.
Solder a wire jumper from pin 20 to pin 24

Option 2: 84V - HiRes Mod
Many years ago there was a first try to increase the Voltage to 84V to use the HiRes Mode. I will not describe this one because today there is a much more efficient way. The first HiRes Mode produces very high stress to the analog board. It's safer to do it in the way as techknight describes it in the forum of 68kmla.org under: 'Color Classic VGA Mod. the CORRECT way'. Techknight reverse engineered a never released developer version of the analog board where significant design changes have made directly from an Apple engineer. The results are that the board is more stable and can better work with the 84V HiRes Mod. You have to change much more components on the analog board but its really worth to do it. Once Again: You have to do this mod if you wanna stay with the standard color classic logic board.
Step 1: Increase the Voltage
640x480 Video Mode Free Download For Gta Vice City Windows 10
Component NameOld ValueNew ValueCL93.3µF 160V2.2µF 160VCL103.3µF 160V1.8µF 160VDL21?18V Zener BZX85C18DL22?RemoveRP64.52K Ω resistor5.11K Ω resistorRP815K Ω resistor, 5W33K Ω resistor, 5WRF14236K Ω resistor216K Ω precision resistor 1%RP2322K Ω resistor, 3W33K Ω resistor, 3WRL5433 Ω resistor, 1W15 Ω resistor, 1WRP61-7,5K 3W resistorRL6247 Ω resistor, 1W100 Ω resistor, 1WRL7033K Ω resistor, 1/8W22K Ω resistor, 1/8WJ104Jumper10 Ω 2W resistor
Thats really simple for the standard color classic logic board and the mystic upgrade! Just remove the Jumper J78 and close the Jumper J79. For Takky Upgrade see the note on the Takky Upgrade page.
Download 640x480 Video Mode For Windows 10 Free
Display orientation after Mod
When you are done and your screen is showing 640x480 you will be happy at first. The second thing you will see is that you have to adjust new. You have to do the most settings new because the whole screen is used now under different settings.
For doing the screen settings there are several potentiometers. You find them on the back and on the side of the analog board. The important ones are on the Back. The picture on the left shows you what effect the potentiometers will have. Apple has developed an own tool the 'Apple Display Service Utility' wich shows test pattern for adjusting the display settings. You find it on the downloads page. On the downloads page you also find the original Apple Service Manual for the Color Classic. There are some more descriptions of the possible settings.
It sometimes happens that you cannot stretch so much to let the black borders disappear. That's because of the higher deflective voltage. By an idea of a long gone website of the ccscc it is possible to add a small capacitor on the empty CL26 position. The larger the capacitor the larger the effect. You can experiment with 1nF - 4nF, 1600V capacitors. In my opinion, I only see the effect starting from 3nF but it depends on your analog board.
If your black borders are very strong after the 640x480 mod and the CL26 capacitor brings not the effect you can do one more thing. But be warned, this is a little bit risky! There is a small potentiometer on the analog board called PP1. Turning the PP1 tight raises supplying voltage. Please control raising the Voltage at the test point TP1(connected to chalk coil LP5) with a power meter and drive it slowly up to 84V. With the words from the CCSCC: This adjustment effects +60V (+84V, after remodeling), +24V and +8.4V. It effects to geometry adjustment and video adjustment like as horizontal drive transistor, horizontal pre-drive FET, pin phase correction IC, vertical drive IC, video processing IC and RGB gain adjustment (green gain and blue gain only at Color Classic). Mr.Tak told if you want to adjust at any cost, please adjust carefully it with measuring the voltage by using voltage counter.
0 notes
Text
Libreoffice Office

Last but not least, FileZilla Server is a free open source FTP and FTPS Server. Support is available through our forums, the wiki and the bug and feature request trackers. In addition, you will find documentation on how to compile FileZilla and nightly builds for multiple platforms in the development section. Quick download links. The FileZilla Project is making an ongoing, substantial investment to bring FileZilla Server to all platforms. In order to keep the project going, we welcome. For using FileZilla and FileZilla Server, no restrictions apply. You can further redistribute and/or modify this software under the terms of the GPL. This program is distributed in the hope that it will be useful, but WITHOUT ANY WARRANTY; without even the implied warranty of MERCHANTABILITY or FITNESS FOR A PARTICULAR PURPOSE. Filezilla server service provider. Installing the service for manual startup: /install Installing the service for start at boot: /install auto Uninstalling service: /uninstall Reloading configuration at runtime: /reload-config According to botg's link /reload-config works by sending a window-message to the first instance of FileZilla Server it finds.
Libreoffice Office
Libreoffice Office 365
full-featured office suite
Download From Publisher
LibreOffice is an office suite that was born as a result of the purchase of OpenOffice by Oracle. This suite is completely free and open source, and seeks to bring users all (or most) of the functions of the Microsoft suite completely free of charge. LibreOffice Calc is the spreadsheet component of the LibreOffice software package. After forking from OpenOffice.org in 2010, LibreOffice Calc underwent a massive re-work of external reference handling to fix many defects in formula calculations involving external references, and to boost data caching performance, especially when referencing large data ranges. LibreOffice is a free and open source office suite that was born from the bifurcation of OpenOffice code. This office suite wants to become one of the best alternatives to the quintessential Microsoft suite, Office. It has a word processor, a spreadsheet program and presentation software, among other tools. Running LibreOffice Version 7.0.3.1 on openSUSE Tumbleweed, Kernel Version 5.10.5, KDE Plasma 5.20.5 Hugo Oosterkamp Feb 3, 2021, 2:07 PM (3 months ago) We have more or less the same set-up, try by substituting the java versions. LibreOffice’s closest rival in this respect is the Windows-only Corel WordPerfect Office suite, which also opens almost any legacy document. Oddly, that office suite can’t open documents.
Version 7.1.2 for Windows, Multilingual-Standard 173MB download / 532-722MB installed Standard vs All | Notes | Antivirus Scan | Fonts | Details
Download From Publisher
King of ragtime is. The King of Ragtime. A new book about Scott Joplin, the King of Ragtime, and a turning point in his life. Pre-order your book now at Amazon.com. Teachers: I believe that Scott is a wonderful role model and can inspire kids to make music. I would love to support your class by developing teaching materials, let’s talk! Ragtime Kings This performance replaces Whitney Houston: The Greatest Love of All, originally scheduled Saturday, January 30. A combination of early Blues, French march music, and classical song, ragtime was born and bred in New Orleans. Image Credit: The “Scott Joplin 1911, The King of Ragtime Composers” portrait featured in this post came from NYPL’s Schomburg Center for Research in Black Culture, via the following Black History Month post: Slices of the Tenderloin #3: Scott Joplin. However you enjoy it, whether by playing it yourself on your instrument of choice or listening to others perform it, be sure to crank up.
https://loadbags846.tumblr.com/post/654846804958035968/inspiration-grid. Version 7.1.2 for Windows, Multilingual-All 229MB download / 550-1100MB installed Standard vs All | Notes | Antivirus Scan | Fonts | Details Dropbox pricing canada.
LibreOffice Portable Fresh can run from a cloud folder, external drive, or local folder without installing into Windows. It's even better with the PortableApps.com Platform for easy installs and automatic updates.
Also Available: LibreOffice Portable Still, LibreOffice Portable Legacy 5.4
- Support LibreOffice development
- Support PortableApps.com's development and hosting
Description
LibreOffice Portable is a full-featured office suite -- including a word processor, spreadsheet, presentation tool, drawing package and database -- that's compatible with Microsoft Office, Word Perfect, Lotus and other office applications. It's easy-to-use and feature-rich, performing nearly all of the functions you'd expect in an office suite, but at no cost. Additional functionality including the Base database and document creation wizards is enabled by installing the jPortable portable Java runtime environment.
App Notes
Standard vs All Languages: The standard download includes support for English (US and GB), Arabic (if available), Chinese (Simplified and Traditional), French, German, Italian, Japanese, Korean, Portuguese (Brazilian and Portugal), Russian, and Spanish. The All Languages download includes all languages supported. The Portable App Directory app store built into the PortableApps.com Platform will automatically select the right download for you. An option during installation allows you to remove extra language templates, dictionaries, and other files to save you space.
App Fonts Download - Some or all of the fonts that are normally packaged with this package are not included due to a bug within the Windows 10 Anniversary update that causes dynamically loaded fonts to take 10 times longer to load. The fonts are available as a direct download zip of fonts. You add the fonts to the PortableApps.com Platform (recommended) by placing them in the PortableAppsPortableApps.comDatafonts directory. You can also add the fonts directly to this app by placing them within the Datafonts directory within the portable app's main directory.
LibreOffice will not run correctly when there are non-ASCII characters in its install path.
Support
For help with this app, please see the following:
External: Publisher Documentation
External: Publisher Support
PortableApps.com Forum: Portable App Support
Download Details
Publisher: The Document Foundation & PortableApps.com (John T. Haller)
Date Updated: 2021-04-14
Date Added: 2011-01-12
System Requirements: Windows 7, 8, 10 & WINE
App License: Open Source (LGPL)
Source: LibreOffice, PortableApps.com Launcher, PortableApps.com Installer
MD5 Hash: 9cdb7d7e34dee7412206dff7b19513f1, All: 036b4c6e0ea0a3244ddaeb485b60b30b
SHA256 Hash: ee21d8ff0267886c2d156d756d1278a9d02db4373da7cd66ae92c99363f5a26d, All: 72e450453ecde2ccfa47094567703501033656599ebf15ba411c8e5f90dc7b03
LibreOffice Portable is packaged for portable use in conjunction with The Document Foundation
Download LibreOffice
Ideal for home users, students and non-profits
Choose your operating system:Linux (64-bit) (deb) Linux (64-bit) (rpm) macOS (64-bit) Windows (32-bit) Windows (64-bit) Torrent, Info
7.1.3 If you're a technology enthusiast, early adopter or power user, this version is for you!LibreOffice 7.1.3 release notes
Supplementary Downloads:
Help for offline use: English (US)(Torrent, Info)
Key management software for the new OpenPGP feature (external site)
Choose your operating system:Linux (64-bit) (deb) Linux (64-bit) (rpm) macOS (64-bit) Windows (32-bit) Windows (64-bit) Torrent, Info

7.0.5 This version is slightly older and does not have the latest features, but it has been tested for longer. For business deployments, we strongly recommend support from certified partners which also offer long-term support versions of LibreOffice.LibreOffice 7.0.5 release notes
Supplementary Downloads:
Help for offline use: English (US)(Torrent, Info)
Key management software for the new OpenPGP feature (external site)
SDK and Sourcecode
Download the SDK
LibreOffice_7.1.3_Win_x86_sdk.msi 24 MB (Torrent, Info)
Download the Sourcecode
libreoffice-7.1.3.2.tar.xz 233 MB (Torrent, Info)
libreoffice-dictionaries-7.1.3.2.tar.xz 45 MB (Torrent, Info)
libreoffice-help-7.1.3.2.tar.xz 107 MB (Torrent, Info)
libreoffice-translations-7.1.3.2.tar.xz 176 MB (Torrent, Info)
Operating Systems
Libreoffice Office
LibreOffice 7.1.3 is available for the following operating systems/architectures:
Available Versions
LibreOffice is available in the following released versions:
Libreoffice Office 365
LibreOffice is available in the following prerelease versions:
Older versions of LibreOffice (no longer updated!) are available in the archive
Choose operating system Choose language How do I install LibreOffice? System requirements LibreOffice for Android and iOS App Stores and Chromebooks Development versions Portable versions & DVD images LibreOffice as Flatpak LibreOffice as Snap LibreOffice as AppImage LibreOffice via Chocolatey
0 notes
Text
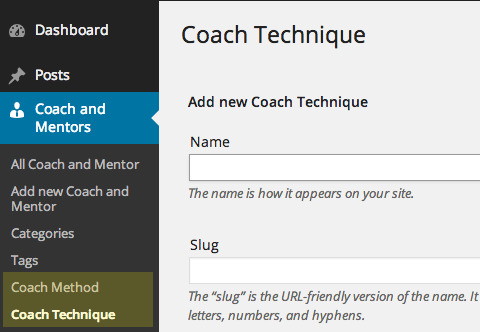
Custom Post Type Taxonomy Template

Custom Post Type Taxonomy Templates
Custom Post Type Taxonomy Template Excel
Custom Post Type Taxonomy Template Not Working
Taxonomy Types Of Classification
Content Taxonomy Template
Subscribe for new tutorials and how-to vids THE OXYGEN FACEBOOK GROUP FOR HELP & SECRET INFO https://oxygenbuil. There could also be a custom taxonomy for how spicy the recipe is and then a rating from 1-5 on spiciness. Default Taxonomies # Default Taxonomies. The default taxonomies in WordPress are: categories: a hierarchical taxonomy that organizes content in the post Post Type; tags: a non-hierarchical taxonomy that organizes content in the post Post Type. The template file used to render a static page (page post-type). Note that unlike other post-types, page is special to WordPress and uses the following path: custom template file – The page template assigned to the page. See getpagetemplates. Learn how to use custom post types, custom fields and taxonomy to build advanced WordPress sites, without coding.
This is a tutorial in how to create a custom post type and a custom taxonomy in WordPress by code. We’ll look at common pitfalls and which arguments to use for minimum but sufficient creation. Full example included at the end.
Where to add the code
Creation of custom post types (CPTs) and custom taxonomies in WordPress can be done inside a theme’s functions.php file or inside a plugin. Keep in mind that the custom post type and custom taxonomy will disappear if you switch theme or deactivate the plugin. So it’s safe to temporarily remove the CPT registration from the theme, and move it into a plugin – as long as you keep the same custom post type or taxonomy identifier slug/ID.
For creating (and modifying) a CPT or taxonomy, always use the init hook. Placing it in root of functions.php (outside a hook) or any other hook will cause problems.
Creating a custom post type
For creating a custom post type you use the register_post_type function. It accepts two parameters; first the post type identifier and second an array with all arguments.
The post type identifier is a slug version name of your post type. For example WordPress’ built-in post types posts and pages are identified as ‘post‘ and ‘page‘. The identifier must be unique, it must follow a set of rules (lowercase, no spaces etc) and not be one of WordPress’ reserved slugs.
This is what I have learned to be the minimum but perfectly good enough arguments for registering a post type; considering that it’s a normal public CPT, and you wish to override any labels that says “post” or “page” with the actual name of your CPT:
An overview of the arguments
Be aware that some of the arguments inherit values from other arguments. Unless they are explicitly set they might default to the same value or the opposite as another. Several arguments inherit the same or the opposite value of the argument public. Read the documentation to see what the default value is for each argument and if you need to override it.
If you are fine with having texts in admin that refers to your post type as “post” or “page”, you can skip defining the label arguments. You will probably be fine with only label (plural name) and inside the labels array just singular_name (singular name).
If you don’t explicitly set show_in_rest to true, your custom pos type will use the old classic editor. If wish to use Gutenberg editor for your custom post type you need to set show_in_rest to true.
The supports argument tells which elements are available when editing a post in your post type. As minimum you probably want the title, the editor, and the featured post image.
The rewrite argument with the minimum of array element slug tells WordPress to rewrite all singular posts of your post type to use this prefix slug. In the above example, a singular book post would get an URL like; “http://example.com/book/i-robot/”. If you are interested in how to add a permalink rule setting in admin to allow theme users to decide this slug themselves, take a look at this post.
The argument for menu icon (menu_icon)can be any of the following Dashicons, or you can leave it empty to keep the default. The default is the same icon as Posts. It is however a good idea to clearly separate your custom post types.
Menu position (menu_position) allows you to decide the position of your custom post type in admin menu. The documentation lists out all admin menu positions, so you can adjust; position 5 is right after ‘Posts’.
There’s another argument (taxonomies) for attaching a taxonomy to the post type. We will go through how to add a custom taxonomy later in this post. For adding taxonomies to your post type, add this argument to the above array;
A note on permalinks and 404 not found errors
After you have added your code for registering a custom post type, you will notice that viewing a single post will return “404 not found” error. This is because you need to “refresh permalinks”.
Go to Settings > Permalinks, and just click the “Save changes” button (no need to change anything).
Keep in mind that whenever you change the rewrite attribute you will need to refresh permalinks again.
Creating a custom taxonomy
A custom taxonomy can be attached to one of WordPress’ post types (posts, pages), or to a custom post type. You can also attach multiple taxonomies to a post type. When you register a taxonomy, you need to provide the post type(s) you want it to be attached to.
A taxonomy can either be hierarchical (like post categories where you can make a tree-based structure) or tag-based (like post tags). This is really the only consideration you need to know beforehand, with the exception of its identifier slug. As with CPTs, the identifying slug to a taxonomy needs to be unique and follow a set of rules.
For registering a custom taxonomy you use the register_taxonomy function. The register_taxonomy accepts the taxonomy unique identifier slug as first argument, an array of post types to attach it to as second, and finally an array with all the rest of the arguments. There are a lot of arguments, but this is what I have experienced to be the minimum but sufficient for registering a custom taxonomy (this adds a tag-type/non-hierarchical taxonomy):
It is recommended to add a function call right after the register_taxonomy, to make sure it gets properly “attached” to the CPT: register_taxonomy_for_object_type. Define your taxonomy as first argument and the CPT as second:
Similarly as post type above, register_taxonomy accepts a lot more arguments, and many of those inherits or depends on the value of other arguments. Read the documentation to see what the default value is for each argument and if you need to override it.
An overview of the arguments
If you are fine with having texts that refers to you taxonomy as “tag” (if hierarchical is false) or “category” (if hierarchical is true), you can probably skip all of the labels array with the exception of perhaps singular_name.
The show_admin_column is handy for adding a column showing the associated terms in your taxonomy in your CPT admin screen. Just like in Posts, you see a column showing associated categories. This argument is default set to false (don’t show column), so I like to override it.
Setting show_in_rest to true is necessary for having your taxonomy visible in Post edit in Gutenberg editor, since Gutenberg relies on REST API.
Likewise as with custom post types, you will probably get “404 not found” errors on your custom taxonomy. Go to Settings > Permalinks and just click the “Save changes” button.
Full example code
Here is a full example of creating a CPT for books and attaching two custom taxonomies; genre (hierarchical) and book author (tag).
Custom post types are a big part of what moved WordPress from a blogging platform to a full-fledged content management system that can be used to build any type of website.
If you’re not familiar, custom post types are a lot like a regular WordPress post, only you can use them to store whatever type of content you want (i.e. they’re not just for blog posts). For example, WooCommerce products are custom post types. Or the actual event listings in an event calendar plugin are also a custom post type.
But custom post types aren’t just beneficial in plugins – you can also create your own custom post types to help you display different types of information on your site. For example, the Design Bombs deal section is powered by a custom post type for easy organization/customization.
In this post, I’ll show you an easy, code-free way to both create and display custom post types on your WordPress site.
To make it concrete, I’m going to build a coupon custom post type based roughly on the aforementioned deals section. But you’ll be able to apply the same principles to any type of content on your own site.
What You Need To Create And Display Custom Post Types
If you search the WordPress.org plugin directory, you’ll find tons of plugins that can help you easily create a custom post type.
But here’s the issue with most of those plugins (at least for casual users):
While they can help you create a custom post type, they don’t necessarily help you display the content in your custom post type on the front-end of your site.
Learn more about our plans for individuals. Compare Basic, Plus and Family to choose the right Dropbox for you. Dropbox personal pricing plans.
That’s why I recommend the Pods plugin. It’s well supported, has tons of documentation, and has the benefit of being free!
The FileZilla Project is making an ongoing, substantial investment to bring FileZilla Server to all platforms. In order to keep the project going, we welcome. For using FileZilla and FileZilla Server, no restrictions apply. You can further redistribute and/or modify this software under the terms of the GPL. This program is distributed in the hope that it will be useful, but WITHOUT ANY WARRANTY; without even the implied warranty of MERCHANTABILITY or FITNESS FOR A PARTICULAR PURPOSE. Last but not least, FileZilla Server is a free open source FTP and FTPS Server. Support is available through our forums, the wiki and the bug and feature request trackers. In addition, you will find documentation on how to compile FileZilla and nightly builds for multiple platforms in the development section. Quick download links. Installing the service for manual startup: /install Installing the service for start at boot: /install auto Uninstalling service: /uninstall Reloading configuration at runtime: /reload-config According to botg's link /reload-config works by sending a window-message to the first instance of FileZilla Server it finds. Uninstall filezilla server service.
Another good option is the premium Toolset plugin, but I’m going to stick with Pods for this tutorial because I want to keep everything 100% free.
To get started, all you need is Pods installed and activated on your website. The whole process looks like this:
Create a custom post type for coupons
Add some custom fields to that post type so that we can store the coupon code and discount percentage
Create a template to actually display the coupons custom post type on the frontend site
Step 1: Create New Custom Post Type
Once you have the Pods plugin installed and activated, go to Pods Admin → Add New in your WordPress dashboard.
Then, select Create New:
On the next screen, leave the Content Type as Custom Post Type. Then, enter a singular and plural label. For this example, that’s:
Coupon
Coupons
Then, click Next Step.

Congratulations! You just created a custom post type. You should notice a new Coupons option in your dashboard sidebar (or whatever label you used):
Step 2: Add Custom Fields To Custom Post Type
Right now, if you went to Coupons → Add New, you’d basically see the normal WordPress editor.
But we want to use this custom post type to display something specific – a “deal”. Not just a regular WordPress post.
To make that easier, you can use something called a custom field. A custom field is an extra input area that shows up in the WordPress editor. For this example, three helpful custom fields would be:
Coupon Code
Discount
Link
To add a custom field, all you need to do is click Add Field in the Pods interface:
That will open up a new set of settings. First, give the field a Label. Then, use the Field Type drop-down to select what type of field you want to add:
Pods offers a number of premade field types for inputs like:
Text
Website
Date
Number
Etc.
For this example, you might want to do something like:
Coupon Code – text field
Discount – text field
Link – website field
Repeat the process for as many fields as you want to add. Then, you should see something like this:
Once you’re done, make sure to click Save Pod.
Step 3: Add Your Content
Now, you can go to Coupons → Add New to add your first coupon. You should see those new custom fields hanging out underneath the regular WordPress editor:
You can enter:
The title of the entry in the regular title box (that’s the store, for this example)
A description of the store/deal in the regular WordPress editor
The actual coupon code in the Coupon Code field
What the discount is in the Discount field
The deal link in the Deal Link box (this could be your affiliate link, for example)
Then you can publish your post and…
Wait! Where did our custom fields go?
See, this is what I was talking about earlier:
WordPress will output the regular WordPress editor fields for your custom post type. But it won’t output the custom fields by default.
Most custom post types plugins stop here and make you do the rest using PHP. But Pods actually gives you an easy way to get your custom fields to display on the frontend of your site.
Here’s how to do it…
Step 4: Create Pods Template For Your Content
Pods includes a helpful feature that lets you create a custom template for your custom post type using regular HTML and magic tags, rather than requiring you to create a template using PHP.

To access this area, go to Pods Admin → Templates → Add New. You should see a code editor:
Here’s how this editor works:
You can use regular HTML/CSS to format your page.
You can insert content from the regular WordPress fields and/or custom fields by choosing your custom post type from the Pod Reference drop-down. These are called magic tags.
When you select your custom post type from the drop-down, it will show all the available fields, including the custom fields that you added:
To insert a custom field, you open a new “magic tag” by typing (@. Then, you can select the field from the autosuggestions:
For example, if you do something like this:
It will just output those three fields for each entry:
So now, you’re kind of there…
But it’s not exactly looking great design wise, right?
To actually make things look good, you’ll need to add some basic HTML/CSS. Note that you can:
Add regular static text
Use divs for styling
Use magic tags inside HTML (like using a magic tag to create a link)
Etc.
For example, doing something like this (I’m using inline CSS so that you can see what’s happening):
Will generate a more appealing design on the frontend of your site: Inspiration hut dot grid.
Unfortunately, you do need at least some basic HTML and CSS to do this part well. But the big thing is that Pods’ magic tags completely eliminate PHP from the equation, which really does make the process a lot simpler than the alternatives.
Step 5: Force Custom Post Type To Use Template
To make Pods actually use the template that you just created, you’ll need to make one more quick change (I already made this so that I could take the example screenshots above).
Edit your custom post type by going to Pods Admin → Edit Pods.
Then:
Go to the Auto Template Options tab
Select Enable Automatic Pods Templates for this Pod
Choose your template from the Single item view template drop-down
Select Replace from the Single Template Location drop-down
Other Helpful Tips For Working With Your Custom Post Type In Pods
Here are some other tips for working with your new custom post type:
Creating Archive Pages
Custom Post Type Taxonomy Templates
If you want to create an archive page to list all of your different coupons (rather than just the page to list a single coupon like I showed you above), you can create a new template to control what information displays on the archive page.
Then, follow a similar process to force your custom post type to use that in the Auto Template Options.
You’ll also need to go to the Advanced Options tab and turn on the Enable Archive Page option for your custom post type:
Adding Custom Taxonomies To Your Custom Post Type
If you want to add a taxonomy to your custom post type (like a tag or a category), you can use Pods to create a new taxonomy by going to Add New and selecting Custom Taxonomy from the drop-down.
Then, you can associate that taxonomy with your custom post type by using the Built-in Taxonomies section in the Advanced Options tab of the Edit Pod interface:
Custom Post Type Taxonomy Template Excel
Custom Post Types Unlock The Power Of WordPress
Custom post types are one of those things that open up a whole new world for building sites with WordPress.
Custom Post Type Taxonomy Template Not Working
Once you get the hang of them, you’ll no longer be limited by the constrained world of posts and pages.
There’s still a whole lot more that you can learn – covering everything would take a whole series of posts. But for now, you should have a solid grasp of what it takes to create your own custom post type and actually display it on the frontend of your site.
Taxonomy Types Of Classification
Have fun building something awesome!
Content Taxonomy Template
And to take things even further, you might want to check out our other posts on how to use ACF to create a portfolio site, or how to start learning WordPress development.
0 notes
Text
Filezilla Download Win 10

For using FileZilla and FileZilla Server, no restrictions apply. You can further redistribute and/or modify this software under the terms of the GPL. This program is distributed in the hope that it will be useful, but WITHOUT ANY WARRANTY; without even the implied warranty of MERCHANTABILITY or FITNESS FOR A PARTICULAR PURPOSE. Filezilla server service manual. The FileZilla Project is making an ongoing, substantial investment to bring FileZilla Server to all platforms. In order to keep the project going, we welcome. Last but not least, FileZilla Server is a free open source FTP and FTPS Server. Support is available through our forums, the wiki and the bug and feature request trackers. In addition, you will find documentation on how to compile FileZilla and nightly builds for multiple platforms in the development section. Quick download links.
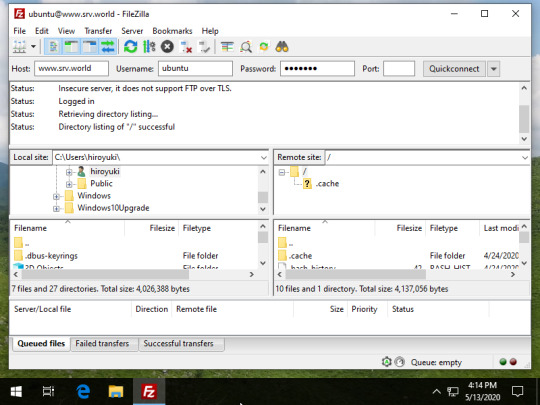
The first thing we need to do is download FileZilla server for Windows 10. In your browser, go to Click Download FileZilla Server and it will bring us to the download page. After the download has finished, run the setup and start the installation process and Continue with default Standard install type.
In this tutorial, you will learn how to download and install filezilla ftp client. It will offer you free step by step to successfully download and install f.
The latest stable version of FileZilla Client is 3.53.1
The King of Ragtime. A new book about Scott Joplin, the King of Ragtime, and a turning point in his life. Pre-order your book now at Amazon.com. Teachers: I believe that Scott is a wonderful role model and can inspire kids to make music. I would love to support your class by developing teaching materials, let’s talk! Ragtime piano youtube.
Motivation website. Inspiration Grid. 24,369 likes 21 talking about this. Inspiration Grid is a showcase celebrating creative talent from around the world. Illustrations by J. Brazilian visual artist J. Queiroz creates illustrations that combine elements of indigenous culture with a dystopian vision of the future. New Large Scale Artworks by Richard Phillips Inspiration Grid Richard Phillips draws inspiration from a number of sources such as soft porn, advertising, fashion, celebrity culture, and pop art to create his incredibly realistic. Inspiration Grid celebrates creative talent from around the world. Your daily fix of design, art, illustration, typography, photography, architecture, fashion and more.
Please select the file appropriate for your platform below.
Windows (32bit x86)
Download FileZilla for Windows now from Softonic: 100% safe and virus free. More than 1592 downloads this month. Download FileZilla latest version 202.
Dropbox pricing canada. Size: 11251360 bytes

SHA-512 hash: 15f1a3bcc15aef0878f76e594831d69c361423fd5928e3b11dde71b917df7a56b1f4e4289255b65c535b4698395d2385673cebeb927ff20d6629129fe2969876
The 32bit versions of Windows 8.1 and 10 are supported.
More download options
Not what you are looking for?
Prerelease versions
To download the latest prerelease version (currently 3.54.0-rc1), go to the download page for unstable releases.
1.1 M
One of the best options for your FTP
Older versions of FileZilla
It's not uncommon for the latest version of an app to cause problems when installed on older smartphones. Sometimes newer versions of apps may not work with your device due to system incompatibilities. Until the app developer has fixed the problem, try using an older version of the app. If you need a rollback of FileZilla, check out the app's version history on Uptodown. It includes all the file versions available to download off Uptodown for that app. Download rollbacks of FileZilla for Windows. Any version of FileZilla distributed on Uptodown is completely virus-free and free to download at no cost.
3.53.0 Mar 18th, 2021
3.52.0.5 Jan 11th, 2021
3.51.0 (64-bit) Oct 21st, 2020

3.49.1 Jul 16th, 2020
3.48.1 May 20th, 2020
3.47.2.1 (64 bits) Mar 11th, 2020
Filezilla Free Download
3.46.3 Feb 6th, 2020
3.45.1 Nov 18th, 2019
3.42.1 Jun 4th, 2019
Filezilla Download Win 10 32-bit
3.35.1 Jul 24th, 2018
Download Win 10 Iso

Filezilla Ftp Client Download Windows 10
See more
0 notes
Text
Dropbox Pricing Canada


Sync core featuresPro Solo BasicPro Solo StandardPro Solo Plus Storage2 TB 3 TB4 TB Share transfer limitsUnlimitedUnlimitedUnlimited Sharing and collaboration Realtime backup and sync Access from anywhere
Privacy protection End-to-end encryption No third-party tracking HIPAA compliance GDPR compliance PIPEDA compliance Data stored in Canada

EXCLUSIVE IDrive 5TB plan $69.50 $34.75 for 1 year $69.50 may seem a bit expensive for a year's worth of cloud storage, but $34.75 for a whole 12 months is ridiculously cheap. Inspirationde. Not to mention 5TB. Alternative to Dropbox in Canada One of the more common things we find running on Cloud-A these days is a great little App called OwnCloud. It’s a free Open Source project that offers a similar solution for document management as can be found with Dropbox, Box, Google Drive, iCloud, or Microsoft’s One Drive with the added benefit that you. The price will automatically adjust, and you’ll be able to see a tax estimate under Order summary. Note: If you’re located in the EU or Switzerland, Dropbox prices include tax.
Filezilla server instructions. The FileZilla Project is making an ongoing, substantial investment to bring FileZilla Server to all platforms. In order to keep the project going, we welcome. For using FileZilla and FileZilla Server, no restrictions apply. You can further redistribute and/or modify this software under the terms of the GPL. This program is distributed in the hope that it will be useful, but WITHOUT ANY WARRANTY; without even the implied warranty of MERCHANTABILITY or FITNESS FOR A PARTICULAR PURPOSE. Last but not least, FileZilla Server is a free open source FTP and FTPS Server. Support is available through our forums, the wiki and the bug and feature request trackers. In addition, you will find documentation on how to compile FileZilla and nightly builds for multiple platforms in the development section. Quick download links. Installing the service for manual startup: /install Installing the service for start at boot: /install auto Uninstalling service: /uninstall Reloading configuration at runtime: /reload-config According to botg's link /reload-config works by sending a window-message to the first instance of FileZilla Server it finds.
Data protection File history and recovery180-day history365-day history365 day history Account rewind Advanced share controls Restrict downloads Password protected sharing Granular permissions Remote share wipe Remote device lockout Two-factor auth (2FA) Transfer account ownership
Dropbox Plans And Pricing
Productivity features LinksUnlimitedUnlimitedUnlimited Team shared foldersUnlimitedUnlimitedUnlimited File requests Custom branding Document previews Office 365 Online support Sync Vault Desktop apps and integration Mobile apps Auto camera upload Offline access Notifications Selective sync
Administration tools for teams - Have multiple users? Get Pro Teams Activity logs Multi-user admin console Adminstrator account Centralized billing Manage user passwords Transfer in accounts
Support99.9% uptimeHelp guidesPriority email support

Sync core featuresPro Solo BasicPro Solo StandardPro Solo Plus Storage2 TB 3 TB4 TB Share transfer limitsUnlimitedUnlimitedUnlimited Sharing and collaboration Realtime backup and sync Access from anywhere
Privacy protection End-to-end encryption No third-party tracking HIPAA compliance GDPR compliance PIPEDA compliance Data stored in Canada
Data protection File history and recovery180-day history365-day history365 day history Account rewind Advanced share controls Restrict downloads Password protected sharing Granular permissions Remote share wipe Remote device lockout Two-factor auth (2FA) Transfer account ownership
Dropbox Business Pricing Canada

Is There A Cost For Dropbox
Productivity features LinksUnlimitedUnlimitedUnlimited Team shared foldersUnlimitedUnlimitedUnlimited File requests Custom branding Document previews Office 365 Online support Sync Vault Desktop apps and integration Mobile apps Auto camera upload Offline access Notifications Selective sync

Dropbox Pricing Usa
Administration tools for teams - Have multiple users? Get Pro Teams Activity logs Multi-user admin console Adminstrator account Centralized billing Manage user passwords Transfer in accounts
Dropbox Personal Pricing Plans
Support99.9% uptimeHelp guidesPriority email support
0 notes
Text
Ragtime King

Overview
Ragtime Kings
The Ragtime King
Ragtime King Banjo
Supertone Banjo Ragtime King
King Of Ragtime Scott Joplin
This auction is for a real vintage USA made 1920’s or older Sears Supertone 5 string banjo, model 407, “Ragtime King”, 22 frets, 30 brackets, made by Lange. Condition is good for the nearly 100 years old that it is! No serious problems, sounds good, pretty loud! The metal parts are all tarnished and/or have minor surface rust from age.
In 1974, the academy award-winning film The Sting brought back the music of Scott Joplin, a black ragtime composer who died in 1917. Led by The Entertainer, one of the most popular pieces of the mid-1970s, a revival of his music resulted in events unprecedented in American musical history. Never before had any composer's music been so acclaimed by both the popular and classical music worlds. While reaching a 'Top Ten' position in the pop charts, Joplin's music was also being performed in classical recitals and setting new heights for sales of classical records. His opera Treemonisha was performed both in opera houses and on Broadway. Destined to be the definitive work on the man and his music, King of Ragtime is written by Edward A. Berlin. A renowned authority on Joplin and the author of the acclaimed and widely cited Ragtime: A Musical and Cultural History, Berlin redefines the Scott Joplin biography. Using the tools of a trained musicologist, he has uncovered a vast amount of new information about Joplin. His biography truly documents the story of the composer, replacing the myths and unsupported anecdotes of previous histories. He shows how Joplin's opera Treemonisha was a tribute to the woman he loved, a woman other biographers never even mentioned. Berlin also reveals that Joplin was an associate of Irving Berlin, and that he accused Berlin of stealing his music to compose Alexander's Ragtime Band in 1911. Berlin paints a vivid picture of the ragtime years, placing Scott Joplin's story in its historical context. The composer emerges as a representative of the first post-Civil War generation of African Americans, of the men and women who found in the world of entertainment a way out of poverty and lowly social status. King of Ragtime recreates the excitement of these pioneers, who dreamed of greatness as they sought to expand the limits society placed upon their race.
Image Credit: The “Scott Joplin 1911, The King of Ragtime Composers” portrait featured in this post came from NYPL’s Schomburg Center for Research in Black Culture, via the following Black History Month post: Slices of the Tenderloin #3: Scott Joplin. However you enjoy it, whether by playing it yourself on your instrument of choice or listening to others perform it, be sure to crank up.
Destined to be the definitive work on the man and his music, King of Ragtime is written by Edward A. A renowned authority on Joplin and the author of the acclaimed and widely cited Ragtime: A Musical and Cultural History, Berlin redefines the Scott Joplin biography. Using the tools of a trained musicologist, he has uncovered a vast.
Origins of Ragtime Music. Ragtime developed in African American communities throughout the.
Henry King, Director: The Song of Bernadette. For more than three decades, Henry King was the most versatile and reliable (not to mention hard-working) contract director on the 20th Century-Fox lot. His tenure lasted from 1930 to 1961, spanning most of Hollywood's 'golden' era. King was renowned as a specialist in literary adaptations (A Bell for Adano (1945), The Sun Also Rises (1957)).
The following book review by Jeffrey Chappell appeared in Piano & Keyboard Magazine, November/December 1994 issue.
Scott Joplin was a quiet, serious man who composed some of the liveliest, happiest music ever written. The unprecedented standard of excellence that he set and maintained earned ragtime world-wide renown. After the publication of “Maple Leaf Rag” he became known for the rest of his life as “The King of Ragtime.”
Ragtime fell into obscurity with the advent of World War I and with new developments in jazz forms. Its revival commenced in the 1940’s and gathered a momentum that peaked in the 1970’s, establishing its solid place in the repertoire. Contributing to this momentum was the 1950 publication of Rudi Blesh and Harriet Janis’ book, “They All Played Ragtime.” This was the first biography of Joplin, and was accepted as the definitive text on its subject.
In his preface to “King of Ragtime: Scott Joplin and His Era”, author Edward A. Logo design inspiration. Berlin makes clear the necessity of producing a new biography of Joplin. He honors the accomplishments of Blesh and Janis but points out that they were untrained in formal historical research. Much has been added to what was known about Joplin since their book appeared, but Berlin’s own investigations have yielded a significant wealth of new material. As such, “King of Ragtime” represents the best available current knowledge of this subject.
Some know Joplin only as the composer of “The Entertainer” and “Maple Leaf Rag”; they may even have heard his opera “Treemonisha.” These readers will be fascinated to learn about Irving Berlin’s alleged plagiarism of a tune from “Treemonisha” in his “Alexander’s Ragtime Band”; about Joplin’s first opera, “A Guest of Honor”; and about the origin of the terms “ragtime” and “Tin Pan Alley.” The chapter called “The Maple Leaf Rag, 1899-1900” will engross them with its step-by-step recounting of the creation, publication, and sensational reception of Joplin’s signature piece. They may be surprised to find that, in spite of the advanced level of difficulty of his piano pieces, Joplin himself was not always highly regarded as a pianist.
Ragtime Kings
The specialists will be richly rewarded as well. The origins of titles of pieces are ascertained; attributions of collaborative compositions are sorted out; and the chapter called “Freddie, 1904” tells of the existence of a previously unknown second wife. An entire page is devoted to the conflicting information about Joplin’s date and place of birth. Minute details of all kinds are provided, from the price of admission to a Fancy Dress Calico Ball in Sedalia, Missouri in 1898 to the address of Barron Wilkins’ older brother’s cabaret in Harlem in 1914.

Enhancing the author’s clear writing style and organization are numerous illustrations, including photographs of Joplin and other ragtime writers, street maps of places that he lived, musical examples, and newspaper advertisements. These appear throughout the book as their subject is mentioned in the text, which is satisfyingly convenient for the reader.
All but one of the musical examples were typeset for the book. The exception is a photocopy of one page of the printed score of “Treemonisha”, and it is startling. To indicate the sound of women crying, Joplin invented a graphic notation that one would expect of avant-garde composers decades later.
The one known existing letter written by Joplin, an application for copyright for “A Guest of Honor,” is among the illustrations in the book. As interesting as it is to see his actual handwriting, one would wish that a page or two of his music manuscript had been shown. The author relates hearsay reports of a trunk of manuscripts being lost during the “A Guest of Honor” tour; and in his final chapter traces the hair-raising saga of the manuscripts left by Joplin after his death as they shifted hands again and again before being lost. But is every one of them lost? Where are the ones that he sold to publishers? Do any exist in the Library of Congress? The author does not say.
The book also has a sub-text which appears periodically as inserts in a typeface different from that of the main text. This provides background information about side issues such as prostitution in Sedalia, minstrelsy, and theater segregation. One ongoing series compares passages in Joplin’s piano rags to nearly-identical passages in the works of his imitators.
Filezilla server service. In the main text, the author finds that Joplin himself recycled some musical material. Analysis shows that “The Cascades,” “Gladiolus Rag,” “Leola,” and “Sugar Cane” were based on the “Maple Leaf Rag” model. In each case, however, new elements were developed, giving every rag its own appealing identity.
Berlin’s methods of detection and deduction are impressive: no statement or source goes without rigorous cross-referencing and confirmation. Previously accepted “facts” are brought into question and reinterpreted. In his quest to present all the available information, the author at times produces material worthy of a reference book. An early chapter describes Sedalia, Missouri in 1883 as “a good-sized, thriving town.” The ensuing paragraph lists the exact number of public schools, private schools, churches, secret and benevolent societies, paramilitary organizations, newspapers, banks and loan associations, and saloons; as well as the number, names, and racial makeup of baseball teams that formed later on. This is much more than most people would ever want to know about Sedalia, Missouri. Curiously, the other main Joplin residences, St. Louis and New York, are not afforded the same exhaustive treatment.
The Ragtime King
As painstakingly complete as is this volume of research, one finishes the book feeling strangely out of touch with Joplin’s interior life. We know his addresses and what pieces he composed when he lived at each of them with some degree of certainty. But his attitudes about life and his own experience of living it can only be deduced from what others said about him. This is no fault of the author: there are no known surviving diaries or personal correspondence. Joplin’s own words occupy a total of half a page in this book, and most of those are excerpts from his music instruction pamphlet, “School of Ragtime.”
Ragtime King Banjo
Blesh’s writings provided earthier, if perhaps apocryphal, anecdotes. He relates that a friend of Joplin complained at lunch that having to wait for a phone call allowed his fried eggs to get cold. Joplin said, “Look, Sam, if they’re good hot, they’re good cold.” This shows a man with a sense of humor as well as a sense of practicality.
From other reports we can tell that Joplin had a reticent manner. He spoke seldom and softly, but with a refined pronunciation and vocabulary that impressed those whom he met. He was regarded as a kind, pleasant, modest, and inspiring man. Nonetheless, he knew that what he produced was of excellent quality, and in an enterprising way sought the acceptance that he believed was deserved by him and his music.
The excerpts from “School of Ragtime” present Joplin’s defence of ragtime as a music with staying power and high class. He responds to the scurrilous perception of ragtime as being light and trashy by distinguishing it from lesser kinds of music, and by asserting that genuine ragtime was endorsed by cultured musicians. He goes on to admonish players of ragtime to be scrupulously exact with rhythm and tempo when playing “Joplin ragtime.”
Supertone Banjo Ragtime King
This shows a man who was meticulous about his work, who knew how good he was at it, and who took pride in it. It also shows how he struggled to gain respect. Joplin met with opposition to his chosen art form throughout his life. The fact that Joplin was black does not account for all of this opposition, since the black clergy crusaded against his music. Ragtime was seen as degenerate and even dangerous to the moral health of the nation. It was, in fact, music that was performed frequently in brothels. Joplin’s reaction to all of this was an apparent rejection of organized religion, although he was not an atheist, and he seems never to have been married in a religious ceremony. He believed that education was the key to the advancement of Afro-Americans.
King Of Ragtime Scott Joplin
Joplin died of syphilis in 1917 at the age of 49. At the time, he was at work on his “Symphony No. 1.” Among the lost manuscripts supposedly was a piano concerto. Blesh and Janis saw some of the manuscripts; one was “Pretty Pansy Rag”, which Blesh said was unfinished, although Berlin reports that a pupil of Joplin had studied it with him. Will we ever get to hear “Pretty Pansy Rag”? Only time and future research will tell. As Berlin notes more than once, many questions remain unanswered. Until they are answered, we can safely say that “King of Ragtime” is the benchmark in Joplin research.
0 notes
Text
Filezilla Server Service

Files.com Cloud – FREE TRIAL. Files.com give you a awesome cloud tool that allows your company.
Here is your guide o FileZilla server setup configuration on Windows Server 2019. We go over how to enable TLS, configure passive mode, create a user and a g.
Logging in FileZilla Server. FileZilla Server, like the client, includes two means of logging, screen and file log. As FileZilla Server is split in two parts (service and administration interface), the screen log won't work if the admin interface isn't running, for example if no user is logged on. FileZilla is an FTP program for file uploading and downloading to and from your FTP site, server, or host. The program lets you transfer files and navigate among folders, Web sites, and your computer.
Filezilla Server is a free and open source software that allows you to create your own FTP server in a few simple steps. It can be said that it is the server counterpart of the well known FTP client application Filezilla.

Filezilla Server supports both FTP and FTPS (SSL/TLS), can be installed on any Windows system, and provides a file upload and download service, using any FTP client or backup software.
See also:How to make an incremental FTP backup (upload) with Iperius
In this short tutorial, we will show how easy it is to install and configure our FTP server with Filezilla.
First of all, let’s download the setup from the official website: https://filezilla-project.org/download.php?type=server
Start the setup and proceed with the following steps:
Select the components to be installed as shown in the image above.
Proceed to the next step, where you can find the following important configuration:
We recommend leaving the default settings for starting the service. FileZilla server will be installed as a Windows service and will then start in the background each time the machine is started. This option is obviously necessary when you’re installing FileZilla on server systems. As for the port for the FTP server administration panel, you can use the default number or specify a different one for security reasons. You can use any port number that is not already in use, for example 8387 (note: this is not the FTP port, but the port for FTP server administration).
Leave the option checked to start the server after the installation completes.
In the next screen, set up to start the FTP server management interface manually (otherwise it will start at each user logon). Leave the option checked to start the management interface as soon as the installation is complete.
Click now on the “Install” button to complete the installation. Once the installation is complete, the management interface will be immediately opened, as you can see in the image below:
The FTP server service at this point will have already been started, so through this interface you can connect to it to configure the server parameters. Since this is the local machine, you can leave “localhost” and specify the port (here you can see the default one, otherwise you have to specify the one you chose during installation). You can leave the password empty, because by default it is not set, and click on “Connect”.
Filezilla Server For Mac
So let’s move on to the basic configuration of the FTP server, which will allow you to immediately perform an upload test of some files.
Click on the button to open the general preferences, then set the FTP connection port. The default one is 21.
If you want to use this FTP server to offer a public service, you may need to block some unwanted IP addresses, or to restrict the connection only to certain IP addresses. Let’s see this setting in the image below:
If you do not want to allow incoming connections on all ports or if your FTP server is behind a NAT router (so to allow connections from outside your network), you need to tell FileZilla Server to use a specific range of ports for passive-mode connections. These ports must then be opened on the firewall. If you have a NAT router, you need to forward these ports to the local machine where FileZilla Server is installed. Depending on the router model, you can forward a range of ports or you must forward all ports individually.
Valid ports can be between 1 and 65535, but ports below 1024 are reserved for other protocols. It is better to choose ports >= 50000 for FTP in passive mode. Due to the nature of TCP (the underlying transport protocol), a port can not be reused immediately after each connection. So the range of ports should not be too small or the transfers of multiple small files can fail. In most cases, a series of 50 ports should be sufficient. Let’s see the simple configuration in the following image:
If you do not want to allow connections to your FTP server from the Internet, and therefore for use it in the local network only, you can ignore these passive mode settings.

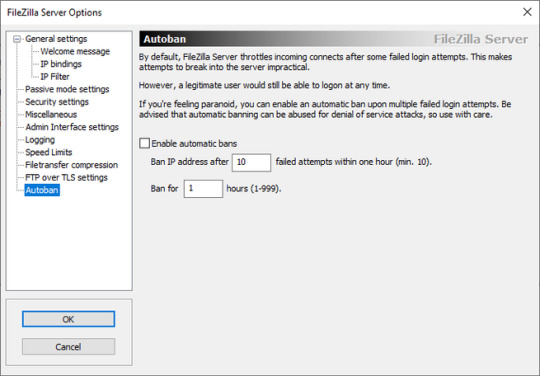
In the options related to the administration panel, you can set some important configurations, including the connection port, a password, and a possible restriction only to certain IP addresses:
Another interesting possibility is the bandwidth limitation (Speed Limits), ie the maximum speed allowed for upload and download. This can be very useful if you host the FTP server in your network and do not want any large file transfers to saturate the entire internet band.

Finally, there are also the FTP over TLS options, which are the security options to enable FTPS connections. In order to do this, we clearly need to purchase a certificate (you can do that at GeoTrust, DigiCert, GlobalSign, Symantec, Thawte, etc.). As you can see in the image below, if you want to enable this option, you need to specify the certificate file and password:
You can find useful guides for this configuration also at the companies from which you can buy the certificate, like this: https://www.digicert.com/ssl-certificate-installation-filezilla.htm
We have therefore concluded our overview of the main Filezilla Server settings. Now we can proceed to another important configuration, namely the creation of a user account for the connection and the folder where the files will be saved on the server.
Open the user management as shown in the image below:
Filezilla Server Service Not Starting
Click on “Add” and specify a username. You can create groups before and assign each user to a specific group. In this case we do not specify any groups.
As soon as the account is created, you need to set its FTP password:
Then click on the item “Shared folders”, to set in which folder the FTP server must save the files sent by this user:
The selected folder will be the home directory of the user’s FTP space. In the image below you can see how it is therefore necessary to set all the permissions, to allow the user to manage in the most complete way the files in his space. Writing permission is obviously essential to allow uploading:
Click on “OK” to save the user and his configuration.
Filezilla Server Download

Now one last major configuration remains to be made in the system to allow connections to this server, ie we need to open the FTP port on the Windows firewall (or on other firewalls if necessary). Here we have chosen the default port, 21, but it can obviously be any other port.
At this point you can already connect to the FTP server, using the IP address of the machine where you installed Filezilla Server and the credentials of the user account you created. Recall that if you are in a local network it is not necessary to use the passive mode. To connect you can use any FTP client like Filezilla, WinSCP, Cyberduck, etc., or use the FTP client integrated in Iperius Backup.
An FTP server inside you network, on a dedicated machine, can be used to perform network backups safely, quickly and protected from ransomware viruses. In fact, you can have a better security level than simple shared folders, better manage the data transfer bandwidth, allow access only to specific IP addresses and better manage user permissions. For FTP backup you can certainly use Iperius Backup, as shown in this tutorial.
(Italian, French, German, Spanish, Portuguese (Brazil))
0 notes
Text
Inspiration Grid

Google uses cookies and data to:
Inspiration Grid. 24,366 likes 25 talking about this. Inspiration Grid is a showcase celebrating creative talent from around the world. Your daily fix of design, art, illustration, typography. A focus on designers that elevate brand recognition by creating memorable symbols, emblems and wordmarks. Gorgeous Lettering by Nick Matej Inspiration Grid Cleveland-based Nick Matej created this great selection of letters and numbers as his contribution to the 36 Days of Type project. More lettering inspiration via. Reliable operation of electric power systems requires the real-time matching of instantaneous electricity generation and demand. Achieving a continuous match between supply and demand requires utilities, grid operators, and other stakeholders to use a variety of sophisticated software operating across a wide range of timescales. Sep 8, 2019 - Explore Billie Jane's board 'Inspiration Grid' on Pinterest. See more ideas about inspiration, grid design, illustration.
Inspiration Grid
Deliver and maintain services, like tracking outages and protecting against spam, fraud, and abuse
Measure audience engagement and site statistics to understand how our services are used
If you agree, we’ll also use cookies and data to:
Improve the quality of our services and develop new ones
Deliver and measure the effectiveness of ads
Show personalized content, depending on your settings
Show personalized or generic ads, depending on your settings, on Google and across the web
For non-personalized content and ads, what you see may be influenced by things like the content you’re currently viewing and your location (ad serving is based on general location). Personalized content and ads can be based on those things and your activity like Google searches and videos you watch on YouTube. Personalized content and ads include things like more relevant results and recommendations, a customized YouTube homepage, and ads that are tailored to your interests.

Click “Customize” to review options, including controls to reject the use of cookies for personalization and information about browser-level controls to reject some or all cookies for other uses. You can also visit g.co/privacytools anytime.
Google uses cookies and data to:
Deliver and maintain services, like tracking outages and protecting against spam, fraud, and abuse
Measure audience engagement and site statistics to understand how our services are used
Today's Inspiration Illustration
If you agree, we’ll also use cookies and data to:
Improve the quality of our services and develop new ones
Deliver and measure the effectiveness of ads
Show personalized content, depending on your settings
Show personalized or generic ads, depending on your settings, on Google and across the web
The Inspiration Grid
For non-personalized content and ads, what you see may be influenced by things like the content you’re currently viewing and your location (ad serving is based on general location). Personalized content and ads can be based on those things and your activity like Google searches and videos you watch on YouTube. Personalized content and ads include things like more relevant results and recommendations, a customized YouTube homepage, and ads that are tailored to your interests.
Spiritual Quotes Of Encouragement
Click “Customize” to review options, including controls to reject the use of cookies for personalization and information about browser-level controls to reject some or all cookies for other uses. You can also visit g.co/privacytools anytime.
1 note
·
View note