
Don't wanna be here? Send us removal request.
Statistics
We looked inside some of the posts by loadingexecutive400 and here's what we found interesting.
Average Info
Notes Per Post
1
Likes Per Post
1
Reblog Per Post
0
Reply Per Post
0
Time Between Posts
17 days
Number of Posts By Type
Text
11
Last Seen Tumblr Blogs


Fun Fact
When “GIF” was named word of the year in 2012, Oxford Dictionaries U.S.A. credited Tumblr for pushing the word.
Text
War Thunder Hack Golden Eagles No Human Verification Clash
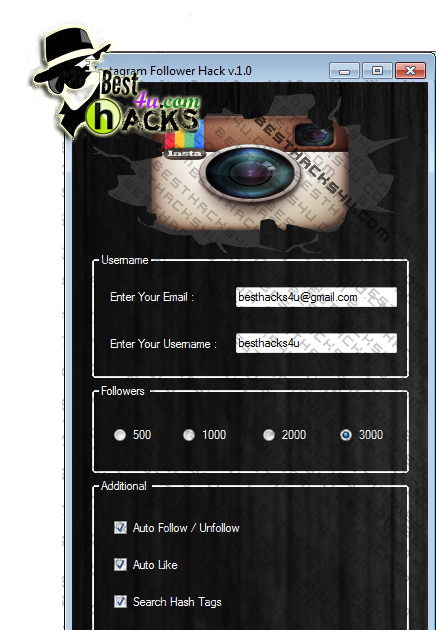
We decided to build War Thunder Hack v1.69 for one of the best flight combat games ever made! So in case you decide to use this hack tool, we guarantee your gaming experience will advance to a higher level. Why is that? Can you imagine this game with unlimited currency? Well, this is not a dream anymore, it’s real! Free and safe to use!
So as you may know, WarThunder is a massively multiplayer online combat flight game that offers an amazing gaming experience to players. You can choose between one of the three main game modes: Arcade battles, Realistic battles or Simulator Battles. The game is set to contain aircrafts, but also armored vehicles and ships from the pre-WWII era. Most of the maps are either directly or indirectly based on real-life battles of this period. This game is so cool! And in case you need more Gold and Silver for your account, this is your locky day! War Thunder Hack is able to generate unlimited amounts of in-game currency for free! How cool is that?
War Thunder Hack Cheats Tool. This War Thunder Hack will help you generate unlimited Golden Eagles and Silver Lions War Thunder Hack Cheat is our newest “modhacks.com” fresh from the oven. We worked hard on this one because,being a multi-platform Exploit it can be very difficult to write. The best and largest selection of PC game cheats, PC game codes, PC game cheat codes, PC cheatcodes, PC passwords, PC hints, PC tips, PC tricks, PC strategy guides, PC FAQs, codes for PC, pc codes, pc cheats, pc cheat codes, pc cheatcodes, pc passwords, pc hints, pc tips, pc tricks, pc strategy guides, pc faqs, pc video game cheat codes. Dec 7, 2018 - War Thunder Golden Eagles Generator. Download War Thunder Golden Eagles Generator. We show you an astounding War Thunder Golden Eagles Generator for everybody.

War Thunder Hack is both free and safe to use!
That’s right! Unfortulately, War Thunder Hack only can only be used for the PC version of the game. We will try to build a working one for PlayStation 4 and Mac also. Now all you need to do in order to enjoy this hack tool is get the hack archive from one of the download servers provided below. Extract the archive to your computer and open War Thunder Hack executable file. The hack program will now open on your screen. Ready to use it?
Sep 29, 2020 - War Thunder Cheats Hack War Thunder Hack – Unlimited Golden Eagles, Silver Lions,Speed,Aimbot,XP,Kill Shot,Invisibility browser game No Sur. Rate this cheats: 26 25. God mode and infinite ammo, fuel, money, and golden eagles. Added: Feb 28th 2015. While in a realistic tank battle you need the M2 and kill 2 of your team mates without getting hurt. Then make your self tip side ways and leave the tank. More tricks, tips and cheats for this game are right here - War Thunder cheats.
War Thunder Hack Golden Eagles
Good. Then enter your username or e-mail in the specified field and input the desired amounts of Gold and Silver. Click on the Start Hack button and be patient for a few minutes. After the hack process comes to an end, all you need to do is login and check your in-game currency. Amazing! War Thunder Hack is totally working hack tool!
Also note that War Thunder Hack includes a unique auto-update feature that will make sure you will get to use the latest working cheat codes for both Gold and Silver everytime you will decide to use this hack tool. Cool! This means no matter if the game developers release new game patches in the future, War Thunder Hack will still be a working one!
So don’t waste more time and take the wise decision now! Use our War Thunder Hack for free! Epson scan smart.
RapidShare – Download Mirror
ZippyShare – Download Mirror Mixemergency authorization code.
Got problems while using this free hack tool? Feel free to contact us through the contact page and a team member will get back to you in a short time!
Additional searches:
* Working-Hacks * free War Thunder Silver * free GOLD generator * War Thunder hacks 2014 * no survey hacks 2014 War Thunder Hack
War Thunder Hack
Are you guys looking for a smart way to get more Gold and Silver in War Thunder? Then you landed on the right page! War Thunder Hack v3.74 is here and ready to generate unlimited amounts of in-game currency in a matter of minutes. And it’s totally free and safe to use! We know you need this free hack tool! So do not hesitate and get War Thunder Hack now!
War Thunder Hack Golden Eagles No Human Verification Clash Royale
As you definitely know already, WarThunder is a multiplayer online game combat flight game that features three game modes. In arcade more, the game draws two teams of players with planes from different countries and close levels. The simulator battles are more realistic and they feature first-person view. But we’re sure you’re more into the Realistic Battle mode, a mode designed for more advanced users! So are you ready to live an amazing flying experience? Good. But what happens when you run out of in-game currency? This is not an issue anymore! War Thunder Hack is able to generate infinite amounts of Gold and Silver for free! How awesome is that guys?
War Thunder Hack v3.74 is so easy to use!
That’s right! War Thunder Hack is very easy to use! All you need to do first is order to enjoy this hack tool is get the hack files archive by clicking on a download mirror below. Extract the archive to your computer or laptop and open War Thunder Hack v3.74.exe. Great! The hack tool will now pop up on your screen like in the preview picture shown above. Now get ready for free Gold and Silver!

Input your username or e-mail in the field and enter your desired amounts of Gold and Silver. Click on the Hack button on the right and be patient for a few minutes. After the hack process completes, feel free to login and check your in-game currency. Amazing! War Thunder Hack is totally working! Please leave a comment feedback below so that others know this is the real deal!
In case you get worried about safety while using War Thunder Hack, please note that the software includes unique protection features. These special modules will make sure your account stays safe during the whole cheating process. And the internal Auto-Update feature will make sure you will get to use the latest working cheat codes for Gold and Silver. And that will happen everytime War Thunder Hack opens. Enjoy!
Don’t let others take the lead! Click on a download button below and use War Thunder Hack for free!
RapidShare Free Download
ZippyShare Free Download
Got problems when using our War Thunder Hack? Feel free to contact us through the contact page. Thank you!
War Thunder Hack v3.74 is a free hack tool, able to generate unlimited Gold and Silver for free! No survey hack tool!
Manufacturer:Free-Hack-Tool.Com
Product ID:WTH 3.74

War Thunder Hack Golden Eagles No Human Verification Clash Games
War Thunder Hack
0 notes
Text
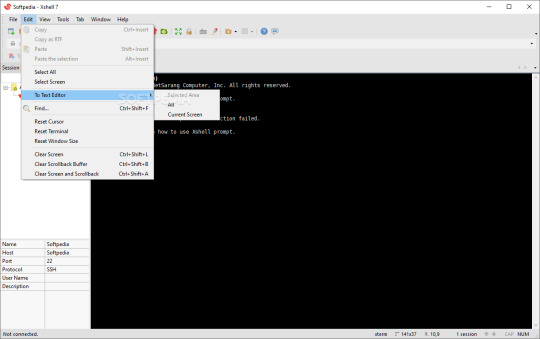
Xshell Tool

Terminals, mRemoteNG, SmarTTY, MobaXterm, KiTTY, and PuTTY can be the best SSH Clients for home server/ media center users. Most of the solutions like KiTTY, Solar PuTTY, WinSCP, SmarTTY, Bitvise SSH Client, FileZilla, and mRemoteNG are free tools. MobaXterm, ZOC, and Xshell are commercial tools. Xshell is a powerful SSH client. It allows you to easily create, edit, and launch sessions with the Session Manager and Inheritable Session Properties. It has many different authentication methods, protocols, and algorithms to handle any situation, and you get access to tools such as CMD, WSL, Powershell, and more directly within.
Xshell Display
Xshell Decrypt
Download torrent
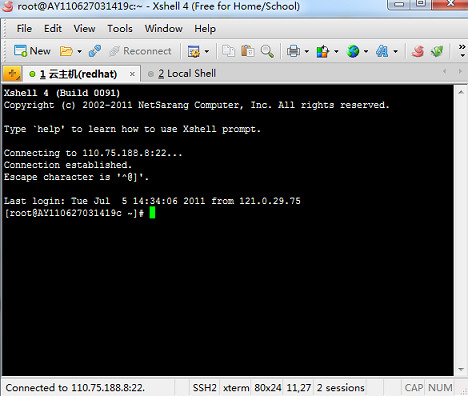
An easy terminal emulator! XShell is a popular and simple networking program designed to mimic a virtual terminal. Although experienced users are not suitable for beginners and find it easier to use. With this tool you can use a specific computer to act as a terminal. It is very useful in offices and workplaces, where you need to access data from a mainframe. As it is an open source platform, you do not have to pay any fees or subscribe to the plans. After downloading and installing the program, you can start using it immediately. No need to worry about feature software and a clean interface! XShell is one of the most powerful terminal emulators. Supports rlog, SFTP, SERIAL, TELNET, SSH2 and SSH1. With a wide range of features, the tool offers excellent performance. In fact, XShell offers a combination of benefits and features not available to other leading SSH clients, such as AnyDesk or (function () ((review-app-page-desktop ‘);)); The platform is used by various businesses around the world. The main reason for its increasing popularity is the availability of dynamic port forwarding, tab environment, configuration highlights, custom key mapping, duplicate font support for non-ASCII and ASCII characters, Jscript / VB / Python scripts and PKCS # 11 with a wide range of dropdown tabs and is therefore considered a solid modular emulator. While using the tool, you can click on any tab to create a separate window. As mentioned above, XShell is a solid modulator emulator as it contains multiple deductions. You can easily click on one or more of the tabs to open separate windows. It can help you monitor multiple computers at the same time as you continue with other tasks. Based on company information and user feedback, XShell uses the secure MIT Kerberos authentication system, which ensures that your data is private and uses XShell, and you do not have to worry about the information being compromised. The tool includes a live update feature, which automatically downloads updates from the network. There is also a redirect key that provides easy access to various remote terminals, provided it is mentioned that XShell is free. However, the free version can only be used in educational or home settings. There is no reason to underestimate the benefits of this application. Although the free edition has limited features, the developers have included the full feature set from the commercial version. For a small fee, you get access to the full potential of the most powerful and secure terminal emulators; XShell can be used to directly access Linux / Unix hosts from a Microsoft Windows computer. The program is intuitive and contains a wide range of advanced tools specifically designed to meet the requirements of both beginners and experts. Some of the highlights are the support for frequent expression, file management, local commands, tunnel and dynamic port XShell has feature-rich security? In fact, even the free version is equipped with strong authentication methods for public keys, SSH2 / SSH1 protocols, traffic encryption and password protection. With these features the tool can intercept thefrom third parties and keep your data safe and offer XShell configuration options? It can emulate various terminals including SCOANSI, xterm, LINUX, ANSI, VT320, VT220 and VT100. As such, it will help you to fully adjust the default settings. Because the program has a multiple interface, you can run multiple sessions at once. There is a compost bar that can be used to send a text string to multiple XShells; you can create and activate scripts to automate repetitive and small tasks. It makes your workflow more efficient. In addition, you can receive and send files while monitoring transfers. To enable error-free remote tasks, XShell uses dynamic gatekeeping, protocol tracking and key functions, and a simple interface; the free version of XShell proves to be a safe and reliable terminal emulator. Although the intuitive interface is popular with beginners, the advanced options help experts to create a safer work environment. The consumption of RAM and CPU is minimal, and it assures you that you do not have to worry; can you use XShell? The XShell Download is available as a free tool for 64-bit and 32-bit Windows operating systems. https://loadingexecutive400.tumblr.com/post/661709160288845824/epson-scan-smart. You can use the SSH / TELNET client without any restrictions on a desktop or laptop. If you are using a Windows 10 computer, you can use XShell without any problems. The program is also available for Windows 8 and Windows 7. It should be noted that the program is lightweight and requires only 50 MB of free disk space. Although the compatibility of this tool may differ, you will not experience any delay or hangover if your laptop or desk is in good condition. NetSarang Computer also features a standalone Ammyy x64 driver, XShell supports a wide range of languages. As such, it provides excellent multilingual emulation. In addition, the tool supports various protocols, including TELNET, SSH, SERIAL, rlogin and SFTP. Although it offers extensive and diverse terminal setup options, XShell wants to replace the dangerous TELNET clients of the entire robust platform to mimic a virtual terminal. In addition, this offline software offers several levels of automation to ensure excellent performance. Compared to generic terminal emulators, XShell focuses on safety and ease of use. With UTF8 encoding, the program can provide support for multiple languages. As such, it is an ideal option for foreign users who want to access an international terminal. With teams in world offices, this feature is very useful. Last but not least, XShell has a simple and clean interface that allows you to use the program without any problems.
Xshell 5 free download. Internet & Network tools downloads - Xshell by NetSarang Computer, Inc. And many more programs are available for instant and free download. Xshell is another great tool for connecting to SSH1, SSH2, SFTP, Telnet, rLogin, and even to Serial connections. Some features of Xshell include the following: Tabbed Environment to connect to Multiple sessions in the Same Window using different Tabs.
Xshell Display
Torrent vote 30 5
Xshell Decrypt
XShell Download Torrent
0 notes
Text
Mixemergency Authorization Code

Mixemergency Authorization Codes
Mixemergency Authorization Code Scam
Mixemergency Authorization Code For Medicare
Mixemergency Authorization Code List
Mixemergency Authorization Code
MixEmergency is officially compatible with Scratch Live, Serato DJ and Serato DJ Pro. When will I receive my product authorization code? Your authorization code will be sent to you by email once the payment has been processed by FastSpring. Free updates until MixEmergency 4. When you upgrade to a MixEmergency 3 authorization code you will receive free updates until version 4.0. You will be able to take advantage of new features, improvements, and fixes for problems that may come up in the future (for example, relating to Mac OS X updates). Authorization of the emergency use of ACTEMRA under section 564(b)(1) of the Act, 21 U.S.C. § 360bbb-3(b)(1), unless the authorization is terminated or revoked sooner. Justification for Emergency. Poweriso 6.8 Registration Code Free Download Mixemergency Authorization Code Free Download Visual Studio C 2017 Source Code Download Free Search Doro 611 Free Unlock Code California Building Code 2010 Pdf Free Download Free Lg Imei Unlock Code Generator Download Free 50 Psn Code No Survey Or Download.
Advanced Video DJing software for Serato DJ Pro and Scratch Live
An innovator in Video DJing, Inklen was first to deliver features such as Random Transitions, Delay Compensation and a second-to-none recording system – all while refusing to compromise on stability, image quality, and performance. It’s no surprise that MixEmergency has become the software most recommended by Video DJs.
USD199
Requires Mac OS X
Buy MixEmergencyFind out more about MixEmergencyGet support for MixEmergency
Features of MixEmergency 3.1
Recording
Sample Player (8 samples, 4 banks)
Text, Image, Quartz Composition, and Video Input Overlays
Over 100 Transition and Effect Plug-ins
Effects Sequencer
Mixer Effects
Extensive MIDI Mapping
Delay Compensation
Syphon Input and Output
NDI Input and Output
Deejay Irie - World Champion DMC Visual DJ 2015
“After I found out MixEmergency featured Syphon and can incorporate video scratching with other software it became my #1 tool for my solo and theater shows.”
Eclectic Method (aka Jonny Wilson)
“MixEmergency is all I use for live shows and now in all production work too thanks to the Syphon function.”
Welcome to the MixEmergency (3.0.0) manual.
MixEmergency is an application designed to mix and scratch video and visualisations. It has the ability to be controlled externally by Scratch Live or Serato DJ. MixEmergency is a visualisation application only and does not handle any audio processing.
You can download a demo version of MixEmergency from http://www.inklen.com/mixemergency/. It is recommended to download and try MixEmergency on your system before you purchase a license key to ensure that it fits your needs and meets your performance requirements.
License keys can be purchased online from http://www.inklen.com/mixemergency/.
Hardware
Mac (2010 model or later)
Software
Mac OS X 10.8.5
Scratch Live 1.9.2 or Serato DJ 1.61
1 For external control
To fully activate MixEmergency requires a valid authorization code. This can be purchased online at: http://www.inklen.com/mixemergency/
Once purchased you will receive your authorization code via e-mail.
To authorize MixEmergency:
Launch MixEmergency
Select 'Authorize...' from the MixEmergency application menu
Enter the authorization code that you received via e-mail
Click the 'Authorize' button
MixEmergency supports mixing and scratching1 of a range of files playable in Quicktime. It is recommended that you extensively test your media files before performing live to avoid any unforeseen issues.
1 Requires external control via Scratch Live or Serato DJ
Video Files
MixEmergency officially supports and recommends the following video container formats: mp4, mov, m4v, avi and the following video codecs: H.264, MPEG-4, HAP, Motion JPEG, Apple Intermediate Codec.
A limited range of other containers and formats may load1 and play2, but are not recommended for optimal performance and so are not officially supported (e.g. 3gp, dv, divx, mpeg, mpg, xvid, vob, m2v, flv).
1 May require third party codecs to be installed. 2 Several formats are unable to be cached by MixEmergency, and so are not recommended if you require video to be scratched.
Image Files
MixEmergency can import most image formats recognised by QuickTime. It is also capable of playing animated GIF images.
Quartz Compositions
MixEmergency supports the loading and playing of Quartz Compositions (.qtz files).
Karaoke Files
MixEmergency supports the loading and playing of CDG files.
The main window of MixEmergency displays the channel and output preview views as well as several frequently used controls (described below). This window can be shown/hidden from the Window menu, or by using the keyboard shortcut ⌘1. You can toggle this window to float above all other windows by pushing the 'pin' button on the top right of the title bar.
Right-clicking on the left or right Preview View will open a pop-up menu with options to:
Syphon (to load a Syphon input)
NDI (to load a NDI input)
Eject
Lock/Unlock
External Control
MixEmergency has the ability to act as a 'plug-in' for Scratch Live. This allows Scratch Live to control aspects of MixEmergency such as play position, mix and current media.
The external control pop-up menu allows you to select either MixEmergency or Scratch Live as the controller for MixEmergency. A connection status indicator appears to the right of this menu when not connected to MixEmergency. The indicator will be colored green when there are no connection problems, or red when there are. You can view a text message of this status in the indicator's tool-tip.
Panel Controls
The panel control buttons allow you to toggle several of MixEmergency's windows: the Control window, Media window, Output window, Messages window and Presets window. The MIDI button toggles the MIDI mapping mode.
Full Screen Controls
The full screen controls allow you to toggle the output of MixEmergency between full screen and windowed mode. The output pop-up menu allows you to select the screen to use when the output is full screen.
Multiple Window Preview Layout
The main window is split into four windows when using the Multiple Window Preview layout. Three of the windows contain the channel preview views, while the fourth contains the external, panel and full-screen controls.
The Control window contains the Transition, Effect and Transport controls of MixEmergency. This window can be shown/hidden from the Window menu, the Control window button on the Main window, or by using the keyboard shortcut ⌘3.
Transition View
The Transition view lets you control the output mix of your media sources.
Upfader Control - Controls the brightness of the media source.
Upfader Link - Links the Upfader of your mixer to the Upfader Control.
Crossfader - Controls the mix between the current media sources.
Autofade - Automatically moves the Crossfader to the opposite media source from the one displayed.
Autofade Time - Adjusts the duration of the autofade.
Transition Parameter - Allows customization of some transitions.
Transition Select - Selects the transition to use when mixing the media sources. A more detailed explanation of the transitions is available in the Transitions section of the manual.
Link Crossfader - Links the Crossfader of your mixer to the Crossfader control.
Link Cuefader - Links the Cuefader of your mixer to the Crossfader control.
Link Upfader - Links the Upfaders of your mixer to the Crossfader control.
Link Auto-Autofade - Links the Crossfader to the autofade function.
Transport View
The Transport view is on the first tab to either side of the Transition view.
Transport Controls - Allow you to restart, rewind, play backward, play forward or fast forward the media. These are disabled when controlled externally. When controlled by an external application, these buttons change to a Link with Audio button that can be used to link audio in the external control application with video or Quartz Compositions playing in MixEmergency.
Media Progress - Displays the current play position of the media (not displayed for Quartz Compositions). The progress bar will be colored red if the file is not recommended for video scratching.
Eject - Ejects the media from the deck.
Capture Image - Captures an image from the current Channel Preview view to be used in the Media Bank.
Effect View
The Effect view, on the second tab to either side of the Transition view, allows you to apply effects to the media sources. These are applied before the transition effect.
Effect select - Selects the effect to apply.
Effect mix - Controls the mix between the original source and the effect.
Effect blend mode - Controls the blending mode for the effect.
Effect Parameter 1 Control Select - Selects the control mode for Effect Parameter 1.
Effect Parameter 1 - Controls the first effect parameter.
Effect Parameter 2 Control Select - Selects the control mode for Effect Parameter 2.
Effect Parameter 2 - Controls the second effect parameter.
Beat Display - Displays the current beat of the media.
The Media Bank is a place to store media that you may use often or for ambient video/Quartz Compositions (there is an option in the Preferences to load these automatically when a song without a video is loaded in Scratch Live). You can toggle the display of the Media window from the Window menu, the Media window button on the Main window, or by using the keyboard shortcut ⌘4
To load media into the Media Bank simply drag and drop files from the Finder onto the desired position.
You can drag an entire folder onto this area to have MixEmergency scan and load the contents of the folder. When using this folder mode, it is capable to load more than 16 clips into the Media Bank.
Clicking on an entry in the Media Bank will load the media to the deck that is not currently displayed on the output window. This is a feature to avoid situations where you may accidentally load media onto the wrong deck. You can also drag and drop media from the Media Bank directly onto a deck to bypass this safety feature.
Right-clicking on an item in the Media Bank will open a pop-up menu with options to:
Delete
Reveal in Finder
Generate Thumbnail
Generate All Thumbnails
Syphon (for adding and saving a Syphon input)
NDI (for adding and saving a NDI input)
Clear Media Bank
You can assign MIDI controls to individual media entries by following the instructions in the MIDI section of the manual.
The Presets window can be used to store and recall effect, transition, text overlay, image overlay, and Quartz Composition overlay settings. You can toggle the display of the Presets window from the Window menu or by using the Presets window button on the Main window.
Each effect preset panel can store six banks of twelve presets (i.e. 72 presets in total).
Preset Bank - Selects the current preset bank.
Preset Trigger - These buttons can be used to trigger an effect preset.
Preset List - This list displays the presets currently assigned to the bank. Selecting these will not trigger a preset, but allows you to select preset slots to either save or delete a preset to. Double-click on a preset to rename. Right-click on a preset to assign a specific target (A, B, Mid.).
Save Preset - Clicking this button will save the settings of an effect or transition as a preset from the currently mapped channel into the currently selected preset slot.
Delete Preset - Clicking this button will delete the preset from the currently selected preset slot.
Preset Channel - This control allows you to select the target for effect presets.
Preset Tab - Here you can navigate between the effect, transition, text overlay, image overlay, Quartz Composition overlay, and FX Sequencer presets.
The Preset Channel control is only available for effect presets. It has five options:
A - The first media channel (left) is selected for presets.
B - The second media channel (right) is selected for presets.
Mid. - The middle channel is selected for presets.
Safe - The channel that is not currently visible on the output is selected for presets. A lighter selection color will also indicate which of the channels (A, B or Mid.) is the current target.
Actv - The channel that is currently visible (or active) on the output is selected for presets. A lighter selection color will also indicate which of the channels (A, B or Mid.) is the current target.
Saving Presets
To save an effect preset:
Select the desired settings for the effect preset using the effect controls on the Control window.
Use the Preset Channel control to select the channel that you have used to set up the effect settings (i.e. A for the left channel, B for the right channel, or Mid. for the middle/output channel).
Select the slot to save the preset to using the Preset List.
Click the Save Preset button.
Importing and Exporting Presets
To export a preset:
Right-click on the preset you want to export.
Select Export Preset.
Enter the name that you wish to save the preset as.
To import a preset:
Right-click on the preset you wish to replace.
Select Import Preset.
Navigate to the preset that you wish to import.
You can also drag a preset file from the Mac OS Finder onto the Preset List to import it.
The Mixer FX window contains controls that allow you to map the High, Mid., Low, Filter, and FX section of your mixer to visual effects in MixEmergency. This window can be shown/hidden from the Window menu, or by using the Mixer FX window button on the Main window.
The High, Mid., and Low controls are automatically mapped to your Rane mixer or Serato DJ controller when Scratch Live or Serato DJ are running. The Filter and FX sections require manual MIDI mapping, which is unavailble on Rane mixers when used with Scratch Live.
Mixer FX View
The Mixer FX view contains the basic controls for mapping visual effects to your mixer's controls. This view has 2 channel strips, and one effect mapping area.
Channel Strips
Knobs - Each knob can be MIDI mapped to your mixer.
Pink Buttons - These buttons can be used to enable/disable the effect of the knob in the counter-clockwise direction.
Yellow Buttons - These buttons can be used to enable/disable the effect of the knob in the clockwise direction.
FX Mapping Area
For the High, Mid., Low, and Filter sections, there are 4 individual mapping sections. Those coloured Pink are for the counter-clockwise direction of the corresponding knob. Those coloured Yellow are for the clockwise directino of the corresponding knob.
In the FX section, there are 12 individual mapping sections. Only 2 of these are applied at one time. The mappings to be applied are selected using the green buttons to the left of the mapping sections.
Mixer FX Edit View
The Mixer FX Edit View allows you to edit how the position of the corresponding knob will control the visual effect.
The view contains controls to edit the Title, select the effect (FX), select the Blend Mode, and 3 sections that allow you to map the Mix, Parameter 1, and Parameter 2, of the selected effect.
Within the 3 mapping sections, you can select the Mode (Direct, or Beats), the number of Beats (for the Beat mode), and edit the graph of how the knob or beat position will be applied to the parameter.
The vertical axis of each Mapping Graph corresponds to the parameter value (e.g. 0%-100%).
When the Direct Mode is selected, the horizontal axis of the Mapping Graph corresponds to the distance from the resting point of the knob (the center for the High, Mid., Low, and Filter knobs, and fully counter-clockwise for the FX knob). There are 2 indicators (an orange point for Channel 1, and a pink point for Channel 2) that indicate the current mapping position when the knob is moved.
There are 3 graphs within the Mapping Graph when the Beat Mode is selected. You can choose which one to edit by clicking either the Blend, Start, or End buttons that will appear along the top of the Mapping Graph. The first graph is the Blend Graph. The horizontal axis for this Graph corresponds to the position of the knob, and the vertical axis corresponds to the blend between the Start and End graphs (0% = the Start Graph, 100% = the End Graph). The other two graphs (Start and End) have a vertical axis that corresponds to the effect parameter (e.g. 0%-100%). The horizontal axis of these Mapping Graphs corresponds to the position within the number of beats selected by the Beats control.
Editing the Mapping Graphs
The Mix, Parameter 1, and Parameter 2 mapping graphs allow you to create complex animations.
To add a new point:
Right-click, and then select 'Add Point', or
Left-click while holding the Command key, or
Double-click
To remove a point:
Right-click on a point, and select 'Remove Point', or
Left-click while holding the Command key on a point, or
Double-click on a point
To extend a control point (for a smooth bezier curve):
Hold down the alt/option key while clicking on a point
To have fine control over a point:
Hold down the shift key while clicking on a point
The Sample Player is designed to allow you to play up to 8 media clips (loops, samples, etc) over MixEmergency's output.
The Sample Player is not linked directly to Serato DJ's, or Scratch Live's, SP-6 Sample Player, so it is also possible to use other audio applications to trigger/play audio samples alongside it.
Sample Player Window
The Sample Player Window contains 2 sections.
To the left are the 8 Samples. Each contains a Sample Preview View, a Stop button, an Eject button, and an Edit button. Clicking on the Sample Preview View will cause the Sample to trigger. This can also be mapped to a MIDI control.
To load a sample, simply drag and drop a media file onto the corresponding Sample Preview View.
To the right are 3 controls. The Bank buttons control which of the 4 banks of samples is currently loaded. The Out buttons control which channel of MixEmergency the samples will be output to (A = left, B = Right, M = Master). The Mix knob controls the wet/dry mix of the samples over the output.
Samples are composited from left to right (i.e. each sample to the right is rendered over the previous one to the left). To rearrange the samples, simply drag and drop their Sample Preview View between the other samples.
Sample Settings Edit View
Clicking on the Edit button below a sample will open the Sample Settings Edit View. This contains a number of settings that can be adjusted for each sample.
Play Mode - there are 3 play modes. From left to right, Play Through (plays from the start to the end), Play While Held (plays while the sample trigger is held), and Play/Stop (trigger once to begin playback, and again to stop).
Blend - selects the blending mode that is used to composite the sample (e.g. Multiply, Difference, etc).
Loop - when this is enabled, videos will loop until the sample is stopped or it reaches the time specified by Override Duration.
Alpha Blending - when this is enabled, media with an Alpha channel will use this Alpha channel to composite the sample over the output.
Play Rate - selects how the rate of playback is calculated. This can be set to either Pitch (play rate is controlled by the Pitch knob - which can be mapped via MIDI), or Sync to BPM (play rate is matched to the currently playing track's BPM at the moment it is triggered).
Override BPM - when this is enabled, the BPM of the media will be set to the BPM entered in the edit box to the right.
Play From - selects the point from which the media starts playback from. This can be set to Start (the beginning of the media), or Time (starts from the time, in seconds, entered in the edit box to the right).
Override Duration - when this is enabled, the media will play for the duration entered in the edit box to the right. This can be useful when triggering short segments from within a larger video or playing images/Quartz Compositions (by default, these have infinite duration).
Below this are 3 areas for animating the Scale, X, and Y position of the sample.
The Mode control allows you to select whether the animation is applied over the Duration of the sample, or synced to a number of Beats of the underlying music (the number of beats is selected with the control labelled Beats to the right).
To reset any of these graphs, right-click (or control-click) on the graph and select Reset.
Recommended Media
If you're playing video samples or loops, it is recommended that you encode your video using the Hap video codec, as MixEmergency can utilise your GPU to decode and playback the video, freeing up your computer's CPU.
To encode or playback Hap videos, you first need to download and install the Hap codec onto your computer.
The FX Sequencer window contains controls that allow you to sequence and animate effect patterns in MixEmergency. This window can be shown/hidden from the Window menu, or by using the FX Sequencer window button on the Main window.
FX Sequencer View
The FX Sequencer view contains the basic controls for sequencing and blending your effect sequences.
Master Wet/Dry Mix - Controls wet/dry mix for the effect sequencer over the output of MixEmergency.
Beat Indicator - Shows the current beat position within the sequence.
Beat Selector - Selects the duration of the sequence (in beats).
Rate - Selects the rate at which the sequence progresses (relative to the beat of the media).
Effect Label/Editor - Displays the title for the effect row, and opens the effect editor. Right-click on this to copy/paste effect animations.
Row Enable - Enables the effect.
Sequence Matrix - From here you can enable the effect on specific beats.
Sequence Type Selector - Allows you select the type of sequnced. You can select Loop (synced), One-shot, or One-shot (synced).
Trigger On Load - When this is enabled, One-shot sequences will be triggered when they are loaded from an FX Sequencer preset.
BPM Knob - Allows you to set the BPM of One-shot sequences.
Trigger Button - Triggers a One-shot sequence.
FX Sequencer Edit View
The FX Sequencer Edit View allows you to edit the effect.
Title - The effect title (this can be renamed by pushing the edit button to the right).
Beat Duration - Selects the number of beats that the animation will cover.
Effect - Selects the effect.
Blend Mode - Selects the blend mode for the effect.
Effect Mix - This mapping graph controls the mix parameter over the course of the animation.
Effect Parameter 1 - This mapping graph controls parameter 1 over the course of the animation.
Effect Parameter 2 - This mapping graph controls parameter 2 over the course of the animation.
Editing the Mapping Graphs
The Mix, Parameter 1, and Parameter 2 mapping graphs allow you to create complex animations.
To add a new point:
Right-click, and then select 'Add Point', or
Left-click while holding the Command key, or
Double-click
To remove a point:
Right-click on a point, and select 'Remove Point', or
Left-click while holding the Command key on a point, or
Double-click on a point
To extend a control point (for a smooth bezier curve):
Hold down the alt/option key while clicking on a point
To have fine control over a point:
Hold down the shift key while clicking on a point
This window can be shown/hidden from the Window menu, the Output window button on the Main window, or by using the keyboard shortcut ⌘2.
To control MixEmergency from Serato DJ:
Launch Serato DJ
Launch MixEmergency
Set MixEmergency's external control selector to Serato DJ / Scratch Live (this is set to Serato DJ / Scratch Live by default)
Check that the external control indicator is colored green
Controlling MixEmergency from Serato DJ is as easy as loading videos in Serato DJ, or dragging Quartz Compositions onto MixEmergency and linking them to the currently loaded audio file in Serato DJ.
To control MixEmergency from Scratch Live:
Launch Scratch Live
Launch MixEmergency
Set MixEmergency's external control selector to Serato DJ / Scratch Live (this is set to Serato DJ / Scratch Live by default)
Check that the external control indicator is colored green
Controlling MixEmergency from Scratch Live is as easy as loading videos in Scratch Live, or dragging Quartz Compositions onto MixEmergency and linking them to the currently loaded audio file in Scratch Live.
Note: If you're not using Scratch Live 2.3.3 or higher, then to import videos into your Scratch Live library you need to download and install the demo version of Video-SL and check 'enable Video-SL plugin' in the plugins tab of Scratch Live's setup screen.
You can choose from a range of transitions to mix between your media sources. Currently there are 30 transitions built into MixEmergency. More transitions can be added by installing transition plug-ins.
Dissolve - Smoothly dissolves between media sources.
Difference - Transitions through the difference between media sources.
Multiply - Transitions through the multiplication of the media sources.
Minimum - Transitions through the minimum of the media sources.
Maximum - Transitions through the maximum of the media sources.
Fade To Black - Transitions through a fade to black.
RGB - Transitions through the red, green and blue color channels. Transition parameter controls the channel order.
Luma Key Black - Transitions based on the brightness of the media sources (darker colors are mixed first). Transition parameter controls how smooth the transition is.
Luma Key White - Transitions based on the brightness of the media sources (lighter colors are mixed first). Transition parameter controls how smooth the transition is.
Slide - Horizontally slides one source in, and one source out.
Wipe H - A horizontal wipe effect. Transition parameter controls the smoothness of the transition edge.
Wipe V - A vertical wipe effect. Transition parameter controls the smoothness of the transition edge.
Iris - An opening iris transition. Transition parameter controls the smoothness of the transition edge.
Squeeze H - Distorts both media sources horizontally.
Squeeze V - Distorts both media sources vertically.
Cube - Projects the media sources onto a rotating cube. Transition parameter controls the 3D perspective.
Flip H - A horizontal 3D flipping transition. Transition parameter controls the 3D perspective.
Flip V - A vertical 3D flipping transition. Transition parameter controls the 3D perspective.
Grid - Displays a 3 by 3 grid that randomly transitions between the media sources. Transition parameter controls the grid size.
Grid 2 - A variation of the Grid transition. Transition parameter controls the grid size.
Grid 3 - A variation of the Grid transition. Transition parameter controls the grid size.
Strobes - Strobes between both media sources. Transition parameter controls the strobe time.
Switch - Switches instantly to the opposite media source at the center position of the crossfader.
Cut - Cuts instantly to the opposite media source as soon as the crossfader begins fading.
Hold - Holds the current media source until the crossfader has completely transitioned to the opposite media source.
Stay - Stays on the currently displayed media.
Stay Reverse - Stays on the opposite channel to the currently displayed media.
Random - Randomly selects a transition when new media is loaded.
Background Left - Moving the crossfader to the left shows the background.
Background Right - Moving the crossfader to the right shows the background.
Background - The output window transparency is controlled by the transition parameter.
You can choose from a range of effects to apply to your media sources. Currently there are 27 effects built into MixEmergency. More effects can be added by installing effect plug-ins.
Invert
Hue
Saturation
Brightness
Contrast
Gamma
Posterize
Sepia Tone
Color Tone
Crop
Scale
Strips
Film Projector
Strobe
Edges
RGB Offset
Rotate
Tile/Rotate
Bump
Circle Splash
Pixellate
LED
Zoom Feedback
RGB Delay
Motion Blur
Zoom Blur
Kaleidoscope
Most effects have either one or two effect parameters that can be adjusted. The adjustments of these effects can be assigned to one of the following controls (this varies depending on the source of the effect).
Internal - The effect parameter is controlled by the main effect parameter knob.
Position - The effect parameter is controlled by the current position (time) of the media.
Velocity - The effect parameter is controlled by the velocity of the media.
Bass - The effect parameter is controlled by the amount of bass in the audio for the media. Note: This option is not available when using MixEmergency as the controller.
Grid - The effect parameter is controlled by the current beat position for songs that have a beat grid (if not, then it will default to using the BPM).
Using these controls you can quickly and easily add effects that react dynamically to mixing and scratching.
Position control
When controlling the effect parameter with the Position control, the knob that appears to the right controls the rate of the effect.
Velocity control
When controlling the effect parameter with the Velocity control, a mapping graph will appear to the right. Clicking on this mapping graph will pop out a larger editing view.
The vertical range corresponds to the effect parameter, and maps directly onto the range of the effect parameter knob. The second range corresponds to velocity, and maps the velocity of the media. This is an advanced function of the program, and may take some time to get used to.
The mapping graph has three parts: two mapping points and a mapping indicator. The mapping points can be repositioned by dragging the points around the graph. The mapping indicator is a blue dot that will automatically move to show the currently mapped position on the graph.
The effect parameter (vertical) range is from 0 to 10 (i.e. the same as the range on the effect parameter knob) and controls the range of the effect to control.
The above examples show:
Mapping from 0 to 10.
Mapping from 5 to 10.
Mapping from 10 to 0.
The velocity (horizontal) range is from -2 to 2 and controls the range of the velocity to affect the control. At -2 the media would be playing backwards at double speed, 0 would be stopped, 1 would be playing forwards at normal speed and 2 would be playing forwards at double speed.
The above examples show:
Mapping -2 to 2 - all velocities in this range will affect the parameter.
Mapping 0 to 2 - only positive velocities (moving forwards) will affect the parameter.
Mapping -1 to 0 - only negative velocities (moving backwards) will affect the parameter. This can be useful if you only want the effect when scratching.
The blue dot on the mapping graph gives an indication of how the current velocity is mapped.
The above examples show:
Velocity is 2 x reverse, mapping the effect parameter to 0.
Velocity is 1 x reverse, mapping the effect parameter to 2.5.
Velocity is 0 (stopped), mapping the effect parameter to 5.
Velocity is 1 x forward, mapping the effect parameter to 7.5.
Velocity is 2 x forward, mapping the effect parameter to 10.
Once you understand how these controls work, you will be able to quickly and easily create effects that compliment your video scratching.
Bass control
The bass control mode graph is similar to the velocity graph. The only difference is that the horizontal axis represents the time since the bass triggered the effect parameter. When the bass triggers the effect parameter the blue mapping indicator will jump to the left of the graph and slowly move towards the right.
Grid control
The Grid control mode graph is similar to the velocity graph. The horizontal axis represents one beat (as defined by a preset Beatgrid, or based upon the BPM of the currently loaded media). As the beat progresses it will shift from the left to the right.
MixEmergency supports effect and transition plug-ins. These can be used to extend MixEmergency with new effects and transitions.
Plug-ins are in a format created exclusively for MixEmergency and use the same high-performance graphics technologies used in MixEmergency.
Installation
To install a plug-in for use withing MixEmergency.
Double-click on the plug-in.
MixEmergency may prompt you to replace the existing plug-in. If so, then click 'replace'.
Re-launch MixEmergency.
Check that the plug-in is now be available in either the effect or transition list.
Plug-in files have the extension 'plugin' and are installed in the folder ~/Movies/MixEmergency/Plug-Ins/.
Removal
To remove a plug-in previously installed with MixEmergency.
Close MixEmergency.
Delete the effect or transition plug-in from the folder ~/Movies/MixEmergency/Plug-Ins/.
The Overlay Window can be used to display text, images, Quartz Compositions, video input, and border fills over the output of MixEmergency. This window can be shown/hidden from the Window menu, or by using the keyboard shortcut ⌘5.
Mixemergency Authorization Codes
Text Overlay
The Text overlay can be used to display static or scrolling text over the output of MixEmergency. The controls, in order from top left to bottom right are:
On/Off - Toggles the text overlay.
Channel - Allows you to place the overlay on the Output, Left or Right channel.
Text - Text to display.
Font - Displays a standard font panel.
Color - The color of the text.
Mix - The opacity of the overlay.
Scale - The height of the font.
X - The horizontal position of the overlay.
Y - The vertical position of the overlay.
Effect - The effect applied to the overlay.
Effect Parameter - An adjustable parameter of the effect.
The Text Overlay Window is useful for adding short text titles or advertisements over the output.
Image Overlay
The Image overlay can be used to display a static image over the output of MixEmergency. The controls, in order from top left to bottom right are:
On/Off - Toggles the image overlay.
Channel - Allows you to place the overlay on the Output, Left or Right channel.
Image - Drag and drop image files here to set them as the current image.
Mix - The opacity of the overlay.
Scale - Scales the image.
X - The horizontal position of the overlay.
Y - The vertical position of the overlay.
Effect - The effect applied to the overlay.
Effect Parameter - An adjustable parameter of the effect.
The Image Overlay Window is useful for adding titles, logos or advertisements over the output. It supports most image file formats that Quicktime can open.
Quartz Composition Overlay
On/Off - Toggles the Quartz Composition overlay.
Quartz Composition - Drag and drop Quartz Compositions here to set them as the current Quartz Composition overlay.
Mix - The opacity of the overlay.
Video Input Overlay
On/Off - Toggles the Video Input overlay.
Device - Allows you to select the Video Input device.
Quality - Allows you to lower the quality level of the video input.
Mix - The opacity of the overlay.
Scale - Scales the image.
X - The horizontal position of the overlay.
Y - The vertical position of the overlay.
Border Fill Overlay
The Border Fill overlay differs from the other overlays in that it is applied to each channel prior to the channel's effects.
The purpose of this overlay is to fill in the 'black bars' that are often seen on videos which have an aspect ratio that differs from the output aspect ratio. You can select from one of several effects to fill this space.
Syphon and NDI Overlay
These overlays allow you to overlay a live video feed via either Syphon or a NDI input.
MixEmergency supports MIDI control of almost all controls available on screen (such as the faders, transition select menu and loading media from the media bank). You can easily use a MIDI capable mixer to control MixEmergency.
MixEmergency also supports MIDI output (also commonly referred to as 'MIDI feedback') - allowing you to sync compatible MIDI gear with the on-screen state of MixEmergency's controls.
To toggle MIDI mapping mode, push the MIDI button on the Main window of MixEmergency. All MIDI mappable controls will display whether they have been MIDI mapped when this mode is on. Controls that have a MIDI mapping will appear green, while those that have not will appear red.
To assign a MIDI control to an on-screen control:
Ensure that your MIDI device is connected
Enter MIDI mapping mode.
Click the on-screen control you wish to map.
If you are adding a second MIDI mapping for a control, ensure that the Learn New Control button is enabled (or the Learn 14-Bit Control button, for high-resolution MIDI controls).
Move or toggle the MIDI control.
To clear an assigned MIDI control:
Enter MIDI mapping mode.
Click the on-screen control that you wish to clear.
Click the trash button to the right of the mapped control you wish to clear.
Advanced MIDI Mapping
The MIDI mapping pop-up panel contains a button that enables the Advanced MIDI mapping mode. This mode enables further options for your MIDI mapping. Also note that you can map multiple MIDI controls to a single control in MixEmergency.
The Advanced MIDI input mapping options are:
Fine - This sets the MIDI control number for the fine MIDI message (only available for 14-Bit MIDI messages).
14-Bit - This enables 14-Bit MIDI control.
Mode - This sets the way in which the MIDI control interacts with the MixEmergency control. You can use this to support the use of rotary MIDI controls, or you can map a MIDI button to step up or down through the effect list of MixEmergency.
Invert - Inverts the MIDI control. For example, a MIDI knob may set a MixEmergency control to the minimum value when turned fully counterclockwise, and to the maximum when turned fully clockwise. If the Invert button was enabled then the control would be set to the maximum when turned fully counterclockwise, and the minimum when turned fully clockwise.
Shift - This allows you to map either an additional MIDI button, or keyboard key, to the mapping. Only when this MIDI button is enabled, or keyboard key pressed, will the mapping apply.
The Advanced MIDI output mapping options are:
Invert - Inverts the MIDI control.
This window can be shown/hidden from the Window menu, or by using the keyboard shortcut ⌘8.
Inputs and Outputs
Here you can select which MIDI input and output devices MixEmergency will send to (outputs) and receive (inputs) MIDI messages from.
You can also set MixEmergency to sync all beat-related features to an incoming MIDI Clock signal.
Shift/Layer Buttons
These MIDI mappable buttons can be used in conjunction with the 'Shift' section of the MIDI mapping pop-up windows.
Mappings
The Mappings section of the MIDI window allows you to load, save and delete MIDI mappings for MixEmergency.
To load a MIDI mapping:
Select the mapping from the MIDI mapping list.
Push the Load button.
To save a MIDI mapping:
Type the desired name for the MIDI mapping in the text box.
Push the Save button.
To delete a MIDI mapping:
Select the mapping from the MIDI mapping list.
Push the Delete button.
Info
This section of the MIDI Window displays information about the current MIDI sources and the data received from these sources.
The Info section can be used to verify that your MIDI device is communicating correctly with MixEmergency. When the Log MIDI Messages check-box is enabled, MIDI data received by MixEmergency will be logged in the lower text view.
The 'In' and 'Out' lights will briefly change to green when a MIDI message is sent or received.
It is recommended that you use the MIDI logging function only if you encounter problems assigning MIDI controls within MixEmergency. During live performance it is recommended that MIDI logging is disabled.
The preferences panel can be accessed through the application menu or the keyboard shortcut ⌘,
General
Windows
Layout - Allows you to select between the Single Window Preview layout and the Multi Window Preview layout (which splits the main MixEmergency window into three independently resizeable windows). Note that Single Window Preview layout is more efficient than the Multi Window Preview layout with regards to CPU and GPU usage.
Opacity - These controls set the opacity of the main application windows. This can be useful if you need to monitor another application while using MixEmergency.
Forward keyboard events - When this option is checked MixEmergency will forward any keyboard events (not including short-cuts used by MixEmergency) to the external controller application. This can be useful if you don't want to switch between the applications.
Disable conflicting shortcuts - When this option is checked MixEmergency will disable keyboard shortcuts that conflict with the application currently controlling MixEmergency.
Auto-hide menu bar and dock - When this option is enabled MixEmergency will auto-hide the menu bar and dock when MixEmergency is set to float above other windows.
Mixemergency Authorization Code Scam
Effects

Automatically load effects - Enables loading of previously saved effects when media is loaded.
Automatically save effects - Enables saving of the last used effect preset per media.
Display
The Display preference panel allows you to control aspects relating to the output of MixEmergency.
Output
Quality - This adjusts the quality of the rendered output level. If you're experiencing low frame rates on full-screen then you may need to lower this setting.
Scaling - There are four types of output scaling: Fit, Letterbox, Zoom and Stretch.
Fit - This adds black bars either horizontally or vertically to fit the full video into the output. The aspect ratio of the media is maintained.
Letterbox - This adds only horizontal black bars to the media. Cropping may occur at the top and bottom of the screen. The aspect ratio of the media is maintained.
Zoom - This will scale the media so that the entire output screen is filled. Cropping may occur at the edges of the screen. The aspect ratio of the media is maintained.
Stretch - This stretches the media to fit into the dimensions of the output screen. The aspect ratio of the media is not maintained.
Arrangement - Controls the arrangement of panels on the output window.
Mix - This option is the default and will display the mixed output of both channels.
Left, Right - This option displays the left and right channel beside each other in the output.
Left, Mix, Right - This option displays the left, mix and right channels horizontally beside each other in the output.
Enable Frame Blending - This option enables frame blending for videos, resulting in smoother video when scratching at slower speeds.
Enable Anti-Aliasing - This option will apply an anti-aliasing filter to the output, which will result in smoother edges on the output image.

Enter full screen on startup - This option automatically activates full screen mode when the application launches. This will only occur when an external monitor is detected.
Flip Horizontal - Flips the output image along the horizontal axis.
Flip Vertical - Flips the output image along the vertical axis.
Enable Color Correction - Enables basic brightness, saturation and contrast controls for the output.
Brightness - Controls the brightness of the output.
Saturation - Controls the saturation of the output.
Contrast - Controls the contrast of the output.
Use Advanced Output - Enables the advanced output. This can be configured by pushing the button labelled 'Configure'.
Preview
Aspect Ratio - This sets the aspect ratio of the preview views. You can choose either None, 4:3 or 16:9.
Update Rate - The update rate of the preview views can be lowered using this control.
Transition
Transition
Reverse MIDI fader - This reverses the direction of any MIDI control assigned to the Crossfader.
Smooth fader - This enables Crossfader smoothing.
Random Transition includes - Use this to choose which transitions will be selected from when using the Random transition.
Auto-fade
Auto-fade duration - This sets the duration of the auto-fade control.
Auto-fade Hot-key - This can be used to assign a global hot-key to the auto-fade button.
Stopping media triggers Auto-fade - Stopping one channel's media (e.g. pulling backwards on your external vinyl control) while this is enabled will cause MixEmergency to trigger an auto-fade to the opposite playing channel. This is useful when you don't have access to a MIDI controller or mixer.
Fader cut distance - Allows you to adjust the fader cut distance for the crossfader.
Use External Controller Crossfader - Enables the use of your External Controller's (e.g. Scratch Live) crossfader.
Use External Controller Upfaders - Enables the use of your External Controller's (e.g. Scratch Live) upfaders.
Use External Controller Cuefader - Enables the use of your External Controller's (e.g. Scratch Live) cuefader.
Contour
Enable - Enables contouring.
Crossfader - Adjusts the contour of the crossfader between slow and fast.
Upfaders - Adjusts the contour of the crossfader between slow and fast.
Use External Controller Contour - Enables the use of your External Controller's (e.g. Scratch Live) contour.
Plug-ins
The two tables on this panel allow you to select and reorder the plug-ins that appear in your effect and transition lists.
Advanced
The settings on the Advanced preference panel are recommended for more advanced users.
Cache
The main slider in this window controls the amount of memory MixEmergency will allocate for caching video frames.
Important: if using GPU-accelerated video decoding, it is recommended to set this value to around a 1/4 of the memory of your GPU (e.g. if your GPU has 1024 MB of memory, you would set the cache size to either 200 MB or 300 MB).
External Control
The pop-up menu allows you to select the default action when an unlinked audio file is loaded.
Enable GPU-Accelerated Video Decoding - This option will cause MixEmergency to attempt to use the GPU to decode H.264 encoded video. This can result in significantly reduced CPU usage. This only affects the main 2 channels (i.e. the Sample Player doesn't take advantage of this). Not all hardware is capable of GPU-accelerated video decoding.
Display Beat Views - This option toggles the visibility of the Beat Views on the effect panel of the Control Window.
Lower full screen window level - This option lowers the window level of the output when full screen. This can allow other windows to display on top of MixEmergency. This is not recommended for general use.
Synchronize Output to Screen Refresh - Turning off this option may result in better performance, but will result in poorer image quality.
Loop Media longer than 1 minute - Selects whether to loop videos longer than one minute in length.
Zero Alpha Channel - Enables clearing of the alpha channel. This is useful if you're compositing the output of MixEmergency in another program via Syphon.
Delay Compensation
Delay Compensation allows you to compensate for any delay in video or audio in your system so that your video and audio will always appear in sync.
Enable - Enables Delay Compensation.
View Helper - When Delay Compensation is enabled, this will flash colours on both the preview views and the output screen. Use the Delay Compensation slider to align these.
Delay Time - Controls the offset for the delay compensation.
Below the slider are + and - buttons that allow you to offset the centre of the Delay Compensation slider by 1 second. This is useful if delay values are outside the range of the slider.
Notifications
Size - Controls the size of the notification overlay.
Position - Controls the vertical position of the notification overlay.
Transition - When this is enabled, changing the Transition will trigger the notification overlay.
Transition Parameter - When this is enabled, changes to the Transition Parameter will trigger the notification overlay.
Effect - When this is enabled, changing the Effect will trigger the notification overlay.
Effect Parameter - When this is enabled, changes to the Effect Parameter will trigger the notification overlay.
Sharing
Syphon Output
'Syphon is an open source Mac OS X technology that allows applications to share frames - full frame rate video or stills - with one another in realtime.'
These settings allow you to toggle output via Syphon to other Syphon enabled applications.
NDI Output
'NDI, NewTek’s Network Device Interface protocol, is new technology for ultra-connected, IP-based video production.'
These settings allow you to toggle output via NDI to other NDI enabled applications.
The Info Window displays information about the current output performance and the loaded media sources. This window can be shown/hidden from the Window menu, or by using the keyboard shortcut ⌘0.
Display - This lists information about the output display. Of most interest is the Output FPS display (FPS is Frames Per Second). You can check this number to check the performance of your system (higher values are better). Note that the optimum value will be one close to the Refresh Rate.
Media 1/2 - This lists information about the current media source and may be useful for identifying incompatible files or problems with your system.
The Messages Window displays any warnings encountered when loading and playing media that may make the media unsuitable for complex mixing and scratching.
MixEmergency allows you to record and export your performance. Only a small amount of data is recorded during the recording stage so that your system's CPU is not put under unnecessary stress.
Recording
Recording your performance couldn't be easier. MixEmergency records the minimum amount of performance data needed to reconstruct your performance. If selected, MixEmergency will also record an audio stream to an uncompressed file.
To record your performance:
Select 'New Recording...' from the Recording menu.
Select a file to record to.
Select whether to also record the audio.
Begin recording by clicking the button labelled 'Record'.
You can then use MixEmergency as you would normally.
To stop recording, simply push the 'Stop' button on the Recording window.
Exporting
Previously recorded performances can be exported from MixEmergency. Exporting can take quite a while to complete depending on the length of your recording and the compression format you have chosen to export to.
Before exporting a performance make sure that all external drives that contain media used during the performance are connected to your computer.
To export your performance:
Select 'Export a Recording...' from the Recording menu.
Select the recording file to export.
Choose the export options. You can choose the rendering pipeline dimensions, the scaling method, whether frame blending is enabled, the output format (e.g. QuickTime, DV, etc) and the options for the output format.
Begin exporting by clicking the button labelled 'Export'.
Note: When choosing a custom format, be sure to select an appropriate frame rate (i.e. not 'current'), as a MixEmergency recording has no concept of frame rate.
A window will appear while exporting that allows you to preview the progress of the export and to cancel the export if necessary.
It is impossible to give a compression setting that satisfies all users, as factors such as computer performance, desired output dimensions and the desired level of compression artefacts are different for each user. Finding an optimal compression setting for your videos may initially involve some experimentation using different formats and compressions presets to determine the optimal settings for your computer.
A few key areas of compression will help with the performance of MixEmergency. Video should be compressed with keyframes every 12 to 25 frames. Longer distances between keyframes will result in a lot of unnecessary decoding, and can degrade the performance of MixEmergency.
Mixemergency Authorization Code For Medicare
The dimensions of the compressed image will depend on the performance of your computer and the output device that you intend on displaying to. For most situations 640 x 480 (or 640 x 360 for wide-screen) will be sufficient. If you experience poor performance, you may need to recompress your video at decreased dimensions.
It is recommended that you compress your video as h.264 video in a mov or mp4 container.
There are currently 23 published inputs that are supported by MixEmergency. These can be used to allow your Quartz Composition to react to your controller (e.g. record velocity when controlled via Scratch Live).
Path - The file path of the Quartz Composition.
Deck - The video deck number (1 or 2).
AudioLevel1 - The audio level of the current channel's media (a number, 0..1)1.
AudioLevel2 - The audio level of the opposite channel's media (a number, 0..1)1.
AudioSpectrum1 - The audio spectrum of the current channel's media (a structure)1.
AudioSpectrum2 - The audio spectrum of the opposite channel's media (a structure)1.
Beat1 - The current beat position of the current channel's media (a number).
Beat2 - The current beat position of the opposite channel's media (a number).
BPM1 - The BPM of the current channel's media (a number).
BPM2 - The BPM of the opposite channel's media (a number).
Image1 - The output of the current channel's media (an image)2.
Image2 - The output of the opposite channel's media (an image)2.
MediaTitle1 - The title of the current channel's media (a string)1.
MediaTitle2 - The title of the opposite channel's media (a string)1.
MediaAlbum1 - The album title of the current channel's media (a string)1.
MediaAlbum2 - The album title of the opposite channel's media (a string)1.
MediaArtist1 - The artist of the current channel's media (a string)1.
MediaArtist2 - The artist of the opposite channel's media (a string)1.
Mix - The crossfader position (a number between 0 and 1).
Position1 - The play position of the current channel's media (a number, in seconds).
Position2 - The play position of the opposite channel's media (a number, in seconds).
Velocity1 - The velocity of the current channel's media (a number, can be positive or negative).
Velocity2 - The velocity of the opposite channel's media (a number, can be positive or negative).
Quartz Compositions are loaded at the current dimensions of the output display. If you experience low frame rates when playing Quartz Compositions, try lowering the Quality setting on the Display preference panel and then re-loading the Quartz Composition.
1 Only available when controlled by Scratch Live 2 Only available to Quartz Composition overlays
Mixemergency Authorization Code List
The Parameter Window allows you to edit published inputs of Quartz Compositions. There are two Parameter Windows - one for media 1, and one for media 2. These can be shown/hidden from the Window menu, or by using the keyboard shortcuts ⌘6 and ⌘7.
Title - Text title of the parameter.
Control - Control for the parameter.
Control Mapping - Displays the mapped control.
Published inputs that have the type Number and a valid minimum and maximum value are assigned slider controls. Published inputs that have the type Boolean are assigned check-box controls. Any control that is a slider or button can be controlled via MIDI using the Control Mapping element. To map a MIDI control to a published input, follow the MIDI assignment instructions in the MIDI section of the manual.
Other published inputs, such as those of type Image, String, Index or Color, are also supported in the Parameter Window.
A number of factors can influence the performance of MixEmergency. The following is a rough guide to some of the features that can influence MixEmergency's performance.
Memory
MixEmergency uses your computer's memory to store video frames in an attempt to optimize video decoding performance. If the memory on your computer becomes low, this can cause MixEmergency's performance to deteriorate. The level of memory used can be set in the Advanced panel of the preferences. You can check the level of your computer's free memory using the Activity Monitor application on Mac OS X.
If using GPU-accelerated video decoding, make sure that MixEmergency's cache size is set to a lower value. Often a good setting is to set this at around 1/4 of the RAM available to the GPU. For example, if your GPU has 1024 MB of RAM, set MixEmergency's Cache Size to between 200 MB to 300 MB. Higher values may degrade performance.
Quality
The quality slider in the Output panel of the preferences can be used to tune performance. For example, if you were to output MixEmergency to an external screen of size 1280 x 720, and your videos are of size 640 x 480, then setting the Quality slider to medium would be appropriate. This would cause MixEmergency to render internally (transitions and effects) at 640 x 480 instead of 1280 x 720, and should improve performance while maintaining the quality of your videos. You can use the Info window to determine the output dimensions, and the quality adjusted dimensions (i.e. the render pipeline dimensions).
Transitions/Effects
Some of the more complex transitions and effects can have an effect on performance. You should test your system with all the effects and transitions that you plan to use in a live situation beforehand.
Mixemergency Authorization Code
Low output frame rates and poor performance
Close any un-used applications.
Try reducing the size of the output window.
Try disabling any effects.
Try lowering the Quality slider in the Display panel of the preferences.
Lower the cache size in the Cache section of the Advanced panel of the preferences if your computer's free memory is running low.
Re-encode your video at a lower resolution.
Low frame rates when full-screen on secondary monitor
Try decreasing the size of your secondary screen.
Try lowering the Quality slider in the Display panel of the preferences.
For help with any other problems, please visit the Inklen support forum: http://www.inklen.com/forum/
0 notes
Text
Epson Scan Smart
Epson ScanSmart is compatible with the following Epson scanners:. Document Scanners: ES-50, ES-60W, ES-200, ES-300W, ES-400, ES-500W, ES-865. Photo and Document Scanner: FastFoto FF-680W. See Epson Scanners. Epson ScanSmart is compatible with:. Epson Document Scanners: ES-50, ES-60W, ES-200, ES-300W, ES-400, ES-500W, ES-865. Epson Photo and Document Scanner: FastFoto FF-680W. Shop Document Scanners. Adobe photoshop mac os x free download. Epson scan smart 2 enthalten Mehr EPSON Scan 3.771. Crossover mac cracked download. Epson - 17,8MB - Freeware - EPSON Scan steuert direkt alle Funktionen des EPSON-Scanners. Epson ScanSmart is a Shareware software in the category Miscellaneous developed by SEIKO EPSON Corporation. It was checked for updates 4,241 times by the users of our client application UpdateStar during the last month. The latest version of Epson ScanSmart is 3.5.2, released on. It was initially added to our database on. EPSON Scan 3.771. Epson - 17.8MB - Freeware. EPSON Scan directly controls all of the features of your EPSON scanner. With this software you can scan images in color, grayscale, or black and white and obtain professional quality results.

Ähnliche Suchanfragen
Epson Scan Smart Es-400
» epson scan smart seiko epson download
» epson scan smart
» epson scan smart panel
» epson scan smart panel 1250
» telecharger epson scan smart
» epson scan smart 2.5
» epson scan smart software download
» logiciel epson scan smart
» epson scan smart 下载
» epson scan smart download
epson scan smart 2
bei UpdateStar
Mehr
Epson ScanSmart 3.5.2
Mehr
EPSON Scan 3.771
EPSON Scan steuert direkt alle Funktionen des EPSON-Scanners. Mit dieser Software können Sie Bilder in Farbe, in Graustufen oder in schwarzweiß drucken und professionelle Ergebnisse erzielen. mehr Info..
Mehr
EPSON Scan OCR Component 3.0.4
Mehr
EPSON Event Manager 3.11.53
EPSON Event Manager allows users to assign any of the product buttons to open a scanning program. It makes scanning users projects even quicker. mehr Info..
Mehr
Epson Software Updater 4.6.1
Mehr
McAfee Security Scan Plus 3.11.2023.1
McAfee Security Scan Plus is a free diagnostic tool to check your computer for core protection and determine if it is on and up to date. mehr Info..
Mehr
Easy Photo Scan 1.0.18
You can use Epson Easy Photo Scan software to easily scan your originals using Epson Scan, edit the scanned images, and share them using Facebook or other photo sharing sites on the web. mehr Info..
Mehr
Canon IJ Scan Utility 2.2.0.10
Canon Ij Scan Utility is a program collection with 90 downloads. It includes 41 freeware products like Scanning Utility 2000 and Canon MG3200 series MP Drivers as well as commercial software like Canon Drivers Update Utility ($39.95) and … mehr Info..
Mehr
EPSON Easy Photo Print 2.83
EPSON Easy Photo Print is a software application that allows you to easily layout and print digital images on various kinds of paper. mehr Info..
Mehr
EPSON Scan PDF EXtensions 1.3.2
Beschreibungen, die
epson scan smart 2
enthalten
Mehr
EPSON Scan 3.771
EPSON Scan steuert direkt alle Funktionen des EPSON-Scanners. Mit dieser Software können Sie Bilder in Farbe, in Graustufen oder in schwarzweiß drucken und professionelle Ergebnisse erzielen. mehr Info..
Mehr
EPSON Event Manager 3.11.53
EPSON Event Manager allows users to assign any of the product buttons to open a scanning program. It makes scanning users projects even quicker. mehr Info..
Mehr
EpsonNet Print 3.1.4
EpsonNet Print is a utility which provides peer to peer printing to Epson printers on a TCP/IP network. mehr Info..
Mehr
Easy Photo Scan 1.0.18
You can use Epson Easy Photo Scan software to easily scan your originals using Epson Scan, edit the scanned images, and share them using Facebook or other photo sharing sites on the web. mehr Info..
Mehr
EPSON Easy Photo Print 2.83
EPSON Easy Photo Print is a software application that allows you to easily layout and print digital images on various kinds of paper. mehr Info..
Mehr
Realtek High Definition Audio Driver 6.0.9088.1
REALTEK Semiconductor Corp. - 168,6MB - Freeware -
Audio-Chipsätze von Realtek werden in vielen Motherboards von unterschiedlichen Herstellern eingesetzt. Falls Sie ein solches Motherboard besitzen, können Sie den von Realtek bereitgestellten Treiber installieren. mehr Info..
Mehr
McAfee Security Scan Plus 3.11.2023.1
McAfee Security Scan Plus is a free diagnostic tool to check your computer for core protection and determine if it is on and up to date. mehr Info..
Mehr
IObit Smart Defrag 7.1.0.71
Disk fragmentation is generally main cause of slow and unstable computer performance. Smart Defrag helps defragment your hard drive most efficiently. Smart Defrag not only defragments computer deeply but optimizes disk performance. mehr Info..
Mehr
VLC media player 3.0.16
Ein Player, der nahezu alle Videodateien abspielt, darunter DVDs, Video-CDs, MPEGs und DivX. Die Besonderheit: Der Player unterstützt MPEG- und DivX-Streaming und kann damit auch Videos schon während des Downloads abspielen. mehr Info..
Mehr
Canon IJ Scan Utility 2.2.0.10
Canon Ij Scan Utility is a program collection with 90 downloads. It includes 41 freeware products like Scanning Utility 2000 and Canon MG3200 series MP Drivers as well as commercial software like Canon Drivers Update Utility ($39.95) and … mehr Info..
Mehr
EPSON Scan 3.771
EPSON Scan steuert direkt alle Funktionen des EPSON-Scanners. Mit dieser Software können Sie Bilder in Farbe, in Graustufen oder in schwarzweiß drucken und professionelle Ergebnisse erzielen. mehr Info..
Mehr
EPSON Scan OCR Component 3.0.4
Mehr
McAfee Security Scan Plus 3.11.2023.1
McAfee Security Scan Plus is a free diagnostic tool to check your computer for core protection and determine if it is on and up to date. mehr Info..
Mehr
Epson Software Updater 4.6.1
Mehr
Canon IJ Scan Utility 2.2.0.10
Canon Ij Scan Utility is a program collection with 90 downloads. It includes 41 freeware products like Scanning Utility 2000 and Canon MG3200 series MP Drivers as well as commercial software like Canon Drivers Update Utility ($39.95) and … mehr Info..
02.08.2021
22.07.2021
21.07.2021
21.07.2021
20.07.2021
12.07.2021
03.07.2021
18.06.2021
Neueste Suchanfragen
» telecharger m track 2x2 gratuit
» uhf tool nedap download
» preset manager download
» flash player 11.3 下载 mac
» free youtube download exe
» pronhub pronhub pronhub
» diagnóstico de segurança bb
» esetup easergy pro
» sweex lw 143 drivers windows 10
» téléchrger windos 7 loader
» badlion download
» smart gaga macrosoft
» application torche c7 simbiene fonloide
» vitrual girl hd telechager
» descarga y2mate gratis
» driverfix for windows 8.1
» télécharger ark genesis partie 2
» lg유플러스 xpay wizrd
» adobe flash player для видеонаблюдения
» 4102211software marcom standard
Related searches
» epson software epson scansmart
» epson scansmart software, free download
» download epson scansmart software
» epson scansmart software
» epson software scansmart
» scansmart epson software
» epson scansmart software install
» software epson scansmart
» epson scansmart download
» download epson scansmart
epson scansmart software download
at UpdateStar
More
Epson ScanSmart 3.5.2
More
EPSON Scan 3.771
EPSON Scan directly controls all of the features of your EPSON scanner. With this software you can scan images in color, grayscale, or black and white and obtain professional quality results. more info..
More
Epson Software Updater 4.6.1
More
Apple Software Update 2.6.3.1
Apple Software Update is a software tool by Apple that installs the latest version of Apple software. It was originally introduced to Mac users in Mac OS 9. A Windows version has been available since the introduction of iTunes 7. more info..
More
EPSON Event Manager 3.11.53
EPSON Event Manager allows users to assign any of the product buttons to open a scanning program. It makes scanning users projects even quicker. more info..
More
UpdateStar Premium Edition 12.0.1923
UpdateStar 10 offers you a time-saving, one-stop information place for your software setup and makes your computer experience more secure and productive. more info..
More
Free Download Manager 6.14.0.39351
Free Download Manager makes downloading files and videos easier and faster and helps avoid dreaded broken downloads. It is especially useful for those who are required to download files continually. more info..
More
EPSON Easy Photo Print 2.83
EPSON Easy Photo Print is a software application that allows you to easily layout and print digital images on various kinds of paper. more info..
More
Internet Download Manager 6.39.2
Accelerate downloads by up to 5 times, schedule downloads, recover and resume broken downloads. The program features an adaptive download accelerator, dynamic file segmentation, high speed settings technology, and multipart downloading … more info..
More
EPSON Print CD 2.50
A software application that allows a CD-enabled printer to print directly onto printable CD/DVDs. more info..
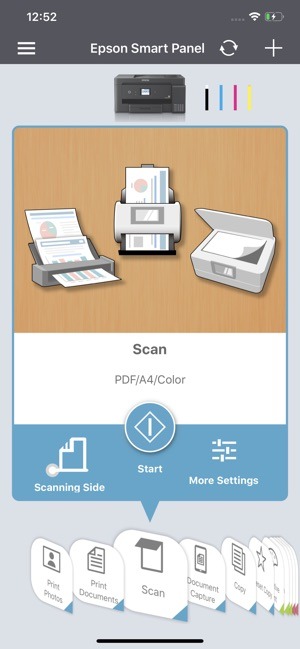
Descriptions containing
epson scansmart software download
More
UpdateStar Premium Edition 12.0.1923
UpdateStar 10 offers you a time-saving, one-stop information place for your software setup and makes your computer experience more secure and productive. more info..
More
EPSON Scan 3.771
EPSON Scan directly controls all of the features of your EPSON scanner. With this software you can scan images in color, grayscale, or black and white and obtain professional quality results. more info..
More
Realtek High Definition Audio Driver 6.0.9088.1
REALTEK Semiconductor Corp. - 168.6MB - Freeware -
Audio chipsets from Realtek are used in motherboards from many different manufacturers. If you have such a motherboard, you can use the drivers provided by Realtek. more info..
More
Apple Software Update 2.6.3.1
Apple Software Update is a software tool by Apple that installs the latest version of Apple software. It was originally introduced to Mac users in Mac OS 9. A Windows version has been available since the introduction of iTunes 7. more info..
More
EPSON Easy Photo Print 2.83
EPSON Easy Photo Print is a software application that allows you to easily layout and print digital images on various kinds of paper. more info..
More
EPSON Event Manager 3.11.53
EPSON Event Manager allows users to assign any of the product buttons to open a scanning program. It makes scanning users projects even quicker. more info..
More
EpsonNet Print 3.1.4
EpsonNet Print is a utility which provides peer to peer printing to Epson printers on a TCP/IP network. more info..
More
Microsoft OneDrive 21.129.0627.0002
Store any file on your free OneDrive (fromer SkyDrive) and it's automatically available from your phone and computers—no syncing or cables needed. more info..
More
WinRAR 6.02
WinRAR is a 32-bit/64-bit Windows version of RAR Archiver, the powerful archiver and archive manager. WinRARs main features are very strong general and multimedia compression, solid compression, archive protection from damage, processing … more info..
More
VLC media player 3.0.16
VLC Media Player Foot Pedal allows VLC Media Player to be used as transcription software for transcription of all types of media files with full foot pedal support. more info..
Additional titles containing
epson scansmart software download
More
Epson Software Updater 4.6.1
More
Epson ScanSmart 3.5.2
More
EPSON Scan 3.771
EPSON Scan directly controls all of the features of your EPSON scanner. With this software you can scan images in color, grayscale, or black and white and obtain professional quality results. more info..
More
Apple Software Update 2.6.3.1
Apple Software Update is a software tool by Apple that installs the latest version of Apple software. It was originally introduced to Mac users in Mac OS 9. A Windows version has been available since the introduction of iTunes 7. more info..
More
EPSON Event Manager 3.11.53
EPSON Event Manager allows users to assign any of the product buttons to open a scanning program. It makes scanning users projects even quicker. more info..
08/02/2021
07/22/2021
07/21/2021
Epson Scansmart
07/21/2021
07/20/2021
07/12/2021
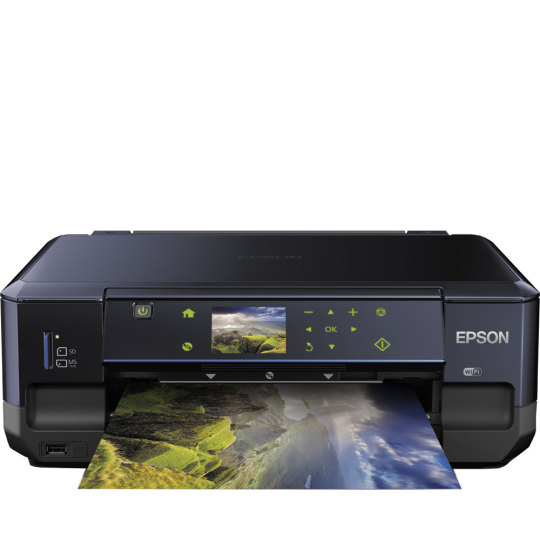
07/03/2021
06/18/2021
Most recent searches
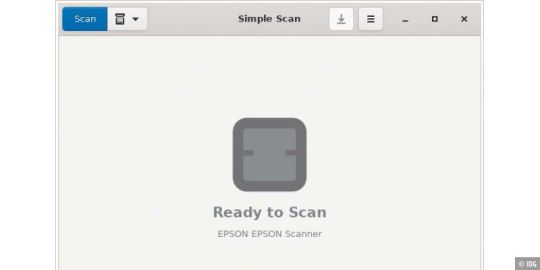
» telecharger m track 2x2 gratuit
» uhf tool nedap download
» preset manager download
» flash player 11.3 下载 mac
» free youtube download exe
» pronhub pronhub pronhub
» diagnóstico de segurança bb
» esetup easergy pro
» sweex lw 143 drivers windows 10
» téléchrger windos 7 loader
» badlion download
» smart gaga macrosoft
» application torche c7 simbiene fonloide
» vitrual girl hd telechager
» descarga y2mate gratis
» driverfix for windows 8.1
» télécharger ark genesis partie 2
» lg유플러스 xpay wizrd
» adobe flash player для видеонаблюдения
» 4102211software marcom standard
0 notes
Text
Crossover Mac Cracked Download

Crossover Mac Cracked Download Torrent
CrossOver Mac 19.0.1 Crack + Activation Code Download

CrossOver Mac Crack is a versatile super genius cross-platform software. You can use it to run various window applications on your Mac OS. It enables you to use directly any Windows app on your Mac without any additional assistance or system reboot. You can switch easily between Windows and Mac OS without restarting your devices. Furthermore, you can run and install this app on your Mac system freely. Further, it is one of the best Windows compatibility environment for iOS, Chrome, Mac, and Linux OS. You can run all types of Windows applications on these systems and vice versa.
Additionally, CrossOver Mac Keygen is also fully working that never disturbs your system performance. So don’t worry about the slow down problem. Perform various functions such as keyboard shortcuts, cut, copy, paste, and much more in a smoother and fast manner. The CrossOver Mac 19.0.1 Crack Latest Version comes with many useful improvements and new UI for both Mac and Linux. This version gives you the opportunity to direct download installation “recipes” from the online official database free. The latest version of CrossOver Mac provides you instant improved access to the Windows application like Office and other needful programs without installing a new Windows OS.
Jun 06, 2018 Download CrossOver 17.5 Full Mac Crack which is now available free. CrossOver For Mac Free Download runs thousands of different Windows programs on Mac. From productivity, software, games, and design software-Windows software never looked better when launched right from the Mac dock with this software. Why Download CrossOver Mac Crack? CrossOver Mac Crack gives the possibility to launch a Windows application on Mac and Linux system. The program is integrated with Tie Technology. It helps you to install software with just a click. You can quickly run your Windows applications without any struggle. With crossover mac download, you can play games, access all files without any errors.
Key Features :
If you looking on the internet a CrossOver 19.0.1.32209 for Mac Download So, you come to the right place now a day shares with you an amazing application The full-version Mac software is free to download CrossOver 19.0.1.32209.A versatile software for Mac CrossOver 2020 that lets users experience Windows applications on Mac without purchasing a Windows license, restore or use a virtual machine.
Aug 25, 2020 CrossOver Mac 2020 Crack with Keygen Torrent Download Mac/Linux CrossOver Mac 19.0.2 Crack 2020 Full Version Download is a versatile supergenius cross-platform software. You can use it to run various window applications on your Mac.
Install Windows Productivity, utility programs and games effortlessly
You don’t need any virtual device to run windows application
You can easily switch between Mac program to Windows software
Perform cut, copy and paste functions between Mac documents and Win documents
Without Rebooting or purchasing license instantly install and run apps with ease
Over 12,000 program can be run on this program
Also, directly run the program on your Mac system
Just clicks on the install button and take a rest
Running this program does not mean that you are using RAM and CPU for two operating system
It gives you native speed for all program including games
So, don’t worry about system bogged down or choppy performance
Also, launch Windows program from the dock which looks great on your Mac system
Last but not least, it the best solution for Mac users as the name mention.
What’s New in Luxion KeyShot Pro Crack Version?
Minor stability improvements with new 3D rendering tools
New short keys wildly dispersed on the control panel for easy handling
Review all feature a little bit with stability revised version
All major and minor bugs are solved
Also, more accurate drawing structure to build the industrial standard 3D designs
More enhanced lightning flow and control
Further, more improved working as well as workflow speed
More control for tri planer as well as UV mapping
New version support 16 bit PSD format for still image and animation frame
More improved library for bubbles, displace, flakes and watermarks
Five new splash screens are added
Advanced new graphics integration for attractive creations
New add geometry node in material graph node.
Crack Serial Code:
23SD4-F5GY7-65F4D-323HG-67HJ6
G5F43-2WE34-567HJ-H6G5F-4D32W
E3R45-T6Y7H-H6G5F-4D3S2-G3456U
System Requirements:

Minimum Intel Pentium 4 processor
RAM must be 2 GB and more for better result
A free hard disk space of 2 GB
A good quality graphic card
Screen resolution of 786×1024 and better
Minimum 2.x open GL
How to Get a Crack Version?
1st install the free trial version
Then, download the Crack KeyShot Pro from the link given here
Follow the instruction and install the complete program
Run it and put the serial keys given above
After the complete installation, restart your system for a smooth result
Enjoy the free Crack KeyShot Pro.
Download are Link given below:
CrossOver Mac 18.5.0 Crack Plus Product Key 2019 (Lifetime)
CrossOver Mac 18.5.0 Crack is a strong and useful macOS utility that allows you to merely arrange and run the required Home home windows. You should use productiveness features or PC video games in your Mac with just a few mouse clicks. CrossOver Mac Crack lets you run Home windows Software program in your Mac. Utilizing this wonderful software, you don’t want to buy the license for Home Windows. It is the best software which latest version is available here for free download. CrossOver Mac 18.5.0 Crack is very easy to use and user-friendly interface.
Crossover Mac Key
CrossOver Mac 18.5.0 Activation Key can get your Home windows operating in your Mac quickly and easily. CrossOver For Mac Obtain runs the Residence home windows software program anyplace. Like you should use at residence, throughout the office, or in class without shopping for a Residence windows license, without rebooting your laptop. And CrossOver Mac Crack can run quite a lot of Residence home windows software program.
Crossover Mac Os

CrossOver Mac 18.5.0 Serial Key is easy-to-use and kind to your Mac’s sources and provides a simple and clear client interface. Therefore, it has the Consumer-friendly consumer interface. Consequently, it has the 2 option to run the home windows application. First, one is “Arrange Home windows application” which lets you arrange the windows software. The second one is “Run Put in Software program” So, you should use the built-in application.
Screenshot Of CrossOver Mac 18.5.0 Crack With License Key
Serial Key:
Key Features Of CrossOver Mac 18.5.0 Crack:
Crossover Mac Cracked Download Mac
CrossOver runs directly on your Mac, and so does your Windows software.
Our CrossTie technology is a major step forward for CrossOver users.
You can do the same thing from our massive Compatibility Center.
CrossOver runs natively on your Mac.
Which means you don’t have to run a copy of Windows.
Run Windows Software Without Rebooting.
You get access to your favorite Windows programs with ease.
No booting required or launching a virtual machine.
Application Full Information:
Language: English
Size: 87.67MB
Manufacturer: CodeWeavers Inc
Category: Software
Operating System: Windows 7/8/8.1/10/Mac
Latest Version: CrossOver Mac 18.5.0 Crack
How To Download & Install ??
Download the software & crack from the giving link below.
Open the software install it.
Now open the folder of crack extract it anywhere you like.
Copy the crack & paste it to the installed folder.
All done enjoy your software
CrossOver Mac 18.5.0 Crack Plus Product Key 2019 (Lifetime)CrossOver Mac Asio for all mac.
Crossover Mac Cracked Download Torrent
For more detail and information visit our website: Mjcracks.co
Here we uploaded a video tutorial for your guide

You can Also Download Its Full Setup From The Given Link
0 notes
Text
Adobe Photoshop Mac Os X Free Download

Adobe Photoshop Free For Mac
Adobe Photoshop Cs6 Mac Os X Free Download
Adobe Photoshop Download Free
Download Adobe Photoshop 2020 for Mac OS for free The media industry is an ever-growing one and with a lot of technical aspects surrounding Download Adobe Photoshop 2019 full version for Mac OS. Jan 21, 2020 Adobe Photoshop CC 2018 free Download for Mac OS (Full Version) Nowadays, with the advent of digital photography, editing your photos is just about as important Download Adobe Photoshop 2020 for Mac OS for free. Adobe Photoshop CC 2019 MAC Full is definitely one of the most popular and one of the best editing software for graphic documents, and there are fewer people who have never heard of it and not a graphic designer who has not used it. The new version of Photoshop has many changes and the Macintosh features were added a lot. The new version of the live video editing has been added and now Adobe. Adobe Photoshop Lightroom CC 6.7 for Mac is available as a free download on our software library. This Mac download was scanned by our antivirus and was rated as clean. The program is categorized as Design & Photo Tools. This software for Mac OS X was originally developed by Adobe Systems Inc.
What's new in Photoshop CC 2017 is apparent when you start working on a new image. Choosing New Documents presents a dialog offering templates such as Textured Geometric Masks, Instant Film Mockups, and Photo Collage Layouts. Filter categories across the top let you restrict the proposed templates to Photo, Print, Art & Illustration, Web, Mobile, and Film & Video.
ASIO4ALL V2 DRIVER FOR MAC - Plugins misbehaving - Crackling can also be caused by plugins behaving badly. Switches - Try the 4 possible combinations of the ' Always resample This is the step that is required to use a USB microphone with your audio device. Since both are activated they will show under the Mixer Output menus. Right-Click the. Asio driver free download - USB Audio ASIO driver, Layla/Gina/Darla ASIO driver, Digidesign CoreAudio Driver, and many more programs. Update Mac OS 8.5 or 8.5.1 to OS 8.6 for improved system. Download USB Audio ASIO driver for Mac to for ASIO-compatible apps. Merging RAVENNA ASIO Driver - v13.0.4 - 64 bit Installer. RAVENNA ASIO Driver (For Windows 7 & 10 - 64bit PC users) - Horus/Hapi/Anubis required. MTUSBSync Board Driver. Driver for the MTUSB Sync Board (v 1.0.17) 36.7 MB. Sony Cutting Master Converter. Asio download mac.
The Photoshop team has tested the following versions of Photoshop on Mac OSX 10.10 (Yosemite) and found no issues specific to this operating system hello, i wanna ask how to check your adobe photoshop CS6 13.0.6 or 13.1.2? And which one is suitable for mac os x 10.10? Mac users who have installed OS X Yosemite (10.10) have complained about compatibility issues with Adobe’s popular photo editing program Photoshop CS5. That leads to discussions among creatives including whether they should install Mac OS X considering much of their workload depends on.
After the huge success of Photoshop CS6 for Windows, Adobe brought out Photoshop CC for Mac OS X. Here, you can Download Adobe Photoshop Mac OS X Full Version for Free.
Download Adobe Photoshop CC full version installation files directly.
Adobe Photoshop Free For Mac
I’ve had this same problem. Downloaded the JAVA script as prompted and still no avail.
Adobe Photoshop Cs6 Mac Os X Free Download
Ive installed a trial of photoshop CS6 and still have the same problem. When i open the photoshop application nothing appears other than the menu selections at the top i.e. File, edit etc. None of the photoshop features/tools show on the screen. When i open the drop down menus to try an open a file it doesn’t let me click on anything. Its only Photoshop I’m having an issue with all other apps are fine. Any advice would be greatly appreciated.
Even though I have already signed into my OneNote on the iphone. Syncing onenote for dropbox free.
Adobe Photoshop Download Free
0 notes
Text
Adobe 9 Download Mac

Acrobat compatibility with the new macOS 10.13 High Sierra
Adobe Pro 9 Mac Download
Adobe 9 Download For Mac
However, they have not made the Mac version available. I don't know why, but that's unfortunately the situation. I am not aware of any legal way to get the Acrobat 9 Pro for Mac installer.
Both Acrobat 2017 and Acrobat DC are compatible with the new macOS High Sierra (10.13). Below are a few known issues. Adobe is trying to fix these issues in a future release.
Installing Adobe Acrobat Reader DC is a two-step process. First you download the installation package, and then you install Acrobat Reader DC from that package file.
Adobe Reader for Mac is an essential application for reading, printing, marking up, and commenting on PDF files. Good functionality: With Adobe Reader for Mac, you can do more than just view.
Since there is no such product as “Adobe Pro” and this thread is about Acrobat Pro 9, can we assume that you are trying “add another user” for Acrobat Pro 9? To “add another user” you need to either buy an additional copy of the software or for volume licenses, add to your license count.
When you upgrade to the latest version of macOS 10.13.4 or launch Acrobat DC or Acrobat Reader DC for the first time on the latest versions of macOS High Sierra, you may see a warning message that indicates Adobe software needs to be optimized for better performance.

This is due to some 32-bit components that Adobe is working to address in the future. Note that no action is required from you at this time and your applications will still run as normal.
For more information, see the following resources:
32-bit app compatibility with macOS High Sierra 10.13.4 (Apple support)
macOS High Sierra (10.13) compatibility FAQ | Creative Cloud (Adobe support)
Adobe applications and 64-bit compatibility (Adobe blog)
Annotations
No check box to mark fill color as Transparent in the properties of eligible annotations. (ADC-4223579)
Adobe Pro 9 Mac Download
Collaboration
While participating in the WebDAV based shared review, keychain password pops up 3 times even if you enter a password and click 'Always Allow'. (ADC-4226584)
Forms
Adobe 9 Download For Mac
Cannot select or change color for 'Border color', 'Fill color', or both from form field properties. (ADC-4225994)
Redaction
https://loadingexecutive400.tumblr.com/post/653697237610840064/asio-download-mac. Download USB Audio ASIO driver for Mac to for ASIO-compatible apps. Asio driver free download - USB Audio ASIO driver, Layla/Gina/Darla ASIO driver, Digidesign CoreAudio Driver, and many more programs. Update Mac OS 8.5 or 8.5.1 to OS 8.6 for improved system.
Cannot 'Fill Color' for redaction in the Properties dialog box. (ADC-4226271)
Sendmail
(11.x Specific) Attach to email does not work when Outlook is default email reader on Mac High Sierra. (ADC-4229279)
Viewer
Some dialogs of Acrobat render momentarily black on launch and then render fine. (ADC-4220296)
0 notes
Text
Asio Download Mac

Asio Download Mac
Asio4all Free Download For Mac

Asio Download Mac
“download ‘ASIO4ALL’, it will solve all your problems” What is this mystical thing? Well, in short, ASIO4ALL is a hardware independent low latency driver built for Windows operating systems and designed to reduce latency. ASIO4ALL is not available for Mac computers and is only available on Windows. Download usb audio asio driver mac os x 10.6.8 for free. Business tools downloads - USB Audio ASIO Driver by and many more programs are available for instant and free download. Visit our Downloads page to access all our. Control Panel for Mac OS X 10.7.5 - 10.9. Control Panel for Windows (including the ASIO/MIDI driver) v2.4. Download Mac App Remover 3. Remove all components related to USB Audio ASIO driver in Finder. Though USB Audio ASIO driver has been deleted to the Trash, its lingering files, logs, caches and other miscellaneous contents may stay on the hard disk. Asio Driver For Mac, free asio driver for mac software downloads, Page 3.
The steps below will guide you through how to set up your Scarlett with FL Studio:

Asio4all Free Download For Mac
Once you have installed the driver go to your computer's 'Control Panel' > 'Sound' option. In the 'Playback' and 'Recording' tabs, make sure the Focusrite/Scarlett option is selected as the default device. If it isn't already, right click it and select 'Set as Default Device'.
Now, open FL Studio. Open the 'Options' menu, go to 'Audio Settings' and set the device to 'Focusrite USB ASIO'. You'll also need to set 'Playback tracking' to either 'Hybrid' or 'Mixer'.
You can change the buffer size from the ASIO Control Panel, which you can open by clicking 'Show ASIO Panel'.
Go to the mixer window ('View' > 'Mixer') and click on the master channel. Make sure the output is set to Focusrite (in this case we are using Output 1 and 2).
To get input from a microphone, go to an insert channel and select the input as the appropriate input:
With these settings you can then press Record and Play to record your audio which will appear as a waveform once recorded:
You can then export this by going to 'File' > 'Export' and selecting the desired format (we would recommend WAV unless you have a reason to choose something else). From here you'll be asked to choose a name for the file as well as it's location. This will then bring up the rendering window where you can choose what you are exporting and other details:
When you are happy with the settings hit start to render.
0 notes
Text
Apple Archive Utility Download Mac

Apple’s Archive Utility supports many other file formats, like ZIP, TAR, and GZIP. But because RAR is proprietary, it can’t be included. Fortunately, there are plenty of third-party software alternatives to work with RAR files on your Mac.
Freeware

macOS
The Mac really doesn't have a lot of great utilities for creating file archives, but it does have one excellent option for unarchiving: the aptly named The Unarchiver. It integrates directly with.
RX Archive Utility is suitable for those users that need a fast, robust utility to create archives. RX Archive Utility doesn't stop here though, and allows you to expand archives as well, using very intuitive menus. All you have to do in order to use the application is select the desired archive.
Download Apple Older Software Downloads Archive for Mac. AppleLANUtility1.0b4.txt AppleModemUpdater.smi.bin AssistantToolbox1.0.1d1.sea.bin.
13.7 MB
143,420


The Unarchiver is designed to handle many more formats than Archive Utility, and to better fit in with the design of the Finder. It can also handle filenames in foreign character sets, created with non-English versions of other operating systems. I personally find it useful for opening Japanese archives, but it should handle many other languages just as well.
It is very simple to use and install - simply copy it into your Applications folder, or whereever else you might prefer, and then set it as the default program for archive files. This can be done either from the preferences panel in the program itself, or in the Finder.
Apple Archive Utility Download
Supported file formats include Zip, Tar-GZip, Tar-BZip2, RAR, 7-zip, LhA, StuffIt and many other old and obscure formats. See the supported formats page for a more complete list of supported formats.
Download it now from the Mac App Store! The Unarchiver is completely free, and will always remain free. If you appreciate the hard work that has gone into writing it, you can use the buttons below to donate and support the developer.
What's New:
The Unarchiver would occasionally crash on older systems. That has been fixed.
We tweaked extraction settings to feel even more system-like
Hardened Runtime was enabled
New icon is here.
UI was given a makeover: we leveled every string of text and measured every indent.
Localizations were meticulously checked, fixed and then checked again. BTW, did you find an error? Tell our support and we'll fix it right away.
Speed was improved. You can now get the contents of the archive you’ve just downloaded much much faster.
Fixed
More RAR4, RAR5 and multipart fixes mean even more weird archives could and will be extracted.
Symbolic links inside of ZIP archives won't be broken upon extraction anymore.
Sometimes, upon trying to open an especially large archive, The Unarchiver would crash. That has been fixed.
Password protected archives used to crash The Unarchiver in some cases. Well, not anymore!
Extracting multiple files won't bug you with multiple 'Extract to..' pop-ups.
Sømé characters in file and folder names caused random crashes. We've fixed that.
Software similar to The Unarchiver for Mac 8
Free Mac Utility
22 votes
WinZip is bar none, the most popular and useful file compression utility out there.
Free to Try
macOS
2031 votes
WinRAR is a powerful archive manager. It can backup your data and reduce the size of email attachments, decompress RAR, ZIP and other files.
Freeware
macOS
75 votes
If the command line is not your thing - here's a GUI front-end for unrar.
Freeware
macOS
0 notes
Text
Free Video Editing Software For Mac 2015

Are you looking for the best free video editing software for Mac? You want it to help you create great videos for fun, entertainment, invitation, advertising or education? Well apart from the cool video footage, the selection of a correct tool is key to the success of a video. We’ve listed both the best free and premium video editing software programs for Mac users in this guide. Whether you are a beginner or a professional, you will find one that works for you.
Free Video Editing Software For Mac 2015 User
Free Video Editing Program For Mac
Best Video Editing Software Imac
Best Video Editing Software Mac
Free Video Editing Program Mac
Best Free Video Editing Software for Mac
iMovie
iMovie is what most people will think to use when they want a free video editing software for Mac. You don’t need to pay a penny for it. It is completely free to use with almost all of the features that we need for processing our video. There are tons of effects, transitions, sound effects, and text styles to help you make your own stylish videos. One of the best features is that its movie trailer themes offers you a lot of options to create amazing cinema-like trailers in just several minutes. The interface is really easy to use and intuitive. So you can start editing your video and quickly get the hang of the program.
ShotCut
Some video editors are free, but there's usually some kind of catch or disadvantage to these programs. (Image credit: Shotcut) Free vs paid video editing software. There are some free video editing solutions out there. Programs such as DaVinci Resolve and Shotcut are free downloads, and iMovie comes preloaded on every new Mac computer. Read about the best video editing apps for Mac here: Best video editing software for Mac myTuner Radio If you like to listen to radio stations try out the myTuner Radio app. Save your favourite.
ShotCut is a great video editing software for Mac, which can be used on Windows or Linux as well. Its interface isn’t really super intuitive but it is not hard to pick up where all of the tools are located. So you should be a little patient if you want to get great results with this program. It contains all the tools you know from Windows Movie Maker, plus a lot of extras. ShotCut’s biggest advantage is its video and audio filters, which can be fully customized, layered, and combined in all kinds of interesting ways. However, you cannot preview the effects before applying them. And although there are excellent export file formats, it has no profiles for different devices.
HitFilm Express
HitFilm Express is another free video editing software for Mac, which has professional tools but without the high price tag. Due to its unique set of features, you need to spend some time before you get the hang of it. There are various tutorials to help you master it using this program. HitFilm Express is not a tool to be used just to help you just cut off unwanted footages, adding color effects, or exporting to a new format, but one that has a full editing suite, such as audio and video filters, compositing tools, layers and masking, green screen effects, and 3D support. Its website puts emphasis on creating Hollywood-style movies, so it is also one of the best tools for YouTubers and vloggers.
Lightworks
Lightworks is another one of the best video editing software for Mac which is packed with pro-level tools. Its interface is a little different from other video editors you may have tried. So don’t expect to master it overnight but it worth the time and effort once you get used to it. Lightworks is very suitable for home users who want an advanced tool for post-production. It has advanced real-time effects, a color correction tool, a precise trimming tool, blurs and masks, which all help to make your video shine.
Best Full-featured Video Editing Software for Mac
If you are looking for a video editing software for Mac that has professional-quality tools but is beginner-friendly, BeeCut is a reliable option to try. It is compatible with both Mac and Windows. If you are going to be jumping between different systems, you can learn one piece of editing software and move around, back and forth. The interface is fairly intuitive and easy to use, but there are also a number of text tutorials on its website, as well as video tutorials on YouTube. So you can really get up to speed quickly. The only downside is the free version will leave a watermark on the video.
Main features:
Supports multiple video aspect ratios – 16:9, 4:3, 9:16, 1:1, and 3:4.
Supports almost all kinds of video formats, audio formats, and image formats.
Includes a complete classic video editing toolkit like trim, cut, split, and more.
Advanced video editing tools like Mosaic, Freeze frame, zoom, PIP, etc.
Double tracks for PIPs, Texts, Music, Filters and Overlays.
Provides hundreds of cool filters, texts, transitions, borders, overlays and animated elements.
Export video in popular formats or for different devices in HD quality.
Related posts:
Mac computers are aimed for professional graphic designing, video editing, and imaging needs. Most of the professionals use premium grade video editors and graphic designing software on their Mac computers to complete their projects.
However, the sad truth is that these professional video editors are really costly. You might have to give up thousands of dollars to buy a video editor for Mac loaded with premium features. These premium video editors are used in movies and TV shows.

If you want to edit your raw videos or working on a project and looking for a free video editing software for Mac then you are at the right place. I have created a list of 10 best free video editing software for Mac computers. These free video editors might not match with the features of premium video editors but they are equipped with the necessary tools and features of basic video editing.
Best Free Video Editing Software for Mac Computers
Some free video editors in this list are quite efficient and provide advanced video editing features while some of these free video editors for Mac provide basic features but are ideal for the newbies. Many contain premium features of video editing. Anyway, I am giving you the list of best free video editing software for Mac and you decide which one is best for you. These are worth a shot for free.
1. Shotcut Video Editor
Shotcut is an open source, cross platform video editing software. It is available for free for Linux, Mac and Windows 10/8/7. This software contains many impressive video editing features.
Shotcut video editor supports almost all the popular video, audio and image formats. There is a broad range of video effects, transitions, filters and compositions that you can use to edit videos in Mac computers. Although, the interface is quite friendly but users completely new to video editing might face a little difficulty. However, there are easy video editing tutorials on YouTube for help.
This one is a feature-rich video editing tool. There are various blending modes for a professional touch to your videos. You can set the color, contrast, brightness, overlays, add different audio effects, bass, treble, delays, etc. The best part I like about it is the highly configurable timeline. So, if you are looking for a free video editing software for Mac then I’d suggest giving Shotcut video editor your first try.
How to Use Shotcut Video editor to edit videos – Shotcut Tutorial
2. Movavi Video Editor
Another simple video editing software. Movavi video editor is available for both Windows and Mac users. You can download the free version of this software from the website. Most users love this tool for its simple and easy to use interface.
Import any video to the software’s timeline and start editing. You can improve the quality, remove noise, add background music or audio, titles, subtitles, font size, color, contrast, saturation, choose aspect ratio, etc. The video editor supports a wide range of formats. There are a lot of creative effects like filters, transitions, animated fades, trim or crop unwanted parts of the video, rotate & adjust, stabilize, preset tunes, etc.
What else? You can create an interesting photo slideshow and reverse a video. Here is a simple tutorial explaining how to work with Movavi video editor.
How to Edit Videos using Movai video editor on Mac | Tutorial
3. AVS Video Editor
The next efficient video editor in the list. AVS video editor is paid video editing software but it provides an unlimited free trial version which is enough for basic video editing requirements.
All popular audio, video and image formats are supported. You can flip, rotate, trim unwanted parts, cut and stabilize your video. There are multiple blending modes, delay, add subtitles, various menu styles, brightness, contrast, etc. There are more than 600 transitions and special effects to choose from. You can get an overview of each project from the storyboard.
This video editor fits the beginners or novice most. Transform your raw camera footage to a finished video easily. The software allows you to output the video to various online video sharing platforms like YouTube, Vimeo, etc.
How to use AVS Video editor | Tutorial
4. Da Vinci Resolve Video Editor for Mac
Da Vinci Resolve video editor is a powerful video editing software for Mac. It has been praised by many professionals and esteemed publications. You can turn to its multi-cam editing mode if you are working with footages from multiple cameras. I have used this video editor for a few of my video editing projects so I personally like it very much. It is quite handy.
The video editing software provides faster speed. You can edit your videos extremely quickly. Although the paid version of this software has more high-end features but even a professional can get most of his video editing work done through the free version. It contains all the basic and many premium grade video editing features.
You can edit the edited videos to YouTube, Vimeo, Dailymotion, etc.
How to use Da Vinci Resolve Video Editing software for Mac | Tutorial
5. Final cut Pro Video Editor for Mac
Final cut pro is a video editing software from Apple. This software is not free and costs about $300. So, what’s it doing in this list? Because, it offers a free trial for 30 days. Final cut pro is one of the best video editing software so if you are working on an important video editing project then you can avail the features for 30 days for free.
This video editing software fits well for the novice and for the professional video editors. It is loaded with basic and advanced video editing features. You can quickly import media to its magnetic timeline, add 3D titles, apply masks, color grading, color balance, effective previews and rendering, smooth transitions, jumps and cuts, effects, stabilization, etc.
This software is actively used by the video editors of movies and TV series.
How to Download and Use Final Cut Pro Free Trial
https://www.youtube.com/watch?v=hsadGq4hWYo
6. OpenShot Video Editor
Another great open source, cross-platform video editing software. OpenShot video editor is available for Windows, Linux and Mac users. The software is rich in features like unlimited audio/video tracks, multiple formats support, various transitions and special effects, stabilization, titles, subtitles, audio features, etc.
The interface is simple yet powerful. The advanced timeline makes it easier to drag, drop, zoom and snap. You can do trimming, rotation, snapping, cutting, scaling, masking, overlays, and add watermarks. This video editor has got multiple updates. The latest update was in August 2016.
How to use OpenShot Video Editor | Tutorial
7. Lightworks Video Editor
Lightworks video editor is a comprehensive non-linear video editing software. Video editing and trimming is relatively easier. It has been used by some movies like Pulp fiction, Heat, etc. for the video editing requirements in the past.
The video editing software is highly customizable and you can really get what you want out of it. Though its free but it contains many premium grade features. However, I found that it has restrictions in terms of project sharing. You can only share a video of up to 1080p in Vimeo and up to 720p output to YouTube.
How to use Lightworks Video Editor | Tutorial
8. Blender Video Editor
Free Video Editing Software For Mac 2015 User
Blender is a free to use, open source 3D creation tool. It providing efficient non-linear video editing features too. Blender is powerful but it takes a little time in getting used to.
By default, the software will show up 3D modelling mode. You will need to change the mode to video editing from menu. It contains all the basic video editing tools that other video editors have. Download it for free from the official website.
How to use Blender Video Editor | Tutorial
9. Avidemux Video Editor
Avidemux is another efficient video editing tool for Mac. Actually, it’s a free cross-platform video editor. It’s not a high end video editor but suits perfectly for basic video editing requirements. The interface is very simple and easy to use.
Free Video Editing Program For Mac
Below is a brief tutorial of Avidemux interface and working. You can get much out of it.
How to use Avidemux Video Editor | Tutorial
10. Jahshaka (CineFX)
Best Video Editing Software Imac
The last but not the least, Jahshaka video editor, my friends. This software provides many different tools to create amazing digital content. You can do video editing, 2D annd 3D animation, stabilization, flash animation, color correction, keying, tracking, composting, etc. There are many audio and video effects.
The developers keep on adding new features with every release.
Best Video Editing Software Mac
How to use Jahshaka (CineFX) Video Editor
These were some of the best video editing software for Mac users. You can get these software for free. These are best for those who are new to video editing or want to do some basic editing for short movie. The professional video editors like Adobe Premiere or Final Cut Pro cost are costly and you might not want to invest your money in these.
Free Video Editing Program Mac
However, if you want to try the professional premium video editing software for Mac then try the trial version first as most of them offer a trial version for a few weeks or month. Which one do you think is the best video editor for Mac?
0 notes
Text
Free Photography Software For Mac

Focus stacking is very important in photography. There are times when one shot of the subject isn’t enough, or maybe the shots look good, but they’re a bit out of focus. To correct that, there are focus stacking software available and some HDR Camera Apps as well.
download free, software For Mac
Free Office Software For Mac
Mac Photo Software Reviews
Related:
If you’re an aspiring photographer or if you just like taking photos and editing them in a way you haven’t done before, then our suggestions below will definitely work for you. Get your cameras ready and take those shots. These software will do the rest and improve the image’s quality to the best.
Picolay
Chasy Draw IES
download free, software For Mac
That’s why we’re taking a look at the best free photo-editing software on the market. Our top pick is GIMP, an open-source photo editing software that is available for the big three operating.
Best Mac Photo Editing Software - Free/Trial or Cheap 1. Apple’s Photos (Built-in app) 2. Luminar (7 days trial) 3. Photolemur 3 (Free Version with watermark) 4. Aurora HDR (14 days trial) 5. Pixelmator (Trial 30 Days) 6. Adobe Photoshop Elements 2020 (Trial link) 7. Affinity Photo (Free Trial) 8. The best free photo editors at a glance 1. GIMP (the GNU Image Manipulation Program) is the best free photo editor around. It's packed with the kind of. Ashampoo Photo Optimizer. Platform: Windows Layers: No Export formats: JPG, PNG, BMP, TIF If you've got a lot of. Verdict: Fotor for Mac is recognized for its web version. It`s one of the best free photo editing apps for Mac, with an option to extend to Fotor Pro version, but the app does not require it and you will not see any built-in ads there.
Enfuse
Helicon Focus for Windows
ImageJ for Mac
Lights, Camera, Edit!
Picolay Picolay is a focus stacking software with multiple uses. It can perform image processing, create slide shows, make animated GIF images, and more.
Chasy Draw IES Chasys Draw is capable of providing super-resolution image stacking, supports icon editing, can convert multiple files images, and many more. Runs on Windows XP, 2003, Vista, 7, 8, and 10.
Enfuse Enfuse makes images more compelling with its image blending tools. You can take shots with different exposures or angles and merge them into one unique picture. Supports Mac OSX 10.4 or higher and Windows XP, 2000, Vista, and 7.
Helicon Focus for Windows Helicon Focus was designed for macro and micro photography. Helicon has accurate color renditioning, state-of-the-art algorithm processes, and more.
ImageJ Built for scientific multidimensional images, ImageJ is an open source image processing software. It’s capable of performing a wide range of tasks and is highly flexible. It can also be used along with other software like MATLAB, KNIME, and ITK, to name a few.
Stacking Photo for Android Stacking Photo is one of the Camera Apps for Samsung Galaxy S6. Designed for those who can’t bring their laptops everywhere and would opt to use their smartphones for stacking images instead.
Adobe Photoshop Adobe Photoshop is easy to use, has stock assets like design templates, graphics, images, etc., helps you design your business cards or brochures, and it can remaster photos, remove objects, and combine images.
TuFuse TuFuse is a focus and exposure blending software that generates focus blended and exposure blended images. It’s also an open source software and is free of charge. It’s compatible with any Windows OS.
Photoacute studio PhotoAcute Studio improves image resolution, increases the depth of field, corrects geometry distortions, and a whole lot more. Compatible with Mac, Linux, Windows Phone, and Windows.
Zerene Stacker Zerene Stacker has amazing retouching capabilities, clean handling of bristles and hairs, advanced stacking algorithms, and a lot more. Supports Linux, Windows XP, Vista, 7, 8, 10, and Mac OS X.
Stacking Photo for Android
Adobe Photoshop- Most Popular Software
TuFuse
Photoacute studio
Zerene Stacker
Free Office Software For Mac
Focus stacking software and apps are very useful. It lets us bring out a new kind of image from the picture we just took. We could make it brighter, darker, shinier, and a bunch of other things we could do. When we are using them, our imaginations are truly the limit.
They have the same value as Mobile Camera Apps, which lets us edit our faces into funny-looking images. Lets us enhance our facial features, lighten our skin, etc. Today, we’re not just taking pictures anymore. We are now enhancing them to the fullest and making them the best.
Mac Photo Software Reviews
Related Posts
1 note
·
View note