
Don't wanna be here? Send us removal request.
Statistics
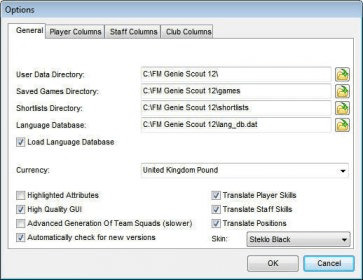
We looked inside some of the posts by loadranch667 and here's what we found interesting.
Average Info
Notes Per Post
1
Likes Per Post
1
Reblog Per Post
0
Reply Per Post
0
Time Between Posts
13 days
Number of Posts By Type
Text
14
Last Seen Tumblr Blogs


Fun Fact
There are dozens of funny blogs to kill time on Tumblr.
Text
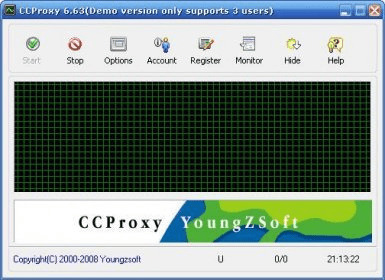
Ccproxy 8 Keygen Rar
DOWNLOADED 6520 TIMES File Name: KeyGen-R2R.rar 867.31 KB It will only get better! Free ANSWERS and CHEATS to GAMES and APPS. Youngzsoft CCProxy 8.0 (2015) With Keygen. Posted on May 10, 2018 April 23, 2019 by admin. Ccproxy 8.0 crackDownload Link:-:1. https://loadranch667.tumblr.com/post/661089130313334784/genie-scout-for-mac. Uninstall the Previous Version With IObit Uninstaller2. CCProxy 8.0 Build 2021 Serial Key is an innovative solution to control Internet connection and sharing options whether for home as well as a business network. It features powerful account management functions, online access monitoring and access logging, and more.
CCProxy là một phần mềm máy chủ proxy dễ sử dụng và mạnh mẽ hỗ trợ kết nối băng thông rộng, DSL, quay số, cáp quang, vệ tinh, ISDN và DDN. Nó giúp bạn xây dựng máy chủ proxy của riêng bạn, nhận ra và chia sẻ kết nối Internet trong mạng LAN dễ dàng. Proxy Server CCProxy có tính năng kiểm soát truy cập internet, kiểm soát băng thông, lọc web trên Internet, lọc nội dung, kiểm soát thời gian và hơn thế nữa. Nói cách khác, bằng cách sử dụng phần mềm này bạn có thể dễ dàng đặt chi tiết và độ sâu liên quan đến kết nối internet, bao gồm băng thông, điều khiển truy cập, tốc độ kết nối và nhiều hơn nữa.

CCProxy là một giải pháp sáng tạo để kiểm soát kết nối Internet và các tùy chọn chia sẻ cho dù nhà cũng như mạng lưới kinh doanh. Nó có chức năng mạnh mẽ quản lý tài khoản, giám sát truy cập online và truy cập vào các bản ghi, và nhiều hơn nữa. Nó cho phép bạn tăng tốc lướt Internet, trình duyệt các trang web trơn tru, tải các tập tin nhanh chóng, cũng như gửi và nhận e-mail an toàn.
Các tính năng chính: https://loadranch667.tumblr.com/post/661089199477374977/minitool-partition-wizard-pro-ultimate-full-version.
Truy cập đăng nhập và giám sát truy cập trực tuyến
Tránh tắc nghẽn mạng lưới một cách dễ dàng
Kiểm soát băng thông sử dụng của khách hàng
Built-in DNS có thể giải quyết tên miền
Kiểm soát truy cập Internet trên mạng LAN
Giải pháp kiểm soát truy cập Internet
Chức năng quản lý internet mạnh mẽ
Quay số từ xa và ngắt kết nối tự động
Một số loại xác thực tài khoản
Hỗ trợ SOCKS5 và chứng thực web
Hỗ trợ modem, ISDN, ADSL, DDN, WiFi, vv
Bộ nhớ cache trên web để tăng tốc độ duyệt web
Lọc và lọc nội dung web
Phân bổ băng thông của máy khách proxy, và nhiều hơn nữa.
Hướng dẫn cài đặt

Tải và giải nén tập tin
Mở phần mềm và cài đặt bình thường
Trên giao diện phần mềm click Register -> Click Offine -> Copy ID
Mở keymaker -> Paste ID -> Generate
Sử dụng thông tin trong Keymaker để kích hoạt
Xong.
Xem thêm : Tổng hợp phần mềm, Game PC chia sẻ trên Site “Toàn tập“
Tải phần mềm (Pass: phanmemtop.net)
Vui lòng sử dụng Winrar để giải nén tệp tin Link Google lỗi quá tải người dùng, vui lòng đăng nhập tài khoản google của bạn để tải file hoặc tải Link Dự phòng
Ccproxy 8 Keygen Rar File Opener
Vui lòng để lại bình luận để site thêm phong phú và cố gắng phát triển nhé 🙂

Ccproxy 8 Keygen Rar Download
1) File Keygen và Crack hay bị trình diệt Virus nhận nhầm là Vius. https://loadranch667.tumblr.com/post/661089057935425536/format-sandisk-flash-drive-for-mac. Do vậy bạn tạm thời ngắt kết nối internet và trình diệt virus trong quá trình cài đặt phần mềm
2) Nên chạy File Crack 'Patch' và 'Keygen' bằng quyền 'Run as administrator'. Khi sử dụng Key cho phần mềm cần chú ý để việc chặn phần mềm bằng Firewall để License Key hoạt động tốt.
3) Một số phần mềm và Game Yêu cầu NET Framework và DirectX mới nhất mới chạy được. Hãy kiểm tra lại trên máy tính của bạn và cài đặt nếu chưa có.
Hướng dẫn chặn phần mềm bằng tường lửa Windows Firewall
1. Vào 'Control Panel' -> Chọn 'System and Security' -> Rồi tìm 'Windows Defender Firewall'. (Hoặc bạn có thể search 'Windows Defender Firewall' ngay góc trái bên dưới thanh Taskbar) 2. Chọn “Advanced settings” 3. Chọn ” Inbound rules” list danh sách các phần mềm sẽ xuất hiện 4. Nếu chương trình bạn cần block có trong list rồi thì bạn chuột phải vào tên chương trình rồi chọn ” Properties” sẽ xuất hiện -> chọn “block…” rồi “apply” và 'ok'. Xong 5. Hoàn thành. 6. Nếu chương trình cần block không có trong list thì bạn chọn “New Rule.” Mục 'Actions' bên phải giao diện 7. Ở mục 'Rule Type' chọn 'Program' và Click Next 8. Ở mục 'Program' Tìm đường dẫn đến file exe của chương trình cần block( ở ổ C hoặc short cut ngoài desktop): và Click Next 9. Ở mục 'Action' Chọn ” Block the connection” để ngăn chặn việc kết nối internet và Click Next 10. Chọn “Next” để tiếp tục 11. Đặt tên cho phần mềm bạn block- đặt tên gợi nhớ. 12. Click ' Finish' để kết thúc : Kết quả, phần mềm đó đã bị block.
0 notes
Text
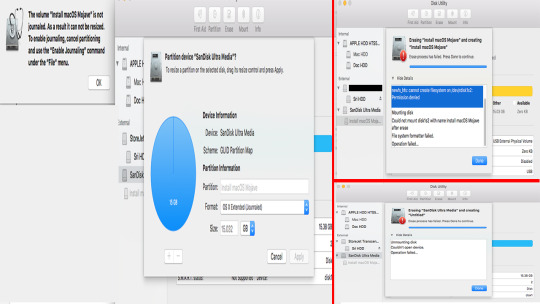
Minitool Partition Wizard Ultimate Full
Minitool Partition Wizard Ultimate Full Crack
Minitool Partition Wizard Pro Ultimate Full Download
Minitool Partition Wizard Ultimate Full Episodes
Minitool Partition Wizard Free 10
View Difference Only; Free; Pro Annual Subscription MiniTool Partition Wizard - Annual Subscription License is valid for 1-year usage starting from the purchase date. This subscription will be automatically renewed unless you unsubscribe before the next term. Pro Deluxe Annual Subscription MiniTool Partition Wizard.
MiniTool Partition Wizard Pro Ultimate v12.1 (x64) WinPE ISO
Posted by: rafaqatkiani007 on 20-07-2020, 12:29
See Orignal Post @ Nulled.OrgDownload MiniTool Partition Wizard Pro Ultimate v12.1 (x64) WinPE ISO with high speed
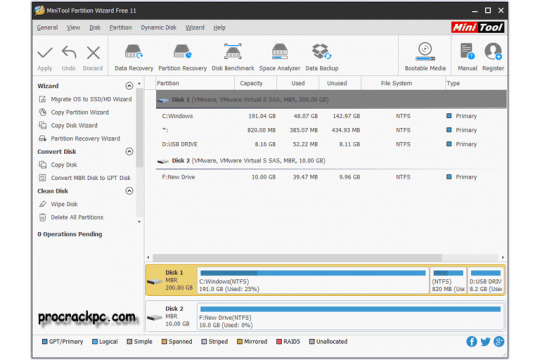
MiniTool Partition Wizard Pro Ultimate v12.1 (x64) WinPE ISO | 435.01 MB MiniTool Partition Wizard is a rich-featured partition magic, which is designed to optimize disk usage and to protect your data. It comes with so many powerful features with which you can completely control your hard disk and partition. With its user-friendly interface and straightforward guidance, you are able to resize partition, copy disk, scan lost partitions, and migrate OS to SSD easily and safely. Due to its outstanding performance, MiniTool Partition Wizard Free Edition has earned good reputation among global users.
How to Activate MiniTool Partition Wizard 12.1 Activation 32 / 64bit Windows 10 / 7 / 8 All Full Version Free Download Lifetime 2019 - 1000% Working Lice. MiniTool Partition Wizard Full Crack is one of the best partition managers. https://loadranch667.tumblr.com/post/661089199477374977/minitool-partition-wizard-pro-ultimate-full-version. It not only includes all Free functions, but also embeds some advanced partition technologies such as merging Partitions, converting NTFS to FAT32, changing cluster size, and converting dynamic disks to basic to help professional users. All-in-one Disk Partition Manager As best partition manager for Windows, MiniTool Partition Wizard aims to maximize disk performance. It helps create/resize/format partition flexibly, convert disk between.
Screenshot

Extend System Partition Extend system partition to solve low disk space issue by its 'Move/Resize Partition' & 'Extend Partition' f Copy Disk Partition Copy disk partition for hard drive upgrade or for data backup in case that your computer may run into a problem. Merge Adjacent Partitions Combine two adjacent partitions into a bigger one safely so as to make full use of the unused space. Migrate OS to SSD
Minitool Partition Wizard Ultimate Full Crack

Migrate OS to SSD/HD to get better computer performance or to back up OS for system restoration. Surface Test Check disk/partition surface test to confirm whether there are bad sectors on the target location. Basic Management Enable to manage disk partitions such as create, delete, format, split, wipe, align partition and more.

Convert Disk Partition Table Convert non-system disk from MBR to GPT and vice versa without data loss to support large drive or full OS. Convert File System? Convert NTFS to FAT or convert FAT to NTFS without formatting to support early Windows OS or to store large files. Set Primary/Logical Set partition logical to create more than four partitions or set partition primary to make it active. Download Single Link
NitroFlare https://nitroflare.com/view/949553A54E67E58/MiniTool_Partition_Wizard_Pro_Ultimate_12.1_x64_WinPE.rar Rapidgator https://rapidgator.net/file/5c8e20317809a5d1cfe29e752708c028/MiniTool_Partition_Wizard_Pro_Ultimate_12.1_x64_WinPE.rar.html
Download MiniTool Partition Wizard Pro Ultimate v12.1 (x64) WinPE ISO with high speed
Go back00
Category: Software
Minitool Partition Wizard Pro Ultimate Full Download
Dear visitor, you enter the site as unregistered member. We recommend you to register or log in.
MiniTool Partition Wizard
Rich-featured partition magic, which is designed to optimize disk usage and to protect your data. Format sandisk flash drive for mac. It comes with so many powerful features with which you can completely control your hard disk and partition. With its user-friendly interface and straightforward guidance, you are able to resize partition, copy disk, scan lost partitions, and migrate OS to SSD easily and safely. Due to its outstanding performance, the MiniTool Partition Wizard Free Edition has earned a good reputation among global users.
Features
Extend System Partition: Extend system partition to solve low disk space issue by its “Move/Resize Partition” & “Extend Partition” f
Copy Disk Partition: Copy disk partition for hard drive upgrade or for data backup in case your computer may run into a problem.
Merge Adjacent Partitions: Combine two adjacent partitions into a bigger one safely so as to make full use of the unused space.
Migrate OS to SSD: Migrate OS to SSD/HD to get better computer performance or to back up OS for system restoration.
Surface Test: Check the disk/partition surface test to confirm whether there are bad sectors on the target location.
Basic Management: Enable to manage disk partitions such as create, delete, format, split, wipe, align partition, and more.
Convert Disk Partition Table: Convert non-system disk from MBR to GPT and vice versa without data loss to support large drive or full OS.
Convert File System? Convert NTFS to FAT or convert FAT to NTFS without formatting to support early Windows OS or to store large files.
Set Primary/Logical: Set partition logical to create more than four partitions or set partition primary to make it active.?
Screenshots
Download Link
MiniTool Partition Wizard Pro 12.3 Full Version Rar (28.6 MB) | Mirror
WinPE
Minitool Partition Wizard Ultimate Full Episodes
MiniTool Partition Wizard Pro 12.1 X86 WinPE ISO (156.0 MB) | Mirror
MiniTool Partition Wizard Pro 12.3 X64 WinPE ISO (484.2 MB) | Mirror
Minitool Partition Wizard Free 10
Related Softwares
0 notes
Text
Download Baidu Wifi Hotspot For Mac
Wifi Hotspot Software For Mac DOWNLOAD. Explore Mac apps like Baidu WiFi Hotspot, all suggested and ranked by the. Minitool partition wizard pro full. NetSpot is a free app for wireless site surveys, Wi-Fi analysis, and troubleshooting. When 2 PC are connected on the same Wi-Fi hotspot they are truly sharing the same. What people are asking for is software for Mac OS.
Wifi Hotspot For Mac free download - Baidu WiFi Hotspot, Thinix WiFi Hotspot, Hotspot Shield, and many more programs.
Download Wifi Hotspot - Free download Download the. PC, to convert your to convert your laptop computer into a wireless Baidu WiFi Hotspot for During such times, the the Baidu wifi hotspot Shield VPN ) is Latest) for Windows 10, five mins later Apple — Baidu WiFi WiFi Hotspot - free Free Alternative to Baidu in handy.
1- Just click on the download button and select a location to download the file. 2- After the download finishes, open the Baidu WiFi Hotspot folder and extract its content. 3- Now open the Baidu WiFi Hotspot folder and double click on the Baidu WiFi Hotspot setup file.
Baidu WiFi Hotspot is a small and free utility which can share your wired Internet connection as a wireless hotspot. Genie scout 2018 mac.
This hotspot creator is pretty easy to use and after installation, you can select the name of the network, the WiFi password and on which bandwidth to share on. Note: older devices may not be compatible with 5GHz.
Another feature that's included in Baidu WiFi Hotspot is the ability to receive files from cell phones connected to the network. You can select which folder should be designated as where received files should be saved.
The overall interface of this WiFi Hotspot application is rather simple and requires little in terms of technical knowledge in order to get started. Format sandisk flash drive for macbook pro. Just select a name, password and bandwidth.
Baidu WiFi Hotspot is software which can create WiFi hotspots.
Features and highlights
No limit on the amount of data that may be transferred
Control the WiFi connected devices
Customize your WiFi name
Send mobile photos to your PC
Baidu WiFi Hotspot 5.1.4 on 32-bit and 64-bit PCs
This download is licensed as freeware for the Windows (32-bit and 64-bit) operating system on a laptop or desktop PC from wifi software without restrictions. Baidu WiFi Hotspot 5.1.4 is available to all software users as a free download for Windows.
Download Baidu Wifi Hotspot For Pc Windows 10
Filed under:
Baidu WiFi Hotspot Download
Freeware WiFi Software
Major release: Baidu WiFi Hotspot 5.1
Wireless Hotspot Software
Connectify – Free and Up-to-Date Alternative to Baidu WiFi Hotspot
Do you need to share your computer’s Internet connection to other devices? Looking to connect your smartphone, tablet, eReader or other devices to the Internet via WiFi from your Windows PC? Get Connectify Hotspot for free and enjoy constantly updated WiFi hotspot software with even more functionalities than Baidu WiFi Hotspot.
See below how simple it is to use Connectify and turn your laptop into a WiFi hotspot!
Baidu WiFi Hotspot Alternative: Connect All Your Devices to the Internet with Connectify Hotspot Software


When you need a lightweight, handy tool to share your computer’s network with your cell phone or tablet easily, use Connectify Hotspot. You get multiple benefits.
Connectify Hotspotvirtual router softwareallows you to share your Internet connection with just a few clicks… the best Baidu WiFi Hotspot alternative!All you need is a working Windows PC with a WiFi network adapter.This can be the computer / laptop you’re currently using or an older laptop or PC that’s just collecting dust.
Watch the tutorial video below to learn how you can turn your laptop into aWiFi hotspotand share your Internet at the click-of-a-button.
Baidu Hotspot Download For Pc
Additional Benefits of Baidu WiFi Hotspot Alternative Solution: Connectify Hotspot
While other free WiFi hotspot software only “help” you share your Internet connection (inherent issues included –NAT levels, peering, Chromecast apps won’t find your Chromecast, your Apple TV won’t show up for your Mac to stream to…), Connectify Hotspot offers you more:
Download Baidu Wifi Hotspot For Mac
Save up to 60% of Internet bandwidth by using the built-inuniversal ad blocker. It evenblocks in-app ads!
Easily bridge other devices onto your home network withWiFi Bridging Mode: eliminate all game consoles (Nintendo, Playstation, Xbox) and smart TV issues with your home WiFi network!
Save money whiletraveling: Get all devices online for the price of one when being charged for Internet per device athotels, on airplanes, etc.
Share your secure VPN connection via WiFi.
Share any type of Internet connection with all your devices: share Internet from existingWiFi networks,LAN,DSL,3G/4G, eventethered smartphones!
Don't Have Connectify Hotspot Yet?
Hotspot Wifi Baidu Download
Hunger roxane. Turn your PC into a WiFi Hotspot and Share Internet with your Devices
0 notes
Text
Minitool Partition Wizard Pro Ultimate Full Version

Minitool Partition Wizard Pro Ultimate Full Version Download
Minitool Partition Wizard 12 Full
Minitool Partition Wizard Pro Ultimate Full Version Full
Minitool Partition Wizard Pro Ultimate
โหลด MiniTool Partition Wizard Pro 2021 ตัวเต็ม ถาวร เวอร์ชั่นล่าสุด 127 MB |
MiniTool Partition Wizard ISO Full Portable. Apart from this, if any data has been delete, we can also bring it back. New MiniTool Partition Wizard Pro Torrent finally help you when you need its license for full version. MiniTool Partition Wizard Pro 12.3 Full Version Rar (28.6 MB) Mirror. MiniTool Partition Wizard Pro 12.1 X86 WinPE ISO (156.0 MB) Mirror. MiniTool Partition Wizard Pro 12.3 X64 WinPE ISO (484.2 MB) Mirror. Samsung notes to evernote.
MiniTool Partition Wizard Crack Pro 12 + Serial Key 2020 Free Download. MiniTool Partition Wizard Crack is the best free disk partitioning software preferred by more than tens of millions of users. MiniTool Partition Wizard 12 Overview. MiniTool Partition Wizard is one of the best partition managers. Not only does it covers all the functions of the Free, but also embeds some advanced partitioning technologies like merge Partition, convert NTFS to FAT32, change cluster size, and convert dynamic disk to basic to helpfessional users. MiniTool Partition Wizard is a complete & advanced Windows Partition Management tool that helps you perform a number of Drive management function on Windows partitions such as copy, merge, extend, wipe, delete, format or slit. The ultimate software gives you full.


Minitool Partition Wizard Pro Ultimate Full Version Download

MiniTool Partition Wizard เป็นโปรแกรมที่เอาไว้จัดการพาร์ติชั่น หรือ จัดการแบ่งสันปันส่วนพื้นที่จัดเก็บข้อมูลของคุณได้ตามใจชอบ เพื่อใช้กับวัตถุประสงค์ต่างๆ ได้ตามความต้อ��การของคุณ และผู้ใช้งาน สามารถใช้งานได้กับทั้งระบบปฏิบัติการตั้งแต่วินโดวส์ XP Vista 7 รวมไปถึง วินโดวส์ 8 ซึ่งได้ทั้งแบบ 32 บิต และ 64 บิต โดยความสามารถหลักๆ ของโปรแกรม MiniTool Partition Wizard ตัวนี้คือ สามารถทำได้ทั้ง ปรับขนาดพาร์ติชั่น คัดลอกพาร์ติชั่น สร้างพาร์ติชั่น ลบพาร์ติชั่น และนอกจากนี้ยังสามารถทำการฟอแมต (Format) เพื่อล้างข้อมูลทั้งหมดที่มีอยู่บนฮาร์ดดิสก์ให้หายไปแบบไม่เหลือซาก
Features of MiniTool Partition Wizard
Minitool Partition Wizard 12 Full
• Create, Copy, Extend, Resize, Merge, Split partitions • Format, Wipe & delete Partitions • Copy HDD, Dynamic Disk, UEFI boot Disk • Move Boot/System volume for Dynamic Disk • Convert NTFS, GPT Disk, MBR Disk, Dynamic Disk, Basic Disk • Easily set partitions as logical, primary or active partition • Hide and Unhide Drive, set label or drive letter • Change Cluster size, partition serial number & ID • Rebuilt MBR, support RAID • Test Disk Surface & partition surface • Support 4096-byte-sector-based hard drive • Hot Extend Partition without reboot https://loadranch667.tumblr.com/post/654189531615166464/hunger-roxane.
Minitool Partition Wizard Pro Ultimate Full Version Full
Minitool Partition Wizard Pro Ultimate
Developers : MiniTool Solution Ltd License : Shareware ภาษา : Multilingual ระบบปฏิบัติการ : Windows 10/8.1/8/7/Vista/XP ประเภทของระบบ : x86 / x64 ขนาด : 127 MB นามสกุลไฟล์ : rar อัพเดท : 2/1/2021 เวอร์ชั่น : 12.3 อัพโหลดโดย : Admin-aXeload วิธีติดตั้ง : อยู่ในไฟล์ “วิธีติดตั้ง.txt”
0 notes
Text
Genie Scout For Mac

Genie Scout For Mac Download
Genie Scout For Mac Os
Genie Scout 20
Genie Scout 19
Genie Scout 20 For Mac
Feature-packed special edition of world’s best scouting tool for FM20
FM Genie Scout 12 is a popular scouting tool for Football Manager 2012 1.2 FMScout. Review Comments Questions & Answers Update program info. Genie Scout comes in two editions. Public edition has 2 banners, when the limited version doesn't have any ads. I will provide the download link for the free of adverts edition to.
Donate to Eugene Get GS20g Today
Build 1031 for 20.4.4NEW! updated September 26th
Use 1password as authenticator. Genie Scout public edition is always free to download and use. People who support the development with their donation, get rewarded with the special 'g' edition that is ads-free and has 7 extra features.
No Advertisements
The public edition of Genie Scout comes with 2 banner ads. A vertical 120x600 unit to the left side of main GS window. A horizontal 728x90 unit to the top of player profile window. These are removed on the “g” edition, making it ads-free.
Seven Extra Features
GS STATS
Brand new feature of Genie Scout 18g providing in-depth player development knowledge based on the history of thousands of games. Learn more about the most significant GS feature ever! GS STATS: See the Future
In-Game Scout
Click the (i) icon next to player's name within FM normally shows up a pop-up box with his attributes and some quick details. With IGS enabled, this pop-up box is enhanced with many added insights, including potential skills and rating. You no longer need to switch to the GS window to check on hidden attributes or potential ability.
Roles & Duties
Ratings on 99 Roles & Duties available with ability to search. You're able to find a player perfectly fitting to your tactics.
Probability of Development
A statistically based model that will show the probability of reaching theoretical maximum of players ability.
Progress Rate
Genie Scout For Mac Download
Shows the predicted speed of player's development, depending on his ambition, determination, professionalism etc.
Top Players Lists
Automatically generated lists for best players, most promising and top bargains in the world, by position.
Support for graphics
If you have custom facepacks and/or kitpacks added to your FM, it should show on player and team profiles on GS.

Eugene Tarabanovsky
I started to work on Genie Scout 14 years ago. I have spent more than 2900 hours to give you Genie Scout as you see it today. But times have changed. I am a family man and have 2 little kids, and it's harder to find time to continue updating Genie Scout. If you appreciate the effort I put in every year, if you enjoy the tool, I'd be really thankful for any support from your side.
Support Genie Scout
Genie Scout For Mac Os
You can support the development of this tool by donating to Eugene who will reward you with the special “g” edition of Genie Scout 20g. This is an one-time donation for the entire cycle of GS20g updates.
Genie Scout 20
Not compatible with Mac or Linux. I'd like to donate:
Your support is what keeps Genie Scout alive.
You may request an additional key file in case you own 2 computers without having to donate again. Simply send an email to Eugene with your request.
IMPORTANT: You need to provide your unique ID in order to complete your donation. You can find it from the public edition of Genie Scout 20. Fire up GS20, click on the circle GS icon at the top left corner to open the main menu, then go to Help & Support and finally Donate. Your ID will be there.
FMS Chat–
Genie Scout 19
Stam hey, just wanted to let you know that we have a fb style chat for our members. login or sign up to start chatting.
Genie Scout 20 For Mac
↑
0 notes
Text
Format Sandisk Flash Drive For Mac

In the top menu bar, go to View, and choose Show All Devices 3. Select the upper level of the drive you would like to format and click the Erase button 4. Choose Mac OS Extended (Journaled) from the Format pop-up menu and click the Apply button. In the sheet that appears click the Partition button and your flash drive will be formatted as a Mac OS X.
Flash Drive Issue I'm using an 8 gig SanDisk flash drive to transfer files from my pc over to my macbook pro slowly, but every time I delete stuff off of my flash drive it shows that the free space is low, even though there's nothing in my flash drive.
Not only can you make SanDisk USB flash drive bootable, but also you can make any brand of USB drive bootable as long as it is big enough to hold your setup files. It has a user-friendly interface and the Windows To Go Creator feature will make that complex process simply finished in several clicks.
So, if users anticipate using the flash drive with more than one operating system, they will definitely benefit from the FAT32 file system. For Apple Mac users, there are two ways to format a USB flash drive to FAT32, namely Disk Utility and Terminal command line. Below are the detailed steps of the FAT32 format with both methods.
By Adela D. Louie, Last updated: August 27, 2019
In today’s technology, if you buy a USB hard drive, you can just simply use it directly using your Mac. However, there are instances that not unless that your flash drive is build to use for your Mac, you will not be able to format it.
Why is this so? The answer to this is because most of the computers actually run on Windows and they actually use a different file format which is known to be the Fat32.
Those drives that are formatted in Fat32 can be used in your Mac for reading and writing but there might be an instance that you might experience some trouble once that you use your macOS native format.
So, in case that you have a flash drive that is formatted into Fat32 or any type of format rather than having a Mac OS Extended or AFPS, then we are going to show you in this article how you could possibly format your flash drive using your Mac.
Part 1: How To Format Flash Drive On Mac
Here are the steps that you need to follow. Do these steps and you will then be able to format your flash drive on your Mac.
Step 1: Go ahead and plug in your flash drive in the USB port on your Mac.
Step 2: After that, go ahead and launch the Finder and click on your flash drive detected by your Mac.
Step 3: See to it that there are no files saved on your flash drive that you no longer need. This is because formatting your flash drive will remove all the data that is stored in it. If there are some files that you want to remain, simply copy these files to your Mac.
Step 4: After getting all the files that you need from your flash drive, go ahead and click on “Applications” and then click “Utilities” and then choose “Disk Utility”.

Step 5: And then, go ahead and click on your flash drive from the sidebar.
Step 6: Once that you have chosen your flash drive, go ahead and click on the “Erase” button located at the toolbar at the top of the window.
Step 7: On the next window that will appear on your screen, go ahead and key in a name for the flash drive that you are formatting from the box next to the “Name” option.
Step 8: And then select a format that you want from the drop-down menu.
Step 9: No, if you have previously stored a data on your flash drive that is highly sensitive, just go ahead and click on the Security Tab.
Step 10: From the security tab, go ahead and choose the level of the security that you want. The more that you move to your right, then the more “passes” the deleted tool will be but it will securely delete your files. However, doing to so will take more of your time to format your flash drive.
Step 11: After that, go ahead and click on the “OK” button and then click on the “Erase” button.
Part 2: Choosing the Right Format
There are formats that you need to choose from depending on the Mac that you are using. If you are using the macOS Sierra or a later version, then you have to options to choose from. One is the AFPS and the other one is the Mac OS Extended. The question now here is that which one should you choose.
You have to keep in mind that once you have formatted your flash drive into AFPS, then those Macs that are running on macOS that is older than the High Sierra will not be able to recognize it.
So, if you would want to use your flash drive on Macs that are running on High Sierra, then you have to choose the Mac OS Extended format.
However, you also have to know that AFPS is actually optimized for SSD or “solid state drive” and it includes flash drives.
That is why if you are going to reformat a flash drive on your Mac, then you should definitely choose the AFPS format as it is known to be the most reliable and faster than the Mac OS Extended. But again, that is if you do not have any plans in using it on a pre-High Sierra course.
And lastly, if in case that you would want to use your flash drive as one of your backup options in Time Machine, then you should definitely have it formatted in Mac OS Extended.
This is because Time Machine does not have the ability yet to backup flash drives that are formatted in AFPS. So, if you are using an AFPS formatted flash drive on Time Machine, it will just ask you to format your flash drive into Mac OS Extended.
Part 3: How To Format Flash Drive To Fat32 On Your Mac
Once that you have a flash drive, then what you would need to do is to have it formatted into Fat32. Why? This is because once that you have formatted your flash drive into Fat32, then you will be able to use it on both Windows and Mac PC when you want to save or transfer files with either of the two.
The Fat32 format can be used – read or write – with both Mac and Windows PC and because of this, it makes the device more versatile.
However, there are some limitations that you should need to know such as an individual file should only have a maximum size of 4GB. But do not worry because there is still something you can do about it and that is by formatting it to exFAT.
The exFAT format will not give any limitations on the file size that you are going to store on your flash drive and you can still use it on both Windows and Macs that are running in Mac OS X Snow Leopard or later version. For you to be able to format your flash drive into Fat32, here is what you need to do.
Step 1: Go ahead and connect your flash drive to your Mac.
Step 2: And then, go to Application and then click on Utilities.
Step 3: After that, go ahead and launch Disk Utility.
Step 4: And then, go ahead and click on your flash drive located at the sidebar in Disk Utility.
Step 5: After that, click on 'Erase' in the Disk Utility window.
Step 6: After that, go ahead and enter the name for the flash drive that you formatted.
Step 7: And then, choose the Format menu and then select MS-DOS (FAT32) or the ExFAT.
Step 8: After that, go ahead and click on the 'Erase' button.
Once that you are done with the provided steps for you, your flash drive will then completely wipe out all the data stored and it is re-formatted into either an ExFAT or FAT32 depending on what you have chosen on the previous steps.
Part 4: Getting Your Mac System Run Fast
Now that you have known with how you can format your flash drive on your Mac, now it is time for you to get your Mac cleaned up.
Getting your Mac clean on a regular basis after doing tasks can help your Mac maintain its speed and will also give you more space for your storage.
There is one great option for you to clean up your Mac in no time and this is by using the software called the FoneDog Mac Cleaner.
People Also ReadHow to Fix my Mac Running Slow?The Best iphone Data recovery Free Download on Mac
The FoneDog Mac Cleaner will help you to speed up your Mac with just a few simple clicks. This software can also help you in scanning your Mac faster and find all of your junk files on your Mac.
It also has the capability of checking your Mac's system status which includes your CPU status, your memory usage and more. This way, you will have an idea of what is the data that is actually eating up a lot of storage space on your Mac and which is causing it to perform slower than the usual.
The FoneDog Mac Cleaner will not only help you in removing all of the junk files that you have on your Mac. It can also help you to completely uninstall applications that you no longer use together with all the files that are associated with that app. It can also serve as a Similar Image Finder, an Extension Manager, a Duplicate Finder, and more.
For you to start cleaning up your Mac, all you have to do is to follow all the steps that we are going to provide to you. Do not worry, this is really simple and easy to follow and it will not consume a lot of your time. In addition, the screenshots below are shown under the dark mode on Mac.
Step 1: Download and Install
Have the FoneDog Mac Cleaner downloaded from our official website at https://www.fonedog.com/mac-cleaner/. Once that you have completely downloaded the program, go ahead and have the program installed on your Mac.
Step 2: Launch the Program
After that installation process is complete, go ahead and run the program on your Mac. Once that the program is up and running, you will be able to see on your screen the system status of your Mac. With that information, you will have an idea which files are taking up a lot of space on your Mac.
Step 3: Select Cleaner
Cleaner provides you with the cleaning function for the system, photo, email, files, apps and other fields on your Mac.
Step 4: Choose iTunes Junk
Here, take iTunes Junk as an example to show you how to clean junks on your Mac to make your Mac run faster. Note: As for the other tools like 'System Junk' and 'Email Junk', the steps to clean up them is the same as that in 'iTunes Junk' tool.
Step 5. Scan iTunes Files
After clicking into the page of iTunes Junk, press the Scan button to start scan all the iTunes backups, Cache, updates and downloads on your Mac.
Step 6: Review and Select Items
After that scanning process is completely done, you will be able to see on the left side of your window screen a list of category folders of all the junk files of iTunes that you have on your Mac. If you click each folder, you will see on the right side of your screen all the items that each folder contains.
Review each item on each folder for you to make sure that all the junk files shown on your screen are unnecessary any more.
Once that you are satisfied with the result, you can go ahead and simply click on the 'Clean' button to clean up all your junk files.
Step 7: Confirm Your Choice
There would be a pop-up window called Confirmation turning up. Please press the 'Confirm' button if you are sure to delete the selected files; otherwise, please press the Cancel button and return to the previous page.
Step 8: Cleaning Done
Once that the cleaning process is done, all those unnecessary files that you have there will all be deleted from your Mac.
Part 5: Conclusion
Now, as you can see, formatting your flash drive on your Mac is a very easy thing to do. All you need to have is the knowledge on how you can do.
And keep in mind that if you are going to format your flash drive, make sure that you choose the right format so that you can use it in any PC.
Formatting is easy, just like in cleaning up your Mac. Getting your Mac tidy is one of the best things that you should do for you to be able to maintain the speed of your Mac and of course for you to get more space on your storage. And the best way for you to clean up your Mac is by using the FoneDog Mac Cleaner.
>Clean up Mac >How to Format A Flash Drive on Mac?
Comment ()
Dec 16, 2020 • Filed to: Solve Mac Problems • Proven solutions
For many years, users of Macs have been looking for the best tutorial to make sure that the use of USB drives on a Mac is not only explored, but it is also done well, and that the best. To help users make the best use of the system tools, this article has met the demands and needs of Mac users and increase general awareness.
Numerous advanced tips can be used to make sure that the user gets the best results when it comes to USB usage on a Mac. This tutorial will discuss the top 7 tips for using a flash drive. It will also provide a basic level of training to make the overall use of flash drive easier for Mac users.
1 Connecting Flash Drive to MAC
This is the first step that a user will take. Connecting USB to Mac is a simple process. Connecting to the Mac leads to the recognition of the device which can then be used for file transfer and sharing. USB ports are on all Macs and the user should connect the USB flash drive as seen in the picture below:
2 Formatting Flash Drive on Mac

This process is as follows:
Format Usb Flash Drive Windows
a. Press CMD + Spacebar keys, then type application to access the application folder. Select Disk Utility.
b. Select the USB drive that is to be formatted from the left panel. Press the Erase button.
c. Press the Erase button again to confirm the process has been finished.
Related: Further, read and know more complete details on formatting flash drive on Mac.
3 Scanning for Virus on USB Flash Drive on Mac
This is also one of the functions that should be carried out to ensure that the system is never affected and the USB drive's data is also protected properly. The USB device should be right-clicked once the ClamXav has been installed, which is the best antivirus software program. Please select the scan option to complete the process.
4 Opening Flash Drive on Mac
This is also one of the simplest processes that can be carried out. It should be noted that a user should first scan the drive for viruses so that the malware and viruses never affect the system. The finder that is built on Mac can open USB drives. The left panel shows all the connected drives and once the desired one has been clicked, the contents are shown in the right panel.
5 Transferring File from MAC to Flash Drive
Users can use flash drive on Mac in a simple way. Please scan the files that are being transferred to avoid virus attacks. The flash drive appears on the desktop of the Mac as soon as connected and the files can be dragged to finish the process.
6 Making Backup of Your Flash Drive on Mac
Users can right-click the flash drive and select the duplicate option to backup data on Mac easily.
7 Recovering Files from Flash Drive on Mac
By using the Recoverit for Mac, the process is also very easy as below:
Format Flash Drive Mac Fat32
Recoverit for Mac can help you perform 'All-Around Recovery' once you launch Recoverit. Follow the next simple steps to perform flash drive data recovery on Mac.
Step 1: Select your flash drive on the section 'External removable device' to start scanning your data.
Step 2: A scanning process will run immediately. You can preview the files to make sure the files that you need are found.
Step 3. Select the required files and click the Recover button to finish the process.
What's Wrong with Mac
Recover Your Mac
Fix Your Mac
Delete Your Mac
Learn Mac Hacks
0 notes
Text
Samsung Notes To Evernote

Transfer Samsung Notes To Evernote
Evernote just announced that it is raising the prices of its premium tier plans, but the change that could annoy the most number of users is on the free Base plan which will now be limited to use on just two devices. In a world where one phone and one computer is the bare minimum, this could be a limit you can't live with, so we wanted to take a look at the best notes apps if you need to ditch.
To answer your question, I had 22 S Notes on my Note 5. On all my previous Note phones I never synced with Evernote or Samsung. With the Note 5, I went into S-Notes and I selected them all and hit share. It will give you 3 options to convert to another type of file. I shared as S-Notes and just emailed them all to myself.
Download Evernote onto your computer, create an Evernote account, and log in to Evernote. Note: You cannot import content into Evernote using a mobile device. Open and expand your.zip files into folders on your computer. Usually you can simply double-click on a.zip file to create a folder full of your notes.
Click on a note or hold down the command key and click to select multiple notes. Right-click on selected note(s) and select Export Note(s). Make sure Evernote XML format (.enex) is selected.
Search 'Samsung Notes' using the search bar in the upper left corner of the application's window. Click Samsung Notes and Install. Sign into the same Samsung account on your computer that you use for your phone or tablet.
Part 1. Regular Way to Export Samsung Notes through Share
Part 2. Professional Way to Export Samsung Data to Computer
Backup & Restore Android
Backup and restore Android data to your computer easily.
Transfer Phone Data Now
Move your data between phone and computer.

Music
Contacts
SMS
Photo
Call Log
Video
File
WhatsApp
Calendar
To PC
To New Phone
Samsung Notes provides a convenient way to make notes with texts, images, voice recordings, and music. It may have stored many valuable information and data. The truth is, Samsung has been offering a Notes app right from its first Android phone. There are various brush types and color mixers offered in Samsung Notes app. You are allowed to draw your own paintings.
Samsung Notes is one kind of hub for all your hand-written notes, sketches and drawings. But do you know how to export Samsung notes?
In fact, it’s quite simple to share Samsung notes, no matter where you want to export these Samsung notes to, a portable device or a computer. This post will show you 2 detailed solutions to help you transfer notes on your Samsung phone.
1. Regular Way to Export Samsung Notes through Share
Step 1Open the Notes app on your Samsung phone.
Step 2To select one or more notes you want to export, you can long tap on one note. Then you can continue to choose all Samsung notes you intend to export.
Step 3After selecting all the notes, you can tap the Share icon on the top-right. During this step, you can choose to export Samsung notes as PDF. You can also share notes as an SDOC if you are going to export Samsung notes to another Samsung Galaxy device.
Step 4 Now you can decide where you want to export these notes to. There are many basic options offered. You can export Samsung notes to Cloud Drive. Or you can share these notes through email or some third-party apps based on your needs. After that, you can follow the prompts on the screen to export your Samsung notes with ease.

2. Professional Way to Export Samsung Data to Computer
With the method above, you can handily share all your notes on Samsung device. What if you want to export Samsung data to computer for backup? This part will show you an effective method to transfer Samsung data to Windows PC or Mac. Here we strongly recommend a great Samsung files transfer to help you get the job done.
Android Data Backup & Restore can work as an easy-to-use Samsung data transfer and backup tool. It has the capability to export all types of data on your Samsung phone to computer for backup. Moreover, it enables you to restore these files to Samsung device in case the data loss. It allows you to back up Android data like photos, contacts, messages, call logs, and more. Now you can take the following guide to export Samsung data.
Android Data Backup & Restore
With FoneLab for Android, you are enabled to backup and restore Android data to your computer easily.
Backup and restore Android data to your computer easily.
Preview data in detail before you restore data from backups.
Backup and restore Android phone and SD card data Selectively.

Step 1First, you need to install this powerful Samsung notes transfer software on your computer by just clicking the download button above. It offers two versions to ensure you can easily transfer notes from your Samsung Galaxy phone either on Windows PC or Mac.
After downloading, run it and connect your Samsung to computer with a USB cable. It will automatically detect this Android device. For the first connection, you need to tap “Trust this computer” on the screen.
Step 2As you enter the main interface, you can see 4 options right on the left panel, which are Android Data Recovery, Broken Android Data Extraction, Android Data Backup & Restore, and More Tools. Here you need to choose and click the Android Data Backup & Restore option.
Step 3On the right window, you can use the key functions, Device Data Backup and Device Data Restore. Here you need to choose the “Device Data Backup” feature.
Step 4Under the “Device Data Backup” feature, you can see the One-Click Backup button, click on it to start backup all notes on your Samsung device. As mentioned above, it also can help you backup other data like contacts, messages, pictures and more.
After backing up, you will see a backup file listed in the interface. If you need to check these Samsung notes or restore Samsung data, you can back to this software to do that with ease.
After reading this article, you can get simple way to export Samsung notes and backup Android data. Whether you want to transfer Samsung data to another Samsung device, or copy these Samsung notes to computer for a backup, you can get a suitable tool here. Leave us a message if you still have any questions.
Android Recovery Software to Recover Deleted Photos from Android Internal Memory
Broken Android SMS recovery - Recover SMS from Samsung Galaxy S5 with Black Screen
How to Enable Android USB Debugging Mode
During the announcement event for the Galaxy Note 20 one of the features I was most interested in was the ability to synchronize Samsung Notes with OneNote. Samsung Notes has the screen off memo function that OneNote can’t match. The problem is, when I’ve used it to jot down something quick that information ends up isolated from the rest of my repository.
For the longest time Samsung’s solution was to install their Note app on your PC. The PC version of Samsung Notes is a decent experience but lacks the integrations with other Office software that OneNote enjoys. There’s also no easy method to migrate from OneNote to Samsung Notes, both reasons kept me from using the software.
Now, the newest version of Samsung Notes on your Galaxy will synchronize to your Microsoft 365 account. The synched data can only be viewed in the Outlook web client at the moment. However, if you have selected to be an Office Insider you can see that Microsoft is building the framework for the OneNote feed to show Samsung Notes, it already appears as a non-functioning option.
UPDATE: The synchronized notes are viewable in OneNote now. See my newest post on this subject for more information. https://techbloggingfool.com/2020/12/29/samsung-notes-synch-with-onenote-feature-is-here-now-more-functional/
The first thing you’ll need to do is to upgrade both apps. Open the Galaxy Store app on your mobile and tap the hamburger menu, then tap updates and install the newest version of, well, everything. The same goes for your PC, open the Windows Store and click the … menu in the upper right. Choose Downloads and Updates then click the Get Updates button and install everything.
Now configure the Samsung Notes app on your mobile device. Open it and hit the options icon again. You should now see “Sync to Microsoft OneNote Beta”, toggle it on and sign in with the Microsoft Account you want to share notes with. You’ll also need to select the folders who’s notes you to sync. I recommend tapping the sync now button just for good measure.
To see the synchronized notes, sign-in to Outlook.com with the same account that you configured in Samsung Notes. In the upper right, click the OneNote feed icon. The OneNote Feed pane will slide open from the right. Click a note to see more of it and to get an option to copy it to the clipboard. Right now I find that copying a Samsung Note in this manner and pasting it to a blank OneNote page is the optimal way to use the tool.
Transfer Samsung Notes To Evernote
We know that Microsoft and Samsung have plans to enhance this feature in the near future. The Note Feed is present in the insider edition of the Windows 10 OneNote app and Samsung Notes is an option in it although it doesn’t work yet. Hopefully they’ll get to a point where the Samsung Notes become pages in OneNote but we’ll have to wait and see.
0 notes
Text
Hunger Roxane

Hunger Roxane Gay Quotes
Hunger Roxane Gay Summary
Gay, Roxane This Study Guide consists of approximately 34 pages of chapter summaries, quotes, character analysis, themes, and more - everything you need to sharpen your knowledge of Hunger.
1

Hunger Roxane Gay Quotes
Hunger: A Memoir of (My) Body Hardcover – June 13 2017. Roxane Gay (Author) › Visit Amazon's Roxane Gay page. Find all the books, read about the author and more. Search results for this author. Roxane Gay (Author) 4.5 out of 5 stars. Free download or read online Hunger: A Memoir of (My) Body pdf (ePUB) book. The first edition of the novel was published in June 13th 2017, and was written by Roxane Gay. The book was published in multiple languages including English, consists of 306 pages and is available in Hardcover format. The main characters of this non fiction, autobiography story are,. The book has been awarded with. 'The first and worst was not understanding the difference between Roxane writing in her book, Hunger, about her experiences and difficulties of trying to navigate the world and me talking about.
Every body has a story and a history. Here I offer mine with a memoir of my body and my hunger.
2
The story of my body is not a story of triumph. This is not a weight-loss memoir. There will be no picture of a thin version of me, my slender body emblazoned across this book's cover, with me standing in one leg of my former, fatter self's jeans. This is not a book that will offer motivation. I don't have any powerful insight into what it takes to overcome an unruly body and unruly appetites. Mine is not a success story. Mine is, simply, a true story. I wish, so very much, that I could write a book about triumphant weight loss and how I learned how to live more effectively with my demons. I wish I could write a book about being at peace and loving myself wholly, at any size. Instead, I have written this book, which has been the most difficult writing experience of my life, one far more challenging than I could have ever imagined. When I set out to write Hunger, I was certain the words would come easily, the way they usually do. And what could be easier to write about than the body I have lived in for more than forty years? But I soon realized I was not only writing a memoir of my body; I was forcing myself to look at what my body has endured, the weight I gained, and how hard it has been to both live with and lose that weight. I've been forced to look at my guiltiest secrets. I've cut myself wide open. I am exposed. That is not comfortable. That is not easy. I wish I had the kind of strength and willpower to tell you a triumphant story. I am in search of that kind of strength and willpower. I am determined to be more than my body—what my body has endured, what my body has become. Determination, though, has not gotten me very far. Writing this book is a confession. These are the ugliest, weakest, barest parts of me. This is my truth. This is a memoir of (my) body because, more often than not, stories of bodies like mine are ignored or dismissed or derided. People see bodies like mine and make their assumptions. They think they know the why of my body. They do not. This is not a story of triumph, but this is a story that demands to be told and deserves to be heard. This is a book about my body, about my hunger, and ultimately, this is a book about disappearing and being lost and wanting so very much, wanting to be seen and understood. This is a book about learning, however slowly, to allow myself to be seen and understood.
3
To tell you the story of my body, do I tell you how much I weighed at my heaviest? Do I tell you that number, the shameful truth of it always strangling me? Do I tell you I know I should not consider the truth of my body shameful? Or do I just tell you the truth while holding my breath and awaiting your judgment? At my heaviest, I weighed 577 pounds at six feet, three inches tall. That is a staggering number, one I can hardly believe, but at one point, that was the truth of my body. I learned of the number at a Cleveland Clinic in Weston, Florida. I don't know how I let things get so out of control, but I do. My father went with me to Cleveland Clinic. I was in my late twenties. It was July. Outside, it was hot and muggy and lushly green. In the clinic, the air was frigid and antiseptic. Everything was slick, expensive wood, marble. I thought, This is how I am spending my summer vacation. There were seven other people in the meeting room—an orientation session for gastric bypass surgery—two fat guys, a slightly overweight woman and her thin husband, two people in lab coats, and another large woman. As I surveyed my surroundings, I did that thing fat people tend to do around other fat people—I measured myself in relation to their size. I was bigger than five, smaller than two. At least, that is what I told myself. For $270, I spent a good portion of my day listening to the benefits of having my anatomy drastically altered to lose weight. It was, the doctors said, 'the only effective therapy for obesity.' They were doctors. They were supposed to know what was best for me. I wanted to believe them.
Excerpted from Hunger by Roxane Gay. Copyright © 2017 by Roxane Gay. Excerpted by permission of Harper. All rights reserved. No part of this excerpt may be reproduced or reprinted without permission in writing from the publisher.
Watch any episode of My 600lb Life and you will see that there is a direct, and oft-repeated, correlation between childhood sexual abuse and obesity. This is something that the book's author, Roxanne Gay, also experienced and speaks to very early on in her narrative. Gay gained most of her weight shortly after her abuse; at the time she realized that she was comforting and emotionally medicating herself with food, and she later came to realize that she was subconsciously insulating herself from the outside world as well, and protecting herself from unwanted attention. Eventually, she became obese, and then morbidly obese, finally receiving a diagnosis of super-morbidly obese as she strove to become physically repulsive to men and to keep them away from her all together.
Having a dysfunctional relationship with food also leads to a dysfunction in every other relationship as well, and if not dysfunctional, each relationship is governed by the way in which others view excessive weight. Her relationship with her parents, for example, becomes difficult, and she finds that it is increasingly difficult for her to deal with their perception of her. until this becomes another emotional issue that she uses food to hide from.
Gay's feelings about other people who judge her weight are not positive; sometimes people just stare, and don't say anything, but sometimes they are more vocal, and comment about her size. People are sometimes angry with her for letting herself get to be this size. Walking down a street can result in negative words from complete strangers, which she resents because she does not feel it is for others to have an opinion about her obesity.
As well as talking about the reaction of others to her size, Gay also tells the reader of her own reaction to how big she has allowed herself to become. Sometimes, when reacting to the criticism of others, she is defiant and convinced that she wants to be left alone to be fat but on other occasions, she has moments of introspection, and feels self-loathing and looks at her body with the same hyper-critical eye that she looks at other people.
Hunger Roxane Gay Summary
The book ends with a number of questions and observations that can be quite controversial; Gay lambasts the clothing industry for their failure to make clothes big enough for the super-morbidly obese woman. She is equally scathing about transportation companies, city planners and other agencies that she deals with who similarly do not make accommodations for the super-sized. This is, in her opinion, damaging to self-esteem and makes it seem unacceptable for a person as large as she was to be out and about in society.
0 notes
Text
Use 1password As Authenticator

1password Setup Code
Use 1password As Authenticator App
Use 1password As Authenticator App
Though Autofill isn’t as elegant or as security-minded as, say, 1Password, it’s free to use. You can view, delete, and edit stored passwords. If you’re making the switch from another password. Use 1Password as an authenticator for sites with two-factor authentication I am new to 1password and considering using 1P as a 2fa. İs this only available on desktop or is jt available on all platforms.

There’s a lot of chatter in the information security community how SMS 2FA is awful, and with all the recent high-profile cases of sim swapping attacks due to useless Telco’s or susceptible employees, you would have good reason to think that. For further reading, see Brian Krebs fairly recentarticle on an example of why SMS based 2FA is bad and what we should be using in place of it.
How to use 1Password as an authenticator for Laravel Forge with two-factor authentication 1Password is an excellent piece of software I highly recommend it if you are serious. One feature that may not be obvious is that 1Password can handle 2FA authentication too. In this article. The Microsoft Authenticator app can be used to sign in to any Azure AD account without using a password. Microsoft Authenticator uses key-based authentication to enable a user credential that is tied to a device, where the device uses a PIN or biometric. Disclaimer: I work for 1Password, a password manager that is also an authenticator app for storing one-time passwords. Set up 2-Step Verification for your Google account 1. Go to the 2-Step Verification page. You might have to sign in to your Go.
A common safer alternative to SMS based 2FA is TOTP or Time-based One-time Password. TOTP is similar to SMS 2FA by virtue that you still need a code to authenticate your identity into whatever application it is you are signing into. This code is computed based on the current time and a shared secret seed. It will be refreshed after a time period, usually about 30 seconds. You can read more about the technology behind it here.
Typically, users will have to install an application like Google Authenticator to see their TOTP code for their intended applications. Setting up 2FA is quite easy, users usually (and this is the typical use case) scan the QR code the application provides which will register it to your authenticator app.
1password Setup Code
Google authenticator in action.
So where does 1Password come in? If you have 1Password, there is no a need for an extra application like Google Authenticator. 1Password has this TOTP feature baked right in to the Android and IOS applications and Chrome extension. For the Chrome extension, go to your desired website and begin setting up 2FA. When you see the QR code on your screen, open the 1Password extension and you will see this:

Scan the QR Code.
Click the circled QR code button and 1Password will scan the QR code on the web page and viola, it’s registered. You should see a new section below your other details with the TOTP code. On some sites, the 2FA code will even autofill for you.
For the Android and IOS apps, go to your login details, click add new section then add new field and click one time password. You’ll see a QR code option, click that and the camera will open to allow you to scan the QR code on your screen.
From the 1Password blog, an example of a one-time password.
Use 1password As Authenticator App
The main reason I prefer this is that it’s device agnostic. That is to say, it will work over many devices and systems (e.g. IOS, Android, Chrome, Safari, Windows etc.). I’ve always worried about losing my mobile phone and the authenticator app along with it. If that situation occurs and you do not have your backup recovery codes for your applications, you’re in a world of trouble. Or imagine another situation at an internet café or library and you, for some reason, don’t have your mobile on you and need to login to an account.
Use 1password As Authenticator App

These days, I use 1Password for 2FA for the sites and applications that support it, and store my backup codes in the notes section for that login. Everything is in one place, accessible from any device I have an internet connection to. Convenience at no extra cost.
0 notes
Text
Affinity Designer Ico

Affinity Photo Icon
Affinity Designer Ico File
Affinity Designer Uses
Affinity Designer Logo Design
Affinity Designer Icon Template
. Affinity Designer supports iPad Pro, iPad Air 2, 3 & 4, iPad Mini 5 and iPad (early 2017 onwards). Please note that older iPads are not supported. Built with input from some of the world’s leading designers and based on Apple Design award-winning technology, Affinity Designer for iPad takes a.

A message from the Affinity team
As a way to lend support to the creative community during these difficult times, we’re once again offering a 90-day free trial of the Mac and Windows versions of the whole Affinity suite, for anyone who wants to use them (even those who have previously completed a free trial). We’re also bringing back the 50% discount for those who would prefer to buy and keep the apps, including our iPad versions.
Affinity designer Icons - Download 13 Free Affinity designer icons @ IconArchive. Search more than 600,000 icons for Web & Desktop here. ICO is a file of this format usually contains a small image icons of different resolutions (16x16, 32x32, 64x64 pixels) and various color depths (16 colors, 32, 64, 128, 256, 16-bit, and so on). Used to display files and folders in the graphical user interface (GUI) operating systems. This format can be opened with the help of the program ACDSee. Affinity Designer is the fastest, smoothest, most precise vector graphic design software around. Built from the ground up over a five-year period, every feature, tool, panel and function has been developed with the needs of creative professionals at its core. With continuous innovation and development, the result is a ground-breaking. Affinity Designer Best in class for creating concept art, print projects, logos, icons, UI designs, mock-ups and more, our powerful design app is already the choice of thousands of professional illustrators, web designers and game developers who love its silky-smooth combination of vector and raster design tools. Was $49.99 Now only $24.99.
More info

about supporting the creative community initiative
Find out more about Affinity apps on Big Sur
In other news…
our apps are fully optimized for the next generation of Mac
Ready to go on Apple’s Big Sur and primed to deliver superfast performance on Macs with M1 chips, recent updates to the macOS versions of our apps mean huge performance gains.
Learn more

about Apple and Affinity updates
Affinity DesignerDeveloper(s)Serif EuropeInitial release1 October 2014; 6 years agoStable release
1.9.3 / 13 April 2021; 8 days ago[1]
Operating systemmacOS, Microsoft Windows, iPadOSAvailable in9 languages
English, German, Spanish, French, Italian, Portuguese, Japanese, Chinese, Russian
TypeVector graphics editorLicenseProprietaryWebsiteaffinity.serif.com/designer/

Affinity Designer is a vector graphics editor developed by Serif for macOS, iPadOS, and Microsoft Windows. It is part of the 'Affinity trinity' alongside Affinity Photo and Affinity Publisher. Affinity Designer is available for purchase directly from the company website and in the Mac App Store, iOS App Store, and the Microsoft Store.
Functionality[edit]
Affinity Designer serves as a successor to Serif's own DrawPlus software, which the company discontinued in August 2017 in order to focus on the Affinity product range.[2] It has been described as an Adobe Illustrator alternative,[3][4][5] and is compatible with common graphics file formats, including Adobe Illustrator (AI), Scalable Vector Graphics (SVG), Adobe Photoshop (PSD), Portable Document Format (PDF), and Encapsulated PostScript (EPS) formats.[6] The application can also import data from some Adobe FreeHand files (specifically versions 10 & MX).[7]
Affinity Designer's core functions include vector pen and shape-drawing tools, support for custom vector and raster brushes (including the ability to import Adobe Photoshop (ABR) brushes), dynamic symbols, stroke stabilization, text style management, and vector/pixel export options.[5][8][9]
Affinity Designer provides non-destructive editing features across unlimited layers, with pan and zoom at 60fps, and real-time views for effects and transformations.[10] It supports the RGB, RGB Hex, LAB, CMYK and Grayscale color models, along with PANTONE color swatches and an end-to-end CMYK workflow with ICC color management, and 16-bit per channel editing.[11][9]
Development[edit]
Affinity Designer began as a vector graphics editor solely for macOS. It was developed entirely from scratch for this operating system, allowing it to leverage core native technologies such as OpenGL, Grand Central Dispatch, and Core Graphics.[12]
The first version was released in October 2014, making it the first of the Affinity apps to be released by Serif (and their first macOS release).[13] At that time, Serif's vector graphics application for Windows was DrawPlus; however, following the release of Affinity Designer for Windows, this product has now been discontinued.[14]
Version 1.2, released in April 2015, introduced new tools and features, such as a corner tool and a pixel-alignment mode for GUI design tasks.[15] In December 2015, version 1.4 then introduced new features for managing artboards and printing.[16] With version 1.5 in October 2016, the application received multiple new features, including symbols, constraints, asset management and text styles.[17]
The application began branching out to other platforms in November 2016, when it first launched for Microsoft Windows.[18]
Affinity Photo Icon
Version 1.6 was released in November 2017, introducing performance improvements and alternative GUI display mode.[19]
The first release of a separate iPad version of Affinity Designer took place in July 2018.[20]
Version 1.7 was released in June 2019 adding some key features such as HDR support, unlimited strokes and fills to a single shape, new point transform tool, new transform mode in Node tool, Lasso selection of nodes, new sculpt mode added to pencil, and also some big performance improvements.[21] Version 1.8, released in February 2020, added the ability for users to define their own document templates and keyboard shortcuts, and a built-in panel for adding stock images.[22]
Reception[edit]
Affinity Designer was selected as a runner-up in Apple's 'Best of 2014' list of Mac App Store and iTunes Store content in the macOS app category.[23][24][25] It also was one of the winners of the 2015 Apple Design Award.[26]
In 2018, the Windows version of Affinity Designer won 'Application Creator of the Year' at the Windows Developer Awards (part of Microsoft Build 2018).[27]
See also[edit]
Affinity Designer Ico File
References[edit]
Affinity Designer Uses
^'Affinity Designer for Windows - 1.9.0'. Affinity Forum. Retrieved 2021-02-04.CS1 maint: discouraged parameter (link)
^Ogunjobi, Anino (2017-08-10). 'Digital Craft: Serif discontinues its Pageplus, Drawplus and Photoplus designing software to focus on its(Serif) new Affinity range of Professional graphic design software'. ANINO. Retrieved 2019-08-17.
^'Why I Use Affinity Designer Instead of Illustrator for Motion Design'. School of Motion. Retrieved 2018-08-06.
^'Affinity Designer vs Adobe Illustrator CC 2018 Comparison | FinancesOnline'. Financesonline.com. Retrieved 2018-08-06.
^ ab'Affinity Designer vs. Adobe Illustrator: can Designer replace Illustrator? - 99designs'. 99designs. 2016-08-17. Retrieved 2018-08-06.
^Martin, Keith (November 27, 2014). 'Serif Affinity Designer'. Expert Reviews. Retrieved December 25, 2015.
^'Import and export file formats - Affinity Designer Help'. affinity.help. Retrieved 2018-08-06.
^'Affinity - One Year Review'. Cargo Creative. Retrieved 2018-09-05.
^ ab'Affinity Designer - Complete Feature List'. affinity.serif.com. Retrieved 2018-09-05.
^'Illustrator rival launches on Windows'. Creative Bloq. Retrieved 2018-09-05.
^'Graphic Design App 'Affinity Designer' Launches for iPad With Apple Pencil Support'. Retrieved 2018-09-05.
^'Serif releases free alternative to Adobe Illustrator'. Creative Bloq. Retrieved 2018-08-06.
^'Affinity Designer is a new graphics design suite available for Mac'. iMore. 2014-10-02. Retrieved 2018-08-06.
^'Digital Craft: Serif discontinues its Pageplus, Drawplus and Photoplus designing software to focus on its(Serif) new Affinity range of Professional graphic design software - ANINO'. ANINO. 2017-08-10. Retrieved 2018-09-04.
^'Affinity Designer gets first big update'. Creative Bloq. Retrieved 2018-08-06.
^'Top new features in Affinity Designer 1.4'. Creative Bloq. Retrieved 2018-08-06.
^'Affinity Designer 1.5 released | Webdesigner Depot'. Webdesigner Depot. 2016-10-12. Retrieved 2018-08-06.
^'Affinity Spotlight - Photography, Design & Illustration'. Affinity Spotlight.
^'Affinity Photo 1.6 released: faster processing, new features, and free stuff'. DPReview. Retrieved 2018-08-06.
^'9to5'. Twitter. Retrieved 2018-07-11.
^'Affinity Designer and Photo for Mac updated to version 1.7 with multi-GPU and HDR display support'. 9 to 5 Mac.
^Benjamin, Jeff (2020-02-26). 'Affinity Photo, Publisher, and Designer updated to version 1.8'. 9to5Mac. Retrieved 2020-03-07.
^Spencer, Graham (December 8, 2014). 'Apple Posts 'Best of 2014' App Store and iTunes Store Lists'. MacStories. Retrieved December 25, 2015.
^May, Tom (December 10, 2014). 'Affinity Designer is number 2 Mac app of 2014'. Creative Bloq. Retrieved December 25, 2015.
^Calimlim, Aldrin (December 8, 2014). 'Apple announces the App Store's Best of 2014 for iPhone, iPad and Mac'. AppAdvice. Retrieved December 25, 2015.
^Panzarino, Matthew (June 8, 2015). 'Fantastical 2, Workflow, Robinhood Among Winners At Apple Design Awards'. TechCrunch. Retrieved March 23, 2016.
^'Windows Developer Awards - Build 2018 - Windows app development'. developer.microsoft.com (in Spanish). Retrieved 2018-08-14.
Further reading[edit]
Affinity Designer Logo Design
Affinity Designer Workbook. Nottingham: Serif Europe Ltd. 2016. ISBN9781909581036.
External links[edit]
Affinity Designer Icon Template
Retrieved from 'https://en.wikipedia.org/w/index.php?title=Affinity_Designer&oldid=1017580272'
0 notes
Text
Adobe Audition For Live Streaming

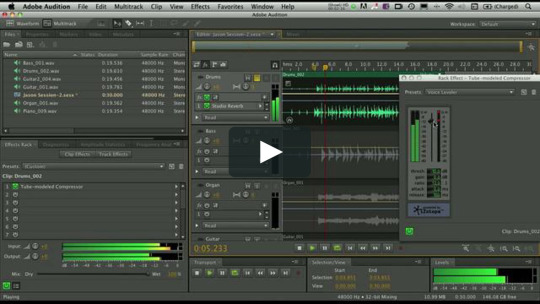
Hello and welcome to a quick(ish) 5 step tutorial on how to clean up your staticky microphone for a better sounding stream. For this tutorial you will need a copy of both Adobe Audition and Virtual Audio Cable (VAC) installed onto your computer with default settings. I hope you find this tutorial useful, or at least insightful for your own methods! Step 1) Setting up Adobe Audition. first create a new multitrack session in AA using the default settings Step 2) Setting up your mic. On the first track of your multitrack, click the drop down that says 'default stereo input' and select 'audio hardware' Next, change your default output to Line 1 (this audio device was created when you installed VAC) and change the latency to 50 (this number may vary for you, play around with it to find a setting that wont cause any audio stuttering) Step 3) Setting up the audio pass-through. back on the main window, on the first track, click the 'R' button in the upper right, followed by the 'I' button. this will let our audio pass to our Line 1 in realtime (there is in actuality some latency, but non to really be mention worthy) Step 4) Setting up the noise reduction. on the left, you will find an 'effects rack' tab, that should already be selected. on the first row click the right facing arrow, go down to noise reduction/restoration, and select adaptive noise reduction. a window will pop up after this. you can play with the sliders if you like, but the default setting works well. you can close that pop up window after. Step 5) Setting up the mic in OBS. Last step woo! open up OBS, go to the settings, then click on audio. under the 'microphone/auxiliary audio device dropdown you want to pick your Line 1 (virtual audio cable) device. that's it! your mic is now being filtered in realtime by AA Disclaimer Something to keep in mind while using this method of mic cleanup is that it DOES use some CPU. the CPU use on my system is negligible however, only ever peeking at 2%. this is with a Intel Ivy i5-3750k. Your results may vary
Today I’m going to walk you through how to sync audio to video in Adobe Audition. Adobe Audition is an audio editor where you can edit podcasts, voiceovers, instrumentals, etc. You can also edit and sync audio to video in this application. I’ll be walking you through how to go into multi-track settings in Adobe Audition and sync up video.
To get started, import a video into Adobe Audition.
Once you import the video, a smaller video panel will appear.
When you press play, you’ll see that the video is synced up with the audio behind it.
Go to File in the top left corner and select New Multi-track Session.
Drag the video file into the new multi-track session. There’s now a video reference track above Track 1. This allows the video to sync up with the audio as you play through.
You can drag another video in and it will create a separate audio track.
The blue line lets you know exactly where you are in the video. This allows you to drag a video into Adobe Audition and play around with the audio by clicking and dragging to make it sync up exactly.
To put a sounder in a specific portion of a video: import a music track or audio and choose where you want it to begin in the video. Play around with the timeline to make it sync up.
I hope this tutorial on how to sync audio to video in Adobe Audition. If you have any questions, be sure to leave those in the comments below.

Adobe Audition For Live Streaming Free
The new Dynamic Link video streaming feature lets you stream video without rendering when sending projects from Premiere Pro to Audition. When you send Premiere Pro projects to Audition using the Dynamic Link video streaming video option, you can view video in its native resolution within Audition. Previously, Audition always rendered videos in native formats into DV files in 720x480 format at 30. I tried to run my audio through Adobe Audition to apply noise reduction and other various effects but the latency is horrible. I can't set the latency under 30 ms in Audition and it gives me distortion at that setting. How do I record live stream using adobe audition? I want to record from a web based radio live stream into audition. It seems to be recording but there is no sound there - or visual activty in the audition window, apart from the timer.
Adobe Audition For Live Streaming App
Adobe Audition For Live Streaming
If you’re interested in other Adobe tutorials, check out my post on how to zoom in on video in Adobe Premiere.
If you’re not subscribed to my YouTube channel, make sure you go over and watch my videos and subscribe.
0 notes
Text
New Memoir


Obama New Memoir
Queer Eye's Jonathan Van Ness's new memoir Over the Top puts his zany humor and empowering self-confidence on full display, Comedian Ali Wong's book contains heartfelt and hilarious letters to her. Apr 08, 2021 He delves into all of the above (some in more detail than others) in his new memoir, Beautiful Things, which will be published by Gallery Books on April 6. Here are the biggest takeaways. The book is primarily “a Biden love story.”. Amazon.com New Releases: The best-selling new & future releases in Memoirs. Amazon Hot New Releases Our best-selling new and future releases. New Releases in Memoirs #1. Finding Freedom: A Cook's Story; Remaking a Life from Scratch Erin French. 4.5 out of 5 stars 45. New Releases Best Sellers Award Winners New Releases Coming Soon Audiobooks Biography & Memoir Children’s Books Classics Cooking Fiction Historical Fiction History Humor Literary Fiction Mystery & Suspense Nonfiction Poetry Romance Sci-Fi & Fantasy Teen & Young Adult. Sep 17, 2020 Former President Barack Obama’s new memoir will be published in November, shortly after the election, his publisher, Penguin Random House, announced on Thursday. The 768-page book, “A.
NPR’s sites use cookies, similar tracking and storage technologies, and information about the device you use to access our sites (together, “cookies”) to enhance your viewing, listening and user experience, personalize content, personalize messages from NPR’s sponsors, provide social media features, and analyze NPR’s traffic. This information is shared with social media, sponsorship, analytics, and other vendors or service providers. See details.

Obama New Memoir
You may click on “Your Choices” below to learn about and use cookie management tools to limit use of cookies when you visit NPR’s sites. You can adjust your cookie choices in those tools at any time. If you click “Agree and Continue” below, you acknowledge that your cookie choices in those tools will be respected and that you otherwise agree to the use of cookies on NPR’s sites.
0 notes
Text
Quitter A Memoir Of Drinking Relapse And Recovery

Quitter A Memoir Of Drinking Relapse And Recovery Book
Quitter A Memoir Of Drinking Relapse And Recovery Youtube
Quitter A Memoir Of Drinking Relapse And Recovery
Why Do Recovering Addicts Relapse
Quitter A Memoir Of Drinking Relapse And Recovery Free
A Seattle-based political reporter recounts her tumultuous, nearly deadly dance with the bottle. Writing a recovery memoir seems to be Step 13 for many professional writers of nonfiction who make it out the other side of addiction: Pete Hamill, Leslie Jamison, Mary Karr, David Carr, Caroline Knapp, and Sarah Hepola are just a few of the names that spring to mind. If you’re in the mood for a well-written, relatable, rock-bottom recovery memoir, this will hit the spot.” —Kirkus Reviews “I can’t think of another memoir that captures the nightmare of drinking relapse like this one. Erica Barnett’s tale is brutal, maddening, and beautiful.

Jul 7, 2020
In this video, we discuss how tostop drinking alcohol, as Erica C. Barnett shares her story ofrecovery from alcohol addiction. We discuss her new book Quitter: AMemoir of Drinking, Relapse, and Recovery. If you’re strugglingwith alcohol addiction or you’re on your road to recovery, thenthis video is for you! Thank you for being a part of this communityand I hope you enjoy this episode!
PurchaseQuitter: A Memoir of Drinking, Relapse, andRecovery on Amazon:https://amzn.to/3gv2WjG
PurchaseQuitter: A Memoir of Drinking, Relapse, andRecovery on bookshop.org:https://bookshop.org/books/quitter-a-memoir-of-drinking-relapse-and-recovery/9780525522324
👇 SUBSCRIBE TO DAN'S YOUTUBECHANNEL NOW 👇
https://www.youtube.com/channel/UCzQBoadYRT5t42v7iO51tew?sub_confirmation=1
Quitter A Memoir Of Drinking Relapse And Recovery Book
Connect with Dan Voss
YouTube:https://www.youtube.com/c/danvoss
Facebook:https://www.facebook.com/dan.voss.91/
Twitter:https://twitter.com/danvoss10

Instagram:https://www.instagram.com/dan.voss/
Health & Humanity PodcastResources
Subscribe on ApplePodcasts:https://apple.co/3huL2PA
Subscribe on Spotify:https://spoti.fi/3d4NatN
Subscribe on Stitcher:https://bit.ly/37za23m
Quitter A Memoir Of Drinking Relapse And Recovery Youtube
Follow Erica C.Barnett
Quitter A Memoir Of Drinking Relapse And Recovery

Why Do Recovering Addicts Relapse
Website:thecisforcrank.com
Twitter:@ericacbarnett
Quitter A Memoir Of Drinking Relapse And Recovery Free
Instagram:@ericacbarnett
0 notes
Text
Meeting Minutes Onenote

Meeting Minutes Onenote Template
Microsoft Onenote Meeting Minutes Template
The Ultimate Guide to OneNote
This video gives you three tips for when you want to use Microsoft OneNote for meetings: easily transferring meeting details from Outlook to OneNote; transla. When I schedule a meeting for an Office 365 group with Outlook 2016 desktop, I want to include/associate meeting notes in OneNote. I assumed that clicking on the OneNote icon in the meeting request ribbon would allow me to specify the notebook associated with the group - but it doesn't. In fact, the notebook with the group isn't even accessible.
Here on the BetterCloud Monitor we’ve showed you how OneNote is a useful tool for creating to-do lists (and shopping lists) and working with other kinds of files. Today’s video tip centers around another way to use OneNote to improve an unavoidable corporate task: meeting minutes.
Meeting Minutes Onenote Template
OneNote 2013/2016 makes the note-taking process easier by allowing you to:
Launch OneNote directly from your Outlook calendar or the meeting appointment itself
Insert meeting details onto the OneNote page, including the attendee list and any attachments
Check boxes next to the attendee names to indicate who was present
Update changed meeting details by selecting Refresh Meeting Details for this Page under Meeting Details
Share meeting notes with others from a shared location or by emailing the page
Use all the features of OneNote that you already love!
Whenever you have a meeting you need to make sure that someone is taking proper meeting minutes. Taking effective meeting notes is quite difficult; you need to capture all the key points, at the same time as you are actively engaging in the meeting.
In this video you’ll learn how to use OneNote to take effective meeting minutes. You’ll learn how to use tags to keep track of follow up action items, you’ll learn how to convert handwritten notes to text and how to share meeting notes with others.
Today I have a meeting with a customer, and as always I will take meeting minutes in OneNote. I have all meeting minutes gathered in a notebook dedicated for work-relates notes, under the section group called “Meeting Minutes”. To create a new page for this customer meeting, under the “Customer Meeting” section I’ll click the plus sign to create a new page. If you have information about the meeting in your Outlook calendar you can insert it directly into the page.
To insert Outlook meeting details into your notes, on the ”HOME” tab in the “Meetings” section click ”Meeting Details”. Here you will see all meetings scheduled for today.
If you want to insert meeting information from another date just click ”Choose a meeting from Another day”. Here you can click the arrows to go back and forth between different days. Click the little calendar icon to select a date from the calendar. I’ll click Today to go back to today’s date and select the 10 am Office Adoption Program meeting and click “Insert Details”.
The meeting name, the date, location and the names of the invited attendees are inserted, as well as a link to the Outlook meeting invitation and the invitation message. Click “Expand” next to the invitation message to see the full message. Here I can see the agenda that was included in the invitation.
Another way to do this is to open up the meeting invitation in Outlook. Under the “MEETING” tab, in the “Meeting Notes” section click “Meeting Notes” and then select “Take notes on your own”. Select where you want to place the meeting notes. Here I’ll select my Customer Meeting section and click OK. A page for your meeting notes is created in OneNote.
Now I can start taking my meeting minutes. I strongly recommend that you take meeting minutes by hand. If you have a device with a digital stylus, you can take handwritten notes directly on your device using OneNote.
To support my writing I’ll add lines to the paper by clicking the “VIEW” tab and then under “Page Setup” I’ll click “Rule Lines” here I’ll select rule lines with an appropriate width for my handwriting.
Turn your device and OneNote automatically converts to writing mode, hiding all unnecessary menus. If you want to change the pen settings, click the three periods to open up the ribbon menu, under the “DRAW” tab, select the type of pen you want to use. Just tap on the page to go back to full page mode.
When you take meeting minutes you should make sure to write down the most important things such as action items, deliverables, decisions and so on. You won’t be able to write down everything people say. Use abbreviations and symbols as much as you can. I use the “@” symbol for action items and an arrow or triangle for decisions made. You can spend more time after the meeting to clean up your notes so just make sure you capture the key points. When I’m done taking my notes on my device, I’ll synchronize the notebook by touching the notebook name and pressing “Sync This Notebook Now” before I close it down.
Directly after the meeting, while I still have the details from the meeting fresh in my mind, I’ll spend some time to clean up my notes. The notes I took on my device have synchronized to OneNote on my laptop.
To keep a copy of your handwritten notes as a reference, right-click the page tab and select “Copy”, right-click again and select “Paste”. I’ll right-click the copied page and select “Make Subpage” so that I know the pages belong together. Before I convert the handwriting into text I will remove the ruler lines by clicking the “VIEW” tab, and under “Rule Lines” I’ll select “None.”
Now I want to convert my handwriting into text. To convert handwriting into text, click the “DRAW” tab and then in the “Convert” section click “Ink to text”.

Everything that is handwritten on the page is converted to text. If you have used a lot of abbreviations and symbols the converted text won’t be perfect, but it will at least be a good starting point. You can now spend some more time to clean up your notes, making them easier for others to understand.
Microsoft Onenote Meeting Minutes Template

To keep track of all action items and decisions made you can tag them in Outlook. I’ll remove the @ symbol and on the “HOME” tab I’ll click the “To Do Tag”. I’ll do the same for all action items. For the decision made I’ll mark it with a customized tag I’ve created called “Decisions made”. I’ll make some final modifications before I’m ready to share the meeting minutes with all meeting attendees.
To send your meeting minutes in the body of the email click “FILE”, “Send” and then “Email page”. The meeting attendees are automatically added to the addressee field and your meeting minutes are inserted in the body of the email.
If you want to share the meeting minutes as a PDF attachment instead, click “FILE” and then “Send” and select to “Send as PDF”.
The meeting minutes are converted into a PDF document and attached to an email addressed to all meeting attendees. The PDF document is identical to the OneNote page. I’ll write a short note and then send off the email with the attached meeting minutes.
Later today I have a meeting with some colleagues regarding our Company Offsite. If you have frequent meetings with the same people it is very beneficial to use a shared notebook where you can all access meeting minutes from your meetings. We have a notebook called “Company Event 2015” where we share everything related to the planning for the event. Here we also have meeting minutes from all of our meetings.
In order to use OneNote to share meeting notes with meeting participants you need to make sure that everyone who is invited to the meeting has permissions to access the notebook.
To check permissions of a notebook, click the “FILE” tab and then “Share”.
Here I can see who has access to the notebook and what permissions they have. If you have invited someone to the meeting that should have access to the notebook just add their email address here to invite them to share the notebook. When you are sharing notebooks it is all or nothing, meaning you can’t just give access to the section with the meeting minutes, the whole notebook will be shared.
To share notes with other meeting attendees, open up the Outlook meeting request. If you haven’t already done so when you sent out the meeting invitation, on the “MEETING” tab, click “Meeting Notes”, select “Share notes with the meeting”.
Select where you want the meeting notes to be located. Here I’ll select our shared “Company Event” notebook and the “Meeting Minutes” section and click OK. Two links are inserted into the meeting request, one link that opens up the meeting minutes in the OneNote application and one link which opens up the meeting minutes in a browser using OneNote Online. This way anyone who has access to the shared notebook can access the meeting minutes whether they have OneNote installed on their device or not.
I’ll send an update of this meeting invitation with the link to the meeting minutes. When it is time for the meeting, I’ll click the link to open up the meeting minutes.
Even though OneNote supports coauthoring, meaning that everyone can take notes on the same page at the same time, this can become quite hard to manage, so in my experience it is better that you dedicate one person to take the meeting notes.
I’ll expand the meeting invitation to see the agenda for the meeting. The first agenda item is to review action items from previous meetings. Since we have all our previous meeting minutes organized here, it is easy to access decisions made and action items that have been assigned.
By using tags in OneNote you can easily summarize this information. To get a summary of all your tagged information in your meeting minutes on the “HOME” tab click “Find Tags”. I’ll select to only look at tags in this section with meeting minutes. Here you can see a summary of all the decisions that have been tagged during our meetings and the action items that have been assigned.
To only see the action items that have not been marked as complete, check the option “Show only unchecked items”. In the meeting we will spend some time to discuss the outstanding actions, and if they have been completed, you can mark them as complete here in the summary pane. Click “Refresh Results” to only display the unchecked actions items. We will continue the meeting taking notes in our shared notebook.
As you can see, having access to all your meeting minutes in one place using OneNote can help you save time and make your meetings more effective.
This site uses Akismet to reduce spam. Learn how your comment data is processed.
1 note
·
View note