
Don't wanna be here? Send us removal request.
Statistics
We looked inside some of the posts by luispcrepairing and here's what we found interesting.
Average Info
Notes Per Post
1
Likes Per Post
1
Reblog Per Post
0
Reply Per Post
0
Time Between Posts
2 days
Number of Posts By Type
Text
9
Last Seen Tumblr Blogs


Fun Fact
Tumblr has a 66 index score for customer satisfaction in the US.
Text
Recommendation of hardware configuration
OFFICE WORKER
An employee who works in an office, especially one engaged in clerical or administrative work.
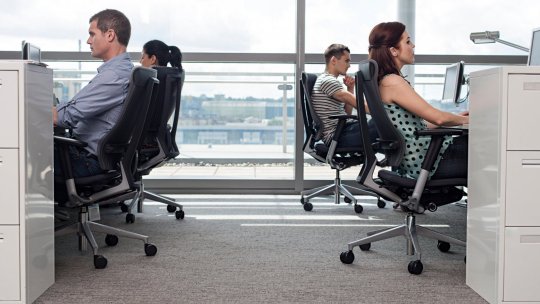
Processor: Intel core i7
Memory: 16 GB RAM +
Storage: 250 GB
CPU: Intel core i5 or i7CD-ROM- DVD/CD
Monitor/Display: 14" monitor
1. Monitor
Having two monitors is better.
Workers in programs will need two monitors.
Employees that work in the admin section only need one monitor to perform the job.
2.CD/DVD drive
Maybe you can get by without a CD/DVD drive.
If you have some programs that require a CD it is necessary
3. Memory
Memory makes your pc to do multiple things at the same time.
If you want to do a lot of things at the same instant, I recommend you to get 8GB of RAM at the minimum.
4. Hard drive
A hard drive size is 500GB is good if you require people to store information there.
If you are working with a large data get more than 500GB of hard drive space.
5. CPU
The best are I5 and I7 processors.
The I7 is better but, i5 will be more in laptops.
For a software that is heavy the i5 is the best of bests.
Software Developers
A software developer is a person concerned with facets of the software development process.

Less than 16GB of RAM (32GB preferred) and an SSD.
Discrete graphics card than can drive a 4K monitor.
Two monitors is the primary need.
Some versions of CPUs have limited VT-x support as they are targeted as gaming or performance CPUs.
The hardware virtualization allows you to more efficiently run emulators and hypervisors.
A desktop is needed.
Graphic designer
They are visual communicators, who create visual concepts by hand or by using computer software. They communicate ideas to inspire, inform, or captivate consumers through both physical and virtual art forms that include images, words, or graphics.
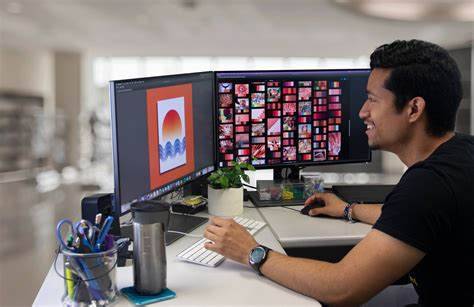
1. MAC or a PC
Apple computers are the number one choice for graphic designers.
They are good for graphic design, but they are not upgradeable
2. Desktop or Laptop
A desktop is frequently faster and more powerful, but not portable.
Having both is the best, but you have to make sure that files are on the correct machine and that software is kept compatible on the two devices.
3. Storage drive
The storage drive can be a hard disk drive (HDD) or a solid-state drive (SSD).
SSDs open files faster, which can make a difference if you're opening large files regularly.
For your working drive, you'll want at least a 512 GB SSD or a 750 GB HDD.
You want at least a 7200 RPM drive.
4. GPU and VRAM
A GPU can be integrated into the processor, or a separate unit. For all but the most basic graphic design, a dedicated GPU is good.
A dedicated graphics card will have memory on it, usually called VRAM. More VRAM is generally better, a minimum for complicated work is 1 GB.
5. CPU
For graphic design there are two specifications that are important; the number of cores and the speed of the processor. You'll want a quad core processor with a speed of 1 gigahertz (GHz).
6. RAM
RAM is used by the processor to store information for the files you are currently using. A minimum amount of RAM is 16 GB.
Computer Gamer.
A gamer is a person who plays interactive games, especially video games, tabletop role-playing games, and skill-based card games, and who plays for usually long periods of time. Some gamers are competitive, meaning that they compete in some games for money.

CPU
Motherboard
RAM
Graphics Processing Unit
HDD or SSD
Mouse
Monitor
Keyboard
1. The Motherboard
The motherboard is one of the most important gaming computer components.
The motherboard and its chipset determine what processors your computer will be able to use, and what features it will have, like the maximum number of USB ports you can have and whether there is on-board video.
Today, many gamers opt for the Intel Z170 chipset. This is one of the new chipsets that works with the Intel Skylake processors, but the Z170 chipset specifically allows for two sought-after features in a good gaming PC: overclocking and SLI.
Overclocking allows you to manually speed up the processor, while SLI allows you to use multiple NVIDIA graphics cards.
2. The Processor
The processor is also one of the most important components for a gaming PC.
While games tend to be more GPU intensive, the CPU is still important for overall system performance.
Top end gaming computers will often feature i5 or i7 processors with up to 8 cores, however for a cheap gaming PC a processor with 4 cores is all you will need.
The Intel core i5 processor seems to sit right in the sweet spot of power and affordability for most types of gaming.
3. The Memory
In order to have a PC run smoothly, it is important to have enough RAM, but it’s really not necessary to go overboard in this aspect.
DDR3 ram is a fairly inexpensive upgrade, and a true gaming computer should have at least 8GB to run anything that’s thrown at it, but 16GB is also a good amount.
Gamers will typically opt for high-speed memory, especially when overclocking, but the additional performance per dollar spent just isn’t there.
4. The GPU
Finally, the single most important aspect that sets gaming computers apart is a dedicated graphics card.
This is where you are going to see the biggest boost in gaming performance, and it is important to stay away from low end cards.
I recommend that you allocate about 1/3 of your total budget to buying the best graphics card that you can afford.
For a mid-range card, we recommend at least an Nvidia GTX 960 or an AMD Radeon R9 380 for a good balance of price and performance.
While you can play games on lower end cards, you will see a significant performance loss.
If you want to dabble in virtual reality, the minimum is a GTX 970, but these days we recommend at least a GTX 1070.
0 notes
Text
Guideline to troubleshoot at lease 10 different common computer issues
1. Computer keeps restarting:
Computer keeps restarting is also a dual problem. It may be happened because of windows update or antivirus problem. Or it can be your motherboard, graphics card or network card drivers. You should check your windows update and antivirus. If there is no problem with windows or antivirus than it should be caused for hardware.
steps:
1. Disabling automatic restart
When you want to fix endless reboot loop after Windows 10 update, the first thing you should do is disable the automatic restart feature. This will allow you to temporarily stop the computer from restarting.
Turn on your computer.
Before the Windows logo shows up, press and hold the F8 key. This should bring up the boot menu.
Select Safe Mode.
Boot your computer through Safe Mode, then press Windows Key+R.
In the run dialog, type “sysdm.cpl” (no quotes), then click OK.
Go to the Advanced tab.
Under the Startup and Recovery section, click the Settings button.
You will find the Automatically Restart option under System Failure. Deselect it if it has been checked. Note that the box beside “Write an event to the system log” has to be selected. This feature records problems occurring in your system.
Save the changes by clicking OK.
2: Deleting bad registry files
You have to be completely confident that you can complete the process without making any mistake. Keep in mind that the Windows Registry is a sensitive database. Even misplacing a comma can cause damages to your computer!
Steps:
Click the Search icon.
Type in “regedit” (no quotes), then hit Enter.
Navigate to this path: HKEY_LOCAL_MACHINE\SOFTWARE\Microsoft\Windows NT\CurrentVersion\ProfileList
Before you make any changes, make sure you create a backup of your registry first. This ensures that you can easily undo any mistakes you might make.
Browse through the ProfileList IDs and watch out for those with ProfileImagePath. If you find any, delete it.
Exit the Registry Editor.
Restart your computer and check if the problem has been fixed.
2. Slow Internet
To improve your Internet browser performance, you need to clear cookies and Internet temporary files frequently. In the Windows search bar, type ‘%temp%’ and hit enter to open the temporary files folder.
steps:
1. Restart the modem: you can just turn off the dem for 2 minutes and turn it on again.
2. Kill the unwanted software: Check your task manager and turn off automatic updates.
3. Can't Install or Update Store Apps
If your PC applications cannot install or update automatically, you can try updating your Microsoft Store. In the Store, open settings and then click Download and updates> Get updates. If this does not work, try this other method:1 Open Start and go to settings2 Find the Updates & Security3 Click on Troubleshoot and then select Windows Store Apps.4 Windows will then automatically find and repair the store app that cannot update or install.
4. Fixing black screen errors
Black Screen Errors can be caused by different reasons, but it is most likely because of errors in plugged in external devices, or incompatibility issues with Windows 10.1 Shut down and then restart your PC, then hold down the Shift key as soon as it boots to enter the Safe Mode.2 Wait for the PC to start in Safe Mode and this should solve the black screen.
5. Blue Screen of Death
The 'blue screen of death' is one of the most recognizable computer errors that can occur, and if you’ve ever used a PC there’s a good chance that you might have encountered a blue screen of death error already.
What usually happens is that your PC will become unresponsive for a few seconds, and then the screen will turn completely blue and an error message (that’s sometimes completely indecipherable) will appear. Your PC will then restart, and if you’re lucky you won’t have lost too much work.
Steps:
1. Check if there is enough space for updates: Blue Screens of Death and other serious issues, like data corruption, can occur if there's not enough free space on your primary partition.
2. Scan your system for a virus: Some viruses can cause a Blue Screen of Death, especially ones that infect the master boot record (MBR) or boot sector.
3. Update hardware drives: Most Blue Screens of Death are hardware or driver related, so updated drivers could fix the cause of the STOP error.
6. Apps behaving badly
Another common PC problem is when apps and programs start acting strangely. Perhaps they suddenly close down without warning, or maybe documents look a bit strange in Word.
Steps:
1. The first thing you should do is save your work.
2. restart your PC.
3. Load up the app, and see if it is now working as intended.
7. Fan not spinning
The fan not spinning is a problem as well. It normally happens when the CPU temperatures are low. It mostly happens because of the motherboard.
1. Restart your computer
The CPU fan can easily be stopped with a finger or debris since it does not have much torque. To prevent the fan wiring from frying or any other damage, your fan will stop spinning even if you remove your finger or the debris. Restart your computer to clear this error.
2. Reset/Flash your BIOS
Your BIOS controls your fan. Resting it will clear any misconfigurations and get your fan working. To reset the BIOS:
Shut down your PC
Press the power button and immediately press F2 to enter into BIOS setup
Press F9 (or the load defaults button shown on the BIOS screen) to reset your BIOS
Press Esc or F10 and select “save and Exit” press Enter and allow your system to restart then check if the fan.
8. Noisy hard drive
The hard drive is one of the most important components in your laptop or your desktop computer. It’s designed to run silently, the level of which may depend on the brand and model, but none should be making abnormal noises.
1. Ensure That the Hard Drive Has Enough Power
If one of your home’s power lines is overwhelmed, it might mean that your hard drive isn’t getting enough power. The power supply could be defective, and that’s what’s why the hard drive is making those sounds. If that’s the case, plug your computer into a different outlet, preferably in another part of the house, and check if it’s still making noises.
2. Use the Built-In Disk Management Tool
You can run another native command to see if your hard drive is faulty. Do this:
1. Press the Windows Key again and the “R” key on your keyboard.
2. Then enter the following command in the pop-up window: “diskmgmt.msc” and hit “OK.”
3. When another window appears, you need to highlight the offending drive and right-click on it.
4. Then select “Properties” from the menu.
5. On the next window, toggle to “Tools” and then select the “Check now” option under the “Error-checking” option.
9. PC isn’t powering on
If your PC is not powering on at all not even a single light in it, then it must be a problem with the power source.
1. Desktop users: If your PC’s extension cord, power outlet, and other connections are working fine, then the problem may be with the PC’s power cable. Replace the power cable of the monitor with the CPU’s (if you don’t have a spare) to see if it turns on. You’ll have to get a new power cable if this fixes the problem.
2. Laptop users: Take out the battery and put it back before starting the laptop. If this doesn’t work, then take out the battery again and connect the charging cable to the laptop. Start the PC on charger power and see if it works. You will have to replace the battery if it fixes the problem.
10. PC keeps disconnecting from Wi-Fi
If your Wi-Fi is working fine but your PC keeps disconnecting from it, then your PC’s network card may not be receiving full power. Windows has a built-in power saver option that gives less power to the network card. You need to disable this feature:
Go to Advanced settings in the Power Options.
Here expand Wireless Adaptor Settings and then expand Power Saving Mode.
Set this to Maximum Performance.
0 notes
Text
Index of Topics Hyperlinks
5- Tools needed to fix a computer system 6- Installation of OS A- Download a Linux Distribution B- Create a bootable flash drive ( for linux and windows** ) C- 1.Explain step by step how to create the partitions required to install the dual boot. 2.Partitions. D- Explain the installation process of both operating systems ( use print screens ). E- Video tutorial*** how to install the operating systems
0 notes
Text
Installation of OS
7.Create your Linux partitions
Follow the installer until you get to the installation type screen, and then select ‘Something else’.

You might want to research Linux partitioning schemes at this point - you may find the Ubuntu wiki helpful - but essentially you will want your available drive space split into at least three partitions:
/ (root) - where all your system files and most programs are stored
/swap - what your system will use for extra memory when you run out of RAM (Random Access Memory)
/home - where all your other files and documents are stored
If you are installing Linux on a new hard drive, find and select it on this screen. Otherwise, find the free space that you created earlier.
Create your / (root) partition
Once you have selected your new drive or the free space on an existing drive, click the ‘+’ sign. This will open a ‘Create partition’ window, which will let you create your main Linux partition. You will need to assign enough space for this partition to store the operating systems and all your other programs. You will want to have at least 10GB for this, but depending on how many programs you are planning to install, you might want anything up to 50GB. The size is entered in megabytes, so remember that one gigabyte is roughly 10,000 megabytes.
The options you need to select are:
Size: 10000MB (or up to 50000MB)
Type for the new partition: Primary
Location for the new partition: Beginning of this space
Use as: Ext4 journaling file system
Mount point:

Create your swap partition
Click the ‘+’ sign again. You will now need to create the partition your operating system uses as swap - temporary memory for when your RAM is full. It’s recommended that you make this roughly the same size as your RAM. For example, if you have 6GB of RAM, assign 6GB or about 6000MB for this partition.
The options you want for your swap partition are:
Size: 6000MB
Type for the new partition: Primary
Location for the new partition: Beginning of this space
Use as: swap area

Create your home partition
Click the ‘+’ sign again. You will now need to create the home partition, which is where all your files and documents are stored. This is going to be your largest partition, and you’re free to assign all the remaining free space on your drive to this.
The options you want for your home partition are:
Size: 20000MB (or all the remaining free space on your drive)
Type for the new partition: Primary
Location for the new partition: Beginning of this space
Use as: Ext4 journaling file system
Mount point: home
Once you are happy with your partitions, click ‘Install’.
8.Install Linux
You can now complete the rest of the installer according to your own preferences. On Mint you will be asked to choose your time zone and keyboard layout, as well as creating a new username and password.
9.Use the boot manager to switch between Windows and Linux
Once you have finished the Linux installation process, whenever you restart your computer you will boot up to the GRUB screen. GRUB (Grand Unified Bootloader) is Linux Mint’s preferred boot manager, and it allows you to choose whether you want to boot up Mint or Windows. Just use the Up and Down arrow keys to navigate and press Enter to boot into your chosen OS. Most other Linux distributions will also use GRUB.
0 notes
Text
Installation of OS
C- Explain step by step how to create the partitions required to install the dual boot.
Dual boot Windows and Linux
If you’d like to run Linux and Windows on the same computer, you will first have to decide which Linux distribution you want to use. The most popular ones are Ubuntu, Debian, Mint and Manjaro, but there are hundreds to choose from. All of them have their own unique features and quirks, though the popular ones are the most forgiving to new users.
This guide will assume you are installing Linux Mint, but the steps for installing the other distributions are not dissimilar. You will just need to download the correct disk image for the distribution you would like to use, and find the distribution’s own documentation for more details on their installers.
1. Get a Linux Disk Image
You can download the Mint disk image straight from the Linux Mint Website. If you’re using another distribution, find a disk image on their website.
2. Create Bootable Media
For this, you will need an empty USB flash drive (any data or files will be deleted).
The easiest way to make your USB drive into a bootable installation media is with the Universal USB Installer. You can download it and find instructions on how to use it on their Official Website.
3. Create a partition for Linux
On a desktop computer, you could simply buy and install another hard drive to use for your Linux installation. Otherwise, follow the instructions below to create a new partition.
Right-click the Windows icon on your taskbar, and select ‘Disk Management’.

2. In Disk Management, find the partition that you would like to shrink to make space for your Linux installation. If you only have one disk drive, this will most likely be Windows (C:). Right-click on the partition and select ‘Shrink Volume’.

3. In the dialog box that opens, choose by how much you would like to shrink the partition. For Linux Mint, you will want at least 30GB.

4.You can simply leave the free space you have just created as it is. You will use the Mint installer to create a new partition (see below) and the installers of most other distributions have the same capability. Check the documentation of your distribution if you’re not certain.
5.Disable UEFI Secure boot
Windows 10 added a feature called Secure Boot, which is intended to stop malicious tampering of your Windows installation. However, Secure Boot may cause problems when dual-booting with Linux. Disabling it may or may not be necessary depending on your specific hardware, but to stop any problems from popping up later it’s safest to turn off the Secure Boot from the start.
In order to turn off secure boot, you will need to access the UEFI settings. UEFI (Unified Extended Firmware Interface) is the software that runs on modern motherboards.
1.Open your Windows start menu, and click the ‘Settings’ icon.

2.In the Settings window, click ‘Update & Security’.
3.In the left pane, click ‘Recovery’.
4.Under Advanced startup, click ‘Restart now’.

5.Your computer will restart and boot up to an options menu before loading Windows. Click ‘Troubleshoot’.

6.Click ‘Advanced options’.

7.Click ‘UEFI Firmware Settings’.

8.You will now be in your motherboard’s settings menu, and how this looks will entirely depend on your motherboard manufacturer. You will need to find the Secure Boot option and disable it. If you can’t find the option, search ‘secure boot’ and the name of your motherboard’s manufacturer (which should be visible at the top of the motherboard).

9.Press F10 on your keyboard to save changes and exit the UEFI settings.
6.Boot from your installation media.
Make sure the USB flash drive you put the Linux installer on is plugged into your PC.
To get to the boot manager, hold down Shift on your keyboard and restart your computer by right-clicking on your Windows icon on your taskbar and clicking ‘Shut down or sign out’ > ‘Restart’.
After your computer has restarted you will be in the Windows boot manager. You will need to use the arrow Up and Down keys on your keyboard to navigate to the USB Linux drive. Once you have this selected, press Enter.

0 notes
Text
Installation of OS
B- Create a bootable flash drive ( for Linux and Windows** )
How to Create a Bootable USB Drive on Windows
There are many tools that can do this job for you, but we recommend a free program called Rufus—it’s faster and more reliable than many of the other tools you’ll see recommended, including UNetbootin.
Download Rufus and run it on your Windows PC. The tool will open immediately—you don’t even have to install it.
Connect a USB drive with at least 2GB of free space to your Windows PC (this may vary depending on your distribution of choice). The contents of this drive will be erased, so back up any important files on the drive first. Click the “Device” box in Rufus and ensure your connected drive is selected.

If the “Create a bootable disk using” option is grayed out, click the “File System” box and select “FAT32”.

Activate the “Create a bootable disk using” checkbox, click the button to the right of it, and select your downloaded ISO file.
Once you’ve selected the correct options, click the “Start” button to begin creating the bootable drive.
You may be told you need newer SysLinux files. Just click the “Yes” button and Rufus will automatically download them for you.

Rufus will ask how you want to write the image. Just Select the default option—“Write in ISO Image Mode (Recommended)”—and click “OK”.
You’ll be warned that all data on the USB drive will be erased. Click “OK” to continue if the drive has no important data on it. (If you forgot to back up your data, click “Cancel”, back up the data on the USB drive, and then run Rufus again.)

Rufus will create the bootable USB drive. You can click “Close” to close Rufus when it’s done.
0 notes
Text
Installation of OS
A- Download a Linux Distribution
Ubuntu
Boot from USB flash drive
Most computers will boot from USB automatically. Simply insert the USB flash drive and either power on your computer or restart it. You should see the same welcome window we saw in the previous ‘Install from DVD’ step, prompting you to choose your language and either install or try the Ubuntu desktop.
If your computer doesn’t automatically boot from USB, try holding F12 when your computer first starts. With most machines, this will allow you to select the USB device from a system-specific boot menu.
F12 is the most common key for bringing up your system’s boot menu, but Escape, F2 and F10 are common alternatives. If you’re unsure, look for a brief message when your system starts - this will often inform you of which key to press to bring up the boot menu.
Prepare to install Ubuntu
You will first be asked to select your keyboard layout. If the installer doesn’t guess the default layout correctly, use the ‘Detect Keyboard Layout’ button to run through a brief configuration procedure.
After selecting Continue you will be asked 'What apps would you like to install to start with?' The two options are ‘Normal installation’ and ‘Minimal installation’. The first is the equivalent to the old default bundle of utilities, applications, games and media players — a great launchpad for any Linux installation. The second takes considerably less storage space and allows you to install only what you need.
Beneath the installation-type question are two checkboxes; one to enable updates while installing and another to enable third-party software.
We advise enabling both Download updates and Install third-party software.
Stay connected to the internet so you can get the latest updates while you install Ubuntu.
If you are not connected to the internet, you will be asked to select a wireless network, if available. We advise you to connect during the installation so we can ensure your machine is up to date

Allocate Drive Space
Use the checkboxes to choose whether you’d like to install Ubuntu alongside another operating system, delete your existing operating system and replace it with Ubuntu, or — if you’re an advanced user — choose the ’Something else’ option.

Begin Installation
After configuring storage, click on the ‘Install Now’ button. A small pane will appear with an overview of the storage options you’ve chosen, with the chance to go back if the details are incorrect.
Click 'Continue' to fix those changes in place and start the installation process.

Select your Location
If you are connected to the internet, your location will be detected automatically. Check your location is correct and click ’Forward’ to proceed.
If you’re unsure of your time zone, type the name of a local town or city or use the map to select your location.

Login Details
Enter your name and the installer will automatically suggest a computer name and username. These can easily be changed if you prefer. The computer name is how your computer will appear on the network, while your username will be your login and account name.
Next, enter a strong password. The installer will let you know if it’s too weak.
You can also choose to enable automatic login and home folder encryption. If your machine is portable, we recommend keeping automatic login disabled and enabling encryption. This should stop people accessing your personal files if the machine is lost or stolen.

Background Installation
The installer will now complete in the background while the installation window teaches you a little about how awesome Ubuntu is. Depending on the speed of your machine and network connection, installation should only take a few minutes.

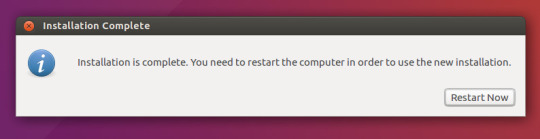
Installation Complete
After everything has been installed and configured, a small window will appear asking you to restart your machine. Click on 'Restart Now' and remove either the DVD or USB flash drive when prompted. If you initiated the installation while testing the desktop, you also get the option to continue testing.
0 notes
Text
Tools needed to fix a Computer System
1. Screwdrivers (Non-magnetic):
The premium-quality non-magnetic screwdriver of assorted sizes is an indispensable tool to open the hardware components of a PC.

2. ATX Power Supply Tester:
For the purpose of power supply, the ATX power supply tester is needed. It is also required for functional terminals that allow testing voltage using a voltmeter.

3. Multi-Tester:
This tool helps in testing voltage resistance and continuity to measure the power functions of the motherboard of the PC.

4. Cable Testers:
It helps in substituting cables and repairs the plug point or wires connected to the different parts of a computer.

5. POST Card:
When you plug a wire into an explosion slot, there may be a change of short circuit sometimes. In that case, the POST card helps to diagnose the problem and prevent frets & accidents caused by a short circuit.

6. Data-Recovery Software:
Loss of data is a software-related problem. You can solve this issue by the tool kit of data recovery that is used by computer repair technicians.
Data-Recovery Software Tools
7. USB Network Adapter:
A computer repair technician uses a USB network adapter toolkit to ease network access on PC via USB ports and solve the poor network connection issues.

0 notes
Text
Welcome to Luis PC Repairing Blog
Hello! My name is Luis Alcoser and the main purpose of this blog is to bring you peace and hope throughout the process of repairing your PC. There is a wide variety of problem that can cause you issues with your computer. No matter what’s causing the issue, troubleshooting will always be a process of trial and error. In some cases, you may need to use different approaching techniques before finding a solution. There are many scenarios that can cause panic in users such as: blue screen, general slowdown and audio issues. I highly recommend that users keep calm above all. There are many basic troubleshooting techniques that would help you in fixing issues like this. In this blog we’ll show you some basic things to try when troubleshooting. Keep in mind that most computer problems have simple solutions, although they are consuming. For difficult problems, a more drastic solution may be required like reformatting your hard drive or reinstalling your operating system. If you think you might need help, I am hereby willing to assist you. If you are not a computer expert, don’t hesitate in attempting the solutions that I will be presenting, since it might help you in fixing your computer.
1 note
·
View note