
Woodburning. Crafts. Home decor. Everything from the brain of Emily Joyce. she/her. Find me at madebyemilyjoyce on instagram!
Don't wanna be here? Send us removal request.
Statistics
We looked inside some of the posts by madebyemilyjoyce and here's what we found interesting.
Average Info
Notes Per Post
17
Likes Per Post
14
Reblog Per Post
3
Reply Per Post
0
Time Between Posts
3 months
Number of Posts By Type
Photo
1
Text
6
Last Seen Tumblr Blogs


Fun Fact
Tumblr was the first site to host the blog for President Barack Obama in 2011.
Photo
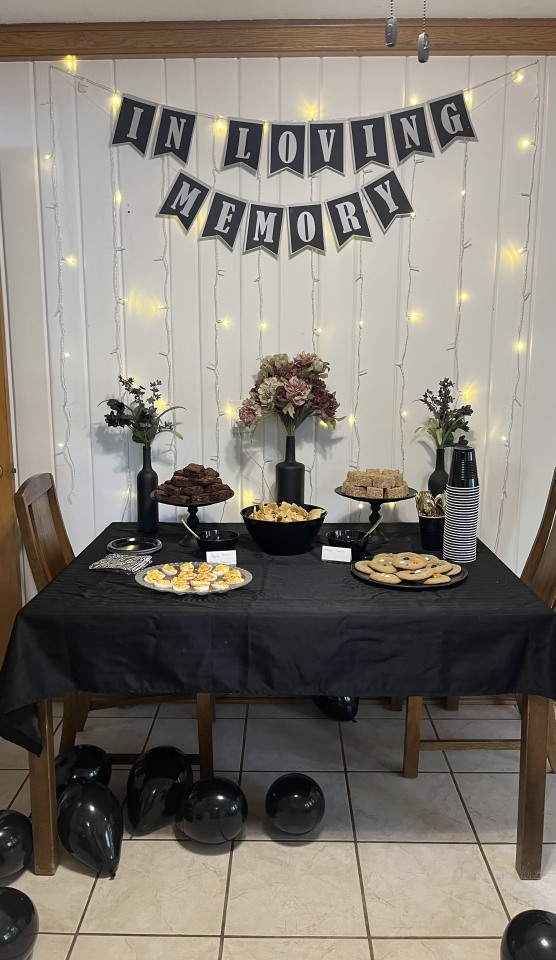
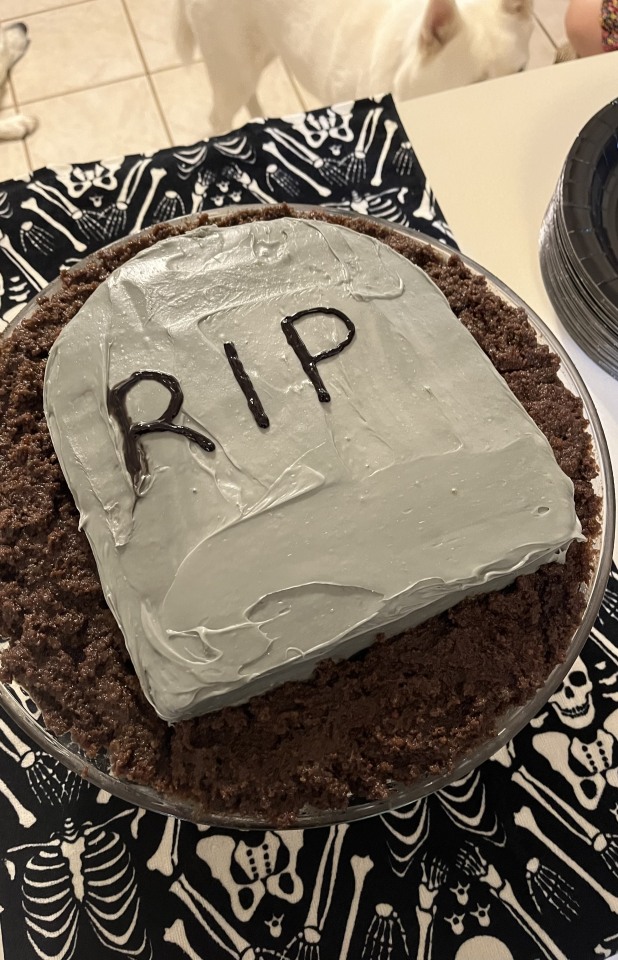

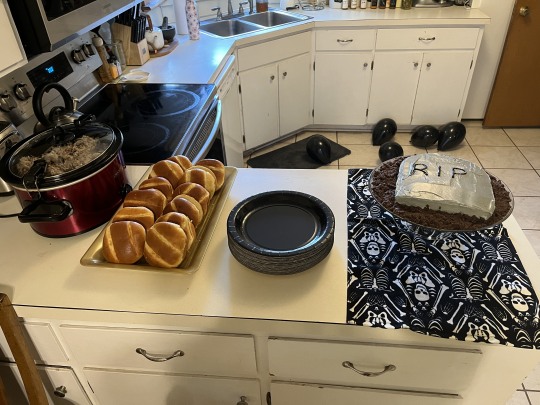
Derek’s Funeral For His Youth! This was my alternative to your typical Dirty Thirty, made even better by the fact that it’s spooky month! Menu: Pulled pork sandwiches, deviled eggs, funeral potatoes (not pictured), brownies, rice krispy treats, chocolate chip cookies, chips and salsa, and of course, a gravestone cake! I made the “In Loving Memory” banner using my Cricut, as well as some cardstock gravestones you can see peeking out behind the picture with the coffin, which, oh yeah, we also built for this party! Other decor included spray painted black flowers, some spray painted black bottles serving as vases, black balloons, and black serving platters made from candlesticks and black plates. The only thing I don’t have pictures of is our guests, who dutifully wore all black to mourn the solemn occasion!
0 notes
Text

Wedding season means lots of handmade gifts!
0 notes
Text
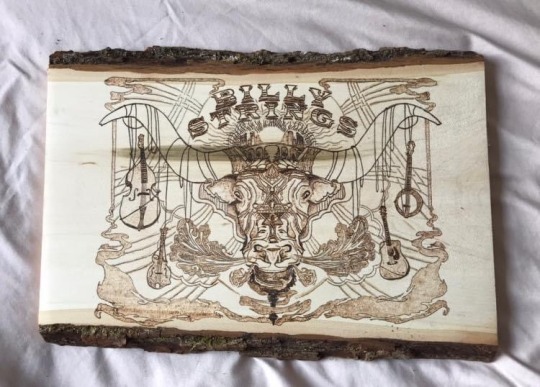
When you see some really cool Billy Strings art and think, “Man, that’d look so cool on wood” and then realize that you have the ability to woodburn it 😍 (Original art by Half Hazard Press)
2 notes
·
View notes
Text
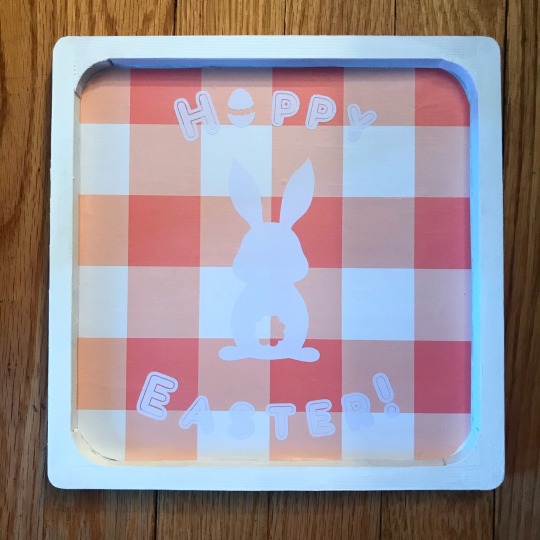
Of course I’m a day late posting 🙄 But happy Easter! As a lover of pastels (and big meals!), Easter is a favorite day for me! I made this project because I found the cute plaid vinyl at Target. In hindsight, I should’ve outlined the text in a different color (turns out white doesn’t show well on white 😅) but you live and you learn!
1 note
·
View note
Text
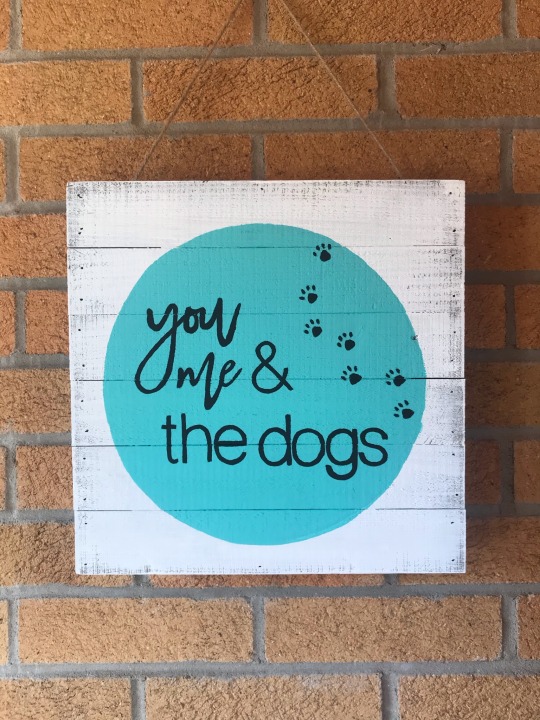
A sign I made in my pre-cricut days! I got DIY ing because of cheapness and that cheapness made me adamant that I did NOT need to buy a cricut (but then one was gifted to me and I wasn’t gonna say ~no~ lol). Anyway, the point of this tutorial is that you don’t need a Cricut to make cute signs for your house. (Just a little more patience!)
I got the wood for this piece at Michael’s (link here). Make sure you check for coupons before you check out- I don’t think I’ve ever went to Michael’s and ~not~ used a coupon. I usually just google coupons while I’m in line and pull it up on my phone for them to scan.
1.) Paint your surface white. I wanted mine to look a little rustic so I did a thin coat starting from the middle and stretching the paint out to the edges so the edges look less covered. Alternatively you could sand the edges down a little if you don’t like how your paint looks.
2.) Trace a circle. I used a bowl and just eyeballed where the center was. Then paint! I mixed this color myself from paints I had on hand- just a hint, if you’re mixing, do more than you expect to use! I had to start over once because I ran out and couldn’t get exactly the same shade when mixing the second time.
3.) Now for the words. I found a font I liked (there’s tonsssss of free fonts on pinterest) and printed it off. Then, using graphite paper, trace the words over onto your wood. You could do the same for the paw prints too if you found a paw print you liked. I went rogue and free handed them (and regretted it, because I for some reason made them WAY too small 😂).
4.) Now the tough part: painting the font. I used the smallest paint brush I could find (actually a makeup brush LOL) and got started. My only tip here is to go s-l-o-w-l-y and use as little paint as possible. It’s going to take a long time, but that’s less work than making a mistake and having to start over.
5.) Admire your finished piece! Something to remember- this sign is hand painted, and unless you’re a professional, it’s going to look hand painted. Don’t worry about tiny imperfections- that’s part of what makes it unique and gives it a story.
0 notes
Text
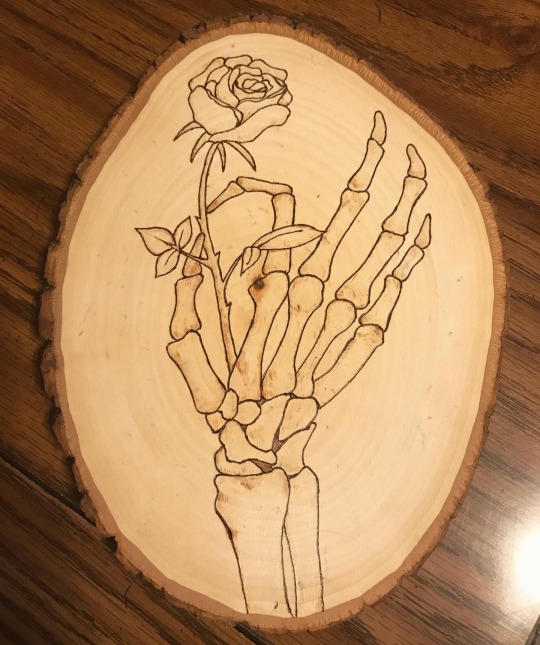

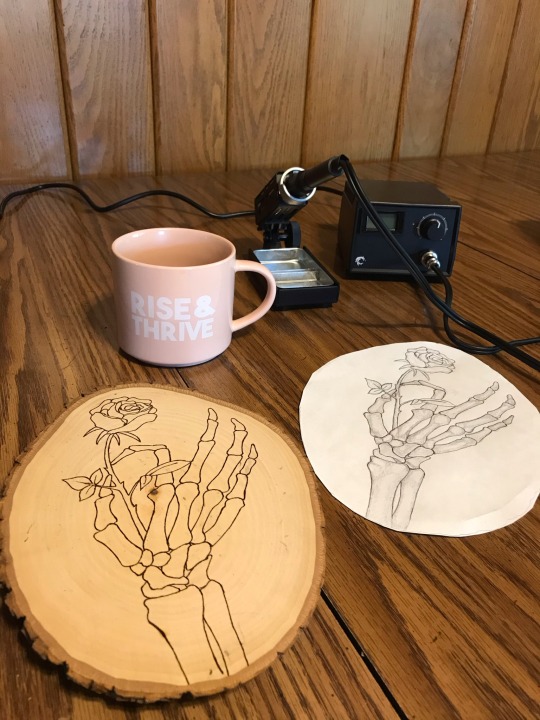
One of my favorite hand drawn pieces that I’ve woodburned! Here’s a step-by-step!
1.) Decide what you want to draw, and find reference pictures! I wish I still had my reference pictures saved but I think I used like five of them to draw this.
2.) Draw on PAPER first! I know some people draw right on wood- I erase wayyyy too much and find it tends to leave eraser marks. No bueno. I like to trace the outline of the piece of wood onto the paper so I know exactlyyyy how big to draw my design.
3.) Transfer your paper to wood with graphite paper. (I got mine here). Graphite paper is black looking paper with graphite on one side (like from a pencil). When you place is under your design (shiny side down) and then trace on top of your design, it will transfer the design to your wood. I know some people think graphite paper is too messy because it might leave some stray marks and be hard to remove, but it’s what I use.
6.) Choose your tip. I tend to use the looped tip the most- it’s very versatile but can still do fine details as well. Make sure your woodburning tool is OFF while changing tips, and to be on the safe side, I tend to unplug mine as well.
5.) Time to burn! Turn your woodburning tool on, and do a test patch on a similar piece of wood. The graphite will burn faster than the wood, so I prefer to test with graphite on my test wood. When you picked a good temperature, you can start on your design!
6.) Trace your design with the woodburning tool using minimal pressure- the heat should be doing the work, not you! Move relatively quickly to avoid the burn spreading off your line, and be aware that different knots of wood might burn faster, causing splotches.
7.) Neaten it up! I go back over my lines a few times to clean them up before adding any shading. You can also use a razor blade to kind of scrape away any splotches in your line. Just be sure to scrape as little as possible so you don’t remove a chunk of your wood!
8.) If you’re doing any shading, make sure your tool is off and cooled all the way before changing tips. After changing to a shading tip, redo the testing process before burning on your actual piece. With shading, it’s even more important to move your tip quickly so you get an even shade.
9.) Ta-da! Your piece is complete! You can add a quick spray of polyurethane finish to seal it up, or you can leave it be if it’s not going to be coming in contact with any moisture!
#woodburning#woodburn#how to woodburn#art#diy#diy gifts#pyrography#homemade gifts#madebyemilyjoyce#skeleton hand with rose#skeleton art#woodburning tutorial
9 notes
·
View notes
Text
Black Cheetah Tumblr 🙀 Made this with my cricut but it took MUCH longer than I expected! I’m hoping to add these to my etsy eventually but I’ll need to change my methodology somehow!
#cricut#vinyl#cheetah#cheetah print#black cheetah print#tumblers#black tumbler#black cheetah print tumbler
5 notes
·
View notes