
Posts on The Sims 4 (especially extra details for my gallery builds), and other game related stuff. | EA Sims Gallery ID: marroniocchi | she/her
Don't wanna be here? Send us removal request.
Statistics
We looked inside some of the posts by marroniocchi and here's what we found interesting.
Average Info
Notes Per Post
27
Likes Per Post
23
Reblog Per Post
2
Reply Per Post
2
Time Between Posts
3 days
Number of Posts By Type
Text
8
Last Seen Tumblr Blogs


Fun Fact
70% of Tumblr users say the Dashboard is their favorite place to spend time online.
Text
Apparently they didn't build the Sims 4 Get to Work police station with a sprinkler system in it...


0 notes
Text
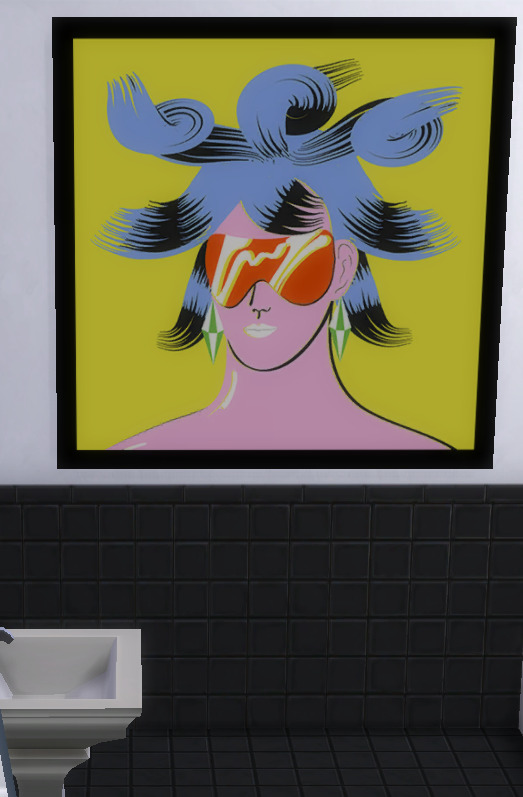
Screenshot above is of Sims 4 base game only build. It is just a clip of a short height wall in one room with what appears to be the only reasonably priced and large height and width wall decoration that does not require you to adjust its size.
It also is very bright and colorful and done in a very specific style and has no other swatches, not even for the frame color.
<steps on soapbox>
WHY ARE THERE ALMOST ZERO NON-EXPENSIVE BUT LARGE WALL DECORATIONS (OF ANY TYPE) IN THE BASE GAME?
</steps off soapbox>
I even gave in and tried to check debug and live edit objects.
Rant over.
NOTE: As always there is alt-text for the image for accessibility reasons.
0 notes
Text


My current dilemma...which chair to choose?
The images shown above (which contain alt text descriptions) are for a mobility (impaired) accessible design I am working on. The first image shows the two bathrooms side-by-side. Both rooms are Sims 4 base-game only designs and do not use the move objects cheat.
The bathroom on the left has a walk-in / roll-in shower [faked using an enclosed shower because this is a base-game item only build]. The bathroom on the right is the one that will have the bathtub.
Currently I am stuck on the bathroom on the right because I am trying to decide which chair (of the two pictured) to use that will go on the right side of the bathtub as mobility aid.
On the one hand, the chair on the right is of a good height, has 'handles' that are thin, curve down, and don't go to the edge of the seat. This means it won't necessarily get in the way of someone using the chair to lift / push themselves up and move into the bathtub.
On the other hand, the chair on the left may provide better grip on the thicker handles, the handles go all the way to the front edge of the seat (making it easier to get into for some), and as a chair that works outdoors it will be more water friendly and easier to clean. But, as noted above, the higher and thicker handles may make moving from the chair to the bathtub harder.
Because different accessibility needs might make one chair 'better' than others for different people, I am finding myself still sitting here debating on which one to take.
So my question - at least to myself - is: which chair should I pick?
1 note
·
View note
Text

I know that in some countries there is "new math". I also know that The Sims 4 can sometimes do weird things. But I am at a loss for words here. How does the math on these bills work: Lot Taxes: -$365 Power: +$0 Water: +$0 Other Taxes: +$0 Total: -$372
23 notes
·
View notes
Text


EA Sims Gallery User ID: marroniocchi | This is my first career / pack focused build. It is a starter build for Eco Lifestyle placed on the Pinecrest Apartments #402 lot in Evergreen Harbor.
GOALS: Create a starter build using only base game and Eco Lifestyle items located in Evergreen Harbor and designed to help a sims starting in the Civil Designer career.
Because it is an apartment the Sims 4 currently requires you to save it as one room I had to remove walls to connect all the rooms together. Once you place the lot you will want to go back in and add walls back to separate the rooms. (See the circles marked in the first picture.)
Also, unlike apartments in City Living, for example, you can add things around the outside of the building on the ground as it shows up as part of the lot. However, since you can't save it as a lot nothing could be placed there and saved to the gallery.
The 'lot' costs are low enough that a standard 20,000 Simoleon sim starting funds can cover the deposit, furnishings, and still have items leftover to purchase outside the apartment items. Recommendations are to start with at least a couple ground solar panels and a couple dew/water collectors. In the first picture the rectangle marked in the upper corner is where you should start with your first solar panels based on how the sun passes the building. The area marked in the lower left is where you can place the dew collectors (because as far as I am aware the sun light doesn't affect how those work).
The kitchen has the same or similar appliances as the build currently there, but the cabinet with sink was replaced with one of the pack's standalone sinks to be more eco-friendly. The bathroom also had the shower replaced to make that more eco-friendly as well.
The living room was changed as well primarily to remove the large, power hungry TV and replace it with a storage item and the set of books that acts as a bookcase.
The other two rooms were greatly changed in the spirit of less consumerism and to help your Sim have a good support system for the first part of the Civil Designer career (as your needs will change once you choose a career track later on).
The bedroom has everything but the bed removed and that bed was swapped for the best single bed in Eco Lifestyle. In place of all the other furniture two items were added to help with the "eco footprint". First, an insect farm - which you will want either for when you complete certain upgrades or for cooking needs. Second, a planter box that already has 4 items planted including a tomato - because what Sim hasn't eaten a garden salad, right?
The second room was also gutted and now features a woodcrafting table (for handiness skill) and a chess table with chairs (for logic skill). Either of those items can be swapped out to create room for the fabricator you will get as a career reward.
Both of those rooms had windows added that increase your green eco footprint as well as all wall and floor coverings have eco footprint (and sometimes bill discount!) bonuses. Reminder: Because of how it has to be done for pictures, please be friendly to the environment and turn on auto-lights once you're in there!
As with my standard builds, this apartment has no MOO (move objects on cheat), no CC (custom content), and no uncomfortable beds.
NOTE: There is alt text included for every image.
1 note
·
View note
Text


Sims Gallery User ID: marroniocchi - This build is on my gallery under the name Stuck Scenario - Curious. This is the first of my uploaded 'scenario specific' homes (although you can use it for whatever you wish).
GOALS: Create a base game only build that was designed specifically for Nova Curious who is the pre-made household for the Stuck in Their Shadow Scenario. This is not a starter build because Nova starts with an amazing 30,000 Simoleons!
There is no exterior landscaping so that you can place this in whatever world and size lot works best for you. It comes preset with three base game lot traits based around Nova and the Scenario: Fast Internet, Convivial, and Bracing Breezes
For this build, I allowed myself the ability to use debug / live edit objects (mostly for clutter) and some alt-placing and shift-sizing. BUT, there is no MOO (move objects on cheat), CC (custom content), or uncomfortable beds used.
The "scenario specific" aspect means that this is built to accomodate the start and goals of the scenario. In addition, because this scenario starts with a pre-made Sim you must use for this scenario.
The home makes use of Nova's preferred colors as well as her current skills, likes, activities, and future career needs. The design features a purple color running through the middle of all the areas to complement and give cohesiveness to the whole home while the rest features the green, gray, black, etc. colors Nova has as presets.
This build does not include a computer because Nova starts with a laptop in her inventory. There is a cheap TV in the living room with a large framed picture over it because depending on the track you choose you will earn a huge wall TV as a career reward. You can also replace the couch with the Hipster Hugger" career reward.
[The moon and stars rug on the front porch is there as a suggested place to store your pocket observatory (telescope) when you're not using it.]
The last picture I added green circles to give you another example of how the house was prepared for the starting and future earned career rewards. In the office the end table/nightstand on the left can hold the large hard drives item, the end countertop on the right can hold the coffee maker, the bookcase has spots for the various trophies, and there's plenty of wall space to put up the clock or the picture you get as a "gift".
Hopefully this gives you a little more insight into why the build is designed the way it is.
P.S. You can always lock some of the doors to keep Lewis, or any visitor, out if you don't want them to access your bedroom or office (or even bathroom)!
NOTE: There is alt text included for every image
0 notes
Text


Sims Gallery User ID: marroniocchi - There are two versions of this on my gallery under the names BG Colorblind Friendly S1 and BG Colorblind Friendly S2. This is the first of my uploaded 'accessible design' homes.
GOALS: Create a base game only starter build that was colorblind friendly - both for simmers as well as a sim you are playing as someone who is colorblind.
The main difference between the two versions is in S2 I allowed myself the ability to use debug / live edit objects (mostly for clutter and landscaping). In both versions there is no MOO (move objects on cheat) or CC (custom content) used.
The "colorblind friendly" aspect means that outside of items like the trees, bushes, and other landscaping, all items used had to show up under the color filters for white, black, or gray. Most items are fully in that monochromatic set of colors.
This allows anyone to pick an accent color that works for them to add or change items without worry that it will clash or be a problem if they are colorblind.
Although the build is a starter home it does include a TV and computer with two bedrooms and two bathrooms. There are cute details like trying to replicate the entry double door by placing interior doors side-by-side. And, as always, I NEVER use "uncomfortable" beds. Thank you for learning more about this build!
NOTE: There is alt text included for every image
1 note
·
View note
Text
Let's see how this goes...
I decided to start this tumblr blog because I found that I can't really explain - within the character limits - the details behind some of the builds I've been slowly working on and uploading to the Sims 4 Gallery. EA User ID: marroniocchi
In addition, this gives me a place to post other items that I just want a place to post, generally around the world of games. Don't expect this to be a super active tumblr, but if even if one person finds it helpful then YAY!
1 note
·
View note