
Last Seen Blogs

sn3333tz
Untitled

oriflamebyadvertiser
Untitled

arif20
Untitled

kimberleyyyy
Untitled

titaniaintheflesh
faeryland
Text

The theme of the new project was lottery tickets, I made an A2 sheet of research paper to branch off my different ideas, first I split the lottery ticket into the six words that related to it, then I branches words linking and relating to the previous, for example Luck would link to the leprechaun and four leaf clover, and from the leprechaun I would link to Ireland and so on so forth.
I also listed ofy skill set in the bottom right
0 notes
Text


From further testing to reveal the problem, the actual circuit I had did work, I tested the battery's power with croc clips, the battery was full and a direct connection to the battery lit up the LED. So the unfortunate problem was not the circuit or the battery, but the component that connects the battery to the circuit had somehow been damaged, so it couldn't send power to the wire, and I couldn't get to it because the component was already under the chamber that had already been super glued down into place.
0 notes
Text


This is the soldering phase, I glued in all the components in place and shortened them when necessary, The old soldering iron I used didn't work too well when soldering and the tip was dirty so it had to be cleaned multiple times but I managed to get everything in its right spot, I almost made the mistake of fusing a positive wire and a negative wire together which would have short circuited the electrics and exploded the battery, so it was lucky that I didn't do that... and finally when I hooked in the battery and flipped the switch...nothing happened, so I re wired it to a smaller circuit with only one LED still nothing, so in the end it all went crashing down in a ball of fire.
0 notes
Text


This is the printing phase of the first batter chamber which didn't turn out too well, this was added in at this point because tumblr decided to choose violence on me at one point.
0 notes
Text


At home I had some leftover super sculpy from another project so I used pens and paintbrush tips to make this little wooden like charm for the model.
0 notes
Text


I re printed the battery chamber because it didn't fit the electronic to connect the battery and it didn't feel nice so that took a short while to make. but once this new model had been made and sanded, it didn't fit in the model... So I sanded the bollocks out of it more until I forced it into place.
I then spray painted the model gold and painted everything that needed to be completed, including the battery chamber which turned out really nice I must say, no0w the next step is final touches and then soldering.
0 notes
Text
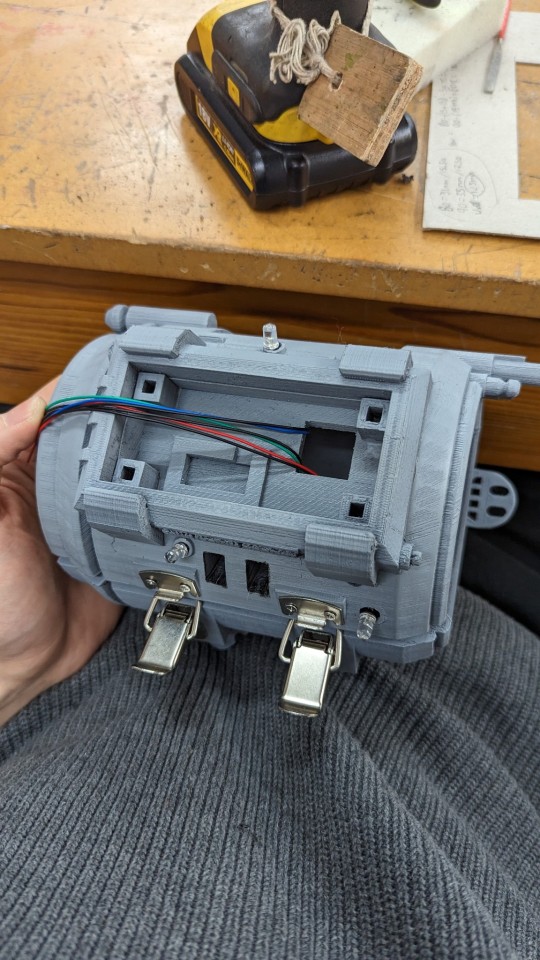
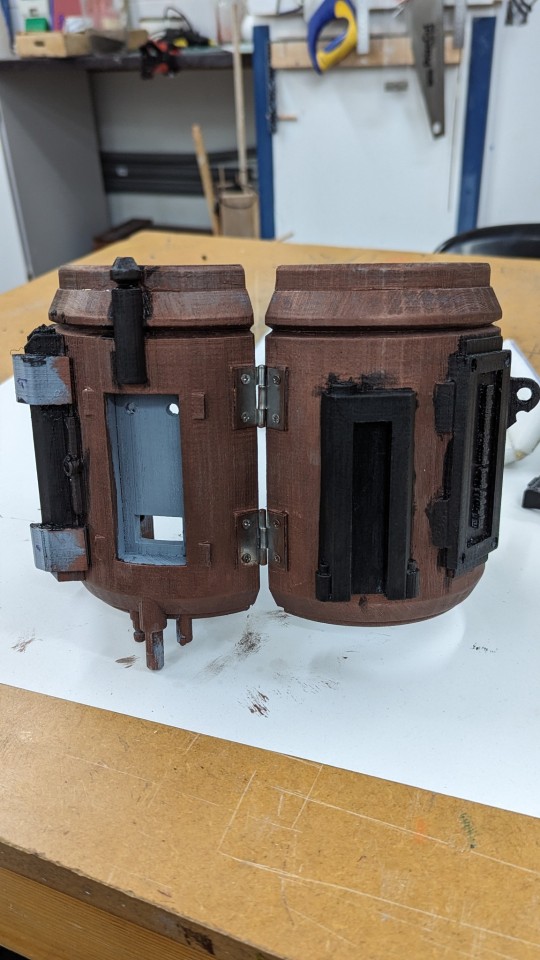
Everything has been sprayed with the primer, the hinges and tension locks have been glued in and screwed in due to the filling not being a true solid to hold it, I glued everything else in place including the wires and electronics ready for soldering and I have mo9veed onto the painting phase.
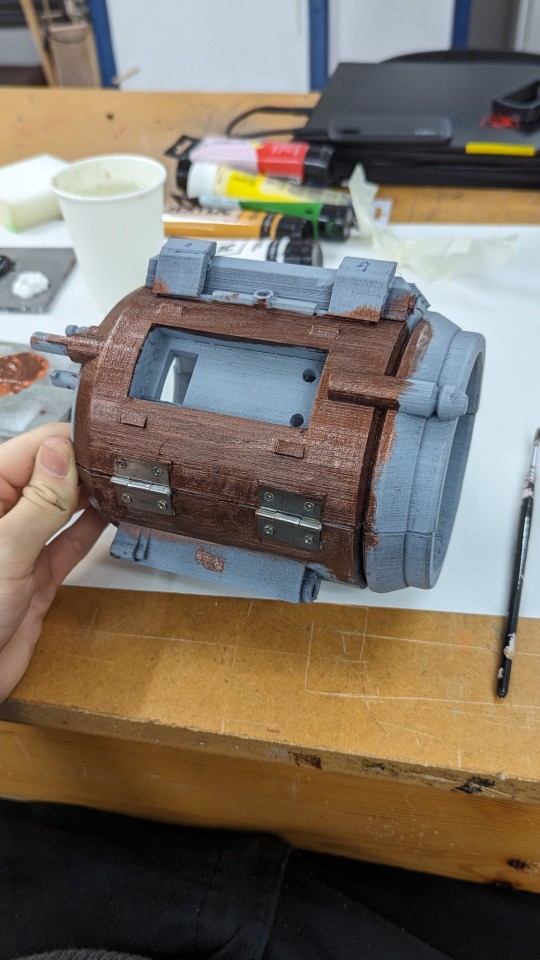
I wanted a mix of copper gold and black to give a steampunk type vibe painted the surface but now looking at it from a side angle it looks more like wood rather than copper, which is fine with me, gives that extra pristine look. First layer of paint is complete just need the gold accents and edge highlights.
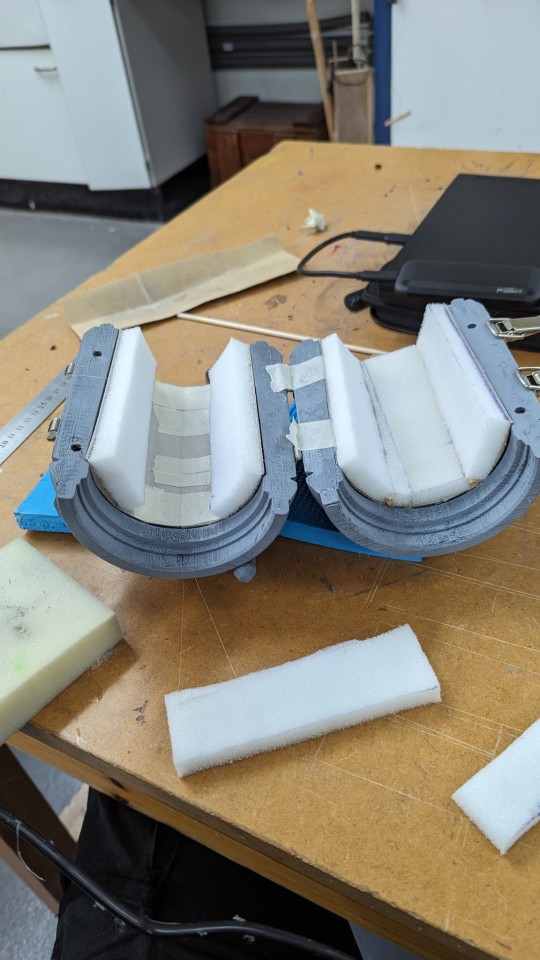
I also glued in the sponge material to the curved card, made more than I needed but the extras filled in the space in-between the other sponge parts which was fine, I led a piece of 120mm by 5mm dowel rod through the mini gaps for extra added strength to the model and to each of the pieces.
0 notes
Text


Second half complete and again sanded the bollocks out of, with a little USB type Gizmo to go along with it, glued in the first magnets which was probably a mistake because I still have to paint this model but I had to test out its function, luckily it revealed the exterior design stuck out too much and need to be sanded back a bit, and now it attaches fine now. I cut out some transparent acrylic and glued it to that little USB gizmo and it slides in and out smooth-ish, I have planes to print of type of stickers of faces and numbers ad glue them on the back of the acrylic to give a futuristic design aesthetic.
0 notes
Text


I had finalized all my models and converted them into a new coding software for the replicator 5th Gen 3D printer, The process of printing took a whole day for some of the prints but overall it didn't take too long, after shedding there supports and getting many cuts from the plastics in the process revealed a shiny print of my virtual model... Naturally with any new born print I sanded the bollocks out of it until it was smooth to the touch, and did the same for the other components, I drilled 5mm holes into the areas that would house LEDS and magnet's then gave it a primer coating of grey and left it to dry.
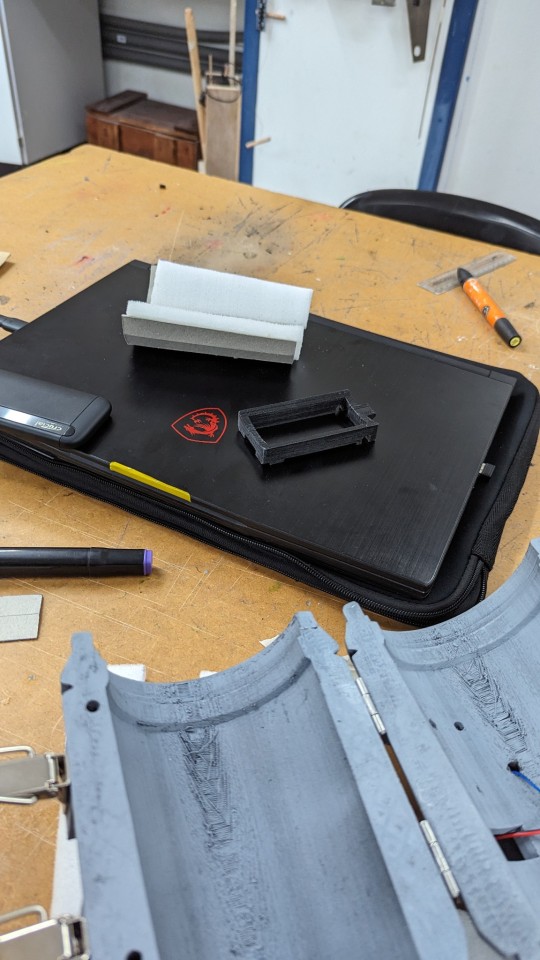
Whilst drying I made prototypes of the interior padding using prior measurements and knowledge, I made a pillow at first as a prototype which didn't turn out how I wanted but did feel comfy, next was hard foam with cuts in it to be bent around the model, this slightly worked but was a big time waster, then I got a soft sponge to use which I imagine will be used just fine when attached to my card plates.
0 notes
Text


Once I thought I completed the model I put it into Ultimaker Cura for it to be converted into G-Code for a computer to understand the movement path in XYZ coordinates, the new unfortunate problem I had faced in the software was that something was quite clearly wrong as the final outcome was definitely not supposed to be like the image above, obviously there were parts of the model that were awfully wrong and for a time I could not understand why. My solution at the time was to copy and paste the model and delete everything except for the battery chamber housing and the screen and turn them separately into components, and then putting it back into Cura to see if there was anything else wrong, however not6 too long after this I had a thought that the reason for this cock up could be because some objects would go into the model and create an open space in the interior which would confuse the software and it couldn't distinguish between the gaps of the model and just make it an open surface... and sure enough it was, and I had wasted time creating different components for the 3D printing software to handle.
Also at this point because of the mistake I changed a few of the design features slightly so it would work better and become flush.
0 notes
Text


In this lesson I started work on the interior of the bracelet which would house the battery component, I followed the dimensions of the battery chamber and a few mm on to the interior so it would swivel and fit nicely. I made the interior as deep in the model as I could make it however the chamber would still be sticking out so I had to adjust the model by making an area around it at the same level. the previous design of the battery chamber wouldn't work in my model due to the side catches would be a pain to install it into the interior, however this issue was an easy solution, I just had to add stoppers on the back at an angle and change the back of the models battery chamber holder, I made some side parts that could be glued down to hold the rotating part in place.
Once I had finish making entry ways for the wires to go I made the second cylinder which was significantly more straightforward then the original half, keynotes for that half is that I made a surface for magnet's to go in so It could be used as like a tool adapter to be swapped out when necessary, I made a little area to thread through some string for a small keychain for sentimental purpose fort he person who owns this bracelet, and then I mad an area for where a piece of transparent acrylic would go and act as a type of USB or ID.
On both models I made surfaces for the hinges and tension lock to be screwed on once printed, and also small holes for 2mm by 5mm magnets to fit in for better connection when around a persons arm.
0 notes
Text


These pieces of paper were cut out to the measurement's of my wrist and arm, But I need to create the rough precise measurements for the padding that would go around my arm comfortably and not be too tight or too loose for the padding. I managed to effectively make a small paper model of what the padding shape and interior of the model should look like by following this formula Diameter * PI which would give me the circumference of each circle in mm, I did the top and bottom dimensions then simply did the length between the two, cut them out and taped them together and I now have accurate measurement's for the real padding.
0 notes
Text


Made the battery chamber first so I could adjust the bracelet if it was necessary, I still have a rough idea on how the mechanism works however I cant visualize that to well so slowly but surely Ill come up with something that makes sense... I made a little cut out so the battery could be grabbed easier and made a little battery symbol extruding from the top of the battery.
I then moved onto the actual bracelet which at first started out really easy, creating a 2D inner design which would then be extruded round a circle to create a 3d cylinder, that part was easy creating the hollow cylinder, however actually cutting it in half to create two separate components was much more trickier due to the fact the way I intended to do it didn't work, basically using a tool that would slice it the further you went into the model. After much finesse I made a square going directly in the middle of the model and drew an edge for the model by connecting parts of the square to the bracelet, once connected I used the rubber tool and removed any unwanted or unused square faces and other half of bracelet and viola, half a cylinder.
Making the screen was slightly more tricky but I had done something like this before so I had experience attaching something perpendicular to one of the faces of the cylinders side, Its just annoying to do. my method would be to draw a line going off directly off one of the faces for the mid point of the screen, I the create 90 degree lines going off from the midpoint and going round connecting into a square, I then extruded the 2d square down into the model and created another rectangle going around the perimeter of the original, I then moved the top face of the original square down into the model and it created the effect you see above in the pictures, I then did some finer details on it creating a flat edge and wrapping these frames around four points of the side of the screen.
0 notes
Text

More fleshed out blueprint of the bracelet which is true to life scale of what it would look like. There is also more sketches of components that could possibly be attached to the bracelet... I began mapping out and designing the battery chamber for the electronics, I looked at google for the dimensions of a 9v battery and went from there, making a box then taking inspiration for how a dog bin works I made it so it could lift up but would go all the way round, the part sticking out would get stuck on the interior of the model.
Most of my base designing is finished, due to lack of time I can't really gather more research because this project needs to be complete asap, so ill make design choice's through out the construction of the bracelet.
0 notes
Text

Now my part in this duo project was to design make and paint this bracelet which would show the hologram above it. I made a rough design sheet to display my ideas which started off from a gauntlet design and shortened to fit in the shape of a bracelet, this was done so I could create the model in time for the deadline which is one month...
Through my designs I took inspiration from star wars mini gauntlets that would appear on the sides of certain characters arms for instance Boba Fetts gauntlet, I also took heavy inspiration from the pip boy in the fallout series, I wanted the design to have a screen, switches and buttons, and a cool few design features.
To make the project interesting I decided to add electronics in the form of a few LEDS which one would display the point of origin for the hologram, this could be possible with the components on hand, I will have to order extras such as a battery and proper switches but the idea is possible.
An issue I had was deciding whether or not I wanted to make the model using wood and various other materials...or risk it and spend my time modelling digitally for 3D printing which would take a while and could not work out once completed, however I think I could be more precise on 3D CAD (Computer Aided Design) then in real life, it would make it seem authentic and as if it were manufactured, and I could test out other ideas I had if I didn't like something.
I will have to figure out how to house the battery and hide it but to also make It accessible for when it runs out of power and needs to be replaced.
I also started to measure the rough diameter of my wrist and upper arm for when I design it in SketchUp I will have those ,e3asurements on hand.
0 notes
Text


Initial ideas and trials of equilibrium, branching ideas and similarities between the word equilibrium, balance, reveal, opposites etc, and branching off of these keywords would leave me with new ideas through the form of movies, simple phrases or religious ideologies.... Once me and my partner had established a general idea that linked to the different skills sets between us, I decided it would be best if we split the project up to better suit our specialties. We formed an idea of a sci fi gritty bracelet that would display a hologram like from Pacific rims hologram, that could be seen by scanning a QR code on the bracelet and be seen through AR for the hologram.
I made a small paper model to explain my idea to lacceti who will then go off and replicate it in cinema 4D, I wanted the holograms effect to be split up into layers, from face on it would be 2D, from the side it wouldn't really be visible at all and from looking at it at the right perspective you would see the 3D effect that would be created from this 2D model. She didn't really understand it so I made that model to show her, even still she loosely followed but I have faith.
0 notes