
midcenturysmarthome
Mid Century Smart home
This blog is dedicated to the concept of combining the best of mid-century design with modern "smart home" concepts and tech.
11 posts
Don't wanna be here? Send us removal request.
Last Seen Blogs

sunnyillyana
Struggling Writer and Huge Nerd

keyboardpunk
Keyboard Punk

mistkilyred
MistkilyRed

bollandbranch1-blog
Boll & Branch

yuki-of-the-future
Yuki Yoisaki
Photo
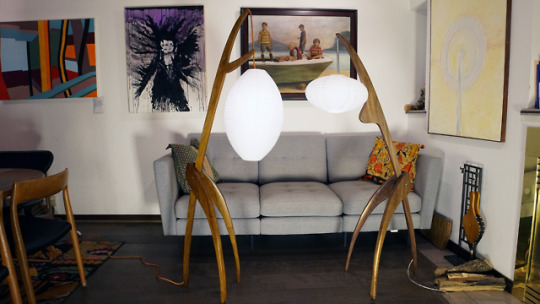
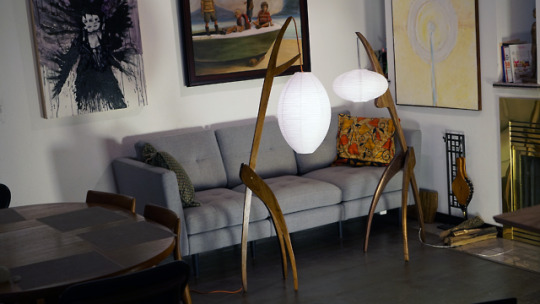
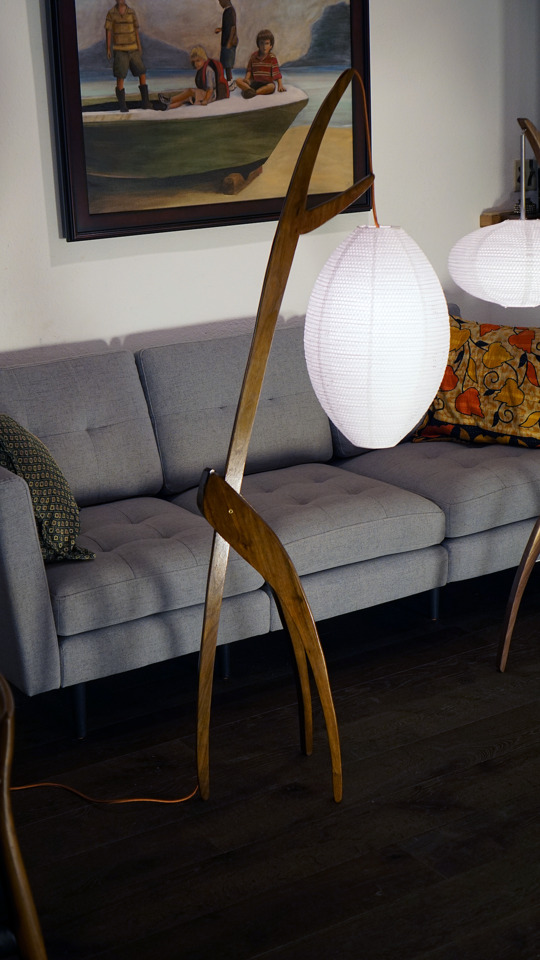
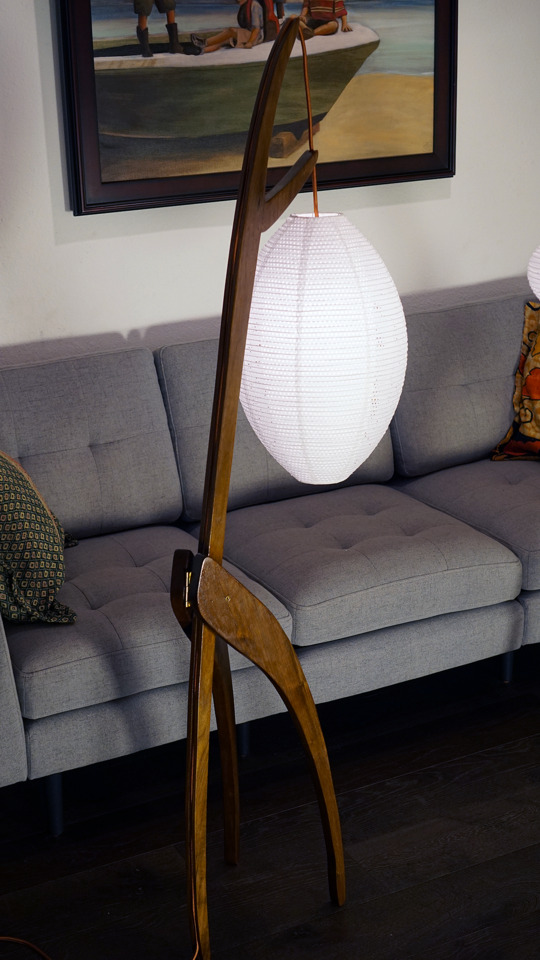


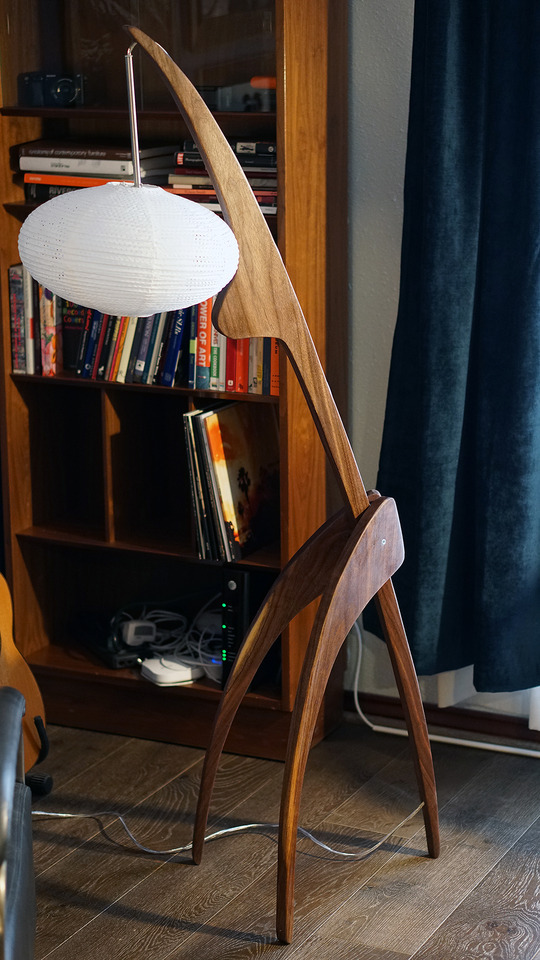
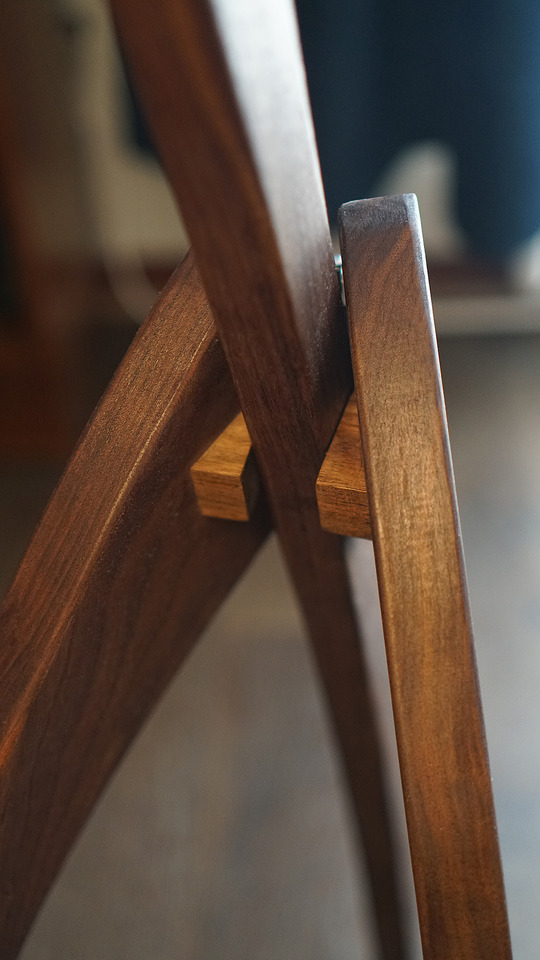
Here are some photos of the Rispal inspired lamps I’ve been building. To see the whole process - you can watch the video here: https://www.youtube.com/watch?v=zTgAwl817s8
3 notes
·
View notes
Video
youtube
Here is something I've been working on for the last few months. I recently got obsessed with some very obscure lighting designs from the 50's by French designer Rispal. Known as "“Formes Nouvelles”, these lamps are rarely seen for sale because they were never made in very large quantities and were reasonably fragile. When they do appear for sale, they sell for many thousands of dollars. I wanted to see if I could make a series of lamps loosely based on the originals, and this is what I came up with. Paired with modern smart bulbs, these lamps need no controls for on/off and are fully dimmable. I am very happy with the results!
1 note
·
View note
Video
youtube
I installed a set of Eze-Breeze windows on our screened porch over the holiday. I was impressed with the quality of the product and ease of install. I would recommend these to anyone looking for a similar solution. The nice thing about these inside mount units is that they don’t change the look of your cabin on the outside too much. It still looks like a 1920′s classic cabin, but with some modern touches inside.
0 notes
Video
youtube
Summer is over, and I am finally getting around to posting some of the videos I made this summer about our MidCentury Smart Home cabin experience. In this video, Mandy hooks us up to the outside world for both internet and cell phone coverage.
0 notes
Video
youtube
This summer we moved 2 dogs, 2 kids, and cat 600 miles north to a 1920’s cabin in a canyon. I’ll be making a series of videos that describe our design process, IOT and smart home plans, and our construction process.
#smarthome#smart home#interiors#interior design#cabinlife#cabin#sketchup#woodworking#carpentry#midcentury#mid century modern
1 note
·
View note
Photo
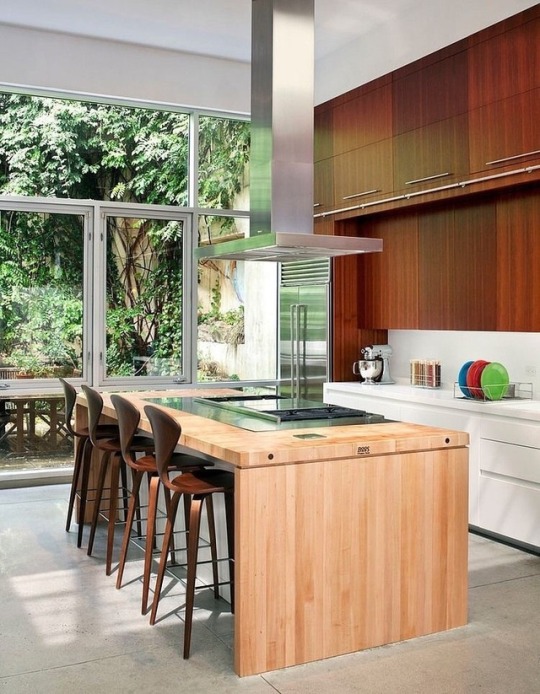
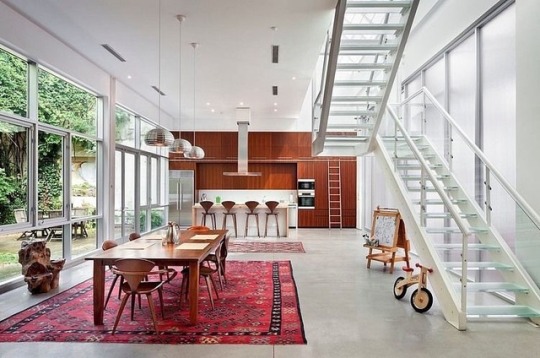
Wow.
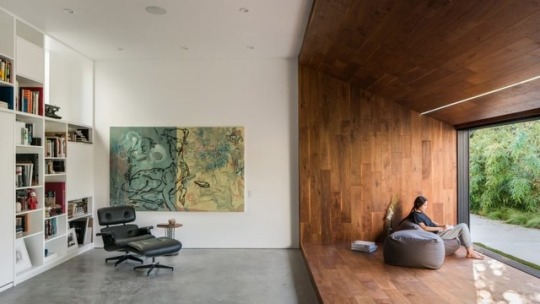


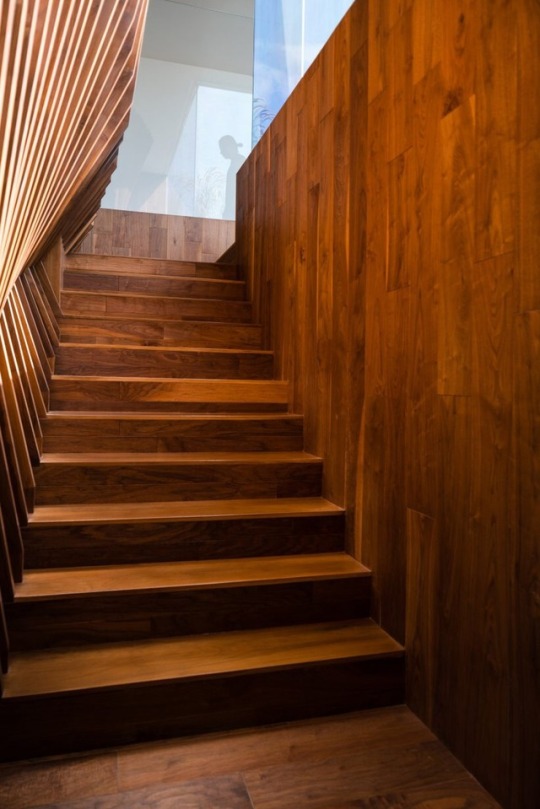
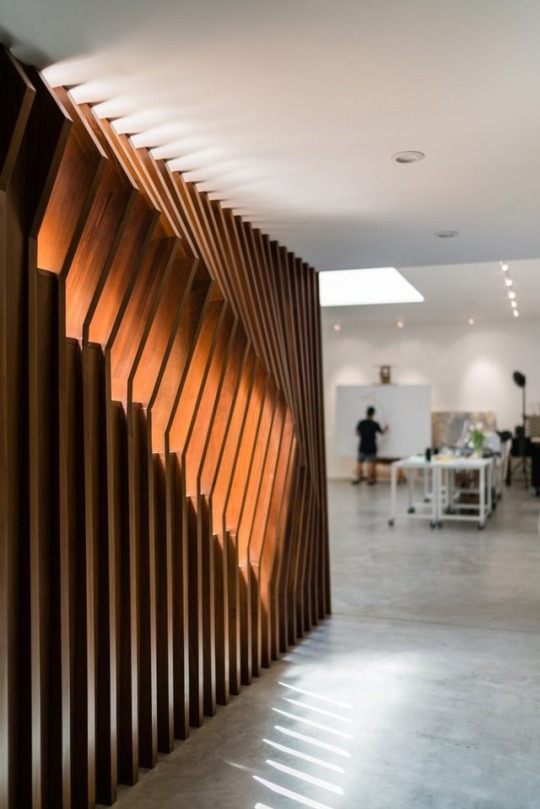
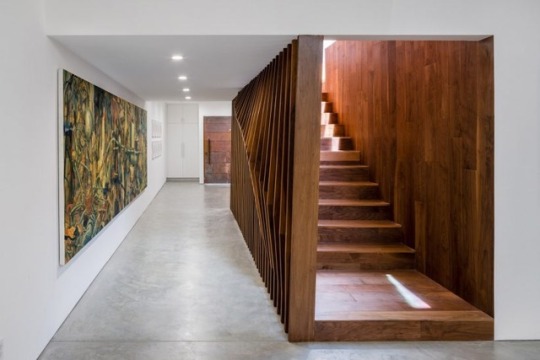

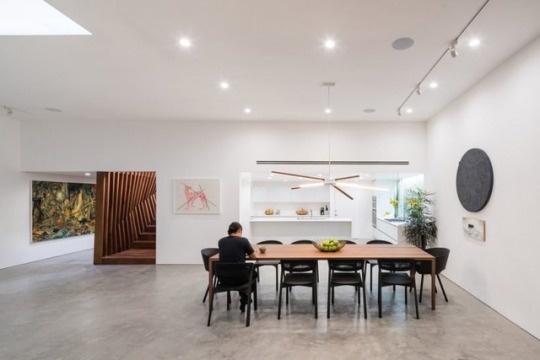

Good wood - LA based Dan Brunn Architecture pay homage to the original architect Frank Gehry in this super re-vamped minimal pad in LA. Gotta dig that staircase too…
3K notes
·
View notes
Photo
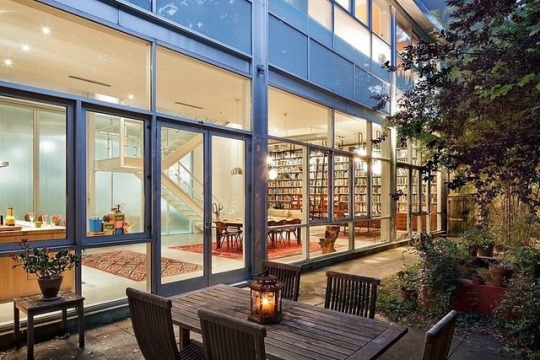
Beautiful.
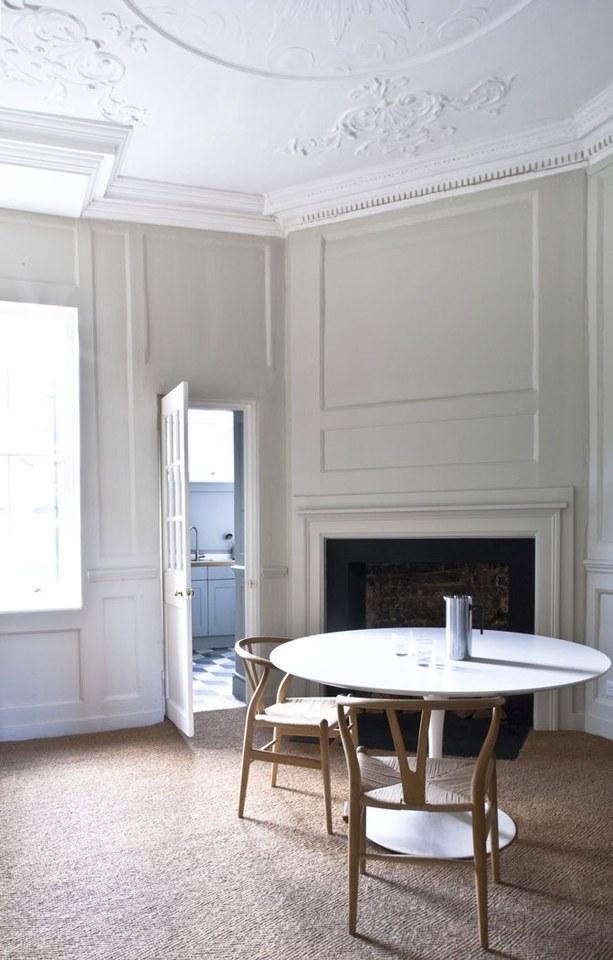
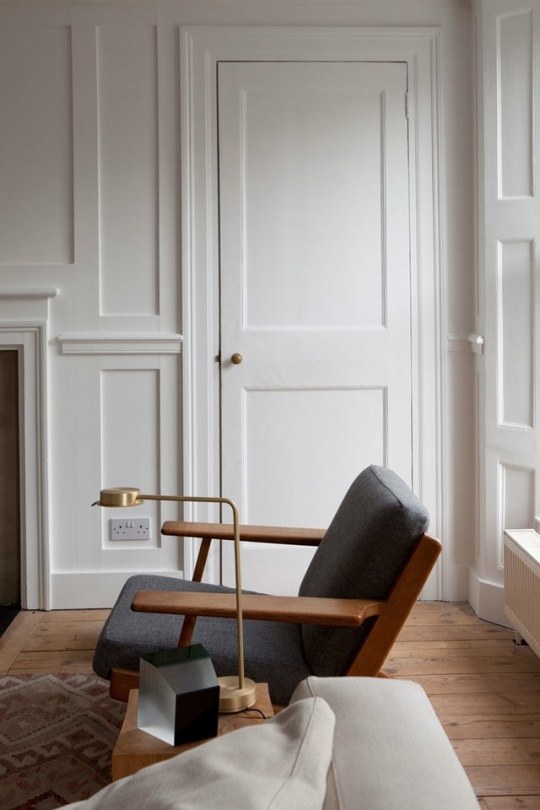
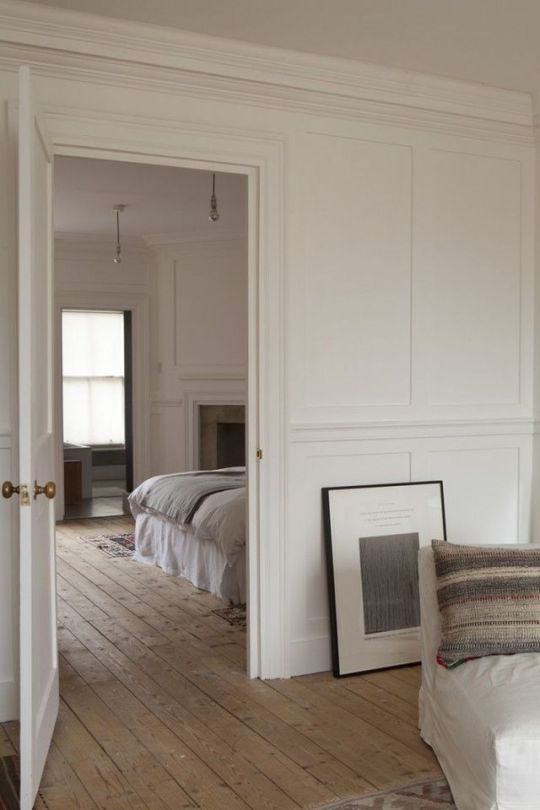
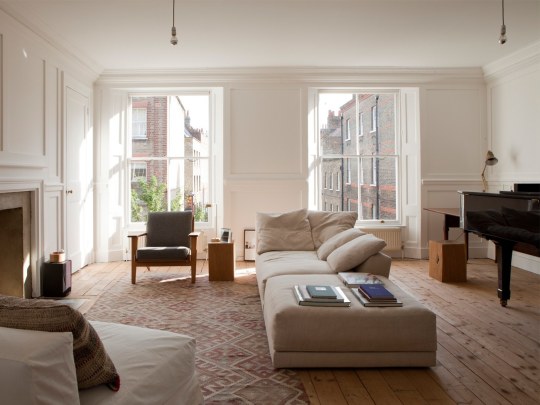

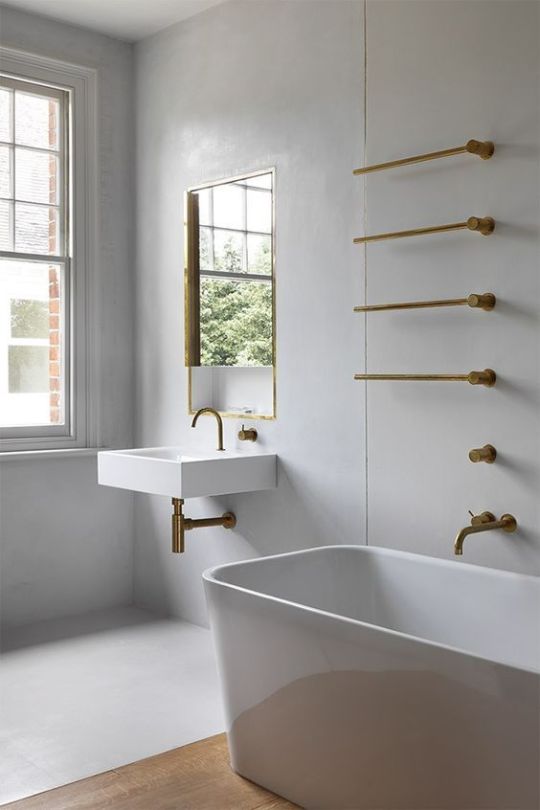
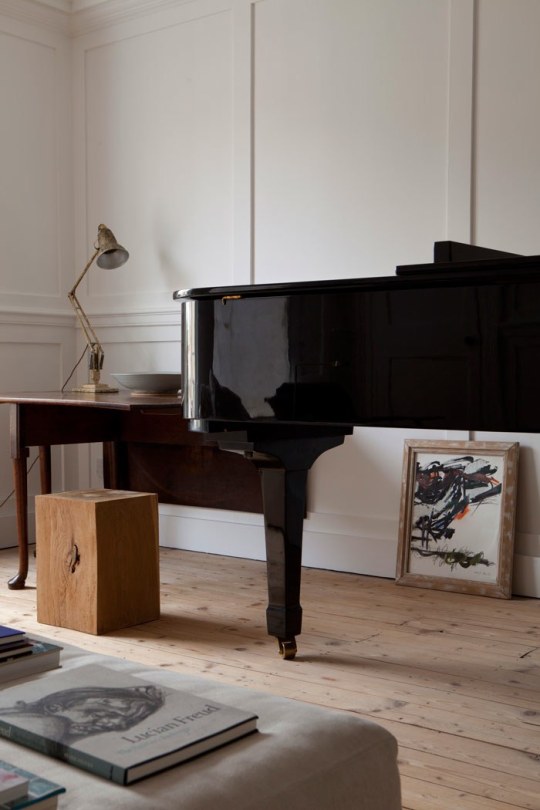
Architect William Smalley’s apartment in London, featured in The World of Interiors December 2014
1K notes
·
View notes
Photo
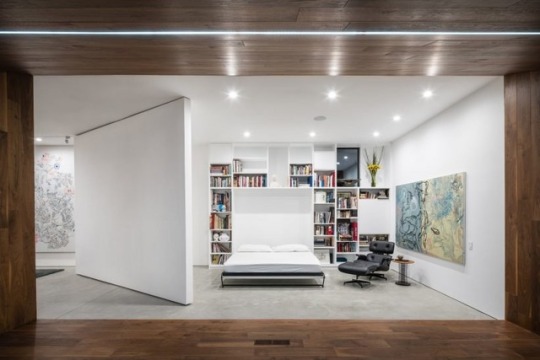
Incredible book wall!
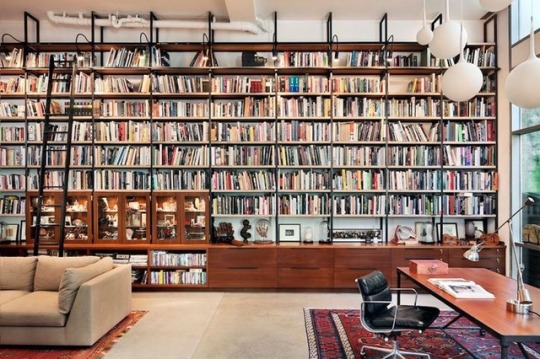


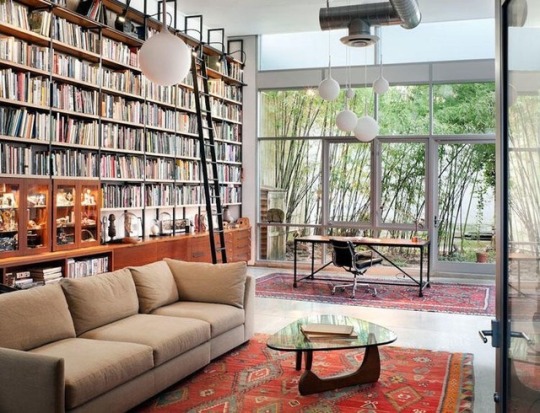
Brooklyn Artist Loft by BWArchitects.
1K notes
·
View notes
Video
youtube
Here I talk about my design inspiration for the "wood wall" in our recent remodeling project including a fortuitous visit to the Crystal Bridges museum in Bentonville, Arkansas and the Bachman-Wilson house designed by Frank Lloyd Wright.
1 note
·
View note
Text
6 Essential elements of a smart home system (2017)
I have recently completed a major smart home systems install as a part of my recent remodel. I have had many questions related to the exact tech components and configurations I chose, so I decided to write this blog post to give some further details.
I will cover 6 subsystems that were part of my recent project:
Network
Lighting
Window shades
Climate control
Audio/Visual
Control systems
Network:
Having consistently good wireless network coverage is the heart of any smart home install. Due the size (3500 sq ft) and 2 story nature of our house, getting solid network coverage from a single access point proved to be a challenge.
We chose to implement a mesh network using the Eero home wifi system. We ended up with a total of 4 Eero units that work together to form a blanket of wifi coverage across the entire house.
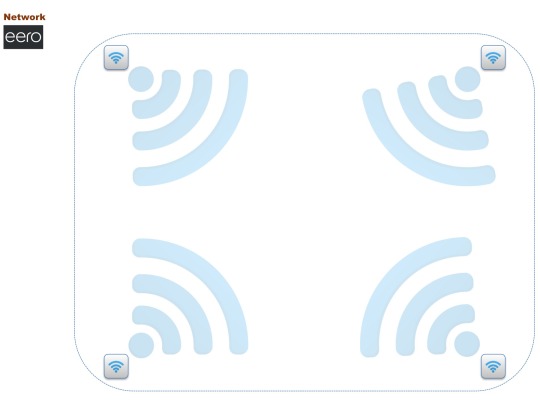
One great thing about these Eero boxes being distributed across the house is that each base station has 2 ethernet jacks. This allows you to plug other smart home control units that require a hard wire into the Eero unit closest to the object you are trying to control.
Lighting
There are many smart lighting systems on the market and many are interoperable. However, we chose the Philips Hue system due to the range of options (bulb form factors, motion sensors, and strip lights) and the overall breath of compatibility with other systems. This room has many in-ceiling lights designed for a “flood” light bulb form factor. For those fixtures we chose the Philips BR30 bulbs, which can do both white light and color.
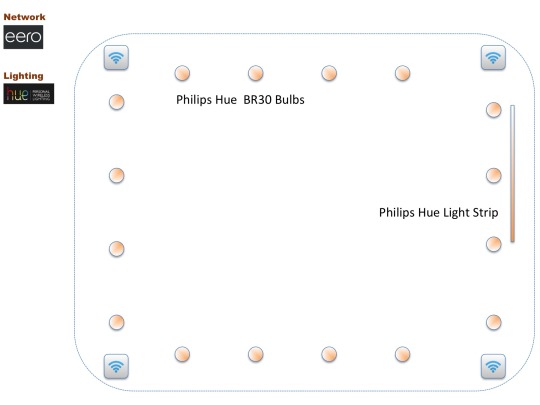
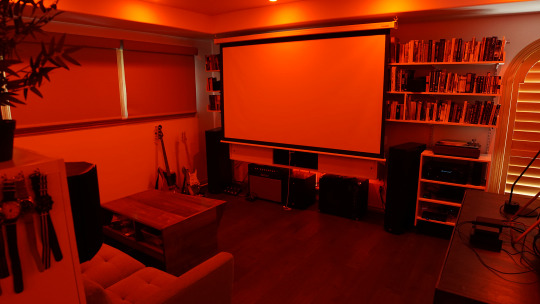
Under the console which houses our center channel speaker for the home theater system, we installed a Philips Hue Strip - which can also do both white light and color.
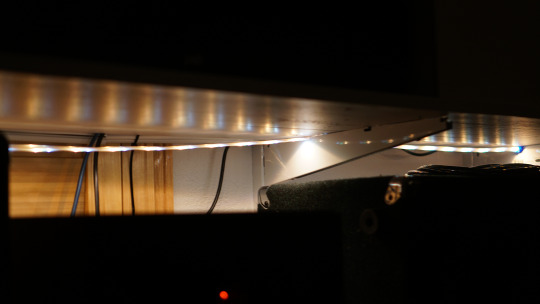
This touch really helps make the console feel like it is floating and also functions as a bias light for watching TV.
Window Shades
There are a large number of windows in this room, many of which are above or behind beds and shelves. Our desire was to be able to better control the light in the room with a minimum of fuss. We chose to purchase a set of Serena Shades directly from the manufacturer.
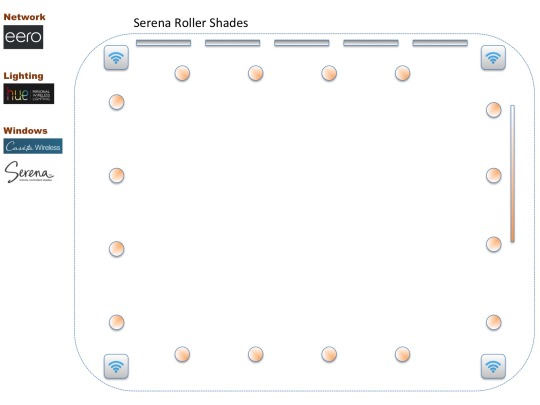
Each of these motorized roller shades contains a set of “D” batteries that last for “years” depending on usage which allows them to be hooked up to a Lutron Caseta wireless bridge for control of opening/closing. Totally wireless!
I cannot overstate how amazing these blinds are. The fabrics and build quality are fantastic. They are exactly what you want - and have never once lost connectivity.
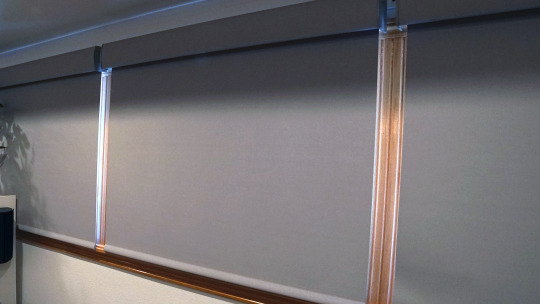
Climate Control
When we built the new wood wall and sliding door, we cut off the main room from the thermostat. There is no air conditioning vent in the stairwell and with the door closed there was no way for the thermostat to effectively regulate the temperature in the main room. Although we already had a Nest thermostat installed, I discovered that Nest still doesn’t have any support for external/remote temperature sensors.
Ultimately, we replaced the Nest thermostat with an Ecobee 3 thermostat and remote temperature sensor.
The Ecobee allows you to disable the temperature sensor in the head unit of the thermostat. So in our configuration, the only temperature reading is coming from the remote sensor which is located in the main room.
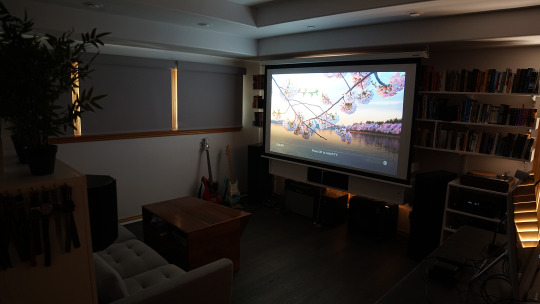
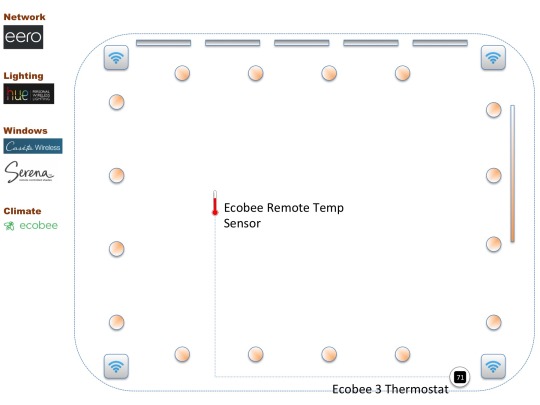
Audio Visual
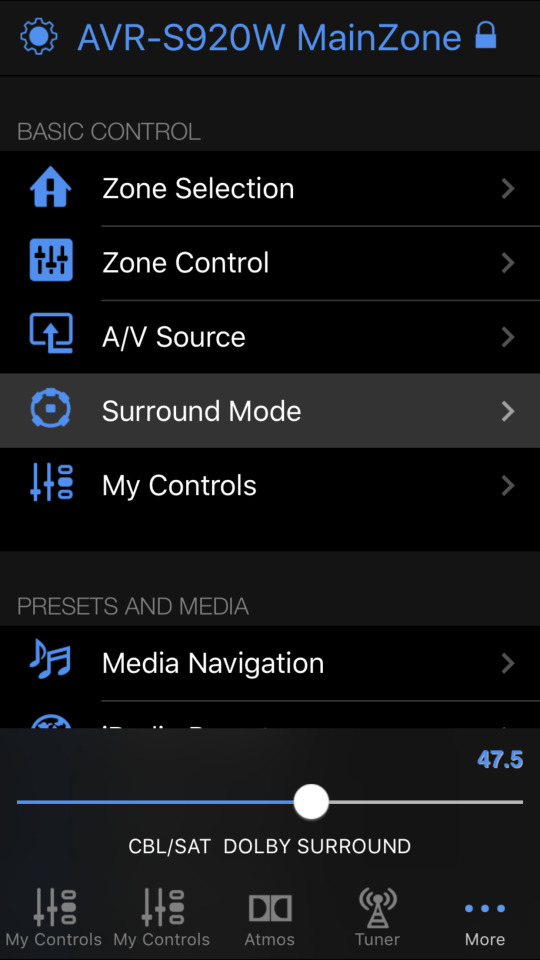
One of the main design goals for this room was to install a compelling home theater experience. After some research, we decided on a 7 speaker (plus subwoofer) setup running in a Dolby Atmos 7.1 configuration. Since there really isn’t an affordable selection of 4k projectors today, we decided to use the HD projector we already owned (a BenQ w1500). For amplification, processing, and signal routing, we chose a Denon AVR-S920W. This was honestly one of the most confusing purchases in this whole process because of the huge number of very similar products on the market. The deciding factors for us were the Denon unit’s direct Apple AirPlay support, Dolby Atmos 7.2 support, and enough application power to drive some high quality speakers efficiently.
For speakers, we went with a variety of purpose-specific speakers from PSB.
Front “height” speakers: PSB Imagine XA Speakers
Subwoofer: PSB SubSeries 200 Subwoofer
Center channel: PSB Image 9C
Front main L/R speakers: PSB Image 6T
Surround speakers: PSB S5
The other thing we needed to do was invest in a Bluray player capable of playing back the latest Dolby Atmos encoded material. For that we chose a Samsung UBD-K8500.
The end result is excellent. With the appropriate Dolby Atmos encoded Bluray disc, it is a very immerse viewing/listening experience. One of the unexpected benefits of this system was how good it makes older material that is not mixed explicitly for Atmos sound. The Denon unit makes intelligent use of the front “height” speakers even with standard 5.1 sound and really makes older movies sound better.
Control Systems
Obviously with this many systems in play, the ability to easily control everything is very important. As a first step, the majority of these systems have a native iPhone app that allows for device specific control.
Denon:
Ecobee:

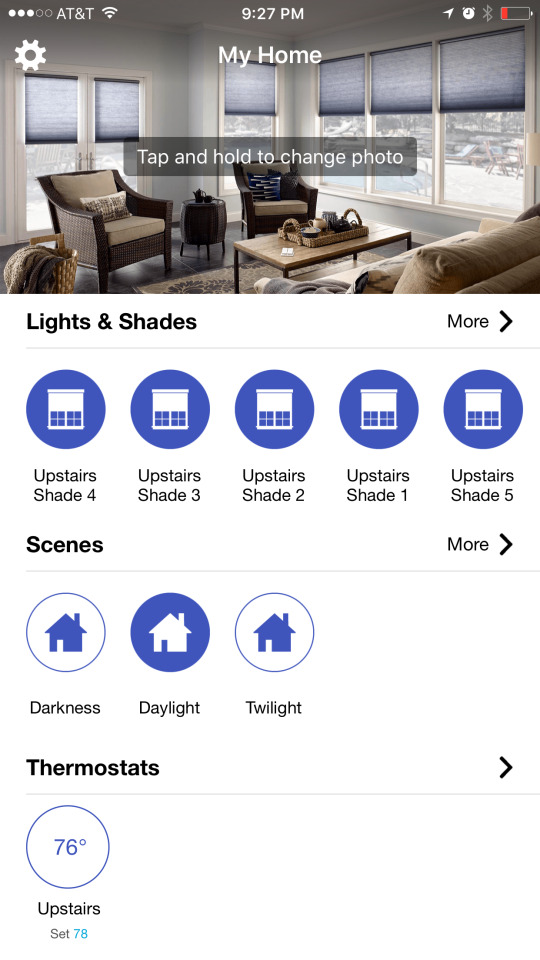
Lutron Caseta/Serena Shades:
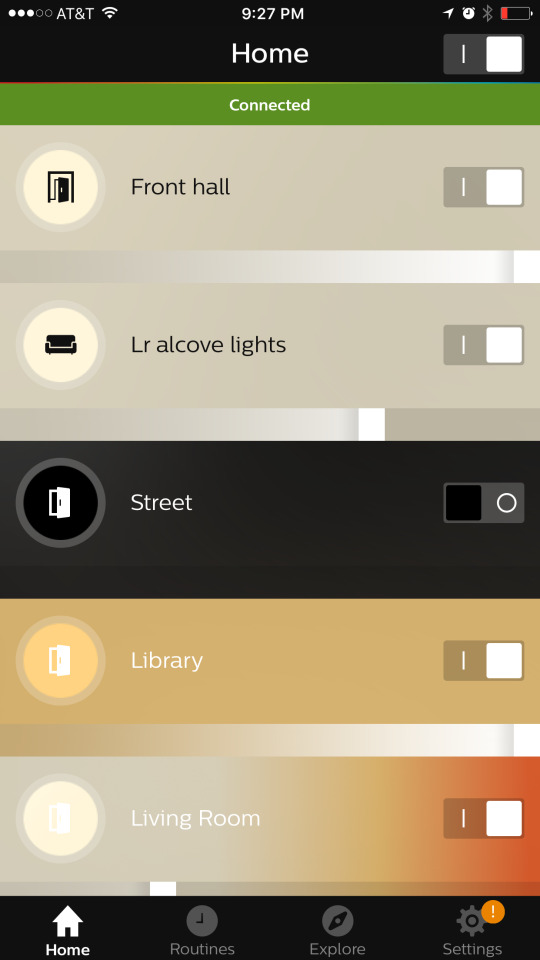
Philips Hue:
Each iPhone app is useful for setting up individual configurations that are specific to the particular device. But, what you really want with a system like this is to be able to set up configurations that span across multiple subsystems (lighting + temp + windows). Enter Amazon Alexa.
One key factor in choosing each of these products was support for Amazon Alexa. Within the Alexa iPhone app, you can enable a “Skill” for each of these products.
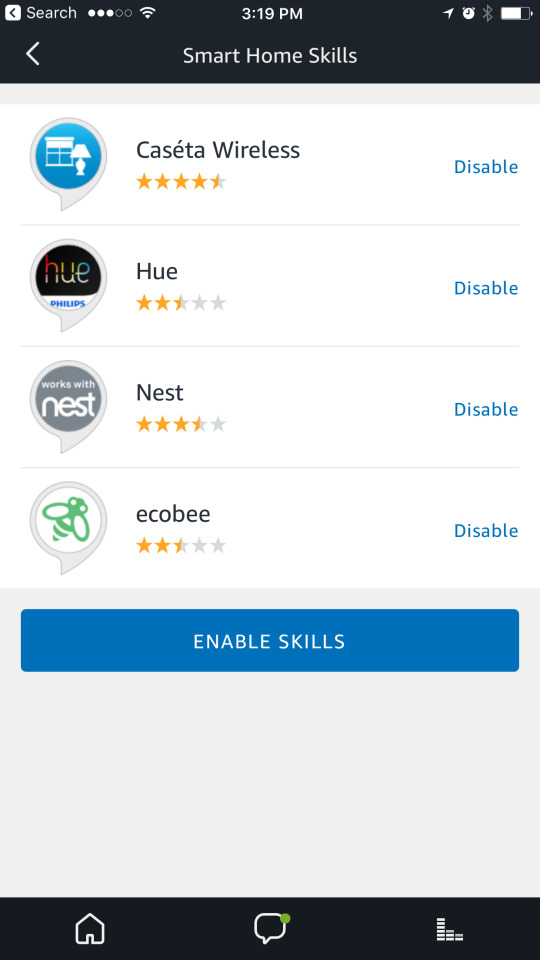
Once you have enabled the Alexa skill, Alexa can scan your smart home setup and learn about your devices and any “scenes” you may have set up within each particular subsystem (a red lighting scene for instance).
Once Alexa knows about your devices and scenes, you can use the Alexa app to set up voice controllable “groups”.
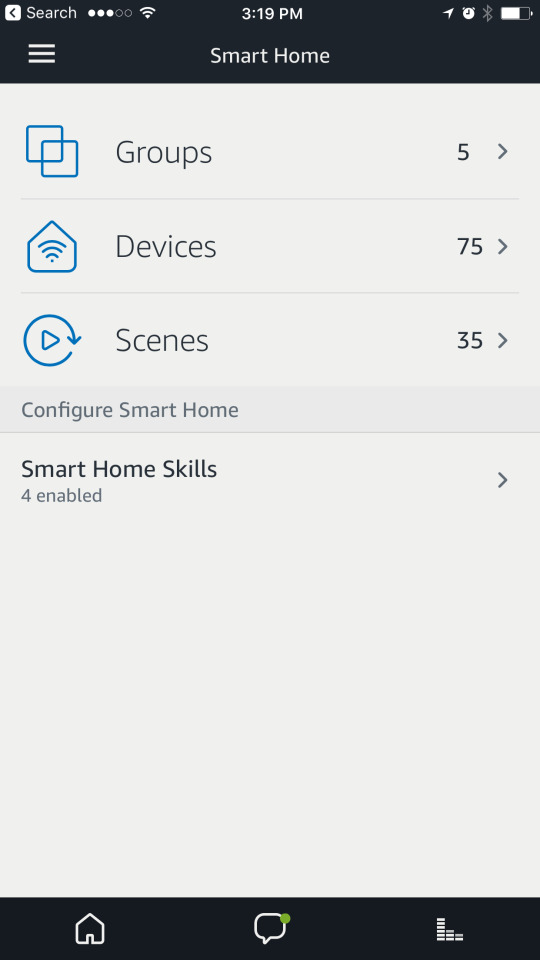
Groups can be used to close the curtains, dim the lights, and turn down the air conditioning in a single voice command as in “Alexa turn on Watch TV”.
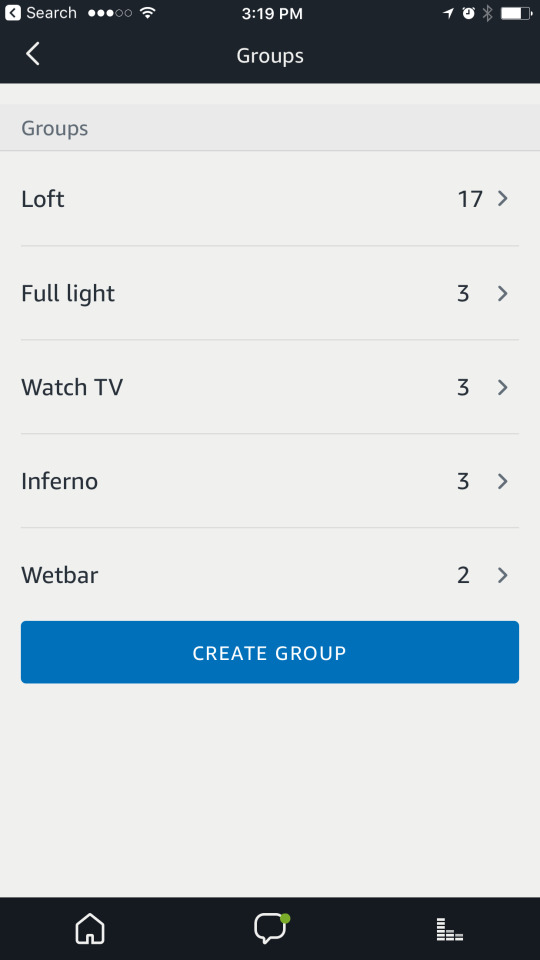
This is the real killer feature of this setup, and it fulfills the full promise of a well designed set of smart home systems working together. To see a demo of all of these systems working together, you can check out the video here:
youtube
0 notes
Text
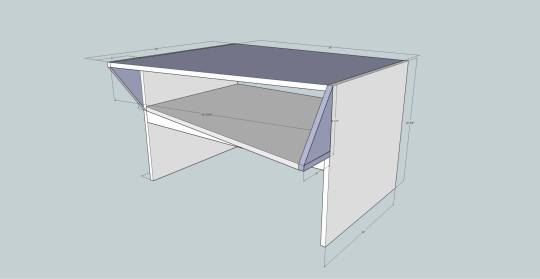
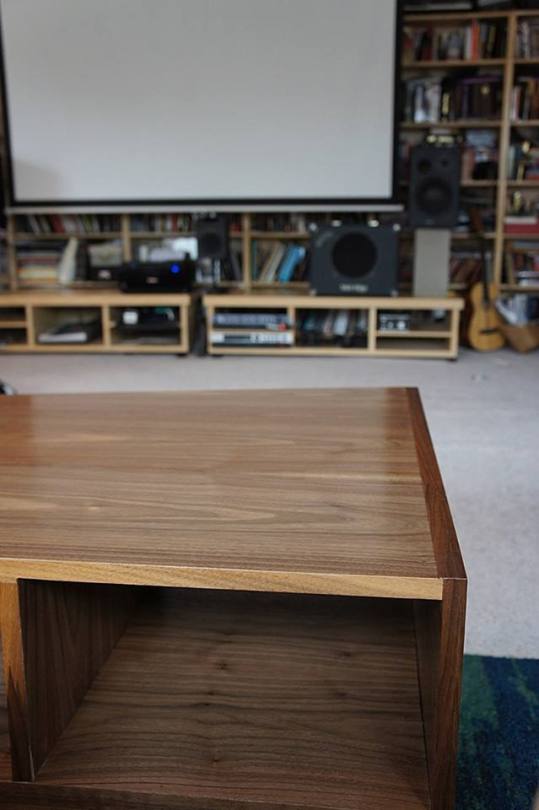
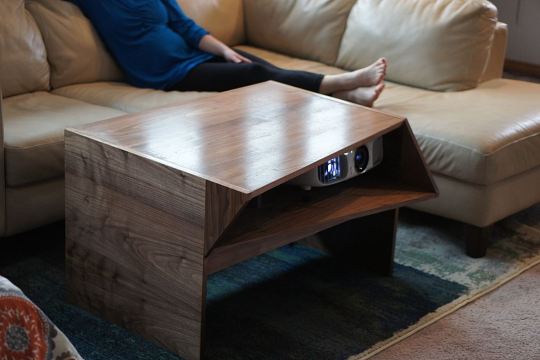
Projector Table (2014)
I designed and built this projector table in 2014 using walnut veneered plywood. The projector is a BenQ W1500.

For this project, I wanted to design a piece of furniture that served a few purposes.
1. First, I wanted to be able to put a projector inside of the table to use for home theater projection.
2. With the projector inside the table, I wanted to be able to discreetly run power and HDMI cables to the projector.
3. I wanted the piece to be stable enough that it could stand people putting their feet on it or bumping into it, without easily disturbing the projected image. I found that projector central had all of the information I needed to make the required calculations.
4. I wanted it to be large enough to hold some drinks and plates for informal dining.
5. The final height of the projector had to be within the tolerances allowed for my particular unit to project a good image onto the screen.
With all of these constraints in mind, I started as I usually do using the SketchUp sofware to begin the design process.
Once I had settled on the basic design, I did a cut plan layout of all of the pieces on a 4′x8′ sheet to see how many pieces of plywood I would need to build the table.
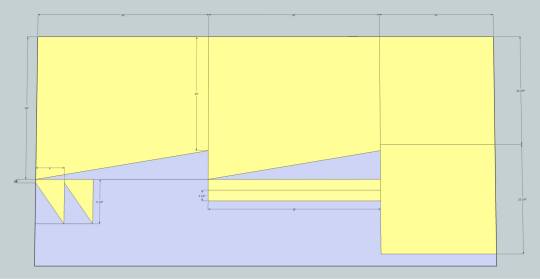
Through this process, I discovered that if I shaved 2″ off of the depth of the table I could avoid buying 2nd sheet of plywood. I decided that removing 2″ from the overall depth would not affect the functional or aesthetic design goals. These walnut plywood sheets are about $200, so that was a big savings.
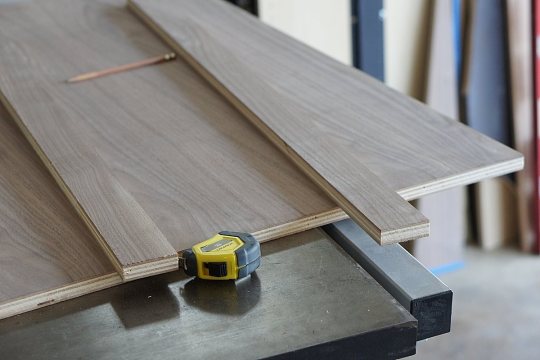
After I finalized the design, I could begin building the table. The first step was cutting out the main shapes. For this I used a table saw and a circular saw. When I need to make long straight angled cuts, I use a long metal level clamped to the wood as a guide for the circular saw.

After the working pieces were cut to size, I began assembling the table using a pneumatic nail gun.
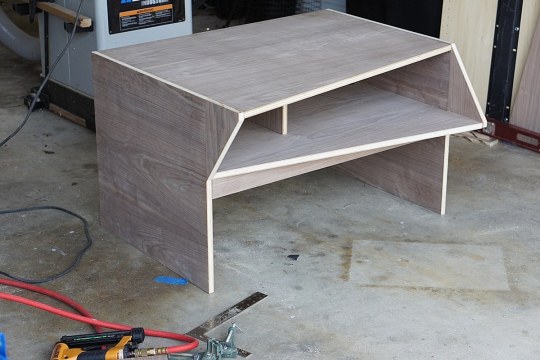
After sanding the table with a small orbital sander, I installed a few right angle metal brackets on the underside to help stabilize any lateral movement. Then I installed the two horizontal trim pieces that run along the bottom edge to hide the brackets.
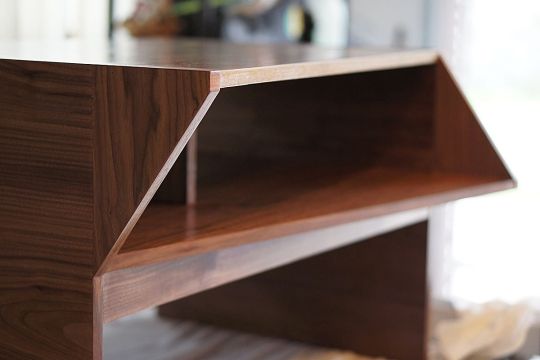
I used some iron-on walnut veneer strips to cover the plywood edges, making a very seamless look.

Next, I decided to finish the table with a medium gloss tung oil. Tung oil is very water resistant and tough, making it a great finish for table surfaces.

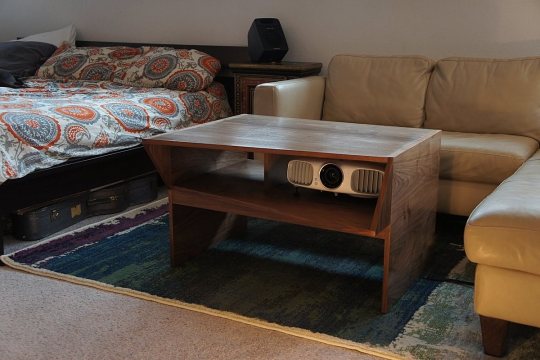
I highly recommend the BenQ projector I have (w1500), and if you can still get one its a great machine. The closest new equivalent is probably the BenQ HT1070.
0 notes