
Don't wanna be here? Send us removal request.
Statistics
We looked inside some of the posts by milap-sd and here's what we found interesting.
Average Info
Notes Per Post
0
Likes Per Post
0
Reblog Per Post
0
Reply Per Post
0
Time Between Posts
5 days
Number of Posts By Type
Text
17
Last Seen Tumblr Blogs


Fun Fact
Tumblr’s reach among the 26-to-35-year-olds in the US is 11%.
Text
Shopify Custom Pages using the Grid :)
Hello and welcome to the post guide to Shopify custom page layouts using the column framework today we're gonna take a look at this 16 column framework that the themes are built upon and how you can leverage the framework using different divisions and classes to create a layout of your liking and by layouts what I mean is a page a custom page that is divided into various rows and columns.
Now I'm going to be using columns in two different ways here when I'm talking about the layouts one being the 16 column framework that the layout of the theme is built upon the other being the columns that you will make on this 16 column framework so we'll get into that in a little bit more detail a little bit later on but what I'm gonna do is walk you through a sequence of examples that will get a little bit more complex at each step so by the end of it you will have all the tips that you need to leverage this framework to create the page layouts so to talk a little bit about what I mean by the 16 column framework you're theme has an overall width to the layout.
Now there are some elements that will span the entire width of the window so those elements are breaking out of this framework but other than those elements everything else exists within this grid that has a specific overall width and all of the elements exist inside of containers that have their own widths that are specific and relative to the overall width of the layout then as you adjust the width of the window or as you look at the site on a screen that is more narrow all of the elements of the site will adjust and reposition and resize and then eventually stack to make sure that all of your content is visible regardless of what screen is being used to view the content so this is called responsive behavior .
The theme is already built like this but now I'm gonna give you tips on how to build internal pages that will have columns and rows of content that will all behave with this responsive behavior so to jump in here all of the examples that we're gonna take a look at are going to be an admin online store pages and it's here that you create custom pages not only that whenever I'm talking about elements and items throughout this walkthrough that could be anything that could be images it could be a paragraph of text it could be a list it could be any element that you can add to a page with HTML or with the editor.

Here what I'm going to be describing isn't the content that you can add to pages but the way that you can create layouts for the content so I'm going to be using a paragraph of lorem ipsum placeholder text for my examples I'm going to be using this placeholder image for my examples but let your imagination run wild with all the various types of content that you could be using in these different layout examples let's move in here with our first fairly straightforward example and that's creating a page that has a single row of items that are evenly spaced and are taking up the same amount of space so they evenly divide the width of the layout and you can divide it in two three or four using this trick.
So here I am on a page try not to pay attention to the preview that appears in the editor here but instead flip over to the HTML editor using this button and as you see I like to separate it here to make it a little bit more obvious but we have a paragraph of text and we've got an image here so using either this normal page template or the page multi-column template we can enter this special tag that will separate this content into two evenly divided columns for us and that tag looks like this open bracket exclamation point dash space split.

It's a split tag that looks like that so just that on its own again don't pay attention to this preview but view the page and as you see we've created a layout one row with two columns here that are taking up the exact same amount of space we can repeat that whole process.
So let's say we want another image to appear right beside it let's place an image with another split between these two images can save that and this template will automatically understand that that means to create a three items per row layout which looks just like that as you would guess this works again this time we're going to do it with a paragraph again put the paragraph below that image and make sure to input that split tag so the template knows to create a new column and there we go with four evenly spaced columns so they are exactly the same amount of width given to each one of these containers and of course as I mentioned given that these are in responsive containers as I constrain the width of the window all of the content adjusts to keep things in the layout that I prefer up until the mobile layout where the content will become stacked.
So the split tag is a great shortcut to create a page layout that has a single row where the items take up an even amount of the width each let's take a look at a scenario where you would like to create a page that has maybe multiple rows or where elements are taking up uneven amounts of the layout to do that we're going to have to take advantage of the column classes and do a little bit of HTML.
So I've got another example here where we are going to split the layout into two evenly spaced columns but this time we're going to do it the hard way we're going to do it using the column classes so that you can get an idea of how this all works so once again flipping over into the HTML editor we've got our paragraph and we've got our image the first step here is to wrap each one of them in a divider.
Now I'm just gonna show you this step by step but these aren't you may not follow these steps in the same order when it comes to doing this yourself once you get the hang of it so now we've wrapped them both in the divider.

Now we've got to give them a class that allocates a number of the 16 columns of the overall 16 column framework to each of these sections of content so if we would like to create two even columns out of 16 total columns that means we need to give 8 columns to each one of these pieces of content.
So I'm gonna make this one div class equals 8 columns and I'm gonna do the same thing for the image so that both the image and the paragraph of text get 8 columns allocated then to make sure that the content has the correct margins for the page we need to make sure to add alpha to the leftmost element and add Omega to the rightmost element so when we save that and give it a view you see we have once again created a two column layout but now if we would like to make this an uneven layout.
It's as easy as changing the relationship of these columns here making sure that they still add up to a total of 16 so let's try 7 and 9 and we'll see that the image now occupies more space than the text compared to our previous example here so you can do that with any combination of column classes as long as they're adding up to 16 to fill the width of the layout and here's a screenshot here of all of those classes and as you see we even have some fractional classes.
So we've got classes like 1/3 2/3 1/5 so you could use those to your disposal as well if you would like to divide the layout into 5 oranges and as you can see in this helpful article we have a few other common examples we've already taken a look at two columns using the column classes but we can use this one third column class as well to divide up the layout into three or for you making sure in both cases of course to have alpha added to the leftmost element and Omega added to the rightmost element.
Now let's try to combine some of our examples to create a layout that has more than just the one row so what I'm gonna do is take the three per row layout that I've already created on this page here I'm gonna copy it and I'm gonna place it underneath an existing page that looks like this so we already have the image on the left with some text up here on the right and I intend to show three images in a row below this area.
Here so I'm going to go to that page and as we see we've got the nine columns given to the image the seven columns given to the paragraph and directly below that I'm going to paste in the three images in a row that we've already created and go ahead and save that and take a look at the result and as we see it did not appear quite as intended and the reason is because the gap that is below the text.

Here is the next available space for some content to appear so the first image from our row of three images tried to appear there and then subsequently broke the layout for the rest of the page so to get around that I'm going to show you what you can do to define rows to make sure that rows will start over and that a new row will start at the leftmost position of the page to do that you need to wrap the content of your row in a section clear fix divider or a divider with the class of section clear fix so to do that I'm going to make some space between the two rows and then wrap each one in the divider as I described technically you only need to do this to the preceding row but it's a good habit to wrap any row with the section clear fix.
In case you happen to add more content it will make sure that the next content is added in the leftmost position in the subsequent row so with each of those rows wrapped in the section clear fix divider we can go ahead and give it a view and see that it is now appearing as intended for this next example.
Let's take a look at the offset classes which are a way of moving over in columns without having to occupy those columns with content so for this example here in the h2 in the HTML editor you see I have two images and what I'd like to do is allocate each one of these images four columns I don't want them to take up half of the layout each I'd only like them to take up a smaller portion of the layout but I'd still like them to appear centered in the layout.
So to do that first I'm going to give each of these the four columns that they deserve and we'll see what that looks like just to get an idea that of course those images have appeared to the far left so now what we'd like to do is to offset their position to have them appear in the middle of the page.

So to do that I'm going to add an offset by 4 to the first image here and save that that's going to allow that image to move over by 4 columns and then start adding content from there so that's how you can use the offset feature to move around and to skip columns you can offset by as many columns as you want from 1 to 15 on the topic of the offsets there are a couple of other page templates that apply to this conversation about the column framework.
So here I am on a page I'm going to set it to the narrow template here we're gonna save it this page contains a simple paragraph of text let's see what it looks like here so instead of it occupying the 16 column framework its occupying the 12 Center columns so it's a 12 column framework that's been offset to occupy two Center columns.
So if you wanted to divide it in half you would give a six column class to each of course our helpful support center is filled with articles about the column framework that discuss the definitions of the column framework creating various layouts using HTML how to use the split tag as a shortcut to creating layouts why we use the alpha and omega classes how to divide your page into some fractions and finally the offsetting feature.
0 notes
Text
Turbo Shopify Theme - Featured Promotions Section :)
Hello and welcome to the post guide to the turbo Shopify theme featured promotions section today we're going to take a look at the featured promotion section and the settings associated with it here I am in the customize settings editor and I'm just going to scroll down on the homepage a little bit here to see this row of featured promotions appearing with some animation styles as it loads up but in case you don't have a featured promotions section already as part of your layout here's how you add one.
You go ahead to add section locate featured promotions and add it to the layout and of course just like any of the other sections in this sequence of sections here you can click and drag to move it around within the sequence.
I'm going to remove this example section here and then scroll on back up to the default section and take a look at the settings associated with it to do that we'll go ahead and click on the featured promotions section here to open up these settings so the settings up here pertain to the entire section whereas the settings associated with each one of the features each one of those content blocks can be viewed here as we expand that content block.

Great let's take a look at this first setting here promotions per row which can go between 2 & 4 looking good and of course we can add more features to fill out the layout by clicking add promotion here now we've got six featured promotions appearing.
Now in a three per row layout I'm just going to remove those last two that I added as an example here so that we can go ahead and start to configure a four per row layout of featured promotions the next setting here that applies to the entire section is this wide display setting which will allow the features to span the entire width of the layout as opposed to having that setting disabled where the featured promotions appear sort of within the layout of the theme.
Great we've got the promotion animations of course none is an option if you would like for those promotions to simply appear we also have fade in which appears like this fade up and of course this default fade down looking good and those animations will take place as the user Scrolls to that area of the page as opposed to it happening right on page load.

In case those featured promotions are out of view and then as the user Scrolls down they will animate into position we have a few options for promotion styles to add some flexibility to this section we can have them appear as circles as squares or as squares with rounded corners as you see here with these featured promotions that title is appearing on the promotion itself however you can have the title appear below the featured promotion as you see here.
Great let's have those titles appear right on top of the featured promotion and then take a look at the settings associated with each one of the featured promotions to do that we expand the settings here and of course our first setting that we can configure is the image.
I'll go ahead and choose an example image here great of course these featured promotions should probably link somewhere to do that you can select from any of your pages blog posts products and collections on the Shopify platform or go ahead and input a different link this is where we can input the title that appears on the featured promotion and then we've got this text setting.
Now you can't see the text right now because the text appears as we hover over the featured promotion along with that underlined style appearing so of course this is where you can edit the text fantastic alright scrolling down from there we've got one last setting that applies to each one of the featured promotions individually and that is the button labeled.

I'll just add some text here to show you what that button looks like and here it is as we hover over the featured promotion and of course clicking on the button or anywhere in the featured promotion will lead to the link that you have set up in this link setting these settings for the other featured promotions are all exactly the same so each one of these featured promotions is configured the same way.
So let's take a look at how we have used this feature on some of our demo shops so that you can see how flexible it is and hopefully give you ideas of how you can configure your featured promotions section on your own site first here is our Portland demo where we have a for per row layout it is set to the wide display some of the featured promotions have a button some do not and they all lead to different places around the site.
The about Us page whether you've got a special collection of sale items or to the blog great here in our Florence demo we have prominently featured the featured promotions section in this spot where you would usually see a banner image instead we've got two featured promotions appearing with the wide display setting enabled with button text with some additional information text as well to give you this effect in our Dubai demo.
Here we've got two per row appearing with the wide display setting disabled and no additional text appearing just the underline style to give some style to these links in our sole demo here we've got a two per row set up we've got the wide display setting disabled.
We've got the title appearing below the featured promotion and then with a significant amount of text and a button appearing on hover as you see here finally with our Chicago demo we've got three featured promotions appearing in a row with the wide display feature enabled we've got the button appearing with some text appearing as well and these all leading to various collections or blogs throughout the site.

So that's how you go about configuring your featured promotions don't forget any of these content blocks you can click and drag them among the other content blocks to reposition that featured promotion in the order that they appear hopefully this gives you some ideas of how you can configure a compelling featured promotion section on your home page.
0 notes
Text
Add a Cookies Banner to Shopify Store :)
Hello in this post I will show you how to make one cookies banner creates how to use a privacy policy generator data protection page created and complies legally so that we do not no warnings from any lawyers or can punish other personalities and we're really going through it step by step all completely free, it really offers providers who charge 100 euros and more.
So even 1000 euros for such a service, although everything is free and is really 100 percent safe and how do you do that from shopware see certified by a dealer and the anti right law firm checked it is a checked shop system you can here exactly inform the dealer buch.de and the it right at heidi law firm.
You can inform dot de here exactly, but we are leaving now step by step everything so that we have a data protection page and a we google with the cookie banner and as a legally compliant one and we click here privacy policy generator active thinks and there is completely free there are really party costs a few a hundred euros for free thank you times active means and now we click here and the next step like scroll down yes important here the date is last 10 april been updated if we did that now in 2020 after then please see the scroll below and your changelog the active date.
So we choose september 2009 10 that fits still click on then of course read everything through and who is responsible and now the band seems to be saving so here really seems an important one name up here now lift provider access data to this access data are available to almost every website visitor raised and to be on the safe side you can just click once a year.
If you don't know then I know don't write down actually set cookies I can do it here read through it again and be on the safe side again click year, although it does not do this if you have your own cookies installed please include this here, including the storage time, I write 30 days there and i really don't chase more than 30 days.
So if you guys longer is followed by 30 days, it can also write here for 60 days then the user can register on their website yes if we were I would just be decades maybe I will change something in the shop sometime and with yes since you are on the safe page.
Here also you can allow users to comment on their website in blog maybe you can't leave it at the moment or shop sometime maybe it would make it possible and here you are simply on the safe side of the then there is a limit.

The newsletter will be published at some point contact form yes then put Google analytics maybe that doesn't do it right now but if you are really profitable online marketing with targeting with Google later really with Google analytics works will use something safe because yes click on everyone.
If I don't know the motor happily, then I will continue not an adobe analytics neither no don't use google web fans by that either there I would now with well I work with google maps so yes I do so you do that so that you can find a safe place on the safe side I also make youtube videos and click here again social.
So plugins recognize that if you have such a button on your page then you have to use the two click solution here if he doesn't like me then click on mine and then click on yes again in any case click google adwords and conversion tracking and that too in any case i will give you a course later show how to do google adwords conversion tracking retargeting google shopping and so on.
Then further you are processed order yes if yes go your order processed so no i do it myself So you are further in the organization of the data protection officer if you are all alone in the company then you can look at the result now comes the dsgv text and then take the scroll down.
I don't think anyone has read that on data protection time but yes and now here all the way down and this actively means too copy with which the lawyer can see you holds that was created by experts and she already has authority burglar if it is already clear to me then please about this ag company stock company because it will be difficult for.

It is easy to sue him 1 company 1 individual but a huge risk is a huge company behind it more difficult for lawyer to copy then go to our shop here attitudes to the legal texts quite a data protection declaration copy save beforehand i am not a lawyer I just show you the lies so do it on the right lease do about you can do that again and on active means everything can be done that's really my own responsibility.
I don't want any of that laws change so that is now as of 2009 10 September and then you have to you really read everything so that it was really up to date time fits and then save online shop pages.
Now create one create data protection copy data protection here again then save to navigate click here click foot menu click again menu impression add menu entry privacy here again our privacy policy insert page add save.
So now when we look at our shop and scroll that and here is the data protection from one presses then he can read through it all and perfect and here is the weather for the data protection officer.
So yes, that's why security becomes the kander the lawyer or the one who clicks on us warning or our competition and ct there is an behind and there you feel real so I think you're so sure you're too good.
The next point is the cookies we want a cookie track reinforced go to the apps go to the shop so i have eu cookie bar as well as write now at least delete the times here and right now the first one I'll take now that will be installed install app install hi app install works.

So now we want to have the ball we offer and here this website we use cookies so write a better text about how we use cookies that and the users write a better text about how we use it cookies i mean lasso we use cook is and then write here.
Okay more about that so you know to be creative okay or accept and write here several information and such next chopin just eu kps year so for the usa and outside the eu you don't need that and here you can put your ball in it is his now depending on the design of your shop.
So here you can add the text to the day change green now the green here is also green okay we use cookies and then he can decide ok click or more and kerner sounds more choose who let it through again especially cell phone you just want that kuki banner is gone.
So we know that yes I go to a website already eaten so many cookies I should have 150 kilos optimal and that is now advertising for the other apps and then just like now control reviews his comeback it should and yes below you can see more cookies.
Here is my screen okay there he can choose that means our cuban works I go back again very important now i am not a lawyer or tax advisor and please inform yourself so you cannot sue me now if none clue what to inform yourself at active means it right at the retailer association law firm and I have now shown you a way as quickly as possible data protection bureaucracy got behind it and those responsible are then the respective platforms such as iq power equipment or retailer association etc depending on whether, for example, the service from the dealer association or it would be quite a law firm for larger shops but for beginners.
I recommend this to you via active means that and took a lot of work out of it and it really was it charge others really ask for the same service yes you think just need to know how so always emphasize the question about the comments and I will stop looking that I am a lawyer below and the comments are objectionable if it really is otherwise she sees the links below to the sensitive things respective platforms where I can also inform you at the next time.
0 notes
Text
Slideshow image size best practices in Shopify Theme :)
This post covers best practices with image size when using a slideshow in your Shopify theme. Full-width images, such as slideshows and images with text overlays are common sections in Shopify themes. In this example, you see the slideshow of the free theme called Brooklyn.
The slideshow is a chance to grab the customer’s attention! It should help build your brand identity, so the image should always relate to your business. Start by clicking on the slideshow section on the left-hand side of your theme customizer, and see what editing options are available.

It is important to note, that slideshow customization options in the Brooklyn theme, might not be the same as the slideshow customization options in any other theme you choose. The size of the slideshow area is quite large, particularly in the theme Brooklyn, and requires a high resolution image.
If the image is blurry, low quality or unrelated to the business, the potential customer may leave the online store entirely. Do not to fill the slideshow with any images “just because”; make sure the image relates to your business.
If you’re selling beachwear, then an image of someone at the beach or examples of the bathing suits is a great idea for the slideshow. You are also not required to have multiple images in your slideshow. This example shows one image uploaded, which will be the only image that displays on the online store slideshow.

Aspect ratio plays a big role in how images are cropped. Aspect ratio is the height and width dimensions of the image uploaded. If the image is blurry or stretched out, then a new image with the accurate dimensions will need to be uploaded. Most themes have different recommendations on the image size, so make sure to read the theme documentation to find the optimal size for your theme.
The Brooklyn theme slideshow recommends an image size of 3840 X 2160 pixel or larger. Finally, a crucial factor of a well-done slideshow is understanding the difference in how the image is portrayed on different devices.
Shopify Themes are developed in regards to mobile, desktop, and everything in between. You can preview what the slideshow looks on different devices by selecting one of the device icons at the top of the page.

Each of these devices automatically adjusts the image for its screen. On full-width images, the picture will often crop on the sides. For this reason, make sure to test your images on mobile as well as desktop when designing your storefront.
0 notes
Text
Creating Custom Theme for Shopify with Theme Kit :)
Hello and welcome in this post we are going to create our own theme I hope you have learned how you can customize the theme for Shopify and how theme options will help theme structure work and some of the general sitting around shop with him.
So in this post we'll create our own theme and you will learn how you can create it so far we have customized debut theme which was easy you learn about sections template is snippets and everything you need to know about Shopify theme structure.

So let's get our own him if I come to my theme here as I said what is the require thing about carries himself a theme just these folders assets until template and configure the email for developing like creating a connection between you restore what is unit in your config folder here you need to have a theme like a sitting in schema with this information that is all you need to know.
So if you create that everything will work just fine but if I come to if i open any of this template you have a lot of file here who are going to create this wealth well that will take a lot of time to clear them luckily there is an easy way if i come to the shop by theme kit it has a comment that will generate a theme for me that has the most basic in structure.
It will create a theme for me that will have those folders and those folders will have all those files but those files is not empty those files will have a basic like structure that will make a theme it works just fine but it does not have any design so all you have to do is it structure them put them together add more feature to it and that is how you can kill your own theme you can obviously store creating everything from scratch that is going to take a lot of time and if you want to do it you are welcome to do but if you come to the new comment.

This is going to create a new theme for me I'll copy this one and I will open the notepad just paste it here so that I can fill this parameter what is the API again I will come to my store here I have it in the configure DML and I will reset this again so I'll put it here the password is going to be the password and how about the Eastern name this is going to be the store name and you can pass a name for your theme what is the name for your theme I will give it cut inspire what is the spelling of it yes I know it 101 and this is not the first theme I am creating of course.
I will create some more themes and this is not going to be the first one so I will come to my template here and in the same template that I am creating all these posts I have a div directory here it has a theme here I'll create another folder called themes inside this one I'll open my terminal here.

So I'll open PowerShell you can use any other terminal tools now I will paste my code here that I have copied I didn't copy your cooker you can copy it and you can paste it now if you press Enter I assume you have a theme kit installed and it should create a brand new theme for me yes here is my theme and this will create everything I need what is the last section this is going to do it is going to upload it in my store and as soon as i refresh my page.
I have to see my theme with the new name I have provided for this one so it will take a few second not much time it is already is already upload and I will open it in the visual studio good to see how it looks that is super easy so after this I will make short posts to save time but I will make more posts so if I open the assets it is missing some folders right what are those folders you can compare it with this one ok the other side will be this one ok you have assets you have layout templates it does not have any section and it does not have any snippets you at those but for now it does not have them so that's totally fine for now.

So I can close the old one and I can expand the new one this is what we have in the config a DML this is exactly what we want this is the theme set the theme ID and all you have to do if we open the config you have it in the layout you have only theme that liquid it does not have the password it does not have any other template that you want this is very basic if you open this one HTML stuff and nothing much almost clean you can completely clean it up and then add your own code here.

So for now I will not do that one because that is just 101 creating theme now if I come to my store I will refresh it they'll see if it did create that him here for me I'll put the source code of the theme I create on github and it should be available for everyone not this one the one I am creating finally and every day when I add the code I will put push them on github and you can see what changes I have done so for now you can see this is the columns point 101 and I can click on the publish but I'm doing publish this is previewed how it looks it should look just fine yes it looks very fine.

It shows my product it shows the catalogue it shows the core page and this is my catalog just three products no two products okiya three product the next page it has even pagination yes it can paginate it can send you to the cart page and the card is empty those are the basic stuff it is showing for you know is your time to add the design to it to add more structure to your theme and more feature to your theme so that's it for this post I will see in the next post where we customize our theme and add more feature so this is not the final theme and this is not the only theme accurate I just show you how you can use the new comment in the next post I will show you how you can generate a theme with more features so see you in the next post.
0 notes
Text
ThemeKit Watch Command for Shopify Theme Development :)
Hello and welcome in this post you will learn some new comments using the Shopify theme kit so here is the shelf item kit and we will learn how you can bring the changes in your local environment and you can see instant update in the your store.

So I will come to my store here and let's go to the front page of our store I'll open this in the new tab maybe just click on the I here and I will bring some up this year if I come here in the previous post we just install it and everything we have configured now you will have access to a command line.
If I open terminal here you can press control tilde in your keyboard and it will open the Power Cell here and in the same directory if you run the theme watch command now it is going to see for any changes in this directory and it will instantly up upload those changes to develop minister here this is going to be the theme you're targeting.
So let us try it if I come to the layout directory we will talk about the layout in the next post for now I will come to the layout ready we have file called theme that liquid looks familiar right it is like HTML and CSS don't worry if things are a little bit like confusing here our theme will be a lot cleaner so this is going to be this is the default theme it is nice but when we create our theme it should be more cleaner than this so for now this are something you know every HTML body every like HTML document has a body right.

So if I come here is the body imagine if above everything in the body I create an each one and see and write a text of here is my update see I will save it and now I will open the terminal again check out this one processing uploading it took less than a second to update that one this is super fast if i refresh my page now i should see the text above my navigation here is my object that's it that is how you can develop your theme and you can bring all the changes a new local store.

As soon as you change as you as soon as you switch from the you are coded little to the browser you will see the object yes it is a little you know it's slow because of the internet connection but there is no way you can develop at Shopify theme luckily that's why so this is for the theme watch like it is just see for the changes also there are some other stuff also about these comments now how you stop this one you can preach control see make sure if this is seeing you bring any changes in this directory it will upload this one so make sure like you are not breaking your website.

Now for example I just stopped this one and if i refresh this one it is still here now if I come here and I remove it obviously these are the busy stuff so if I remove it will be removed from my local directory but it will not remove from my live store that's why that's because the theme watch is not running so I will run the theme wash again if you run the theme wash again and you will come to the restore.

Let's see yeah it is running you will come producer you refresh it is still here when you bring any changes when the theme watch is stopped you have to save it again if I press ctrl s again in the directory if you do not bring any changes also it will see the changes it will upload this one for you.

Now if i refresh it now I should not see any here as my other text in my navigation so that's easy right now you can bring any changes you want here in this file which is going to be just an HTML file an HTML page here so that's it for this post thank you for reading it was a short one so see in the next post.
0 notes
Text
Create our First Shopify Developement Store :)
Hello and welcome in this post I'm going to create our first develop minister and Shopify so I will come to the shop I partner here start creating your account I hope you have created your personal account and you are in this dashboard if you haven't please see the previous post where I will talk about how you can create a partner account and you can get unlimited free develop Minister.
So I will create my store just add your store all you require is just to know what you are going to create and what is the name of it I'm going to create a develop Minister there is a manager store which is going to cost you something.

So I will create the development store this is going to be completely free the only limitation in development stories you can have only 50 orders like 50 real orders you can have unlimited test orders but 50 order which is going to be the real orders people can buy it that is the limitation of the Shopify develop minister after that you cannot do anything because that is for development and this is going to be completely free forever and the amount of product you can have as many products as you want why they have developed minister because some clients cannot like doing the circulating the restore it takes like 2 or 3 months for 3 months they do not wanna piss shop why they want to kill the Shopify develop minister their own trade year all they are team configuration they add all their product all the excuse and everything wants everything finished they can just migrate the restore to a manager that is how it works.

So for now I will create a develop minister and here is where you can give it a name and the name for this one is going to be easy whatever you want but they will add the extension of my shop file at the end of it so I'm going to give it a name of could inspire if I see quit inspire it is going to give me that URL because no one already took it so I will say could inspire - dip so it is going to be couldn't so I quit inspired development store for the YouTube.
Also I'll create our get repository for the team I create on get whatever I write I will push it on github so you can see whatever changes have in my team so for now this is our store name and it will be my email address and for the password I will just write something so make sure you write your password I shouldn't say that so and you can scroll down here they have a Developer Preview which is new and if you are going to check this box you are giving to give you the Shopify developer preview mode.

So what is this option this is not for developers do not check this one this is for developers if you want to experiment new feature on Shopify sometimes shuffling an object without letting you letting you know that is the latest object but most of the things break and does not work even if it is develop minister that's why I don't wanna like see the developer preview the new object comes I don't know about this one and it just breaks my store.
So I'm not going to do that one so I will come down here you can create all you can just write all your address here I will fill everything behind the scene but if I scroll down for the purpose of your store is going to be testing app and team so of course I'm going to create my team here so that's why I select this one and for the address I will do it behind the scene.
So the next step is creating your eStore just click on the last button to create your store i will not save my password because i knew what was my password it will take a few seconds to gradually store and you're good to go that's all your students ready now if you click on this eye icon here you can review the front page of your store oh my god it happens like sometimes when you quickly create your account and it does not distinguish this use this subdomain here that's why this happen just take it a while and it is going to work just fine.
Now if i come here just appreciate wallah it is you restore and it is ready and if you scroll down these are all the test stuff you have here now this is going to be a public URL for you to store and you can share it with anyone you want but before doing that if you come to the online store we use the preference there is an option that will let you add a password for your pitch for example you are adding you're developing a store and you don't want people to see everything you are adding because you might just test something and you ask some gibberish good here or gibberish text here but you didn't want people to see it that's why you can add a front page password for your very store.

If you come here scroll down and here is your password protection and enable password this is going to be the password for my page of course I'm going to reset it now if you have seen it so that's it in this post if someone from outside visit this store they will not be able to access this one unless they know my password which is going to be different at the time you are reading this so I hope it has been informative thank you for reading see you in the next post.

0 notes
Text
How to Rearrange the Collections List of Shopify :)
Today I'm working on a Shopify store and one of the requests of the client is to rearrange the list of the collections in the catalog page the catalog page is the master collection that holds all of the collections in the store and by default it shows the collections in alphabetical order but in this case we want the chunks collection to be at the top of the list because it's the best seller and right now it's on the bottom.

Now before I start I just got to warn you that this task needs a little coding familiarity unfortunately Shopify hasn't made any user-friendly customization for this task so I hope by the time that you are reading this they have changed that so just to make sure that you have the updated code go to help that Shopify com and search for changing collections page and this is the one that we want so in the instruction the first thing that you want to do is to create a new navigation menu for the collection arrangement that you want and the name should be all collections it's important that this is the name of the menu so that the code will work.
So let's add the first item which is chunks make sure that you select the collections then I will choose the chunk in billa's now before we dive in and add all the collections that just quickly test this one and continue under steps before we add more into the list.

So let's go back to the instruction and the next step is to open the list collections that liquid file so go to your theme and edit the code type in the search box list and there it is so now that we have found that file let's go back into the instruction and what we need to do now is to look for this code right here so copy that and go back to the code file again and press ctrl F in your keyboard or command F if you are using Mac so paste the code.

Now we can see that there are two codes in this file and we are not sure which one is the one that we need to change so let's just try and do the first one let's go back into the instruction again and what it says is to replace that code with this right with this code right here so copy that and go back to the code file again and replace the code so paste that in and then click the Save Changes and let's click the preview button.
So the catalog page is under the get your module link and see nothing exchange it only means that that's not the one so we go back to the code file and press the control Z that will make it and do the command that we just need and with let's paste the code in the next code right here and click Save and click preview.

All right so now that we can see that the chunks is there awesome let's just quickly add another collection just to make sure it is working so the next one is breathe and save the menu and refresh the page and there you go thank you for reading.
0 notes
Text
Featured Products Using Shopify Collections :)
Hi everyone today we're going to be talking about how to add products to the featured collection on your e-commerce website so if you'll notice we're going to be at using the development site that we use to test and showcase ways of doing things on Shopify.
So the first thing you'll notice is we've installed a new template here on the site so here's the template we're on the actual site domain right now and on this template you'll see that there's actually what's called a featured collection and it's displaying a product here on the home page of the site.
So the question is okay how do I take advantage of this what how do I manage the process of adding featured products whether I do it on a monthly basis a weekly basis or on whatever I do I actually get products in my catalog to display in this featured products collection on Shopify.

So I'm going to jump over here into the back end of the site you'll see I'm logged in here I'm going to go over to first the product section and talk about something called collections can be sort of as a top-level category set but you have to be like dog and cat as a way of order organizing your products if you have a pet food products business.

So if I go to dog I'll see here that I actually have two products in the dog category there's a bag of dry dog food product and there's a can of wet taste of the wild dog food so they're in the collection now what happens is shot price selects one of the collections display on the homepage of your site in the featured collection for simplicity that is a collection known as the home page collection.
Now this might not always be called home page sometimes it will be called featured collection sometimes called scales but Shopify decor will have established one of the collections as a collection that will display in the featured collection portion of the website so in order to select products to display on that featured collections portion of your site.
We need to do is simply add them to the collection that it's set up to display here so for instance right now if I click on the home page we'll see that the only product in the home page collection is the Blue Buffalo bag of dry dog food.

So what I'm going to do is I'm going to showcase how to add another one to explain the home page so I'm going to go to my product catalog and I want the taste of the wild can to display on the home page so I'm going to click on face with a while and go to the product page this is where all the product details are and you'll see over there is only in the dog collection right now products can actually be added to multiple questions in Shopify.
So what I'm going to do here is over and I'm going to select home page and after I select it you'll see it shows up right here tagged in the own page collection and I'm going to click on save once I do that all right and go over here refresh my site you'll see that I now have two products in my featured collection if I go back over here to the collections which again is top-level categories and I click on home page you'll see that within this home page collection there's now both of those products.
So now what happens as we manage this process is people might want these changed out so you might want to change out different featured collections a lot of times it happens on a monthly basis so what you'll do is go to that collection that's designated to display down the homepage and you'll edit and select products to be included or not included in that question you can do that two ways.

So I'll show both examples the first is simply to go to the collection that you want to edit click on homepage and say okay it's time for this pace of the wild product to come off the home page you will featured collections fly so I'm going to click this X right here and what it will do is remove the collection from that product so now there's only one and if i refresh this now it's just the bag of Blue Buffalo dog food again so there is another way to handle this as well so you can either do it right here in the collections portion under the collection that displays on the homepage or you can go to the product itself and you can go to the bag of dog food and over here or it's in the collections simply click the X click Save and now if I go back and refresh the page.

You'll see that I have no featured product and just gives me in these little icon displays here so just like there's two ways to subtract products from the featured collection there's also multiple there's also another way to add them to the featured collection.
So I could go in here to the collection go to the home page collection and say okay look there are no products in this collection right now instead of the product by product if I know which ones I want to add I can simply search for them here so I'm going to search for life protection and here it is I'm going to click on that and it'll add it to my featured collection then I'm going to say you know what I do want to taste the wild in there as well so I'm going to select that and now both products are added there and it automatically saved for me.

So if I go back and refresh it I'll see those two products and I'll appear in that homepage again so just to recap there is going to be a designated collection where that will be used to display products in the featured the featured product section on the site all you need to do is go to that and either add products or subtract products using the product search or go to the product itself directly and choose that collection tag for it or remove that collection tank for it depending on whether you want it to appear there or not so again thanks for joining us.

0 notes
Text
Show Variants as Separate Products on the Shopify Collection Page :)
Hi so what I'm kind of going through here is how to try to follow of these tutorials to show off the colors of a products as separate on a collection page on Shopify this has been very highly commented on my blog so I figured I'd make a post to show people how it works.

So the initial thing you're going to do and is I'm gonna copy everything above insert for loop so let's take this and I'm gonna go in so this is you're gonna look for your the for loop of your products so in this in this theme there's almost every theme there's always a collection template.

So what I'm going to do is I'm gonna take this for loop of the question and I'm gonna modify it and I'm going to add everything from here above the product because you can see so this is a for loop of products I'm just going to delete the else statement because I know that's gonna throw me off because all that does is tell it what to do if there's no products in there and then here you can see include product guard and that is what shows on the page so you have everything organized here.

So unless colas contains color and now I'm gonna go in and I'm going to take cat I'm gonna capture everything below this I'm gonna ignore the last for loop because it's already there and I'm going to paste it so let me start by saving this and I'm gonna go left here and it's working is accordingly so now one product you can see for variants but obviously no other products are showing.

So what I'm gonna do is I'm gonna write everything after here I'm gonna add an else statement I'm going to copy my product card grid and I put this here and I'm gonna say okay here I include this in another one of my guides so it could is the top if product up variant size is greater than one I don't put that right here.
So what you're saying is if there's more than one variant do the color sorting if there's not then just show the regular one that's not working so let me take a look and see what because I didn't close this alright just gonna take a look and all the products are here and the ones showing its variance this is exactly what we want.

So now this is the product card grid we don't want to touch this but we need to modify it so what I've done is I've made a new one called product card grid variant so I'm saving this so what I've done here is I've gone in and I've found everything that's related to the product so this includes the image so starting with the image so assign this are the preview image I removed everything that was here and it's now varying image here I'm just going to go through start all over.
So let's copy the credit card grid paste it in so preview image instead of product dot featured media preview I'm interests ignore that and change it to variant image and that should update the very image everywhere on the site or on this product because it calls it right there as preview image now continue down perfect and then here's the product title.

So what I'm gonna do is I'm gonna add variant title so then if I save that and now I see a unicorn blue black orange and pink and you can see the images for these two which is different is under here's the variants here's the separate images and the names next you make sure that we're showing the variant price instead of the product price.

Now this is all on the debut theme this will be different on every theme but you can see the prices showing or different some of their own sales some of them aren't this lets you kind of not show that every variance on sale if they are at all on sale so just like that you can now see the product or every variant of every product that has variants showing separately for color variants on Shopify store they won't this moment do the same for size.

So you don't have to worry about extra ones but that can easily be modified if you really want to auction is color you could change um if you're in Canada I can do the color that's a very easy change anything there can be changed and also this four loop index is zero if you happen to have two options size and color if colors second then you'd want to change that to one if it's the first one it's zero so that's saved and that's exactly how you organize it so thank you very much.
0 notes
Text
Setup Instagram Lookbook in Shopify :)
Hey guys today and I'll show you how to set up your Instagram lookbook in Shopify okay so first you are heading to you chef account then you go into online store and pages okay now add a page and call it whatever you like fashion lookbook like this okay and now it's important to choose the right template.

So we go into templates and choose page Instagram lookbook okay now is safe okay guys so now we're gonna use the Instagram token generator there's Lincoln descriptions and also in your theme document right here.

Okay I'll press get Toby then you choose to the account you want I will just use my private just to show you and now press alt rice is here okay now we've got a use ID and access token so the thing we are doing right now we're going into online store themes customize theme and now you're going into Instagram oh not sorry I'm sorry yeah Instagram lookbook.

Okay now we copy and paste your access token and paste it right here and you use ID oh sorry and press it in right here okay you choose your Instagram username and mine is enter support okay you choose the size on the page.

I will recommend the medium size it looks nice okay and a maximum of the images you want to show okay and you press save and then you're going to your Instagram lookbook and now my photo should be there exactly okay guys this is it I hope you liked the tutorial.

0 notes
Text
Introduction to Shopify Shipping :)
With countless shipping options available to ship your orders, it’s sometimes difficult to choose what’s best for your business. Shopify Shipping has everything you need to make that decision directly from your Shopify admin.
What is Shopify Shipping? Shopify Shipping provides merchants with access to pre-negotiated shipping rates and labels with shipping carriers based on your Shopify subscription plan. These rates are automatically available for all merchants in the United States and Canada.

Keep an eye out as Shopify adds more eligible countries in the future. With Shopify Shipping, you get access to discounted shipping labels without needing your own account. In the United States, you have access to USPS, UPS, and DHL Express. In Canada, you have access to Canada Post.

There are a few steps to take when using Shopify Shipping: Choose what shipping carriers you'd like to enable at checkout with Shopify Shipping Customers choose their shipping service and speed at checkout. Receive payment for their order and shipping costs.
Fulfill the order in Shopify and print out the corresponding shipping label and packing slip 5. Drop off the package to the carrier or schedule a pickup. Beyond discounted shipping rates and labels, Shopify Shipping also has a suite of tools to streamline your shipping process.

For example, you can purchase and send a return label to your customer directly from your Shopify admin. US merchants also have the option to schedule package pickups. If you purchase UPS or DHL Express labels through Shopify Shipping, then you can schedule pickups directly from your Shopify admin.
Pickups can be scheduled at your preferred date, time, and address. You can also buy and print shipping labels from the orders page in your Shopify admin. Use the checkboxes to select up to 20 orders and save yourself time. To get started with Shopify Shipping, the first thing you need to do is make sure you’ve added weights to all of your products.

For example, this t-shirt has a weight value of 0.1 lbs. As you add new products or variants, you can add the weight individually. If you’ve already added products, use the bulk editor tool to edit all product weight at once.

Check out the link below for more details on how to use the bulk editing tool. It’s also recommended to add any packaging you plan to ship with. This means adding the package dimensions and weight to the Shopify admin. You can locate these details by clicking “Settings” then click “Shipping”. Scroll to the “Packages” section.
For full details on how to add a package, see the link in the description below. Including both product and package weight is important because the final shipping rates shown at checkout and when buying a label are calculated using the weight of products and package combined.

By default, the shipping rate is calculated using your default package weight and dimensions. It’s recommended that you make any adjustments to the default package to best suit your shipping needs. The final shipping cost also depends on how far the package is travelling and how quickly the customer wants to receive it.
For example, this checkout shows an order with two t-shirts shipping within the United States. The shipping rates show both USPS and UPS shipping rates with expedited options. The carriers that show at checkout depend on whether you’re located in Canada or the United States, and what carriers you have enabled in your shipping settings.

The shipping cost adjusts accordingly as your customer adjust the number of items in their cart or changes the shipping address. This example now shows an international order. It’s important to note that shipping rates are only accurate if the product weight and package weight are included.
After you receive an order, you see the shipping option your customer chose on the order details page. From your Shopify admin, click “Orders” and open the order you’d like to see. From here, you see the shipping option selected under “Paid”.

If you’re purchasing and printing your own shipping label, click “Create shipping label”. From here, scroll down to the shipping services section. Here you see a banner with details on what shipping option the customer purchased. It’s important to note that the cost may not match exactly what was purchased by the customer.

Since shipping rates at checkout are calculated based on your default package dimensions, the label cost changes if you have a different package selected under “Package and weight” on this page.
0 notes
Text
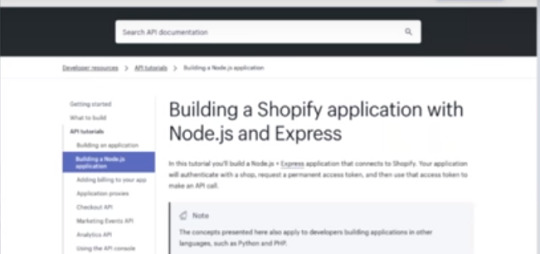
Building Your First Shopify App with Node.js and Express :)
Hey everyone we're gonna be talking about how to build your own first Shopify app using nodejs and Express and yeah you can find the tutorial that we're going through right here if you happen to lag behind or you just prefer to read a hard copy it's essentially the same thing as what's on my screen right now found at our Help Center.
So let's get started just give one a moment here sorry just one second I apologize about that I guess I forgot to book this room that I'm in and someone came to kick me out of it anyways so in this webinar like I said we're gonna be building a basic app using nodejs and Express I'll be primarily focusing on building your app as a public app that essentially means that the app can be installed on multiple shops using OAuth authentication you can also create a private app that is scoped to a single shop it's in the Apps section of the shops admin but like I said we're gonna be focusing on a public app today.
So in order to get the most out of this webinar we're gonna be there's gonna be some things that you'll want to have while these things aren't required in order to build an app these are what I'm going to be using today.
So the first is I'm going to be using Mac OS a tunneling service such as an groucho or forward HQ both of these have a free off or free trial but I'll be using n rock in this tutorial I'm going to be using nodejs as I mentioned I'm on version 8.1 1.1 and NPM I'm gonna be using version 5.1 6.0 just one moment cool so I'll give you a chance now to download and rockeo if you don't have it already.
Yeah so the first thing that we're going to be doing is signing up for our partner account some of you may already have a partner account but if you don't you can sign up here there should be a big blue join Now button so we're going to click on this all right so we're gonna ask for a little bit more information from you and just about your business and this is just for a test stop.
So I'm just gonna put that there put my email my say country and province or state or wherever you're from it might be different and then at the bottom we're gonna ask kind of why you're sitting at the partner account.
So for now if you're creating one with me today we're gonna choose custom app development but there may be other areas that you're interested in so feel free to choose multiples perfect so here we are on our partner dashboard there's this is basically where all of your information and actions will take place from a partner standpoint.

So the first thing that we're gonna do is we're gonna create the development store this is gonna be the shop that we're testing our apple on we're going to install it onto the store and view some of the data on the store once we get making our first API call if you already have a store that you use maybe a paid store or you're offering I'll feel free to use that one otherwise we'll hit create store create our store name create a password first store and then again our address and then it's safe sweet so some of you may already be familiar with the Shopify back-end.
So here it is we can pretty much ignore this for now and let's go back to our partner dashboard awesome so now that we have a partner dashboard open let's click on apps and we're gonna actually create our app we're going to be prompted for a little bit of information again so our app name I'm gonna call my own Shopify Express app and it's gonna ask you for your app URL so this is the address that your app lives at and you can't really just put a local host address here it has to be an actual absolute URL so that's where a tunneling a service comes in handy.
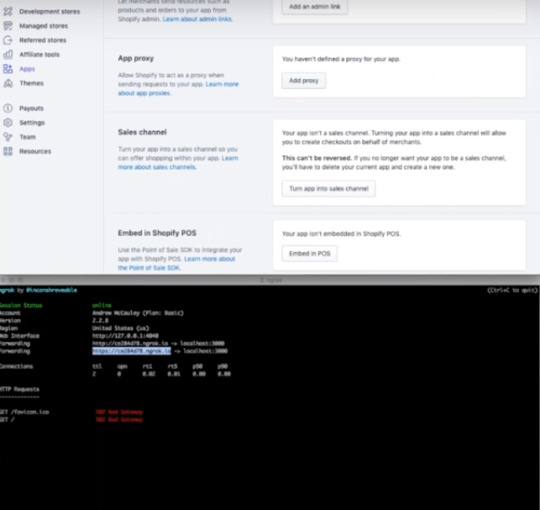
So if you have taken the time to download and Rock or another tunneling service then we're gonna hop in with our terminal and we're gonna change directory to the folder that we downloaded it and then we're gonna type and rock HTTP and then 3,000 which is the port we're gonna run on so if you are using a free trial one caveat is that you are gonna be given a randomly generated sub domain so you can see mine right there so anytime you close your in Rock towing service and then start it up again you're gonna be given a different subdomain.
So just make sure that if you are going to do that you're updating the URL you partner dashboard and updating the URL as it shows in your actual apps code so I'm gonna leave this open for the duration of the webinar but I'm gonna copy the address that we have here on the HTTP version and I'm gonna throw it in the app URL and I'm just gonna end it with slash Shopify.
So we have access to actually use our route URL later on if you wanted to so we're gonna create the app and that's it so now we're in our apps dashboard there's some resources on the the first page here and we can create an app listing for the app store up here which you may want to do if you want to sell your app to merchants on the app store but otherwise we'll click on app info and we'll see a bit of the information that we've already entered our app URL here.
This is the role we entered on the previous step and the URL that is shown that merchants are redirected to if they click the install button on your app store listing and we append the shop as a URL parameter to the end of this URL and then below we have the whitelisted redirection URLs so this basically is white listing the URLs that we're going to redirect the merchants to once they've actually authorized your app.
So for this one we are going to just add slash call back to what's already there and it's good practice also to add this URL without the S so it's just HTTP and you can add as many others that you may need but this should be fine for what we're using it for today.
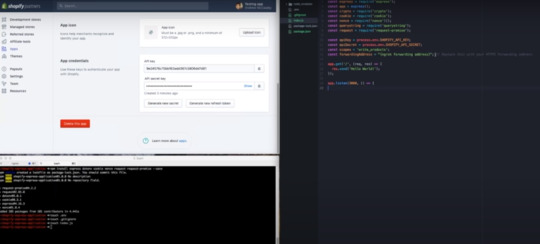
If you scroll below there's a preferences URL which is optional that's just to add a link to preferences on the App Store you can an icon which will show up on the app store and then below is your API key and API secret so we'll take note of these as we'll be using them as environment variables later on but for now we'll save our app cost so a bit more advanced but we also have the option for extensions for example if you want your app to be embedded in the Shopify admin which is enabled by D default admin links which add links to your app within the admin pages such as like the product page orders page.
If you have an app that maybe prints orders things like that an app proxy which allows you to have a view on the storefront that allows you to put your own like apps view or if you're building a sales channel this is the option you can also embed the app in that pls we're not going to be worrying about any of that today.
We're just gonna be building a simple app austell them so let's open a new tab in our terminal and we're gonna create our app stricter so I'm going to do mcdr Shopify - Express - application and then we're gonna actually navigate to this folder and then we're gonna run NPM in it and you should just be able to select all the defaults that it offers you but you can change them if you want but for the sake of this webinar we're just gonna keep hitting Enter all the way through until we're asked if everything that we've chosen is okay and I just sighs this can see everything and so I'm going to confirm and then if we go to our text editor.
I'm using atom and we find our apps folder we'll see that our app is there with a package.json file which is great so next we're going to need to install the required packages for our application so we are going to be using a number of them gonna npm install the first one is Express this is just the node framework that we're going to be using next one is dot env this is to handle our environment variables next one is cookie which is just a basic HTTP cookie parser and serializer next is knots for generating a unique not possible you that'll be part of the security for app that we'll go over in a bit request which allows us to make HTTP calls and request promise which adds promise functionality to our requests end it with - - save which essentially just tells npm that we want to add these packages as dependencies to our packaged tour packages of JSON file and we'll hit enter awesome.
So now that our packages of JSON is filled with our dependencies and all of our packages are installed we're going to want to create an environment file to save our environment variables and to do that we'll just touch a env and of course we're going to want to put our and file in to get ignore to make sure that we're not sharing our environment variables with the world if we push them to get up.
So we're also going to type touch dot get ignore and in that get ignore file we will add dot tnp and in the dot env file we're gonna add our credentials so I'm going to put it as Shopify API oops key and we're gonna make it equal to the API key that we find in our partner dashboard so we'll just copy it there and we're gonna do the same with our secret they're gonna make it called Shopify API secret will copy the secret from our partner dashboard.
We'll paste it in there we'll hit save and we'll move on to the next step actually building our app the fun stuff so to start will actually need our index dot JSP so we will touch index touch yes which creates a file in our app folder and we are going to just build a foundation of a very simple hello world app that we can build off of so I'm going to paste some code here I'll be writing out the rest of the code but this is mainly just setting all of our packages to constants grabbing our ad I can secret from our animal file setting them to constants and then setting a few more constants that we'll need later on such as the Scopes that our app is going to request.
So we're requesting write products which means we'll have access to both view product data and create product data within the shop that our app is installed and then we also have our forwarding address which is simply just the it's the URL of our app so we're gonna want to replace what's in here with the URL of our app that we put in our partner dashboard there we go and all I have here is a very simple get route to our route that'll print out hello world on the screen and of course we're listening on port 30,000 so we'll save it and we'll run her out make sure everything is working so far it should be but you never know especially with live coding what did I do here.
Oh I forgot it's a little bit there go perfect so now we'll save and we'll try it again there we go and then we'll visit our app URL also got our hello world so from here we're gonna want to create our first route this row is going to be the we'll call it the install rate.
So we'll replace our hello world route with a shell type the set up so it seemed easy to follow with a get route to our app URL as we put it in our partner dashboard which is just slash Shopify and inside we're gonna set a constant which will be this job so the shop should be passed in as a query parameter and it'll be called shop and we're just if statement to make sure that we actually have the shop variable and if we don't we're going to return a four hundred response please add just saying that you'll need to add the shop as a query parameter to the address that you're visiting and again if you're clicking get to install the app from the App Store then this will already be attached to your URL so you should always have it awesome.
So if we do have this job parameter we are going to use our nonce package to set a constant called state we are going to set our redirect URI just the same as we set up in our partner dashboard so that's slash Shopify slash callback whoops and then we're going to build our install URL so there's a number of things that we'll need in our install URL.
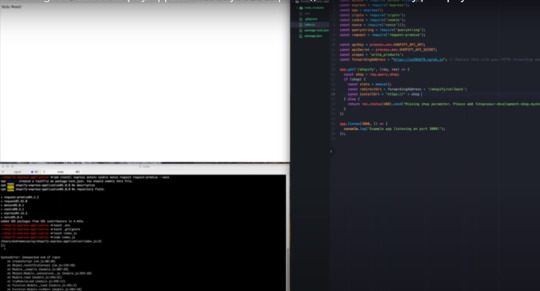
Let me just get down the beginnings HTTP plus shop plus slash admin / pull off / authorize and then the first query parameter is going to be client underscore ID and this is going to be equal to the API key the next variable or a URL parameter sorry is going to be the scope and that's simply going to be equal to the scope that we set previously whoops the next one is going to be our state same thing the same as the state that we set previously and then lastly we're gonna set the redirect URI.
So Shopify knows where we're gonna redirect the merchants as soon as they have authorized your app to be installed on their store that's going to be equal to awesome so just a little bit more about the state or nonce this is essentially just a random string that you would set the nonce package takes care of that automatically for me that we're gonna send on the request and once we receive a call back from Shopify is going to echo that date.
So that we can compare the two if they match then great we know the request came from Shopify if they don't match then chances are someone is trying to spoof the request and we can't confirm the origin of it in which case we would go on a return an error so we're going to set that to a cookie normally you would want to encrypt it before setting it to a cookie since it will live on the client-side however for the sake of this app.
We'll just set it to state for the sake of time and then we're gonna redirect to the installing URL that we just built oh sweet all right let me just make sure I'm not missing anything looks good so let's give this a test we'll save our work we'll restart our app and we've got an error of course unexpected identifier oh I forgot a plus here all right let's try this again.
Okay so we'll go to our app slash Shopify and then we'll add our shop you just grab to the shop URL since we have that open and we'll add this as a query parameter scope is not defined oh I called it scopes whoops okay all right third time's a channel let's close out our app restart it and all right what am I doing wrong redirect to your I slash Shopify slash callback.

Okay so this essentially it's a common error that comes up if the callback isn't whitelisted but it does look like listed so let's try to find out what I'm doing wrong here oh whoops reader right you are / Shopify / a callback why is uh not wait listen did we say no is there whoops Shopify guys call it back whoops oh don't think I'd save all right everything one second folks.
Let's try this again all right shop equals why is this happen redirect your eyes missed oh whoops all right so this actually has to be redirect underscore URI so the correct you are I was whitelisted I just had the wrong query parameter key so this should work again just the joys of live programming take our app URL equals there we go so this is the authorization prompt that merchants are going to see and you'll be able to see the Scopes that we requested which is managed products and it'll show your app logo if you have one your app name it shows that this app isn't listed on the App Store but of course your app if it was listed it would not have this banner.
So if we click install we'll get a 404 error because it'll redirect to our callback URL but we don't actually have a route for it yeah see so cannot get Shopify / call that so the next step that will do is actually creating that rep alright so here goes our next row.
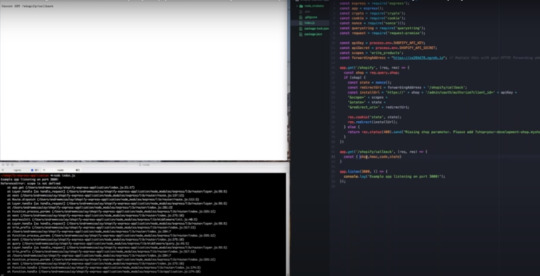
We're going to set it to the same as our whitelisted URL that we put in our turnout board all right oh you can't see my screen anymore whoops thank you hello there girl perfect okay alright so building your route whoops and to start off in this route we are going to first set a constant that is going to be the query parameters that Shopify sense to us and that'll be the shop the H Mac and the code and then in this state echoed from the one that we set previously alright and those are just great parameters.
So request three and then we're going to grab that state cookie that we set previously let's go and we're gonna verify that they actually matched and if they don't then we're gonna return a 403 message as I mentioned previously and we're gonna say that the request can't be verified if it does not equal the state from our cookie again.
If you are saving your state in a cookie make sure you encrypt it as it is on the client side and you can decrypt it once you get the request awesome so the next step we're gonna also put in some logic to make sure that we have all the necessary parameters and then we're going to start with our H max validation which is probably the part that people struggle with the most when setting up a new shop application.
So basically we need to calculate a signature using all the query parameters that we received and to validate the request that signatures should match the 8h Mac that Shopify has provided so to start doing that we are first going to map all of our query parameters to an object and the reason we're doing this is just because it'll make it easier to remove the H Mac because we don't want to sign the request including the provided H mat because then we wouldn't get our own signature that matched that H Mac so we're going to delete the map with the key H Mac all right.
So now we're gonna can we r going to make a constant called message and it's just gonna be our object but turn back into a string apply restraining the string that's gonna be awesome so now we have our message so we can actually go ahead and generate that hash we'll call it generated hash and we're gonna use notes built in crypto method and we're gonna create an H Mac it's gonna be using sha-256 encryption and our secret key used to sign.
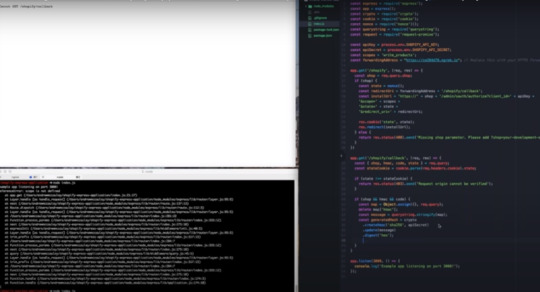
So the idea here is that only you the app developer and Shopify know what your secret key is so you'll be able to sign any request with it to ensure its validity and keep Shopify shalvoy's merchants and your app secure and we're going to be signing the message using a text yes awesome so just like we did with the state we're gonna want to verify that what we calculated matches what shot if I gave us so if generated hash is not equal to RH Mac then we're gonna return oops I can't I ate for my life a status message and 400 error H Mac validation failed otherwise we will simply respond with oops 8200 whoops there we go 200 Datsun H Mac.
So we'll put this here for now just for testing but we'll actually replace this with making their first API call in just a moment but first we want to I forgot about this part we'll just want to make an else statement so that if we don't have the required parameters we actually specify that and I noticed another mistake that I will correct in just a second required parameters oops miss awesome and I forgot to put a closing bracket there sweet.
So hopefully we don't have any errors this time hopefully and we'll test our work I already saved it so we'll just run this again and so far so good so because the merchants in this case just us I'm already authorized the app we shouldn't get that authorized screen again if I were to change my hired scopes then the merchants would be prompted to accept the installation of the app once again because the requested scopes have changed but this should work there you go each Mac validated but that doesn't really do us any good.
So let's actually exchange for an access token and make an API call so we can just replace this line of code right here we will replace it with first the URL that we're going to be making a request to the endpoint and that endpoint is slash admin so the shop slash admin / oo / access underscore token and we're also going to need a payload there's the number of things that we're going to pass into the payload when requesting an access token the first is the client ID which is simply the API key the client secret which you guessed it is the API secret and then that code parameter that Shopify sent us in our callback URL.
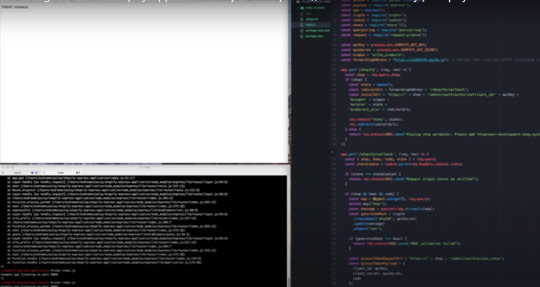
Once you already have an access token you may not actually receive a code which is totally fine you would just go through the validation of the request in the same way just without the code so it's always a good idea not to rely on specific URL parameters to be there because they may not always be there you just want to calculate the signature upon all the query parameters that you have - the H Mac so there's only need for the request so let's make it whoops so we're gonna do a post request and that post request is going to be - the access token request URL with a payload a JSON payload that is equal to the payload that we set previously and once the request completes we are going to save our access token okay god access underscore token awesome and then of course we're gonna send a 200 response status 200 got send got access I'm not sure why I switch to double quotes there but oh well cool and of course we're gonna catch any errors that we may receive here like so we'll save this hope that there's no errors so far so good and we'll visit our app again.
Awesome so we got an access token let's do something with it and we can see all the parameters in the URL there including the code yeah so let's replace this useless message with an actual API call now that we have our authenticated access okay cool so we will do the same as we did when we were exchanging for an access token will create the endpoint API request whoops you are fools and we're just going to be Shopify this is an API that you can hit as long as you have an access token you don't need a specific scope for it and it just gives you information about the shop that your app is installed on so shop + / admin / ah dr. song and it doesn't need a payload.
It's just a request a get request on Shopify and I think generally you should never have a body in your get request URL parameters are better there but we do need to set the leg they're set are a single request header and that request header is the ex Shopify access token header and that essentially is the way that we can tell Shopify a we have our access token here we're authenticated it's cool now give me my dad data and we are gonna set that to our access token okay sweet and then just like we did when we were getting our access token.
We'll create the request set the endpoint that's going to be - whoops I realize anything this wrong it's going to be to API request URL and with the headers whoops API request header and on response we are going to display their sports and of course kept any errors oops that's a comma says code Oh this up a bed alright so when I was doing this earlier I did have an error that I had to fix this one.
So hopefully we have better luck this time and I can get to some questions okay if you are ah and there we go we are now receiving my shot represented in a JSON object and if we wanted to say fetch products instead we could do that fairly easily I'll just change this to products dot JSON hit save and that should be good enough whoops and there you go my shop doesn't have any products.
So we're just getting an empty an empty products object but that's it this is basically the framework that you'll be able to use to make your own app whether it be you know maybe a fulfillment service you know maybe in order printer like I mentioned we have a large number of api's you can view our reference to see all these ones on the left if you're making a carrier service to return Rome shipping rates to a store this is where creativity comes in but yeah that is it we do have some time for questions sorry about the technical difficulties we could have had more time but since we don't gonna look at some of these questions cool.
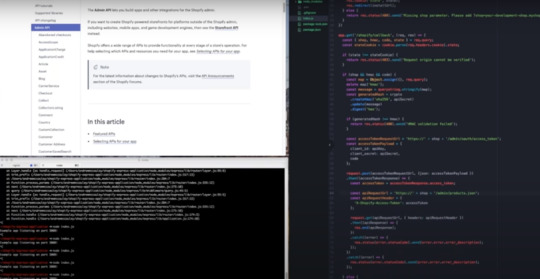
Yep so I believe we're gonna be doing the follow-up so if there's any references that we linked we'll be sending it including the recording to anyone who signed up yeah cool just looking through the questions here so just bear with me I see well now I didn't see the questions previously but I see you guys correcting some of the issues that I had before I should have looked in the chat earlier shout out the Adrian Corcoran for finding the redirect to your I issue and Sergei yeah so the example code will be available actually is already available it's at our building in Chama fire allocation with no das and Express a tutorial if you search our Help Center just search no tap this should be the top result and this is basically everything that I covered today all the code is there you can copy-paste and I believe at the end there's the full project that you can copy and paste and use as your skeleton for your app.
So someone asked can you use your own app to charge a credit card we do have a checkout API which lets you programmatically create checkouts however the ability to process payments is by request only and you can actually request that in your partner dashboard.
So if you go to the extensions tab and you turn your app into a sales channel there'll be an option here to request payment processing access we are only offering that at two sales channels intended to be marketplaces so if you did have an idea for a marketplace by all means turn your app into a sales channel request that payment processing and will basically get back to you if we have approved it switch back to the dot and someone's there we go.
So it doesn't necessarily need to be Shopify underscore API there's no secret or seam with key but whatever you do use just make sure that you use the same when you're setting it to a variable on these lines let's see if time for a couple more questions here macelli asks you have sales people who need to create a custom order and then charge it I'm sorry your best option there would be to use our draft order API so what that allows you to do is create a draft order and then actually send an invoice to the customer where they'll be able to click a link to complete the checkout this is the best option if you actually need to charge people programmatically through the API.
So I got a question about selling apps so do we have to pay any joining fees etc so right now the revenue share modelon our App Store is 8020 so basically 80% of any proceeds from your apps would be paid out with your partner account and then there's the 20% that is delegated to Shopify as fees someone asks how do you deploy this to Heroku and then I think I have time for one more so to answer that we actually have a very good video series called app in five and let me see if I can find it so the one that we have right now the one that we have right now is using Ruby on Rails but basically we create the framework of a Ruby on Rails using our Shopify Rails generator and deploy to Heroku in five minutes look out for another one in the future where we'll do the same thing with nodejs probably with Express we don't have a video on that right.
Now but you should be able to get an idea based on our rails video and then just apply it to whatever language you're working with and then that's I'll find one more question that we can we can throw in here so here's a question about using the crypto method I actually asked myself the same question when I went through this and actually crypto was made baseline in nodejs I can't remember which version but we didn't actually have to install it because it comes with node and then one last question is there a github repository for this there isn't but you can find the code on our building a node app tutorial that's on my screen right now and I'll make sure that this gets sent out in the follow-up email that we send but yeah that's not really.
If you guys have any other questions feel free to hop on our forums like I said I leave the developer support team so we try to answer as many questions from there as we can specifically the API forms and we'll leave it there thanks everyone for joining thanks for your questions but yeah thanks again for joining and the hope that we see you at a future webinar take care of the one.
0 notes
Text
Build a Rails App With the Shopify Gem :)
In this post we will show you how to start up an app with the shopify_gem. This assumes that you have already authorized with your Heroku account and have a base familiarity with rails 5.1.4 and ruby 2.4.1.

To start we going to create our new rails project in our terminal by typing ``rails new shopify_app`` Next we will move into our app’s directory Check this into version control with git.
From here we'll create our heroku app server with ``heroku create``. This creates and initializes a Heroku app that we can push our code to. Make note of the heroku app URL we’re provided, by pasting it somewhere you will find it when needed.
From here we move into our partner dashboard and click create app in the app section.

Add the app name and add the URL that was provided by heroku earlier Then click create app Go to app info tab to update whitelisted redirection url to add /auth/shopify/callback to our Heroku url and save changes.
The shopify_app creates a route by default at the URL we just whitelisted on which it will exchange our oauth code for permanent access token. Shopify checks to ensure that this url matches that which is provided by the app in its initial oauth request.

Move to the extensions tab to confirm that our app is an embedded app. If the embedded app feature is not enabled, click enable. An embedded app pulls your app interface into an iframe within the admin to create a more seamless experience for the merchant.

Move back into terminal and open your project with our preferred text editor and open your gem file. Move the sqlite3 gem into our development test group. Create a new group called production and add pg gem Add the gem shopify_app above our rails gem Run bundle install Run rails generate shopify_app Provide our app credentials which we can get in the partner dashboard under the app info tab.

This adds the functionality needed to run an app that interfaces with Shopify. Now check our changes into version control. Deploy our app to heroku with ``git push heroku master``. Before we can access our app successfully we have to run with our rails generate function ``Heroku rails run db:migrate``.

From there we can visit the app url that we grabbed earlier and add our shop url and install app. We can already see that the app by default grabs some shop data via the api.

0 notes
Text
How to Add a Favicon to your Shopify Theme :)
If you’re looking for ways to build your store’s brand identity, then keep reading to learn how to create a favicon and add it your online store. First, what is a favicon? When you open a tab in your web browser, a small image appears in the corner of the tab. This little icon is called a fave-ih-con or a fa-vih-con.

Favicons add to the look and feel of your store while making the brand easy to identify. People often have many tabs open on their computer, so adding a favicon makes it easy for customers to find your online store in their web browser. If customers pin the tab for your online store or have lots of tabs open, then they won’t be able to see your store’s name on the tab.

If you don’t have a favicon, then it might be difficult for your customers to find the tab for your store. To add a favicon to your online store, you need to upload an image to your theme. You can create a favicon image by editing your own image, by using a free favicon or logo creator such as Hatchful.shopify.com, or by hiring a Shopify expert developer.

Your favicon image should stand out and be easy to identify. Favicons are small, so avoid using text or complicated images that are difficult to see. It’s better to have a well-defined logo or symbol as a favicon without any text included.
To make sure your favicon is easy to see, it should also stand out against backgrounds ranging from white to black. The background colour of a browser tab is usually light or dark grey, but browser backgrounds can be any colour including black.
Use an image with bright, saturated colours to contrast against many backgrounds. For example, these favicons are easy to identify even though you can’t see the name of the page in the tab.
The colours contrast well with the background and the images are easily recognizable even though they’re small. However, these images do not work well as favicons. The first favicon uses text, which looks blurry and isn’t easy to read.
The second favicon doesn’t work well because the grey colours in the logo don’t contrast with the grey background. To add a favicon to your store, your image needs to meet certain technical requirements so it uploads properly.
First, your favicon needs to be square. If you want to use a round logo or symbol, you can use a coloured circle on a transparent background. Your favicon also needs to be in PNG format. JPEG is not an accepted format for Favicons.

Finally, your favicon needs to have a resolution of 16 by 16 pixels or 32 by 32 pixels. If the image you use is bigger than 32 by 32 pixels, then the image is automatically reduced in size when you upload it into your theme. Once you have a favicon image, add it to your store’s theme so it appears when customers visit your online store.

From your Shopify admin, click Online Store and check that you are on the Themes page. Click Customize on your current theme to open the Theme Editor. Click the Theme settings tab and then click Favicon. Under Favicon image, click Select image. From here, you can upload an image from your computer, or use an image that is already in your library.
To upload an image from your computer, click Upload Image and select the file you would like to upload. Once the image is uploaded, a check mark appears in the bottom right corner of the image you’ve uploaded.
If your image isn’t uploading, make sure that your file is in PNG format and has a resolution of 32 by 32 or 16 by 16 pixels. If you would like to select an image that’s already in your library, click the image so a check mark appears. After you’ve uploaded or chosen an image, click Select.
In the Favicon image area, you see the favicon image that you’ve selected. From here, you can also change, edit or remove your image. Once you're done selecting your image, click Save to add the favicon to your online store. Your new favicon won’t display here in the theme editor, but you can see your new favicon by viewing your online store.
From your Shopify admin, click the eye symbol beside Online Store. You see a new tab open in your browser. This is the landing page for your online store. Your favicon is in the tab at the top of the web page. If you don’t see your new favicon right away, you may need to clear your cache and refresh the tab.
0 notes
Text
How to set up gift cards in the Shopify admin :)
Gift cards give customers a way to support the brands they love and provide you with access to more cash flow. Gift cards in Shopify can also be used to provide store credit, instead of issuing cash refunds.

Before we get started, it’s important to note that gift cards can only be redeemed through sales channels that use the Shopify checkout - like your online store, or the Buy button. If a customer makes a purchase through a sales channel that has checkout on a third-party website, like Amazon, the gift card will not work.
Gift card payments must be processed through Shopify checkout. To enable gift cards on your online store, start from your Shopify admin and click Products. Then, click Gift cards. On the new page, click Sell gift cards, and then Manage gift card products.
To help, Shopify automatically creates your first gift card product for you. This is hidden and can’t be seen by your customers until you review and make it available. To update an existing gift card product, click the gift card that you want to edit. From this page, you can edit the gift card’s title, as well as the description.
The description is what customers see on the product page when they view the gift card online. If you make any changes here, click Save before moving forward. To add additional pictures or videos for your customers to see on the product page, click Add media. It’s important to note that if you change the images for gift cards or product variants, this change is only reflected on the online store.
Meaning, when the gift card is sent to the customer, the default image showing here is what customers see. Next, go to the Variants section and decide what denominations your store offers. Make sure that the denominations you offer make sense for the products that you’re selling.

For example, if the average product in your store costs 200 dollars, then you probably want to offer gift cards of similar value. To update the title and price of the variants, open each variant individually and make changes. Or, select all variants and use the bulk editor. Since customers can’t choose a custom denomination, it’s best to add new variants with a variety of values.
Here, we’re adding a new $30 denomination. Then back in the variants section, click More options, then Reorder variants. From here, drag and drop the variants in the order you’d prefer. Next, if you’re only selling gift cards in your online store, then you do not need to take the following steps.

But, if you have multiple locations, and plan to sell gift cards on the point of sale, then you need to adjust where the gift cards are stocked. Select all variants and click Open bulk editor. Then click Add fields and add each of your locations.
Select the variants showing Not stocked and change to Stocked. Then click Save. You do not need to track inventory for gift cards, so no further adjustments are needed. Next, in the Product availability section, click Manage to see a list of your active sales channels.
Select the sales channels where you want the gift card to be available for purchase, and click Done. Under Organization, you see the Product type and Vendor fields. For gift cards, both options are automatically set up for you. It’s also important to add your gift card to a collection so customers can easily find it on your online store.

Click the search box to see a list of manual collections you’ve created, and select a collection that you want to add a gift card to. Finally, enter related tags. Tags help customers find your product through your online store search, and can also be used to add gift cards to automated collections. To finish, review the product details and click Save.
Your gift card is now updated. To make it available on the online store, you must link the collection it’s listed in, or the gift card itself, in your store menu. You can also use the online store editor to highlight the gift card on the homepage.
When a customer purchases a gift card, they receive it via email with instructions on how to redeem it. If the customer has purchased this gift card for someone else, they are required to forward the gift card to the new recipient.

After a gift card is purchased it’s added to the gift card section of the Shopify admin. Here, you can view individual gift card details like initial value, balance remaining, order number and the date this was created.
0 notes