
Last Seen Blogs

eggfriiedrice
intense longing 4 nostalgia

kurowa0311
Barely here

edinorogek-lubitel-zefirok
EdinoRogeK love Zefirka
nekrofilth
scumfuck blues

edward151
Untitled
Text
Task 4 - Evaluation
What went well?
I believe what went well for this project is successfully creating a story board. Having a clear story board helps tremendously in creating the final animation as it gives me the right guidance and a step-by-step process into creating the final piece. Moreover, it also helps me visualize how the animation would look and help me to understand and plan out my animation to hit the animation length, which is supposed to be from 1 minute to 1 minute 30 seconds.
In extension to that, what went really well was the process to creating the assets. Although it did took a long time to create as I created the original assets in Adobe Illustrator first before importing it into Adobe Photoshop for added textures. However, I can say that all of the process was definitely worth it as the final look for the animation did meet my expectations and I am satisfied with the results.
What skills did you learn?
One of the skills, and which I think is quite important for creating animation - is how to successfully use the graph editor tool. I managed to learn how to use the graph editor and applied it throughout my animation which definitely help to make it flow better together. It made the scene transitions looked smooth compare it to using what I would normally use, which is to use easy ease and while that can look good - it definitely cannot beat an animation that uses graph editor.
Another skills which I believe is important is how to plan and produce an effective story board. What I did for this project is projecting a rough version of the story board as it helps me to visualize and understand how the animation will look. It’s also to act as a foundation for the animation which I could improve it on to create the final version of the story board.
What would you do to improve your animation skills?
Animation can be a broad subject and there are definitely many more techniques and skills out there that I didn’t know of. In fact, there are certain elements in the animation which I didn’t know how to create such as particles, and to improve my animation skills even further, I looked for online articles and tutorials into creating the particles - in which I later experimented it on my own to create my desired results.
Not only was I able to independently trying to research and learn a skills that I don’t know, but I have also improved and developed on the skills that I have learned to get the results that I wanted. However, I don’t think I would learn it by doing it only just once, I believe to see a successful results in learning is to repeat the process multiple times and developed the skills before I can say that I have improved my animation skills.
What would you do to improve the motion graphics?
One thing which I do want to improve on my motion graphic is to do a better research. This means that I must decide on the topic I wanted to do before I even begin researching as it can save me a tremendous amount of time. Moreover, another thing to improve is my script. In the final animation, I feel like things doesn’t flow better together as at one point I was talking about plastic life cycle, which is followed by how plastic get into the ocean, impact on the marine life, and back to plastic again. Although it is good, but it would be best if I only focus on one thing such as the marine life and talk about the impact of that.
What would you do to improve the sound?
One of the things which I would do to improve my sound is add more sounds into the animation such as sound effects for some of the actions. It seems that I was too focused on adding soundtracks and sound effects for each transitions in the animation that I forgot to add sounds for some of the actions. In extension to that, to improve on the sound, it would be best if I experiment and try creating sound effects myself.
Feedback
Rudi - sound track fits well. The graphics are really really good, love the colours and the slight textures look really nice. There are certain parts of of the animation that look really good for example the part where someone is flicking through there phone and the use of focal length and depth of field in the landfill junk section. The animation is flawless great movements sounds and graphics the only thing you could add is possibly some more sound affects to represent motions and objects but you do already have some in there so it might crowd it. Basically the animation is some professional clean shizzz.
Toby - I really like this, it looks very consistent throughout the animation and nothing looks out of place. I also like how you have transitioned between scenes creatively.
0 notes
Text
Task 3 - Production
Final Storyboard
Once the planning is completed, it is now time for me to draw out the final storyboard for the animation to better get a clear idea and visualize how my animation is going to look.

I have drawn the storyboard accordingly to how my script is written and use it as a guide. Moreover, the storyboard is drawn in Adobe Photoshop as I really wanted a clean look for my storyboard as opposed to drawing it on paper.
Creating assets
As for the assets making, I will be using 2 software and that is Adobe Illustrator and Photoshop. This is because having plain vector assets in illustrator is boring. To really make this interesting and visually pleasing, I have decided to add some textures as a finishing touch to the assets in Photoshop.
Before I begin creating the assets, I need to decide the colour scheme that I am going to be using first. I wanted at least 3 colours and it would be used in the entire assets in order to keep the animation consistent.
Using the sketches that I have drawn, it was easy for me to create the assets in Adobe Illustrator as it is just simple shapes and lines. I have also added light reflections on some of the objects to create some interests, and overall - it just makes the assets look so much better.

The assets above are some of the assets I have created in Illustrator before importing it into Photoshop for added texture. It is possible to add texture in Illustrator; however, by importing it into Photoshop, there are many more options which I could play around and I love how easy it is to change colours for the assets with a single quick setting.

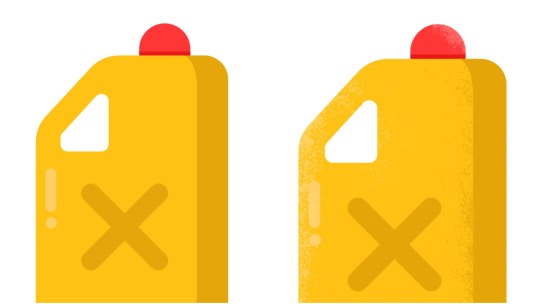
This is a comparison of textures being added in Illustrator and Photoshop:
However, I didn’t add textures to all of my assets as I still want to have plain assets in my animation as well, but in a considerable amount, because too much would make the animation look flat.
These are all of the assets created in Adobe Illustrator and Photoshop:


Once all of the assets are created, I’d need to make sure that the assets that are going to be animated need to be in separate layers. To make sure that everything is organized, I created the assets using the storyboard as a guide and it also helps me not forget to leave any assets out.
Creating the animation
After every assets are created and in separate layers, it is now time for me to move on to the animation process. In Adobe After Effect, I start to import all of the assets into the software, making sure to label them correctly so I won’t be confused later on. I have decided to work in a linear way which is following the storyboard as a guide and make the scene step by step.
Following the storyboard, the first scene shows the planet Earth in space. The animation process for this scene is simple as the keyframes I used are scale, position and rotation. The scale keyframes are used to animate the zooming in, and out of the planet Earth as well as playing with the scale of the stars to get a realistic zooming look.


I then use the position keyframe to animate or create an illusion that the earth is spinning when all I’m animating is the position keyframe. To do this, I used the earth assets I have created, and alpha matte it to an ellipse shape. This creates an illusion that the earth is spinning.

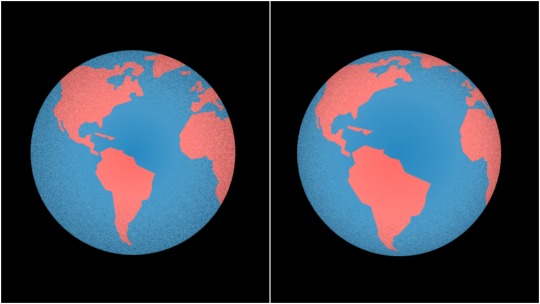
However, to make it even more realistic, I used the effect called ‘Bulge’ which adds a curvature around the edge of the affected area, and here is a comparison of before and after applying the effect:
Moreover, I also used this technique for the moon as well and playing around with the position keyframe to create a spinning effect. I then used the rotation keyframe to animate the ellipse dotted lines rotating and parent the moon to the ellipse shape to create the rotation effect around the planet earth.


Finally, I created the sun using the effect in Adobe After Effect. The effect I used is called ‘CC Light Rays’ and this will create a bright ellipse shape effect. I then changed the colour of it to an almost orange colour.

However, the look of the sun is a little bit boring as it’s literally an ellipse shape. To add more interests and a certain style to this, I have decided to create these four light lines:

To do this, I went on the internet to search for light ray PNG and found something that looked good. However, the colour of the light ray is incorrectly and not something I wanted. To fix this, I used Adobe Photoshop to change the colour that fits the sun colour that I chose and importing it into After Effect.


Before I begin explaining the process for scene number two, I just wanted to talk about the process for the transition first. The transition of the scene can easily be created by alpha matte scene two to an ellipse shape and playing around with the scale keyframe. In addition to that, I have also used the graph editor for this transition to create a new smooth look and feel, instead of just having easy ease applied to the keyframe and have a really simple linear look to the transition.


For scene number two, there really isn’t much to it. In the animation, it may look like the number and letters appear out of nowhere and this may look like a really hard process; however, it is actually very simple. The thing is I kind of cheated a little as the background is in the same colour. I created a rectangle shape that covers the entire bottom half of the composition while the number and letters are sitting under the layer.
The number and letters need to be in separate layers and then I played around with the position keyframes, and have the letters appear a few milliseconds later to create the effect. Moreover, I used the graph editor for all of these layers to create a smooth effect.

The transition for scene number 3 is a spinning effect. This can be easily created by moving scene three to be under scene number two, and make sure that the layers timeline collapses with one another to create a smooth effect. Moving back onto scene number two, set the rotation keyframe to 0° and +90°. As for scene number three, set the rotation keyframe to -90° first and 0° close to another.


Since the scene is going to be spinning, there may be certain areas that may not cover the composition entirely. To fix this, use the effect called ‘CC RepeTile’ so that the spinning layer will not expose any blank areas in the composition. Last but not least, I then add motion blur into both of the layers to create a smooth effect.

As for scene number three, this is a really simple animation of three different plastic bottles sliding across the composition. The keyframes I have used for this scene is rotation and position keyframes. I have used the position keyframe to animate the movement of the plastic bottles while making sure to leave some spaces between each of the bottles. Moreover, I used the graph editor for this as well to create a really smooth and dynamic transition as opposed to having it sliding across in a linear way.

I have used the rotation keyframes to create the effect when the plastic bottles completely stopped - which creates a small lean to the right. I have thought of possible ways I could do this as this can really get complicated as the anchor point is set to be in the centre of the assets when I animate the position keyframes. To create the stopping effect, the anchor point needs to be on the left bottom edge of the assets to create a realistic look.
After a lot of thoughts, I have decided to create a null object layer and parent the plastic bottles to the null layer. This way, I can change the position of the anchor point of the null layer to where I wanted it to be and animate the rotation keyframe to create a realistic stopping look.

The transition to scene number four is similar to what I have created previously. I alpha matte layer four to an ellipse shape and animate the scale keyframe. The only added thing is the other coloured ring outside and this is to create certain interests to the scene transition.

For scene number five, this can get really complicated but what I did was used an external plugin called ‘Duik’, and what this does is it allows me to create movements of my character to be in a simple format rather than doing it all manually using the position and rotation keyframes. Plus, it saved me a tremendous amount of time to animate it.

I imported the character using the phone scene into Adobe After Effect and making sure to place every layer correctly so that it looked correct as it was in Illustrator and Photoshop. There are two things which I would need to animate for this scene - which is the finger movement and the phone screen. The phone screen animation is actually simple to create; however, the finger movement is - if done manually can be complicated and time-consuming, plus it may not look as realistic as it can be.
In order to save time, I used the plugins called ‘Duik’ and added a mover feature onto the finger. This allows me to use the mover feature and move the finger freely without having to mess around with the position and rotation keyframes.

I then used the position keyframe to animate the finger movement and also playing around with the graph editor to create a smooth effect.

As for the phone screen animation, I alpha matte the content layer for the screen to the screen shape layer, and animate the position keyframes accordingly to when the finger swipe on the screen. I then play around with the graph editor to create a smooth effect as the content on the screen will move fast when the finger swipes and slow down in a few seconds later.

As for scene number six, I just reused scene number three to save time as I thought it was relevant to the script.

To animate the transition animation to scene number seven, I alpha matte scene seven to a shape that fits the composition. I then created a coloured shape rectangle as a way to tell the scene transition. Moreover, I animated the shape that has been alpha matte, using the position keyframe and playing around with the graph editor to create a smooth effect.


To create scene number eight and nine, I centralized the assets and using the position keyframe to animate the asset to the left-hand-side to reveal the number and text. Again, I cheated with the way I created this a little, seeing as the background is a plain colour. I created a shape that is coloured the same as the background and a shape that fits the asset. I then parent the asset and the shape together, having the shape underneath the asset.


I then created the text underneath the shape layer and animated it using the position keyframes to animate it to the right-hand side. Overall, once it is finished, it creates a smooth revealing effect as I expected. I repeat the process and created the same effect for scene number nine as well. I’m sure there are other methods of doing this, but I believe this is a really cool and quick technique to do which I am aware of.

As for scene number ten, it is a character scene holding a coffee cup. Again, to save time for animating the position and rotation keyframes manually, I used the Duik plugins and played around with the movements of the hand and finger to create the effect as if the character is holding the coffee cup and releases it a few seconds later. Moreover, I have also used the graph editor to create smooth and natural movements of the character.

For scene number eleven, I wanted to create a really cool and smooth transition between ten and eleven, and to do this, I just parent scene eleven to scene number 10 and animate the position keyframe of it to move the layer and reveal scene eleven.

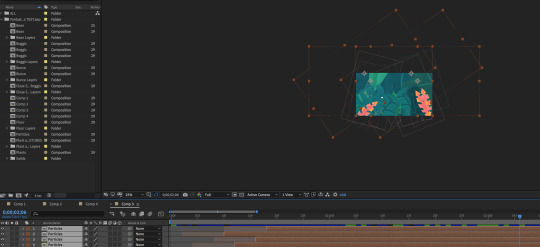
Scene number 12 is a little bit complicated but overall easy to animate. I have used the rotation, position and scale keyframe for this scene. For the position keyframes, I have used this for the floating plastic bottles in the centre of the composition as well as the ones in the background. Moreover, the position keyframe is also being used on the fish to create movements.

The rotation keyframe is used throughout this scene for the plastic bottles as well as the fish when changing directions.

Last but not least, I have used the scale keyframe on the fishtail fin by animating it from a small position to the original position to create the illusion that the fish is actually swimming.

To create the floating particles effect in the underwater, I followed a tutorial on the internet - using the CC Particle World effect available in Adobe After Effect.

The next scene - scene number 13, is re-using certain assets from scene number 1. However, not all of them. The things that have changed is the colour of the earth and adding facial expression onto the planet earth to show that it is sad. The process is exactly the same as I alpha matte the asset to an ellipse shape and animate the position keyframe to create the earth rotation illusion. Other than that, everything else stays exactly the same.

I didn’t animate the four following scene as I wanted to keep it simple and only focus on the scene transition instead. The following scenes are the 100,000 scenes, whale, dolphin, and sea lions scene. Furthermore, the shape which shows the transition is coloured accordingly to how the assets looked for each scene to create consistency and interests to the animation.


The next scene is a coin being flip and landed on the ground. The animation process for this is actually simple as all I have used are the position and rotation keyframes. I used the position keyframe to animate where the coin is coming from and when it stopped. I then use the graph editor to edit a smooth animation for it. I then used the rotation keyframe as the coin will be spinning before it landed on the ground. However, I didn’t want the spinning to be extreme and look unrealistic; therefore, I only use a tiny amount of it in the animation.


Finally, the last scene displays a cityscape and the animation process for this is actually simple. In Adobe Illustrator, I made sure that the buildings are in separate layers as I wanted to animate them individually. In Adobe After Effect, I pre-compose all of the buildings together so that I could animate the position keyframes, which would show the scene to be panning.

Inside of the pre-composed layer, I then animate the buildings individually by having the buildings in the foreground pan to the right a little faster than the ones in the background. This creates more of a dynamic look into the scene and makes the animation much better.

Making of sounds
I decided to record my voice instead of using captions in my video as I thought captions would ruin some of the scenes and distract them from looking where they are meant to be looking. I recorded my voice using a microphone and read out the script that I have made which is supposed to last between 1 minute and 1 minute 30 seconds if my pacing is correct.
Moreover, instead of recording and reading the whole script in one go, I have decided to break it down into small sections of a paragraph as I will likely fail if I read the whole script in one go. This is a great way to have more control over my recordings as I can edit certain parts out very quickly and easily.
Once all of the recordings are completed, I then use Adobe Premiere Pro to compile all of the recordings together and making sure that they are set to where they are supposed to be. I then exported the file to an MP4 file.

Once the MP4 is ready, I have decided to use Adobe Audition to equalize and edit the volume to a standard volume.
The reason why I have to equalize the sound was that the original record was really bad, and I mean some parts were really quiet and some parts are really loud. By equalizing the sound, it will give off a steady and consistence sound which is good for the viewers to listen to. Once finished, I then exported the file into a WAV, ready to be used.

These are the following websites I used for the sound effects:
Freesound.org
Zapsplat.com
This is the website I used for the soundtrack:
Free Music Archive
Once the animation is completed and completely rendered, I then exported it into an MP4 file which will be imported into Adobe Premiere Pro to add sound effects and soundtrack. I carefully choose the sound effects that I really liked and place them accordingly in alignment with the actions in the animation.

Final results:
youtube
0 notes
Text
Task 2 - Initial Ideas and Development
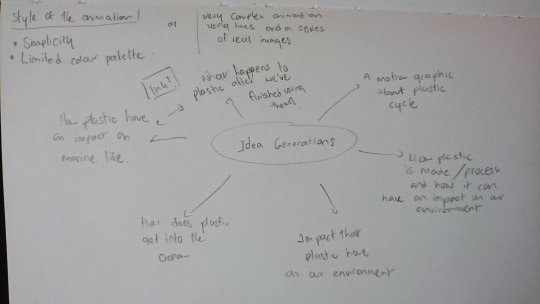
For this week, we are going to come up with our initial ideas and develop them further. After having completed all of the research on plastic last week, it is time for me to come up with possible ideas of what type of plastic animation I wanted to go for. In this case, I am interested in the idea of how plastic has an effect on our environment, marine life and the life cycle of it.
After I know what information is going to be added into the animation, it is time for me to decide on which type of animation styles I am going for. To get a better idea of this, I have decided to create a mood board with different pictures of animation styles for me to decide. I thought that choosing a flat minimalist style would suit best as not only is it fun in creating the assets, but it is visually pleasing as well.

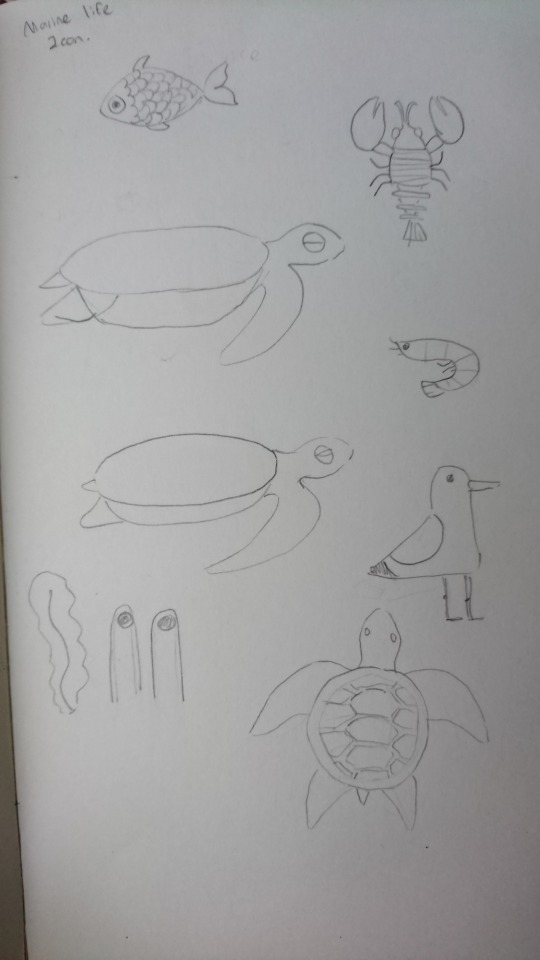
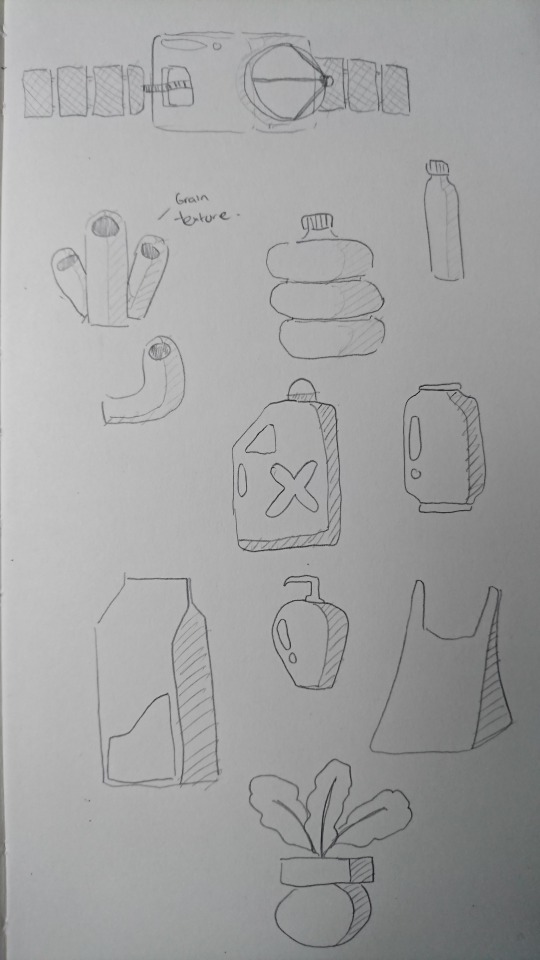
I then looked at some image references I could find on Pinterest and sketch out ideas for my characters and other assets. Moreover, I tried to draw them in the minimalist style as this is going to make it easy for me when looking at the references that I have drawn and actually creating it in Adobe Illustrator.

After the sketches are completed, I decided to create a rough storyboard to get a better idea for the animation. However, this is not going to be the final storyboard as I would have to take the timing and the script into consideration to call this the final version.
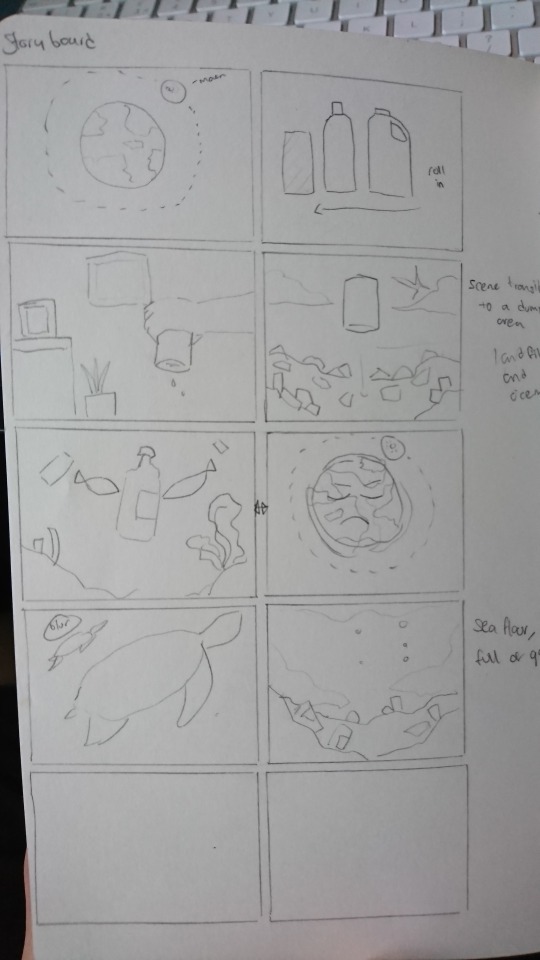
For this animation, I don’t want it to go over the 1-minute mark as too long could be boring. I wanted to create a short animation that has a lot of information and meanings behind them to show that I have put a lot of thoughts into it. Moreover, long animation will just lose the viewers’ attention.
After I have decided that the animation is going to be 1 minute long, it is now time for me to create a script, and essentially, 1 minute isn’t a long time so I’d need to put a lot of thought into choosing information that is important and putting it into the animation.
Using the information that I have gathered from the research, I created a script which I believe to be at least 1 minute long. Of course, I have to put my pacing into consideration as well when recording my voice and make sure that it is not too fast or too slow.
Script
Our planet earth, where 71 per cent of the earth’s surface is water-covered and a population of more than 7 billion.
We use plastic in every day of our lives, and when compared it to other materials, plastics are relatively modern and new. Over the century, the usage of plastic has enabled society to make technological advances, but have you ever stop and wondered the life cycle of these plastics?
Well, a small plastic bag can take up to 20 years to break it down. Now don’t be surprised, a plastic toothbrush will take more than 500 years to break it down and that is a very long time.
So what happens to the plastic after it was done being used?
They end up in the landfill and sometimes make their way to our ocean. More than eight million tonnes of plastic enter the world’s oceans every year and this is a great danger to our ocean, marine life and well, making our planet sick.
Around 100,000 marine mammals die every year as a result of plastic pollution. This can include whales, dolphins, and sea lions.
What makes plastic so convenient in our day-to-day lives is that it’s cheap, which also makes it appear everywhere, resulting in one of our planet’s greatest environmental challenges.
Since the duration of the animation is going to be between 1 minute and 1 minute 30 seconds, I didn't want to write my script any longer and only focuses on the information which I think it is important to get out there.
Proposal
For this motion graphics project, I have decided to be focusing on the issue and impact of how plastic can have on the marine life as well as addressing the issues as to how plastic travelled and get to the ocean. As for how the animation assets are going to look, I’m going to be creating them in Adobe Illustrator with bright and vibrancy colour schemes to keep the viewers interested throughout, as well as keeping the consistency of the animation contained. In addition to that, the assets are going to look minimalist and simple. I initially wanted to go with the style that uses real images as animation assets and I thought it would be a good idea to address the plastic issue using real-life images and shows the damages it has already caused. However, the idea fell quickly as I would rather create my own assets instead, as I wanted a certain style for the final animation.
Furthermore, I’m not going to be addressing the issue on every marine life but I am going to be addressing on the marine life such as sea turtles, birds, whales, and dolphins that died from plastic pollution. In addition to that, I am also going to be focusing on the possible ways that plastic can kill these marine lives such as drowning, the risk of infections and mistaking plastic as food. However, to make this motion graphic animation successful, I’d need to create a brainstorm of the possible ideas for the animation, as well as creating a storyboard to make everything organised for myself.
Planning assets
After the storyboard, script and the proposal are set, it is now time for me to plan how and what software am I going to be creating my assets in. I plan on using Adobe Illustrator to create the vector assets and moving into Adobe Photoshop later to add textures to the assets. This just gives an interesting look to the assets, instead of having a plain vector.
Colour scheme
The colour I chose for this plastic animation is red, blue and yellow. The main reason why I have decided to choose these three colours as it is not only because it is the primary colours, but it is the three colours which are very saturated, stand out and easy to remember. This is a good idea as everyone knows the primary and by using these three colours in the animation, it would help keep the animation consistent and will likely attract the audience’s attention.

Music and sound
I will be using a website called ‘Free Music Archive’ to find a soundtrack that fits my animation. I have a general idea for it, which is instrumental and happy. The soundtrack will be downloaded in MP3 or WAV file and importing it into Adobe Premiere Pro. The reason why I am using Adobe Premiere Pro is that it is just a better software to use for video editing and adding sound into it. Of course, I could use After Effect; however, it just doesn’t give many options for me to edit the sound as conveniently as Premiere Pro.

Since I am going to be recording my voice with a microphone, I am going to be editing the sound in Premiere Pro as I am going to be recording me reading one sentence at a time as I will likely fail if I record the whole script in one recording - which is why I break it down into small sections and combine it to make one whole script in Premiere Pro.
I then plan on exporting the script recording file into Adobe Audition to fine tune the voice and balance the audio level. It is very important to balance the level of volume as the recording may be imperfect and some areas may be louder or quieter than the other areas which are a sign of a bad audio level. This could also put off the audience as the consistency of the sound level keeps changing. I will also be tuning my voice to make it sharp and crisper as well to receive the results I wanted.
I also plan on adding effect and impact sound into the animation as well, and I am going to be using the website called ‘Freesound’ and ‘ZapSplat’ for it. I believe adding the effect sound could emphasis some of the actions in my animation, for instance - the falling sound or the background sound can really add texture to the animation and make it realistic and more dynamic in terms of sound.
0 notes
Text
Task 1 - Research
What is plastic?
Plastic is a type of synthetic or man-made polymer; similar in many ways to natural resins found in trees and other plants.
The history of plastic goes as far back more than 100 years; however, when compared to other materials, plastics are relatively modern and new. Over the century, the usage of plastic has enabled society to make huge technological advances. Although plastics are thought of as a modern invention, there have always been “natural polymers” such as amber, tortoise shells and animal horns. These materials behaved like today’s manufactured plastics and were often used similarly to the way plastics are currently applied.
Plastic has been of use for daily tasks to our most unusual needs, and have increasingly provided the performance characteristics that fulfil consumer needs at all levels.
References: https://plastics.americanchemistry.com/Lifecycle-of-a-Plastic-Product/
Plastic life cycle
In the present time, plastic is everywhere around us. Plastic has existed for the last 60 to 70 years; however, it has transformed everything from packaging to product design and retailing. The downside of it is that plastics are designed to last and nearly all plastic that has been created exists in some form even today. Plastic could end up in the ocean, and it could take hundreds of years to break it down, if at all.
Plastic bag - 20 years
Coffee cup - 30 years
Plastic straw - 200 years
6-pack plastic rings - 400 years
Plastic water bottle - 450 years
Coffee pod - 500 years
Plastic cup - 450 years
Disposable diaper - 500 years
Plastic toothbrush - 500 years
Plastic bag
plastic bags pose one of the greatest ocean wildlife as there have been many reports on wildlife animals mistaking it as food, for example, sea turtle. Even though they only make up a small percentage of our litter, they can break up into smaller pieces
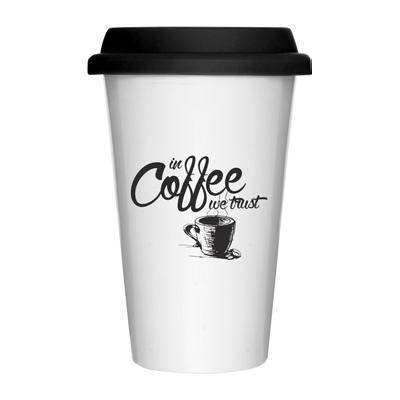
Takeaway coffee cups
Coffee cups are not recyclable due to the plastic membrane that lines them and can take up to 30 years to degrade.
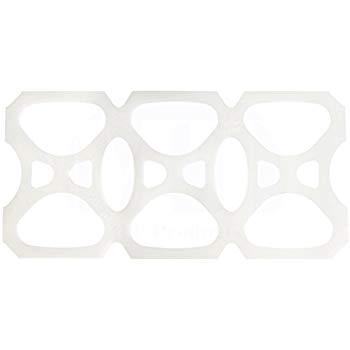
6-pack plastic rings
When one of these things in up in the ocean, they can be devastating to our marine wildlife who get entangled.
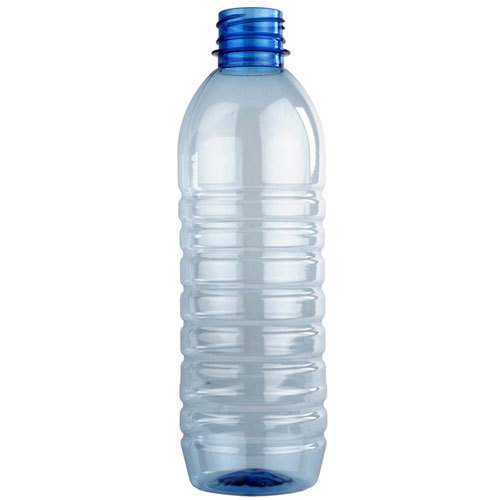
Plastic bottles
The energy required to produce and transport plastic water bottles could fuel an estimated 1.5 million cars for a year, yet approximately 75% of water bottles are not recycled – they end up in landfills, litter roadsides, and pollute waterways and oceans.
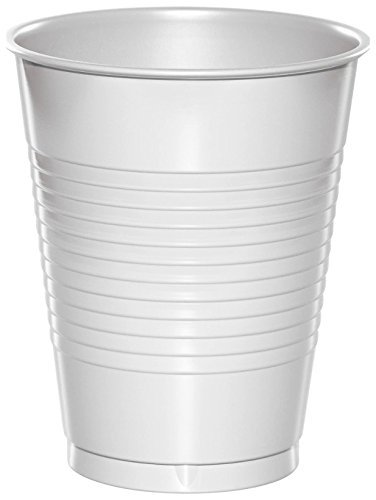
Plastic cups
The chemical bonds of plastic cups make them durable, but also resistant to breaking down. Moreover, they can also release toxic chemicals over time into the environment and are more likely to be ingested by vulnerable marine wildlife.
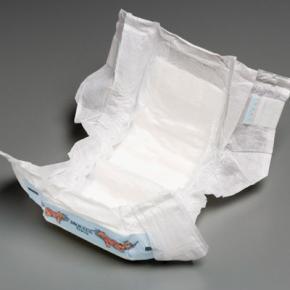
Disposable diapers
Disposable diapers need to be exposed to oxygen and sunlight in order to decompose, and they don’t decompose well in a landfill. Once in a landfill, they can contaminate groundwater, posing serious threats to the environment.
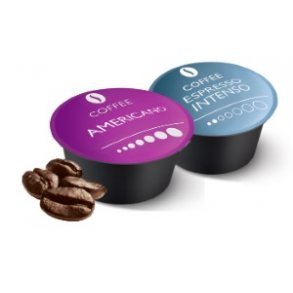
Coffee Pods
These coffee pods can take up to 500 years to break down because of the plastic that’s inside them, and it is releasing harmful amounts of methane gas as it is breaking down.
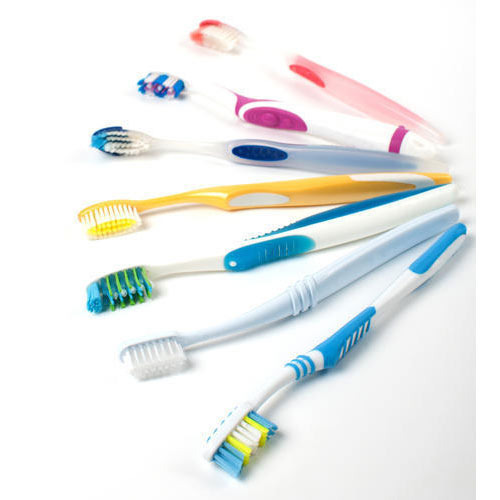
Plastic toothbrush
3.5 billion toothbrushes are sold worldwide each year. Most get lost in the recycling process and end up in a landfill or make their way into rivers and oceans. These toothbrushes are made from polypropylene plastic and nylon and can take up to 500 years or more to decompose.
How does plastic get into the ocean?
There are more than eight million tonnes of plastics that enter the world’s oceans every year, and here are some common ways:
Through rivers
According to the scientific research that I have found on the internet, it suggests that as much as 90% of marine plastic debris enter our ocean through 10 of the world’s rivers.
This doesn’t involve plastics being dumped directly into rivers, although this does happen. However, due to its lightweight nature, it’s easy for plastics en route to landfill to escape containment. This can then enter waterways and eventually, our oceans.
From boats
An estimated 20% of the Great Pacific Garbage Patch trash comes from ships and offshore oil rigs. This can happen from the people cutting loose their nets on a fishing trip to large cargo ships losing of dumping significant quantities of waste.
From factories
There isn’t enough care when factories producing, transporting or disposing of plastics, and therefore, this contributes significantly to the amount of marine debris.
Down the drain
To put simply, the journey of plastics to the ocean can all start in our bathroom. A high profile example involves the recent banning of microbeads by several countries. These tiny plastic balls are found in common items such as exfoliants, shower gels and glitter-based makeup. However, microbeads aren’t the only culprits. Cotton buds, sanitary products and face wipes often contain plastic, and some will escape cleansing operation at wastewater plants and make it to the ocean.
Great Pacific Garbage Patch
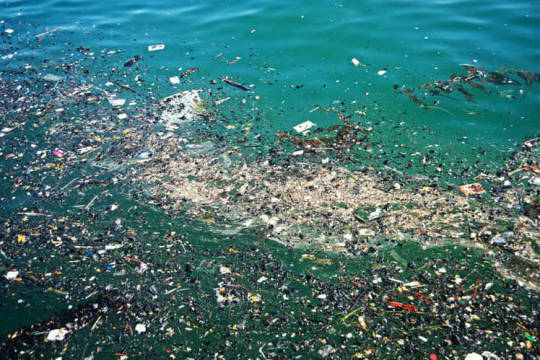
What happens to the plastic at the Great Pacific Garbage Patch?
There are two properties of plastic that make it such a visible problem in our ocean:
It’s light - many plastic objects won’t sink.
It’s durable - because plastic is relatively new, we don’t know how long it takes to break down.
The majority of the plastic in the Great Pacific Garbage Patch will simply float there. They will gradually be worn down by the waves and sunlight. However, even when this happens, the plastic doesn’t simply disappear entirely. Instead, it becomes microplastics. According to scientific results, it is believed that estimated of microplastics makeup 94% of the object count at the Great Pacific Garbage Patch.
What are the dangers of the Great Pacific Garbage Patch?
The obvious answer that we know is that plastic pollution is killing marine life. An estimate of 1 million seabirds and 100,000 wildlife mammals are affected every year, as well as many other species. For example, sea turtles often mistake plastic bags for prey such as jellyfish. Furthermore, abandoned fishing lines, fishing nets and equipment can ensnare and drown dolphins, porpoises and whales.
This is obviously the bigger problems we are seeing, and how can people expect there would be no danger to the wildlife when humans aren’t free from the potentials dangers of the Great Pacific Garbage Patch. Microplastics have been found in the stomachs of nearly half of the most important species for global fisheries, and this could simply mean that we could be eating our own trash. If these plastics make their way up the food chain and into our bodies, there are concerns over potential health implications.
How many birds die from plastic pollution?
A lot of the data regarding birds and plastics comes from studies of seabirds, as the presence of plastic in the ocean has garnered a lot of media attention. The number of seabirds dying as a result of plastic is currently estimated at 1 million a year. This shocking statistic becomes even more worrying when we consider just how quickly this problem has grown. In 1960, fewer than 5% of seabirds were found to have plastic in their stomachs, but this number had rocketed to 80% in 1980. Based on this research, and modern studies, it’s expected that by 2050, 99% of all sea bird species will be ingesting plastic.
Why do birds eat plastic?
It looks like food - small particles of plastic floating in the ocean can be easily mistaken for prey.
It smells like food - studies show that the smell of krill feeding on the algae that coat marine plastic debris is similar to natural scents that many seabirds follow when hunting for food.
It floats - plastic’s lightweight nature is also a huge part of the problem. Albatross species, in particular, feed by skimming low over the water and inadvertently consume plastic as a result.
What happens to birds that consume plastic?
The impacts of plastic consumption for birds depend on what they eat. Some birds die quickly as a result of sharp plastics puncturing their internal organs, but others may starve to death as they feel full from eating plastic but receive no nutritional benefits.
This could also be a huge problem as due to the amount they’re eating, birds are at risk of toxic effects of the chemicals that coat plastics. Moreover, adults birds that leave nests to hunt often return with plastic they have mistaken for food and feed it to their chicks.
What happens to birds that become entangled in plastic?
This really depends on where and how the birds become entangled.
Drowning in nets - for gannets, penguins and other birds that dive for their food, becoming caught in underwater plastic will mean they can’t get back to the surface, and so they drown.
Risk of infection - if the plastic is tightly wrapped it can cut the bird, leading to infection.
Inability to move - entanglement can mean that birds are unable to escape natural predators, or find food themselves.
How does plastic affect marine life?
Around 100,000 marine mammals die every year as a result of plastic pollution. This can include whales, dolphins, porpoises, seals and sea lions.
Why do they eat plastic?
A plastic bag ballooned with water can look a lot like squid, or other prey, to the seals and marine mammals that hunt them. However, even species that don’t identify them by sight aren’t completely safe. For example, toothed whales, and many species of dolphins use sophisticated sonar-type techniques called echolocation to find their prey. According to research, it is believed that unnatural objects such as plastic waste can confuse this sonar, and are incorrectly interpreted as food.
References: https://www.wwf.org.au/news/blogs/plastic-in-our-oceans-is-killing-marine-mammals#gs.4mrQVKAkhttps://www.wwf.org.au/news/blogs/plastic-pollution-is-killing-sea-turtles-heres-how#gs.wbbvse2Shttps://www.wwf.org.au/news/blogs/what-do-sea-turtles-eat-unfortunately-plastic-bags#gs.RqJUnW5E
What is single-use plastic? How are they disposed of?
Single-use plastics or often referred to as disposable plastics are commonly used for plastic packaging and this can include items such as grocery bags, food packaging, bottles, straws, containers, cups, and cutlery where they are intended to be used only once before they are thrown away or recycled.
How long does a plastic product take to biodegrade?
Plastic is still relatively new compared to other materials and although plastic has revolutionized how we store our food and packaging - the downside of it is plastic items can take up to 1000 years to decompose in a landfill. But plastic bags we use in our everyday life take 20 years to decompose, while plastic bottles can take up to 450 years.
Which countries have the highest/lowest rate of plastic pollution?
According to what I have found on the internet, a team of researchers in the United States and Australia led by Jenna Jambeck analyzed plastic waste levels in the world’s oceans.
In 2010, 8.8 million metric tons of plastic waste came from China with an estimated 5.53 million tons of it ending up in the ocean. The United States is also polluting the oceans with plastics; however, at a much lower rate than China.
How has it affected the environment?
The world is currently producing nearly 300 million tons of plastic each year - a significant amount of which could end up in our ocean.
Not only is plastic harmful to the environment and oceans, but it is harmful to wildlife as well. According to the Ocean Conservancy, plastic has been found in more than 60 per cent of all seabirds and 100 per cent of sea turtle species.
What is being done to tackle plastic use?
To tackle plastic being used, many countries such as Canada, Costa Rica, Great Britain, Greece and many more have ban plastic straws. Moreover, many businesses such as Alaska Airline will be removing all non-recyclable plastic stir straws and citrus picks and replacing them with sustainable, marine-friendly alternatives on all domestic and international flights. Plastic bags have also been ban in many countries such as Australia, Boston, Canada, Chile, China, Costa Rica, and many more.
What are the creative responses to plastic use?
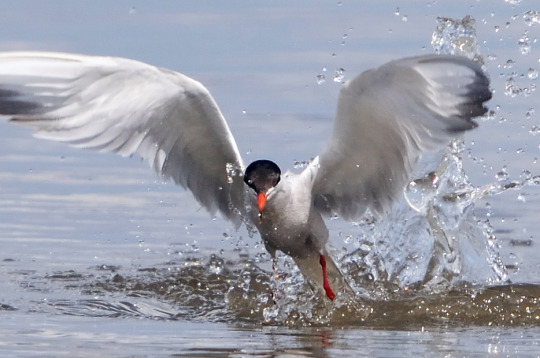
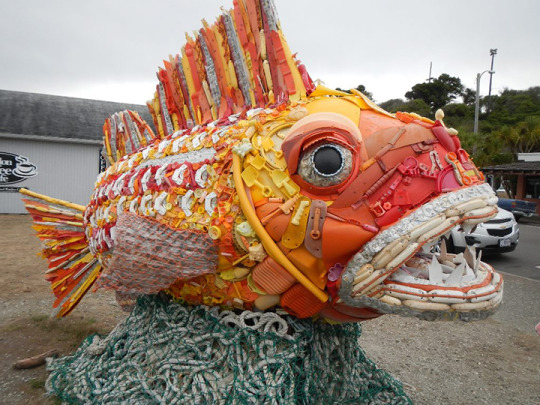
There have been some very creative responses in using plastic and turning it into something creative. For example, washed ashore rallies volunteers to clean beaches are using collected debris to create larger-than-life sculptures of the marine life affected by ocean trash and teaching students about the impacts of marine debris through art.
Another creative process is transforming lost fishing nets into energy. The Fishing for Energy partnership helps fishermen properly dispose of old and abandoned fishing nets and other gear - much of it plastic - at no cost to the fishermen. In addition to donating their own worn-out nets, some fishermen also directly retrieve lost fishing gear out of the ocean. After being collected and sorted, any metal parts are recycled, and everything else is converted into electricity, with roughly one ton of old nets producing enough electricity to power a house for 25 days.

What are the long-term consequences of plastic use?
The plastic that pollutes our ocean and waterways have severe impacts on our environment and our economy. For example, seabirds, whales, sea turtles and other marine life are eating plastic pollution and dying from choking, intestinal blockage and starvation.
0 notes
Text
Week 7 - Motion Graphics
For this week’s task, we are going to be creating a music motion graphic video. There is resources file that we would need to download at the beginning of the lesson, and it’s on the Interact website. We quickly go through tutorials at the beginning of the lesson as to how a music motion graphic video is made using abstract shapes and applying different techniques.
To begin the task, open up the Adobe After Effect file that we have downloaded from Interact and create a new composition. Any resolution for the composition will do, and in this case, I chose HD TV 1080p at 29.97 as this will have to be uploaded onto Youtube and I wanted the best quality as possible.
The first technique we will be applying is the trim paths. Select the pen tool in After Effect and making sure that the fill is set to none, while the stroke is set to about 6-8 px. Now draw a curve line to your preferences.

Click on the layer for the curve line, and there should be an ‘Add’ button on the right-hand side. Click on it to open up a new menu and select, ‘Trim Paths’.

The use of the trim paths is complicated to explain but after playing around with it, try to find the best results as possible using the keyframe for ‘Start’ and ‘End’. Here are the keyframes I used to create the line effect:

Once this is completed, I repeat the process again and create 2 more lines in different patterns to get different results. I’ve also changed some of the strokes for to lines for different variations and I have also added a line that has a glow to it. This is actually really easy to create, and the method I used to create the glow is by going to the Effects & Presets panel and search for ‘Glow’. Now, apply the effect directly onto the line to create a glowing effect.

Pre-composed all of the layers and duplicate the pre-composed layer a few more times. I then change the position and rotate the pre-composed layers to get different variations of the line and this method will save me a tremendous amount of time I wouldn’t have to recreate those lines again.

To create the explosion effect, select the ellipse shape and making sure that the fill is set to none, while the stroke is set to about 6-8 px. In the ellipse layer, click on the add button and select ‘Stroke’.

Enable the stroke width keyframe and animate the value of the stroke from 0 to 8. Moreover, for the transform of the layer, make sure to animate the scale of the ellipse shape, starting from 0 to its actual size.

Duplicate the layer and repeat the process again to get different results and making sure to add the glow effect to some of the explosion as well. Once completed, pre-composed the layer and duplicated it a few more times.

Now to create the spinning ring, select the pen tool and create a straight line. Make sure that the anchor point for this line is in the centre. Once completed, click on add and select ‘Repeater’. Change how many copies you wanted for the ring and change the position to 0 and the rotation to your preferences.

To finish this animation off, create a text in the centre of the composition - in this case, I chose the word ‘Shake’ and only put an outline on it as well as some glow to make it look interesting.

Final results:

Once we’ve finished with the tutorials, it is time for us to create a music motion graphic video of our own, and we can choose any songs we wanted for the animation as well.
Final results:
youtube
2 notes
·
View notes
Text
Week 5 & 6 - Mini Animation Project
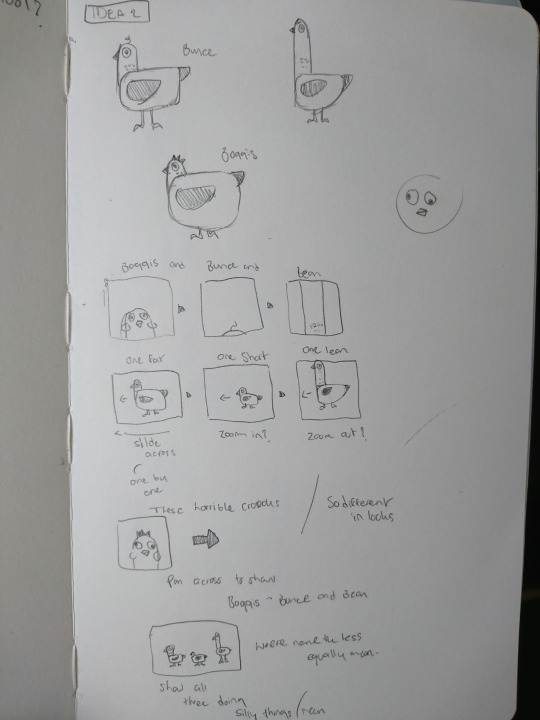
For this week’s task, we are going to create an animation based on what we’ve learnt over the past few weeks. Moreover, we only have one week to create the animation, and so we’ve decided to use Roald Dahl’s work for the animation. Furthermore, we also do have the option to choose which quote we are going for, and I chose a quote from ‘Fantastic Mr Fox’.
'Boggis and Bunce and Bean
One fat, one short, one lean.
These horrible crooks
So different in looks
Were none the less equally mean.'
Source: https://www.thebookpeople.co.uk/webapp/wcs/stores/servlet/article?articleId=100-roald-dahl-quotes
The reason I chose this quote was that it is engaging and I can create an animation that could look interesting as well. At this point, I already have a few ideas in mind as to what I wanted to develop. However, before I can even begin to create the animation in Adobe After Effect, I’d need to create quick sketches of my ideas first.
I drew small thumbnails of a storyboard to quickly generate ideas, rather than doing a big drawing as it could take me a long time. For my first idea, I wanted to use simple geometric shapes for the animation. As shown in the image below, Boggis is a circle, Bunce is a triangle, and Bean is a rectangle. These shapes show their appearance such as circle is round and big, meaning fat. For the triangle, I could make it smaller to fit the appearance of Bunce, while Bean is a rectangle as he is described as being lean.
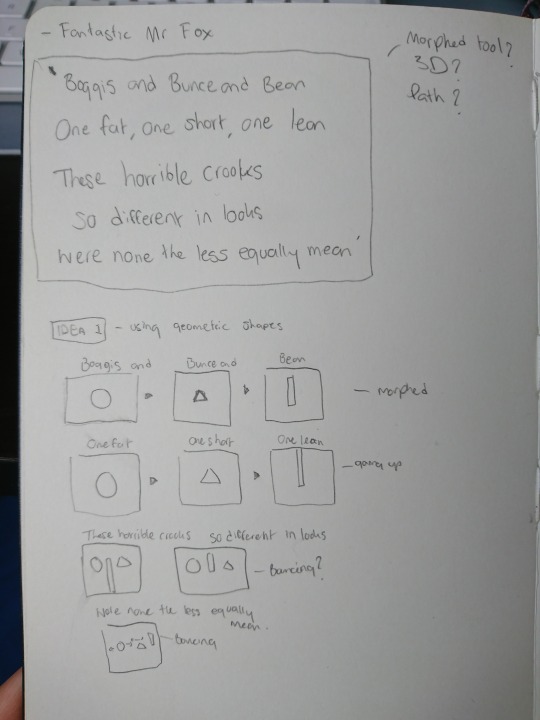
I have an idea to create the transition between the characters using the techniques called, ‘Morphing’. What it does is converting one shape to another, which is perfect for this particular animation.
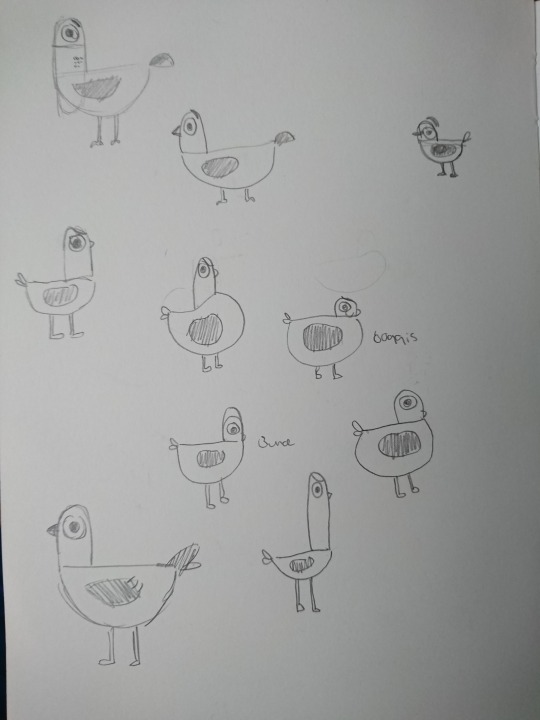
Another idea I’ve generated is turning Boggis, Bunce, and Bean into bird characters. The reason was that I wanted this animation to have a sense of humour into it to create interests, and I turn them into birds to do just that, as I could create the birds to have funny appearances.
The next thing I did was coming up with a mood board showing all the interesting appearances of the birds and what colour schemes I am going to be using.

Once I have the mood board set, I then coming up with quick sketches of the birds. I’d also have to take their appearances into the considerations as Boggis is fat, Bunce is short, and Bean is lean. I didn’t want to draw the characters too complicated as I’d have to re-create it in Adobe Illustrator again.
Once the characters have been designed, I then create a mini-storyboard showing all the ideas of how it all going to connect and my planning in general.
I have also decided to go with my second idea as I thought it was pretty funny and engaging to the audience. I knew that by going with the second idea, it would be time-constraint as I’d have to create all the assets in Illustrator, and then animating it in After Effect. Not to mention, this mini project’s deadline is in one week, however, to compensate that - it was a great choice going for a simple character's design as this would save me a tremendous amount of time designing it in Adobe Illustrator.

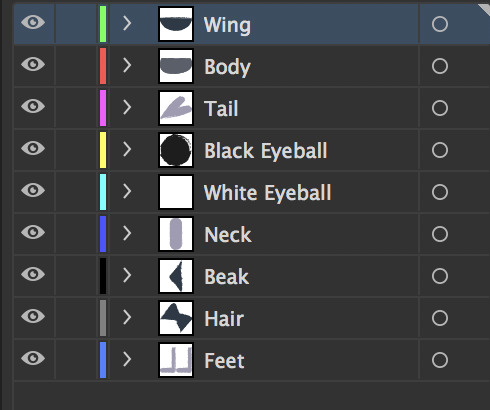
In Adobe Illustrator, I have created all of the assets with each feature in separate layers. The reason why I do this was, for instance - if I wanted to have the wing and tail move, I’d need to have these in separate layers as Adobe After Effect will not recognise each feature that is in the same layer; therefore, I have to do it manually.

Furthermore, I created different variations to experiment with colours and how the birds are going to be displayed. Moreover, I decided to go with the bottom ones as I really like the outline of the character, which has a drawing feel to it, and it makes it perfect for this particular animation.

The next thing I did was create assets for the close-up shot, and an introduction to the characters at the beginning.
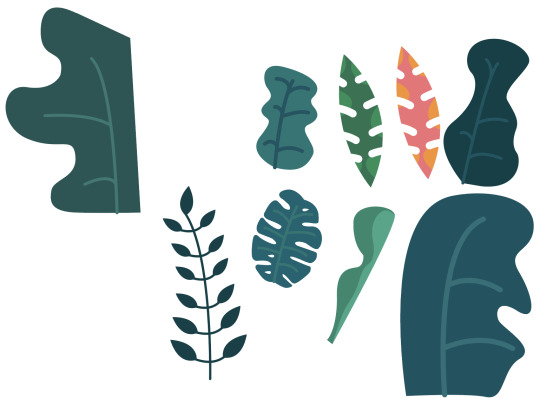
As for the transition between each scene, I decided to use different variations of plants covering up the composition which later on changes the scene once the plant has been moved out of the composition. This creates an entertaining and engaging animation to the audience, and it fit perfectly with the simplistic characters that I have designed.
The creation process for these plants assets is the same. It was created in Adobe Illustrator while making sure that each plant is in its own individual layers. In extension to that, I went a step further ahead and exported these assets into Adobe Photoshop so that I can add textures into them to create interests as opposed to having just a plant vector with no textures.

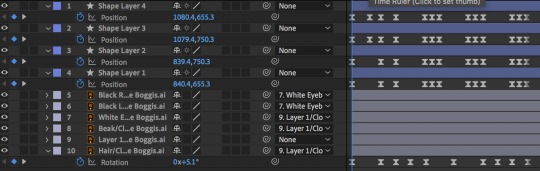
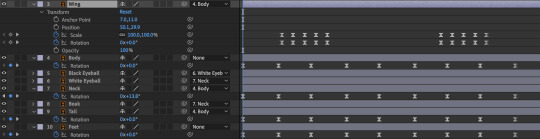
Once all of the assets are made and exported into Adobe After Effect, it is time for me to animate it. However, there are a few things that need to be considered and prepare before that. For instance, the character assets that I have exported - I need to make sure that the assets are layered correctly and are placed in the correct orders. After that, I need to parent some of the assets to the body of the character so that it moved as a whole, and finally - making sure that the anchor points are placed in the correct position to where I want to animate from. In addition to that, I need to make sure to pre-composed all the layers as this will keep everything organised.
Once everything is in order and placed correctly for all of the assets, from the characters to the plants. It is now time for me to animate. It may seem really confusing and intimidating given how there are a lot of assets to use for the animation and a lot of planning and timing involved. However, at a time like this, it is always best to have a storyboard at hands so that I will know exactly what I need to be doing first and break it down into step-by-step.

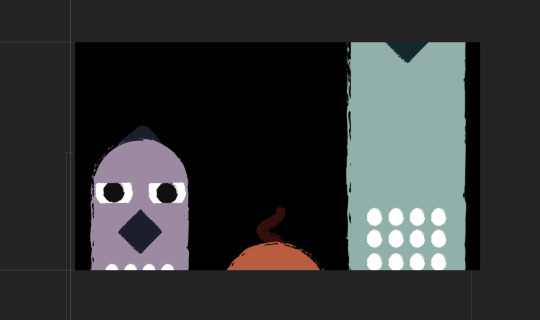
Following the storyboard, the first scene that I need to be animating is a close-up and an introduction scene for Boggis. This is really simple to get started as there are not a lot of moving elements for this scene, except for his eyes and hair. I animated his eye using the position keyframes while making sure that the keyframes are placed at a distance from each other to get the timing correct, and overall, make it look natural. As for his hair, it is a little simple, and all I have used is the rotation keyframe to animate slight movements.

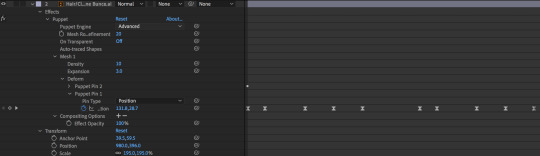
As for the animation for Bunce, I tried to make it funny by only displaying the top of his head, given how he is described as being short. This one is also easy to animate as well as the only element that I need to be animating is his hair. I wanted his hair to have subtle wiggle movements, and to do that - I am going to use the tool called ‘Puppet Position Pin Tool’. This tool allows me to freely manipulate his hair using the pin indicator. I placed one pin at the tip of his hair while the other one is behind the head. To animate it, I move the tip of his hair to the desired position while moving the keyframes to get the action in.

Meanwhile, for Bean, I didn’t want to animate anything as I thought it would be funny this way. I tried to also make it funny for Bean by making him so tall that he could hardly fit into the scene - which is why I decided not to animate anything.
The next step for me is to animate a fast moving scene where the character is described by their appearances. To do this, I created a floor in Adobe Photoshop to illustrate where the character should be standing, and I will also be animating only the floor. The way I go about making this is positioned the character at the centre and parent it to the floor. This way, when I animate the position keyframe of the floor, the character will move with it.
To animate the floor, all I did was use the position keyframe and carefully planned out the distance between each keyframe to make the movement natural. I then set the easy ease to smooth out the animation.

At this point, I realised that not animating the character would look dull and plain. It was a good idea to make a fast-moving introduction of the characters. However, I wanted to make it look even more natural, and the best way to go about this is animating the character when the floor moves back and forth.

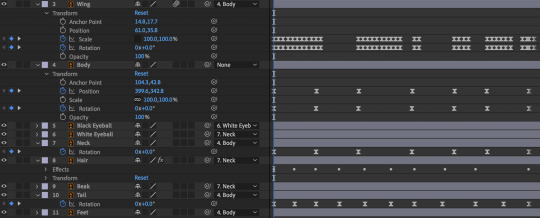
What this means is that when the floor come into the scene, I will be animating the character’s body position, the character’s neck, and tail. These slight movements can have significant changes in the animation that I have created as it gives the character a personality and made it look more dynamic.

To properly explain this, what I mean by animating the neck and body position is when the floor is moving so fast into the scene, the character will actually be leaning backwards as well as his neck. I will be animating it the opposite when the floor suddenly made a stop - this will give the animation a sense of speed.

Once completed, I repeated the process for Bunce and Bean and ready to move on to the next scene. As for the next scene, I will be animating this part from the quote: “These horrible crooks. So different in looks.”
For this scene, it is easy for me as I didn’t have to animate anything, but rather position the character correctly. I will be re-using the characters I have already animated for this scene as it would save me a tremendous amount of time. I placed the character right next to one another and pre-composed all of the layers. I then animate the pre-composed layer using the position keyframe to create the panning effect.
To finish the animation off, the last animation will require extra attention and detail as I have to animate all three of the characters individually. The final scene quote is: “Were none the less equally mean.”, and to animate this part - I wanted to make the characters looking silly and doing silly things which were supposed to be funny.
For Boggis, I made him look like he was dancing by moving up and down. I animated him by using the position keyframe and set the distance equal to one another to create a consistency movement. I also animated his neck by using the rotation keyframe, as well as his tail. As for his wings, I made it look like he was flapping his wing twice by animating the scale to about -100% and this gives the illusion that his wing is actually flapping.


For Bunce, I made him trying to fly for a short distance and back down to the floor again. The animation in itself is simple as all I did was animate him flying using the position keyframe, while making sure that I get his wing flapping correct. As he ascends from the floor, his wing will be flapping really hard, some in mid-air, and some of it as he’s slowly descending to the floor again.
Moreover, I have also animated his body and neck position using the rotation keyframe to make it look natural. For instance, If Bunce were to fly to the left side, his body language would need to move to the left as well as his neck as this signifies that he is moving left. This also makes the animation looked more natural and dynamic which is fundamental and note not to miss out on.
For Bean, I animated him similar to how I animated Boggis as I really want to make him do a funny and silly dance. Bean was animated using only the rotation keyframe such as his body, feet, tail, and neck. There isn’t anything complicated for Bean animation process at all.
Last but not least, for the transition animation - this is something that will be taking me the most time as I would have to animate the plants individually and there are about nine plants in total. I also think that I can get away by copying the keyframes to save time and changes some of it to create variations.
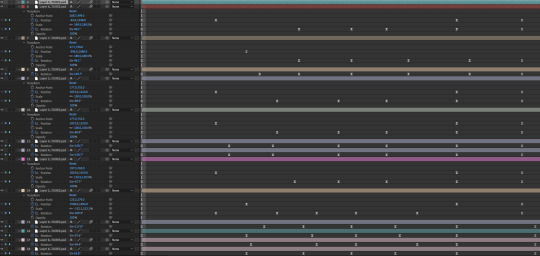
The plants will be animated using the position keyframes as well as the rotation keyframe to make it appear to cover the composition. It is rather a simple process but time-consuming. Moreover, I could also easily turn these keyframes into easy ease to save time. However, I really wanted to go the extra mile and make the animation look more dynamic, and to that - I decided to use the graph editor.


I can easily manipulate the motion between each keyframe to my desire using the graph editor, and it is a very useful tool in creating a beautiful animation. I wanted some of the plants to move into the composition slowly, while some move in quickly to create different variations. Moreover, I need to pay extra attention to details and see the movement between each keyframe as I really want the plant to flow smoothly, and no sudden movements.

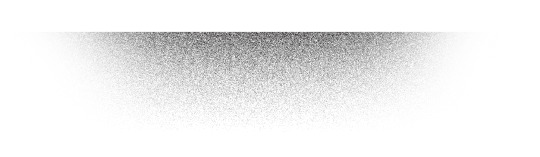
While I was at it, I also animated some of the particles that came flying when the plants move into the scene. This was created easily using the ellipse and rectangle shapes available in Adobe After Effect. I then use the position keyframes to move the particles in random places. Moreover, this was done individually, which is why it took me an amount of time to complete, but nonetheless - I am satisfied with the subtle movements in the animation which makes it look ten times better without the particles.
Moreover, I also repeated some of the particle processes by pre-composing it and duplicating the layers - changing the position and rotation of the pre-composed layer to create different variations.
I have also added some plants into the final scene to create some interests into the scene and visually make it look colourful as opposed to having just the birds there.
Once the animation is completed, the next step I did was render the animation into a movie file and importing the movie file into Adobe Premiere Pro. The reason why I imported it to there was that I wanted to add music and sound effects into the animation, and the best place for me to do that was in Premiere Pro. Sure, I could also do it in After Effect, however, since the project is layered with different assets and all of the pre-composed layers, I thought it would confuse me in the process. Besides, I already have prior knowledge on how to use Adobe Premiere Pro anyway, which makes it my choice into adding the sound effect.
This is a list of websites I used to get my soundtracks and sound effects:
Zapsplat
Freesound
dig.ccMixter
Final animation:
youtube
8 notes
·
View notes
Text
Week 4 - After Effect Activity (2)
For this week’s lesson, we are to practice more techniques in Adobe After Effect. Using different techniques we have learnt the past few weeks to animate shapes. In extension to that, we’re going to animate shapes animations in three different compositions with each varying in its own. Once completed, we’re going to combine all of the three animations into one composition to create the final animation.
To begin the task, select the ellipse shape tool and create a symmetrical ellipse shape by pressing and holding the shift key. Once completed, on the Align panel, select the following to make sure that the ellipse is in the centre of the composition.


Copy and paste the ellipse shapes five more times, and make sure that each individual ellipse shapes’ scale is set apart by 20. For instance, the biggest ellipse shape would have 100% while the rest is 80%, 60%, 40%, and 20%.

Make sure to select different shades of tones of the same colour for the five ellipse shapes. For this animation, we are to use the opacity keyframe to animating these ellipse shapes. These are the timeline of the keyframes:

As shown in the image above, the keyframes are set individually apart from each other at the same distance. For the beginning of the sequence, all five of the opacity keyframes are set to 0%, and at a distance, it is set to 100%. Repeat the same process for the other four ellipse shapes.
Final results:

For the second animation, repeat the process and create ellipse shapes five times. The next step is to select all five of the layers and create opacity keyframes. Set it at the beginning of each sequence at 0%. Now at a distance, set it to 100% again.

The image above shows how I have moved the beginning of the sequence for each layer to where I set 100% for the previous layer. You can overlap the layer to create the appearance of two shapes overlapping each other too.

Finally, to create the shapes to flicker, play around with the opacity tool and changing the distance of each keyframe to create a fast and slow flashing effect

Final results:

For this third and final animation, instead of using the opacity keyframe as we did for the previous two - now we’re going to use the scale keyframe to animate.
The same as always, create five ellipse shapes the same method as we did with the previous two. Now zoom in on the timeline panel until it changes from seconds to frames. Move each of the four layers to about the distance of 5 frames each.

Once completed, set the scale keyframes for each of the layers and at the beginning of the sequence, each scale keyframes should be at 0%. Now at a distance - depending on how far the distance you want, set the scale keyframe again at 100%.

As shown in the image above, this should be the results to create a successful animation using the scale keyframe. In extension to that, I have also added 100% scale keyframes again to make sure that it does not move.
To animate the ellipse shapes disappearing from the composition, repeat the same process as animating it coming into the composition. However, the position of the keyframes should be the opposite of it.
Example:

Final results:

Once everything is completed, we are now going to put all of these animations into the same composition to create the final animation. However, before we can begin, make sure that you’ve pre-composed all of the animations. To do this, select all of the layers, right click and select ‘pre-composed’.


Final results:

1 note
·
View note
Text
Week 3 - After Effect Activity (1)
For this week’s lesson, we are to practice more animation techniques in Adobe After Effect. We will try to create an animation using only text and will be based on Roald Dahl’s works.
To understand what we are really working with, it’d be best to understand who the artist is and what kind of work he produced. We did a brief research on the artist, and he was the author of Charlie and the Chocolate Factory, Matilda, The BFG, and a treasury of original, evergreen, and beloved children’s books. He was born on 13th September 1916 and died on 23rd November 1990, yet he remains the world’s NO. 1 storyteller.
There were many works that he has produced. However, the class agreed to do one of his work, ‘George’s Marvellous Medicine’ and chose one of the quotes:
‘Will she go pop? Will she explode?
Will she go flying down the road?
Will she go poof in a puff of smoke?
Start fizzing like a can of Coke?’
However, for this animation, we’d only be using the first two lines.
https://www.thebookpeople.co.uk/webapp/wcs/stores/servlet/article?articleId=100-roald-dahl-quotes
The sentence, ‘Will she go pop?’ Was separated into individual layers to create this fast transaction between the words. However, for the word ‘Pop?’, It is animated using the scale keyframe to give the sense of the word actually popping towards the composition. In extension to that, to bring a sense of fast motion, I applied ‘Motion Blur’ into the animation as this will make it look natural, under the circumstances of a fast-moving pace animation.
The same method is applied to the sentence, ‘Will she explode?’ as it’s separated into individual layers. The word ‘Explode’ was animated in the same way as the word ‘Pop’ using the scale keyframe, but enlarging the word to a certain extent. Moreover, opacity keyframe was also applied to this word as for when it reaches a certain amount of seconds, the word ‘Explode’ would disappear from the composition.
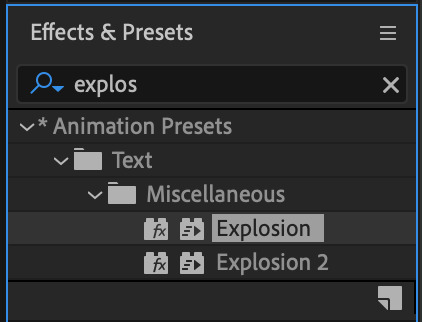
To create the explosion effect, I used the effect called ‘Explosion’. However, before the effect is being applied, the word ‘Explode’ is duplicated into another layer. Right click on the word and select, ‘Create shapes from text’. Once completed, the layer should be automatically duplicated and the previous layer should be hidden.


Select the new layer where the word ‘Explode’ has been created as a shape. Now on the add-on button, add the effect called ‘Pucker & Bloat’ and apply it to the layer.

At the beginning of the sequence of the word ‘Explode’, animate the effect ‘Pucker & Bloat’, and make sure the effect is set to a certain extent to create the explosion effect.

Finally, to animate the sentence, “Will she go flying down the road?” - I would have to create a path first. Select the pen tool and create a path. Once completed, select the drop menu on the layer and select Text > Path Option > Path and select the option to ‘Mask 1′.

Change the settings so that it starts out of the composition and ends when it’s out of the composition using keyframes. Moreover, it is essential to put the timing into consideration as the viewers may get confused if the sentence moved too fast. In extension to that, I have also applied the ‘Explosion’ effect to the sentence to create that explosion of the text at the end.
Final results:

1 note
·
View note
Text
Week 2 - 12 Principles of Animation
Squash and stretch
Squash and stretch is the action of giving the illusions of weight and volume to the object as it moved. However, this depends on the extreme uses of squash and stretch as to what required in animating the scene. This principle can be applied to object as simple as a bouncing ball to character animation.

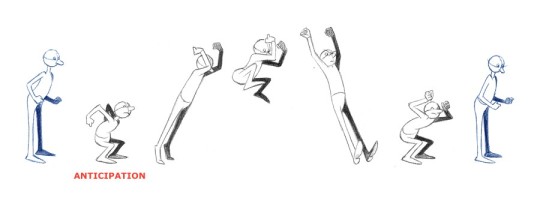
Anticipation
Anticipation is a significant movement which a character performs before it starting to run, jump or change expressions. For instance, a dancing character does not leap off the floor immediately - anticipation occurs before the forward action performed, which is the backward movement.
Staging
A pose or movement of the character should be adequately conveyed to the audiences. For instance, the mood, the reaction or idea of a character should be in relation to the story and the continuity of the storyline. Moreover, it is beneficial if the uses of the camera positions are used correctly under the right circumstances such as long, medium and close up shots.
There is also a limit amount of time in a film to consider - subsequently, the sequences, scene and frame must be related to the overall story and does not go over time of the animation.
Another point which is worth considering is the actions in a frame. Avoid using many movements in one frame as it will confuse the audience by using too many actions; therefore, it’s a good idea to limit the number of movements in a scene and focuses on what’s important to get the idea across.
The uses of the background are also very critical in animation. If the environment is poorly made with little details, it will not cooperate with the flow of the characters or if the background is too detailed - it may distract the audiences and draws their attention away from the main focus of the animation.

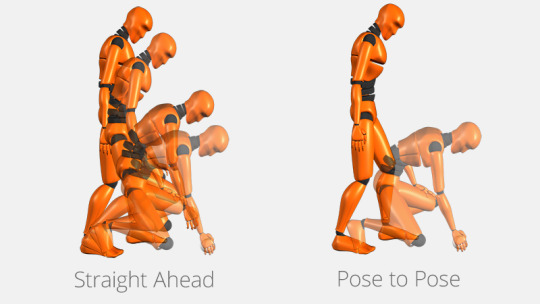
Straight ahead and pose to pose animation
Straight ahead animation is the process that starts at the first drawing, middle drawing and drawing to the end of the scene. This method is not as flexible as it can lose size, volume and proportions easily. However, it does create a nice freshness to the animation, and not to mention - fast and wild scene are created this way.
Pose to pose animation is a method that is well planned out and are charted with key drawings. By using this method, the size, volume and proportions are better controlled. The lead animator will draw the key sketches which are drawn at intervals throughout the whole scene. The lead animator will hand the chartings and keys to the assistant, which the missing frames will be drawn to fill out the in-between of the key movements. The advantage of using this method is that it is flexible and it allows the animator to do more scenes and concentrate on the planning of the animation.
Follow through and overlapping action
Follow through action is when the main body of the character stops - all other parts of the body will continue to follow and catch up the central mass of the character. For instance, arms, long hair, dress or clothing.
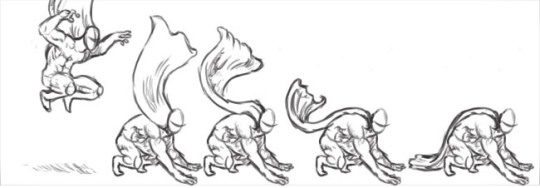
Overlapping action is when the character shifts in a new direction. This means that many frames later; the clothing, hair and movement of the body will continue to catch up. For instance, when Snow White starts to dance, her dress or hair does not begin to move as she immediately moved, it will continue to catch up to her until she completely stops.

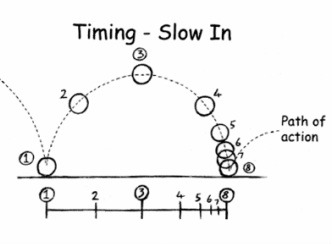
Slow-out and slow-in
As the animation starts; there will be more drawings at the beginning of the pose, one or two in the middle, and back to more drawings near the next pose. This means that fewer drawings make the animation goes faster while more drawings indicate it will make the animation goes slower. Slow-in and slow-out soften the action, making it more life-like.

Arcs
This method can be applied to a moving lib by rotating the joint, or a thrown object. All actions, with a few exceptions, follow an arc or slightly circular path and this is true in human figures as well as the movement of the animals. Arcs will give the animation a better natural look and natural flow of the animation which will overall, make the animation a lot better.

Secondary action
Adding secondary actions to the main action would not only support the main action but also give the movement of the character more life and natural looking. For instance, a character is walking - their arms simultaneously swing, put it in the pocket, speak, whistle or express emotions through facial expressions. These actions support the main action rather than take away attention from the main action.

Timing
Timing refers to the number of drawings or frames for a certain action. This means that more drawings between poses can smooth and slow the action in a scene and fewer drawings between poses can make the animation goes faster and crispier.
In animation, a variety of slow and fast action within the scene can add interest to the movement which would make the animation more interesting. More importantly, timing is crucial in establishing the expression or emotion of the character within the scene. This means that if you have a fast-moving animation scene, but the appearance is entirely off from the movement of the character, the animation wouldn’t look natural anymore.

Exaggeration
Exaggeration is an effect in animation that is useful. The level of exaggeration depends on how an animator is desired to make it as close to reality as possible or to a specific style. There are different forms of exaggerations such as supernatural or surreal. It is also essential to restraint the amount of exaggeration used in animation because overusing exaggeration can make the audience confused with the storyline and the message you’re trying to convey.

Solid drawing
The principle of the solid drawing is a principle concerning the uses of the three-dimensional space or giving them volume and weight. This means that you need to be able to understand the basis of three-dimensional space, anatomy, weight and balance, Today’s animator draws less because it is convenient to use a computer to do all of the work.

Appeal
Animated character needs to have appeal. This doesn’t mean that appealing animation needs to have a character that is cute. This means that a particular character will appear to have a certain appeal. For example, they may be heroic, villainous, comical or charming. An appeal will include a character design that might be related to their personality; clear drawing or personality development will make the audience understand the character.

Animating in Adobe After Effect
After we have completed our research on the 12 principles of animation, it is now time for us to create a simple animation in Adobe After Effect applying one, if not two of the animation principles.
I strive to create an animation focusing on the uses of weight and volume which is the main focal point in the animation. Regarding the principles, this is called ‘squash and stretch’, and as a result, I applied this principle throughout the production of my animation while considering the slow-in, slow-out and timing. These principles are acceptable and very essential to use to create a convincing and natural looking animation.
Animation 1

To create the effect of squash and stretch, I consider the uses of rotation, easy ease and timing which is the position of the keyframe to indicate the scale of speed - which in terms can be used to create the effect of weight and volume.
The keyframe is placed carefully on rotation to create the weight and volume as well as indicating its speed. For instance, fast rotation can suggest that the object is heavy while slow rotation can mean light object. However, it needs to be used considerately as too slow can create unappealing and unrealistic results of animation.
Animation 2

This animation focuses more on its weight and volume as noticeable. I primary made uses of the rotation keyframe to get the results of an object that has weight to it. This was animated by concentrating on the placing of the keyframes between one another as this is indeed considered to be the ‘Timing’ principle.
It means that if I placed keyframes closer to one another, the animation would speed up while setting further away from one another creates alow animation. I made uses of this principle by placing keyframes further apart from one another as the word ‘swing’ is rotating to a verticle angle. Once reaches the top of its peak, momentum began to accelerate due to gravity, and I create the sense of speed by placing keyframes closer together.
Finally, to make the word ‘swing’ seems that it has weight and volume, I just used the rotation keyframe again to stop at the position, and rotating the movement slightly backwards and forward again a few times to create that ‘short bounce’.
Animation 3

I wanted to experiment more on the weight and volume of an object, and it was in my best interest to use a similar method as the previous animation but create a slightly different version of it.
Methods are the same; however, once it swings right and left a few times, the word ‘swing’ lost its attachment and thrown away in a short distance. I used the position keyframe to create this thrown effect that I have added while considering the timing of the rotation keyframe correctly so that it lands upside down. Not to mention, to create the heavy object that has weight and volume, I have also added that ‘short bounce’ to create the illusion.
Animation 4

This animation was slightly more complicated to animate as there are countless things to consider. This focuses more and everything on squash & stretch, weight, exaggeration and timing. Everything mentioned is significant in animation and should consistently be considered the uses of it.
The word ‘swing’ is imitating a bouncing ball, and to create the illusion of it was to use the scale and position keyframe. While the word ‘swing’ is in mid-air, I used the scale keyframe to create the stretch vertically following the principle of ‘squash and stretch’ as well as ‘exaggeration’. Once it has fallen on the ground, I used the scale keyframe again; however, this time, it is stretched horizontally to create the squash effect.
Furthermore, the position keyframe is used to create the bouncing effect. However, it won’t be bouncing forever, the word ‘swing’ will eventually lose its momentum, which is why the position keyframe are used individually for each of the bounce, and this was so I could adjust the bouncing scale for each of the bounce until it stops.
3 notes
·
View notes
Text
Week 1 - Motion Graphic
What is the purpose of a motion graphic?
Motion graphic is a new form of animation. It consolidates the uses of animation and graphic design and usually holds the purpose of presenting the information to the viewers through the use of animated text or graphics.
Some motion graphic, if not most - may have a voice-over narrating the data in the motion graphic video or text of information. In the simplest term, motion graphic is a tool of communication to convey information in a video format.
What is motion graphic used for?
There are many uses for motion graphic, including how they are used to create subtitles and credits in TV programs and films. Moreover, motion graphics can be used in marketing to inform customers about varying features and products. Motion graphic is put to good use in these fields as it is helpful at capturing the attention of viewers. Not to mention, more and more websites have begun using motion graphic on their website to grab the attention of the viewers.
Lists of what motion graphic are used for?
Advertising
Branding
Educational
Music video
Title sequences
Key features of motion graphics:
Elegance - it looks more sophisticated than other kings of explainer videos.
Formality - appearances that corporate businesses look and style.
Bright colours - vivid and saturated colours are used to grab the attention of the viewers.
Simplify - turning complex ideas into a form of information that is easy to digest.
Fun - Boring and long information content can turn into an entertaining and fun video.
Research and list four:
Instagram Motion Graphics Video
vimeo
This motion graphic informs the viewers what Instagram is all about in the simplest way. It could be used to advertise its product to customers who have never used it before and are wondering what this social network is all about.
This motion graphic may be short but it gets all its points across in just 30 seconds through a clear narrative as well as the graphic and sound.
Google Motion Graphics Video
youtube
This motion graphic explains how Google Cloud IoT platform helps people stream and transform data as it arrives with Cloud Dataflow. This motion graphics video shows how you can take advantage of Google’s web-scale processing, analytics, and machine intelligence.
The motion graphic is fun to watch and everything is always constantly moving. This really helps keep the video entertaining and not boring as people tend to get bored of information they perceived if the video is at a standstill. Moreover, the uses of the sound effect in this motion graphic really bring the video together and make it interesting.
Jive Motion Graphics Video
vimeo
This motion graphic shows how people can engage directly and authentically with thousands or millions of people at a time. It highlights how Jive delivers great experiences that drive loyalty and brand advocacy.
This motion graphic has a clear narrative-voice which explains what the company does. The graphic is very pleasant and subtle in the video which makes it clear for the viewers to see. Moreover, the uses of the sound really help bring the narrative-voice and graphic together.
Cisco Motion Graphics Video
youtube
This motion graphic shows the transformation of healthcare organization digitally. Cisco’s experts securely connect patients, doctors, and processes to increase access, quality of care, and efficiency. This motion graphic shows how Cisco leads the industry with innovative solutions that lay the foundation for a healthier tomorrow.
This motion graphic clearly explains what it does. The sound in this motion graphic is in sync with the narrative-voice as well as the graphic which makes it successful in trying to get the point across.
In the second part of the lesson, we have a practice in adobe after effect - exploring the position, scale, opacity, anchor point and rotation, while keeping in mind the 12 principles of animation. Since I was able to use adobe after effect before and remember how to use, it wasn’t hard for me to get into it again.
Final result:

3 notes
·
View notes