
Don't wanna be here? Send us removal request.
Statistics
We looked inside some of the posts by myalternatechesssetproject and here's what we found interesting.
Average Info
Notes Per Post
0
Likes Per Post
0
Reblog Per Post
0
Reply Per Post
0
Time Between Posts
18 hours
Number of Posts By Type
Text
17
Last Seen Tumblr Blogs


Fun Fact
Tumblr has 411 employees.
Text
Joysticks Final
I sprayed the joysticks with primer to make sure the paint will stick to them. I have then painted them to make the final product. I chose to paint the bases black, the sticks silver and the top spheres blue or red depending if they are white or black chess pieces to match the arcade machines. They were hard to paint with the 90 angle between the sticks and the base but I am happy with outcome and the finer details on the arcade machines were harder to paint overall.


0 notes
Text
Pawn Sanded
I have sanded the pawns down so they can be sprayed with primer and painted. The sanding will erase all rough patches and supports so the primer sticks to a flat surface. They both were easier than I thought but were more work than the arcade machines.


0 notes
Text
Pawn Printed
I printed 2 pawns that are joysticks to complete the set I wanted for the rest of this project. They required supports because of the sphere so they will need more sanding than the arcade machines did but I really like how they turned out. They look like joysticks and pawns.


0 notes
Text
Final Results


The images above shows my final outcomes with this project and I am really happy with how they turned out. I loved the painting, modelling and priming process. I am incredibly proud of the results and my painting skills have drastically improved over this project.
0 notes
Text
Marquee done
I painted the names of the pieces onto the marquee on the arcade machines. I was very happy with this and they both took several attempts to get them readable and so I was happy with them. The B on the Bishop looks slightly strange because I had to put blue in the middle of the holes.


0 notes
Text
Marquee Practice
This was the sheet of paper I used to practice painting the names on the marquees of the machines. I tried many times to get this to work. This was the sheet of paper I printed out the vectors onto to check the scale also. This process helped me feel confident enough to try and paint onto the prints.

0 notes
Text
Buttons and screen
I painted the buttons and screen on both models I was very proud of how clean I managed to get the sides of the buttons in particular as they were tiny and thin. I also like the silver as the screen and the contrasting buttons I think it ties everything together. I know the screens are streaky but I added an extra coat at the end using a larger brush to try and help with this so I think this is as good as I will get them.


0 notes
Text
Stencils complete
I have placed both of the stencils and used paint to join them on the edge. I really like how this turned out and the black in particular looks great because the dark paint hides the join line better. I will keep applying paint to try to close the line on the white paint model. I think they resemble the pieces they are meant to very well and will serve their purpose to identify the pieces well.


0 notes
Text
Joining the seams and cleaning up
I had to paint and join the seams between the 2 stencils on the backs and side of the models. To try and prevent the line you can see in the image below

The image below shows the end result:

You can still see the seam below but it is a lot less noticeable and I am happy with this as a final result. I think it also looks like a bishop and my cleaning up of the edges was difficult but was very worth it because the edges are significantly cleaner than they were.
0 notes
Text
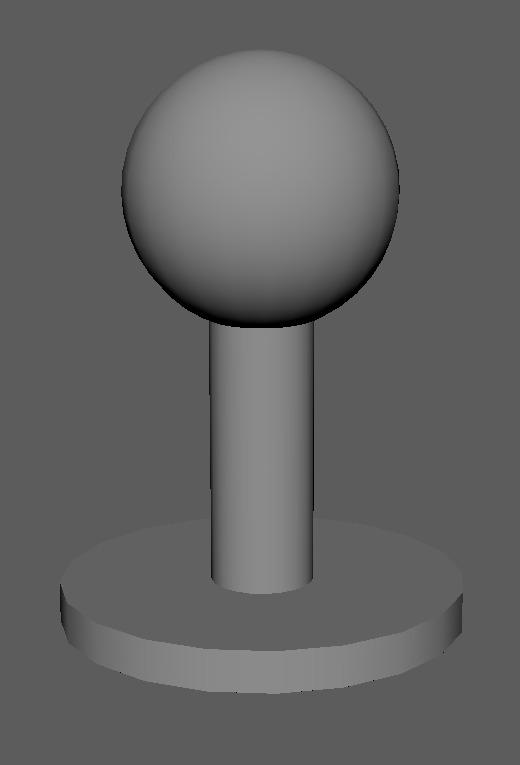
Joystick Model
I 3D modelled the joystick in Maya. This was for the 3D printing. I think the result looks like a joystick and because it was 3 shapes it was incredibly easy to set up and make. I hope to have these all printed by the end of the project but there was a problem with me printing at college. I hope to get 2 printed despite this problem and I think the model will print well despite the supports it will need to hold the sphere.
0 notes
Text
Stencil Outcome
The outcome of the using the stencils on the front icon is shown below. As you can see in the left image the paint got under the stencils. This happened to both. It made the image unclear and it was too much for me to clean up with a brush. I decided to sand them both down and the right image shows the result after I had done that. I then applied a few coats of red or blue to reset it back to a blank square.


0 notes
Text
Stencil
I used a stencil to apply the paint in the shape of the icons. They were too detailed for me to hand paint and I thought it might work. I used sticker vinyl that was cut precisely by a machine to ensure accuracy. My parents have a vinyl cutter at work and they let me use it for this purpose. I figured that I could stick the stencils on then stick on excess to ensure that no paint hits the model outside of the stencil. Then I would paint over it let it dry and peel it off and hope that the shape remains.


0 notes
Text
Sticker Vs Normal Vinyl
When I thought of making the stencils I cut them out using the cutter in vinyl. I then released that the vinyl would be floppy and not hold it’s shape and there would be no way of connecting it to the model without risking paint being pulled off. I then realised that we could use sticker vinyl instead. It would solve both problems. It is a lot thicker and holds it’s shape very well and it’s sticky so it would stick to the model. They aren’t incredibly sticky and I hoped they wouldn’t pull the paint off. The left image is the standard vinyl the right one is the sticker vinyl.


0 notes
Text
Base colour painted
I painted the base colour on the models today. I painted one of the pieces red, this will have icons painted in black and the other base colour was blue. The blue piece will have icons painted in white. I chose white and black to represent conventional chess pieces. I will also paint the buttons either blue or red (opposite to the base colour) and the screens silver. This will give a more accurate arcade machine as the buttons wouldn’t be the same colour as the machine in real life and neither would the screen be either.
I was really happy with the coverage of the base coat. I had to do 4 coats of the red and 3 of the blue. The blue covered the grey better so I had to do less coats. I also painted the red first so the blue got better technique as I never paint so I had to develop a technique to maximise coverage and minimise more coats needing to be applied. I am happy with the shades of red and blue I chose I think they look great and contrast well.


0 notes
Text
Spraying Primer
Today I sprayed my models with primer. This made the models grey which can be painted over with any colour and it made the models smooth and the paint will stick to the primer more than the plastic. The primer I got was an aerosol so I planned to do it outside but it got dark too fast and below freezing so I became concerned that it might not stick. So I opened both my windows in my room and sprayed them there. This stunk put my entire house but the result turned out great. It is streaky in places but that won’t matter because it is getting painted over. I got very good coverage including the bottoms of them. This will help with the painting stage drastically. I had never sprayed anything before and I really enjoyed it.

0 notes
Text
Base Problem
I had a problem with both my models that are going to be used in this project. They were accidentally set to have the base be on the side of the model. This means that the base will be more difficult to pull off of the model. I eventually got it off with help from my teachers and pliers. The side of the models is a lot less clean because of this and will require extra sanding to clean it up but this isn’t a major problem as it can be sanded down.

0 notes
Text
3D Print Correct Size
I have printed 2 models at the correct size. These will be my models for the end of the project I will start priming them next. I think despot the size difference they are still surprisingly clean and smooth. There will be some extra sanding but that won’t be too big of an issue for me to deal with. I am impressed with the buttons in particular because of their small size and their thinness. I think they turned out really well and I am excited to start sanding because I have never sanded anything before.


0 notes