
Don't wanna be here? Send us removal request.
Statistics
We looked inside some of the posts by mydeckbuildingterrace and here's what we found interesting.
Average Info
Notes Per Post
1
Likes Per Post
1
Reblog Per Post
0
Reply Per Post
0
Time Between Posts
25 seconds
Number of Posts By Type
Text
2
Last Seen Tumblr Blogs


Fun Fact
US Tumblr user growth rate is estimated to slow down to 4.1%.
Text
Build a Wooden Deck Building Terrace
Any motivated do-it-yourselfer can build a wooden deck building, provided they adhere to a few simple, but important principles.
Here is some basic theory first, after which we follow and find more the construction of such a terrace step by step.
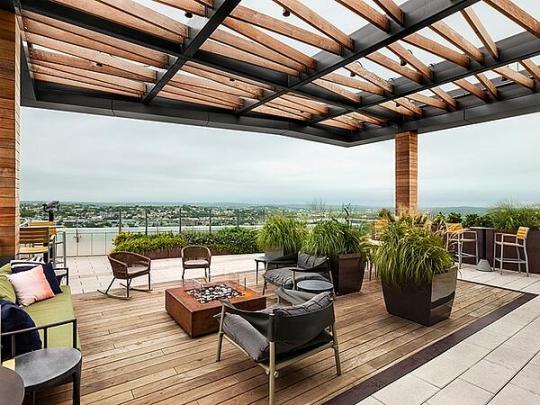
Would one floor covering be better suited than wood, the natural material of choice, for the transition from the house to the garden? Probably not. Wood is also a pleasant and easy material to work with. Nevertheless, you should certainly not underestimate the construction of even a simple terrace.
That starts with making a wise choice from the numerous types of wood on offer, opting for a suitable structure and the correct fixings, and so on. That is why it is important that before you actually start, you first gather the necessary documentation and information.
The first choice that comes to mind is therefore that of the type of wood you are going to use. More than aesthetic considerations - we will return to this later, it is mainly the properties of the wood that must determine your choice.
Which wood type to choose?
Wood must meet certain conditions in order to be used outdoors. It must be sturdy, durable and resistant to fungi and mold. Depending on its natural durability, wood is classified in durability classes from I to V. Wood in class I is very durable and remains at least
25 years in good contact with the ground. Class II wood has a lifespan of at least 15 to 25 years. Wood that belongs to one of the other three classes is not durable enough for a terrace.
The durability of wood can be improved by having it undergo thorough preventive protection. This can be done in different ways and with different products. A process that is often used is to impregnate coniferous woods by means of a vacuum pressure treatment. Nevertheless, in our opinion, it is better to give preference to wood with great natural durability.
Other properties of the wood that must be taken into account are its stability (few changes in shape) and its stiffness (which determines the bearing capacity).
Some native woods such as chestnut and oak have the required qualities, but are not always sufficiently available or sometimes simply too expensive.
Most tropical woods that are recommended for a deck building are also suitable for this, but there are different ethical and ecological problems. In any case, always ask for wood with an FSC label.
Teak is the best type of wood for terraces, but the high price (more than 120 euros per m2, excluding VAT and installation) deters many enthusiasts. Other, more affordable woods have replaced teak.
Bangkirai is the best known example of this. This type of wood from the humid forests of Indonesia and Malaysia completely took over the market in the 1990s and completely supplanted all other types of wood for a while. But bangkirai (or yellow balau), is in fact a generic name that includes a dozen or so Shorea species with dissimilar characteristics. The specific weight (the 'density'), for example, varies from 700 to 1,150 kg per cubic meter.
Bangkirai belongs to durability class II (service life of 15 to 25 years) and offers good value for money, if the wood is of good origin, with the quality label 'Select and better'. It does have some imperfections. Some varieties contain gums that can cause brown spots on underlying elements of the structure. The wood also tends to crack surface when exposed to the sun and sometimes has small dark holes resulting from worms. None of these errors have a negative impact on the durability of the wood.
Finally, Bangkirai also has a tendency to turn black when oiled or varnished regularly, and can warp a bit over time.
It is very hard, very heavy wood (1,050 kg / m3) and very durable (class I). It is also called 'green ebony' because of its properties. The wood is green to yellowish brown and the grain is very fine. The big disadvantage is that it shrinks considerably when drying, which is reflected in cracks between planks that can reach 5 mm between the humid season and full summer.
According to specialists, a scarcity of ipé can be expected in 5 to 10 years. The price is also rising rapidly (+ 50% in just over a year).
Others, mainly African woods, are ready to change the guard. The most common or most promising ones are presented in the box on the left.
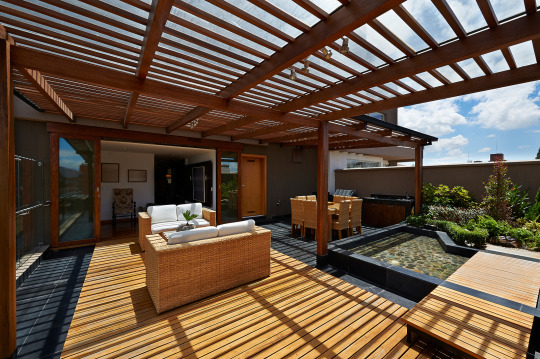
Structure
A wooden terrace is almost always executed in much the same way: a plank floor fixed on a beam structure. This structure can run parallel but is better crossed, so that a solid grid is created. The spacing between the beams depends on the thickness and width of the boards that will be placed on it. Planks of 20 mm thick and 140 mm wide must be supported at an intermediate distance of maximum 40 cm. Per additional mm of thickness or per additional 2 cm width, the intermediate distance may increase by 4 to 5 cm.
You also need to ensure that you insulate the structure as well as possible from ground moisture. A drainage deck building geotextile under the terrace is also recommended, as it prevents the growth of weeds.
So much for the basic principles, but depending on the circumstances, the constructions can become a lot more complicated.
1 note
·
View note
Text
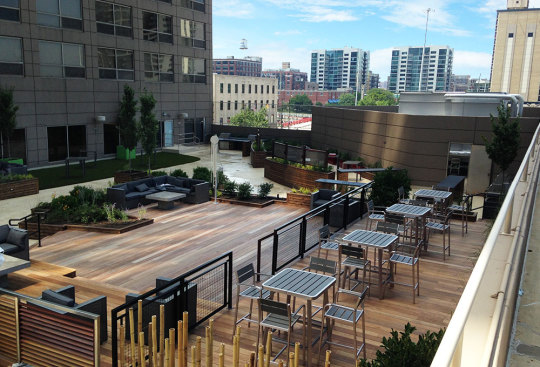
A Wooden Deck Building Terrace
Step 1: Determine Location
Provide a good location with a lot of sun.
Orient the terrace as much as possible to the south so that you can fully enjoy the sunshine.
Do not place the terrace against the east facade of the house. During the hottest hours of sunshine, Deck building the terrace is then in the shadow of the facade.

Step 2: Smooth The Ground Plane
The place where the wooden terrace will be placed must be level and free of weeds. So remove any stones, bumps or weeds.
For good drainage it is important that the terrace slopes slightly: one centimeter per meter is sufficient, because the water can also flow into the ground between the wood.
Every meter, drive a corner post into the ground with a marking line on it. The posts are in direct contact with the moisture of the soil. So make sure you choose posts from a durable type of wood or treat them beforehand with a protective stain.
Step 3: Placing the foundation
The foundation is very important when constructing a wooden terrace: it absorbs the pressure and distributes it. Every five feet, lay old paving stones, horizontally opposite each other, on a flat and stable surface on which to mount the support beams.
You can also drive posts into the ground and, if necessary, concretize them: they provide more strength and are ideal for installing a terrace next to a pond. Often, rafters are combined with support posts - 7x7cm - in the corners for an extra sturdy construction.
Step 4: Laying geotextiles and placing sub beams
To prevent the weeds from growing through the planks, lay a drainage layer of geotextile on the foundation. This textile is perfectly water-permeable so that excess water can drain quickly. On the other hand, it is strong enough to stop growing weeds.
Overlap the strips by at least 15cm. The canvas gets stuck when the rafters are on top.
The distance between the joists depends on what you put on them.
Use a decking tile or garden plank to determine the spacing.
Usually the center-to-center distance of the rafters is a maximum of half a meter.
Just make sure they are well anchored and level.
Step 5: Assemble garden tiles / planks
The most common coverings are square or rectangular garden tiles and profile boards. The distance from the plank floor to the bottom must be at least 10 cm. This ensures good ventilation of the wood so that it remains better protected.
Lay the planks perpendicular to the joists with an interval of half a centimeter to a maximum of one centimeter. Drill two screw holes on each side of the plank and countersink the holes in the beam. Use stainless steel screws for mounting.
Always pre-drill the screw holes, if you do not do this, the plank can split during hammering. If you saw the profile boards, it is best to treat the sawn side with wood preservative.

Step 6: maintain the terrace
Make sure that the garden wood you use is resistant to wood rot and fungi. Treat the wood with suitable protection products and consult our job 'Repairing wood rot'.
Wood from colder regions grows more slowly and is therefore stronger. It does require more maintenance, such as regular oiling. Tropical woods are more durable, do not require extra protection and require little maintenance. Hardwood is also moss-resistant and does not turn green.
There are 'grayers' to remove stubborn green deposits. Use a teak oil every now and then for a richer natural finish that takes away the silver color.
If you don't like that patina, that is.
A wooden deck can be particularly slippery when it has just rained. So watch out after a downpour. Therefore choose wooden planks with milled profiles to divert the excess water.
If you want to thoroughly clean the terrace with water in the spring, then preferably do not use a high-pressure cleaner. This loosens the wood fibers, makes the wood woolly and increases the risk of splinters.
Prefer to use water and a hard brush or, if necessary, a high-pressure cleaner that you can set to a quiet setting.
After cleaning, let the deck dry for a few days and then apply varnish or oil. Opt for a non-film-forming oil. Otherwise, the patio may turn brown after a few years.
Repeat the treatment annually and twice a year in the sunniest places.
Do not use bleach and other harmful products when cleaning.
0 notes