
n8983810
Animation
Kathrine Harijatna Student n8983810: a portfolio for studies in animation for QUT
93 posts
Don't wanna be here? Send us removal request.
Last Seen Blogs

harubaku
東京

thetechventers-blog
Tech Ventures


cyndi-walker
This Girl Draws
cheezy-str33t
Bots of a Bygone Era
Photo


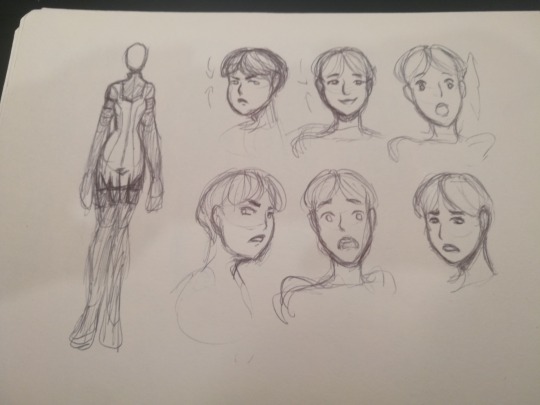
KNB217 Assignment 2 Human Character: Reflection
Textures and UV Unwrapping
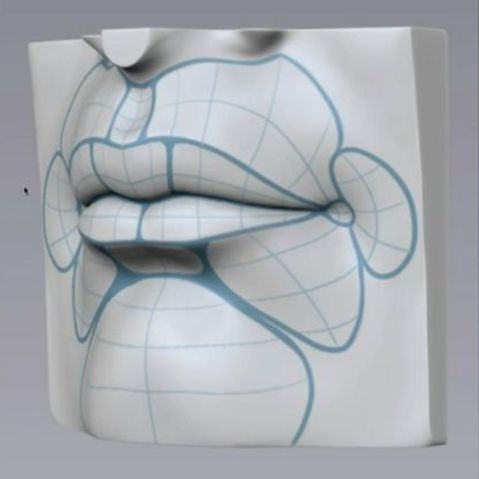
UV unwrapping was straight forward though there are a few problems in the eyelids and the mouth.
I made the textures rather last minute as well so it is messier than I would like. But I am fine with them for the most part. I would like to make the textures more realistic if I had time, like separating the lens of the eyes and making them a transparent layer over the top of the eye to make them more true to life but that would probably not be feasible in this particular assignment. I also would have added more cool tones to the skin to break it up but I think the current version is fairly balanced as is.
1 note
·
View note
Photo
KNB217 Assignment 2 Human Character: Reflection
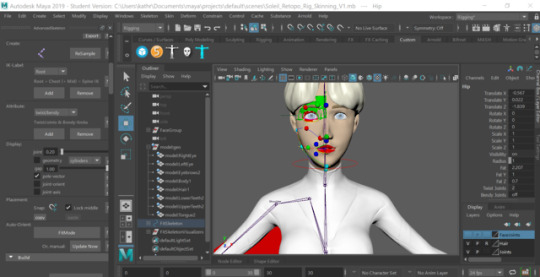
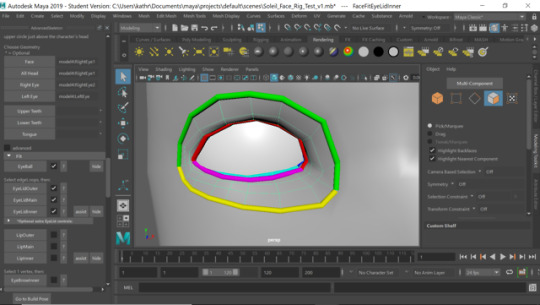
Rigging
I started rigging too late into production so there are plenty of things that could be improved. I’m unhappy with the placement of the wrists and scapula joints and perhaps the toes could be in a better place.
The face is mostly fine with a few problems with the inner lip being too close to the main lip edge loop causing it to clip into the lip and leaving me unable to do any open mouth smiles on the mode without clipping. The eyes also don’t close the entire way without me adjusting the face joints individually due to me sculpting the eyes as an exaggerated lopsided almond. (Jones, J. 2018)
Skinning

I didn’t have too many errors to fix in skinning because I made the skin cage fit very close to the model so there wasn’t too many errors in the skinning. I just made sure the joints would ‘squish’ together better like the thighs against the torso and the knees, and forearm and upper arm, and in particular the breasts when the chest is moving around were stretched too much with the model so I had to bind them to the chest more to create the illusion that they are separate objects that are subtly changed by the muscle movement, like they are in real life. Unfortunately, because I left this so late, I completely forgot to adjust in the skin in a few key areas like the neck being too heavily distorted by head movement, with the model unable to turn its head too much to either side.
Animating
This section did not give me much trouble since the animations did not have to be timed well and just flowed from key to key, however it was in this stage I found a lot of things I missed with the skinning and rigging that it was too late to go back and fix. I was unable to recreate the characters signature open mouth smile because of my errors rigging, and I broke the rig somehow so that the neck joint would not accept any key frames so that could not be in the calisthenics videos and had to be screenshot instead. (Maestri, G. 2015) (Animation Mentor Blog. 2019)
I made sure to make the expressions rather exaggerated as the character herself is quite open and unrestricted with her emotions. The only expressions I did not do this with was contempt, since it is more of a microrexpression and sadness, since I found if I pushed it too much she would look too pouty and sullen and not truly sad. (Science of People. 2019)
0 notes
Photo


KNB217 Assignment 2 Human Character: Reflection
References for Retopology
0 notes
Photo


KNB217 Assignment 2 Human Character: Reflection
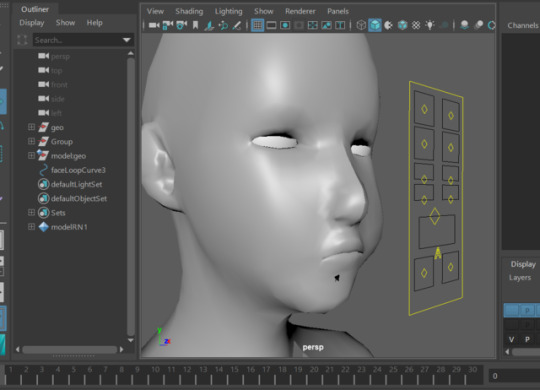
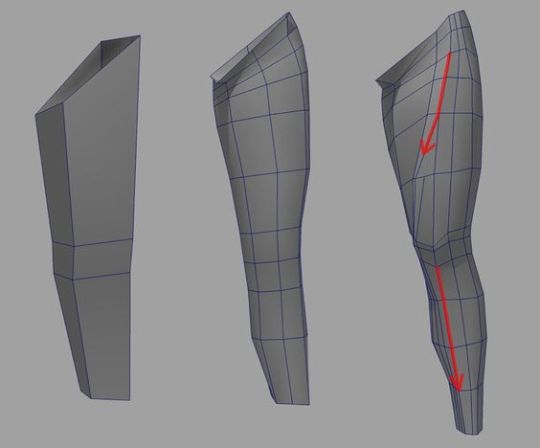
Retopology
Retopology turned out much simpler due to having more references for human anatomy. It was still fairly time consuming since I wanted to make sure the anatomy was suitable for animation (Kittleson, R. 2018). I’m still not that happy with the knees as they don’t allow for bending more than 100 degrees without distorting more than acceptable.
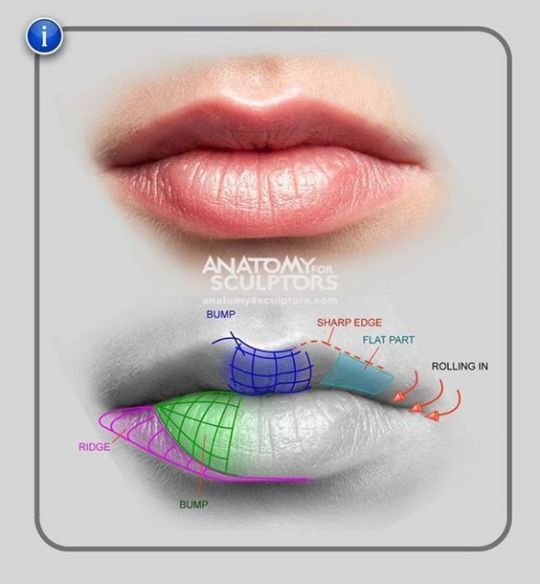
I had to look at a few mouth anatomy photos to make sure the mouth cavity and teeth were the correct size (Sanchez, J. 2014) I spent too much time in this phase since I did not think to delete half of the model and just mirror it later to gain better access to the mouth until I was almost finished.
0 notes
Photo


KNB217 Assignment 2 Human Character
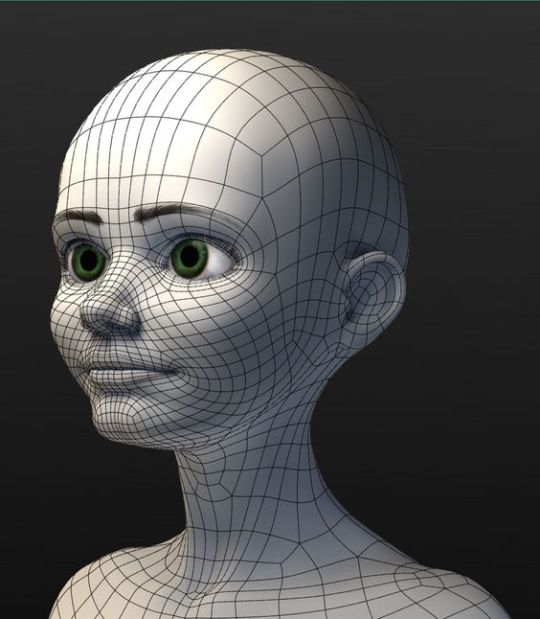
Sculpting
I started with realism because I was having trouble envisioning the 2D designs base skull and skeleton underneath the design so I went with realism so I could get all the underlying structures correct (Kittleson, R. 2014).
I used a lot of human references since I wanted the body to be fairly realistic to start so I would have all the anatomy in place when I started to simply the design and exaggerate the silhouette to suit my 2D design better. I had trouble making the design too simplistic because I struggled to picture a 2D design in a 3D space so the final product ended up more realistic than I was aiming for and I’m still not completely happy with the body proportions but I was already spending too much time on the sculpting phase.
I used a Lynda tutorial to assist my sculpting progress as I had very little experience in that field. To start off I simple manipulated the body into more of the silhouette that I wanted and then added the bone and muscle anatomy later. The same goes for the head. I had trouble making anatomy to suit my character so I heavily referenced Reese Witherspoon since she had similar facial structure and a lot of photos that were available to the public so I could get all the angles I needed for reference.
I had problems with the face coming off as a little too realistic because I referenced a real person so heavily but I think I managed to simplify the shapes and proportions into something reasonably exaggerated and expressive. My problems mostly stemmed from the body as I could not get the shoulder to neck to head ratio right. I wanted her to be top heavy with wide shoulders and a large bust but I had problems figuring out the exact ratios that would be aesthetically pleasing while still being a unique silhouette. The breasts were a point of contention as well, as I wanted them to be big enough to be part of the silhouette even from front on, but I had trouble making them look realistic since I tried to sculpt her as if she were already wearing a bra, since she would be clothed in the end.
The hand is also not up to my standards proportions wise, with the palm being too long and the fingers too short, with the index finger being the worst. This would have benefited from me plotting it out in Maya and not starting from the sculpting phase.
I plotted the basic shape for the hair first in Maya and brought it into Mudbox but the problem with this method is the topology is not clean with many subdivision around the edges making react a little weirdly with the sculpting tools. I wish I could have put more detail in the hair but did not have the time, so I just made sure it was accurate to the style planned and detailed enough to match the body and face. A lot of my problems stemmed from the fact that I went too detailed with the initial model which meant I had to make sure the rest of the models had enough detail to match body.
0 notes
Photo


KNB217 Assignment 2 Human Character
Inspiration and references for character design.
0 notes
Photo


KNB217 Assignment 2 Human Character Reflection.
Design and Character Profile
I started with a simple premise for a character: sci-fi gangster. This idea turned into an actual character as I drew a lot of inspiration from fashion model proportions and the character started to become more of a spoiled mafia princess. Her hair is styled to show boyish cuteness but also communicates how committed she is to her appearance, having to get it cut and styled every fortnight. Her plugsuit is similarly styled to be fancy but practical, as she knows that wearing a dress in a mech would be dangerous but got her suit designed to invoke fancy dresses.
She is the adopted daughter of a mob boss. Loves machinery and fashion. Builds a lot of the weapons and sells them from her mech as a travelling black market dealer. She is intended to be more of an NPC in a sci-fi game. A travelling salesman who would customise and build weaponry for you in exchange for rare materials with the rest of her mafioso family being more of the side quests.
Because I designed her for a game and as a side character, I tried to focus mostly on making the body proportions were distinctive and good for action poses. I gave her a wide shoulder to look commanding and slightly imposing, and long legs with small hips to look athletic and graceful. It was important to me that the body would look good in both editorial fashion poses and action poses. It is a body type that creates a strong line of action in action poses.
Her childlike face is contrasted against her body since while I wanted her body to look good doing what the character would do the face has to communicate what the character feels. And while this character is a weapons dealer for the mob, she was raised and doted on by her gangster father, so there’s less inherit malice in her actions and more of an innocent amorality. She’s a spoiled child who doesn’t care that people are getting hurt in order to get her way. I went for a heart shaped face with a lot of baby fat and large eyes to show childishness without being too young looking.
I looked at a lot of 3d Disney characters designs because I like their style of expressive animation, and they have a lot of heart shaped faced characters to take inspiration from. I found it important to make sure that the face can squash and stretch proper for expressions to read well from a distance so I made sure that I distort the face and still have it look like the character.


0 notes
Text
KNB217 Assignment 2 Bibliography:
CGArena : Modeling Ears in 3D. (2008). Retrieved from http://www.cgarena.com/freestuff/tutorials/misc/earsmodeling/index.html
Holmes, S. (2015). Master Maya characters in 20 steps | 3D Artist - Animation, Models, Inspiration & Advice | 3DArtist Magazine. Retrieved from https://www.3dartistonline.com/news/2015/07/master-maya-characters-in-20-steps/
Jones, J. (2018). Advanced Skeleton Setup - Body Rig - Part 1 of 2. Retrieved from https://www.youtube.com/watch?v=NRsfy1-0jqE&t=3624s
Jones, J. (2018). Advanced Skeleton Setup - Facial Rig - Part 2 of 2. Retrieved from https://www.youtube.com/watch?v=ofDHz8J_Abc&t=2160s
Kittleson, R. (2018). Maya: Retopology for Animation. Retrieved from https://www.lynda.com/ZBrush-tutorials/Maya-Retopology-Animation/704112-2.html
Kittleson, R. (2014). ZBrush: Sculpting Portraits. Retrieved from https://www.lynda.com/ZBrush-tutorials/Sculpting-Portraits-ZBrush/167071-2.html
Learn How to Animate Your Character’s Face | Animation Mentor Blog. (2019). Retrieved from https://blog.animationmentor.com/how-to-get-great-expressions-and-animate-faces/
Maestri, G. (2015). Animating Cartoon Characters in Maya. Retrieved from https://www.lynda.com/Maya-tutorials/Animating-Cartoon-Characters-Maya/191957-2.html
Maestri, G. (2019). Maya 2019 Essential Training. Retrieved from https://www.lynda.com/Maya-tutorials/Maya-2019-Essential-Training/728366-2.html
Maestri, G. (2015). Modeling a Cartoon Character in Maya. Retrieved from https://www.lynda.com/Maya-tutorials/Modeling-Cartoon-Character-Maya/191958-2.html
Sanchez, J. (2014). Tutorial: Modelling the lips and mouth in 3D by Jorge Sanchez | corematte. Retrieved from http://www.corematte.com/blog/tutorial-modelling-the-lips-and-mouth-in-3d-by-jorge-sanchez/
The Definitive Guide to Reading Microexpressions (With Examples). (2019). Retrieved from https://www.scienceofpeople.com/microexpressions/
0 notes
Video
undefined
tumblr
KNB217 Assignment 2 Human Character: Playblast Expressions Video
In the following order: Neutral, Joy, Surprise, Fear, Disgust, Anger, Contempt and Sadness then back to Neutral.
0 notes
Video
undefined
tumblr


KNB217 Assignment 2 Human Character: Playblast Calisthenics Video
With screenshots of the neck movement because my rig broke and it would not let me add key frames to the neck joint.
0 notes
Photo

KNB217 Assignment 2 Human Character: Hero Pose Final Render
0 notes
Text
KNB217 Assignment 1 Bibliography
Animal Watch. (2019). THE DINGO - UP CLOSE. [online] Available at: https://www.youtube.com/watch?v=GFkappvsEJ4&t=555s [Accessed 20 Apr. 2019].
Brave Wilderness. (2018). Dingo Meets a Coyote!. [online] Available at: https://www.youtube.com/watch?v=ir-_cm0BaWc&t=663s [Accessed 20 Apr. 2019].
Native-languages.org. (2015). Windigo, the Ice Cannibal (Wendigo, Wiindigoo, Windgo, Windego). [online] Available at: http://www.native-languages.org/windigo.htm?fbclid=IwAR0BjG-ZswMQ0wQMxLntA5mOyGUlZHhJWBYTeYFwFzWMzJ_io4_PkWFZeWc [Accessed 20 Apr. 2019].
E. Ritzenthaler, R. and Ritzenthaler, P. (1983). Ojibwe Oral Traditions - Indian Country Wisconsin. [online] Mpm.edu. Available at: http://www.mpm.edu/content/wirp/ICW-141.html#another [Accessed 20 Apr. 2019].
Sanchez, J. (2014). Tutorial: Making an eye in 3D by Jorge Sanchez | corematte. [online] Corematte.com. Available at: http://www.corematte.com/blog/tutorial-making-an-eye-in-3d-by-jorge-sanchez/ [Accessed 20 Apr. 2019].
Sanden, H. (2013). How to UV map efficiently using ZBrush - Henning Sanden. [online] Henning Sanden. Available at: http://henningsanden.com/2013/04/13/extremely-efficient-uv-mapping-using-zbrush/ [Accessed 20 Apr. 2019].
профиль, П. (2012). TOPOLOGY. [online] Skif3d-eng.blogspot.com. Available at: http://skif3d-eng.blogspot.com/2012/06/topology.html [Accessed 20 Apr. 2019].
0 notes
Photo


KNB217 Fantasy Model Final Render
Had a bit of trouble with the intensity of the lights since they showed up a bit different in the Arnold renderer but I got it sorted out fairly quickly. Created a simple curved plane for the background and ran into the same problem as my Australian Animal model where the textures as an EXR would show up much lighter than they did in Mudbox or even when exported to a PNG which I had to do to meet Sketchfabs upload limit. So the final renders are much lighter than the rest of my uploads since I went back and darkened a bunch of my textures to look better in the final render.
0 notes
Photo


KNB217 Fantasy Model UV Unwrapping and Texturing
UV unwrapping had very little issues although it took me a few tries to fine the optimal edgeloop for the shoulders and arms (Sanden, H, 2013).
Texturing was simple enough. I used a basic colour and a few shades darker for shading and then topped them all off with a highlight. I only needed to do two colours one for the skin and one for the skull so it went by fairly quickly.
I had a bit of trouble actually attaching the textures to the materials because I misremembered the method of attaching normal maps in Maya and I was used to using Unreal. But that was cleared up in the tutorial.
0 notes