
Don't wanna be here? Send us removal request.
Statistics
We looked inside some of the posts by nadias-a-notebook-blog and here's what we found interesting.
Average Info
Notes Per Post
5
Likes Per Post
5
Reblog Per Post
0
Reply Per Post
0
Time Between Posts
4 days
Number of Posts By Type
Photo
17
Last Seen Tumblr Blogs


Fun Fact
BuzzFeed published a report claiming that Tumblr was utilized as a distribution channel for Russian agents to influence American voting habits during the 2016 presidential election in Feb 2018.
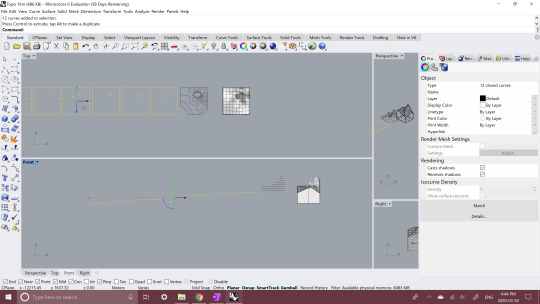
Photo

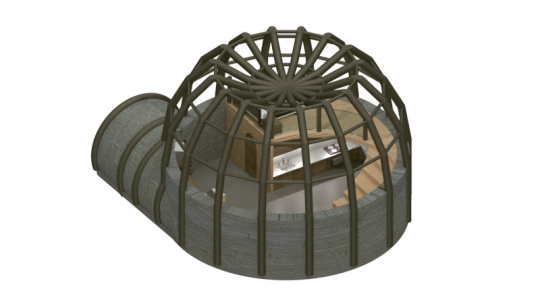
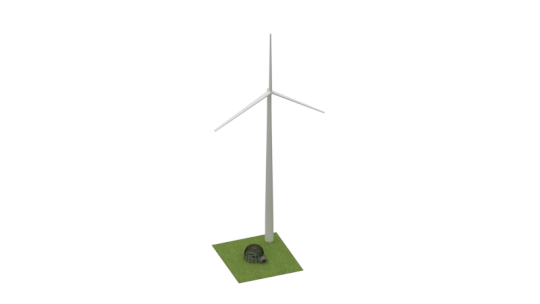
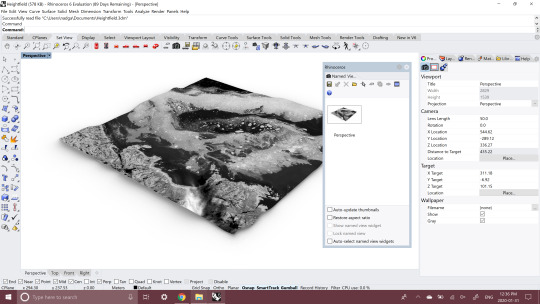
Outpost Model:
This is my second interaction of my outpost model. I added more details and made it somewhere my researcher could live. To make it off the grid I built a wind turbine for power. Since it is a small building it would be a reliable source of energy. As before I have my water collected from the dip in the roof that drains into a container under the outpost.
Since my researcher is studying the water supply of a nearby lake I designed pipes that collect water from the lake and bring it straight to the desk on the main floor. This way they don’t need to travel to collect samples. I also included storage around the desk to store samples and other tools needed for research.
When making this model I wanted to add more clutter items to make it feel more lived-in but had problems downloading in a format that was compatible with Rhino. I think there might be an issue with one of the importers in Rhino from what I was reading online but have yet t figure out the problem. So, I made all the furniture within the building which was fun and a lot easier than I expected.
Finally, I played with adding light sources into lamps and under the counters to see how the different options affected the environment and reflected off different surfaces. The lights under the cabinets made the space feel more real and inviting and got rid of some of the dark corners that were bothering me.
1 note
·
View note
Photo

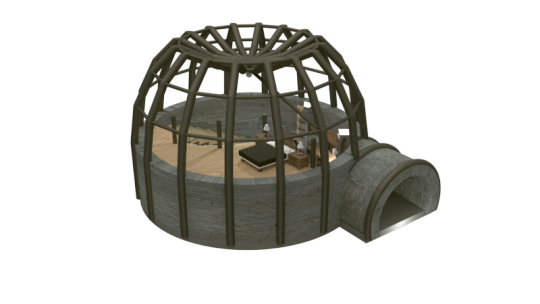
Task 8: Outpost
Reflection: This is the First interaction of my outpost. The researcher who lives here is currently studying the water supply of a nearby lake to see if it is safe to drink after a nuclear disaster that happened a long time ago. Since the surrounding area might still be dangerous I wanted my outpost to be compact and strong. So I decided to create a dome that is supported by a metal frame and a concrete foundation. The top curves in for water collection since the nearby supply can’t be relied upon. The entrance is protected by a short tunnel that acts as a buffer between the outpost and the outside world. The roof is made of glass to allow in natural light. There is a second-half floor above the bathroom which acts as a bedroom separating personal space from work space.
1 note
·
View note
Photo


Task 7: Future Projections
Image 1: 25 Years
The reason the Ruin was abandoned was flooding so after 25 years the water levels are still high enough to submerge part of the ruin. This is also after the disaster that caused the nearby city to be abandoned so there is little vegetation.
Image 2: 100 Years
After 100 years the water levels go down and the plant life begins to returns.
Reflection:
I had trouble getting the V-ray textures to size correctly. I was able to change it on planar surfaces but when changing the texture on the grass it warped and came out uneven. I’m not sure what caused it. Also, when I was rendering the water it was black and not coming up as the sample showed so I had to play with the setting for over an hour to figure out what the problem was. It turns out since the diffuse color was set to black it made the whole thing black.
1 note
·
View note
Photo


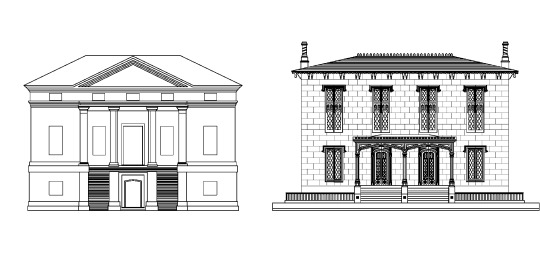
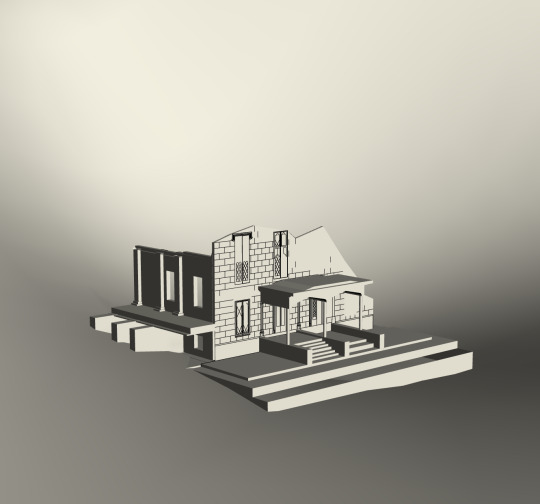
Assignment 6: Ruination
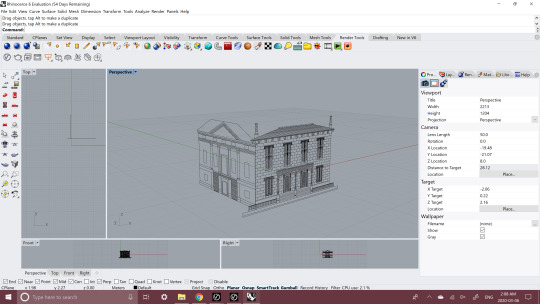
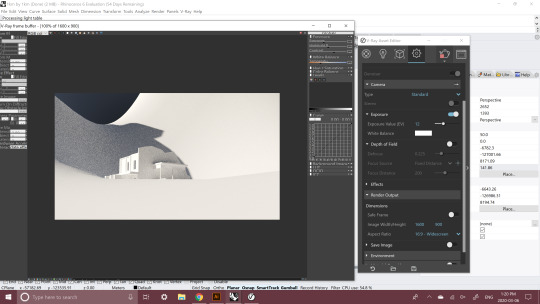
For this assignment, I tried to merge my two elevations into one building. To start I imported my images into AutoCAD and traced the raster data. I used layers to apply line weights to my drawings using heavier lines at the front and thinner lines for objects further back. It was hard to remember shortcuts that we learned so I ended up googling many things. I will have to use the program more before I can do anything quickly so this took me a very long time to complete. I will probably end up updating this assignment as I begin designing my outpost so that that I can keep some of the features that I like in my AutoCAD drawings in my final model. I used single lines usually when I was building my AutoCAD drawings so when I put them into Rhino I found it difficult to extrude surfaces. So next time I will be more thoughtful about how I make my drawing so It’s easier in Rhino. I struggled to get V-Ray on my laptop because of installation issues and licensing problems but after a lot of work and reading I figured it out. If anyone else is struggling with it try opening the “Change V-Ray License settings” installer type thing and make sure that your username is not your login info but your consumer number that is provided in the email they send you. Your password should be the same.
1 note
·
View note
Photo


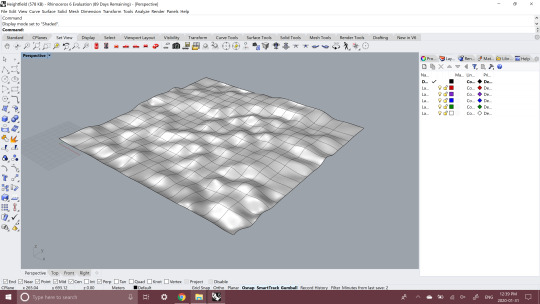
Assignment 5: Tiny World Prototypes
For this assignment, I prepared files for laser cutting and 3D printing. To make the file for laser cutting I selected my terrain and used the contour tool. Since my model was already to scale I decided that 85m between lines was a good distance for showing the levels of my topography and it would work with 1/4 inch acrylic. I then took the contour lines and laid them flat so I could export them into illustrator. In illustrator, I colored all the lines red so that the laser cutter would know to cut them. It was a bit tricky to figure out how to space my contour lines so that my model would be to scale but doing to the work previously to have my measurements in place really helped. When I originally made this model I already booleansplit it to make sure it was solid so to prepare it for 3D printing I just used to analysis tool to make sure there were no naked edges and kept it as a Rhino file.
0 notes
Photo

Assignment 4: Made with Illustrator
Reflection:
This assignment was difficult to figure out. When I first attempted it I had started on my laptop then moved to the school computers. But then Rhino crashed and since I didn’t save my work in the right place I lost it and ended up having to redo it. The reason it crashed was that when I had used the gumball the stretch one of my buildings it added extra lines and I copied and pasted it over and over again which slowed it down. When I did it the second time I was careful not to do that again. I tried to render the Image using V-ray but I had problems with the exposer and contrast. During the next tutorial, I will ask how to fix it because no matter how much I played with the settings I couldn’t get it to a place I was happy with.
0 notes


Photo


In-Class Exercise:
I used my topography as a base for my world trying out different interpretations of the lines. I changed where the water was and where higher elevations were to fully explore the possibilities. I then took cut-outs from my inspiration images and created small clusters that represent different cities.
0 notes
Photo
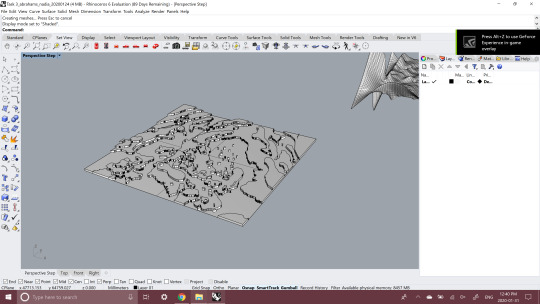
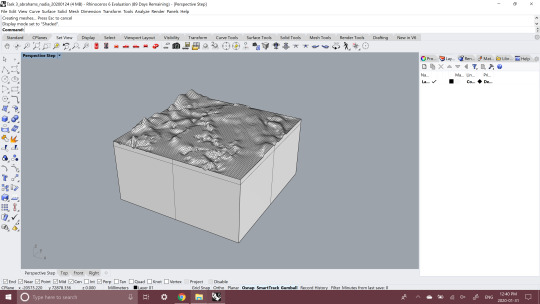
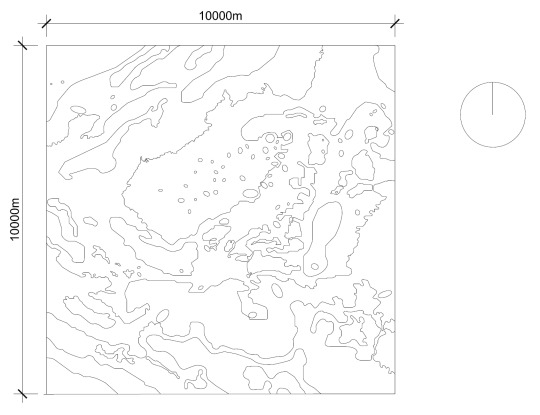
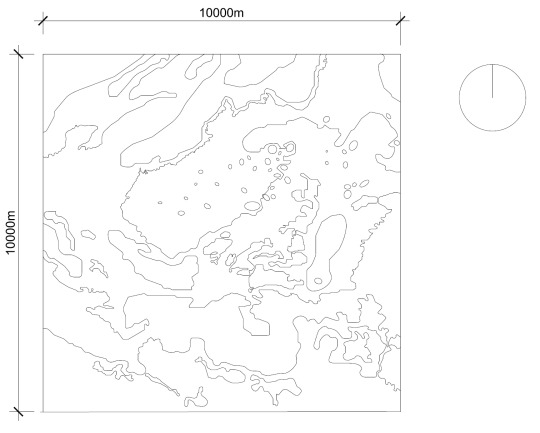
Task 3: New Cartographies, Emergent Landscapes
Created in Adobe Illustrator
Finished Topographies Reflection:
To create these topographies I took my AutoCAD line drawings and made them into PDFs then imported them into Rhino. Unfortunately, all my polylines disconnected and create many tiny lines that I then had to reconnect. At first, I was holding down shift and selecting each line until I had all of them selected. Then I used the command “Join” to create a whole line. After some trial and error, I learned that Join only works with lines that are already touching each other so I selected all the linework and used “Join” to reconnect all the lines that were touching.
I then started using the GumBall to move my lines to different elevations. When I moved some of the lines that were around the edges away from the boundary line they were no longer complete shapes so, I used to line tool to enclose them. For the Stepped topographies, I used the “ExtrudeCrv” Tool to move each of the levels up to create different steps. I learned that you have to make sure that all your lines are connected or while you use this tool it will delete lines. For the Smooth topographies, I used the “Patch” command to create the surface then used the “Booleanspilt” to trim the edges and make it fit into the 10km by 10km square.
Finally, I found my views and made them 2D using the “Make2D” tool. I then selected the linework and pressed “export selected” to export my linework to Illustrator. I didn’t like the look of the line drawings so I instead took screenshots into Illustrator to make my final image.
1 note
·
View note
Photo


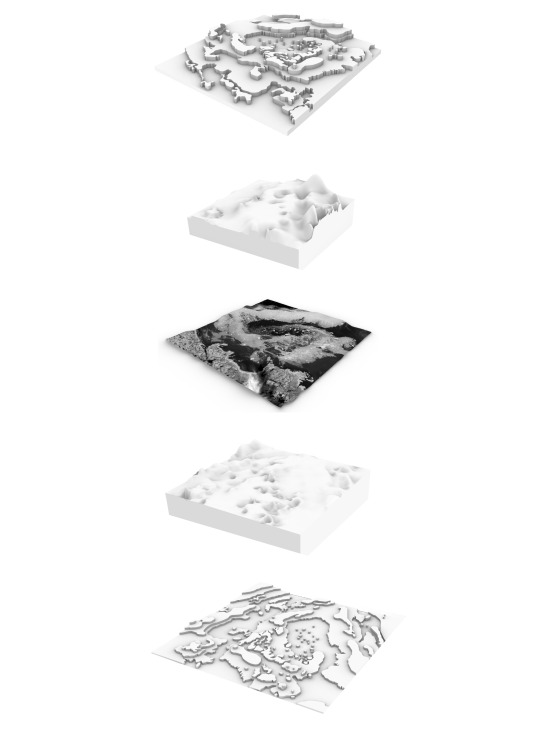
Task 3: New Cartographies, Emergent Landscapes
Topography using Rhino 2020/01/31
Image 1: Linework 1 Stepped Topography
Image 2: Linework 1 Smooth Topography
Image 3: Linework 2 Stepped Topography
Image 4: Linework 2 Smooth Topography
Image 4: Heightfield Topography
(Each Screenshot shows layers)
Image 5: Illustrator File with Layers
Images 6 - 8: Saved Views in Rhino
0 notes
Photo
Task 2: New Topographies, Nascent Landscapes
Finished Topographies: I made two different versions following different contours in the image. There were some lines that were more prominent than others so I used them in both topographies and changed some of the ambiguous lines to see what worked better.
Nadia Abrahams
2020/01/24
0 notes
Photo

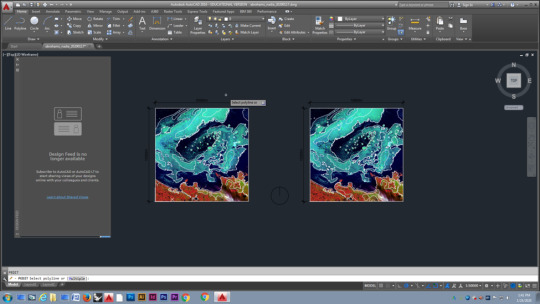
Progress on Task 2: New Topographies, Nascent Landscapes. I started out by using the Polyline tool to trace the contours in the image then I used the PEDIT Fit function to curve the line.
2020/01/24
0 notes
Photo


Tutorial 1: It’s our first look at AutoCAD. I had fun with the offset tool and made some interesting shapes.
2020/01/17
0 notes
Photo

Dreamscape By Liviu Mihai
http://coolvibe.com/digital-art/scenerylandscapes/page/26/
accessed: 2020/01/17
0 notes
Photo

Alien Concept by: Jeremy Chong scenery
http://coolvibe.com/digital-art/scenerylandscapes/page/18/
accessed 2020/01/17
0 notes

Photo

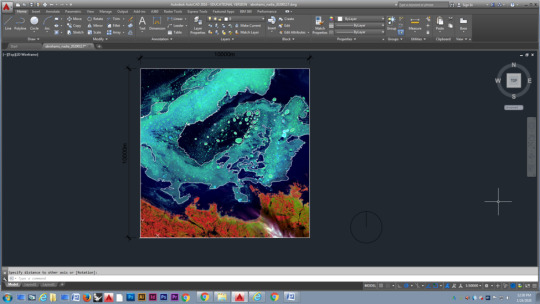
Foxe Basin
https://www.over-view.com/daily/2#DatoCmsOverview-1911174-en
UNITED STATES GEOLOGICAL SURVEY
Accessed: 2020/01/16
0 notes