
Statistics
We looked inside some of the posts by nasagabby and here's what we found interesting.
Average Info
Notes Per Post
0
Likes Per Post
0
Reblog Per Post
0
Reply Per Post
0
Time Between Posts
15 hours
Number of Posts By Type
Text
17
Last Seen Tumblr Blogs


Fun Fact
Tumblr was acquired by Yahoo for $1.1B in 2013.
Text
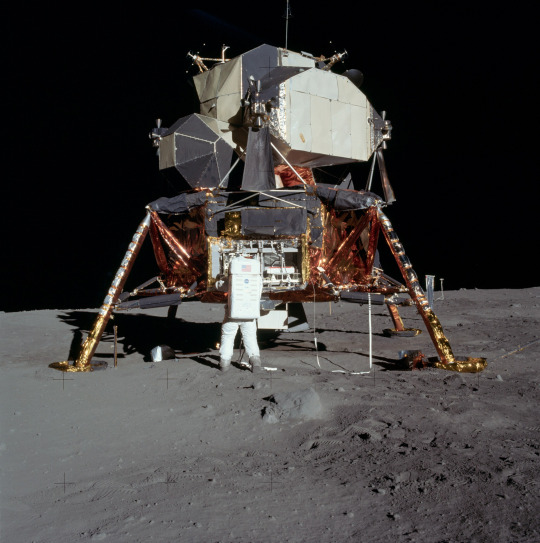
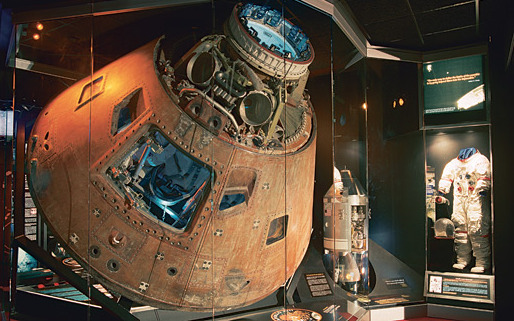
The Lunar Module
The lunar module was made by Grumman Aircraft and was the first spacecraft to ‘operate exclusively in the vacuum of space’. The lunar module reached the moon as it was attached to the command module which contained the necessary rockets and fuel for it to leave the Earth’s atmosphere. While the design of the entire Apollo 11 Rocket is very streamlined and smooth, resembling what you’d expect a stereotypical rocket to look like - but the actual lunar lander looks quite the opposite. It looks very haphazard and almost messy, like the components have been randomly stuck on like it’s a model - with no account as to how it would actually work. The different sections of the ship also seem really randomly placed on the main structure like there’s been no real consideration put into the design. It’s purely been created to function, rather than to look like a typical aircraft.
Due to it’s unique appearance, it doesn’t look like it could actually even function in space as it’s so randomly arranged. This could be one of the reasons that so many people believe that the moon landing was faked.

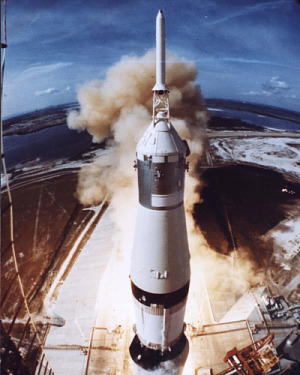
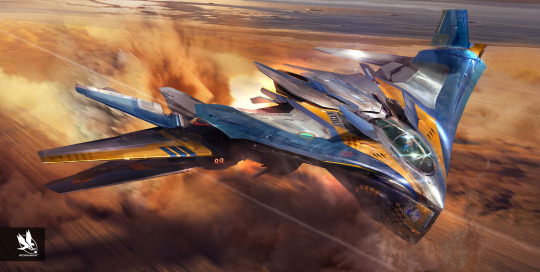
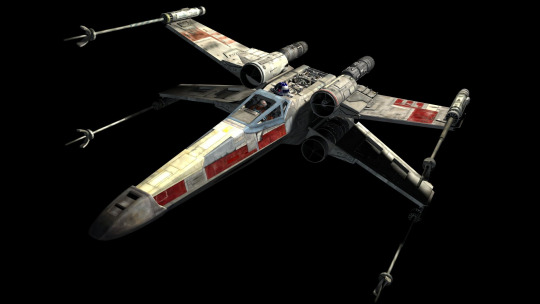
When compared to other ships, such as the Star Wars X wing plane, the design of the Lunar Module looks even more unrealistic and messy looking. This is because the design of these other spacecrafts is a lot more sophisticated, as they are designed to come from the future, after we have perfected the art of space travel. The lunar module by itself differs greatly from any preexisting ships - the entire Apollo 11 however looks a lot more futuristic and similar to these ships in shape and design.
They look a lot more realistic for this reason, as they have become an extremely large influence on what we expect our own spacecrafts to look like - despite our society being a lot less advanced. I think that there is definitely a link between the design of sci-fi rockets in media and the future of space travel on Earth - as nowadays we care a lot more about the appearance (on top of function) of our modern vehicles - particularly cars and jets for example. The aesthetic of space travel seems to be becoming increasingly important to us - for example the ship design in Guardians of the Galaxy reflects this due to its bright paint job and colourful decorations. However, I do think that we are a long way off from having our own spacecrafts resemble those in movies - as all of ours so far are not really reusable or very practical. Our rockets are controlled by thousands of people and constantly looked over to make sure nothing goes wrong, and have parts which detach once they are no longer needed - they are not really equipped with renewable energy or prepared for long missions. If anything, I think that at the moment, our spaceship designs in media actually resemble planes and jets more than rockets as we have developed sophisticated technology for them.
0 notes
Text
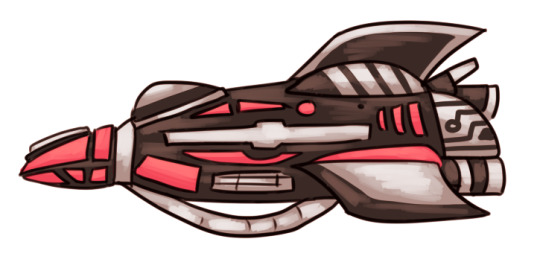
Kitbashing Rocket Evaluation
I think out of all the three projects, this one was my favourite as it was not extremely difficult and turned out pretty well in the end! I actually managed to complete all of the work on time and didn’t really rush any part of it, which was a surprise to me.
I’m really happy with the finished look of the rocket, as well as the stand and the artwork for it. Most of my process was completely trial and error- I didn’t have a lot of time to plan things out before I made them. My favourite part is how the rocket is symmetrical and has a very comic book/cartoon appearance as opposed to something realistic- and matches the stand which I made. The painting looks really cool as well, I think the colours I chose make it stand out really well and also help the foam look like scratched metal. In the beginning, the rocket looked extremely different - it didn’t have wings and had a different front piece, which I’m glad I corrected as it would look weird without them.
The shape and design of the stand I also really like, as it matches the rocket’s aesthetic. I had a rough idea of the kind of thing I wanted with the stand, but couldn’t get my ideas accurately on paper, so I just started making it instead. I kept adding pieces until I was happy with the finished product.
If I could make this again, I would’ve heat sealed the foam before priming it so the primer wouldn’t be absorbed as much, as well as using a much stronger glue. This is because the hot glue was not strong enough and didn’t really stick to the metal and plastic, causing some pieces to break off multiple times- as well as this, the way the glue dried looked very messy and didn’t match the smooth look of the ship- luckily it wasn’t very visible. But overall i’m really happy with how everything turned out in the end!
0 notes
Text
Animation Evaluation
I really enjoyed this project, but I think that I definitely attempted more work than I could handle. It was a really fun project to work on and i’m mostly happy with how the result turned out, despite it taking up a lot of time I should’ve used for other projects. If I could make this animation again, I would’ve definitely considered making it shorter.
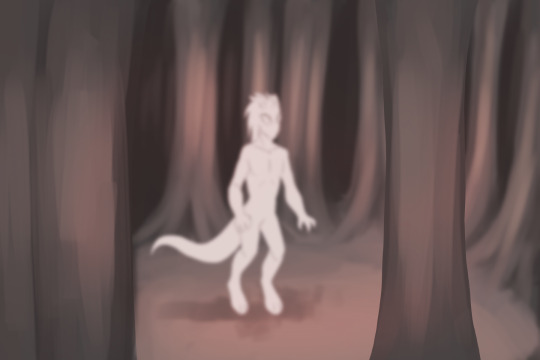
When starting this project, I knew roughly what I wanted to achieve and started planning out a situation based on the prompt ‘Alien Encounter’ which I found to be the most interesting of the 3 scenarios we could have picked; I find character design and animation much more interesting than vehicles etc. I’m especially glad that I was allowed to work on the computer as it was a medium I was much more familiar with, and would’ve allowed me to have as lot more freedom with my project. For this reason, I came to the unreasonable conclusion that I wanted my animation to be around 30 seconds long as it would be easy to achieve working on the computer - and that I couldn’t convey any kind of story with only 10 seconds worth of footage.
A lot of the mistakes I made during this project were entirely my own fault - I shouldn’t have decided to colour in each frame after I was told I could leave it; this took an extra weekend that I should have been using to do my blog. My lack of time management also meant that I had to cut a lot of corners when making this, so it turned out very rough and not as refined as i’d have liked. The lines that are shown in my final animation are the sketches I did - so some are extremely messy. I had planned to clean all these lines up but did not have time; I didn’t think it would make that much of a difference until I added colour and was able to see the jumpiness between certain frames due to the sketchy lines.
I also encountered various problems in After Effects, but I didn’t have time to fix them as I finished the animation only a couple days before the due date. I think if my time management had been better and my idea had been a little more realistic it would’ve worked much better!
I am pretty happy with how a lot of things turned out - especially the lighting effects done in After Effects and the backgrounds - as well as the consistent colour palette I used throughout the video. I’d love to do another project like this again!
0 notes
Text
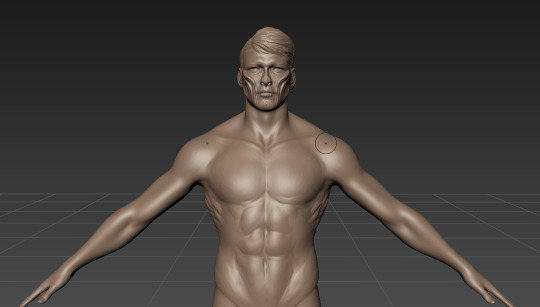
3D Alien Model - Process
The tools I used primarily for this project was the wax tool, the grab tool and the flatten tool. The wax was used to sculpt all of the details, the grab tool was used to bring out certain areas such as the claws and ears, and the flatten tool was to smooth the armor.
To start the sculpt, I used a pre existing sculpt of a man. I opened Mudbox and added a new sculpting layer which I set to level 5 subdivision.
The first thing I did was the hair of the model; this was easily one of the most time consuming parts.

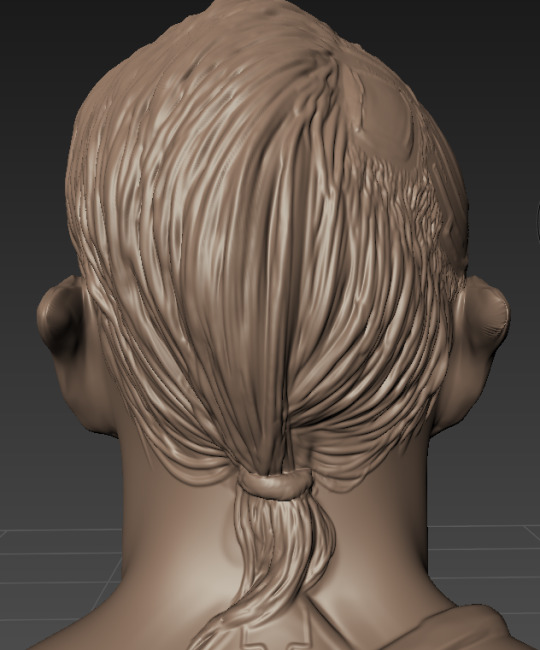
I wanted it to have one side shaved as I did this when experimenting with the program and really liked how it looked. I was also inspired partially by Sombra from Overwatch. I built up the surface of the head with a large wax tool with a high opacity, then started from the back of the head using a smaller brush and added strands of hair. I added streaks to the designated portion of the head, then repeated it a few more times with continuously smaller brushes. I opted for short hair as longer hair would have meant that I had to built strands of hair that weren’t attached to the entire head, which I didn’t know how to do at the time.
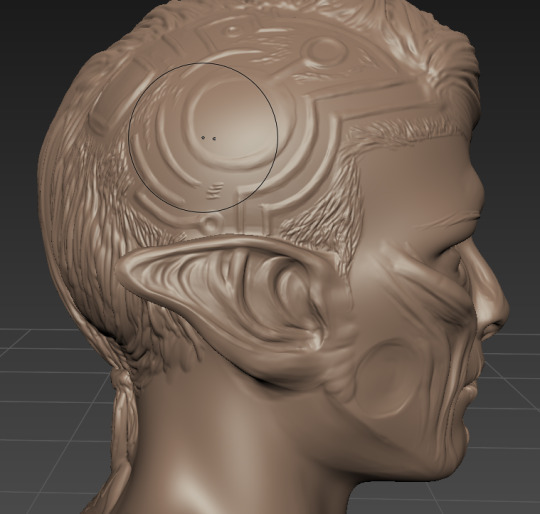
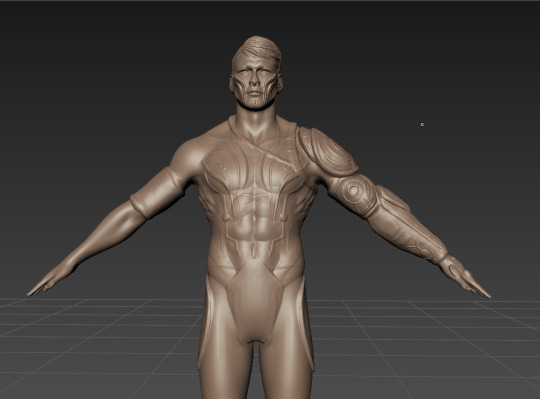
Once I had finished the hair, I added a futuristic design to the shorter haired side of his head with the wax, as well as indenting the cheekbones and adding other details to try and make him look less like a regular person.
The ears were made by building up the back using wax, then grabbing it and pulling it back even further into a point. I am really happy with how the hair and the ears have turned out.
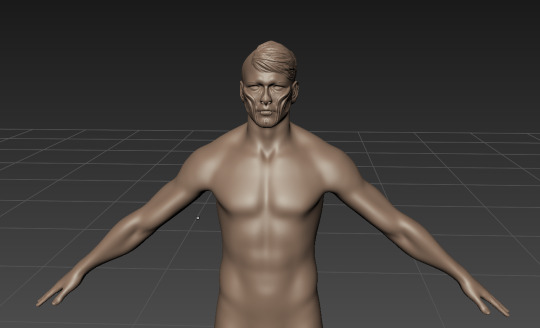
Before adding the armor, I wanted to sculpt the body to give it a more realistic appearance, so I used a couple of reference images to accurately add more definition and make the model’s body less smooth.
The lower part of the body and the back were not done using the symmetry tool to try and make them look more organic and true to life.
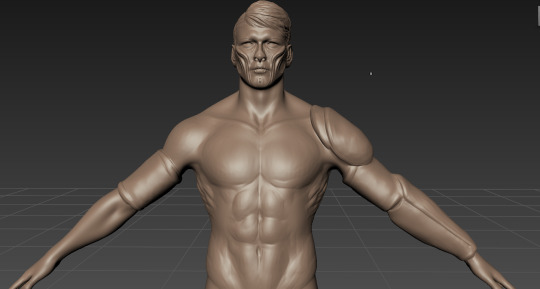
The armour took an extremely long time to sculpt as I had to repeatedly add layers of wax and then flatten the body around it to create the sharp edges. It took a while to build up and then smooth it enough to look like metal, which is why the project itself is not as detailed as I wanted it to be to begin with. Once I was happy with the armor (which was inspired by a combination of fantasy cosplay armour and Sci-fi video games) I added the details using a very small wax brush. The style of the details is based on Crop Circles, which are typically associated with aliens.
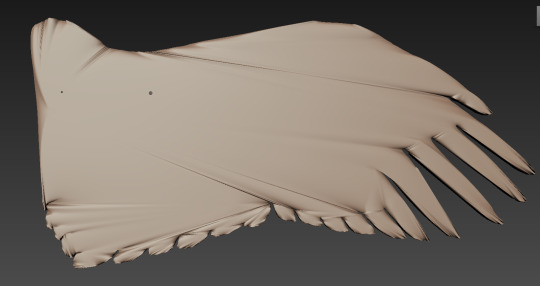
I tried to make a set of wings for the character a variety of ways, but none of them were successful enough for me to include on the final model - which could be a good thing as they didn’t really fit with the rest of the aesthetic anyway. The one below was drawn in Illustrator then made into an object in Cinema4D. Once it was imported into Mudbox the mesh behaved in a really strange way that was not suitable to be sculpted onto due to the arrangement of the polygons - as can be seen below. I tried to make other wings briefly by following the few existing tutorials but decided just to leave him without them as I didn’t have enough knowledge to be able to recreate what I’d seen. However I would like to try and make a model with wings in the future if possible.
0 notes
Text
Cinema 4D Creations
These Cinema4D creations help set the boundaries for the kind of thing that can be achieved using the modelling tools available in this program.
Tadeo Soriano


Soriano’s work is primarily focused on the sculpting of the characters as opposed to the environment around them. the characters are all extremely stylised and are easily recognisable as the artist’s creations. They have very simple proportions and large heads, and are coloured in bright and bold tones. Their work demonstrates the ability to create cartoony, toy like characters using Cinema4D, with smooth and slightly reflective textures and soft dynamic lighting. I really like Soriano’s work for these qualities.
Daniel Linard
Linard uses a semi-realistic style in his work, and demonstrates the amount of detail that Cinema 4D can be used to create. All of his pieces contain a variety of textures and an impressive amount of attention to detail - you can see the individual strands of hair/fur/grass down to even the texture of skin, which amazes me. i also love the really realistic lighting and backgrounds which he creates for his cartoon characters, again showing just how much you can do in the program.
Oscar Creativo

I find Creativo’s work to be similar to Linards in his extremely detailed textures. However, his actual models are composed of very basic shapes and yet still look stunning thanks to the light and shadows. The backgrounds in his work are very simplistic and blurred, which help draw attention to the character in the centre.
BillElis & Adam Spizak
These two artists create incredibly beautiful and detailed models that look very realistic although fantasical. One of my favourite aspects of these artist’s works is their use of glowing light effects to really bring the characters to life and make them look magical. The reflective quality of the metal armor is also very impressive.
Stuart LippinCott


LippinCott’s work focuses mainly on the background and colour palettes in his work, creating some very cinematic and beautiful scenes using Cinema4D’s engine. The amount of detail in all of the buildings and landscapes, as well as the fog and other atmospheric effects (such as the use of atmoshpheric perspective) is really amazing to me. His work is a real inspiration to me.
0 notes
Text
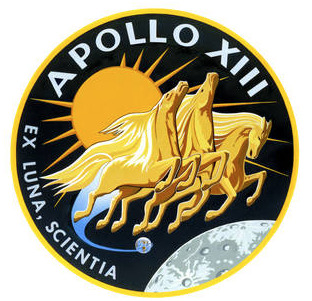
Apollo 13
Mission Objective Apollo 13 was supposed to land in the Fra Mauro area. An explosion on board forced Apollo 13 to circle the moon without landing. The Fra Mauro site was reassigned to Apollo 14.
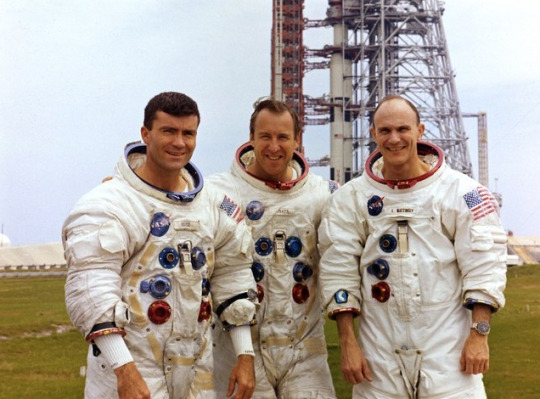
Crew James A. Lovell Jr., Commander Fred W. Haise Jr., Lunar Module Pilot John L. Swigert Jr., Command Module Pilot
Backup Crew John W. Young, Commander Charles M. Duke Jr., Lunar Module Pilot John L. Swigert Jr., Command Module Pilot
Payload Odyssey (CM-109) Aquarius (LM-7) Prelaunch Milestones 6/13/69 - S-IVB ondock at Kennedy 6/29/69 - S-II ondock at Kennedy 6/16/69 - S-IC ondock at Kennedy 7/7/69 - S-IU ondock at Kennedy
Launch April 11, 1970; 1:13 p.m. CST Launch Pad 39A Saturn-V AS-508 High Bay 1 Mobile Launcher Platform-3 Firing Room 1
Orbit Altitude: 118.99 miles Inclination: 32.547 degrees Earth Orbits: 1.5 Duration: five days, 22 hours, 54 minutes, 41 seconds Distance: 622,268 miles
Landing April 17, 1970 Pacific Ocean Recovery Ship: USS Iwo Jima
0 notes
Text
Kerbal Space Program
To bring his ambitious project into existence, Falanghe and his team turned to Unity. “We chose Unity almost from day one,” he says. “We had already done some small projects with it, and we chose it at first for how quickly you can put something together, and how simple it is to deploy what you created.” He had worked mostly with Flash back in those days, and considered creating KSP in Flash at the start of the project. “But we quickly realized Flash could only have taken it up to a certain point, and since we were already contemplating the potential for growing the game if things turned out alright, we decided to go with Unity from the start,” he says. “I’ve been very happy with our decision. Once we familiarized ourselves with it, we loved working with it. The modular behaviors, for instance, are something we abuse a lot in KSP. C# is an awesome language to work with also. I’m a total convert now, definitely.” He says that Unity Asset Store packages like EzGUI, Vectrosity, AdvancedRagdoll, and SmartWater have saved the team a lot of time and effort.

Getting the idea rolling was a rather speedy process. Falanghe put the first version of KSP together in about a day, just to see something that vaguely resembled the concept on screen. “It was no more than a few stacked cylinders and some forces applied with some particle effects, set against a flat terrain plane and a skybox,” he recalls. There were no camera controls, or any other controls at all, and hardly any code for that matter. “I had set the parameters for the forces and joints just so that the cylinders that were supposed to be SRBs broke loose while the rocket was still in the frame. That was version 0.0.”

“Through all our updates, we’ve focused on having a playable game at all times,” says Falanghe. “This is a very important part of our development style—it would be very disheartening to have something unplayable. Besides, I can’t sleep if some script in the game won’t compile, so the game in an unplayable state for any amount of time could really affect my health!” There were moments during development where he says he was utterly stumped by one problem or another, and sometimes it did feel like they’d hit upon an unsolvable, project-sinking issue. He recalls one such case, when the team first got into making the physics transition into its two-body deterministic solver. “There were so many issues with disabling the PhysX rigidbodies mid-flight and putting the ship on rails, and then transitioning back out again, I felt we had taken a step longer than our own legs were that time,” he says. Despite the stress, however, they eventually found a way around each issue and picked their way out of the rut.

0 notes
Text
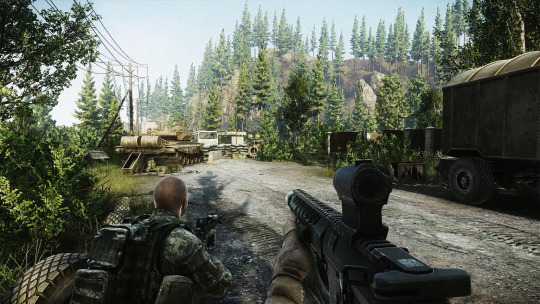
Escape From Tarkov

Battlestate turned to 3D terrain generator World Machine to procedurally create the perfect environment on which to stage compelling gameplay. Once the base was generated, the result was split into 35 sub-terrains and given a custom LOD system and dynamic terrain output preforms.
To handle the huge amount of detail, Battlestate used custom scripts to offload resources outside the field of view. “Basically, what we built amounts to manual occlusion culling. The normal method required a lot of CPU resources given the size of the maps and amount of detail,” continues Nik.
“We were determined from the start to create large and detailed areas, which means we need to put an extra emphasis, from the ground up, on how they’re optimized. This comes down to careful planning for how to handle issues like occlusion culling, but we also have Unity specialists hard at work revealing opportunities to reduce RAM consumption and CPU time – a rather huge but rather thankless task. The Unity Profiler, specifically the Memory Profiler, has been a huge help in this regard.”
Providing an adrenaline-charged package takes more than just ballistics and gun models, and this is where Unity’s Mecanim features came in.
“It was important for us to have character animation be as accurate as the guns themselves. Characters need to run, crouch, and crawl just as real military operatives would, and this also makes transitioning between animations very important,” explains Nik. “These animated transitions don’t just have aesthetic implications but also gameplay. How long does it take to stand up and run? How quickly can you reload your weapon? Mecanim was an important tool for us to tune the many actions and make them feel realistic and fluid.”
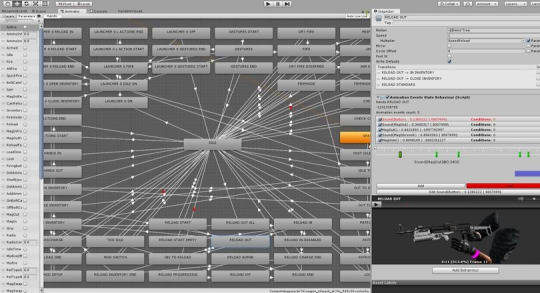
The complexity of animation states extends beyond standard movements as well. Characters have to interact with weapons in detailed ways and with different potential attachments, many of which also affect the animation tree. The result is a massive state machine web showing how far Battlestate is pushing the animated detail, enough that they extended Mecanim with a custom Events system to account for all the potential interactions. And that effort will pay off for players looking for a realistic hardcore shooter experience when Escape from Tarkov leaves closed beta in 2018.
0 notes
Text
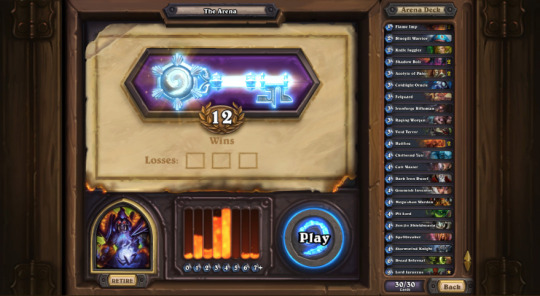
Hearthstone
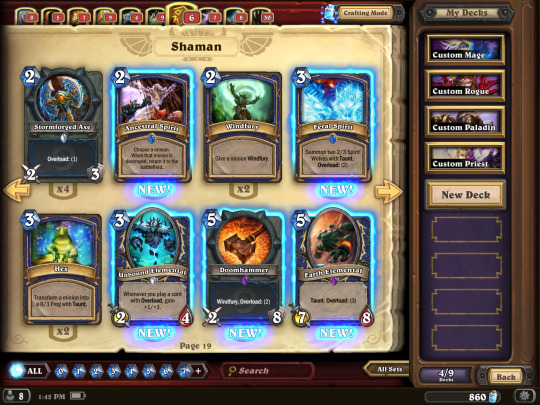
‘The team was small by Blizzard’s standards: about 15 people for a number of years. In terms of the folks tasked with bringing the game to mobile, that sits at around four or five. “One of the things that really made Unity a great solution for us, is that we really like to iterate here at Blizzard,” says Chayes. “That’s one of the things that’s been core to our game development process in the past: we spend a lot of time going over the mechanics, multiple times, and working on them to make sure they’re as polished and as awesome as they can be.”
Because Hearthstone was a smaller game and had a shorter development timeframe than some of its other titles, the Blizzard team didn’t have as much time to go through its traditional iteration cycles. “One of the great things about using Unity is the speed with which you can iterate allows us to learn things that are working and not working, very fast,” says Chayes. “The fact that you can run the editor and it shows the same thing players are going to see in the game – and then stop it and go and identify bugs or polish things you want to tweak – really helped us learn faster about some of the things we thought we could be improved.”
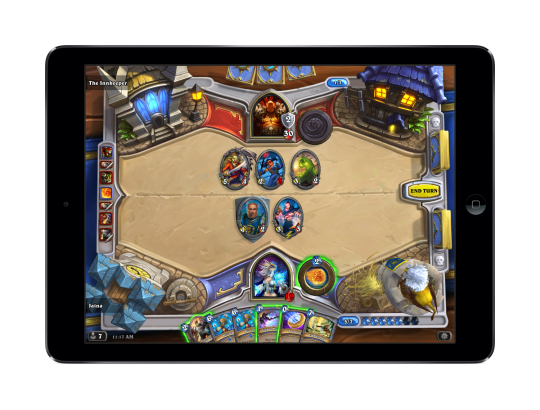
“Another thing that was really great about Unity was that it had native support for a lot of the tools that our artists like to use – Photoshop and Maya – and can read in their base file formats, without having to go through some conversion process, which also sped up our process.” He says that one of the tools the team got out of the Unity Asset Store was PlayMaker. “That’s something we’ve used in the game to create scripted events alongside our animation system. It was actually a big help in enabling our art team to independently make cool events in-game.”
Indeed, this was the team’s first experience with Unity, turning development at one of the world’s most successful developers into something of a learning experience. “One thing that’s been great for us is the amount of support we found, even for issues we didn’t anticipate, as we began development with Unity,” says Chayes. “It was really easy for us to jump online and find out that, ‘Oh hey, guess what? This problem we ran into, other people have already encountered it in the past. We don’t have to go and find the solution on our own because there’s this great network of support.’ That was another huge reason why we chose to go this direction, and it ended up really helping us time and time again. On the whole, I think the Unity community has been awesome.”
0 notes
Text
AliReza Akhbari
Akhbari is a digital sculptor who creates incredibly realistic models, often of animals or people. One of my favourite aspects of their work is the amount of detail in the eyes and fur/hair of the characters.
0 notes
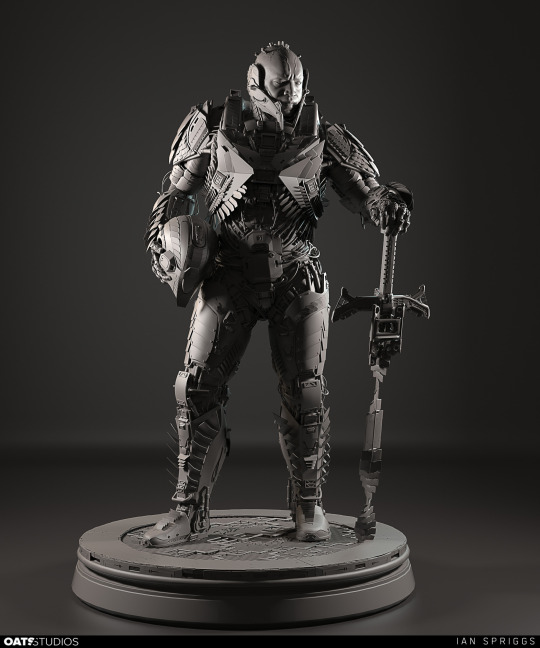
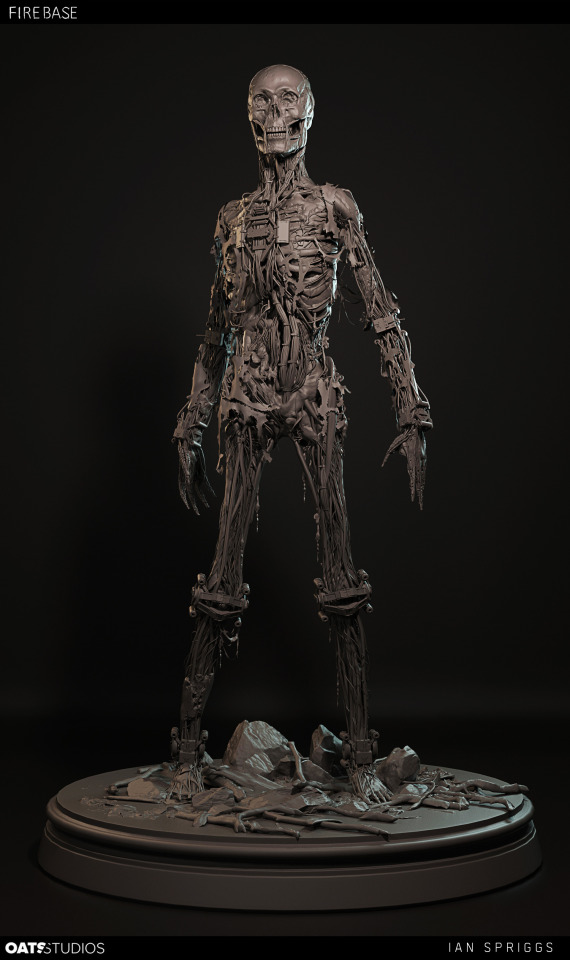
Text
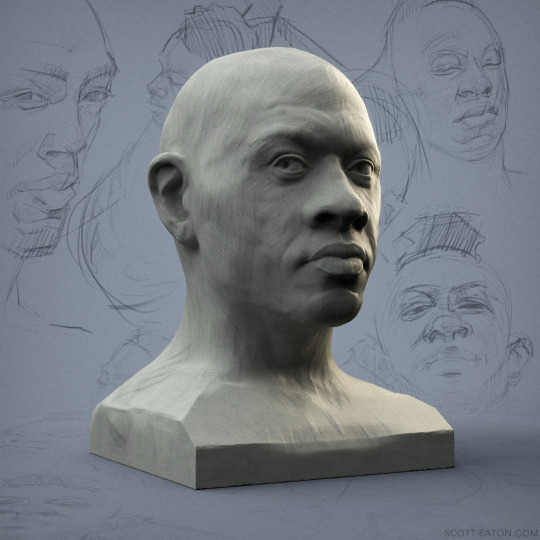
Ian Spriggs
Spriggs is a digital sculptor who focuses on character design. His sculpts are very realistic and almost have a futuristic quality to them. Unlike Akhbari, his work is often to showcase the design elements to a character rather than to be rendered like an actual photograph or scene. His sculpts are not usually painted for the same reasons but are still cool regardless.
0 notes
Text
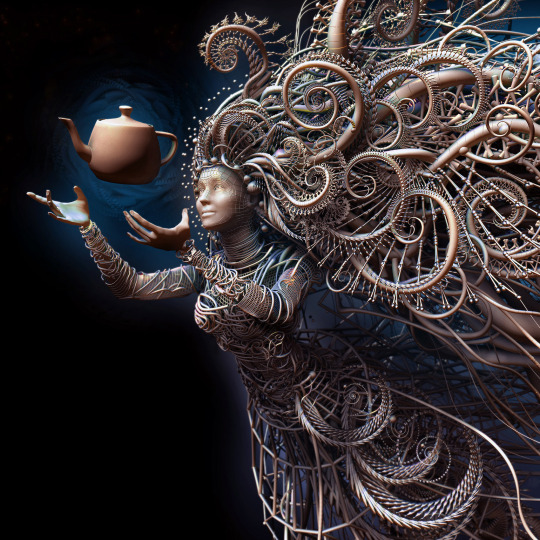
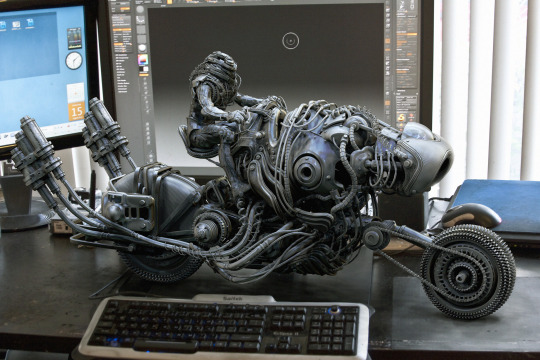
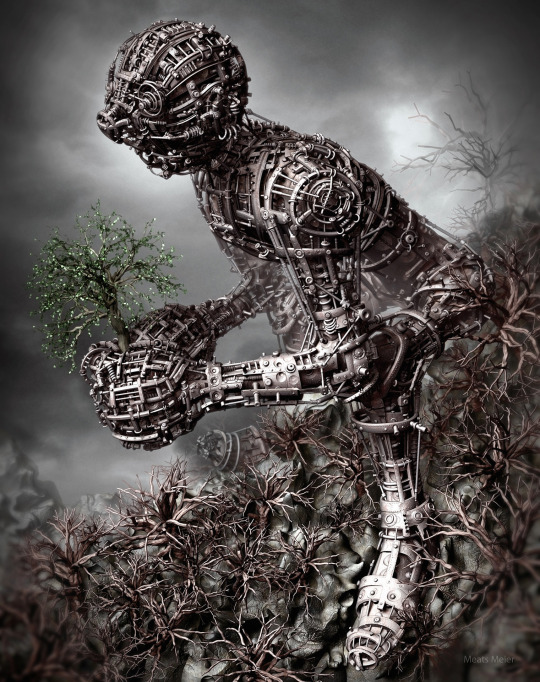
Meats Meiers
Meiers creates very unique sculpts that are incredibly stylised, often mixing realistic human models with abstract spirals or wires. The sculpts are often inspired by real life creations - such as a motorbike, yet remind me of alien technology. I especially like the wide range of backgrounds they use depending on the type of model - putting the motorbike model in a VR setting makes it look really unique.
0 notes
Text
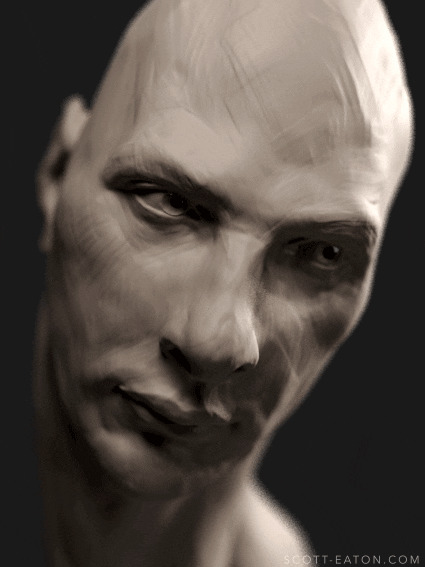
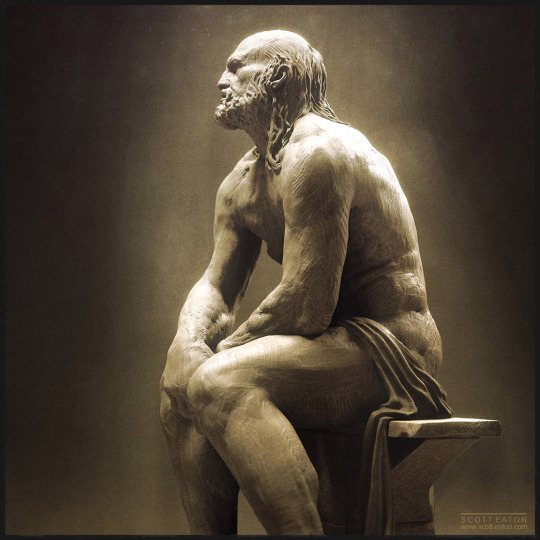
Scott Eaton
Eaton’s work reminds me of a physical sculpture due to the texture that’s been applied to it which looks really nice in my opinion - it differentiates his work from other human sculptors. This texture also creates the impression that it’s been sculpted out of marble like a greek statue. The way he does hair is also reminiscent of this as it’s done in chunks rather than individual strands. I really like this quality as I don’t see if often especially in 3D sculpts.
0 notes
Text
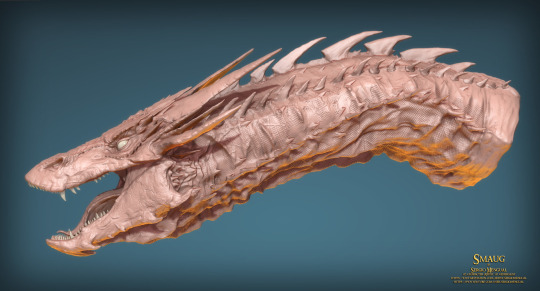
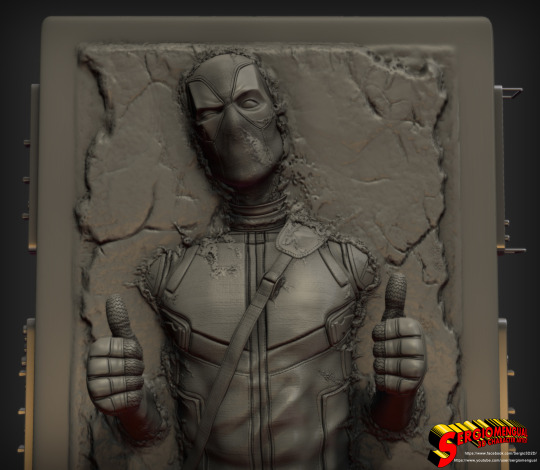
Sergio Gabriel Mengual
Mengual specialises in character sculpts, often for fantasy/alien characters including dragons and Predator.

0 notes
Text
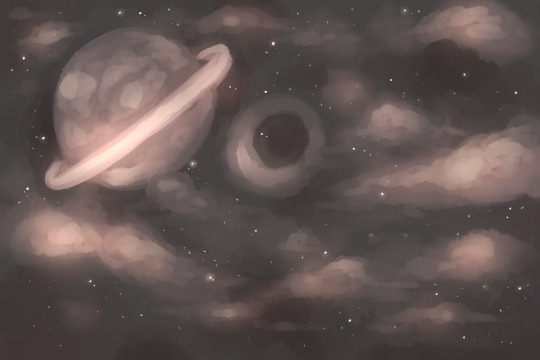
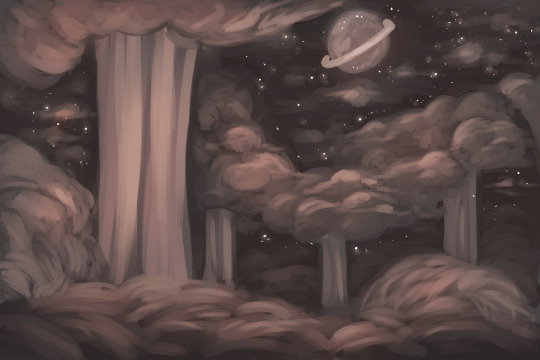
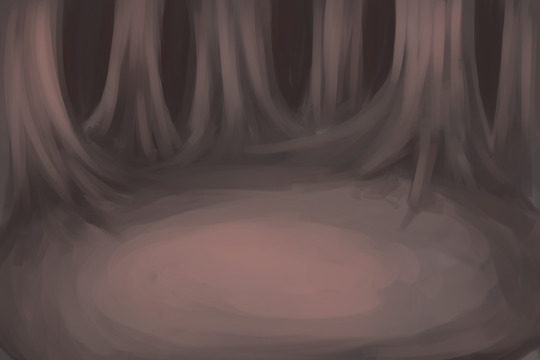
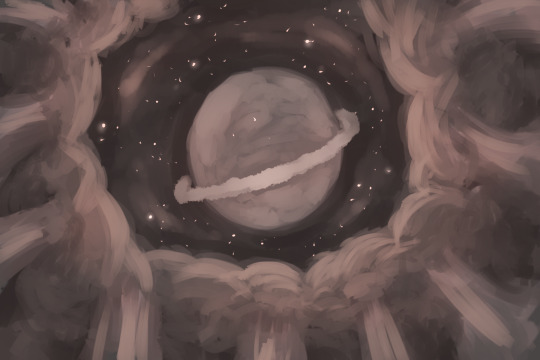
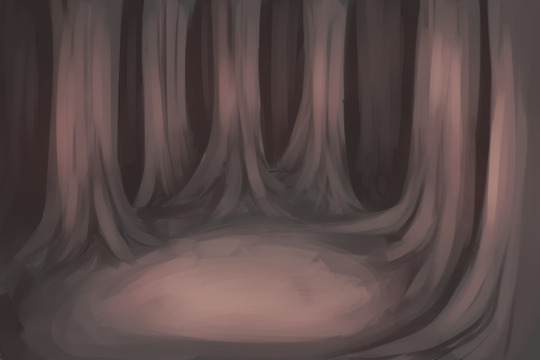
Animation: Painted Backgrounds
I wanted all of the backgrounds to have the same colour palette to give the animation a very obvious aesthetic. I painted 3 or 4 generic forest backgrounds (not pictured here) that I used multiple times as they weren’t noticed much anyway. The generic forest ones took about 5-10 minutes each while these took 20-30 minutes each. They were painted on a single layer, then had an overlay layer to add more red tones, then a luminosity layer for stars and highlights. These were all created in Paint Tool Sai.
I also painted a miniature version of my rocket model to go in the animation which was added in using After effects later.

0 notes
Text
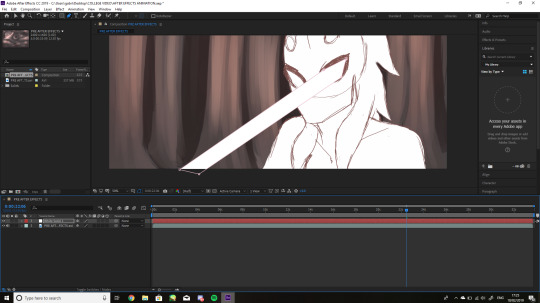
Animation - After Effects

There were a number of aspects in this animation which I added in in After Effects as I wasn’t sure how else I could’ve achieved them.
Laser Eyes
youtube
To create the laser eye effects I used a lightsaber tutorial as this was the closest thing to what I wanted. This tutorial was fantastic and explained how to do everything really simply but I did encounter a problem that I have been unable to fix, so I had to leave it in the final animation. I still don’t know how to fix this problem without redoing the entire sequence.
To add the laser beam to the eyes, I needed to import the finished animation into After Effects, which didn’t work. After Effects would open the file then freeze several minutes after. The first time this happened I assumed the file size was too big so I compressed it twice - resulting in a very small MOV. file. But it still wouldn’t work - and even after a lot of googling I still couldn’t find the answer to it. The solution turned out to be to restart the computer which I wish i’d have found out earlier as it was very annoying.
After this, it worked fine, which I will definitely try earlier on if it happens again.
To create the effect, I created a composition with the video in it, then created a new solid layer in white. I hid the solid layer and used the pen tool to create a (fairly) rectangular mask - but with a lot of extra points around the edges so I could easily change the shape. I then turned the solid layer back on, resulting in the white laser shape. After this, I enabled the keyframing for ‘Mask Path’, ‘Position’, ‘Rotation’ and ‘Opacity’. By editing a combination of these at different points I was able to animate the beam to look how I intended it to. To create the glow, I duplicated the layer 5 times and set the mask feathering to the following settings:
First layer: 3, Second layer: 10, Third layer: 30, Fourth layer: 60 and the Fifth layer: 120.
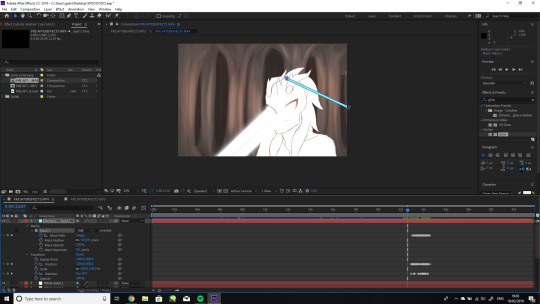
After doing this, I selected all 5 layers and pre-composed them together, then duplicated the new composition and moved it to the other eye.
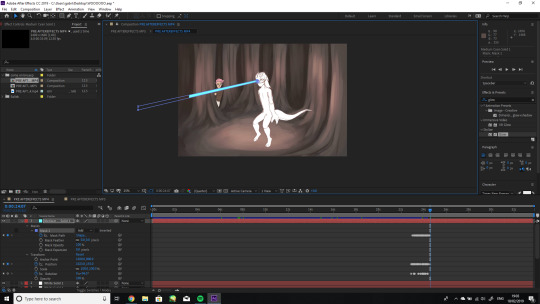
When making the laser in this scene, I encountered the problem that I was unable to fix. I made the solid the same size as the video frame, which definitely had a negative impact. Due to the fact I changed the size, position and rotation of the mask that was attached to the solid multiple times while making it, I think that this meant that it ended up not being big enough to completely fill the mask.
Because of this, the laser beam has a very awkward cut off near the bottom of the screen. I tried to just increase the size of the solid but found that it changed the size and position of the mask as well- and after having to adjust the mask 46 odd times to get it to be in exactly the right position in each frame , I wasn’t too keen on doing it again as it had already taken over an hour. In the end I just left it as it sort of looked like the beam had been stopped by the floor and trees upon a first glance - but i’m still not happy with it. It was a really difficult problem to try and search for a solution to as I wasn’t exactly sure what to type.
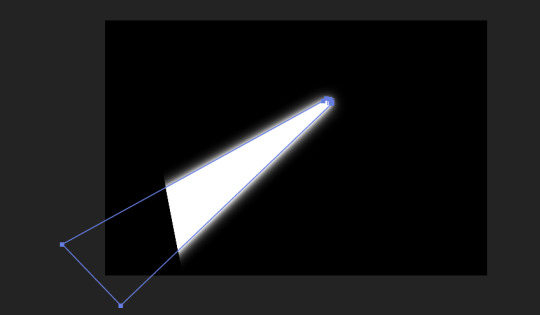
This is the intended shape of the beam - but the white solid cuts off before the edges of the mask.
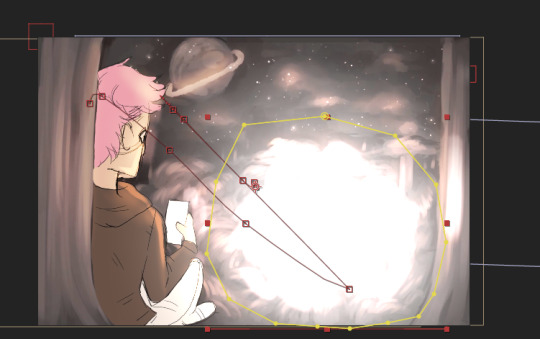
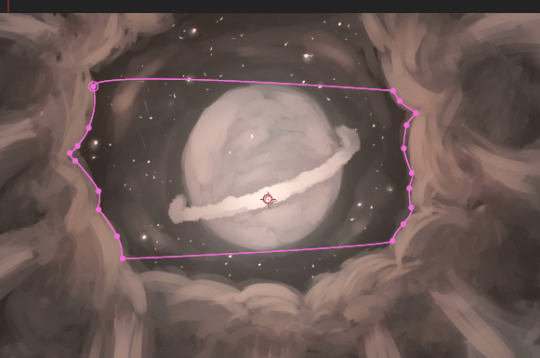
The glows near the beginning of the animation were created by adding a white solid, hiding it then creating a large mask with a very high level of feathering. I then changed the blending mode to ‘Add’ to give it this glowing effect. I turned on the keyframing for the mask shape as well so I could make it fit the explosion:
The Rocket ship animation
This was done entirely in after effects. The background was on a single layer - If I had done it on multiple then this effect would’ve been a lot easier to produce but I didn’t think of that until after i’d finished it. I wanted to have the rocket go behind the trees as if it’s in the sky, which I over-complicated but it still worked fine. I’m actually really happy that I used this method as I learned how to do it in the last project and was really satisfying to get right.
Like all of the previous effects, I added a white solid and hid it, then made a mask of the sky like this:
I feathered the mask a little as well so the edges of the trees wouldn’t look so sharp. I added the rocket in as a PSD layer which I made sure was transparent.
I started by keyframing the position of the rocket until it moved horizontally along this path:

At this stage, the rocket was in front of the trees. To get it to go behind the trees I did the following things:
I placed the solid layer directly above the rocket ship layer, making sure the solid itself was still hidden.

After this, I selected the psd layer and changed the layer’s track matte to ‘Alpha Inverted Matte’
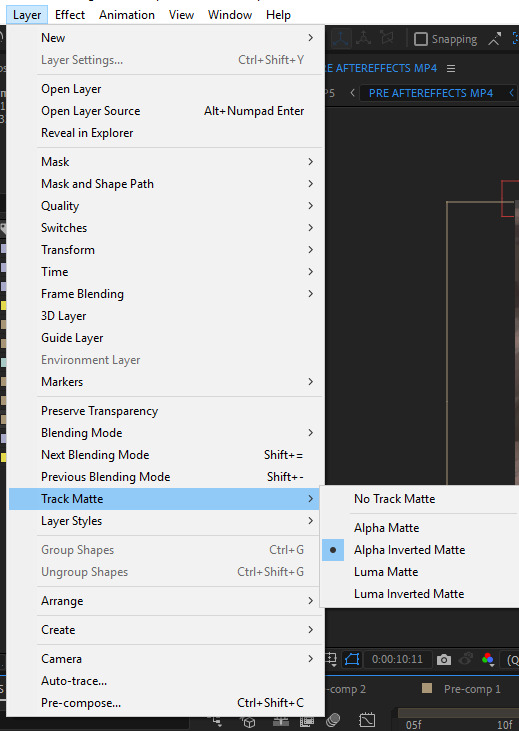
After this, I had to open the mask layer and invert the mask:

Now, the ship will only be visible outside of the mask’s area - aka in the sky.
0 notes