
Statistics
We looked inside some of the posts by nicecycleblog and here's what we found interesting.
Average Info
Notes Per Post
9
Likes Per Post
8
Reblog Per Post
0
Reply Per Post
1
Time Between Posts
6 days
Number of Posts By Type
Text
7
Last Seen Tumblr Blogs


Fun Fact
There are dozens of funny blogs to kill time on Tumblr.
Text
Tips on Finding the Best Motorcycle Shop Near You for Fender Eliminator Kit
Riding a motorcycle is a thrilling experience, but it also comes with a lot of responsibilities. One of these responsibilities is maintaining your motorcycle in top condition. If you need to upgrade your bike with a fender eliminator kit, it's crucial to find the best motorcycle shop near you. Here are some tips to help you find the right shop.

Check online reviews: Start by doing some research on the internet. Look for reviews of motorcycle parts shop in your area. Pay attention to the comments and ratings left by previous customers. This will give you a good idea of the quality of service you can expect from the shop.
Ask for recommendations: If you have friends or family members who ride motorcycles, ask them for recommendations. They may know of a good motorcycle shop that they've used in the past. You can trust their opinion since they have firsthand experience with the shop.
Look for a specialty shop: It's always best to look for a motorcycle parts shop that specializes in your brand of motorcycle. This will ensure that the technicians working on your bike have the necessary training and experience to provide the best service possible.
Visit the shop: Before making a decision, visit the motorcycle shop in person. Look around and see if they have the equipment and tools necessary to work on your motorcycle. Also, check if they have a clean and organized workspace.
Ask about warranties and guarantees: Ask the motorcycle parts shop if they offer warranties and guarantees on their services. This will give you peace of mind knowing that they stand behind their work.
Compare prices: It's always a good idea to compare prices from different motorcycle shops. However, don't make your decision based solely on price. Quality of service should be your top priority.
Check their credentials: Finally, make sure the motorcycle parts shop has the necessary licenses and certifications to operate. This will ensure that they meet the standards set by regulatory bodies.
In conclusion, finding the best motorcycle shop near you for a fender eliminator kit requires some research and due diligence. By following these tips, you'll be able to find a reputable and reliable shop that will provide quality service for your motorcycle. For best motorcycle shop visit https://www.nicecycle.com
4 notes
·
View notes
Text
Upgrade Your Bike with the Right Motorcycle Parts and exhaust Get Ready
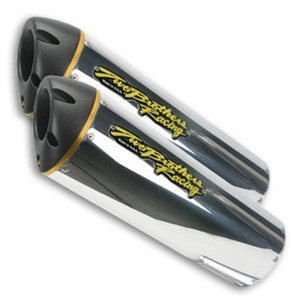
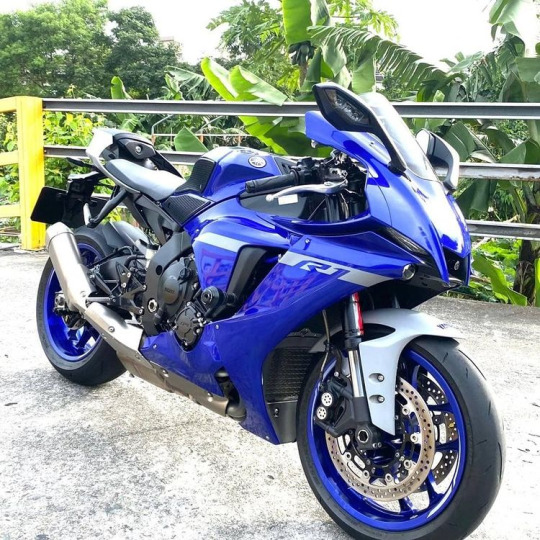
If you're a motorcycle enthusiast, you know that the bike is more than just a means of transportation - it's a way of life. And like any lifestyle, it's always evolving. One of the most exciting ways to upgrade your ride is by investing in the right motorcycle parts and motorcycle exhaust. Not only will these upgrades improve your bike's performance and look, but they'll also give you a sense of satisfaction that comes with building and customizing your own ride.
The first step in upgrading your bike is to identify what you want to improve. Do you want to increase your bike's horsepower, improve its handling, or enhance its style? Once you've identified your goals, you can start researching the motorcycle parts and accessories that will help you achieve them.
One of the most popular upgrades for a motorcycle is the exhaust system. A new motorcycle exhaust system can not only change the look of your bike but also enhance its performance. A high-quality exhaust system can improve your bike's horsepower and torque, increase its acceleration, and give it a more aggressive sound. But, it's important to choose the right exhaust system for your bike, as not all systems will be compatible with every make and model.
Another popular upgrade is replacing the air intake system. A high-performance air intake system can improve your bike's horsepower and throttle response by allowing more air to flow into the engine. This is particularly important if you're upgrading your exhaust system, as the increased airflow from the motorcycle exhaust will require a corresponding increase in airflow from the air intake.
Upgrading your bike's suspension system is another way to improve its handling and performance. A new suspension system can provide better stability, smoother handling, and improved cornering ability. It's important to choose a suspension system that's designed for your bike's make and model, as different bikes require different suspension setups.
Finally, upgrading your bike's brakes is another way to enhance its performance and safety. High-performance brake pads and rotors can provide better stopping power, while braided steel brake lines can improve brake feel and responsiveness. Upgrading your brakes can be particularly important if you're upgrading other parts of your bike that will increase its speed and power.
In conclusion, upgrading your bike with the right motorcycle parts and exhaust can be a great way to improve its performance, handling, and style. Whether you're looking to increase your bike's horsepower, improve its suspension, or upgrade its brakes, there are a variety of parts and accessories available to help you achieve your goals. So, get ready to take your ride to the next level and start researching the upgrades that will make your bike truly your own. Buy good quality motorcycle parts here https://www.nicecycle.com/
0 notes
Text
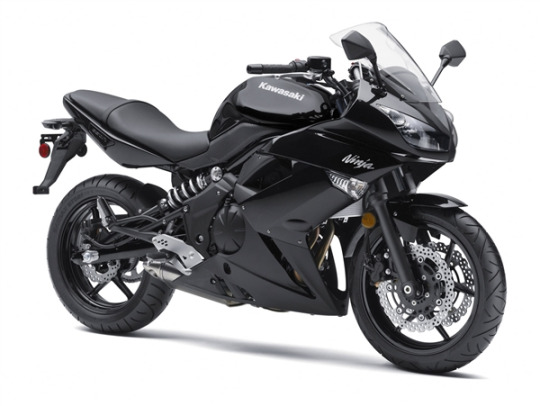
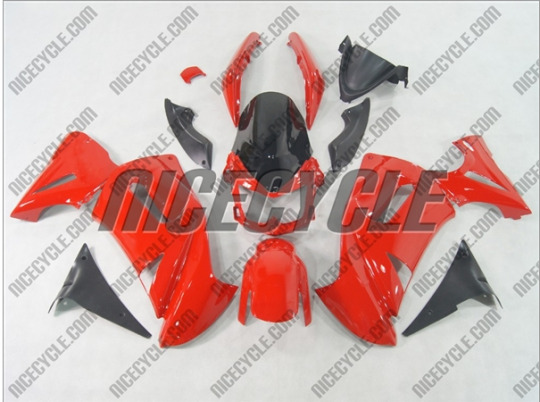
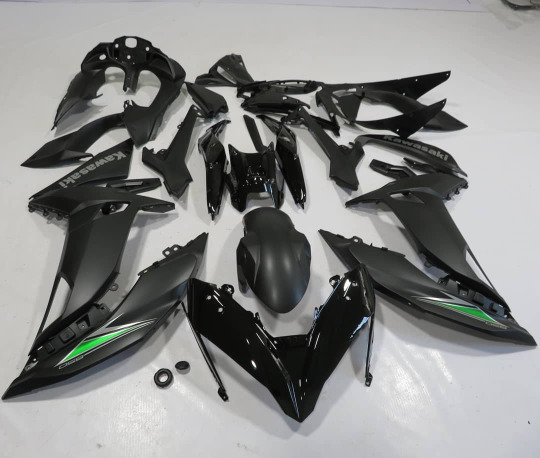
How to Install Kawasaki & Ninja Fairings on Your Motorcycle Easily
If you are a Kawasaki or Ninja motorcycle owner, you may be interested in installing new fairings on your bike. Fairings not only enhance the look of your motorcycle but also provide protection against the wind and other weather elements. While installing Kawasaki fairings may seem daunting, it can be a relatively easy task if you follow the steps outlined below.
Step 1: Gather the Required Materials
Before starting the installation process, you will need to gather the necessary tools and materials. Some of the materials you will need include a fairing kit, bolts, and washers. The tools required include a socket wrench set, pliers, screwdrivers, and a torque wrench.
Step 2: Remove the Old Fairings
The first step in installing new Ninja 650R fairings is to remove the old ones. Start by removing any screws or bolts that hold the fairings in place. Use a socket wrench set to remove the bolts and a screwdriver to remove the screws. If your motorcycle has any electrical wiring or cables connected to the fairings, make sure to disconnect them carefully.
Step 3: Test Fit the New Fairings
After removing the old Ninja fairings, test fit the new ones to ensure they fit perfectly. This step is important as it allows you to identify any fitting issues before installing the fairings permanently. Place the new Ninja fairings in position and make sure they align correctly with the mounting holes.
Step 4: Install the New Fairings
Once you have tested the new Kawasaki fairings and Ninja 650R fairings they fit properly, it is time to install them. Start by securing the fairings in place using bolts and washers. Use a torque wrench to tighten the bolts to the manufacturer's recommended specifications. Make sure not to over-tighten the bolts as this could damage the fairings or other motorcycle parts.
Step 5: Reconnect Any Electrical Wiring or Cables
If your motorcycle has any electrical wiring or cables connected to the fairings, it is time to reconnect them. Use pliers to connect any cable connectors or wiring connections carefully. Ensure that all connections are secure and that there are no loose wires.
Step 6: Test the New Fairings
After installing the new fairings and reconnecting any electrical wiring or cables, start your motorcycle and take it for a test ride. During the ride, check the fairings for any signs of wobbling or vibration. If you notice any issues, stop the motorcycle and inspect the fairings to identify the cause of the problem.
In conclusion, installing new fairings on your Kawasaki or Ninja motorcycle can be a simple and straightforward process if you follow the steps outlined above. By doing so, you can enhance the look of your motorcycle while also providing protection against wind and other weather elements.
We also offer Free shipping worldwide on all kits and you should receive your kit delivered to your door within 14 working days. Nice Cycle really is your one stop solution for High quality Fairing. Shop now https://www.nicecycle.com
0 notes
Text
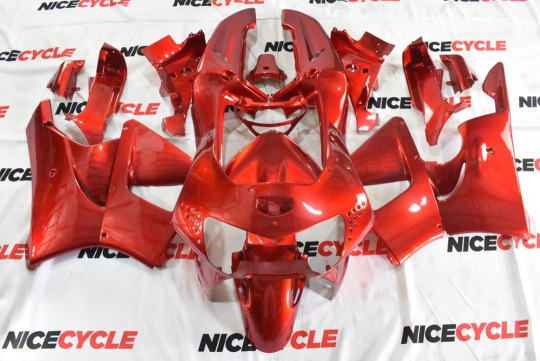
What You Should Know About the Kawasaki Ninja 650 Fairing Kit
The Kawasaki Ninja 650 is a popular sport bike known for its smooth ride, agile handling, and powerful engine. One of the most popular aftermarket upgrades for the Ninja 650 is the fairing kit, which can significantly enhance the bike's performance, style, and comfort. Here are some important things to consider if you're thinking about installing a fairing kit on your Kawasaki Ninja 650.
Benefits of a Fairing Kit
A fairing is an aerodynamic shell that covers the bike's frame and engine, reducing air resistance and drag. This results in increased speed and performance, as well as improved fuel efficiency. A fairing kit can also improve the bike's stability, handling, and cornering ability by reducing wind buffeting and turbulence. Additionally, a fairing can provide protection from wind, rain, and debris, making your ride more comfortable and enjoyable.
Types of Fairing Kits
There are several types of fairing kits available for the Kawasaki Ninja 650, including full fairing kits, half fairing kits, and quarter fairing kits. Full fairing kits cover the entire front of the bike, including the headlights, while half fairing kits cover only the upper half of the front, leaving the lower part of the engine exposed. Quarter fairing kits cover just the handlebars and instrument panel. Each type of fairing kit offers its own benefits and drawbacks, so it's important to choose the one that best suits your needs and riding style.
Materials
Fairing kits are typically made from one of three materials: ABS plastic, fiberglass, or carbon fiber. ABS plastic is the most common material and is known for its durability and affordability. Fiberglass is lightweight and provides excellent strength and rigidity. Carbon fiber is the most expensive option but is the strongest and lightest material, providing the best performance and style.
Cost
The cost of a motorcycle fairing kit varies depending on the type and material. Full fairing kits are typically the most expensive, ranging from $500 to $1,500. Half and quarter fairing kits are less expensive, with prices ranging from $200 to $500. Carbon fiber fairings are the most expensive, with prices ranging from $1,000 to $3,000. It's important to consider the cost of the fairing kit as well as any additional installation and customization costs before making a purchase.
Installation and Customization
Fairing kits can be installed by a professional mechanic or DIY with the right tools and knowledge. It's important to carefully read the instructions and follow the recommended installation process to ensure the fairing is properly secured and aligned. Additionally, fairing kits can be customized with different colors, graphics, and designs to match your personal style and preferences.
In conclusion, a fairing kit is an excellent investment for Kawasaki Ninja 650 owners looking to improve their bike's performance, style, and comfort. By considering the type, material, cost, and installation process, you can choose the fairing kit that best fits your needs and riding style. With proper installation and customization, a fairing kit can transform your Kawasaki Ninja 650 into a sleek and powerful spot bike.
You can also click on our website https://www.nicecycle.com/
2 notes
·
View notes
Text
4 Common Types of Motorcycle Fairings
1 Full Fairing: A fairing that completely encloses the motorcycle's front and rear, including the engine, is referred to as a full fairing.
Fun fact: The first sport touring motorbike to come standard with a complete fairing was the BMW R100RS
2. Half Fairing
It's very possible that your sports bike, like the Suzuki SV650 in the image above, has this kind of fairing.
The coverage from a half fairing isn't as good as it is with a complete fairing. While a windscreen and engine covers are frequently used with a half fairing, the gearbox is normally left exposed.
3. Quarter Fairing
The quarter fairing, sometimes known as a "bikini fairing," is thin. It frequently just protects the rider's head and chest from the wind.
4. Touring Fairing
Long-distance travels on touring bikes, often even cross-country trips, call for nearly complete protection from the wind and the elements for the rider and their passengers. Additionally, touring riders require a lot of luggage space. This is where touring fairings, which provide even more protection than a complete fairing, come into play.
Here are the latest collection of motorcycle fairings https://www.nicecycle.com/
0 notes
Text
Differences Between ABS Fairings and Carbon Fairings
In the past, fairing was constructed from shaped sheets of metal, canvas, or aluminium. These days, it is constructed out of printed plastic, fibreglass, and, less frequently, carbon fibre. Beginning in the 1970s, the fairings had universal bindings that could be adjusted to fit the models of the main motorcycle manufacturer.
For the record, we review the three primary materials with which motorcycle fairings are currently constructed, even though our guide focuses on the distinctions between ABS fairings and carbon fairings:
ABS Fiberglass; Carbon fiber
The most common material for motorcycle fairings is ABS. ABS is frequently used for fenders and the sides of two wheels in particular. This material's structure is difficult to fix, and maintenance is expensive.
Despite being a material that is highly sensitive, fibreglass has a variety of properties. It is frequently used for track fairings since it is simple to assemble and maintain. Fiberglass fairings (VTR) are inexpensive, lightweight, and excellent for track riding. Being fragile, they may eventually start to show signs of giving way (cracks around the fixing screws). As a result, the most important points of VTR fairings are frequently marketed with kevlar or carbon reinforcements.
Strength and lightness are two outstanding characteristics that carbon fibre boasts. For more details about motorcycle fairings visit https://www.nicecycle.com/
1 note
·
View note
Text
How to Paint Motorcycle Fairings?
How are motorbike fairings painted? This post will address the solution to this query step by step so that you will understand the procedures to follow in order to successfully paint your fairing.
Step 1. Prepare and clean up the work space. Due to the paint fumes that come along with painting, select a workspace that has good ventilation. To prevent spills on your floor caused by additional paint that will fall off your fairing as you paint it, place an old rag underneath the fairing. Remember to paint any areas where you keep food or water. It is a crucial component of getting the area ready for paintwork.
Step 2. Well-apply sandpaper. To get an incredibly even surface, sandpaper in straight strokes. This is a crucial step in the process, so take your time. Make sure the fairing has been completely painted over with the new paint. It will make it simple to apply fresh paint.
Step 3. You must fix the fairing s bodywork for this phase. Long-term motorcycle use increases the likelihood that you may need to perform some bodywork. Your motorbike fairing will need to be repaired if it has any holes, dents, or scratches.
Step 4. If you've made it this far, you should have a smooth, dent-free fairing that is prepared to be painted in a good work area. Use the primer on the now-smooth fairing in this stage. For this, you'll need to utilize a spray gun. I'll suggest that you apply a thick layer to hide the dents and holes. You must effectively prime if you want a flawless look fairing.
Step 5. The application of the paint represents the crucial stage at this point. Any lacquer paint in the shade of your choice may be used. Give your fairing two thorough coats of paint; doing so will give it a glossy, well-done finish. Give the lacquer paint enough time to dry after you've finished applying it before admiring your lovely fairing.
Conclusion
Motorcycle owners all over the world are very interested in learning how to paint their fairings, especially those who have had their bikes for a while. A well-maintained and neatly painted fairing says a lot about the motorcycle and much more about its owner.
Click the below mentioned link to see the painted Motorcycle Fairings https://www.nicecycle.com/
2 notes
·
View notes