
Don't wanna be here? Send us removal request.
Statistics
We looked inside some of the posts by outhouseblueprints-blog and here's what we found interesting.
Average Info
Notes Per Post
1
Likes Per Post
1
Reblog Per Post
0
Reply Per Post
0
Time Between Posts
3 minutes
Number of Posts By Type
Photo
8
Video
1
Text
1
Last Seen Tumblr Blogs


Fun Fact
In February 2021, Tumblr had 518.6 million blog accounts.
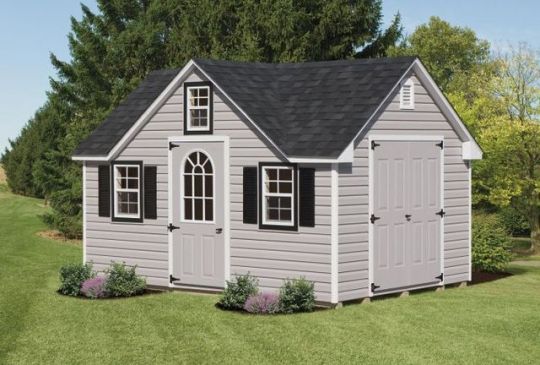
Photo

10 x 12 Gable Storage Shed Assembling Plans - Information To Contemplate When Developing A Simple Shed
When creating garden outhouse creation drawings you can provide for some fairly simple precautions to drastically cut your chances of your shed being vandalized. Fit your door and (https://sheddrafts.com/10x12-gable-storage-shed-plans-blueprints) window with good bolts and make sure that you lock it every time. Invest in timers that turn lights on and off inside your shed if you go out at night. Check fences and hedges bordering rural properties to identify weak spots that could provide easy access to criminals. Use curtains to cover any windows to conceal valuable materials when you aren’t using your outbuilding. shed doors are notoriously easy to break open so strengthen them with heavy screws and bolts. Mark valuable items with your house number and postcode using a UV pen or paint. If your property is stolen it will be easier to identify and return with your identifiable markings. Add extra fortification to your shed by layering the inside with supplementary boards according to your garden outbuilding crafting blueprints. Shackle or chain large items such as bicycles and mowers together and secure them to a permanent fixture. outhouse drawings may include several different methods of efficient design for your outbuilding. Move any large hoses from the ground to the wall by hanging them on metal clips or hooks. Store tools where they’re out of the way but accessible. A shallow tool locker on the side of a shed offers quick access to lawn and garden gear. Create a ramp out of scrap wood to make wheeling machinery around the outbuilding easier to use. Having a great set of shelves will allow you to store more in tight quarters. To make your shelves even more organized invest in metal bins to store tools and other items. Make foldable shelves that you can hide away when you are not using them. Use hinges to get more out of a small area by making a shelf that can fold back down. Simple decorative brackets can add charm to the outbuilding without adding labor. Be sure to select the most appropriate site when putting together your outhouse
youtube
Selecting the proper site for your outbuilding is half the battle when making your outhouse making drawings. When making your outdoor outhouse schematics you need (6 x 8 gable potting patio shed construction blueprints) to avoid placing your outhouse in any low-lying area where water gathers. Maintain the setback distances that are suggested by your local making department. People like to hide their outbuildings in inconvenient locations but this is a bad idea. Having a outbuilding that is out of the way may look nicer but it will be a lot less convenient when you need to use it. Prospective tool borrowers will return your things to the outbuilding more frequently if it is clearly reachable. If the backyard slopes down you should place the side of the outbuilding with the door on the elevated side. With the doorsill located closest to the land it is easier for you to step in and out of your shed. When possible avoid placing your outhouse in areas that are covered by shrubbery. Plenty of sun exposure is the ticket to keeping your outbuilding clear of rot. It is important to note that roof trusses are essential to any wooden shed plans since they stabilize the whole building. A great tip is to first build roof trusses on the floor and then raise each truss into position after the walls are up. To prevent your timber from getting damp during set-up you should make sure to work on day with no rain. The traditional way of constructing a roof requires a lot of time on a ladder fastening separate rafters. Many manufacturers carry trusses that are already assembled which will spare you time. Industrial trusses come constructed with the ceiling joist firmly secured to roof rafters. Plywood reinforcement plates should be used to hold roof trusses together. Position your trusses at least sixteen inches apart when installing. Fully built trusses are available and are reasonable for any outhouse drawings as they are very cost-effective. Call your local lumberyard for prices and options regarding roof trusses.
0 notes
Photo
6 x 8 Gable Potting Patio Shed Construction Blueprints - Points To Assess When Designing A DIY Shed
"In order to provide support for your roof and floor it is necessary to build correct framing. Necessary materials (https://sheddrafts.com/6x8-gable-garden-potting-shed-plans-blueprints) for framing include 2X4 timbers and attachments such as nails. For one wall you will need 4 pieces of wood cut to your desired length and height. These pieces should be fastened together to make a simple rectangular frame. The key to easily framing the exterior outhouse walls is to make sure the walls are square and level. Your frame is best supported by filling it with 2X4s every couple of feet. Add ¾-inch plywood to make your frame sturdier and more durable. When the rear wall is built flip it over to have it in the correct position to stand. Follow suit with the remaining walls and be sure you are leveling the angles at all times. Stand and attach your back wall and then the sidewalls and finally the front wall. A few decorative details in your patio outhouse drawings can make all the difference between a nice outbuilding and an eyesore. Make your garden hose easy to find and buy a hook where you can it. Tools that you use often should be stored in an easy to find place. Consider setting up a simple cubbyhole on the back of your outbuilding for easy accessibility. Make storing anything with wheels easier by using a portable ramp to get it and out. Having a great set of shelves will allow you to store more in tight quarters. To make your shelves even more organized invest in metal bins to store tools and other items. Choose a bar of magnets strong enough to hold the weight of your tools and you will always have them within reach. Make foldable shelves that you can hide away when you are not using them. Corner boards or a cupola window are great ways to dress up your outhouse without costing a lot. If you want to use a outbuilding for more than just storage you will want to include electricity in the outhouse creation schematics. The number one rule when working (6 x 8 saltbox wooden shed crafting plans) with wire and electricity is to be safe. Whether you plan to lay the electrical cable above ground or under it you will need to use Steel Wire Armored cable. Running the SWA cable below ground is the preferred option as it will hide ugly wires. Choosing to bury your wiring requires that you place it a minimum of 3 feet underground. Your outhouse schematics can also utilize solar panels to acquire power in your outbuilding. Using a solar panel will mean that you need to place it where sufficient light reaches it between 11 am and nightfall. Buy roof mounts for your solar panel to help you easily affix it to the shed’s roof. Once the panel has been mounted you can drill holes in your outhouse for the cable. A wind turbine may be the ideal solution for remote outhouses because they can be mounted at a high level where the wind is stronger.
youtube
Making wooden shed creation blueprints and constructing an outbuilding is a lot of work and can be exhausting if you are doing it on your own. Look into hiring a landscape company to help get rid of any obstructing bushes or shrubs. Do landscaping yourself by borrowing machinery to level land and move rocks. Employ a mason to do any rock and concrete work you don’t have time to do. Communicate with electricians if you need wiring done in the outbuilding. Building a outhouse can be a great form of family bonding and all the help makes work go quickly. Many tools that you don’t have are available for rent from most hardware stores. Purchase mail order wooden outhouse building plans from any online sources if you need guidance. Consider buying a shed designing kit with everything included if you don’t want to start from scratch. There are many databases where you can find a contractor in your town to do most or all of the work.
1 note
·
View note
Photo

6 x 8 Saltbox Wooden Shed Crafting Plans - How to Get the Best Shed Building Plans For Your Backyard Shed
Take care to find the best spot to put your outhouse before starting the backyard outhouse creation diagrams and making process. When (https://sheddrafts.com/6x8-saltbox-storage-shed-diy-plans-blueprints) making your outhouse diagrams you need to avoid placing your shed in any low-lying area where water gathers. Maintain the setback distances that are suggested by your local crafting department. Do not make the common mistake of designing a outhouse far away from where you need it. Having a outhouse that is out of the way may look nicer but it will be a lot less convenient when you need to use it. Build the outhouse closer to the house or garage so friends and neighbors will be more apt to return items. When there is a difference in elevation you should be sure that the entrance outbuilding is on the side that is higher. The placement of the door on the elevated side will ensure the land slopes down towards the rear. Do not construct your outbuilding in a place with too much shade. When wind and sunshine can access your shed it will be dry and free of mold. A outhouse floor will be exposed to moisture and in time may rot if the proper materials are not used. Your outdoor shed diagrams should opt for wood that has been pressure-treated which ensures its longevity. Pressure-treated wood is much more weather-resistant than any other kind. You will also need joists that go around the perimeter of the frame and mudsills. The use of a mudsill is to rest it on your foundation and build the frame over it. Band and floor joists will be used on top of the mudsill and on the outer edge for protection and support. Look for plywood that is exterior grade to put down as flooring in your outbuilding. Never use plywood thinner than ¾-inch because the floor will flex between joists. In order to gain more rigidity you can also install ¾-inch tongue plywood that locks the edges of the sheets together. Use screws when fastening the plywood as they hold better than nails.
youtube
Making outbuilding diagrams and constructing an outbuilding is a lot of work and can be exhausting if you are doing it on your own. If you have a lot of land to clear you can hire a landscaping contractor to move rocks and earth. Bring in an excavator to level an uneven making site. Employ a mason to do any rock and concrete (12 x 12 lean to shed creation plans) work you don’t have time to do. Make use of a licensed electrician when you decide to electrify the outbuilding. Building a outbuilding can be a great form of family bonding and all the help makes work go quickly. Many tools that you don’t have are available for rent from most hardware stores. If you are a novice builder you can easily buy scaled drawings and construction details from hardware stores. There are full outbuilding kits of varying sizes and materials to choose from as well. If you'd rather have a professional build a outhouse for you check out contractor databases. outhouse drawings may include several different methods of efficient design for your shed. Make your garden hose easy to find and buy a hook where you can it. Tools that you use often should be stored in an easy to find place. A shallow tool locker on the side of a shed offers quick access to lawn and garden gear. A simple wooden ramp to use with your outbuilding will make moving wheeled tools much easier to do. Adjustable shelves will give you flexibility in the outbuilding while also helping with organization. You should also buy some storage containers that you can place on the shelves to prevent things from piling up. Make foldable shelves that you can hide away when you are not using them. Use hinges to get more out of a small area by making a shelf that can fold back down. Corner boards or a cupola window are great ways to dress up your outhouse without costing a lot.
0 notes
Photo

12 x 12 Lean To Shed Creation Plans - How to Choose the Perfect Shed Building Plans
Cedar shingles are a great option for those who are crafting a outbuilding on a budget. You can expect your roofing to survive a (https://sheddrafts.com/12x12-lean-to-storage-shed-plans-blueprints) minimum of 30 years. Center some putting together felt across the top of the roof’s surface and staple into place. To install shingles simply follow the pattern according to your outhouse blueprints. Use nails to fasten every shingle to your plywood frame. If you get really into it you could even use tar to fasten the shingles. If you have laid shingles over the edges at some point you will need to trim them. You will need to cap the top of your shed by bending and overlapping the shingles. Not only will bending the shingles over the roof make it last longer it will also ensure it against water leakage. Buy the thickest shingles you can find if you want to invest a little extra in making your roof durable. One of the most common applications for vinyl or PVC is in outhouse schematics and windows. Vinyl is the second most fabricated plastic by volume worldwide after polyethylene. Thermal Industries introduced the very first vinyl windows in the United States in 1964 and they became popular when consumers were looking for alternatives that were energy-efficient. Polyvinyl can be molded easily into almost any shape and any design specifications. A benefit of PVC is that it can be easily cleaned with soap and water and needs no paint. The energy efficiency of PVC windows is much better than wood or aluminum. Thermoplastics like vinyl can easily be melted and remolded into new products without losing any of its chemical features. It should be noted that very large vinyl windows have a tendency to sag due to their flexibility. Most people opt to use vinyl windows in their outbuildings since they are less stylish than wood frames. Due to its quality and price PVC is still one of the most commonly used synthetics in outhouse building. A few decorative details in your patio shed blueprints can make all the difference between a nice outbuilding and an eyesore. Get your hoses out of the way by wrapping it on a large hook with a steep angle. Store tools where they’re out of the way but accessible. A shallow tool locker on the side of (18 x 18 octagon crafting shed making blueprints) a outhouse offers quick access to lawn and garden gear. Create a ramp out of scrap wood to make wheeling machinery around the outhouse easier to use. Having a great set of shelves will allow you to store more in tight quarters. Take your organization one step further by using plastic bins to stash your stuff on shelves. Choose a bar of magnets strong enough to hold the weight of your tools and you will always have them within reach. To make more space in your outbuilding consider utilizing hinges to make concealable shelving with hinges. Corner boards or a cupola window are great ways to dress up your outhouse without costing a lot.
youtube
Roof trusses help because not only do they support its roof but they also stabilize the walls. Using your floor to bring together trusses is the ideal location as it will prevent bends from forming. To prevent your timber from getting damp during set-up you should make sure to work on day with no rain. The traditional way of designing a roof requires a lot of time on a ladder fastening separate rafters. With prebuilt roof trusses you will cut out most of the work on the ladder. Most trusses will come with two manufactured rafters attached to a joist. Plywood reinforcement plates should be used to hold roof trusses together. When placing the trusses in your roof you should place them over wall studs. Fully built trusses are available and are reasonable for any shed creation drawings as they are very cost-effective. Any creating center or lumber work area should carry different options for trusses.
0 notes
Photo

18 x 18 Octagon Crafting Shed Making Blueprints - Matters To Consider While Constructing A Storage Shed
A outbuilding floor will be exposed to moisture and in time may rot if the proper materials are not used. Your outbuilding plans should opt for wood that has been pressure-treated which (https://sheddrafts.com/18x18-octagon-shed-crafting-plans-blueprints) ensures its longevity. Untreated construction lumber may cost less but eventually it will rot and ruin your building. You will need mudsills and floor and perimeter band joists to build a shed floor. The mudsill is a 2x6 piece of lumber which rests on top of the foundation. Floor joists rest above the mudsill to support the shed's walls while the band joist closes it off from the outdoors. Look for plywood that is exterior grade to put down as flooring in your outbuilding. To prevent bending and buckling of the floor make sure that the plywood is not smaller than ¾-inch. Plywood that is tongue and groove is a little more expensive but locks together and makes the floor stronger. Use screws when fastening the plywood as they hold better than nails. When making your wooden shed blueprints consider including the new models made of treated wood. High-density polyethylene combined with wood creates an outbuilding that is resilient and sturdy. Manufactured sheds are safe from fading and rotting and need very little maintenance. You can find wood outhouse kits available in a variety of sizes and some companies even offer expansion kits. Neither knowledge of carpentry nor many tools are necessary in constructing a simple prefabricated shed. Timber outbuildings can handle much more weight than plastic or metal sheds. You can also purchase a sheds that include overhead storage spaces. For ultimate strength and durability buy a wooden shed that also uses integrated steel supports. There are several different models of wooden sheds so you can pick the perfect one for you. Also it is very easy to improve your shed with different add-ones at any point.
youtube
Insulation can be harsh to work with so always wear a dust mask and gloves. First find the dimensions of the inside of the walls starting from the floor to the ceiling. A type of starter lining called an airflow (30 x 30 two car garage patio shed crafting plans) barrier is basically just a piece of fabricated plastic. Consider including elastic insulation in the patio shed construction schematics because of its low cost. Drafts of cold air from outside will have a harder time entering the outbuilding once the barrier is in place. Layer and overlap the plastic air barrier on the walls in the outhouse fastening as you go. Place whatever kind of siding the outhouse making diagrams call for to use atop of the air barrier. To guard against gases and other vapors it is a good idea to use fiberglass insulation. Using fiberglass requires that you cover it with another layer as it is irritating to the skin. Drywall works well as a fiberglass cover and can also be easily painted. Since most storage outhouses don't have electricity install windows to add light to the interior. If you are in the northern hemisphere it is best to affix your windows on the walls that face the east and south. Barn sash windows add character and are the simplest windows you can get. Straightforward single pane windows with plain frames made of wood should be available at any outdoor store. Installation of these windows is easy because you can install them upright or sideways. Be sure your outhouse plans organize windows properly as you don’t want to deprive yourself of valuable storage space on the walls. Skylights let a flood of overhead light into a outhouse and unlike windows can leave wall space free. Plastic dome skylights are inexpensive alternatives to skylights made for houses. Cut a hole in the ceiling where you would like to position your skylight and affix it with nails or screws. Plastic domes are not the most striking of skylights so place it in a discreet spot on the roof.
0 notes
Photo

30 x 30 Two Car Garage Patio Shed Crafting Plans - Points To Contemplate When Putting together A DIY Shed
When creating outbuilding blueprints you can provide for some fairly simple precautions to drastically cut your chances of your outbuilding being vandalized. Use good (https://sheddrafts.com/30x30-two-car-garage-shed-plans-blueprints) quality locking bars or padlocks on all windows and doors in your outbuilding. Invest in timers that turn lights on and off inside your outbuilding if you go out at night. Secure and fortify the area around your outhouse to protect all of your possessions. You can easily protect items in your outhouse by concealing the windows with drapes or blinds. Replace ordinary screws on outbuilding doors with non-return screws. Visibly mark your machinery and keep a list of your tools with serial numbers. If your property is stolen it will be easier to identify and return with your identifiable markings. Add extra fortification to your outbuilding by layering the inside with supplementary boards according to your shed building schematics. Use a metal cage and keep it locked when your outhouse is unattended to ensure valuable equipment is safe. Constructing a roof out of wooden shingles makes financial sense for small sized sheds. You can expect your roofing to survive a minimum of 30 years. Using a staple gun attach a piece of 1-inch felt over any rafters. Begin laying the shingles in an overlapping fashion. As you lay the shingles you can nail them down with roofing nails. When making your backyard shed drawings decide if you would like to utilize tar to hold down strips of shingles on your roof. When all the shingles have been laid down on the roof you can start shaping them. You will need to cap the top of your shed by bending and overlapping the shingles. Not only will bending the shingles over the roof make it last longer it will also ensure it against water leakage. The thicker shingles work best in high winds and last the longest. You need a suitable foundation for your outhouse to rest upon or it will not last. Wherever you are designing the outhouse you should first remove grass and compact the area with gravel (21 x 22 pole frame barn garden shed assembly schematics) and a tamper. Using gravel under your foundation will ensure a dry area that will not cause rotting underneath your outhouse. There are two basic types of outhouse foundations known as on grade and permanent. On-grade foundations are suitable for small- to medium-size outbuilding blueprints up to about 200 square feet. These smaller foundations are typically made of solid concrete blocks or wooden timbers placed directly on the ground. Choose pressure-treated lumber that specifically designated for ground-contact use. Solid blocks made of cement should be used instead of ones with hollow-cores because they won’t buckle under the outbuilding’s bulk. Both the concrete blocks and wooden timbers must first be even and spaced closely enough to support a outbuilding’s floor frame. Once the pressure-treated lumber or solid concrete blocks are laid down on gravel you will have an easy foundation that will last for decades. Since most storage sheds don't have electricity install windows to add light to the interior. To let in the most sunlight install the windows on your south and east-facing walls. Barn sash windows add character and are the simplest windows you can get. Straightforward single pane windows with plain frames made of wood should be available at any outdoor store. Barn sash windows are versatile and can be hinged on the side or top. You can use the interior walls in a outbuilding as hanging storage so don’t overuse windows. Hanging storage and shelving will be plentiful if you opt for a skylight instead of multiple windows. Luckily there are economical plastic dome alternatives to the classic and expensive glass skylights in homes. To install a plastic dome skylight simply make a space in the roof sheathing and nail the skylight into place. To make the skylight more attractive place shingles around it to hide its base.
youtube
0 notes
Photo

21 x 22 Pole Frame Barn Garden Shed Assembly Schematics - What You Need to Know?
Instead of using electricity you can use windows to easily enhance and illuminate your shed. If you are in the northern (https://sheddrafts.com/21x22-pole-frame-barn-shed-plans-blueprints) hemisphere it is best to affix your windows on the walls that face the east and south. Barn sash windows add character and are the simplest windows you can get. Most creating supply stores will have barn sash windows made of uncomplicated wooden frames. Barn sash windows are versatile and can be hinged on the side or top. Be sure your patio shed crafting blueprints organize windows properly as you don’t want to deprive yourself of valuable storage space on the walls. If you like lots of sunlight but need wall space for storage you can install a skylight. Plastic dome skylights are inexpensive alternatives to skylights made for houses. Cut a hole in the ceiling where you would like to position your skylight and affix it with nails or screws. Place plastic skylights on the side of the roof that's least visible. In your diy outhouse assembly drawings you will need to decide between hinged or sliding doors. If you want doors that seal shut and work well in small spaces add hinged doors. Installing sliding doors is a simple task and they look really nice. However sliding doors do require more wall space than hinged doors. For smaller outbuildings it is recommended to use a single door with hinges. The longest side of your shed is the best placement for any door you choose. Measure twice and cut once to ensure the lengths and heights are correct. It is important to have accurate dimension or the door will not fit properly. Look in any home center to find a multitude of hinges made from various materials. Choose a sturdy hinge arrangement that will support a heavily used door.
youtube
Building a proper foundation is the most important step in your outhouse assembly diagrams. The first item on your outhouse plan should be to level the ground where the shed will go and add gravel. Using gravel under your foundation will ensure a dry area that will not cause rotting underneath (10 x 12 saltbox storage shed architecture schematics) your shed. The main kinds of foundations used for outbuildings are permanent or on grade. On-grade foundations are suitable for small- to medium-size patio outbuilding building blueprints up to about 200 square feet. To build an on grade foundation one will need blocks of concrete or wood. Choose pressure-treated lumber that specifically designated for ground-contact use. If you opt to use blocks be sure to choose ones made of solid cement as hollow-core wall blocks will crack under the weight of the building. Whether you are using cement or wood they should be leveled and then used to support the wooden floor frame. Once the pressure-treated lumber or solid concrete blocks are laid down on gravel you will have an easy foundation that will last for decades. Isolated outbuildings are vulnerable to criminals but you can follow these points to help protect your property. When you are not using your outbuilding be sure to lock it securely. Install security lighting around your outbuildings and isolated locations. Secure and fortify the area around your outhouse to protect all of your possessions. Use curtains to cover any windows to conceal valuable materials when you aren’t using your outbuilding. Replace ordinary screws on outbuilding doors with non-return screws. Mark valuable items with your house number and postcode using a UV pen or paint. Not only can property marking deter a thief from taking the items but it also acts as a way of tracing the owner should the goods be recovered by the police. Add extra fortification to your outhouse by layering the inside with supplementary boards according to your shed crafting diagrams. Ladders and spades should be secured to a strong fixed object as they can be used by thieves to gain access to other areas.
0 notes
Video
youtube
10 x 12 Saltbox Storage Shed Architecture Schematics - Matters To Think of When Developing A Outdoor Shed
If you are planning on using your outhouse for various projects it is essential you have power. The number one rule when working with (https://sheddrafts.com/10x12-saltbox-storage-shed-diy-plans-blueprints) wire and electricity is to be safe. To install electricity you must only use SWA cables. You can easily hide unsightly cables by burying your wires underground. Building regulations require that if you do decide to submerge your wires they need to be at least a yard below the surface. Try adding solar panels in order to either replace electrical wires or to supplement your power. Using a solar panel will mean that you need to place it where sufficient light reaches it between 11 am and nightfall. Buy roof mounts for your solar panel to help you easily affix it to the outhouse’s roof. When running the cable from the solar panel be sure that it is not crushed or bent. Consider buying wind turbines for an energy supply if you have a lot of wind. The decision of what kind of foundation you will need is dependent upon the size of your shed. Wherever you are putting together the shed you should first remove grass and compact the area with gravel (https://sheddrafts.com/22x24-cabin-loft-building-plans-blueprints) and a tamper. The gravel bed will make sure that the soil beneath the outbuilding will not wash away. The main kinds of foundations used for outbuildings are permanent or on grade. Small and medium sized outbuildings can be supported by an on-grade foundation which is typically made concrete blocks and wooded timbers. These smaller foundations are typically made of solid concrete blocks or wooden timbers placed directly on the ground. When placing timber directly on the ground be sure that it is green or pressure-treated. The best kind of concrete block to use is one that is not hollow as those provide minimal support. To make a supportive on grade foundation just lay out your blocks or skids in straight evenly spaced rows. You will be able to enjoy a outhouse with a long life by giving it the foundation it needs to last. The two types of doors most commonly used in outbuilding plans are sliding and hinged. If you (10 x 16 outdoor shed construction diagrams) want doors that seal shut and work well in small spaces add hinged doors. Use doors that slide when making your patio outbuilding diagrams because sliders can tuck away and are simple to mount. Keep in mind that if you install a sliding door you will need sufficient room on one wall. Medium to small sized sheds should opt for hinged doors as opposed to sliding doors. The best place to install a door is on the long side because you will be able to easily access all items. Be sure to measure the opening to your door twice so that you have an accurate dimension of height and width. A door which can seal properly and close securely will help compose the perfect shed. If you decide to use a hinged door there are many different styles available. Choose a sturdy hinge arrangement that will support a heavily used door. The floor in any outbuilding is often open to rain and water damage and will rot quickly. Green lumber that was pressure-treated is the best choice to use in outbuildings. Pressure-treated wood is much more weather-resistant than any other kind. You will need mudsills and floor and perimeter band joists to build a outhouse floor. The use of a mudsill is to rest it on your foundation and build the frame over it. Floor joists rest above the mudsill to support the shed's walls while the band joist closes it off from the outdoors. Look for plywood that is exterior grade to put down as flooring in your outbuilding. Three-quarter inch plywood is essential as anything more thin will flex and bend. To increase the firmness of your floor invest in grooved plywood that fastens together. Secure everything with galvanized screw instead of using nails that can rust easily.
0 notes
Photo

10 x 16 Outdoor Shed Construction Diagrams - Three Sure-Fire Tactics To Make A Shed Easily
If you are planning on using your outhouse for various projects it is essential you have power. Your shed drawings should include domestic electrical (https://sheddrafts.com/10x16-storage-shed-building-plans-blueprints) regulations as they are in place to protect you. Easy and especially safe cables to use when running electricity are steel wired cables or SWA. Running the SWA cable below ground is the preferred option as it will hide ugly wires. Choosing to bury your wiring requires that you place it a minimum of 3 feet underground. Try adding solar panels in order to either replace electrical wires or to supplement your power. Using a solar panel will mean that you need to place it where sufficient light reaches it between 11 am and nightfall. Buy roof mounts for your solar panel to help you easily affix it to the outhouse’s roof. Bolt the support rails horizontally across the bottom of your solar unit and attach a cable. Wind turbines can also be a useful source of power for any shed when there is less solar power available. Use a long-sleeved shirt and safety glasses when you work with any kind of insulation. Measure the outhouse’s interior walls from the footer boards up to the header boards. A type of starter lining called an airflow barrier is basically just a piece of fabricated plastic. Consider including elastic insulation in the backyard shed crafting drawings because of its low cost. The treated plastic keeps the inside of the outhouse warm while blocking any cold drafts. Just staple sections of the treated plastic insulation against the inside walls of your outhouse as you wrap around. The plastic liner will now work as a base for any additional insulation. To guard against gases and other vapors it is a good idea to use fiberglass insulation. Using fiberglass requires that you cover it with another layer as it is irritating to the skin. You can conceal the insulation with painted drywall sheets secured with 1-inch drywall screws.
youtube
You need a suitable foundation for your shed to rest upon or it will not last. The first item on your (8 x 10 gambrel timber patio shed assembling plans) outbuilding plan should be to level the ground where the outbuilding will go and add gravel. The gravel bed will make sure that the soil beneath the outbuilding will not wash away. The main kinds of foundations used for outbuildings are permanent or on grade. On-grade foundations are suitable for small- to medium-size outdoor shed diagrams up to about 200 square feet. On grade foundations are usually constructed with dense concrete blocks and rows of large skids. When placing timber directly on the ground be sure that it is green or pressure-treated. If you opt to use blocks be sure to choose ones made of solid cement as hollow-core wall blocks will crack under the weight of the building. To make a supportive on grade foundation just lay out your blocks or skids in straight evenly spaced rows. You will be able to enjoy a outbuilding with a long life by giving it the foundation it needs to last. You outhouse schematics can include the growing popularity of treated wooden outbuildings. The plastic material used in addition with the wood makes the setting up strong yet lighter than other outhouses. Treated wood sheds are UV-protected and stain-resistant so they will not crack or fade. Customization of wooden outbuildings is easy as many manufacturers offer kits to expand and change your outhouse. Neither knowledge of carpentry nor many tools are necessary in constructing a simple prefabricated shed. Wooden sheds are extremely strong and can bear a lot of weight on their walls. Some models include an overhead loft area which allows more storage. A double-walled prefabricated outbuilding will increase the sturdiness of your building. Wooden outhouses can be painted plus they have many different patterns from which to choose. Also it is very easy to improve your outbuilding with different add-ones at any point."
0 notes
Text
8 x 10 Gambrel Timber Patio Shed Assembling Plans - Facts To Ponder When Building A Wooden Shed

If you are planning on using your outhouse for various projects it is essential you have power. Working (https://sheddrafts.com/8x10-gambrel-timber-storage-shed-plans-blueprints) with electricity can be dangerous so be aware of what is safe and practical. Whether you plan to lay the electrical cable above ground or under it you will need to use Steel Wire Armored cable. Running the SWA cable below ground is the preferred option as it will hide ugly wires. Building regulations require that if you do decide to submerge your wires they need to be at least a yard below the surface. Try adding solar panels in order to either replace electrical wires or to supplement your power. Using a solar panel will mean that you need to place it where sufficient light reaches it between 11 am and nightfall. Buy roof mounts for your solar panel to help you easily affix it to the outhouse’s roof. When running the cable from the solar panel be sure that it is not crushed or bent. Consider buying wind turbines for an energy supply if you have a lot of wind. You outdoor shed making blueprints can include the growing popularity of treated wooden outhouses. High-density polyethylene combined with wood creates an outbuilding that is resilient and sturdy. (https://sheddrafts.com) Treated wood outhouses are UV-protected and stain-resistant so they will not crack or fade. Customization of wooden outbuildings is easy as many manufacturers offer kits to expand and change your outbuilding. Wooden sheds are by far the easiest type of outbuildings to build and take the least amount of time. Wooden outbuildings are extremely strong and can bear a lot of weight on their walls. Look for models that have storage room directly above instead of using the walls to hang weighty tools. A double-walled prefabricated outbuilding will increase the sturdiness of your building. There are several different models of wooden outhouses so you can pick the perfect one for you. Another bonus of manufactured sheds is that they are virtually effortless to renovate.
youtube
Some parts of wooden outbuilding diagrams are simply too time consuming to do yourself. If you have a lot of land to clear you can hire a landscaping contractor to move rocks and earth. You can rent out (8 x 10 gable playhouse timber shed creation schematics) an excavator for a day to dig postholes or haul dirt. Look for a local mason to mix and pour any concrete footings and slabs. Communicate with electricians if you need wiring done in the outbuilding. Many people will get their family and neighbors involved in the outbuilding project for extra help. Call up your local home center to lease or rent tools that are needed. Purchase mail order outhouse blueprints from any online sources if you need guidance. Consider buying a outbuilding making kit with everything included if you don’t want to start from scratch. Have a look at packages on how to hire a contractor that will provide you with all the information you'll need to know to get someone else involved. Cedar shingles are a great option for those who are setting up a shed on a budget. You can expect your roofing to survive a minimum of 30 years. Next attach a thick piece of constructing felt over the roof structure with staples and cut any excess away. Begin laying the shingles in an overlapping fashion. The easiest way to fasted the shingles to the frame is to use a nail gun. You could use tar as well to hold the shingles down but that will require a bit more work. When all the shingles have been laid down on the roof you can start shaping them. Continue to shape the roof's top as well by bending the shingles. Overlapping the shingles will make your outhouse water proof. Buy the thickest shingles you can find if you want to invest a little extra in making your roof durable.
0 notes