
proggingwhatsthatffxiv
A blog that will soon be deleted lol
7 posts
Don't wanna be here? Send us removal request.
Last Seen Blogs

billie3469
Untitled

berrakrana
fennaa.wqzz
mydayswithkota
Kota20211015

aflashofcold
scarlet speedster simp

mm-nkl
[ tanbura- ]
Video
youtube
Phase 2: Quintuplecast
Please refer to video for a visual of what to do during this phase. Starts at 8:47
Suggestion: As soon as Quintuplecast starts casting, party should huddle into the center and position themselves in their respective (inter) cardinal.
This will allow the party to handle all aoes and spread/holy mechanics with ease. Player who is inflicted with Absolute Flash (eye) should move a tad away and face away from all party when that part comes. If easier, said affected player may yell which direction they’ll be facing.
When in doubt! It’s better to get smack with a fire or flash than getting stoned or freeze!
0 notes
Photo

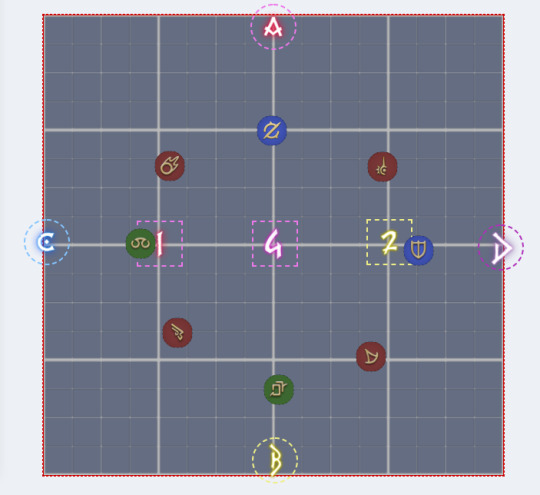
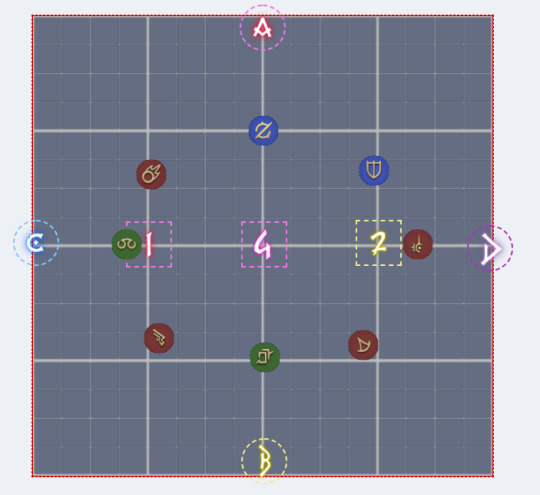
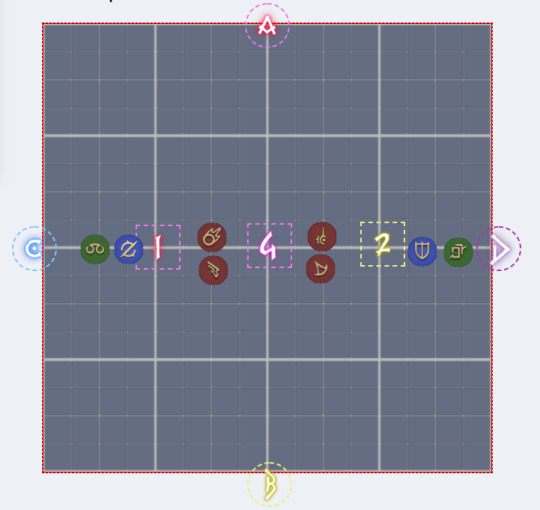
Suggestion: Since we are all range comp, THMR (Tanks, Healer, Melee, Range) should be adjusted to TH D1 D2 (Tanks, Healers, dps team 1, dps team 2)
MT x OT
SCH x AST
BLM x MCH
RDM x SMN
When phase comes, tanks start @ North /A, Healers @ South/B, Team DPS 1 @ West/ C and Team DPS2 @ East/ D.
Please wait til order is conducted and adjust according. When in doubt, follow your respective role pair. Takes approximately 5 seconds per spawn I believe. You may use your status alignment as a count down to know when to move on to the next tower if you don’t like counting.
0 notes
Photo
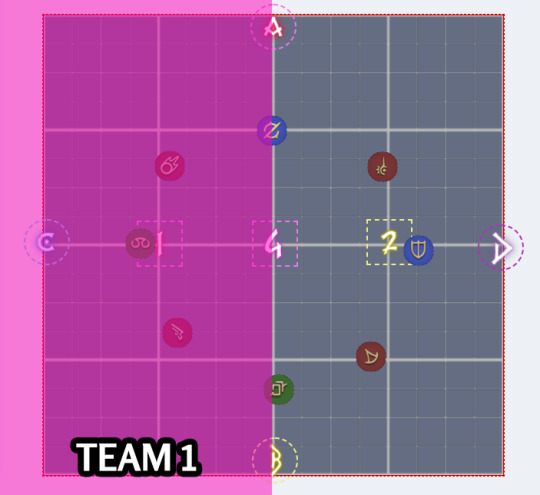
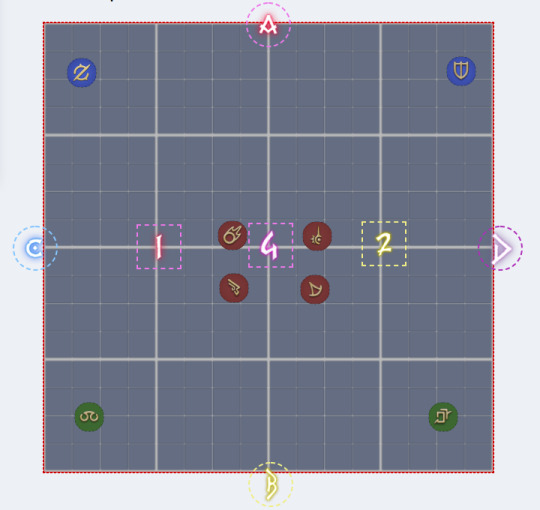
We sorta ended up with...
But either or is fine, if it’s easier for RDM to be NE vs E to reach to drop meteorite, I recommend swapping. In addition, for meteorite pairing, since it’s an all range comp we should go to the closest person... Ideally thinking of something like below..
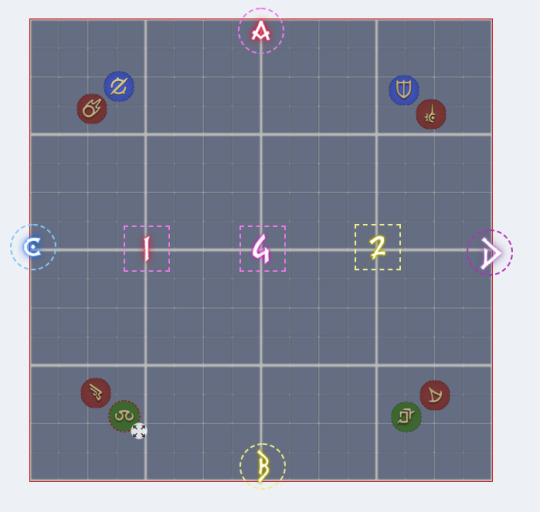
Keep in mind your meteorite pairings are not the same as your tower paring during the BLM x WHM phase.
0 notes
Video
LIMIT BREAK 2: Radiant Desperado
Radiant Desperado LOCKS to healer and whomever at the time with you as soon as the cast ends. Do NOT stand around, make sure you're with someone by the time his cast bar finish casting!
Suggestion: As soon as Absolute Holy ends, rush back to the respective Waypoint 1 and 2 for incoming impact.
0 notes
Video
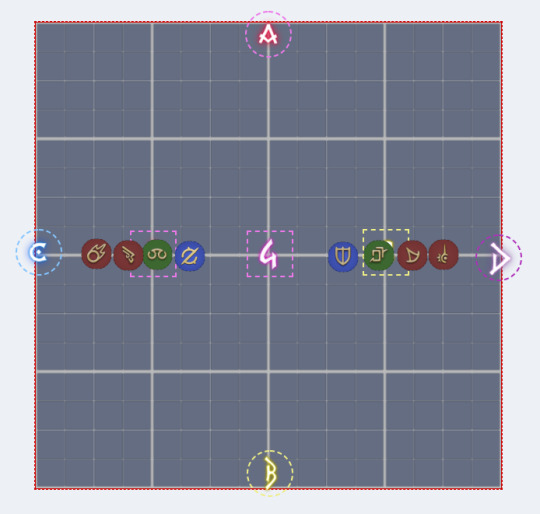
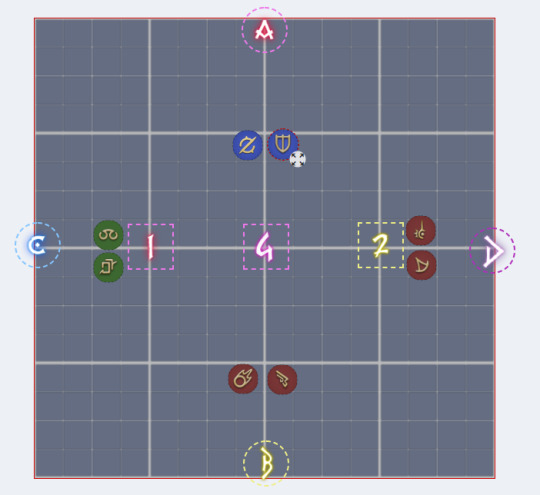
Specter of Light (ADD PHASE)
** Fail execution. Please refer to: AKHM for example.
Showing this so we may see what went wrong here. The strats we’re adopting is the DPS CORNERS, HEALER + TANK STACK, DPS TOWERS, HEALER + TANK TETHERS.
Video Visual reference: https://youtu.be/1KUEBrH0lY4
Suggestion: After Twin Cast Tower ends, DPS will move towards the center, (Waymark G), making it easier for tanks and healers to pick up the tethers. This way we will run a lesser risk of playing hot potatoes. This was our number one offender.
0 notes
Video
PHASE 1: Summon Wyrm x Absolute Flash
(Fake) Bahamut will always drive from the North side, which is Waypoint A. Right as “Summon Wyrm” finish casting and/or you see the ground AOE “Solemn Confiteor” underneath you, swap your camera facing towards North/A so you may determine which side avoid. Do not run off too far, do your best to not be far from your assign position.
KEEP IN MIND, Absolute Flash will be happening too at the same time, so make sure to face away from the eye.
Suggestion: Personally just for the 1st phase I recommend the person with eye marker run up north so we may see where they are. Mostly because this is the introduction of the Wyrm mechanic so you’ll want to adjust camera to look towards North to see where the Wyrm is coming.
(example in video: BLM ran to the top corner)
0 notes
Video
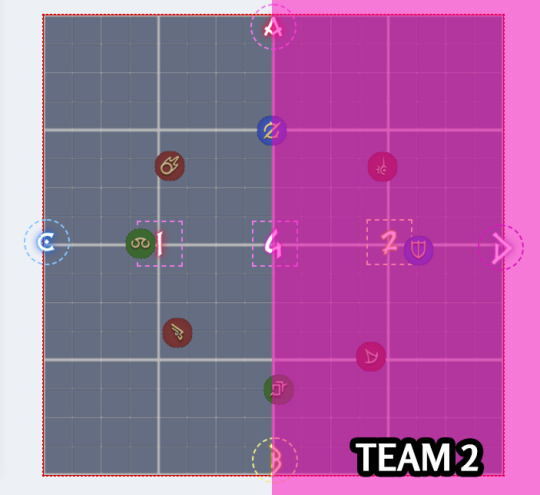
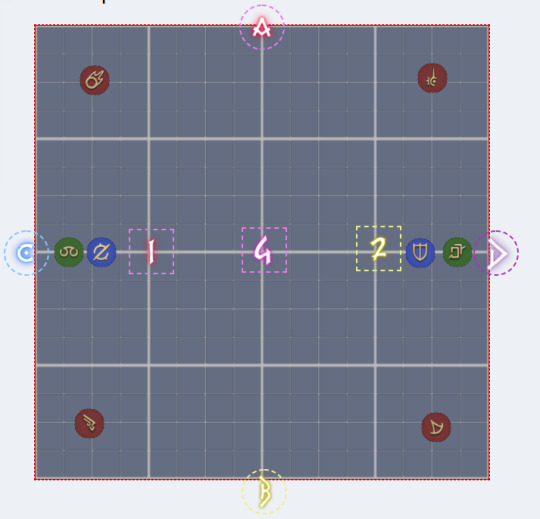
LIMIT BREAK 1: Radiant Braver
** Excuse the typo on video, suppose to be Team 2 DPS @ East (D/2)
Though originally I suggested Tanks goes North, Healer South and DPS yolo (stay at West/East), I notice we ended up adjusting to this for the remainder of the encounter. Therefore I suggest we do this for the LB 1.
Suggestion:
Tanks: North (A)
Heaters: West (C/1)
Team 1 DPS: South (B)
Team 2 DPS: East (D/2)
0 notes