
Pro HVAC Insights offers expert HVAC guides, tips, and troubleshooting advice to help homeowners and professionals maintain comfort and efficiency year-round.
Don't wanna be here? Send us removal request.
Statistics
We looked inside some of the posts by prohvacinsights and here's what we found interesting.
Average Info
Notes Per Post
1
Likes Per Post
1
Reblog Per Post
0
Reply Per Post
0
Time Between Posts
3 days
Number of Posts By Type
Text
6
Last Seen Tumblr Blogs


Fun Fact
China blocked Tumblr because of pornography and censorship problems in 2013.
Text
What Causes Water Leaks in Your HVAC Unit and How to Avoid Them
Moisture pooling around an HVAC unit often signals a mechanical issue that needs prompt attention. If left unaddressed, it may lead to structural damage, mold growth, or even electrical hazards. Understanding the key causes of water leaks and implementing preventative steps helps protect both the system and indoor comfort.
Common Causes of HVAC Water Leaks

Clogged Condensate Drain Line
The condensate drain removes moisture collected during the cooling process. Dust, dirt, and debris easily build up in the line, creating a blockage. Once the water has no path to exit, it backs up and overflows, leading to visible puddles around the unit.
Damaged or Rusted Drain Pan
Older systems often have corroded or cracked drain pans. When the pan fails to collect and channel the moisture into the drain line, it spills over the edge. Even a small crack causes continuous dripping during each cycle.
Dirty Air Filter
Restricted airflow from a clogged air filter causes the evaporator coil to freeze. Once the ice melts, excess water flows rapidly into the pan—often more than the pan can handle—resulting in overflow.
Low Refrigerant Levels
Insufficient refrigerant pressures reduce the coil's temperature. This creates conditions for freezing and thawing, leading to water leakage. The root of the problem lies in a leak or undercharged system, both of which need expert inspection.
Improper Installation or Sloped Drain Line
Poorly installed systems, particularly those with incorrectly sloped drain lines, fail to direct water out efficiently. Gravity-fed drainage needs proper alignment to function. If the angle is off, water collects in the line and eventually spills over.
Faulty Condensate Pump
In HVAC systems installed in basements or below-grade areas, a condensate pump moves water upwards to a suitable drainage point. If the pump malfunctions, moisture remains trapped and eventually leaks around the base.
Prevention Tips to Avoid Water Leaks
Clean the Drain Line Regularly Flush the condensate line using a mix of water and vinegar to prevent blockages. Routine cleaning discourages algae, mold, and bacterial buildup.
Inspect the Drain Pan Annually
Check for rust spots, cracks, or corrosion. If damaged, replace it with a new pan designed for your unit’s model and size.
Replace Air Filters Monthly or As Recommended
Consistent airflow keeps the evaporator coil at optimal performance and prevents freezing. Clean filters also help maintain indoor air quality.
Schedule Routine HVAC Maintenance
Professional maintenance includes refrigerant checks, coil cleaning, and drain line flushing. Early detection of potential leaks saves time and costly repairs.
Verify Correct Unit Installation
Ensure the system is level and that drain lines are properly sloped. Consult a certified HVAC technician to confirm all installation aspects meet current standards.
Frequently Asked Questions
Q1: Why is there water around my indoor HVAC unit?
Water near the unit usually results from a clogged drain line or a full drain pan. It may also indicate a frozen evaporator coil thawing too quickly. A technician should inspect the unit to identify the exact cause.
Q2: How often should I clean the condensate drain line?
It’s recommended to clean the drain line every three months. In humid environments or heavy-use seasons, monthly cleaning ensures better drainage and helps prevent microbial growth.
Conclusion
Understanding what causes water leaks in your HVAC unit and how to avoid them is essential for long-term system performance. Whether it’s due to blocked drains, faulty parts, or poor airflow, proactive attention reduces risks and extends the life of the system.
#HVAC water leaks#AC unit leaking#HVAC maintenance tips#prevent AC moisture#air conditioner water puddles#drain line cleaning
0 notes
Text
Outdoor AC Unit Submerged: What to Know
Heavy rain, flash floods, or rising groundwater put outdoor AC units at risk of water damage. A submerged condenser unit raises serious concerns, from electrical hazards to system failure. Quick and informed action protects your HVAC system and home from further issues.

Understanding the Risks of a Submerged AC Unit
Water exposure threatens both electrical and mechanical components. Outdoor units are built to withstand rain, but not full submersion. Prolonged contact with water affects performance, safety, and longevity.
Signs of Potential Damage
Circuit breakers tripping frequently
Burnt or musty odor near the unit
Visible corrosion or rust on the housing
Unusual noises during startup or operation
Weak or warm airflow indoors
What to Do First After Submersion
Shut off power at the breaker box before inspecting or attempting to start the unit. Allow the area to drain and dry completely. Do not turn the system back on until a technician confirms it's safe.
Key Steps to Take Immediately
Turn off electricity to the AC unit at the main panel
Visually inspect for debris, mold, or standing water
Check for damage to insulation, wires, and housing
Contact an HVAC professional for a full system evaluation
Take photos for warranty or insurance purposes
Avoid running the unit until it has been serviced
What a Technician Will Inspect
Certified HVAC technicians evaluate both electrical and refrigeration systems. Damage to the compressor, fan motor, and control board is common after flooding. Technicians also check refrigerant levels, drain lines, and internal corrosion.
Prevention Tips for Future Flooding
Install the unit on a raised concrete pad
Improve yard drainage near the unit’s location
Clear vegetation or obstructions that trap water
Consider protective covers during storm season
Understanding how to respond to a submerged system keeps your HVAC unit protected. Taking the right steps prevents further harm and ensures the system operates safely. Homeowners who act quickly limit damage and extend system life.
The most critical thing about an outdoor AC unit submerged: what to know is that water and electricity never mix. Professional inspection and recovery are essential for restoring reliable cooling.
FAQs
Q1: Will a submerged AC unit always need replacement?
Not always. If the damage is minor and addressed quickly, cleaning and part replacement may restore function. A technician’s assessment determines what repairs are necessary.
Q2: How long should I wait before restarting a submerged AC unit?
Wait until a licensed HVAC professional inspects and clears the system for safe operation. Restarting a wet or damaged unit risks further damage or electrical shock.
#flooded AC unit#condenser#HVAC#ac maintenance#ac compressor issue#HVAC guide#AC safety tips#HVAC professional#Outdoor AC
0 notes
Text
Effective Strategies to Reduce Allergies in Your Home
Allergens inside the home trigger reactions year-round. Dust mites, pet dander, mold spores, and pollen accumulate quickly, especially in poorly ventilated or cluttered spaces. Clean air and allergen control start with small changes that produce lasting results.

Focus on Air Quality First
Indoor air quality plays a major role in managing allergies. The average home traps pollutants from both inside and outside sources. Improving ventilation and filtration lowers exposure and supports respiratory health.
Key Steps to Improve Indoor Air
Use high-efficiency air filters and replace them regularly
Run exhaust fans during cooking and bathing
Open windows briefly to refresh stale air (weather permitting)
Maintain humidity between 30%–50% with a dehumidifier
Schedule routine HVAC maintenance for optimal performance
Target Dust and Dander Buildup
Soft surfaces attract and hold allergens. Bedding, curtains, carpets, and upholstered furniture collect particles that trigger symptoms.
Tips for Controlling Indoor Allergens
Wash bedding weekly in hot water
Vacuum carpets and rugs with a HEPA-filter vacuum
Replace heavy drapes with washable or hard-surface alternatives
Clean hard floors with a damp mop instead of sweeping
Keep pets off furniture and out of bedrooms
Declutter to Limit Surfaces for Allergen Collection
Fewer objects mean fewer places for allergens to settle. Clutter-free rooms are easier to clean and sanitize regularly.
Decluttering Best Practices
Store items in sealed bins or drawers
Limit indoor plants if mold is a concern
Dispose of old magazines, papers, and unused textiles
Organize closets and clean storage areas monthly
Use Allergen-Proof Covers and Clean Materials
Mattresses and pillows trap skin cells and dust mites over time. Specialized covers and frequent cleaning block allergen buildup.
Helpful Protective Measures
Encase mattresses and pillows in allergy-proof covers
Choose washable pillow inserts and covers
Use blinds or shutters instead of fabric shades
Wash stuffed animals, pet bedding, and slipcovers often
Maintain a Pet-Cleaning Routine
Pets bring allergens indoors, even if they don’t shed. Dander, saliva, and outdoor pollen cling to fur and paws.
Effective Pet Care Habits
Wipe paws before pets come inside
Bathe pets regularly with vet-approved shampoos
Brush pets outdoors to prevent hair buildup inside
Use air purifiers in rooms where pets spend time
Understanding effective strategies to reduce allergies in your home helps protect loved ones and maintain a cleaner living space. Small improvements in daily habits make a noticeable difference in comfort and breathing ease.
FAQs
Q1: Which air filter is best for reducing indoor allergens?
HEPA filters are most effective at trapping dust, dander, and pollen. Look for filters rated MERV 11 or higher for better allergen control.
Q2: Is it better to use carpets or hard flooring for allergy prevention?
Hard flooring is easier to clean and less likely to trap allergens. Replacing carpets with wood, vinyl, or tile reduces exposure significantly.
#home#allergy#indoor allergens#improve air quality#reduce dust mites#clean air strategies#allergen prevention#allergy relief home#Strategies to Reduce Allergies
0 notes
Text
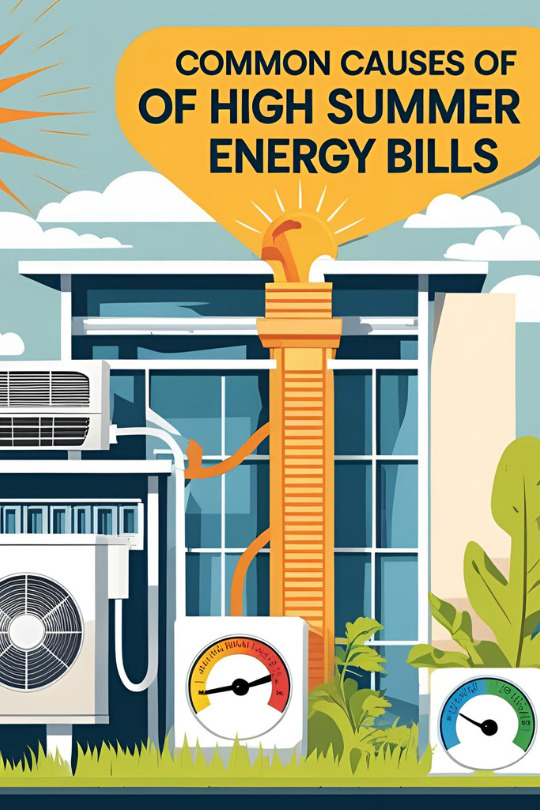
Reasons for High Electricity Bills in Summer
Soaring energy bills during summer months leave many households puzzled and frustrated. While it's natural to increase air conditioner usage in hot weather, there are multiple factors that silently contribute to rising utility costs. Understanding the root causes behind these high expenses helps in taking the right steps toward energy efficiency and financial relief.
Common Causes of High Summer Energy Bills
Increased Air Conditioner Usage
Cooling systems work harder in hot weather, especially if the thermostat is set too low. The greater the temperature difference between indoors and outdoors, the longer the AC runs to maintain comfort. Over time, this consistent strain leads to higher energy consumption.
Poor Home Insulation
Insufficient insulation allows cold air to escape and warm air to enter, making cooling systems work overtime. Attics, windows, doors, and walls without proper sealing significantly impact a home’s ability to retain cool air. Heat infiltration is one of the biggest contributors to summer energy waste.
Inefficient HVAC System
Older air conditioning units or those lacking maintenance are less efficient. Dirty filters, clogged coils, and outdated components force the system to draw more power to achieve desired temperatures. A well-maintained system consumes less energy and performs more reliably.
Phantom Power Draw
Electronics and appliances plugged in but not actively in use still draw power. Game consoles, desktop computers, televisions, and kitchen appliances silently increase electricity bills. Unplugging devices or using a smart power strip reduces this passive energy use.
Daytime Appliance Usage
Running dishwashers, ovens, dryers, or washing machines during the hottest parts of the day generates extra heat indoors. That added warmth makes the air conditioner work harder to cool the space. Shifting these tasks to early morning or late evening hours limits energy waste.
Excessive Lighting
Standard incandescent and halogen bulbs produce heat along with light. Keeping multiple lights on during daylight hours adds unnecessary warmth to living spaces. Replacing them with LED alternatives minimizes heat production and reduces energy draw.
Leaky Ductwork
Conditioned air that escapes through gaps in ductwork results in longer system runtimes. Leaks reduce overall efficiency and cause energy bills to climb steadily. Properly sealed ducts ensure the cooled air reaches its intended destination without loss.
Incorrect Thermostat Settings
Setting the thermostat too low creates a constant energy demand. A smaller difference between indoor and outdoor temperatures lessens strain on the cooling system. Installing a programmable thermostat helps regulate indoor temperatures more efficiently throughout the day.
Heat-Producing Electronics
Televisions, desktop computers, and even large refrigerators emit heat during operation. In rooms with multiple devices, the ambient temperature rises, prompting the cooling system to stay active longer. Keeping these devices in well-ventilated areas and turning them off when not in use limits their impact.
Poor Ventilation
A lack of airflow traps warm air inside the home. Closed doors, blocked vents, or heavy drapes can prevent cool air from circulating freely. Ensuring interior spaces have proper ventilation supports your HVAC system and leads to better energy management.
Using these insights, households gain control over their energy usage. Addressing these causes of elevated costs not only brings relief during warmer months but also creates long-term savings. The reasons for high electricity bills in summer are often avoidable with thoughtful home adjustments and efficient usage habits.
FAQs
Q1: Is it better to leave the AC running all day or turn it off when leaving home?
Turning the AC off or setting it to a higher temperature when leaving reduces energy use. A programmable thermostat can automate this process efficiently.
Q2: How frequently should HVAC filters be replaced in summer?
Filters should be checked monthly during peak cooling season and replaced if they appear dirty. Clean filters allow better airflow and reduce strain on the system.
#energy costs#summer#electricity bill#hvac tips#home cooling#energy efficiency#save energy#AC usage tips
0 notes
Text
How to Prevent Mold in HVAC System
Mold thrives in dark, damp, and poorly ventilated spaces—which makes HVAC systems a common hiding place. Once mold establishes itself inside ducts or near coils, it affects indoor air quality and can trigger respiratory issues. Knowing how to prevent mold in HVAC system components isn’t just about comfort—it’s essential for long-term system efficiency and health.
A Step-by-Step Guide to Prevent Mold in Your HVAC

Controlling indoor humidity, improving airflow, and keeping components clean stops mold from taking hold. These steps ensure smoother operation and help avoid costly repairs in the future.
1. Understand What Causes Mold in HVAC Systems
Moisture is the biggest contributor. Cooling coils naturally produce condensation, and if that water doesn't drain properly, it pools in areas mold favors. Dust and organic debris trapped in filters or ducts act as a food source, accelerating growth. Poor airflow worsens the problem, trapping moisture and reducing evaporation inside the system.
2. Control Moisture Sources
Check drip pans regularly for standing water. Even a small pool beneath the coils creates the perfect breeding ground. Condensate drain lines should remain clear and flushed so that water flows freely out of the system. Damp insulation around ductwork, especially in basements or crawlspaces, should be replaced with mold-resistant materials to eliminate risk zones.
3. Keep Filters Clean and Upgraded
Filters trap dust and airborne particles, but if neglected, they become mold magnets. Replace standard filters every 30 to 60 days. HEPA or high-efficiency filters are even better—they capture finer particles and reduce the organic buildup mold needs to grow. Regular upgrades help maintain airflow and reduce indoor contaminants.
4. Seal and Clean Ductwork
Leaky ducts let moisture and debris enter places they shouldn’t. Inspect ductwork for gaps or cracks and seal them using mastic or foil-backed tape. Any visible dust, dirt, or buildup inside the ducts should be removed. A professional cleaning service helps eliminate contaminants and prevents mold from returning.
5. Manage Indoor Humidity
Humidity above 50% encourages mold development. Keep it between 30% and 50% to reduce the risk. A whole-house dehumidifier is ideal for year-round control, though portable units can work in high-risk areas. Use a hygrometer to track indoor humidity, especially in bathrooms, kitchens, and laundry spaces.
6. Improve System Ventilation
Every room should receive proper airflow. Obstructed vents or closed registers trap moisture and reduce circulation. Exhaust fans in bathrooms and kitchens reduce moisture buildup, especially after showers or cooking. Consistent airflow keeps internal HVAC components dry and mold-resistant.
7. Add UV Light Protection
UV germicidal lamps target microbial growth where it begins—on damp coils and inside air handlers. Installing these lights near drip pans and evaporator coils helps stop spores from spreading through the duct system. Homes in humid regions benefit most, but any HVAC system in a moisture-prone setting sees improved results.
8. Schedule Routine HVAC Maintenance
An HVAC technician should inspect the system at least once or twice a year. Professional servicing includes coil cleaning, duct checks, and mold prevention treatments. These visits catch early signs of water accumulation or mold before serious damage occurs.
9. Recognize Warning Signs of Mold
A persistent musty odor from vents suggests mold is present. Look for visible discoloration around vents or air handlers. Indoor allergy flare-ups may also point to unseen mold inside the system. Quick action at the first sign prevents widespread contamination.
FAQs
Q1: What symptoms suggest mold may be in an HVAC system?
Musty smells from vents, visible mold spots, and increased allergy symptoms indoors are key indicators. Frequent headaches or respiratory irritation may also occur.
Q2: Is UV light a reliable method for mold prevention in HVAC units?
Yes, UV lights placed near coils and pans effectively reduce mold and bacteria on moist surfaces, especially in systems exposed to high humidity.
Conclusion
Consistent upkeep, proper airflow, and targeted humidity control offer a strong defense. Understanding how to prevent mold in HVAC system parts ensures cleaner indoor air, longer system life, and fewer health complaints. Regular maintenance pays off in comfort, efficiency, and peace of mind.
0 notes
Text
Split ac not cooling but fan is running
A split air conditioner running its fan without delivering cool air often points to deeper issues inside the system. From power supply inconsistencies to worn-out components, several hidden factors might be behind this frustrating experience. HVAC experts reveal why your split AC isn’t cooling (even if the fan is on), and how to pinpoint what’s really going on.
Split AC Fan Running but No Cooling? Here’s What’s Wrong

Image Source: canva.com
1. Clogged Air Filters Restrict Airflow
Dust and debris build up inside air filters over time. Blocked filters limit airflow, putting stress on internal components. Reduced airflow prevents the system from cooling efficiently. Cleaning or replacing the filters regularly helps restore proper performance and airflow circulation.
2. Refrigerant Level Has Dropped
Refrigerant absorbs heat from indoor air and transfers it outside. If levels dip due to a leak or system degradation, the unit struggles to cool. A technician uses pressure gauges to assess refrigerant levels and locate possible leaks. Restoring the correct charge ensures the system absorbs and removes heat effectively.
3. Faulty Thermostat Signals
If a thermostat sends incorrect signals, the compressor may fail to engage, even though the fan operates normally. Calibrating or replacing the thermostat restores accurate temperature readings and system communication.
4. Compressor Has Malfunctioned
The compressor plays a critical role in the cooling cycle. If it fails, the refrigerant cannot circulate through the system. A humming sound with no cold air suggests the compressor has trouble starting. Electrical faults or mechanical damage often require professional repair or replacement.
5. Dirty Condenser Coils Reduce Heat Exchange
Outdoor condenser coils release absorbed heat. Dirt or grime covering these coils traps heat inside the system, reducing cooling efficiency. Cleaning the coils helps the unit expel warm air, restoring optimal performance.
6. Capacitor or Contactor Problems
Capacitors and contactors help start the compressor and fan motor. If these electrical parts fail, only the fan might work, leaving the system without cold air. A technician checks these components during inspection and swaps out damaged parts.
7. Electrical Issues or Blown Fuses
Power fluctuations or blown fuses might prevent the compressor from starting. Although the fan operates independently, other parts might receive limited or no power. Inspecting the circuit board and fuse box highlights issues that disrupt power flow.
8. Incorrect Mode or Temperature Settings
An overlooked reason lies in the AC’s settings. If the unit is set to “fan mode” instead of “cool mode,” it will only circulate air without lowering the temperature. Setting the temperature lower than the current room temperature triggers the cooling cycle.
9. Aging System Efficiency Declines
Wear and tear over years of use reduces performance. An older unit with worn parts, aged wiring, or outdated technology might struggle to cool despite the fan running. In some cases, replacing the system becomes more cost-effective than continued repairs.
Frequently Asked Questions
Q1: Is it safe to keep running my split AC if it's not cooling but the fan is on?
A: Running the unit without resolving the issue can strain internal components and lead to bigger problems. It’s best to diagnose and address the cause promptly.
Q2: How can I tell if my AC has low refrigerant?
A: Signs include weak cooling, hissing noises, and ice buildup on the evaporator coils. Only a certified technician can confirm with pressure testing.
HVAC experts reveal why your split AC isn’t cooling (even if the fan is on), and most issues trace back to airflow blockages, component failure, or refrigerant loss. Regular maintenance helps catch problems early and extend your unit’s life.
#split ac#split ac not cooling#ac fan#ac compressor issue#hvac#ac maintenance#hvacparts#hvac maintenance#air conditioning
1 note
·
View note