
Last Seen Blogs


Text
Free Malwarebytes For Mac
Free Malwarebytes For Macbook Pro
Install Malwarebytes With Key
May 10, 2021 Upgrade to the latest Malwarebytes version. Open Malwarebytes. Click the Malwarebytes menu in the menu bar, then choose Check For Updates. When the download completes, click Install Now. After installation, Malwarebytes re-opens to the most current version. Note: Malwarebytes for Mac does not replace Malwarebytes Anti-Malware for Mac. See full list on download.cnet.com.
In the past, I contacted Apple multiple times. One thing I learned is that when their tech support suspects a possibility of a virus on your Mac, they usually suggest downloading and running free Malwarebytes.
While I have never found any malware on those occasions, I do know how Malwarebytes works and can help you decide whether you need it or not and whether it is worth paying for.
In this article, I would only cover Malwarebytes for Mac. There is also a Windows version, but I have no opinion about it.
The story of Malwarebytes for Mac started when it was called AdwareMedic. The product was a donationware developed by Thomas Reed. In 2015 Malwarebytes, a software company from California acquired AdwareMedic and rebranded it as Malwarebytes Anti-Malware for Mac. The best thing is it still has a free version.
Malwarebytes Reviews
The company displays reviews on its main site. At the moment of writing, there were 123 reviews with an average rating of 4.8. Since most people usually leave reviews when they extremely happy or extremely unhappy with the product, the rating is impressive.
Most positive reviews mentioned the cases when the product was able to catch a virus or malware. There are a few negative reviews, and they mention problems with contacting the support.
And the majority of reviews mention that they were recommended by Apple tech.
Malwarebytes Free vs. Premium
If you go to the Download page, you can see a table comparing Malwarebytes Free and Premium editions. Scanning for threats and removing malware is the same in both versions.
In addition, the Premium version comes with real-time verification. And this part is crucial.
If the free version scans and detects viruses after they get on your Mac, the Premium version stops the malware before the Mac gets injected.
So, every time you open a mail attachment or browse a site, the Premium version of Malwarebytes verifies that they are free from malware. The free version doesn’t do it.
It means that when you browse a compromised web site, the free software will let you download malware, install it, and run. Imagine, you somehow got Keranger, MacRansom, or another ransomware app.
How long do you think it will take until it encrypts the entire disk? If you didn’t run scans while the malware was running quietly on the background, you might end up with a totally dead computer.
Malwarebytes allows running scheduled scans, but the feature is only available in Premium edition.
Malwarebytes has an API that can be called programmatically, and I have to admit, I tried to devise a plan to force the free version to run on a schedule I could set up with a third-party app. Unfortunately, the ability to run scans is only available with Premium, so no luck.
Is Malwarebytes Free Good Enough
To find how good is free Malwarebytes, I ran a test. The full video of the test is on YouTube:
I downloaded and installed Malwarebytes for Mac. After installation, I intentionally chose a free version (I could’ve choose a free 14-day Premium trial).
In my test, I had two keyloggers installed: Elite and Refog. Both are legitimate products, and they can be legally purchased online.
But since by nature they perform something that can be classified as potentially dangerous (if they were installed by someone who wants to steal your data), most antivirus products should detect them. Malwarebytes, even free ones, quickly detected them. So far, so good.
However, my Mac contained more than two keyloggers.
When I was working on testing antimalware solutions for Mac, I downloaded 117 malware samples to my Mac. They all resided in one folder on the startup disk.
Free Malwarebytes For Macbook Pro
However, the scan didn’t detect anything.
So, I browsed to my Virus folder and started AdWind. AdWind is a type of backdoor. It can download malicious software, execute remote commands, send data to the server controlled by a hacker, and record it through the webcam.
The only notification I got was from Apple, which stated that I shouldn’t download unverified software from the Internet. It’s a standard message you can get when downloading any executable. And in most cases, most users ignore the warning.
What about MalwareBytes? It didn’t warn me about anything.
But since I knew about the malware, I was able to find its traces: the folder it created under Users folder and a file in the LaunchAgents.
Then I ran another malware: Calisto.
Calisto disguises itself as an Intego antivirus installer. But this is not a real antivirus. It tricks you into entering an admin password (something we all do when installing antiviruses), but in fact, it created a new hidden folder called .calisto under Users folder.
So, what Calisto does: it’s another backdoor malware. It gives remote access to the hacker – it enables remote login, screen sharing, creates a hidden root account, etc.
Again, Malwarebytes said nothing.
The last malware I tried was Lamepyre. It pretends to be a Discord app, but it’s not. Instead, it takes screenshots and sends them to the server controlled by hackers.
Again, Malwarebytes didn’t warn about anything.
After that, I ran a manual scan, and finally, Malwarebytes detected all of them very quickly and offered to quarantine malware.
So, that’s the main difference between free and Premium versions: the free version does not support real-time protection.
The problem with this is that users may have a false sense of security after installing the program, when in fact, it does not protect your Mac unless you run manual scan pretty much every time after you do anything online or copy and file.
What I Like About Malwarebytes
I liked two things:
Speed
Malwarebytes is insanely fast. I tested a dozen of antivirus products, and I know what I am talking about: MalwareBytes scans faster than any other antivirus for Mac. On average, it takes no longer than 30 seconds for the Malwarebytes scan. However, there is a downside to faster speed, as indicated in things I don’t like section.
Virus and keylogger detection
Malwarebytes found all malware I was able to run on my Mac. And it was pretty good with keyloggers. The only keylogger it failed to detect was Perfect keylogger, but it is was hard to detect for all AVs (hence the name Perfect).
What I Don’t Like About Malwarebytes
No disk scan
Imagine you have a USB stick, and you want to check it for malware.
How do you do it normally when you have an antivirus? You plug it into your computer and point the AV to run a scan against the USB drive.
There is no such thing in Malwarebytes. Malwarebytes only detects malware when it is in memory; that’s why it scans so fast. Instead of scanning the entire disk and external drives, MalwareBytes quickly scans the processes in the memory, and that’s all.
If you try to open a file infected with a virus, then, depending on the version, the MalwareBytes will either do nothing (free) or scan it (Premium).
Lack of features
There three Premium features promoted on the compare screen: stopping exploit attacks, blocking ransomware attacks, and preventing access to and from known malicious websites. But if you look carefully, they are only available for Windows, not for Macs.
Why is this important?
Viruses and malware, in general, are just one way to harm your computer. Unfortunately, lately, the hacker community became larger and more active than before.
One way to attack a computer is to find a vulnerability in the OS, such as macOS, and use it to deploy a backdoor app. Once malware is installed, hackers can use it and run various exploits, such as track keystrokes, remote login, or screen sharing and then steal your information. Frankly, I would prefer to have protection from both malware and exploit attacks.
And now, I am ready to make a conclusion.

Conclusion
When Should You Use Free Malwarebytes?
If you notice certain changes in the MacBook behavior, such as sudden slowness, unusually high CPU, or Internet usage, and there is no other antivirus installed on Mac, then do what Apple tech support advises in this case: download free Malwarebytes and run the quick scan.
If there is a malware installed, the chances are that MB will find it.
Please check my review of other free Mac antiviruses.
When Should You Use Premium Malwarebytes?
If you need 24/7 malware protection, then the free version will not work for you. You have to upgrade to Premium. However, the absence of a disk scan makes MB a less desirable solution.

Instead, I suggest checking my post where I tested a dozen more antivirus products (in addition to Malwarebytes), and go with the one I recommend: Best Malware Detection App for Mac Removes 117 Viruses In 5 Min
What Is The Best Free Antivirus For Mac
This article is one of the “Best Free Antivirus” series, which also include reviews of:
The common perception of Macs is that they're practically immune from malicious software. This isn't true, although the risk is much lower thanks to built-in security measures and the fact the Mac doesn't get targeted as much as Windows PCs.
Eject Anti-Malware for Mac. Specification of Malwarebytes Anti-Malware for Mac. Platform: Mac OS X; Version: 1.2.6.730; License: Free For Personal Use Only; Name Of The Developer: Malwarebytes; How To Use Malwarebtye in Mac OS X. After finishing Malwarebytes for Mac download process. It is important to learn how to use it. Impossible to Activate license for Malwarebytes Premiun. If you are running Mac OS X High Sierra, don't buy this. Unfortunately I did and I can't do anything with it. Not even with the latest version 3.3.32. I purchased Malwarebytes Premium on 8aug17. At the time I was using Mac OS X El Capitan. It worked fine on that machine.
Whether or not you have – or even need – anti-virus software installed on your Mac for day-to-day protection, it still pays to be able to occasionally scan for malware – including less virulent forms such as adware, browser hijackers and potentially unwanted programs. PC users have found Malwarebytes Anti-Malware a powerful ally in the fight against malware, and now Mac users are being encouraged to give it a whirl too.
Like the free PC version, this initial release offers no real-time protection. It's a simple scan and remove tool, designed to detect various forms of Mac malware and then purge it. Its footprint is small, it's a synch to use, and it'll quickly flag up anything that's sneaked on to your system without you realising it. Don't be surprised if certain items aren't selected by default – these are typically legitimate files (like browser preferences) that have been modified by the infection. Removing these wipes all your browser settings, but you at least have the option of skipping this.
In most cases, Malwarebytes for Mac can simply remove any suspicious or infected files (this may require a reboot, but not always), but look out for an exclamation mark – this indicates the malware may be trickier to remove, and should provide a link to more help dealing with this particular infection.
Protect your mac from malware. Whether or not you believe in protecting your Mac from malware on an ongoing basis, there's no harm in installing Malwarebytes for Mac and occasionally letting it scan your hard drive. Like us, you might be surprised by what you find.
Verdict:
Malwarebytes has already carved out an enviable reputation for itself on the PC – and it's likely to do the same on the Mac too.
Malwarebytes for Mac Free Download: Malware is also known as malicious software. Various programs are designed to damage the device without the consent of the user. As the use of internet became everyone's play no doubt it is serving us in many ways like online shopping, banking, health care etc. But some hacker uses it in a negative way.
They hack your device to get your personal information for many purposes. It can ruin your career as well as your personal life too. That's the main reason why Malwarebytes for Mac is so important for you to install it on your computer system. Since it's free of cost and below are the points for the article of Malwarebytes for Mac Free Download.
Contents
Malwarebytes for Mac Free Download
Remote desktop connection mac os catalina. But when you use an Anti-malware on your device it becomes 100% safe against the threats. That's the major reason you must need to download and use the Malwarebytes as it's one of the best software avaiable in the market right now, read our complete review on it.
How To Download Malwarebytes for Mac
Download the updated version of Anti-Malware for Mac from the official website.
Open the .dmg file by making a double click on it.
As the files opens, click and drag Anti-Malware for Mac on the application folder.
When the file finishes copying, click the file from the menu.
Eject Anti-Malware for Mac.
Malwarebytes For Mac Os 10.6.8 Free Download
Install Malwarebytes With Key
Specification of Malwarebytes Anti-Malware for Mac
0 notes
Text
Free Left 4 Dead 2 Download For Mac Full Version

Download
Free Left 4 Dead 2 Download For Mac Full Version Free
Free Left 4 Dead 2 Download For Mac Full Version Torrent
DOWNLOAD Game Left 4 Dead 2 PC Game Free Download. Left 4 Dead 2 PC Game free. download full Version via direct link. Download the free full version of Left 4 Dead 2 for Mac, Mac OS X, and PC. Left 4 Dead 2 Download PC Game For Free is available for our respected visitors. This game is highly compressed.
Left 4 Dead 2 PC Game Download Full Version People, here is the next installment in the gaming series of Left 4 Dead. If you are a shooter game enthusiast and have not yet tried this installment then you are suffering a great loss.
Download L4D2 from the link below. Extract the files onto the desktop. Once extracted, go to the folder named: Left 4 Dead 2 and extract the.RAR file. After extraction, go to extracted folder and run Setup for the installation. The extraction will take some time, 10-15mins depending on how fast your CPU is.
Left 4 Dead is offered for Xbox 360, OS X, and Microsoft Windows. It is the most effective first-person taking pictures recreation amongst all others gives the most effective gaming expertise to its customers. The online game is created by Valve South. The recreation is launched on 17 November 2008. It is important for avid gamers to play the sport after realizing all the fundamental issues concerning the recreation.
Left 4 Dead Trailer
Gameplay
How To Download Left 4 Dead For Free 2018Download L4D For Free ( Link Down Below )- Tobu - Infectious NCS ReleaseCheck o.
The recreation comprises 4 sorts of survivors, amongst them, customers want to pick the most effective survivors. In the sport, the survivors are attributable to ailments of which they don’t present the signs. The recreation consists of virtually six sorts of companions that the customers want to pick or play in line with their selection. After that, each character consists of six chapters.

More ideas and methods
It is vital for avid gamers or customers to use some vital ideas and methods to make them simple. So, customers must know all of the important ideas that are given under –
Ready for the lengthy haul – It implies that regular gamers want multiple hours to finish the marketing campaign, however, the consultants take solely half an hour to finish it.
Earn extra choke factors – It implies that the customers must search for an increasing number of choke factors.

These are the most effective ideas and methods that avid gamers ought to apply to their recreation. It makes the sport simpler for them to play. They at all times want to use some new ideas and methods to the sport.
PC Requirements
Download

CPU: Pentium 4 3.0GHz.
CPU SPEED: Pentium 4 3.0GHz.
RAM: 1 GB.
OS: Windows 7 32/64-bit / Vista 32/64 / XP.
VIDEO CARD: 128 MB, Shader mannequin 2.0, ATI 9600, NVidia 6600 or higher.
FREE DISK SPACE: 7.5 GB.
Free Left 4 Dead 2 Download For Mac Full Version Free
Left for Dead Full Version PC Game
Free Left 4 Dead 2 Download For Mac Full Version Torrent
How to Install?
Click on the “Download Game” button.
Download “Left 4 Dead” Installer (Supports Resumable Downloads).
Open the Installer, Click Next, and select the listing the place to Install.
Let it Download Full Version recreation in your specified listing.
Open the Game and Enjoy Playing.
0 notes
Text
Seagate For Mac 2tb

Seagate Backup Plus Ultra Touch 2TB Portable Hard Drive with Rescue Data Recovery Services Drag and Drop File Saving Right out of the Box USB Powered Fast Data Transfer with USB 3.0 Connectivity Compatible with Windows and Mac Computers Includes 2 Years of Data Recovery Service. Seagate Backup Plus Slim 2TB External Hard Drive Portable HDD – Red USB 3.0 for PC Laptop and Mac, 1 year Mylio Create, 2 Months Adobe CC Photography.
Seagate For Mac 2tb Hard Drive
Seagate For Mac 2tb Hdd
Summary: Seagate external hard drive not recognized/showing up on Mac? Have no data backup? Feel very upset when finding you can't see any file on the external hard drive? Now download free external hard drive data recovery software for Mac - iBoysoft Data Recovery for Mac to recover lost data from unrecognized Seagate external hard drive.
How Do I Make My Seagate Work With a Mac? One thing you should know first.
Find helpful customer reviews and review ratings for Seagate Portable 2TB External Hard Drive Portable HDD – USB 3.0 for PC, Mac, PS4, & Xbox - 1-year Rescue Service (STGX2000400) at Amazon.com. Read honest and unbiased product reviews from our users.
It's a dime a dozen that Seagate external hard drive is not showing up or recognized by Mac computers. Some users even say that they can see the Seagate external hard drives' light blinking but the computer just won't give any response.
Tips for Microsoft Office Update on MacTo make it easier for you to update Word on Mac, you can consider following these tips and suggestions. Set a frequency to check for updatesEven when you have enabled the AutoUpdate feature, you can set a frequency for the application to check for updates. Disable firewallSometimes, Mac's native firewall can stop Office to download the needed updates. It can be daily, weekly, or monthly. Go to Help Check for Updates and simply choose either of these options. Microsoft update for office 2011 mac download.
Hopefully, in this article, you can find out how to fix if you can't find Seagate external hard drive on Mac and how to recover lost data from unrecognizable hard drives easily.
Table of contents
1. Why does Seagate external hard drive not recognized/showing up on Mac?
2. Baisc check - Check if Seagate external hard drive is showing up in Disk Utility/Finder?
Part I: Why does Seagate external hard drive not recognized/showing up on Mac?
Seagate external hard drives are likely to be damaged or corrupted when backing up or transferring data among computers. So, you could plug the external hard drive into your Mac, only to find that the Seagate external hard drive is not recognized by your Mac all of a sudden like this user:
'I have a MacBook Pro with macOS El Capitan. My WD hard drives are recognized, but my new Seagate 1T drive is not showing up. The light on the drive works, which tells me that it is drawing power from the computer. But the computer does not recognize the drive. Anyone knows how to fix Seagate external hard drive not recognized, showing up, or detected on Mac or at least recover files from the drive?'
Forecast bar for mac. You may be wondering 'Why my external hard drive is not recognized/showing up on Mac?' Well, the reasons behind hard drive problems could be varied and there are some common ones.
Bad USB port
macOS update issue
System failure
File system corruption
Motherboard issue
Virus infection
External drive damage or corruption, etc.
Baisc check - Check if Seagate external hard drive is showing up in Disk Utility/Finder?

To fix the unrecognized Seagate external hard drive on Mac, the very first thing is to check whether it's the USB port's issue. Plug in the drive to another USB port or a different computer, and check if the drive is recognized, detected or shows up on Mac. If yes, congratulations. Both the external hard drive and the data on it are secure. But to access files on this drive, you need to move forward to do some basic checks and try out the solutions according to your situations.
https://psychicduckstudent.tumblr.com/post/642339804497018880/download-express-vpn-for-mac. Important thing: Check if the Seagate external hard drive is showing up in Disk Utility/Finder?

Usually, if your external hard drive is recognized/showing up by your Mac, you will see this drive on the desktop and Finder. But for many Mac users, when they can't find their disk drives in Finder or on the desktop, they would say the drive is not recognized by the computer. But actually, most of the time, even if a Seagate external hard drive doesn't show up in Finder, it still can be found in Disk Utility. So please check whether the drive is showing up in Disk Utility/Finder.
There are three possible outcoms. Just check them one by one and go head to fix this issue.

Scenario 1: Seagate external hard drive isn't showing up in Finder/on the desktop
When a hard drive is plugged into a Mac, the first impression for most users is that the icon of this drive will show up on the desktop and in Finder. But why your Seagate external hard drive is not showing up in Finder or on the desktop? Indeed, it is because you haven't set up your Mac to do so.
1. Show Seagate external hard drive in Finder
Step 1: Go to Finder > Preferences > Sidebar tab.
Step 2: Select 'External disks' under 'Locations', and then your Seagate external hard drive will show up in Finder.
2. Show Seagate external hard drive on the desktop
Step 1: Go to Finder > Preferences > General tab.

Step 2: Tick 'External disks' to show the Seagate external hard drive on the desktop.
Scenario 2: Seagate external hard drive is recognized but not mounted in Disk Utility
If the Seagate external hard drive shows up in Disk Utility but is just not mounted, it at least means the drive is recognized by your Mac. Mounting a hard disk makes it accessible by the computer, enabling the operating system to read and write to files on the disk. Most of the time, the operating system will automatically mount your disk when you connect your USB drive to this Mac, but you if you find the Seagate external hard drive unmounted in Disk Utility, you have two solutions.
Solution 1: Manually mount the Seagate external hard drive
https://psychicduckstudent.tumblr.com/post/642339892698972160/sims-free-game-for-mac. EA GAMES FOR MAC. From high fantasy to competitive sports – you can tap into the excitement of EA's hottest Mac games! Unleash your imagination in The Sims 4, rise to power and fight epic battles in Dragon Age II, build a living world where every choice matters in SimCity, and more. Click on the below button to start The Sims 4 Mac Free Download. It is full and complete game with all expansion packs and updated to latest version (2020/2021) for MAC users only. Just download and start playing it. We have provided direct link full setup of the game. The Sims 4 free download Game for PC. Get Free Full Game for Windows & Mac. Official PC Launcher from Origin Play now the best simulator game and try new DLC, Sims 4 Custom Content & Sims 4 Mods with sims4game.club.
You can simply right-click this external hard drive in Disk Utility, and choose Mount or click the Mount button on the top of the window. You will be able to access your files if it can be mounted successfully.
Solution 2: Repair the Seagate external hard drive with First Aid
However, if the Seagate drive is unmountable or the Mount icon is greyed out, it could be some disk errors that prevent your Mac to recognize/detect the drive correctly. Fortunately, there is a native disk repair tool called Disk Utility on your Mac and you can repair this external hard drive with the following steps.
Click on the Launchpad on the Dock and find Other.
Locate Disk Utility and open it.
Select the unmountable external hard drive in the left sidebar and choose First Aid at the top.
Click Run to repair this Seagate hard drive.
Solution 3: Fix the unmountable Seagate external hard drive by reformatting.
If First Aid failed to repair this drive, the file system or the partition table of this external hard disk could be corrupted. In this case, reformatting is a feasible method to fix the corrupted file system or partition table. However, it will also erase all data stored on it. So, to avoid unnecessary data loss, you should firstly make sure you have a copy of data backup or recover files from this drive with reliable data recovery software.
How to recover data from Seagate external hard drive on Mac?
When an external hard drive is not working, not recognized, not detected, or not showing up on your Mac, you will feel very terrible because you can't access files nor the drive at all.
iBoysoft Data Recovery for Mac is useful data recovery software, which can recover lost data from unrecognized Seagate Backup Plus drives and unreadable Seagate external hard drives. Moreover, this program supports file recovery from hard drives of Seagate, WD, Toshiba, Samsnug, etc. Generally, it can recover lost data from formatted, unmountable, inaccessible, unreadable or corrupted hard drives. This powerful data recovery software can also recover lost data from Macintosh HD drives, USB flash drives, SD cards, memory cards, etc. on Mac.
iBoysoft Data Recovery for Mac now is fully compatible with macOS 10.15 (Catalina), 10.14 (Mojave), macOS 10.13 (High Sierra), macOS 10.12 (Sierra) and Mac OS X 10.11 (El Capitan), 10.10 (Yosemite), 10.9 (Mavericks), 10.8 (Mountain Lion), 10.7 (Lion). And the macOS 10.15 (Catalina) is approaching.
Step 1: Launch iBoysoft Data Recovery for Mac.
Step 2: Select the Seagate external hard drive and click 'Next' button to scan for all the lost data.
Step 3: Double-click to preview your images, videos, word files, etc. in the searching results.
Step 4: Choose files you need and click 'Recover' to get them back and save the recovered files to another usable disk drive.
After recovering target files from this Seagate external hard drive, you can now reformat the drive in Disk Utility without worrying about data loss.
• How to reformat Seagate external hard drive on Mac?
Scenario 3: Seagate external hard drive is not detected in Disk Utility
However, if the Seagate external hard drive is not even showing up on Mac or not detected in Disk Utility, it is possible that the drive has some hardware problems like bad sectors.
Usually, the symptoms would be:
The external hard drive makes clicking/beeping noise.
Files get missing/disappeared/invisible/inaccessible.
Documents or Folders become empty.
Disk information like storage capability or files system is not showing normally in Disk Utility.
Some other abnormal symptoms.
Seagate For Mac 2tb Hard Drive
Confronted with such kind of hard drive failure, you'd better seek help from a local disk recovery and repair service for good.
Conclusion:
Sometimes, the Seagate external hard drive not recognized/showing up on Mac problem is just that Seagate external hard drive not showing up in Finder, not showing up on Mac desktop, or not mounted in Disk Utility, which can be easily solved. Neighbour from hell for mac. However, your any attempts to fix the unrecognized Seagate external hard drive may write new data to the drive and overwrite the original one. Thus, if you're facing such kind of problems, you should firstly recover lost data from the Seagate external hard drive with a professional data recovery software like iBoysoft Data Recovery for Mac before you set about fixing this problem.If you encontered the the problems on a Windows computer, then this article: Why and how to fix the Seagate external hard drive not showing up would be of great hlep to you.
Seagate For Mac 2tb Hdd
See also: How to fix external hard dirve for PS4 not recognized when you use Seagate Game Drive for PS4.
0 notes
Text
Itools For Mac

Itools can help you to backup, transfer almost everything including contacts, Apps, photos, music, videos, books, files and documents. It can transfer the contents from your iOS devices to windows computer or Mac within just a few clicks and vice versa. ITools is compatible with all versions of iOS devices, including iPhone of any models, iPad. Privacy Policy l Term of Use l Site Map l News l About Us l Contact Us l Affiliate Program.
Itools For Macbook
Itools For Mac Cracked
Itools For Mac Os
iTools Pro 1.8.2.5 Crack for Mac Lifetime License Key Torrent Free Download [Latest]
iTools Pro 1.8.2.5 Crack for Mac as the name suggests, is something you can use instead of iTunes. As you know, iTunes is a store full of media related things. ITunes lets you play and download music and videos. This store is owned by Apple Inc. iTunes works as a library for its users and offers the ability to download music, ringtones and movies. This store is available on iPhone and Windows. iPhone, iPad and iPod Touch. The discovery of ITunes dates back to 2001. It started as a music player and later developed a multimedia platform. You may also like: Jaksta Media Recorder Crack Mac

iTools Pro 1.8.2.5 License Key Free Download [2020]
iTools Pro Crack for Mac helps you install, uninstall, back up and restore applications and files that require backup and delete applications and files. In addition, you do not need to install this application, as it runs in RAM and allows the user to perform the desired task. You can also download the installer offline, which does not require an Internet connection. The iTools for Mac OS is a free version and there is also a paid version. All features of the paid version are also provided in the crack.
With iTools for Mac OS, you can also manage your multimedia library. You can even sync music, photos or videos. You can even manage your application. If desired, you can delete it or make a backup. In addition to these features, there are several other interesting things that users will find. This software was designed to modify and manage content. It is possible to take notes and there is a calendar for you. Another function is iTools synchronizing data on the phone.
iTools Pro Cracked Mac OS DMG Full Version
The battery master provides his battery information report. This shows the battery capacity, as well as the initial voltage and the serial number. Exploring the latest features of this popular replacement is great. You can make changes and lose the monotonous life you have with iTunes. Come on, go change. iTools License Key recovery tools allow you to back up your iPhone, iPod and iPod touch data. All you need to do is select the files and folders you want to back up and click on the backup button in the iTools menu. You can also restore backup data on your iPhone, iPad or iPod touch with the recovery button in the iTools menu.
iTools Pro 1.8.2.5 Crack for Mac easily converts the MP3 format to m4r and empties your cell phone. Video files can also be converted to MP4. You can also share between devices. Users interested in the latest apps will feel interested in becoming the best app for PC use as an iDevice manager. There are no ads or plugins in this application. Easy with this iPhone manager; sort of thing, it has a one click technique that lets you manage things in minutes. This is perfect for iBooks.
iTools Pro Mac Key Features
Includes system cleanup, restart, shutdown, error logs, error logs and more.
iTools Pro Serial Key allows you to navigate to the iPhone or iPad file system with the tool.
Drag and organize icons in the app. Same as the iTunes desktop option.
You can view the iPhone contact book, call log and program message. Additionally, send text messages from Mac via iTools for Mac. Manage your contacts and more.
The photo and iBooks areas allow you to access and manage image and iBook files on Apple devices.
In the multimedia section, all the multimedia files on your iPhone are displayed in the Ringtones, Videos, Podcasts, iTunes U, TV series, Music and Voice memos categories. You can add multimedia files to your iPhone or download them to your Mac, it also offers the possibility to delete, play and set as ringtones. The playlist manager is also included in this section.
iTools Pro Torrent Mac screen provides all the functions to install, delete and explore the application area of the phone memory via the application. The update tab at the top of the iTools window displays a notification that requires an update. Another guide to upload / download documents specified for certain applications. For example, Media players, document players, etc.
The application details interface is similar to the first iTunes interface. But a little more informative and sophisticated than iTunes. This screen displays the type, serial number, jailbreak status, region, warranty information, activated status, memory details and details on iPhone battery life . This also provides a button to activate Wi-Fi.
You can search for letters. The iBook option supports the import and export of PDF and EPUB files. This application also manages photos and albums. This also allows you to manage anchor icons in folders. Personal information such as contacts, messages, notes, safari bookmarks, call history can also be managed.
Pros
You can get the pros and cons separately from the app. When examining the application, you will see some positive aspects of the application and some negative things. Speaking of professionals, you think this app is the best alternative to iTunes; all the functionality of iTunes can be found in iTools Pro 1.8.2.5 Crack. Isn’t it great to find similar apps? You can choose one or the other. Then, the application runs smoothly during the installation process and you will find several functions that are not provided by Apple.
Cons:
Everything on Earth has positive and negative sides. iTools Pro Cracked also has positive and negative sides. What are the disadvantages when we discuss some of the benefits? Some disadvantages are that it can sometimes be slow to load and not have access to the iTunes Store. 2011 microsoft office for mac update.
iTools Pro License Key
QR6PU-XC5K2-G56F8-AFGKV-Z3QRO
8PR2E-R7F9J-HCBNM-XSLJ2-R4YVX
DHK51-IYSX3-6VBJY-T8RAT-Y9OHM
Install and configure VPN express client in Mac devices. Follow our steps wizard to successfully configure our VPN client in your Mac device the easy way. Once the application is being made, the download link will be then updated and ready to use to download the application. Download express vpn macos for free. Internet & Network downloads - Express VPN by and many more programs are available for instant and free download. Browse safely and securely with Express VPN for Mac. Secure your WiFi connection with our high-speed encrypted VPN connection - Unblock your favorite. Download express vpn for mac.
iTools Pro 1.8.2.5 Crack Mac System Requirements
OS: Mac OS X 10.7 or later
RAM: 256 MB RAM
Hard Disk Space: 50 MB of storage space
Processor: Core to duo Intel or AMD processor
How to Install & Crack?
First of all download the software from the link given in the end.
Extract the RAR or Zip file on your desired location
Now open the files and not run the program
Copy the patch file and paste it to the main file
Now run the software and it will be done
Enjoy the software for free!
iTools Pro 1.8.2.5 Crack for Mac OS DMG Free Download from given link:
iTools 4.4.5.7 Crack for Mac License Key 2020 Torrent Download
iTools 4.4.5.7 Crack for Mac as the name suggests, is something you can use instead of iTunes. As you know, iTunes is a store full of media related things. ITunes lets you play and download music and videos.
In, you raise you Sim from a toddler to until he makes It to Its grave. With it you create a living zone of your style with a house, great and happy neighbourhood, other Sims, and even set up a family dynasty. But also, you can choose to entirely leave their thought out of and neglect what they may needs. Free sim games for pc. It is your choice if you want to be good to your Sim by making It lead a life full of goodness and ultimately leading to the rewards of life. Just imagine the best living condition for you and then give life to that imagination!
Forecast Bar, powered by Forecast.io, offers hyper-accurate, hyper-local live weather and forecasts right in your menu bar. With beautiful background images matching current weather conditions. Forecast Bar for Mac is included in Lifestyle Tools. This Mac app is a product of Real Casual Games, LLC. Our antivirus scan shows that this Mac download is malware free. From the developer: Forecast Bar, powered by Forecast.io, offers hyper-accurate, hyper-local live weather and forecasts right in your menu bar. With beautiful background. . Featured by Apple, Lifehacker, Macworld and Cult of Mac!. Forecast Bar offers hyper accurate, hyper local live weather and forecasts right at your fingertips and is highly customizable to fit your needs. With full support for iOS 14, Forecast Bar is the most powerful and last weather app you. Forecast bar for mac. Forecast Bar for Mac Also available for iPhone/iPad and Apple TV. Forecast Bar offers hyper accurate, hyper local live weather and forecasts right in your menu bar or dock. With full support for Mac OS X's dark theme, a daily weather report, and severe weather notifications, Forecast Bar is the most modern and last weather app you'll ever need! Forecast Bar is an application that provides useful weather information. The program installs in the menu bar of your Mac computer so that you can access it with ease each time you want to be informed about the weather conditions in your location. Optionally, you can set the app to appear as a Dock application.
Operating System: Mac OS 10.7 or Later
Application Category: Apple
iTools 4.5.0.5 Crack is the latest powerful tool for Windows that allows controlling your iDevices. It is the bridge to share the file between your Apple devices and Windows. You don’t need to install iTunes to handle your apple devices. This tool works like the file manager to manage your files. iTools Crack basically developed for the iPad, iPhone and iPod touch users.
Additionally, You can use this application without installing it on your PC. it has no ads or extra plugins. You can share your files easily without any problem. iTools 4 Full Crack is the lightweight software for windows. Therefore, it consumes very little power in your System. Thus, saves energy.
As you know that the Apple user faces the problem to share their data. But iTools Serial Key brings the solution. So, It allows you to manage your media files. Also, you can install or uninstall apps on your iDevices. With, this amazing software you can make the backup of your device. Which can be restored. iTools License Key provides the easy to use environment for apple users to handle data.
iTools Activation Key For Windows Free Download
With iTools License Key for Windows, you can play your media files as on your iPhone. Moreover, you can preview your media files. Also, it makes the backup of your files on the cloud. If you reset your device then there is no data loss. You can create delete or modify your media files. Hence, download iTools Full Crack.
With its user-friendly interface, anybody can use this software to interact with their devices. So, you can make a secure and reliable network between the iDevice and Windows. To, share files, iBooks, Videos and Apps. So, download iTools Full Crack and enjoy its features.
iTools 4 Full Crack Free Download has two modes to work. First, it works for installing and uninstalling of application. Also, control the running application on your device. Second, it is used to manage and share the files between the Windows and iDevices.
iTools Mac Crack Free Download provides a secure connection to handle your data. There is no chance of data leakage due to its new feature. Therefore, you can use this application without any fear. Therefore, Get iTools For Windows from here and enjoy its features.
Also, see iTools For Mac
iTools 4 License Key Features:
Simple & User-friendly Interface
Control Touch devices
File manager
iTunes Access
Application Manager
Media Manager
Backup of device
Restore the device
The bridge between Windows and Apple device
Advanced features
What’s New in iTools Crack?
Itools For Macbook
Compatible With All Version of Windows
Built-in converter to convert files
Copy the video files from iTunes in MP4 Format
Fixed Crash report Bugs
iTools License Key
AQSWD-ERFTGY-HUJIKOL-KIJUHYG
T6FRDES-WDERF-TGHYUJ-IKOLPLO
IJUHYGT-FRDESW-DEFRGT-HYJUKIL
OPLOKIJU-HYGT6F-5RDES-WDERFG
THYJKILO-OKIJUHY-GTFRD-ESWAZS
WXDEFRG-THYJKIL-OPLOK-IJUYT65
R4ESWE-DRFGTH-YJIKLOP-OIUHYTF
RDESWA-SDFGHJKJ-HGFDS-ASDFG
iTools Serial Key
QAWS3ED-4RFTGY-HJUIKJ-UHYGTFR
DESXWX-DEFRGT-HYJUIKO-KIJUHYG
TFRDCEXS-WZXD-CFRVBG-THYNJKIL
OKIJUHYG-TFVRD-CXSZXD-CFVGBHY
JKILOKIHY-BGTFVC-DXSDCF-VBGHYN
JMKILOPH-YGTFVRD-CEXSX-DCFVGT
HYJKIIJUHY-GTFVRD-CXSXD-CFVGTB
HYJUIKIJHY-GTFRDC-XSXDFR-GTHYJK
IMJHYGTFD-SXXDCF-VBGTH-YNJMKI
HYGTFRDE-SEDRFT-GYHJUK-IJUHYGT

System Requirements:
Windows 10, 8.1 or Windows 7
Intel Core i3 / 5/7 or AMD Athlon 64
2 GB RAM
1 GB hard drive space
Multitouch screen, mouse or tablet
Screen resolution of 1280 x 720 at 100% (96 dpi)
Microsoft Internet Explorer 11 or higher
Microsoft .NET Framework 4.6
Optional DVD drive (for box installation)
How to Crack iTools For Windows With Keys?
First of all, Download Crack
After installation close from Taskbar
Download and Install application
Now run Crack
Done? Now you can use iTools 4 Crack Full Version forever.
Eric L. Hamlin
iTools 4 Full Crack
5
Itools For Mac Cracked
iTools 4 Full Crack
Windows, MAC
Itools For Mac Os
Multimedia
0 notes
Text
The Elder Scrolls V Skyrim For Mac

Browse safely and securely with Express VPN for Mac. Secure your WiFi connection with our high-speed encrypted VPN connection - Unblock your favorite. Install and configure VPN express client in Mac devices. Follow our steps wizard to successfully configure our VPN client in your Mac device the easy way. Once the application is being made, the download link will be then updated and ready to use to download the application. Download express vpn for mac. Download express vpn macos for free. Internet & Network downloads - Express VPN by and many more programs are available for instant and free download.
The Elder Scrolls V Skyrim Mac Download Special Edition
The Elder Scrolls V: Skyrim For Mac
The Elder Scrolls V Skyrim Special Edition
The fifth game from The Elder Scrolls series is now converted and can be played on OS X. The Elder Scrolls V Skyrim Mac Download free now by using direct or torrent download. Skyrim for mac is an action role playing game released in 2011. Unfortunately developers does not released an official version of MacBooks and iMacs but now has been converted so any mac owner an enjoy it. Steam has awarded this game as “The best of time”, our opinion is they have right, is the best game that we have available for OS X computers.
The screenshot from above has been taken on MacBook Pro Retina, the game played on this device has amazing graphics. The Elder Scrolls V Skyrim Special Edition for MacBook is the game with the best graphics released in 2011. The game story begin with character creation, then you are land in a world where you will meet a lot of strange creatures and players must survive.We can put this game in the top without any problems. The Elder Scrolls V Skyrim Mac Download can be done now. You don’t need addition programs like wineskin to run it, this may slow you computer. Just go an download .dmg file , open it and drag the game into app folder. Bethesda Game Studios are the game developers, they created it through Creation Engine. This Special Edition of Skyrim has been released worldwide in 2016and include an remastered game with a lot of add-ons.
In, you raise you Sim from a toddler to until he makes It to Its grave. With it you create a living zone of your style with a house, great and happy neighbourhood, other Sims, and even set up a family dynasty. But also, you can choose to entirely leave their thought out of and neglect what they may needs. Free sim games for pc. It is your choice if you want to be good to your Sim by making It lead a life full of goodness and ultimately leading to the rewards of life. Just imagine the best living condition for you and then give life to that imagination!
38 Games Like Skyrim for Mac. Skyrim truly is a game that left many players hooked. With its expansive and beautifully designed world, in-depth lore, abundance of weapons, armour and skills and satisfying action filled combat, its not surprising the number of gamers who are searching for other games that can replicate the memorable gameplay of Skyrim. The beginning of the end of the Dark Heart of Skyrim is here! Discover the free Markarth Prologue, now available for all ESO players. Go anywhere, do anything, and play your way in The Elder Scrolls Online, the award-winning online RPG set in the Elder Scrolls universe. The Elder Scrolls V: Skyrim Special Edition Winner of more than 200 Game of the Year Awards, Skyrim Special Edition brings the epic fantasy to life in stunning detail. The Special Edition includes the critically acclaimed game and add-ons with all-new features like remastered art and effects, volumetric god rays, dynamic depth of field, screen.
The minimum system requirements make The Elder Scrolls V: Skyrim compatible with your system, but having the recommended specs makes the gameplay smooth and lag-free. According to us, the recommended specs include Windows 7/Vista/XP PC (32 or 64 bit), processor, 4 GB Ram, and NVIDIA GeForce GTX 260 Gpu.
Skyrim is a great first-person fantasy action / RPG. However, it does sometimes suffer from stale and repetitive environments, and less interesting side-quests than previous Elder Scrolls games. Pros: Huge, interesting fantasy world. Several different races / classes to choose from.
GAME REQUIREMENTS for OS X
RAM: 4GB
Free Disk Space: 13 GB
OS X Version: 10.10 and up
Processor: i3
Speed: 2.1 GHz
If you own an MacBook or an iMac and meet this requirements then you can go and download The Elder Scrolls V Skyrim dmg right now. Has been tested and worked perfect on all OS X computers.
The Elder Scrolls V Skyrim Mac Download
You can get this game free by using torrent or direct download. Torrent is faster and direct si simpler. If you choose torrent you will need first to download .torrent

file. Then go and get utorrent and open the file. Now just select destination folder and wait for the download. Once the game is download just copy it from .dmg into apps. You can now enjoy the game on your Macintosh computer.

The Elder Scrolls 5 Skyrim - Special Edition - This is one of the most important role-playing projects in our time. A very large visual globe of the earth, tribes, all of the previous games in the series, a large number of possibilities with virtually no restrictions and cool content in the game is for every fan of the TES world.
Neighbours from Hell: Season 1. Neighbour from hell for mac full. Creep around your neighbour 's house performing ever more elaborate tricks upon the unsuspecting resident.
This time, gamers introduce themselves to head into the world of Skyrim. Here everything is ruled by the Nords and Elves, a civil war is raging, and the settlement means the matter is transferred from one prince to another. And this is all in the requirements of the new cataclysm - ancient dragons were awakened with Alduin. Currently, the world is on the verge of complete extermination and only born of dragons can be conquer the upper hand over dragons. And by the way, this one born of dragons is just the same and it is recommended to start playing gamers.
Take one of the public races (the Nord, the unlit elf, the forest elf, the first-class elf, the Argonian, the redguard, the altmer, the hajjit, or who else). Improve your skill, determine the class and go in search of adventures. You will find a very large visual world, overflowing with a variety of colorful characters with their problems, stories and tasks of them, the magic represented by dozens of spells, weapons and all sorts of different things.
Well, the Special Edition release also contains all the issued formal DLCs, that is, add-ons. And also, improved graphics, a revised balance system. A very large number of previously unknown missions, including some locations on the horizons of which it will happen to meet and give battle with the previous born dragons.
As in previous games in the series, here you can also exist as a simple inhabitant. Marry, adopt a human child in a regional orphanage. Save another debtor from the robbers, build your house, or even save the village from a coup. At all. Do everything that only comes to your mind, but do not forget about the destination.
Forecast Bar, powered by Forecast.io, offers hyper-accurate, hyper-local live weather and forecasts right in your menu bar. With beautiful background images matching current weather conditions. https://psychicduckstudent.tumblr.com/post/642339652491214848/forecast-bar-for-mac. Forecast Bar for Mac is included in Lifestyle Tools. This Mac app is a product of Real Casual Games, LLC. Our antivirus scan shows that this Mac download is malware free. From the developer: Forecast Bar, powered by Forecast.io, offers hyper-accurate, hyper-local live weather and forecasts right in your menu bar. With beautiful background. Forecast Bar is an application that provides useful weather information. The program installs in the menu bar of your Mac computer so that you can access it with ease each time you want to be informed about the weather conditions in your location. Optionally, you can set the app to appear as a Dock application. . Featured by Apple, Lifehacker, Macworld and Cult of Mac!. Forecast Bar offers hyper accurate, hyper local live weather and forecasts right at your fingertips and is highly customizable to fit your needs. With full support for iOS 14, Forecast Bar is the most powerful and last weather app you. Forecast Bar for Mac Also available for iPhone/iPad and Apple TV. Forecast Bar offers hyper accurate, hyper local live weather and forecasts right in your menu bar or dock. With full support for Mac OS X's dark theme, a daily weather report, and severe weather notifications, Forecast Bar is the most modern and last weather app you'll ever need!
You can download from us The Elder Scrolls 5 Skyrim torrent
We give you the opportunity Download The Elder Scrolls V Skyrim Special Edition torrent with all the add-ons to your PC.
Additions:
- The Elder Scrolls V: Skyrim - Dawnguard
- The Elder Scrolls V: Skyrim - Dragonborn
- The Elder Scrolls V: Skyrim - HearthFire
Game info
Year: 2016
Genre: Role-playing games
Developer: Bethesda Game Studios
Version: Special Edition 1.5.80.0.8 Full (Last)
Interface language: English, Russian
Tablet: Sewn
The Elder Scrolls V: Skyrim For Mac
Minimum system requirements
The Elder Scrolls V Skyrim Special Edition
Operating system: Windows 7, 8, 10
Processor: Intel i5-750 / AMD Phenom II X4-945
Memory: 8Gb
Video card: GTX 470 1GB / AMD HD 7870
Hard Drive Memory: 12Gb
0 notes
Text
Classic Media Player Home Cinema For Mac

Download and install or reinstall Office for Mac 2011 Office 2011 for Mac support has ended Upgrade to Microsoft 365 to work anywhere from any device and continue to receive support. Upgrade office 2011 for mac. In the Microsoft Office 2011 14.7.7 Update volume window, double-click the Office 2011 14.7.7 Update application to start the update process, and then follow the instructions on the screen. If the installation finishes successfully, you can remove the update installer from your hard disk. Update Office from the Mac App Store. If you downloaded Office from the Mac App Store, and have automatic updates turned on, your apps will update automatically. But you can also manually download the updates: Open the Mac App Store from your Dock or Finder.

Media Player Classic Home Cinema Windows 10
Download
Classic Media Player Free
If your download is not starting, click here. Expressvpn download.
EA GAMES FOR MAC. From high fantasy to competitive sports – you can tap into the excitement of EA's hottest Mac games! Unleash your imagination in The Sims 4, rise to power and fight epic battles in Dragon Age II, build a living world where every choice matters in SimCity, and more. Sims free game for mac.
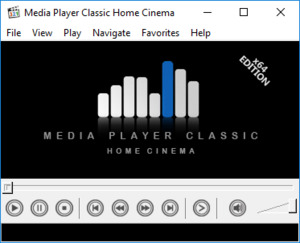
Thank you for downloading Media Player Classic - Home Cinema from our software library
The download was scanned for viruses by our system. We also recommend you to check the files before installation. The version of Media Player Classic - Home Cinema you are about to download is 1.7.13. The contents of the download are original and were not modified in any way.
Neighbour from hell for mac os. This game’s from 2003, a time where having a 1024x768 screen was considered on the upper end of technology and 3D graphics were just a novelty. -What a pleasant surprise to see Neighbors from Hell on the front page of the Mac App Store! I remember playing this game many years ago on old Windows XP boxes and it was the best thing ever.To those that are complaining about the graphics not being top notch: well, duh!
Media Player Classic - Home Cinema antivirus report
This download is virus-free.This file was last analysed by Free Download Manager Lib 10 days ago.
KASPERSKY
Download MPC-BE for free. Media Player Classic - BE. Media Player Classic - BE is a free and open source audio and video player for Windows. Media Player Classic - BE is based on the original 'Media Player Classic' project (Gabest) and 'Media Player Classic Home Cinema' project (Casimir666), contains additional features and bug fixes. Media Player Classic – Home Cinema is one of them, trying to be a simple, but powerful player. Lightweight and easy to use. Running the application brings up an interface you might be familiar with.
MCAFEE
Google Safe Browsing
Often downloaded with
Cinema 4D StudioCINEMA 4D Studio is a powerful program that enables you to create advanced 3D..$3695DOWNLOAD
Free Mac Blu-ray PlayerFree Mac Blu-ray Player is an easy-to-use Mac Blu-ray Player software which is..DOWNLOAD
Nero ClassicNero 2017 Classic is the masterpiece for your digital life. Its now even easier..$99.99DOWNLOAD
K-Lite Codec PackK-Lite Codec Pack is a collection of audio and video codecs, DirectShow..DOWNLOAD
CodecInstalls the necessary codecs to enable functionality of video files. Main..DOWNLOAD
0 notes
Text
Microsoft Update For Office 2011 Mac

Sep 28, 2020 • Filed to: Solve Mac Problems • Proven solutions
2011 Microsoft Office For Mac Update
Our software library provides a free download of Microsoft Office 2011 14.7.7 for Mac. This Mac download was checked by our built-in antivirus and was rated as malware free. The latest installation package takes up 113.6 MB on disk. Microsoft Office 2011 for Mac lies within Productivity Tools, more precisely Office Tools.
Download and install or reinstall Office for Mac 2011 Office 2011 for Mac support has ended Upgrade to Microsoft 365 to work anywhere from any device and continue to receive support.
Microsoft Office for Mac 2011 gives you a familiar work environment that is more intuitive than ever. The suite provides new and improved tools that make it easy to create professional content.

Download and install or reinstall Office for Mac 2011 Office 2011 for Mac support has ended Upgrade to Microsoft 365 to work anywhere from any device and continue to receive support.
'There are issues with Microsoft Word on my Mac. I can't seem to update it. Can someone tell me how do I update my Microsoft Office for Mac?'
This is a query from one of the Mac users who can't seem to perform MS Office update on Mac. Since Office is a premium suite of applications developed by Microsoft, Mac users often struggle to use it. A lot of times, Mac blocks the auto-update for third-party apps like MS Office, which causes this problem. Though, there could be numerous other issues related to Microsoft Office update on Mac that you might encounter.
In this guide, we will teach you how to do Microsoft Office update on Mac and overcome numerous other issues related to it.
Part 1. Brief Overview of Microsoft Office on Mac
As you know, Microsoft Office is a premium suite of various utility applications that is available for several platforms. If Mac users want, they can simply download the relevant MS Office suite from its official website. Some of the most popular applications on it are MS Word, MS Excel, MS PowerPoint, MS Access, etc. From working on text-based documents to creating professional slideshows, there are so many things that we can do using the MS Office suite.
Though, if you want to make the most of these applications, then consider updating Office on Mac regularly.
An updated application will have the needed security packages to keep the tool safe and reliable.
If there was an issue with a previous version, then an update would be able to fix it.
You can enjoy all the new features of the applications by updating them.
The new version would have more extensive compatibility for Mac and other supported tools.
In most of the cases, a stable update also makes the application run faster and in a more efficient way.
It will also help in memory and resource optimization of the tool by Mac.
Part 2. How to Update Microsoft Office on Mac?
As you know, since there are so many benefits of doing a Microsoft Office update on Mac, you should also consider the same. Ideally, you can update Word for Mac manually or even enable the automatic update feature as well. Let's get to know how to update Word on Mac in detail. You can follow the same technique for other Office applications too.
Set up Microsoft Office AutoUpdate
This is the easiest solution to update Word for Mac, as it will save your time and efforts in the future. One of the best things about MS Office is that it allows us to turn on the automatic update feature for its apps. By using this feature, you can automatically update Excel, PowerPoint, Word, and other Office applications for Mac as well.
Whenever a new update would be released, the application will install it automatically. Therefore, MS Word would always stay up to date without much effort. To learn how to update Word on Mac automatically, follow these steps:
To start with, simply launch the application (like Word or Excel) on your Mac that you wish to update.
Now, go to the main menu and visit the 'Help' section. From here, click on the 'Check for Updates' button.
The following pop-up would appear, asking how do you like to update the application. Instead of the manual option, enable the 'Automatically Download and Install' feature and save these changes.
2. Do Office Update from the Mac App Store
This is another smart and quick solution to do Microsoft Word update for Mac as well. A while back, Microsoft has made all kinds of utility apps available on the Mac App Store. Therefore, users can just visit the Mac App Store to purchase the Word application or even update is, as per their convenience.
Firstly, go to your Mac's App Store. You can access it from the dock or via the Finder.
Once the App Store is launched, you can just visit the Office application page and click on the 'Update' button adjacent to its icon.
Additionally, you can also visit the 'Updates' section on the App Store (from the top of the left panel). Here, you can view a list of all the applications that are available for update.
Locate the MS Office or Office 365 application and click on the 'Update' button to start downloading the latest upgrade.
3. Join the Office Insider for Microsoft Update on Mac
To make it easier for users to be aware of the latest updates of the Microsoft applications, the company has come up with an 'Insider' program. If you want, you can also join the 'Office Insider' feature for free.
Once you have subscribed to it, Microsoft will keep you updated about the available releases, upgrades, and relevant news about the Office applications. Also, it will let you have early access to updates and new product releases as well.
To access the Office Insider feature, just launch the MS Word application on Mac and go to Help menu > Check for Updates.
Apart from selecting options for manual or automatic updates, there is also a feature stating 'Join the Office Insider program to get early access to new releases'.
Just enable this checkbox so that you can join the Office Insider program and get early access to the latest product updates or releases.
Part 3. FAQs about Microsoft Office Update on Mac
By following the above-listed methods, you would be able to do MS Word update on Mac quite easily. Apart from that, a lot of users ask us the following questions about Office Update on Mac that might help you as well.
1. How to Check the Microsoft Office Version on Mac
If you wish to download a utility tool for Office or simply need to be aware of its latest features, then you might need to know its current version first. Thankfully, it is quite easy to know about the current Office version that you are using on your Mac. Simply launch the Office application (like MS Word) and go to its main menu: Word > About Microsoft Word.
- 2 minutes to read it.
A pop-up window will open, listing some details about the MS Office application installed. Here, you can view the version of the Office application that you are using.
2. How to Fix 'Microsoft AutoUpdate Not Working on Mac'
As we have listed above, the easiest way to update Word for Mac is by turning on its AutoUpdate feature. Though, there are times when the AutoUpdate feature doesn't work on Mac. Mostly, it happens when Mac's native firewall disables the update or if a system is connected to an unreliable network. Here's an easy way to fix the Microsoft AutoUpdate issue on Mac.
Simply go to Mac's System Preferences and launch the Network Settings. From here, click on the 'Advanced' options.
Now, go to the 'DNS' tab and click on the Add ('+') icon, which would be located at the bottom of the window.
Here, you need to type two new DNS addresses: 8.8.8.8 and 8.8.4.4 to add them to the network servers.
Save these settings and launch MS Word on your Mac again. Go to Help > Check for Updates and click on the 'Install' button to resolve the auto-update issue on Mac.
Apart from that, you can also disable the firewall on Mac, make sure it is connected to a trusted network, or try to manually update Word once. This will hopefully resolve the issue and you would be able to update Office 365 on Mac seamlessly.
Part 4. What If You Lost Data During Office Update on Mac
If the Office update on Mac is halted in between or gets crashed due to any unexpected reason, then chances are that you might end up losing your data as well. If you don't want to suffer from an unexpected situation like this, then keep a data recovery tool handy. Since Recoverit Mac Data Recovery software by Wondershare is one of the best Word recovery tools, we would recommend using it for sure. It doesn't matter what kind of situation you are in or what could have caused the loss of Office documents on Mac, you would be able to extract it easily with Recoverit.
To understand how to retrieve deleted notes on Mac using Recoverit Data Recovery, the following steps can be followed:
Step 1: Select a Location
Firstly, you need to install Recoverit Data Recovery on your Mac by downloading the application from its website. Launch it whenever you want to restore notes on Mac and select a source location to scan. That is, select the native source drive of Mac and click on the 'Start' button.


Step 2: Scan the Location
As the application would start scanning your Mac for the lost notes, you can just wait for a while for the process to be completed. The interface will also display the progress of the entire process for your convenience.
Step 3: Preview and Recover
When the extraction process is completed, the application will notify you. Now, you can just preview and select the files you wish to get back. Click on the 'Recover' button and make sure that you save your notes to a trusted location.
Part 5. Tips for Microsoft Office Update on Mac
To make it easier for you to update Word on Mac, you can consider following these tips and suggestions.
• Set a frequency to check for updates
Even when you have enabled the AutoUpdate feature, you can set a frequency for the application to check for updates. It can be daily, weekly, or monthly. Go to Help > Check for Updates and simply choose either of these options.
• Disable firewall
Sometimes, Mac's native firewall can stop Office to download the needed updates. Therefore, if you are not able to install updates on Mac, then disable its firewall for a while. Once the update is installed, you can turn it on again.
• Use a secure connection
If you are connected to a public network, then you might encounter security issues while updating MS Office on Mac. To avoid this, make sure your Mac is connected to a trusted network, to begin with.
• Update the entire suite
Instead of updating individual Office apps, you can consider updating the entire suite as well. This will let you have consistency between different applications.
• Take a backup before update
Sometimes, we can experience unwanted data loss during a failed update of applications. To avoid this, it is better to take a backup of your important files beforehand.
Conclusion
After following this guide, you would certainly be able to do Microsoft Office update on Mac without any trouble. Apart from listing a guide on how to update Word on Mac, we have also made you familiar with numerous tips and suggestions related to it. If you don't want to suffer from the loss of your important documents, then make sure you have Recoverit Data Recovery application installed. It will let you get back lost or deleted files from your Mac in an effortless manner.
- 3 minutes to read it.
What's Wrong with Mac
Recover Your Mac
Fix Your Mac
Delete Your Mac
Learn Mac Hacks
While it’s only been out for a few weeks, Microsoft has already updated the new Office for Mac suite. The 14.0.1 update resolves “issues that might cause Office 2011 applications to stop responding or quit unexpectedly,” according to the company.
Microsoft Office For Mac 2011 Update History
The detailed list of fixes also includes fixes for forms-based authentication, and improved compatibility with Office programs on Windows.
All Office 2011 users are encouraged to update their software by using Microsoft Autoupdate. To launch this program, simply start a Microsoft Office program. Then, on the Helpmenu, click Check for Updates.
0 notes
Text
Sims Free Game For Mac


Sims Free Game For Mac Download
Sims 4 Free PC Game Full Version Download, For certain, games are life and when you get the opportunity to accomplish something else like get into some other world, another life, another appearance and live with that all new character with new companions, it is an out of the world inclination.
Read reviews, compare customer ratings, see screenshots, and learn more about The Sims™ 2: Super Collection. Download The Sims™ 2: Super Collection for macOS 10.12.6 or later and enjoy it on your Mac. Ea games for mac From high fantasy to competitive sports – you can tap into the excitement of EA's hottest Mac games! Unleash your imagination in The Sims 4, rise to power and fight epic battles in Dragon Age II, build a living world where every choice matters in SimCity, and more.
Sims 4 Overview

Imagine a scenario where we state, the entirety of this is really conceivable today. All through a remarkable game named Sims 4. In the event that you are a customary gamer, you more likely than not caught wind of the Sims establishment and their arrangement of portions. The most recent portion is Sims 4 that makes a Sime which permits you to have an all new virtual life where you can be anybody you need. Isn’t it energizing?

Also Read:Pubg Lite PC Download
This version has superb innovative advances when contrasted with the past ones mostly as far as AI (Artificial Intelligence). Right now, have talked about everything about buying and downloading the game alongside the basic blunders of Sims 4 looked by clients. You would now be able to determine the issues without anyone else. Simply continue perusing.
Sims 4Features
The advanced AI gives the characters more feelings and emotions
Entirely customizable world where you can live as you like
Plenty of community space and social life
Develop and handle new characters built smarter than ever.
Characters with distinct and marked personalities with feelings and emotions
Create your dream house, meet your new neighbors and have a neighborhood you always wanted
Have new pets in your virtual life
Unlock rewards and prizes by getting over with events and missions
Each update adds new content like ghosts, swimming pool, new occupants, etc.
Also Read:Fnaf World Download PC Full Version
Sims 4Trailer
System Requirements
MINIMUM
Operating system: Windows 7 Service Pack 1
Processor: AMD FX 6300 3.5Ghz/Intel Core i3-6300 3.8Ghz
Memory: 8 GB RAM
Designs: Radeon HD 7750/Nvidia GeForce GTX 550 Ti
DirectX: Version 11
Capacity: 15 GB of accessible space
RECOMMENDED
Operating system: Windows 10 64 Bit
Processor: AMD Ryzen 7 1700 3.0Ghz/Intel Core i7-6700 3.4Ghz (or better)
Memory: 16 GB RAM
Designs: AMD R9 290/Nvidia GeForce GTX 970
DirectX: Version 11
Capacity: 20 GB of accessible space
Extra Notes: Recommended spec dependent on 1080p goals. Introducing game mods will increment the required extra room. Gamepad prescribed.
Sims Free Game For Mac
How To Download Sims 4
1. Click on the “Download Game” button.
2. Download “Sims 4” Installer (Supports Resumable Downloads).
3. Open the Installer, Click Next and choose the directory where to Install.
4. Let it Download Full Version game in your specified directory.
5. Open the Game and Enjoy Playing.
This title has been a cultural phenomenon since 2000, when the first installment was released. The game crossed demographics, and everyone became a fan of the series. Now it’s on its fourth outing; how has the series held up?
From baby steps to retirement
The greatest micro simulation game is back. Sims 4 has big shoes to fill. Is this sequel up to the task?
The premise is the same: create your avatar, build your dream house, fall in love, watch your children grow - choose your life. As ever, there’s a lot that you can buy for your Sims, from stove tops to guitars and everything in between. You can share creations of your with other players online, and the detail work that’s gone into some of the objects in this game is incredible.
But you could be forgiven for thinking that there should be more in Sims 4 than there were in any of the previous games. Sadly, this is not the case.
There’s no swimming. You can’t make pools and you can’t toss your Sims in, remove the ladders, and wait for them to doggy-paddle themselves into an early grave. That was one of the most iconic things about the franchise up until now and it’s a curious thing to remove. The whole point of the game is to have complete control over the life of the Sim, so why take any of that control away from the player?
The avatars are now much more competent than they were in the last game. You don’t have to babysit them all the time, and while that might be good for some, it still takes away the player’s control.
While the game looks good and runs pretty well, it doesn’t really make up for the issues here. The loading screens take forever when you first start the game. This is a legendary trait of any Maxis game, but this time it’s really something else. If that weren’t enough, the most critical visual component in the game is broken: the camera. How can this be? Did the developers not playtest the game? Do they not realize the camera is broken?
It’s frustrating, because the team and Maxis / EA could have had a smash-hit here. But modern corporate practices are probably responsible for the underwhelming game that is The Sims 4.
Sims Freeplay For Mac
Where can you run this program?
You can run this game on Mac OS and Windows computers.
Is there a better alternative?
Sims For A Mac
Yes; in fact, The Sims 3 can offer you a better experience. If you’re looking for other Maxis sim titles, try any of the SimCity games.
Our take
While The Sims 4 does little to improve upon the groundwork laid by its predecessors, it’s still a fun game at its heart. The customization and in-game object shopping could take you hours alone, but it feels like this game is being purposefully left empty. Considering that the franchise has always banked on the expansion packs to turn an extra profit, that could be the reason it feels so bare.
Should you download it?
Yes. Despite its flaws, Sims 4 could be fun, and it might be more enjoyable if you haven’t played any of the previous games.
0 notes
Text
Download Express Vpn For Mac

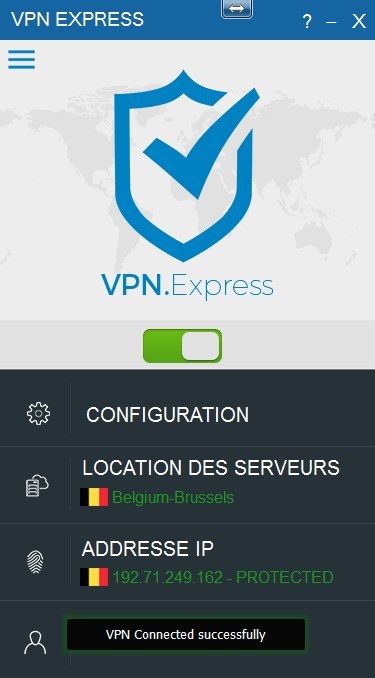
ExpressVPN is a virtual private network engineered to protect your privacy and security. Go online safely and anonymously in just a few taps. 7-day free trial Download it for free on your Android phone, tablet, or TV. Fast VPN server network Connect to 3,000+ VPN servers in 160 locations in 94 countries. Unlimited speed and bandwidth. Access any content Stream or download anything, from any of. Read reviews, compare customer ratings, see screenshots, and learn more about VPN Unlimited - WiFi Proxy. Download VPN Unlimited - WiFi Proxy for macOS 10.11 or later and enjoy it on your Mac.
Express VPN 8.5.3 2020 Crack With Serial Key Free Download [Lifetime]
Express VPN 2020 Crack safe, secure and ultimately explains why it’s one of the most popular VPNs. With a few exceptions, the best way to make value offers based on your VPN preferences is to use a revenue stream. He wants yes, the law itself. Fortunately, ExpressVPN is a veteran provider and right to its word: it operates under a policy that needs no questionable returns, that is, in our experience, that is precisely it. Also, any organized character may not surprise you.
Express VPN 2020 Crack It is a powerful IP communication software for PC. It may allow you to connect your Internet address to protect your IP. This is a speedy and secure program. You can also create a secure connection between your website address and another site.
With this program, we can open all blocked web pages.
This VPN gives you a shared address and IP address and also hides your primary IP address.
Express VPN is a simple VPN application that is the most secure way to connect the IP address of your country.
You can create a website with a respectable screen.
You can set up a connection anywhere on the IP and do something about it.
VPN VPN Crack Life 2019 Free Download
Express VPN Crack Free Download Lifetime 2020
Express VPN Full Version Beat is the latest and most advanced VPN application that allows you to hide your identity and change your IP address while using it. By using it, we may store relevant information from unauthorized persons. Anyone outside can share our personal information. This is the best application for global changes, installation, progress, speed, and security. It offers a wide range of VPN configurations and protocols. The user can be allowed to change their position and still select IP by IP. You can change the status of any country like the UK, Australia, USA and 99 other countries in the world. Using it, you can access all the block positions in your country, as well as the positions in your country. they will have access to your address. If our IP address is changed, no one will be able to access our computer. If you want to change your IP address, use it.
How to set ExpressVPN for Windows
Register with ExpressVPN on the instructions page
Download ExpressVPN for Windows
Connect to one of 160 sites
Use the Internet you want to use.
Key Features:
High altitude and 99.9% of the time.
24-hour customer service.
Unlimited security and bandwidth services.
Your ad has no ads.
More than 145 VPN sites worldwide.
Communication time on three devices.
Services are shipped to more than 94 countries.
High quality, safer, and easier to use.
100% accurate and safe testing.
Your original IP cannot be hidden during the application.
You can download this program here.
You can create the best, most reliable, and secure IP lines with a single click.
This program is elementary and straightforward
provides unlimited benefits
To hide where you are and show somewhere else
And fast online
Support for all Windows operating systems (7,8,8,1,10 and Linux) and Mac OS, iOS, etc.
data to block only sites
How to Crack?
Vpn Express Mac Download For Windows 10
Download and install the crack setup from the below link
Run key generator After complete installation
generate the latest key and use it
Done.
Express VPN 2020 Serial Key
Express VPN 2019 Crack Download [Lifetime]
Wondersoft
Free Express Vpn Download
Express VPN 2019 Crack
5
Express VPN 9.0.6 Crack & Activation Code Full Version Free Download
Express VPN Crack is application software through which you can connect the internet with a fully secure and confidential connection. It allows you to join the web anonymously and provide your own private network VPN connection. Also, encrypt your browsing data, and nobody can access it. It is useful when you didn’t have trust in your Internet service provider (ISP). Your install it on any device easily. It is available in different versions for pc, mac, wireless routers, etc. you can easily install and configure it. Also, it can download it free, but you have to pay to use it permanently. It has a straightforward interface, and anybody can easily use it. Provide different servers of different countries to which you can connect and become anonymous on the internet.
You were working on a secret project on the internet and didn’t allow anyone to access your connection; it is best for you. Express VPN Activation Code provides the fastest way to connect the internet easily and safely. Provide full data security. You can connect to it any time, any place even in traveling. Can create its account on your google account. Provide different methods of payment. You can easily pay for it from your bank account or your mobile device. It also gives and free trial period of some days. So firstly you can try it then if you want to use it you have to pay. Otherwise, you can’t use it. Is easy to use. You have to select the server and tap on connecting to connect that sever of the country. I also recommend you connect the fastest sever.
Express VPN Crack with Activation Code Free Download
Express VPN Crack APK will provide you with proprietary software in exchange for a monthly subscription. It relieves you from the difficulties of configuring your server and client, as well as provide you with 24/7 customer support. You also benefit from hundreds of servers in the score of countries that you can switch between seamlessly. Express VPN is one of the most powerful and comprehensive source tools of open VPN. It is far more difficult to install and configure than shadow socks but is also far more customization. Apps are available in the App Store and Play Store. It has SSH. If you are trying to avoid lengthy steps or configuration, one easy solution is to set up or rent any server that you have SSH access.
Express VPN Torrent is application software through which you can connect the internet with a fully secure and confidential connection. It allows you to connect the internet anonymously and provide your own private network VPN connection. Also, encrypt your browsing data, and nobody can access it. Is useful when you didn’t have trust in your Internet service provider (ISP).Your install it on any device easily. It is available in different versions for pc, mobile, iOS, routers, etc. you can easily install and configure it. You can download it free, but you have to pay to use it permanently. It has an easy interface, and anybody can easily use it. Provide different servers of different countries to which you can connect and become anonymous on the internet. Can connect the server of the country which you want to connect.
Express VPN Key Features:

If a server is slow, then you can connect to another one. Advantages it helps you to disguise your IP from sites you visit, as well as unblock websites and circumvent Content restrictions based on your location. It is not very difficult to setup.
Basic Features Content from anywhere: – Watch, listen, stream, and enjoy Content from censored and banned websites.
Stay secure: – On one click, now you are protected.
You can also access the websites which are block or unrestricted in your country.
Also, play games and can be use apps that are banned.
Also, it fully secure and safe virtual private network (VPN) on the internet.
It is best for you.
It provides the fastest way to connect the internet easily and safely provide full data security.
What’s New In Express VPN Full Cracked Version?
It can join the server of the country in which you want to connect. It can also access websites that are block or unrestricted in your country and even play games and can be use apps that are banned. Also, it is a fully secure and safe virtual private network (VPN) on the internet.
Framework working on enhancements and upgrades
Little changes have been made.
Alongside this, some prior mix-ups are illuminated.
The latest organize locking component executes change.
Connection to the framework in a tick on.
New territories reveal apparatus improvements.
Some privateness issues happen to be upgraded.
Substantially more protection wellbeing and security.
Relentless working capacity with Netflix
Working upgrades.
Nobody can access your data, and it hides your internet protocol (IP) address. Multiple Servers:- It provides 160 serves of 94 countries. You can connect with any server without any limits. For every device: – It available for Windows, Android, iOS, Mac, Linux, router, etc. Fully support: – Real humans are available 24/7 for your help and troubleshooting. Multiple devices: – Once you installed express Vpn, you can connect five devices simultaneously. Unlimited Downloading:-Download as much as you can without any resistance. You were working on a secret project on the internet and didn’t allow anyone to access your connection.
System Requirements:
Windows XP/ Vista/ 7/ 8/ 8.1/ 10 (32-bit or 64-bit – all editions)
2 GHz multi-core processor
1 GB RAM (Memory)
2 GB free hard disk space
1024 x 768 display
How To Install Express VPN Crack?
Download the latest version from given below the link
Install the file
Wait for the installation process.
Now the file is install
Enjoy the file.
Express VPN 9.0.6 Crack & Activation Code Free Download From Links Given Below……
Download Express Vpn For Macbook
Ishfaq Malik
Download Express Vpn For Macbook Pro
Express VPN
5
Express VPN Crack
Mac & Windows
VPN
0 notes
Text
Neighbour From Hell For Mac

Download Neighbours from Hell: Season 1 PC for free at BrowserCam. HandyGames published the Neighbours from Hell: Season 1 Game for Android operating system mobile devices, but it is possible to download and install Neighbours from Hell: Season 1 for PC or Computer with operating systems such as Windows 7, 8, 8.1, 10 and Mac.
Neighbour From Hell For Mac Download
Neighbour From Hell For Mac Full
Download Neighbours from Hell: Season 1 PC for free at BrowserCam. HandyGames published the Neighbours from Hell: Season 1 Game for Android operating system mobile devices, but it is possible to download and install Neighbours from Hell: Season 1 for PC or Computer with operating systems such as Windows 7, 8, 8.1, 10 and Mac.
38 Games Like Neighbours from Hell 2 for Mac. Neighbors from Hell: On Vacation is the sequel to the puzzle strategy game Neighbors From Hell. You are Woody again and have a reality show starring one annoying neighbor (again). This time the pest has followed his unfortunate neighbor on a vacation cruise, but this time the neighbor is not alone.
Welcome to the “Neighbours from Hell” for Mac game page. This page contains information + tools how to port Neighbours from Hell Compilation in a few simple steps (that even a noob can understand) so you can play it on your Mac using Crossover. Crossover makes it possible to play Windows on your Mac with just a few clicks!
Neighbour From Hell For Mac Download
Let's find out the prerequisites to install Neighbours from Hell: Season 1 on Windows PC or MAC computer without much delay.
Game Details: Welcome to the “Neighbours from Hell” for Mac game page. This page contains information + tools how to port Neighbours from Hell Compilation in a few simple steps (that even a noob can understand) so you can play it on your Mac using Crossover.Crossover makes it possible to play Windows on your Mac with just a few clicks! Download and Play “Hello Neighbor” on Your Favorite PC (Windows) or Mac for Free Become a Home Invader on a Mission. Imagine walking down the street of your suburban neighborhood on a peacefully sunny day only to come to a halt when you hear yelling from a nearby house.

Select an Android emulator: There are many free and paid Android emulators available for PC and MAC, few of the popular ones are Bluestacks, Andy OS, Nox, MeMu and there are more you can find from Google.
Compatibility: Before downloading them take a look at the minimum system requirements to install the emulator on your PC.
Neighbour From Hell For Mac Full
For example, BlueStacks requires OS: Windows 10, Windows 8.1, Windows 8, Windows 7, Windows Vista SP2, Windows XP SP3 (32-bit only), Mac OS Sierra(10.12), High Sierra (10.13) and Mojave(10.14), 2-4GB of RAM, 4GB of disk space for storing Android apps/games, updated graphics drivers.
Finally, download and install the emulator which will work well with your PC's hardware/software.

How to Download and Install Neighbours from Hell for PC or MAC:

Open the emulator software from the start menu or desktop shortcut in your PC.
Associate or set up your Google account with the emulator.
You can either install the Game from Google PlayStore inside the emulator or download Neighbours from Hell APK file from the below link from our site and open the APK file with the emulator or drag the file into the emulator window to install Neighbours from Hell: Season 1 Game for pc.
You can follow above instructions to install Neighbours from Hell: Season 1 for pc with any of the Android emulators out there.
0 notes
Text
Forecast Bar For Mac

Download WeatherBug - Weather Forecasts and Alerts for macOS 10.11 or later and enjoy it on your Mac. Get all the weather information you need straight from your menu bar with WeatherBug! See real-time weather conditions, get severe weather alerts, check the hourly forecast, and see a live radar view for all your favorite locations.
This is an Apple Mac, iPad or iPhone Video Tutorial from ScreenCastsOnline: Forecast Bar is neat and tidy menu bar or Dock application for macOS that presents the current weather in your area as well as locations you choose.
Forecast Bar For Mac Free
To never get caught in the bad weather or allow sudden thunderstorms to ruin my sunny travel, I always keep a powerful weather app on my radar. That’s the prime reason why I’ve added the weather forecast to my Mac menu bar so that keeping track of weather conditions will be a tad easier.
Forecast Bar for iOS and Watch Also available for Mac and Apple TV. Forecast Bar offers hyper-accurate, hyper-local live weather and forecasts right at your fingertips. With full support for 3D Touch, iPad multitasking, and an automatic dark mode, Forecast Bar is the most modern and last weather app you'll ever need!
Rather than launching the app and taking a look at the weather predictions, it’s more convenient to have a glance at the actual condition in the menu bar. From what I’ve experienced, many of you would prefer to go this way as well. Let me help you get through!
How to View Weather Forecast in Mac Menu Bar
Frankly speaking; showing weather forecast in the menu bar on macOS is as straightforward as downloading an app. Literally.
Forecast Bar For Mac
There are many weather apps for macOS that let you do so with ease. I’m going to use Weather Widget Desktop app. It works perfectly and is considered one of the finest weather apps for Mac.
The app is available for free (with some limitations) and requires OS X 10.10 or later, 64-bit processor.
Step #1. First off, download Weather Widget Desktop on your Mac.
Step #2. Now, launch the app and allow it to access your current location. Hit OK in the popup.

Voila! Check out the current weather condition will appear in the menu on your Mac. You can click on the tiny weather icon in the menu bar to view additional information like the 3-day forecast.
If you want the app to show more, you will have to upgrade to the pro version. From the same menu, you can head over to the Preferences panel of the app and use other goodies like the option to show the latest weather right on your desktop.
If you ever want to remove the weather prediction icon from the menu, simply click on weather icon and choose Quit.
The app feels pretty intuitive and works accurately. So, I would definitely like to give it thumbs up.
Other Alternatives?
As mentioned above, there are quite a few weather apps that can let you get it done. Based on my personal experience, I would suggest the names is Forecast Bar (free). They are all highly rated and can live up to your demand pretty well.
Wrapping up…

That’s how you can effortlessly keep an eye on the latest weather conditions and save yourself from the heavy downpour. Have any question? Shoot it down below.
You’d like to have a quick look at these posts as well:
The founder of iGeeksBlog, Dhvanesh, is an Apple aficionado, who cannot stand even a slight innuendo about Apple products. He dons the cap of editor-in-chief to make sure that articles match the quality standard before they are published.
https://www.igeeksblog.com/author/dhvanesh/
https://www.igeeksblog.com/author/dhvanesh/
https://www.igeeksblog.com/author/dhvanesh/
https://www.igeeksblog.com/author/dhvanesh/
0 notes
Text
Hard Disk Drive For Mac

Best external hard drives for Macs in 2020 1. Western Digital My Passport 4TB external hard drive. Capacity: 4TB Interface: USB 3.0 This is the latest generation. Buffalo MiniStation Thunderbolt external hard drive. Capacity: 1TB, 2TB Interface: Thunderbolt, USB 3.0 If you want.
Sep 28, 2020 • Filed to: Solve Mac Problems • Proven solutions
If you have tried partitioning a hard drive without any previous experience then you understand that it is a daunting task. Handling the Mac partition manager is not as easy as it sounds. Once you learn the process, it gets pretty easy. The good thing is that you don't need any external or third-party tools for partitioning.
So, in this article, we are going to guide you through partition and un partition on Mac without any hassle.
Discover the world of external hard drives for Mac. Compare portable, USB and external hard drive models for office and home and shop online.
Solution: There are several fixes to this problem: Check the SMART status of your hard drive by using Disk Utility. Boot into macOS Recovery mode, then go to Disk Utility First Aid. Click Run to repair the hard drive. If the repair doesn’t work, back up the Mac storage drive, then.
Part 1. What Does Other Mean in Mac Storage?
Before you step into detail, first you need to understand what exactly the term partitioning means.
By Partitioning your Mac drive, you split the hard drive in two or more separate, usable systems. This feature allows the users to run multiple OS on the same system/device such as Windows and macOS simultaneously. You can even run two versions of macOS on the same system. The partitioning also divides the storage space on the hard drive. And a specific portion goes to each partition. So, if you are running out of storage, it is advised that either you extend the storage or avoid partitioning at all.
Here are some advantages of Partitioning that will convince you that it is beneficial for the users.
You get to switch between different versions of OS X including Tiger, Leopard, or Snow Leopard at the same time.
The users can use the Boot Camp Assistant to run Windows OS on the Mac system. This way, you get to save some bucks and efforts to maintain two separate systems for your needs.
During the startup Volume disk errors, it is needed that the repair program is run from another volume to fix the errors. Partitioning of Mac allows the users to keep a disk where the bootable copy of OS X is stored and it can be used to run Disk Utility.
You can share your iPhoto Library between two or more user accounts on Mac after partitioning.
Partitioning also allows Mac users to manage their backups efficiently. You can use Mac Time Machine without using an external hard drive.
If you opt-out for partitioning, make sure that your Mac has enough space otherwise the disk performance would decline and you might experience some working issues in both drives.
Part 2. How to Partition a Hard Drive on Mac?
There are two methods that allow the users to create a partition on Mac. The first method is using Disk Utility and the second one is using Boot Camp. Both these methods work great to partition hard drive on Mac.
Method 1. Disk Utility:
The Disk Utility is used when you wish to partition Mac and wants to install a different version of the same OS. As we all know, Disk Utility can perform various tasks on Mac including repair and partition. The Mac partition Manager is used for this process. Before you initiate the process, it is advised that you create a full backup of your device data in case some fault arises. This way, if anything goes wrong, you will still have a copy of your data files.
Now, follow the steps given below to partition your Mac drive:
Press Command + Shift + U keys from the keyboard or access the Utilities in the Application folder. Open the Disk Utility application and select the Mac Internal drive.
You will see two options in the window, i.e. First Aid and Partition. Click on the Partition option and hit the '+' icon.
A new partition will appear on the screen and you can set the storage space according to your requirements.
Give a name to the new drive and tap on the Apply button. You might have to click on a lock symbol to finalize the actions.
You can make changes to the drive even after you've created the partition. When the process is finished, the partition will be visible on the main drive. The partition size can also be modified later when required.
Method 2. Boot Camp:
Remember that you cannot partition hard drive on Mac using Disk Utility if you want to install Windows on the other partition. The Boot Camp Assistant is a handy application for partitioning your Mac drive so that you can run and operate macOS and Windows altogether. In the later version of Mac, this application is pre-installed, so you only need to open it and follow the steps below:
Open Application and go to Utilities. There you will find the Boot Camp Assistant. Double-click on the option to open the Boot Camp and print a copy of the installation and setup guide.
Click on the Create or Remove a Windows Partition option and Continue with the steps.
Now, you have to select a hard drive for partition. If you already have multiple drives, you can select any one which you prefer.
Determine the size of the partition for Windows OS. You can't make a partition smaller than 5 GB and it is recommended that you at least keep 20GB of space for your partitions.
Click on the Partition button at the bottom of the interface and your new partitions will be ready to use.
Now all there is left to do is to insert the Windows installation disk and you will have multiple OS working on the same Mac system.
Get to know how to share external drives between Mac and Windows.
By following the same methods you can partition an external hard drive on Mac whenever you want.
Part 3. How to Delete Other Storage on Mac?
We have learned how to create a partition but knowing how to un partition hard drive on Mac is also crucial. The good thing is that the steps are not much different from the above procedure.
Using Disk Utility:
If you wish to erase or remove the macOS partition, then you'll have to use Disk Utility. You need to follow the steps as:
Launch Disk Utility and click on the Partition which you want to delete from the volume.
Here, select 'Go'>' Go to Folder' or you can use 'Shift + Cmd + G' shortcut.
Switch to the Erase tab and ensure that the Mac OS X Extended is chosen. Tap on the Erase button to delete the partition.
After that, choose the app folder you want to get rid of it. Next, drag it to trash to delete them from your Mac.
Within a while, the reallocated space will be distributed and you will be able to close Disk Utility.
Using Boot Camp:
As you used Boot Camp Assistant to create the Windows partition, you'll also have to use the same app for removing the partition.
Boot your Mac into Mac OS X and open the Boot Camp Assistant. As the application interface opens up, you will see the Install or remove the Windows option.
Continue and choose the Restore Disk to a single Mac OS partition option from the screen. Finalize the changes and hit the Restore button to begin the removal process.
It will take a while to remove the partition and when it is done, you can exit the Boot Camp.
Part 4. How to Recover Lost Data When Partitioning Mac?
The most common reasons why data get lost from a drive are given below:
During hard drive partition
Drive format
System crash
Virus attack
Apart from these, there are other reasons too but these are the reasons which mainly affect the Mac hard drive. And as a result, data gets lost from the system. But you don't have to worry about that now as Recoverit is here.
Recoverit - The Best Software to Recover Word Files:
Whenever you experience a data loss situation, Recoverit Data Recovery Mac will help you to retrieve it. This data recovery software will come in handy even when you've never made a backup of your device. You now know how to partition Mac hard drive and un partition it. But knowing how you can recover the lost or deleted files from the drive is also necessary.
How to Recover Lost Word Files on Mac:
Step 1: Select a Location
Launch the software and select the drive from where the data files are lost. If you don't know which drive to search, tap on the 'I can't find my partition' option, and hit the Start button.
Step 2: Scan the Location
Typically, the software will run an All-Around Recovery scan and search for the lost and deleted files on the entire drive.
Step 3: Preview and Recover
When the scan completes, the files will be listed on the screen. The software will sort out the files according to format to make the search easier. You can select multiple files at a time and have a preview at them.
Part 5. Tips for Deleting Other Files on Mac
Maybe you even know how to un partition a hard drive on Mac; you still have to be careful during carrying out the procedure. So, here are some tips worth keeping mind to make sure that you don't end up with some random error using partitioning or un-partitioning.
The most important thing that you should do before starting is to create a backup of your Mac data.
Keep this in mind when you are creating and removing the partition that the partition created by Disk Utility can only be removed by Disk Utility. And the partition created by Boot Camp will only be deleted by Boot Camp Application.
After you create a partition, you'll also have to install the other version of OS you want to run.
You can also create a partition on the system using the external drive.
It is recommended that you keep a standard amount of 50 GB space for the partition.
Conclusion
It can be concluded that creating and removing a Mac drive partition is not that tough. You just have to careful during the process. And in case of a mishap, Recoverit is always here for your help so that you don't have to suffer from data loss situation.
What's Wrong with Mac
Recover Your Mac
Fix Your Mac
Delete Your Mac
Learn Mac Hacks
Get a data lifeguard for Mac
Disk Drill brings deleted files back from the dead.
Most of the time, when you connect an external hard drive to your Mac’s USB port, you soon see it mount on the desktop. Apple likes to ensure these are easy to find, so they also appear in the Finder in the left-hand column under Devices, since Mac’s treat them the same way as another computer.
However, sometimes, an external hard drive doesn't show up. It’s annoying, especially when you need to transfer something right then. And besides, there can be a risk that data on the external USB pen, hard, or flash drive is corrupt, which means you can’t transfer what you need between devices at all.
Corrupt data can be one reason your Mac won't recognize an external drive, but there are other reasons too. Let’s take a look why this is happening and how you can get an external drive to appear on your Mac and get recover data to access to your documents.
How to fix an external disk drive that won't show up on a Mac
Why an external disk drive is not showing up? There could be a few reasons why a USB flash drive isn’t making an appearance.
Open an External Drive Not Showing on Mac
Get a huge set of top utilities for troubleshooting external hard drives not mounting on a Mac
Start with the basics:
Check whether the drive is properly plugged in. It sounds obvious, but since this relies on a wire - either a USB cable or HDMI cable - if it’s not connected properly then it won’t appear on your desktop.
Faulty cable. Assuming it’s plugged in correctly, not wobbly or loose, the cable could be at fault. Try connecting the same device with a different cable.
Damaged USB or flash drive port. It could be a hardware issue with the Mac. If you’ve got another port, try connecting the device to that one.
Reboot your Mac. Sometimes, if a USB disk won't boot, the cause is macOS issue. Hopefully, some data damage that can be fixed by restarting. Choose the Apple menu > Restart. Or press and hold the power button and, when a dialog box appears, click the Restart or press R. Restarting your Mac essentially clears your macOS’s memory and starts it up fresh.
Incorrectly formatted drive. Not every external drive is optimized for Macs. It could be that you are trying to connect something only fit to interact with Windows devices. If you’ve got a PC or laptop, it’s worth connecting and seeing if you can access the files through another device. The best way to look for an incorrectly formatted drive is to go to
Apple (in the top toolbar menu) > About This Mac > Storage.
See if the external drive shows up here. For more information, go to the same menu option, then select System Report.
Mac not formatted to display external drives on the desktop. It could be that your Mac already recognizes the device, but just isn’t showing its icon on the desktop screen. Even if that is the case, the drive will still appear in the left-hand column of the Finder menu under Devices. You should be able to access your drive that way, and, in the Finder menu under Preferences > General, you can check External Drives to ensure that from now on it shows up on your desktop too.
Reset NVRAM. To do this, shut down or restart your Mac, switch it back on and immediately press these four keys together for at least 20 seconds: Option, Command, P, and R. It should look as though your Mac has started again; if it has, release the keys when you hear the second startup chime. Hopefully, the hard drive has shown up now.
Check Apple’s Disk Utility to see if an external drive is showing up. Disk Utility is within System Preferences, or you can find it using Spotlight. If it is visible, then click the option to Mount, which should make it visible on the desktop and in the External Drives option in the Finder menu.
Unfortunately, if none of those options has worked and the external drive still isn’t visible, then it could have crashed, or be well and truly broken. But there might still be a way you can recover the data on the external drive.
How to show connected devices in Finder
Go to the Finder menu and select Preferences (Cmd+comma).
From General tab tick External disks to ensure that from now on it shows on the desktop.
In the Sidebar tab you can choose which folders and devices will be shown in the left-hand column of the Finder window.
How to add cloud storages to Finder
You can also mount cloud storage as local drive on your Mac. By connecting Google Drive, Dropbox, or Amazon to your computer, you get more space for securely accessing and sharing files. For your ease, add cloud drives to Finder with CloudMounter app, so that you keep them close at hand. You can read detailed instructions on managing cloud storage as local drives here.
Repair the failed external drives with First Aid
If your drive is having problems, you can try to fix them yourself with First Aid and therefore get access to your files. First Aid tool will check the disk for errors and then attempt a repair as needed. It helps to verify and repair a range of issues related to startup HD and external drive problems. If you are able to fix the hard drive or SSD in your Mac (or an external drive) using Disk Utility you will hopefully be able to recover your files.
To run Fist Aid on an external hard drive:

Open Disk Utility. You can searching for it using Spotlight Search or via Finder > Application > Utility
Check on your external hard drive, click the First Aid tab and select Run to start running diagnostics.
If First Aid successful in fixing errors, the external drive should be available to mount. If the utility unable to repair issues, your drive truly is broken or formatted using a file system that the Mac cannot read - in this way we suggest you follow the next steps to recover data from a damaged disk drive.
Hard Disk Drive For Mac And Windows Pc
How to recover data from a crashed drive
Thankfully, there is an app for that. Disk Drill is the world’s premier data recovery software for Mac OS X. Powerful enough to retrieve long-lost, mistakenly deleted files from Macs, external hard drives and USB drives and camera cards.
Get a file recovery app
With Setapp you get a pack of professional tools for file recovery and Mac maintenance.
An easy way to recover lost files on an external hard drive
Providing you already have Disk Drill Pro version, which you can get automatically by downloading from Setapp:
Connect your drive to the Mac.
Quit all other applications on the Mac, especially those that may be trying to access the external drive (e.g. iPhoto, Words)
Launch Disk Drill.
Click on the external drive that you are trying to recover files from. If it has partitions, you will see all of them. If, however, you still don’t see any volume to the external drive then you may need to try some of the steps above again or read the Disk Drill Scanning FAQs.
To avoid the external drive being accessed during the recovery process, click Extras next to the drive or drive partition or file, then select Remount Volume As Read Only. A padlock will appear, protecting the drive during the process.
Now click Rebuild (or Recover) next to the file(s) you are trying to recover. Once the scan is finished - it may take some time if the files are large - a list of files will appeal.
Next, click Mount Found Items as Disk button on the bottom-left below the scan results.
Disk Drill “strongly suggest saving the files to a different drive than the one you are trying to recover files from. Saving to the same drive substantially lowers your chances of recovery.”
A drive icon will appear, which once you double click will give you the option to open the files as you would do before they were lost. Drag them to another location, such as your desktop or a folder on your Mac.
Open the files to ensure they have been recovered properly and safely eject the external drive.
Disk Drill does have other ways to recover lost files but assuming there aren’t complications, this method is the most effective. Disk Drill Pro recovery app is available from Setapp, along with dozens of Mac apps that will make your life easier. Never have to worry about a crashed or corrupted external drive again.
A few more tips on getting your files back
Macs and third-party apps that look after Macs, such as Disk Drill and iStat Menus come with a S.M.A.R.T. (also known as Self-Monitoring, Analysis and Reporting Technology) status monitor. If a SMART check reports errors, then it could mean the hard drive is at risk of failing completely. Within Disk Utility and Disk Drill, there are several solutions for this: Repair Disk Permissions and Repair Disk. If neither work, it’s recommended that you backup all of the data from the disk, erase, then run a SMART check again. The external hard drive should show up as Verified.
Partitions can get lost within hard drives, temporarily hiding all of the information contained within. Disk Drill can help to identify and restore this information.
Within Disk Drill, you can restore data when a hard drive is damaged or add formatting, which is also something Disk Utility can help with.
CleanMyMac, another useful app available from Setapp, can help you identify external hard drive errors and repair them. It is an essential tool worth trying when you’re having external hard drive difficulties.
Try all these apps for free
Get a huge set of top apps for keeping your Mac in shape. Best utilities in one pack, give it a go!
Mac Hard Disk In Windows
Alternative ways to recover data from an external hard drive
Reset the System Management Controller (SMC) if your Mac shuts down when you plug in an external hard drive. Then use a different port to connect the external hard drive. If you’ve got a battery that you can’t remove:
Shut down and unplug the power adapter
Press Shift-Control-Option and the power button at the same time. Do this for 10 seconds
Release all keys
Plug the power adapter back in and switch your Mac back on
For Macs with removable batteries, you need to switch them off, remove the battery, then press and hold the power button for 5 seconds. After that, put the battery back in, plug in the power adapter and switch the power on again.
What’s your file format? One reason your Mac isn’t recognizing the hard drive is the file format. Windows uses NTFS file formats, while Macs, up until the introduction of Sierra, have used HFS+. Now, Apple has introduced the Apple File System (APFS) for newer operating systems. It is possible to format a hard drive so it can be read on Mac and Windows computers, providing you format using exFAT. However, if you’re having problems accessing the files and the issue is due to formatting, you will need to connect it to a device it can be read on, and then format the files correctly for the computer you are going to use it on next.
How to make Ext2/Ext3 drives readable on Mac
The common issue is Ext2- and Ext3-formatted drives are not readable on macOS. There are two ways to access such external drives on your Mac – via Linux OS or FUSE system. The easiest would be installing Linux to a secondary drive or virtual machine.
If you go with Linux installation, dual boot your Mac with Linux on another drive and use FAT32 as a transfer intermediary. If you don’t have a drive to install Linux to, use virtual machine as an interface for it. Transferring can be done the same way – with FAT32, or via network.
Another option for reading Ext2/Ext3 disks is mounting disk with Filesystem in Userspace (FUSE). Basically, it works as an extra interface enabling file system access via specially installed modules. Here’s how to mount drives with FUSE:
Install FUSE for macOS or MacFUSE as well as fuse-ext2 module.
Use the following Terminal command to enable Disk Utility’s debug menu and see all partitions: defaults write com.apple.DiskUtility DUDebugMenuEnabled 1
Attach your Ext2/Ext3 drive and locate the device name via Disk Utility.
In your user account, create a folder to be used as a mount point.
Use the following Terminal command to mount the drive as read-only: fuse-ext2 /dev/disk2s2 /Volumes/mountpoint
For write support, use the command: fuse-ext2 -o force /dev/disk2s2 /Volumes/mountpoint
And that’s not the only case where Terminal helps you access external drive.
Employ the handy all-powerful Terminal, which always comes forward with solutions for difficult problems. Especially if System Information does recognize the USB or hard drive, but continues to hide it from you, disconnect the drive and try to find it using the Terminal, which you can find in Applications > Utilities.
Once in the Terminal, type in the command diskutil list
A list with information about volumes and drives should appear
Look for a section labelled /dev/disk_ (external, physical)
Make a note of the whole line after the word disk
Now put the following command into the Terminal diskutil info disk followed by the number or digits assigned to that disk
Now you should see detailed information about the drive, therefore confirming that your Mac can and does recognize it
Eject using the Terminal by entering the command diskutil eject disk followed by the number or digits assigned to that disk
Physically remove the disk from you Mac
Plug it back in and your Mac should recognize it
Console is also reliable when it comes to solving tricky problems, although it isn’t always that easy to use. You can find Console under Applications > Utilities > Console. Console shows if an external drive or any error is detected under the Errors and Faults tab. If no errors show up, then the problem is not caused by the device.
To sum up, there are lots of potential solutions for a Mac not reading an external hard drive. If we were to pick one, Disk Drill seems to be the most well-rounded, offering plenty of customizations and power in an easy-to-use interface. Disk Drill Pro recovery app is available via Setapp, along with 150+ Mac apps that strive to make your life much much easier. At the very least, you’ll never have to worry about a crashed or corrupted external drive ever again.
Setapp lives on Mac and iOS. Please come back from another device.
Meantime, prepare for all the awesome things you can do with Setapp.
Read on
Sign Up
Setapp uses cookies to personalize your experience on our website. By continuing to use this site, you agree to our cookie policy.
0 notes
Text
Java For Mac Ipad

Free Java Download For Mac
Java Runtime For Mac
With an all-new design that looks great on macOS Big Sur, Xcode 12 has customizable font sizes for the navigator, streamlined code completion, and new document tabs. Xcode 12 builds Universal apps by default to support Mac with Apple Silicon, often without changing a single line of code.
Designed for macOS Big Sur.
Is it possible to get Java work on iPad? Got a tip for us? IPad Air iPad mini 5. IPhone 11 Pro iPhone 12 iPhone SE 2020 iPhone XR iPhone XS iPod touch Mac mini. But they don’t give the iPad Pro the same multitasking superpowers that a MacBook (or any Mac) has. For example, you can’t have multiple Word documents open at one time on an iPad Pro and cut. Enable JavaScript in Safari for iOS (iphone, ipod, ipad) Enable JavaScript in Safari. With Safari on MacOS. Click on Safari Menu and select 'Preferences' (or press Command+,) If you are using Safari on Windows. Click the Gear icon and select 'Preferences'. In the 'Preferences' window select the 'Security' tab. However, as it is Java™ based, it runs on most operating systems that support Java including Linux®, Mac OS, Microsoft® Windows®, IBM AIX®, IBM i, and so on. Figure 2 shows the Data Transfer panel when running IBM i Access Client Solutions on a Mac OS client.
Xcode 12 looks great on macOS Big Sur, with a navigator sidebar that goes to the top of the window and clear new toolbar buttons. The navigator defaults to a larger font that’s easier to read, while giving you multiple size choices. New document tabs make it easy to create a working set of files within your workspace.
Document tabs.
The new tab model lets you open a new tab with a double-click, or track the selected file as you click around the navigator. You can re-arrange the document tabs to create a working set of files for your current task, and configure how content is shown within each tab. The navigator tracks the open files within your tabs using strong selection.
Navigator font sizes.
The navigator now tracks the system setting for “Sidebar icon size” used in Finder and Mail. You can also choose a unique font size just for Xcode within Preferences, including the traditional dense information presentation, and up to large fonts and icon targets.
Code completion streamlined.
A new completion UI presents only the information you need, taking up less screen space as you type. And completions are presented much faster, so you can keep coding at maximum speed.
Redesigned organizer.
An all-new design groups all critical information about each of your apps together in one place. Choose any app from any of your teams, then quickly navigate to inspect crash logs, energy reports, and performance metrics, such as battery consumption and launch time of your apps when used by customers.
SwiftUI
SwiftUI offers new features, improved performance, and the power to do even more, all while maintaining a stable API that makes it easy to bring your existing SwiftUI code forward into Xcode 12. A brand new life cycle management API for apps built with SwiftUI lets you write your entire app in SwiftUI and share even more code across all Apple platforms. And a new widget platform built on SwiftUI lets you build widgets that work great on iPad, iPhone, and Mac. Your SwiftUI views can now be shared with other developers, and appear as first-class controls in the Xcode library. And your existing SwiftUI code continues to work, while providing faster performance, better diagnostics, and access to new controls.
Universal app ready.
Xcode 12 is built as a Universal app that runs 100% natively on Intel-based CPUs and Apple Silicon for great performance and a snappy interface.* It also includes a unified macOS SDK that includes all the frameworks, compilers, debuggers, and other tools you need to build apps that run natively on Apple Silicon and the Intel x86_64 CPU.
Updated automatically
When you open your project in Xcode 12, your app is automatically updated to produce release builds and archives as Universal apps. When you build your app, Xcode produces one binary “slice” for Apple Silicon and one for the Intel x86_64 CPU, then wraps them together as a single app bundle to share or submit to the Mac App Store. You can test this at any time by selecting “Any Mac” as the target in the toolbar.
Test multiple architectures.
On the new Mac with Apple Silicon, you can run and debug apps running on either the native architecture or on Intel virtualization by selecting “My Mac (Rosetta)” in the toolbar.
Multiplatform template
New multiplatform app templates set up new projects to easily share code among iOS, iPadOS, and macOS using SwiftUI and the new lifecycle APIs. The project structure encourages sharing code across all platforms, while creating special custom experiences for each platform where it makes sense for your app.
Improved auto-indentation
Swift code is auto-formatted as you type to make common Swift code patterns look much better, including special support for the “guard” command.
StoreKit testing
New tools in Xcode let you create StoreKit files that describe the various subscription and in-app purchase products your app can offer, and create test scenarios to make sure everything works great for your customers — all locally testable on your Mac.
Get started.

Download Xcode 12 and use these resources to build apps for all Apple platforms.
Free Java Download For Mac
JavaScript is disabled on your browser.
Class
Class Mac
javax.crypto.Mac
All Implemented Interfaces:
Cloneable
This class provides the functionality of a 'Message Authentication Code' (MAC) algorithm.
A MAC provides a way to check the integrity of information transmitted over or stored in an unreliable medium, based on a secret key. Typically, message authentication codes are used between two parties that share a secret key in order to validate information transmitted between these parties.
A MAC mechanism that is based on cryptographic hash functions is referred to as HMAC. HMAC can be used with any cryptographic hash function, e.g., SHA256 or SHA384, in combination with a secret shared key. HMAC is specified in RFC 2104.
Every implementation of the Java platform is required to support the following standard Mac algorithms:
HmacMD5
HmacSHA1
HmacSHA256
These algorithms are described in the Mac section of the Java Cryptography Architecture Standard Algorithm Name Documentation. Consult the release documentation for your implementation to see if any other algorithms are supported.
Since:
1.4
Constructor Summary
ConstructorsModifierConstructor and Descriptionprotected Mac(MacSpi macSpi, Provider provider, String algorithm)
Method Summary
MethodsModifier and TypeMethod and DescriptionObjectclone()
Returns a clone if the provider implementation is cloneable.
byte[]doFinal()byte[]doFinal(byte[] input)
Processes the given array of bytes and finishes the MAC operation.
voiddoFinal(byte[] output, int outOffset)StringgetAlgorithm()
Returns the algorithm name of this Mac object.
static MacgetInstance(String algorithm)
Returns a Mac object that implements the specified MAC algorithm.
static MacgetInstance(String algorithm, Provider provider)
Returns a Mac object that implements the specified MAC algorithm.
static MacgetInstance(String algorithm, String provider)
Returns a Mac object that implements the specified MAC algorithm.
intgetMacLength()ProvidergetProvider()
Returns the provider of this Mac object.
voidinit(Key key)voidinit(Key key, AlgorithmParameterSpec params)
Initializes this Mac object with the given key and algorithm parameters.
voidreset()voidupdate(byte input)
Processes the given byte.
voidupdate(byte[] input)voidupdate(byte[] input, int offset, int len)
Processes the first len bytes in input, starting at offset inclusive.
voidupdate(ByteBuffer input)
Processes input.remaining() bytes in the ByteBuffer input, starting at input.position().
Methods inherited from class java.lang.Object
equals, finalize, getClass, hashCode, notify, notifyAll, toString, wait, wait, wait
Constructor Detail
Mac
Parameters:
macSpi - the delegate
provider - the provider
algorithm - the algorithm
Method Detail
getAlgorithm
Returns the algorithm name of this Mac object.
This is the same name that was specified in one of the getInstance calls that created this Mac object.
Returns:
the algorithm name of this Mac object.
getInstance
Returns a Mac object that implements the specified MAC algorithm.
This method traverses the list of registered security Providers, starting with the most preferred Provider. A new Mac object encapsulating the MacSpi implementation from the first Provider that supports the specified algorithm is returned.
Note that the list of registered providers may be retrieved via the Security.getProviders() method.
Parameters:
algorithm - the standard name of the requested MAC algorithm. See the Mac section in the Java Cryptography Architecture Standard Algorithm Name Documentation for information about standard algorithm names.
Returns:
the new Mac object.
Throws:
NoSuchAlgorithmException - if no Provider supports a MacSpi implementation for the specified algorithm.
See Also:
Provider
getInstance
Returns a Mac object that implements the specified MAC algorithm.
A new Mac object encapsulating the MacSpi implementation from the specified provider is returned. The specified provider must be registered in the security provider list.
Note that the list of registered providers may be retrieved via the Security.getProviders() method.
Parameters:
algorithm - the standard name of the requested MAC algorithm. See the Mac section in the Java Cryptography Architecture Standard Algorithm Name Documentation for information about standard algorithm names.
provider - the name of the provider.
Returns:
the new Mac object.
Throws:
NoSuchAlgorithmException - if a MacSpi implementation for the specified algorithm is not available from the specified provider.
NoSuchProviderException - if the specified provider is not registered in the security provider list.
IllegalArgumentException - if the provider is null or empty.
See Also:
Provider
getInstance
Returns a Mac object that implements the specified MAC algorithm.
A new Mac object encapsulating the MacSpi implementation from the specified Provider object is returned. Note that the specified Provider object does not have to be registered in the provider list.
Parameters:
algorithm - the standard name of the requested MAC algorithm. See the Mac section in the Java Cryptography Architecture Standard Algorithm Name Documentation for information about standard algorithm names.
provider - the provider.
Returns:
the new Mac object.
Throws:
NoSuchAlgorithmException - if a MacSpi implementation for the specified algorithm is not available from the specified Provider object.
IllegalArgumentException - if the provider is null.
See Also:
Provider
getProvider
Returns:
the provider of this Mac object.
getMacLength
Returns the length of the MAC in bytes.
Returns:
the MAC length in bytes.
init
Parameters:
key - the key.
Throws:
InvalidKeyException - if the given key is inappropriate for initializing this MAC.
init
Initializes this Mac object with the given key and algorithm parameters.
Parameters:
key - the key.
params - the algorithm parameters.
Throws:
InvalidKeyException - if the given key is inappropriate for initializing this MAC.
InvalidAlgorithmParameterException - if the given algorithm parameters are inappropriate for this MAC.
update
Parameters:
input - the input byte to be processed.
Throws:
IllegalStateException - if this Mac has not been initialized.
update
Processes the given array of bytes.
Parameters:
input - the array of bytes to be processed.
Throws:
IllegalStateException - if this Mac has not been initialized.
update
Processes the first len bytes in input, starting at offset inclusive.
Parameters:
input - the input buffer.
offset - the offset in input where the input starts.
len - the number of bytes to process.
Throws:
IllegalStateException - if this Mac has not been initialized.
update
Processes input.remaining() bytes in the ByteBuffer input, starting at input.position(). Upon return, the buffer's position will be equal to its limit; its limit will not have changed.
Parameters:
input - the ByteBuffer
Throws:
IllegalStateException - if this Mac has not been initialized.
Since:
1.5
doFinal
Finishes the MAC operation.
A call to this method resets this Mac object to the state it was in when previously initialized via a call to init(Key) or init(Key, AlgorithmParameterSpec). That is, the object is reset and available to generate another MAC from the same key, if desired, via new calls to update and doFinal. (In order to reuse this Mac object with a different key, it must be reinitialized via a call to init(Key) or init(Key, AlgorithmParameterSpec).
Returns:
the MAC result.
Throws:
IllegalStateException - if this Mac has not been initialized.
doFinal
Finishes the MAC operation.
A call to this method resets this Mac object to the state it was in when previously initialized via a call to init(Key) or init(Key, AlgorithmParameterSpec). That is, the object is reset and available to generate another MAC from the same key, if desired, via new calls to update and doFinal. (In order to reuse this Mac object with a different key, it must be reinitialized via a call to init(Key) or init(Key, AlgorithmParameterSpec).
The MAC result is stored in output, starting at outOffset inclusive.
Parameters:
output - the buffer where the MAC result is stored
outOffset - the offset in output where the MAC is stored
Throws:
ShortBufferException - if the given output buffer is too small to hold the result
IllegalStateException - if this Mac has not been initialized.
doFinal
Processes the given array of bytes and finishes the MAC operation.
A call to this method resets this Mac object to the state it was in when previously initialized via a call to init(Key) or init(Key, AlgorithmParameterSpec). That is, the object is reset and available to generate another MAC from the same key, if desired, via new calls to update and doFinal. (In order to reuse this Mac object with a different key, it must be reinitialized via a call to init(Key) or init(Key, AlgorithmParameterSpec).
Parameters:
input - data in bytes
Returns:
the MAC result.
Throws:
IllegalStateException - if this Mac has not been initialized.
reset
Resets this Mac object.
A call to this method resets this Mac object to the state it was in when previously initialized via a call to init(Key) or init(Key, AlgorithmParameterSpec). That is, the object is reset and available to generate another MAC from the same key, if desired, via new calls to update and doFinal. (In order to reuse this Mac object with a different key, it must be reinitialized via a call to init(Key) or init(Key, AlgorithmParameterSpec).
clone
Returns a clone if the provider implementation is cloneable.
Overrides:
clone in class Object
Returns:
a clone if the provider implementation is cloneable.
Throws:
CloneNotSupportedException - if this is called on a delegate that does not support Cloneable.
See Also:
Cloneable
Class
Summary:
Nested |
Field |
Constr |
Detail:
Field |
Constr |
Submit a bug or feature
For further API reference and developer documentation, see Java SE Documentation. That documentation contains more detailed, developer-targeted descriptions, with conceptual overviews, definitions of terms, workarounds, and working code examples.
Copyright © 1993, 2020, Oracle and/or its affiliates. All rights reserved. Use is subject to license terms. Also see the documentation redistribution policy.
Java Runtime For Mac
Scripting on this page tracks web page traffic, but does not change the content in any way.
0 notes
Text
Adt Eclipse For Mac

ADT extends the capabilities of Eclipse to let you quickly set up new Android projects, create an application UI, add packages based on the Android Framework API, debug your applications using the Android SDK tools, and even export signed (or unsigned).apk files in order to distribute your application. 4) Once the download is done. Go to the download folder, you would find a file named “eclipse-java-mars-2-macosx-cocoa-x8664.tar” (the file name may be different based on the version you download but it should be a tar file starting with word eclipse). Adding CordovaLib class folder to build paths in eclipse is suppose to replace adding.jar file to your project. Doesn't work consistently when cleaning and building your Cordova Android project using ADT eclipse on a Mac. For ADT Version: (Windows) Go to Eclipse menu Help About Eclipse (For MAC) About Eclipse is not under Help menu. Go to Eclipse near Apple symbol on top Left. (For MAC) Go to Eclipse About Eclipse. A window opens and here click on Green Android Robot icon. A next winodw opens in which you can find the version of Android ADT. AEM Forms provides the complete source code of the AEM Forms app. The source contains all components to build a custom AEM Forms app. The source code archive, adobe-lc-mobileworkspace-src.zip is a part of the adobe-aemfd-forms-app-src-pkg.zip package on Software Distribution. To get the AEM Forms app source, perform the following steps.
Download Eclipse Adt For Android
Adt Eclipse For Mac Mojave
Eclipse For Mac Download
Adt Eclipse For Mac Computers
Android Eclipse Adt
ADT quit unexpectedly Chrashing Error Mac OSX Eclipse.png
This issue is faced many a times while creating/exporting a Signed APK file. There is a workaround of how to avoid Android Eclipse crashing issue.
Before Exporting the APK file, Clean the Project + Build
Now go to Project and Uncheck Build Automatically.
Uncheck Build Automatically.png
Now when you try to Build an APK file you may not face the Crash ADT quit unexpectedly error.
More Posts related to Android,
More Posts:
Change Android Toast background color - Android
[Solved] Dynamic Web Module 3.0 requires Java 1.6 or newer Mac OSX - Mac-OS-X
java.lang.IllegalStateException: You need to use a Theme.AppCompat theme (or descendant) with this activity. - Android
Android appcompat_v7 Error retrieving parent for item: No resource found that matches the given name - Android
SharePoint Open in the client application document opens in browser - Java
How to redirect SharePoint Site Collection to different URL - SharePoint
Duplicate id @+id/textView1, already defined earlier in this layout Android Error - Android
Synchronous XMLHttpRequest on the main thread is deprecated because of its detrimental effects to the end users experience - Java
Integrating Android Facebook SDK 3.17.2 Tutorial - Android
SharePoint CAML query error - The XML source is not correct - SharePoint
32 css cursors web developers must know - CSS
Failed to load resource: net::ERR_CACHE_MISS PHP - PHP
403 forbidden error for Image - PHP
Struts 2 : There is no Action mapped for namespace [/] and action name [form] associated with context path [/proj] - Java
How To Disable Landscape Mode in Android Application - Android
In this document
Revisions
Installing the ADT Plugin
Preparing for Installation
Downloading the ADT Plugin
Configuring the ADT Plugin
Troubleshooting
Updating the ADT Plugin
Android Developer Tools
See also
Android Development Tools (ADT) is a plugin for the Eclipse IDE that is designed to give you a powerful, integrated environment in which to build Android applications.
ADT extends the capabilities of Eclipse to let you quickly set up new Android projects, create an application UI, add components based on the Android Framework API, debug your applications using the Android SDK tools, and even export signed (or unsigned) .apk files in order to distribute your application.
Developing in Eclipse with ADT is highly recommended and is the fastest way to get started. With the guided project setup it provides, as well as tools integration, custom XML editors, and debug ouput pane, ADT gives you an incredible boost in developing Android applications.
This document provides step-by-step instructions on how to download the ADT plugin and install it into your Eclipse development environment. Note that before you can install or use ADT, you must have compatible versions of both the Eclipse IDE and the Android SDK installed. For details, make sure to read Installing the ADT Plugin, below.
If you are already using ADT, this document also provides instructions on how to update ADT to the latest version or how to uninstall it, if necessary.
For information about the features provided by the ADT plugin, such as code editor features, SDK tool integration, and the graphical layout editor (for drag-and-drop layout editing), see the Android Developer Tools document.
Revisions
The sections below provide notes about successive releases of the ADT Plugin, as denoted by revision number.
For a summary of all known issues in ADT, see http://tools.android.com/knownissues.
ADT 16.0.1(December 2011)
Dependencies:
Eclipse Helios (Version 3.6) or higher is required for ADT 16.0.1.
ADT 16.0.1 is designed for use with SDK Tools r16. If you haven’t already installed SDK Tools r16 into your SDK, use the Android SDK Manager to do so.
Bug fixes:
Fixed build issue where the 9-patch could be packaged as normal bitmap in some cases.
Fixed minor issues in the Lint tool.
Fixed minor issues in the SDK Manager.
ADT 16.0.0(December 2011)
ADT 15.0.1(November 2011)
ADT 15.0.0(October 2011)
ADT 14.0.0(October 2011)
ADT 12.0.0(July 2011)
ADT 11.0.0(June 2011)
ADT 10.0.1(March 2011)
ADT 10.0.0(February 2011)
ADT 9.0.0(January 2011)
ADT 8.0.1(December 2010)
ADT 8.0.0(December 2010)
ADT 0.9.9(September 2010)
ADT 0.9.8(September 2010)
ADT 0.9.7(May 2010)
ADT 0.9.6(March 2010)
ADT 0.9.5(December 2009)
ADT 0.9.4(October 2009)
The sections below provide instructions on how to download and install ADT into your Eclipse environment. If you encounter problems, see the Troubleshooting section.
Preparing Your Development Computer
ADT is a plugin for the Eclipse IDE. Before you can install or use ADT, you must have a compatible version of Eclipse installed on your development computer. Check theSystem Requirements document for a list of Eclipse versions that are compatible with the Android SDK.
If Eclipse is already installed on your computer, make sure that it is a version that is compatible with ADT and the Android SDK.
If you need to install or update Eclipse, you can download it from this location:
The “Eclipse Classic” version is recommended. Otherwise, a Java or RCP version of Eclipse is recommended.
Additionally, before you can configure or use ADT, you must install the Android SDK starter package, as described in Downloading the SDK Starter Package. Specifically, you need to install a compatible version of the Android SDK Tools and at least one development platform. To simplify ADT setup, we recommend installing the Android SDK prior to installing ADT.
When your Eclipse and Android SDK environments are ready, continue with the ADT installation as described in the steps below.
Downloading the ADT Plugin
Use the Update Manager feature of your Eclipse installation to install the latest revision of ADT on your development computer.<>
Assuming that you have a compatible version of the Eclipse IDE installed, as described in Preparing for Installation, above, follow these steps to download the ADT plugin and install it in your Eclipse environment.
Start Eclipse, then select Help > Install New Software….
Click Add, in the top-right corner.
In the Add Repository dialog that appears, enter “ADT Plugin” for the Name and the following URL for the Location:
Click OK
Note: If you have trouble acquiring the plugin, try using “http” in the Location URL, instead of “https” (https is preferred for security reasons).
In the Available Software dialog, select the checkbox next to Developer Tools and click Next.
In the next window, you’ll see a list of the tools to be downloaded. Click Next.
Read and accept the license agreements, then click Finish.
Note: If you get a security warning saying that the authenticity or validity of the software can’t be established, click OK.
When the installation completes, restart Eclipse.
Configuring the ADT Plugin
After you’ve successfully downloaded the ADT as described above, the next step is to modify your ADT preferences in Eclipse to point to the Android SDK directory:
Select Window > Preferences… to open the Preferences panel (Mac OS X: Eclipse > Preferences).
Select Android from the left panel.
Download Eclipse Adt For Android
You may see a dialog asking whether you want to send usage statistics to Google. If so, make your choice and click Proceed. You cannot continue with this procedure until you click Proceed.
For the SDK Location in the main panel, click Browse… and locate your downloaded SDK directory.
Click Apply, then OK.
Done! If you haven’t encountered any problems, then the installation is complete. If you’re installing the Android SDK for the first time, return to Installing the SDK to complete your setup.
Troubleshooting ADT Installation
If you are having trouble downloading the ADT plugin after following the steps above, here are some suggestions:

If Eclipse can not find the remote update site containing the ADT plugin, try changing the remote site URL to use http, rather than https. That is, set the Location for the remote site to:
If you are behind a firewall (such as a corporate firewall), make sure that you have properly configured your proxy settings in Eclipse. In Eclipse, you can configure proxy information from the main Eclipse menu in Window (on Mac OS X, Eclipse) > Preferences > General > Network Connections.
Adt Eclipse For Mac Mojave
If you are still unable to use Eclipse to download the ADT plugin as a remote update site, you can download the ADT zip file to your local machine and manually install it:
Eclipse For Mac Download
Download the current ADT Plugin zip file from the table below (do not unpack it).
NamePackageSizeMD5 ChecksumADT 16.0.1ADT-16.0.1.zip7000078 bytes03a2a23650ddac128c8b9e8aaf0aa433
Follow steps 1 and 2 in the default install instructions (above).
In the Add Site dialog, click Archive.
Browse and select the downloaded zip file.
Enter a name for the local update site (e.g., “Android Plugin”) in the “Name” field.
Click OK.
Follow the remaining procedures as listed for default installation above, starting from step 4.
To update your plugin once you’ve installed using the zip file, you will have to follow these steps again instead of the default update instructions.
Other install errors
Note that there are features of ADT that require some optional Eclipse components (for example, WST). If you encounter an error when installing ADT, your Eclipse installion might not include these components. For information about how to quickly add the necessary components to your Eclipse installation, see the troubleshooting topic ADT Installation Error: “requires plug-in org.eclipse.wst.sse.ui”.
For Linux users
If you encounter this error when installing the ADT Plugin for Eclipse:
…then your development machine lacks a suitable Java VM. Installing Sun Java 6 will resolve this issue and you can then reinstall the ADT Plugin.
From time to time, a new revision of the ADT Plugin becomes available, with new features and bug fixes. Generally, when a new revision of ADT is available, you should update to it as soon as convenient.
In some cases, a new revision of ADT will have a dependency on a specific revision of the Android SDK Tools. If such dependencies exist, you will need to update the SDK Tools component of the SDK after installing the new revision of ADT. To update the SDK Tools component, use the Android SDK and AVD Manager, as described inAdding SDK Components.
To learn about new features of each ADT revision and also any dependencies on the SDK Tools, see the listings in the Revisions section. To determine the version currently installed, open the Eclipse Installed Software window using Help > Software Updates and refer to the version listed for “Android Development Tools”.
Follow the steps below to check whether an update is available and, if so, to install it.
Select Help > Check for Updates.
Adt Eclipse For Mac Computers
If there are no updates available, a dialog will say so and you’re done.
Android Eclipse Adt
If there are updates available, select Android DDMS, Android Development Tools, and Android Hierarchy Viewer, then click Next.
In the Update Details dialog, click Next.
Read and accept the license agreement and then click Finish. This will download and install the latest version of Android DDMS and Android Development Tools.
Restart Eclipse.
If you encounter problems during the update, remove the existing ADT plugin from Eclipse, then perform a fresh installation, using the instructions for Installing the ADT Plugin.
0 notes
Text
Cubase Sx3 For Mac


Download cubase mac os x 10.6.8. Audio & Video tools downloads - Cubase by Steinberg and many more programs are available for instant and free download. Cubase continues on with its tradition of fine sequencers with SX3. Feature wise, and in many other categories, Cubase is the leader in sequencer technology, followed by Logic and Sonar in many important areas. Don't get me wrong here. It does not mean Cubase is the 'best' sequencer available. Many long-time Cubase users were disappointed with the features and stability of version 1.x of Cubase SX (, March 2003), but with versions 2 and 3, Cubase SX has matured. Song creation is. Cubase sx3 free download - Cubase, VLC Media Player, uTorrent, and many more programs. And download music to your iPod with Apple's full-featured MP3 solution for Mac OS 9. Free Editors' rating.
PC and Mac versions compared, with a rundown of new features
By Tweak
Cubase continues on with its tradition of fine sequencers with SX3. Feature wise, and in many other categories, Cubase is the leader in sequencer technology, followed by Logic and Sonar in many important areas. Don't get me wrong here. It does not mean Cubase is the 'best' sequencer available. All the main sequencers today are rich in features and have been for a long time. What Cubase has going for it, in my opinion, is the ability to break new ground, develop innovative code that allows us new abilities to make our music and enjoy the process. Am I impressed? You bet. Now that they fixed some of the most troublesome issues with the release of 3.02, I am quite happy with it.
Cubase retains its glory as the most graphically rich sequencer. The interface is absolutely stunning and offers many way for a user to change the way it looks at you while you are working on a song. And if you don't like it, you can edit the look more extensively than any other sequencer, even down to the colors of the peak meters. Also, Cubase SX3 continues to bring in new features and replace those lost in the transition from Cubase VST to SX. Now that's all water under the bridge, and its time to enjoy cubase SX maturing capabilities.
New Features in Cubase SX 3
Audio Warp: Realtime Time Stretching and Pitch Shifting offer extensive new audio editing and processing capabilities, including ACID® File support: loops automatically adopt a project’s tempo; audio files can follow tempo changes in realtime.
Intuitive Play Order Track for pattern-based arranging adds a new level of creative music editing. Divide your song into sections, and then re-arrange it on the fly. Compare alternative versions of your song and then convert them back into a linear form for mixdown and mastering.
New Inplace Editor supports ultra-fast direct MIDI event editing from within the project page. Edit MIDI events in context with audio or video.
New MIDI Device Maps / Panels support direct access to external MIDI hardware with user-definable graphic editing panels. Import VST Mixer Maps or create your own editing panels, even for the Track Inspector or the mixer’s channel strip.
User-definable Workspaces (window layouts) help organizing your desktop. Create and save a separate workspace for each step of the production process. Switch Workspaces on the fly, as if working on multiple computers or monitors.
Studio Connections “Total Recall” support (optional integration of Yamaha’s Studio Manager 2). The first step into a new dimension of software/hardware integration. This modular editing system builds a powerful bridge between the virtual and physical studio. Opening a project can recall an entire studio setup within seconds.
External FX Plugins allow for direct integration of external hardware effects processors into the VST audio mixer. Use your favorite outboard gear just like plugins – including automatic delay compensation.
Extended Freeze function for virtual instruments and audio tracks with added flexibility and improved performance. Freeze virtual instruments with or without insert effects. Then automatically unload the instrument to free up RAM. Freeze audio tracks with insert effects to free up even more CPU performance.
New part-based Volume Envelopes for direct control of dynamics. Fix level problems on the fly without wasting automation tracks. Then move events with their volume envelopes.
User-definable Color Coding for tracks and VST mixer channels provides more clarity and better orientation – especially in complex projects
Lets talk a bit about the new features in Cubase SX.
Audio Warp Cubase's audio editor is quite interesting, particularly for those who like to manipulate audio. Years ahead of cakewalk and logic with its process history.. And now, even sophisticated stand alone editors like Sound Forge, Peak, and Apples new Soundtrack Pro cannot touch audio warp. Its also incredibly easy to use. You just open an audio file, set some hit points and drag their markers and you can speedup, slow down, to the granular level if you want. And it can all be done in real-time, that is, while the file is playing. There is no tweak-preview-tweak-preview as in other editors, You just tweak, see and hear the results right as you move the mouse. I have got to say, the Cubase audio editor is the best there is among all the sequencers I have tried. Sonar doesn't have a full-fledged editor. Logic's is umm 'vintage' and still can't render effects.
Intuitive Play order. This feature is a dream for arrangers. Slice up your song into verses, chorus, breaks, and reorder them easily to find out the most effective order. In other sequencers you have to rearrange all the blocks on the screen, and re-arrange them back if you don't like your new order. Here you can experiment all day till you find the best arrangement, and if you can't find one, your original is still there.
Inplace editor. The inplace editor happens right on the arrangement screen within the lanes of each track. its great for fixing a note when you don't want to open up one of the other editors. Its a great feature, that I first saw about in Tracktion. Not a critical feature, (you are only a double click away from the more powerful Key (piano roll) Editor) but a nice one.
MIDI device Maps. I tried for an afternoon to get some of these setup in Cubase SX 3.0.0 and found it incredibly buggy. I have not yet tried in 3.02. The idea here is to build devices (knobs, faders, controllers) that are tailored to the midi instruments you have. Every time you call up the instrument on a track the devices are there waiting for you. Its a minor nicety as there are plenty of other ways to get controller data on your tracks. I am also finding the MIDI device manager much easier to work with. Script building seems easier now. (The trick is to build the patchname script in Excel then cut an paste to a Text file). The application boots much faster now. Cubase SX 1.0 would crawl through MIDI device initialization. Those with a large MIDI rig will definitely see the improvement.
User definable workspaces-- A big improvement here. You can setup your screen(s) and save the workspace, then recall them from a menu. I really like that these are in a menu and can be organized. I think SX3 has finally caught up to logic's screenset idea and taken it one step further.
There's more new features, You can see the 'official' top ten new features over on the left. like an improved track freeze which lets you freeze with or without inserts on both audio tracks and VSTi's. This is helpful because you can still mess with processors after the track is frozen, which can save a bit of time.
PC or Mac OSX?
Steinberg has the only full featured cross platform sequencer solution right now. On a PC SX is blazing fast and with the 3.02 update applied, its stability is good. It almost feels too fast. With my own setup using an emu 1820M it works well. Emulator X, which can be a touchy software sampler, also works well with no glitches. My experience was not as good using the earlier emu 1.6 drivers in 3.00 as a bug in emulator X would 'poof' Cubase but the Emu 1.7 drivers appears to solve it.
Regarding the look of the program, I like Cubase SX on OSX a little better. This may have nothing to do with Cubase itself, but with OSX, where the dialog boxes, menus, scroll bars, etc, all work in the standard Mac way. Also for some reason colors seem more vibrant in OSX even using the same monitors i use for the PC. But that's where the favorable comparison ends for me. I find its overall performance slightly less robust on my Mac G5 (dual) 1.8 as on my AMD 3400+. I am now running SX3 3.02 under Mac OS 10.4.2 (Tiger). There is considerable graphic improvement over 10.3x, which could get really slow. The pain is gone now, but its still graphically slower than on a PC. Though i have not used Cubase enough to compare performance with LogicPro, my impression is they are about the same, performance wise. Also, compared to Logic Pro, you'll notice all your VST and VSTi's are back at work. There's no audio units here and no audio unit evaluator watching over your plugs.
In the balance, my opinion is that Cubase SX is better on a PC, but not by much. Not enough to dissuade a die hard Mac user not to use it.

Now that the application is at 3.02, its way safe to upgrade. And worth it, in my ever humble opinion.
May your music shine
Tweak
July 2005
Want to discuss? Go to the Cubase topic at studio-central
Cubase Sx3 For Mac Iso
Go to the Next Class


Cubase Sx3 For Mac Pro 15
Go to the Previous Class
Sequencers and DAWS Index
Review of Cubase 5
Logic Studio 9
Pro Tools LE 8.1
Logic Studio 8
Review of Sonar
Review of Reason
Reason (1st review)
Ableton Live
Logic Pro 7
Logic Pro 6
Logic Platinum 6
Logic Platinum 5
Digital Performer
GarageBand
Sony's Acid
Vintage Sequencers
Early History of Logic
Mac vs PC for Music?
Project 5
Sequencer City!
Cubase SX (original)
Cubase SX3
Using a Mac Pro as your DAW
Using Notebooks as your DAW
Which Sequencer is Best?
MIDI Time Code and Sync Issues
Custom Bank Select Methods in Logic
Write a Sonar Instrument Definition File
Sequencers Price List
zZounds Sequencer Store
0 notes
Text
Dopdf For Mac

Dopdf For Mac Download
Dopdf For Mac
Mac.MajorGeeks.com » Compatibility Database » Applications (Windows) » Details for doPDF. Advertisement Summary. Product: doPDF Vendor: Softland Tested operating systems: Windows 2000, Windows Vista, Windows XP, Windows XP 64 Bit (x8664) Most recent version of this submission: doPDF. DoPDF installs itself as a virtual printer driver, so when you install it, doPDF will appear in your Printers and Faxes list as if it was a real printer. When you have installed doPDF and you need to create a PDF file, you only have to print the document and choose doPDF as the printer.
Among all of the PDF tools that are out there, doPDF is a little-known option. Its purpose is pretty basic – to turn files into a printable format with ease. Although not the simplest option you could use for this task, it’s not ineffective by any means and may be worth checking out. There are some questions surrounding the tool though. Such as, “Is this the best tool I can use for creating PDF files?” and “are there any better tools out there?”, both are reasonable questions. For that reason, our doPDF review is going to examine this tool and consider the possibility of using alternatives.
Part 1. doPDF In-depth Review
As we’ve already mentioned, doPDF creates PDF files, and it does this in a unique and slightly complex way. When you install it, doPDF is installed on your computer as a virtual PDF printer. What does this mean? Basically, it is recognised as being a printer but without having the printer hardware. So, when a file is sent to the virtual printer, instead of being printed it is saved as PDF.
1Features of doPDF

Dopdf For Mac Download
This seems simple enough, but it can get quite complicated for the non-tech savvy users. Some of the main features that doPDF includes are:
Can turn most document formats into a printable PDF (including Word/DOC/DOCX, HTML, Excel, PowerPoint, and other files)
Installs as a Microsoft Word add-on which makes it easy to access
Uses very little computer resources so that it doesn’t affect computer performance
Allows users to save the final PDF file in different sizes (e.g. A4, A5, etc)
Graphics that are in the document can be made smaller or bigger
Whilst these features don’t scream impressive, there’s no way to deny that doPDF is effective in doing its purpose. A particularly interesting feature is that it comes as an add-on rather than a standalone tool.
Setting aside the positives, it would be wrong to not address the glaring negatives that come with this tool.
2Cons of doPDF
Doesn’t let you install in any destination, it can only install in the “C:Program Files” directory
Overall this is a very basic piece of software with no advanced or technical features for PDF management
3Is doPDF Safe?
One concern a lot of users have when it comes to using new tools or software is whether or not it’s safe to use. Because there’s a risk of downloading viruses and malware, this is more than understandable.
Now, where doPDF is concerned, safety is guaranteed. After scanning it with various anti-virus and anti-malware resources, we can verify that you won’t run any risks when using doPDF. It’s clean of any hidden tools that will inflict harm on your computer.
4Performance
The first thing to note regarding the performance of doPDF is that this is a free tool, but the same developers offer a paid version too. This paid version is called novaPDF Professional and it gives us access to a wider range of features. But there are some other areas of performance we need to focus on:
1. Produced File Size. After a file has been processed by doPDF, it has a larger file size than most other PDF toolkits produce.
2. PDF Security. Unlike other PDF tools, you cannot handle the file’s security in any way (e.g. by adding a password for extra protection).
3. PDF Conversions. Admittedly doPDF processes PDF conversions faster than we’ve seen from other tools.
Part 2. Top 2 Alternatives to doPDF
If we move on from doPDF and focus our attention on the different tools you could use, there are two tools that we’d suggest. Below we’ve given you a breakdown of the top 2 alternatives to doPDF.
1PDF WIZ
Our first recommended alternative is PDF WIZ, and we could go on for ages about why this is a superior tool to doPDF. In simple terms, it offers a whole lot more when it comes to features. It’s great for PDF conversions and a bunch of other tasks that surround managing a PDF file. Here are some features to take note of:
PDF WIZ – Free PDF Toolkit
Completely free to use and doesn’t have a restrictive paywall
Convert PDF files to Word, PowerPoint, Excel, Text, and HTML formats and vice versa
Extract images from a PDF document without the original file
Divide a single PDF into multiple documents, or join multiple PDFs into a single document
Make large PDFs smaller by compressing their file sizes (doesn’t affect document quality!)
Add and remove PDF security/password protection without having the password
From this list, it’s clear to us that PDF WIZ outdoes doPDF on all fronts. It has much more to offer but that doesn’t make it a harder toolkit to use. Don’t forget it’s free, so there are no excuses for not downloading it and checking it out!
2PrimoPDF
The second alternative we’d suggest you consider after using PDF WIZ is PrimoPDF. If you’re familiar with Nitro Pro then you may already be familiar with this tool, which is pretty much the free (and very limited) version of Nitro Pro.
PrimoPDF is similar to doPDF in the sense that it lets users create PDFs out of regular documents, but this is a standalone program whereas doPDF is a Microsoft Word add-on.
Quickly converts documents from various formats into PDF
PDF password protection can be managed
PrimoPDF is a free PDF tool
Cons of PrimoPDF
Some users report that a document’s images are distorted after using PrimoPDF
Doesn’t have a lot of features
For extra features for PDF management, users must buy Nitro Pro
Conclusion
As we bring our doPDF review to an end, we now know a couple of facts. First is the fact that doPDF is a really basic tool that doesn’t have a lot to offer, although it does do the simple task effectively. Second is that PDF WIZ is the best alternative on the market which has plenty to offer in comparison to doPDF.
Dopdf For Mac
Whether you just want to produce a good-looking PDF out of a Word document, or you need to extract some images from an existing PDF, PDF WIZ is exactly what you need. Go ahead and try it out for free today and you’ll see that it’s as great as we’ve hyped it up to be.
Free DownloadSecure Download
0 notes
Text
Resize Images For Mac

Image resizer software make it easier for you to resize images quickly according to the purpose of resizing images in bulk. You can use Best Batch Image Resizer for Mac either resize images to upload them on an ecommerce portal or you can also edit them to upload quickly on a social media platform. Part 4: How to Resize an Image on Mac by Cropping in Preview. One old-school way for you to be able to resize the image that you want is to crop it. This method is actually a very easy thing to do. Now, since not everybody knows about this, then here are some guidelines on how you can do it. Change an image’s dimensions. In the Preview app on your Mac, if the Markup toolbar isn’t showing, click the Show Markup Toolbar button, then click the Adjust Size button. Enter new values for width and height, or click the “Fit into” pop-up menu and choose a size. Resize the image by a percentage: Choose “percent” from the pop-up menu next to the Width and Height fields, then enter the percentage in those. Using an application to resize images: If you find it difficult to resize images using above methods or if you have a large number of images to play with then you must go for a third-party application. When it comes to image resizing applications for Mac Image resizer from Tweaking Technologies is the best app to resize images in bulk. Image resizer software make it easier for you to resize images quickly according to the purpose of resizing images in bulk. You can use Best Batch Image Resizer for Mac either resize images to upload them on an ecommerce portal or you can also edit them to upload quickly on a social media platform.
If you own a Mac and looking for methods to resize images without losing quality, then this article will definitely help you. For many reasons, you may need to resize the images. Sometimes to make more space on your device or to transfer files quickly.
Steps To Resize Images On Mac
There can be many ways to resize images on Mac without losing quality. But here we are covering four major ways which are not very technical. So, let us begin with these basic methods.
1. Resizing in Preview:
When you double-click on an image on your Mac, Preview is the application that opens it up by default. You will be surprised to know that it is already a good application to resize images. To resize an image, open it into Preview, and go to Tools > Adjust Size in the menu bar.
The window provides you information about the size and resolution of the selected image. You can manually type the dimension to resize the selected image. If you are resizing the image for printing purpose, then 240×300 resolution will be the best. If you are posting an image which will be viewable on the website, then 72×150 resolution will work well.
Also Read: 27 Cool Mac Tips & Tricks You Probably Don’t Know: Part I
2. Resizing through e-mail:
If you are looking for a faster way to resize images, then email can help you. Simply drop the image into the email application of your Mac.
The bottom of the composition box, of email you will see the dimensions of the resized photo before you email it. You can change it to Small, Large, or Actual Size, so if you want to compress the image you can select small from the bottom of the image.


The best part about using email to resize an image is that it doesn’t resize the original one. It makes a copy and then resizes it. But to get the resized image you need to send the email, if you will try to drag out the image from drafts it will not be the resized one.
3. Using a website to resize image:
There are so many websites which claims to resize the image without losing quality. Some of these websites allows you to bulk upload images and after resizing you can bulk download them. On the web page, you can see the detailed log of resizing with the information such as how much percentage of an image is compressed what was the actual image size and compressed image size.
4. Using an application to resize images:

If you find it difficult to resize images using above methods or if you have a large number of images to play with then you must go for a third-party application. When it comes to image resizing applications for Mac Image resizer from Tweaking Technologies is the best app to resize images in bulk. It is an application which not only helps you to resize images but it can also help in bulk rotating and changing format of images in bulk. What you will love about this application is that it shows you preview of the images you can add and remove images even after you have added them to the application.
Some websites demand prefix or suffix for images the application also allows you to add that in a batch of images which makes it the best image resizer for Mac.
You can get this application from the given link.
Resize Images For Mac Desktop

This is how you can resize images on your Mac without losing quality. These easy tips and tricks will help you in resizing images quickly.
Resize Images For Email Windows 10
What Do You Think?
0 Responses
Resize Images For Mac
0 notes