Last Seen Blogs
grac3guts
grace 🦷

myrandombucket-blog
my random bucket
m00n-dust
Sēchi

dilf4maturewomen
Untitled
a-story-in-verse
Collaborative Clash from Middle School
Photo


Fonts for texts (pt4)
Please, like or reblog if you download it
Gandhi
Banana yeti
Winter poppins + Bestlovers
Aaleyah
Bartond
Feelin sweet
7K notes
·
View notes
Photo

𝐑𝐄𝐃 𝐍𝐀𝐈𝐋𝐒 & 𝐀 𝐁𝐔𝐓𝐂𝐇𝐄𝐑'𝐒 𝐊𝐍𝐈𝐅𝐄 𝐛𝐲 𝐁𝐈𝐄𝐑𝐒𝐀𝐂𝐊 : hi everyone, it’s adora, and today i have for all of you a very simple promo template that can be used for indie rp or group rp promos. it’s extremely straightforward and easy to use with everything labeled. minimal photoshop experience is necessary to learn how to use this one. psd coloring is not included. fonts used: germanica, roboto, and playfair. feel free to edit to your liking. credit is appreciated. please like & reblog if using. dl in source.
345 notes
·
View notes
Photo

rhsand’s texture pack: sunbeam
25 sunbeam style texture images in varying golden, black, white, and beige tones.
disclaimer: all images were found, and edited. this is simply a folder of them put together, i do not own any of these images. only for personal use.
download here
like/reblog if using
all textures are 540x700
296 notes
·
View notes
Photo


Gif Overlays Pack #1: Film Damage
click to view/save full size
a like or reblog is appreciated if you use
no credit is necessary
any questions? just send an ask
enjoy!
1K notes
·
View notes
Photo


font pack #1
download
geometos / colors of autumn / gobold / abc logos xyz / baby fox / aracne / river drive / housegrind
2K notes
·
View notes
Photo


Hi!! 100% free fonts hosted in dafont :) like or reblog if you use. f o n t s: Cartoon Marker, Rough Rakoon, Mottona, Autumn in November
x more fonts here x
1K notes
·
View notes
Note
Is there anyway you can make or recommend a tutorial on how to use templates? I recently bought a template and I have no idea how to use it.
I got as far as adding the photos but I couldn’t resize them to fit the canvas. What I bought was a template called rosebud by creationcolors. I can’t find a single tutorial that shows how to edit those kinds of templates.
Absolutely! There are multiple ways to use templates, so here are a mix of tutorials that may help you:
How to put gifs into templates < - (includes resizing)
How to put images into templates
General photo template tutorial
How to put a gif into a template
Another version of a gif template tutorial
Another version of gif template tutorial (a simple version)
Instagram template tutorial
Spotify gif template tutorial
Instagram template with gif tutorial
Basic template tutorial
How to make a header from a template
A few tutorials on resizing/editing gifs:
Circle gif on image tutorial
A guide to resizing, timing, and sharpening gifs by jeongguk
How to make a gif in different shapes (circles, diagonals, etc) by welovetemplates
Cropping a shape into a gif tutorial by mbthecool
I hope one of these helps you! If you are still in need of help, let us know. You could also ask the template maker the preferred dimensions of the gifs in the template and crop to make the gifs that size before starting your template making process.
72 notes
·
View notes
Photo

.*•☆ {“.Fonts Pack 001.´´} ☆•*.
↪ { Download }
Please, like or reblog if you download ♥
192 notes
·
View notes
Photo

Okay so on my previous blogs, I’ve been getting asked how I do certain things in Photoshop. So This post is to help you know everything that you need to for this lovely Program. This will tell you all about the tools and the windows and what some do. This is going to be a long post, so If you cannot find what you’re looking for, try finding what you need by pressing Command + F for Mac, Control + F for Windows (I believe) on your keyboard to search for something. If you can’t find it then it may not be in this post, feel free to ask me in my ask box! Until then Keep reading!
Photoshop Toolbar:
Move Tool: This tool allows you to move any selected section in your layers.
Marquee Tool: This tool, you can select specific areas by clicking and dragging. You can right click to fill the selected section or you can add a stroke. You also have the option to use the Ellipse Tool by right clicking on the tool to make perfect circles! Just play with this tool.
Lasso Tool: This bad boy you can free hand select what you want. Like you’re drawing free hand instead of a square, rectangle, circle etc. This tool comes in handy!
Quick Selection Tool: This tool is your new best friend. Yes! It does EVERYTHING for you when you want to hurry and make a transparent image. It selects everything that you want it to select. I love this tool so much! This is the same thing kind of with the Magic Wand Tool. All you do is click something and it will select what you want!
Crop Tool: This tool is pretty much self explanatory. You just crop your picture!
Eye Dropper Tool: This tool you can take and click on any part of the image you want to get a specific color on the picture. It gives it to you instead of you trying to find it.
Patch Tool: LIFE SAVER! Yes this tool you can remove any flaws in a picture. All you do is circle something and drag it over to a clean spot of the picture. For example: Circle any acne of a person and slide it on a clean piece of skin. I love this tool!
Brush Tool: Another one of those tools that are pretty self explanatory. You can find brushes that you like on deviantart.com and many more sites!
Clone Stamp: With this, you can use this to remove watermarks (logos) on pictures, but I would say it’s not the easiest tool to use.
History Brush Tool: This tool allows you to go back from what you did. I never use this.
Eraser Tool: This allows you to erase anything on a layer besides a background layer if it is locked.
Magic Eraser Tool: This tool is really helpful when you want to make an image transparent. For example: If you want to remove the background of something, use this!
Paint Bucket Tool: You can fill in any layer with a color!
Gradient Tool: When you have a background color and a foreground color you can click and drag this tool to make an awesome gradient! This is how I did the picture above ^.^
Blur Tool: Basically you can blur free hand without the filter.
Sharpen Tool: Same thing with the Blur Tool. Just sharpening any part of a picture.
Dodge Tool: This can lighten up any Midtones, shadows or highlights.
Burn Tool: This can darken up any Midtones, shadows, or highlights.
Pen Tool: This allows you to create certain points and connect them to make a path.
Text Tool: Self explanatory haha. You can find some great fonts at dafont.com!
Path Selection Tool: You can adjust several shape and path layers.
Rectangle Tool: This allows you to create a shape. You can also use custom shapes as well and fill them in with pretty colors.
Hand Tool: You can click and drag where you want you window to be.
Magnifying Glass: Zoom in or Out
Photoshop Windows:
Photoshop Window: Here you can edit any preferences
File Window: You can Save your work, open up things, create new files, open up the Mini Bridge, Share your screen, open gifs, etc.
Edit Window: Undo, redo, fade, cut, copy, paste, clear, spell check, add brushes and patterns, etc.
Image Window: Change the mode of your image, crop, configure adjustments.
Layer Window: Merge layers, make new ones, rasterize (make layer), align, hide, group, unhide, etc.
Select Window: Select everything (entire picture), save or load selection of the layer.
Filter Window: Here you can record actions. You have a sharpen filter, blur filter, high pass filter and most of these have different options and allows you to adjust the amount.
View Window: Anything in Photoshop you want to view like rulers or switch to full screen.
Window: This here, you can view any panel window you want. Such as your layers, text, etc for more options.
Help Window: Obviously, if you need help.. Get your system info. Like what version you’re running etc.
3D Window: This is only optional if you have any extended version of Photoshop.
If you want to know how to do stuff, just feel free to look through the tutorials tag or feel free to request any tutorial that you would like me to make! Hope this helps you and happy Photoshopping!
266 notes
·
View notes
Photo
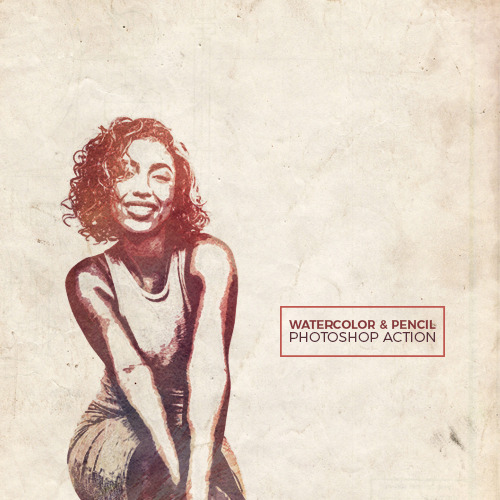
Comes with instructions. You’ll need watercolor textures to make this work.
Notice: When a “make” function not available notice comes up, hit continue.
P.D: To add some background like I did on the preview, use a paper texture set to multiply on top of your edit.
━ Please like or reblog if you use
━ Do not repost
━ Feedback is cool
━ Download
117 notes
·
View notes
Note
hi ava !! i love all of ur edits so so much and they give me a lot of inspiration! one of the problems i have is fonts though so i was wondering if u have any favorite fonts u could share? thank u !! 💓
I have an absurd number of fonts downloaded—I’m literally like a child that’s been left unattended in the toy aisle at the store, I see any font that’s remotely aesthetically pleasing and I download it before I’ve even fully thought it through—and I love probably a similarly ridiculous number of them, so I’m going to narrow it down to fonts I’ve used in gifsets and also a couple of stragglers I thought were worth including.
SERIF
Abril Fatface (used here)
Arastin (used here)
Didot (used here, here, here)
Dubiel (used here)
Encorpada
Florence
Mermaid
Nouvelle Vague (used here, here)
Perla (used here)
Pistilli (used here)
Red Velvet (used here)
Vogue (used here)
SANS-SERIF
Arial (I know everyone has this installed by default, but I use it often and in so many different ways, like here and here and here, and even just for quotation marks like here)
Avenir Next (used here, here)
Bebas Neue
Changa
Corbel
Couture (used here, here, here)
Doboto
Karla (used here)
Roboto
SCRIPT / CURSIVE, BRUSH, HANDWRITTEN
Beastmachine (used here)
Beauty (used here)
Billy Ohio (used here)
Connoisseurs (used here, here)
Daylight & Moonlight
DK Cinnabar Brush (used here)
DK Sensory Overload (used here)
Guld (used here)
Hello Stockholm (used here, here)
Jellyka Bees Antique Handwriting
Jellyka Saint-Andrew’s Queen
Jellyka Vampire Street
Jellyka Western Princess
Kill The Noise (used here)
Lighthouse (used here)
Pappo’s Blues Band (used here)
Pink Blue (used here)
Shorelines (used here)
Taken by Vultures
GOTHIC
Ethelvina (used here)
Germanica
Harbour (used here)
Parchment
Olde English (used here)
2K notes
·
View notes
Photo

Vintage fonts
Please, like or reblog if you download it
Controwell - Casino - Carrington
Breamcatcher - Excalibur - Freudian one
Retroholic - Hazel deco - Volan
Hermione - Instan zen - Made cannes
Metric - Passion - Rhumba
Dymaxion - Sunset boulevard - Tostada
Verve - Vintage warehouse - Vintages
Showtime - Maddison - Hamburger heaven
5K notes
·
View notes
Photo

REGENCYRESOURCE PRESENTS: 001, POR VIDA
ALFORIM / MARMALADE / AUSTIN WORTH / COYOTE / GOLDBOLD HOLLOW / HALBREIN [ DOWNLOAD PACK ]
REMINDER: I DO NOT own any of these fonts and they’re for personal use ONLY. While a LIKE or REBLOG would be nice if you at all find this pack helpful, full credit goes to the original creators.
1K notes
·
View notes
Text
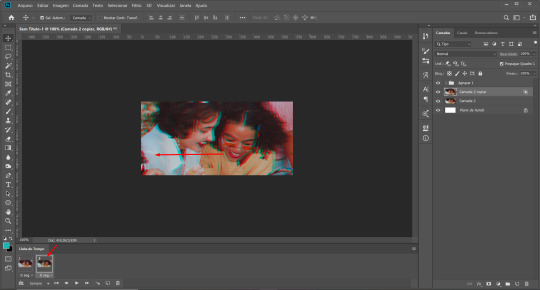
Simple Glitch Effect GIF Tutorial
Hey, how are you? In this tutorial, we’ll see how to make this simple glitch effect gif in Photoshop.
Add adjustments to your liking (you can definitely do this step at the end, it’s up to you). Then open the Timeline (Window> Timeline

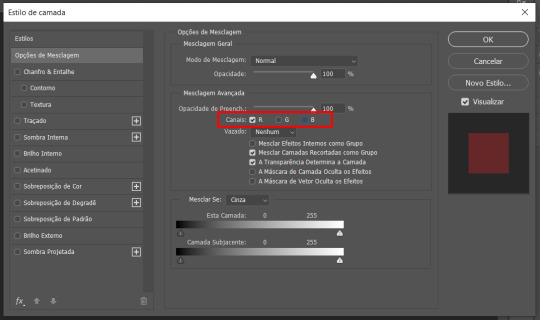
Duplicate the photo’s layer (Ctrl+J) and double click the duplicated layer to open the Layer Style window.
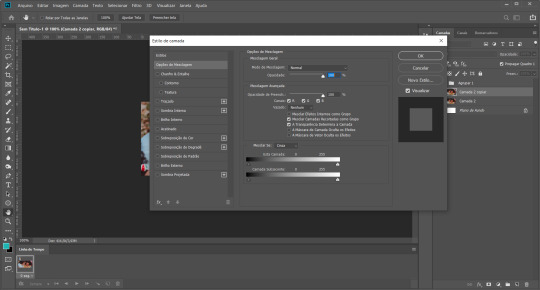
In this default blending option, let only the Red channel visible and click ok:
Create a new frame in your timeline and move the layer (I moved to the left):
Now, create transition frames. To do so, select the first frame and click on this icon (image below). Then, set how many transition frames you want (I did 3).
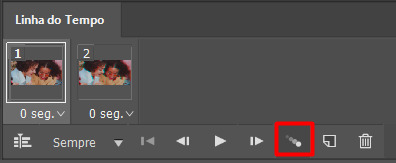
Create a new frame and move the layer to the opposite direction:
Select the penultimate frame then click on the transition frame icon and click ok (add the same amount as the previous step). And you’re done!
Save your click Ctrl+Shift+Alt+S and make sure the predefinition is set to gif and the loop option is always.
75 notes
·
View notes
Photo

✧ TEXTURE PACK 004 — BY EVANSYHELP.
In this pack, you’ll find ( 30 ) dark textures. They’re a mix of 800x1000 and 550x550, and all were made by me from Unsplash photography. Please like or reblog this post if you find this helpful. Credit isn’t necessary but it’s always appreciated!
ENJOY MY CONTENT? Support me on Ko-fi & claim an exclusive reward today!
✧ ✧ ✧ ( DOWNLOAD. ) ( TERMS OF USE. )
435 notes
·
View notes
Photo
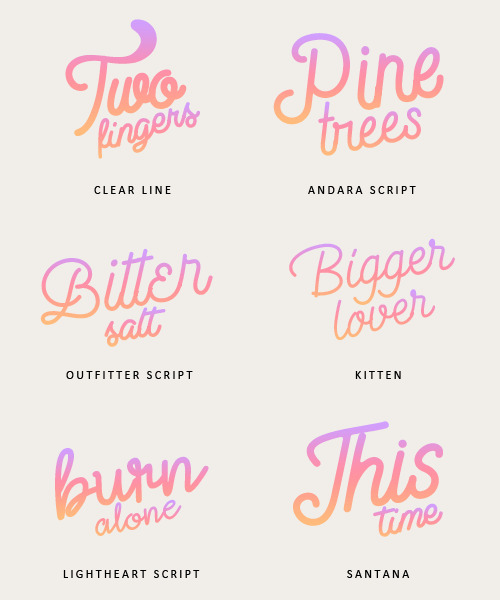
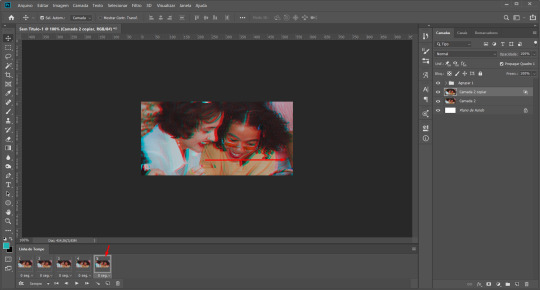
Please, like or reblog if you download it
Clear line
Andara script
Outfitter script
Kitten
Lightheart script
Santana
3K notes
·
View notes
Photo
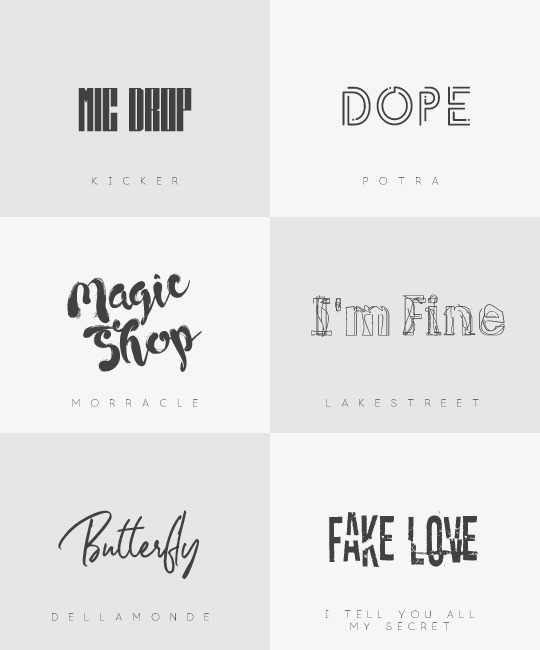
another fonts pack that no one asked for brought to you by this loser
[kicker] [potra]
[morracle] [lakestreet]
[dellamonde] [i tell you all my secret]
2K notes
·
View notes