
rosymothquilts
quilting blog
curation of the #quilting tag + fun stuff i'm working on | buy me a ko-fi
1280 posts
Don't wanna be here? Send us removal request.
Last Seen Blogs

mortistimor-archive-blog
pedicabo

blackberryhub
Untitled

maconsulting
ma

educationalconsultancyservices
Untitled
Text
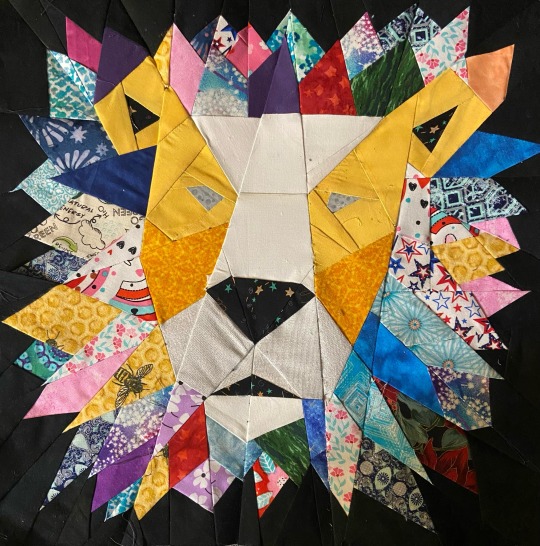
Finished up a scrappy lion fpp block
26 notes
·
View notes
Text
Batik Twinkling Tulips
Batik Twinkling Tulips (close up)Batik Twinkling Tulips (back)Batik Twinkling Tulips (front)
The quilting is subtle but if you look closely, you can see the twinkling tulips! I especially like the texture it brings to the back of the quilt. Add a binding and this is ready for a king size bed.
View On WordPress
8 notes
·
View notes
Text
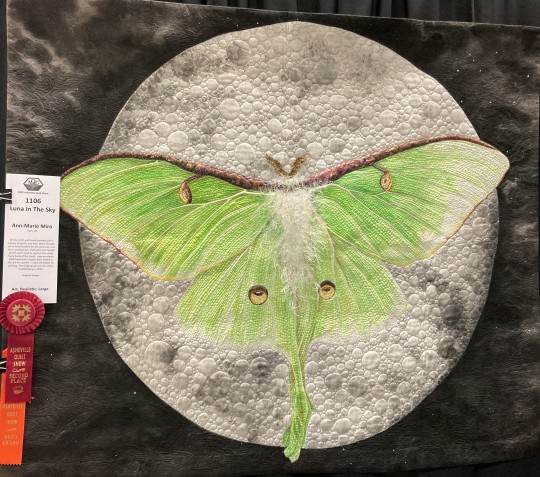
"Luna In The Sky," made by Ann-Marie Miro
36 notes
·
View notes
Text


improv quilted baggies for may first update 🏠 i wanted to try some hand-quilting because it looks so nostalgic
62 notes
·
View notes
Text
My salmon bag I finished last night, wanted to make something for myself for once. This is what I came up with.
Enjoy!
2K notes
·
View notes
Text
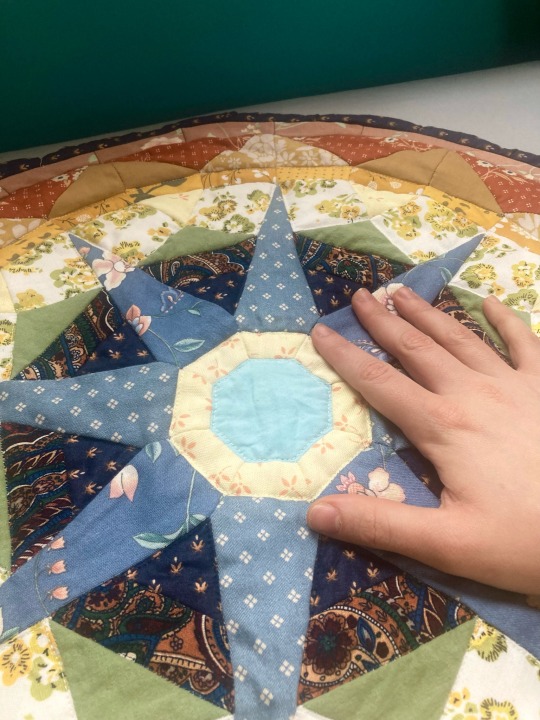

Another one of my EPP quilted pieces I finished recently. This was originally going to be a larger piece in combination with the other one I did (see here) as a large panel, but I decided they would work better as independent projects.
This was my first foray into non-hexagonal paper piecing as well as designing my own EPP patterns and I've certainly learned a lot. Very tricky to get the pieces to work sometimes, but easy enough to design and fun to work on. I'd love to pattern out a full sized quilt using this style, but I imagine it would be much more difficult to complete. We'll see!
Thanks for looking :)
203 notes
·
View notes
Text
Sooooo it turned out larger than intended.


I had to cut the blocks to 9.5x9.5 inches rather than 10x10 inches due several pieces of the layer cake being cut incorrectly. Seeing as I can't do math, I figured I should add more blocks to make up for the loss. It was originally six rows of seven blocks, and I planned on seven rows of seven blocks. I accidently made it seven rows of eight blocks. Because I had the 7x7 layout in mind, I added two borders.
Keep in mind, the original pattern has the quilt at around 67x72 inches. I intended to have it closer to 75x80 inches. Well! It's 80x90 inches. Whoops!
I hope my client loves the quilt top! The commission is for just the quilt top, and I'll be shipping it off either tomorrow afternoon or day thereafter, depending on what they say about the results. I really do not want to take the borders and sashing apart to remove a row.
If you would like to commission me, check out my website. I have my gallery, shop, and commission info available there.
149 notes
·
View notes
Text
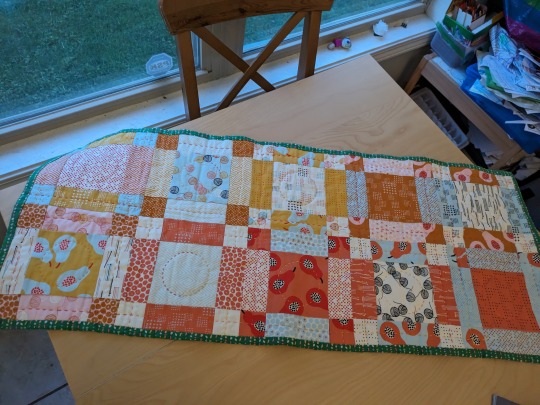
This is technically a quick table runner project but I have been working on it since October because every time I completed a portion I set it aside for months or weeks.
15 notes
·
View notes
Text
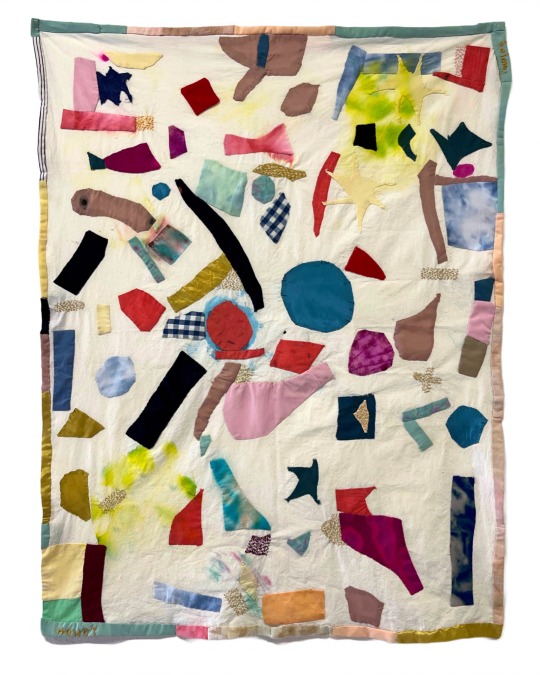
Horrible vacui (2024), assorted found and painted fabric appliqué on cotton
211 notes
·
View notes
Text

Not the best pictures but the half hexi quilt is finally done!
I didn’t space the template the best for the quilting. What ever it was my first time doing any free motion quilting, which sucks balls.
I mean I guess I may try again just one a smaller quilt and one made out of quilting cotton instead of flannel and minky. Really about the worst combo I could come up with to learn on
I tried to go and get one of those artsy pictures down at the beach but it was so damn windy. Quilt blowing everywhere but daughter bitching about how cold it was (it was cold) sand blowing all over, lady picking up mussels giving us dirty looks. Don’t worry Carol I wasn’t about to steal your haul. Probably shouldn’t have attempted it on a day with a gale warning
I’m going to make a bag before going back to quilt the rest of the Christmas 2023 quilts.
11 notes
·
View notes
Text
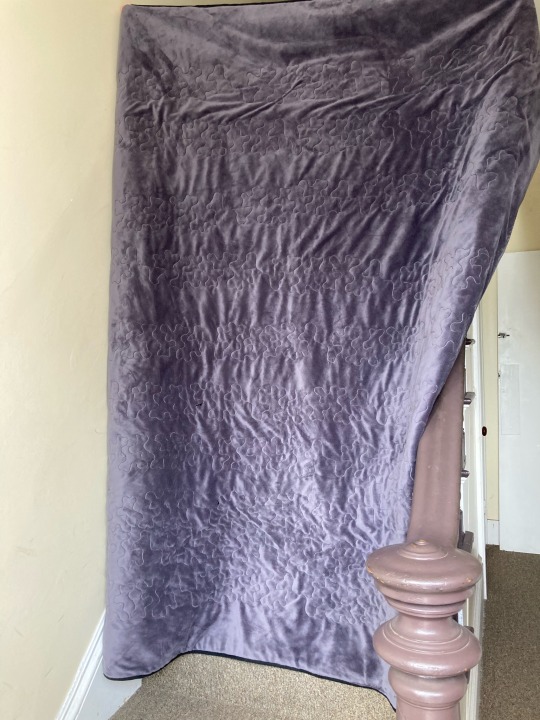
Mauve Spirals
Mauve Spirals (close up)Mauve Spirals (back)Mauve Spirals (front)
Look at how the edge-to-edge design breaks up the straight geometric lines. Wool batting and minky backing gives incredible definition to the quilted spirals on both sides and definitely chase the chills away.
View On WordPress
9 notes
·
View notes
Text


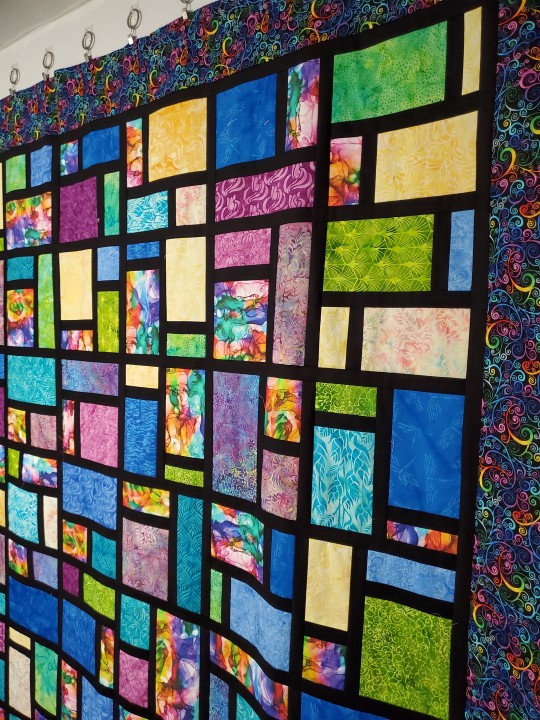
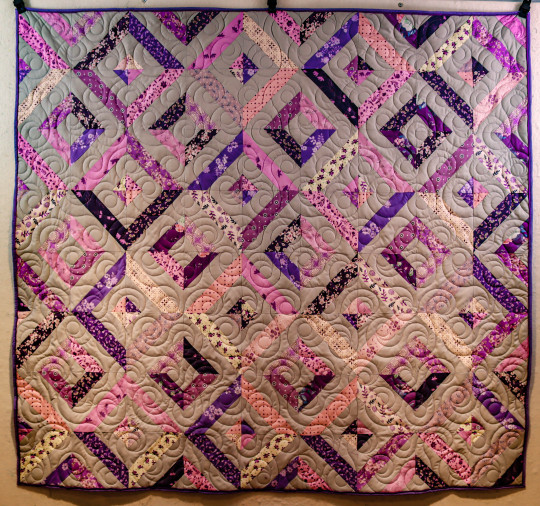
I’m really embarrassed of how excited I got when I finished this.. like seriously. I got so excited when I let this drop down the wall to see it fully finished.
For size reference, that’s a twenty gallon fish tank
27 notes
·
View notes
Text

Another new fabric line. Made something simple this time. Just need to sew my rows together and then add the one border and she’ll be ready to be quilted.
I’m already thinking that black thread will look good cause it’ll show up on the teal background, or teal thread so it’ll blend in everywhere.
As always, the thread audition will be fun 😁
14 notes
·
View notes
Text

I finally finished my nephew's baby blanket! (He's almost six months old, don't worry about it.)
It took me a long time to figure out how to do the fish appliques. Originally I was going to cover the raw edges around the outside of each fish with a tight zig-zag, but that didn't look good when I tried it - too much puckering. And given that this is a baby blanket that is going to have to be washed again and again and again, I was worried about fraying. So what I ended up doing was pieceing each fish together, then turning the hems down and basting everything down by hand. It took a long time but I'm happy with the result.

You can see the hand basting in this photo. Going around all the curves was a pain in the butt.

Before I added the eyes and mouths.

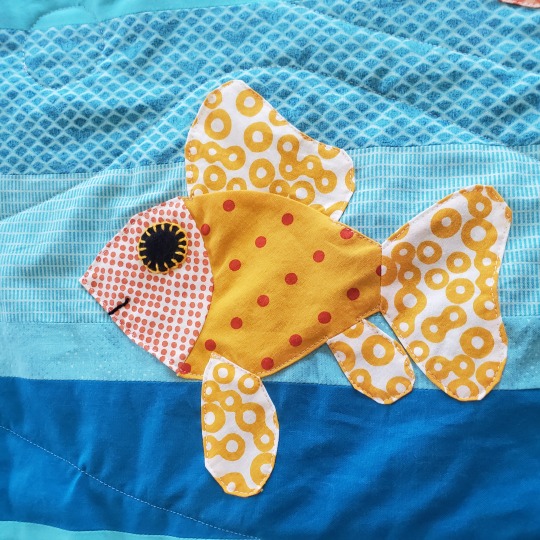

I quilted and bound it myself. I quilted some bubbles and then wavy lines to mimic water.
One of the design elements that I really like is that all the blue fabrics were either solid colour or had a linear, graphic pattern, and I pieced the water in straight lines to go with that. Then all the fabrics I used for the fish are dots and bubbles, and the fish shapes are all curves to match that. Used the rest of my fish fabrics to bind the quilt.
22 notes
·
View notes
Text

My first quilt!
It's mostly made of fabric I bought for masks in 2020, but I think it's a good starting point for quilting.
23 notes
·
View notes
Text
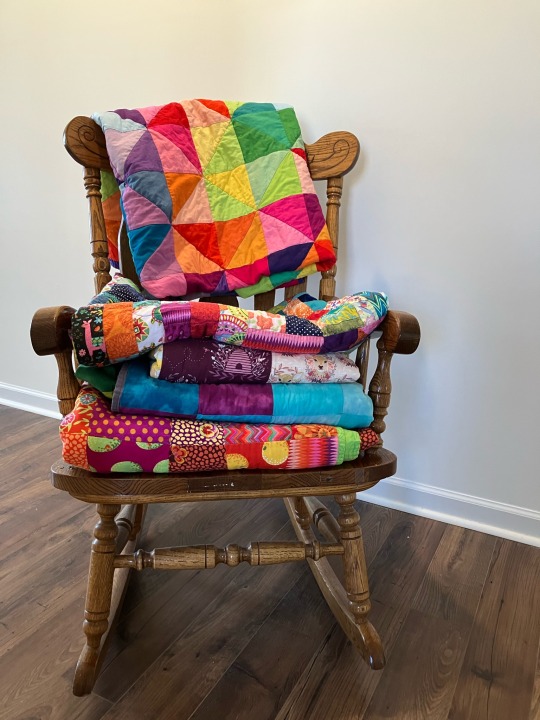
For potential art trade reasons, I took a photo of some of my quilts folded up on a chair and I love how it turned out!
193 notes
·
View notes
Text
Toes in the Sand
Toes in the Sand (close up)Toes in the Sand (back)Toes in the Sand (front)
Large colored triangles alternate with plain white fabric that is perfect so showing off the star and swirls quilting design. This quilt is perfect for a picnic on the beach and having your toes in the sand.
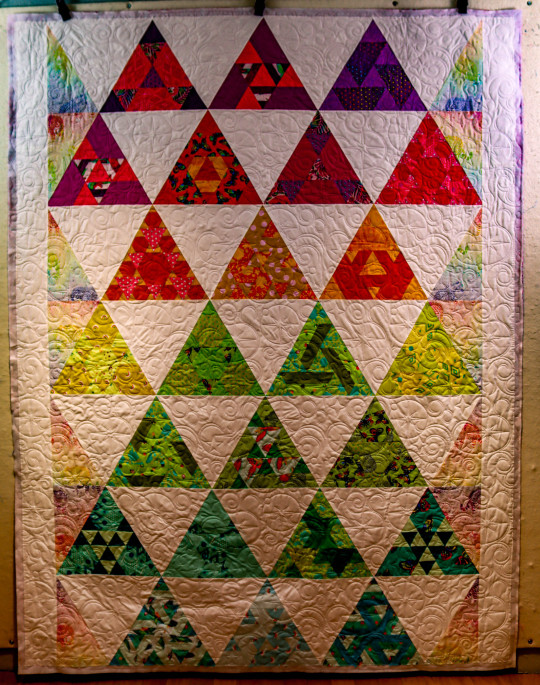
View On WordPress
6 notes
·
View notes