
Don't wanna be here? Send us removal request.
Statistics
We looked inside some of the posts by roundrugs2 and here's what we found interesting.
Average Info
Notes Per Post
0
Likes Per Post
0
Reblog Per Post
0
Reply Per Post
0
Time Between Posts
9 hours
Number of Posts By Type
Text
17
Last Seen Tumblr Blogs


Fun Fact
Mobile Tumblr US users spend an average of 4.04 minutes per session on the app.
Text
Protect Your Floors with Gym Mats for Home
In recent years, the trend of working out at home has skyrocketed. With the rise of at-home fitness programs, many individuals have found themselves swapping gym memberships for personalized home workouts. Whether you're into yoga, Pilates, weightlifting, or bodyweight exercises, one essential piece of equipment you'll need to maximize your workouts is gym mats for home.

wall panels - pvc vinyl flooring dubai - laminate flooring - industrial epoxy flooring dubai - microcement
Why Gym Mats for Home Are Essential
Gym mats for home serve multiple purposes and provide a range of benefits for fitness enthusiasts. First and foremost, they enhance safety by providing a cushioned surface that absorbs shock, reducing the risk of injury. Whether you're performing high-impact exercises or working on balance and flexibility, gym mats for home offer the support and protection you need. Moreover, they create a dedicated workout area in your living space, which helps to establish a workout routine and mindset.
In addition to safety, gym mats for home improve comfort during exercise. Many fitness activities, especially yoga and Pilates, involve floor exercises, and having a soft yet firm surface can make all the difference in your practice. Gym mats for home provide the right amount of cushioning, ensuring that your joints—especially your knees, wrists, and elbows—are protected from hard surfaces. The cushioning can also prevent slipping during exercises, allowing for a more secure and stable workout.
Different Types of Gym Mats for Home
When selecting gym mats for home use, it's essential to consider the type of workouts you plan on doing. Not all mats are created equal, and understanding the differences can help you choose the right one for your fitness needs.
Yoga Mats
For those who practice yoga or Pilates at home, a yoga mat is an essential piece of equipment. Yoga mats are designed with a non-slip surface that offers grip, even during sweaty sessions. They're typically thinner than other types of gym mats for home, providing just enough cushioning for comfort while maintaining stability. They come in various thicknesses, with thicker mats offering more cushion for those who require additional joint protection.
Foam Exercise Mats
Foam exercise mats are an excellent choice for individuals who need more padding and support. These mats are thicker than yoga mats and provide a softer surface for exercises such as bodyweight squats, push-ups, and sit-ups. Foam mats for home also work well for strength training with dumbbells or kettlebells, offering cushioning against hard floors. They can be used in combination with other equipment, such as resistance bands and weights.
Interlocking Mats
Interlocking gym mats for home are designed for those who need a larger workout area. These mats come in puzzle-like pieces that can be assembled to cover any area of your choice. Interlocking mats are versatile, offering a comfortable, cushioned surface for exercises like stretching, cardio, or strength training. They're easy to assemble and disassemble, making them a popular choice for home gyms that need to be set up and taken down quickly.
Rubber Mats
Rubber gym mats for home are particularly popular for weightlifting. They are durable, non-slip, and provide excellent shock absorption, making them ideal for heavy lifting or high-impact exercises. Rubber mats also protect your floor from damage caused by dropped weights or equipment. They are highly durable and can withstand heavy use, making them a great long-term investment for serious fitness enthusiasts.
Tatami Mats
Tatami mats, inspired by traditional Japanese design, are used for martial arts and combat training. These mats are firm yet cushioned and offer excellent shock absorption. If you're training in martial arts, wrestling, or other contact sports, tatami gym mats for home provide the right balance of comfort and support.
Key Benefits of Gym Mats for Home
Protection from Injuries
One of the top benefits of using gym mats for home is injury prevention. Performing exercises on hard floors can put unnecessary stress on your joints and increase the risk of injuries, especially for high-impact activities. Gym mats for home offer cushioning that absorbs shock and distributes impact, reducing the strain on your body.
Improved Comfort
Gym mats for home provide a comfortable surface for exercising, especially during floor-based activities such as sit-ups, push-ups, or stretches. The soft yet firm surface helps reduce discomfort from hard floors, making workouts more enjoyable and enabling you to focus better on your exercise routine.
Versatility
Gym mats for home come in a variety of shapes, sizes, and materials, making them versatile and adaptable to different types of workouts. Whether you're doing yoga, weightlifting, cardio, or bodyweight exercises, there's a mat that can cater to your specific needs. You can also use different types of mats in combination to create a customized workout area.
Easy to Clean
Maintaining cleanliness in your workout space is important, and gym mats for home are generally easy to clean. Most mats are made from materials that are resistant to dirt, moisture, and bacteria. You can simply wipe them down after each use or give them a quick wash to keep your space hygienic. This is especially important for home gyms that are used frequently.
Noise Reduction
If you live in an apartment or share your living space, noise reduction is an important factor when working out. Gym mats for home, especially rubber mats, can help reduce noise when performing high-impact exercises such as jumping or lifting heavy weights. This makes your workouts quieter, preventing disturbance to others in your household or neighbors.
Cost-Effective
Investing in gym mats for home is a cost-effective solution compared to paying for a gym membership. Gym mats are affordable, durable, and long-lasting, offering great value for money. You can create a functional and safe workout space at home without breaking the bank.
How to Choose the Right Gym Mats for Home
When selecting gym mats for home use, it's essential to consider several factors to ensure you choose the right option for your workout style and space.
Thickness
The thickness of the mat plays a significant role in the comfort and support it provides. If you're doing high-impact exercises or require more cushioning for your joints, opt for thicker mats. On the other hand, if you're focusing on stability and need a more firm surface, a thinner mat may be more suitable.
Material
Gym mats for home come in various materials, including foam, rubber, and PVC. Foam mats are lightweight, soft, and easy to clean, making them great for activities like yoga and Pilates. Rubber mats are durable and ideal for heavy-duty workouts, such as weightlifting. Consider the material that best suits your needs.
Size and Coverage
Consider how much space you have for your workout area when selecting gym mats for home. If you're working in a small space, opt for compact mats that you can easily store away when not in use. If you need a larger area, interlocking mats are an excellent option, as they can cover a wide surface area.
Non-Slip Surface
A non-slip surface is a must-have for any gym mat. A slip-resistant mat ensures that you stay stable during your workouts, whether you're doing yoga, lifting weights, or performing high-intensity cardio. Look for mats that have a textured or rubberized surface to prevent sliding.
Portability
If you plan on moving your gym mats for home around or need a mat that you can take with you, choose lightweight options that are easy to transport. Some mats come with carrying straps or bags for added convenience.
Conclusion
Gym mats for home are an essential investment for anyone looking to create a safe, comfortable, and functional workout space at home. Whether you're practicing yoga, lifting weights, or performing high-impact exercises, the right gym mat can improve your workout experience by providing support, comfort, and safety. With various options available, from yoga mats to interlocking foam mats and rubber mats, there's a gym mat for every fitness need. So, invest in gym mats for home, and take your home workouts to the next level!
0 notes
Text
Choosing the Best Gym Flooring for Garage Spaces
Setting up a gym at home can be an exciting and cost-effective way to stay fit. One of the essential components of any home gym is gym flooring for garage. Whether you’re setting up a weightlifting station, a yoga area, or a space for cardio workouts, having the right flooring can make a huge difference in terms of comfort, safety, and performance.
In this article, we’ll explore the importance of choosing the right gym flooring for garage, the different types of flooring materials available, installation tips, and factors to consider when selecting the perfect option for your home gym.

wooden flooring - sports flooring dubai - terrazzo tiles - lvt flooring - large floor cushion - sports flooring dubai
Why is Gym Flooring for Garage Important?
A garage gym can be an excellent alternative to expensive gym memberships, and it offers the convenience of working out at any time. However, the garage floor isn’t designed to accommodate the wear and tear of exercise equipment or intense physical activity. This is where gym flooring for garage comes into play. The right flooring will protect both your equipment and the garage itself while enhancing your workout experience. Let’s dive into why gym flooring is a must-have for your garage setup:
Protection for the Floor The most obvious benefit of gym flooring for garage is that it protects your garage floor from the impact of heavy equipment, dropped weights, and constant movement. Without proper flooring, your garage floor can suffer from dents, scratches, and stains over time. Gym floors are designed to absorb these impacts, preventing any damage to the underlying surface.
Safety and Injury Prevention A good gym floor offers more than just protection. It also provides a slip-resistant surface, which is crucial for safety. Whether you’re lifting heavy weights or performing cardio exercises, a non-slip surface reduces the risk of accidents and injuries. High-quality gym flooring for garage offers traction that helps you maintain balance, especially during high-intensity workouts.
Noise Reduction Another significant benefit of installing gym flooring for your garage is the reduction of noise. Many people work out with weights or use equipment like treadmills, which can be noisy, especially in a hard, concrete garage. Gym floors, particularly rubber mats or tiles, can help absorb the noise and vibrations, making your workout environment more comfortable for you and your neighbors.
Easy Maintenance Unlike concrete or other types of flooring, gym flooring is easy to clean and maintain. Sweeping away dust and debris is simple, and spills, such as water or sweat, can be wiped off without causing damage. This easy maintenance ensures that your gym space remains hygienic and visually appealing.
Types of Gym Flooring for Garage
There are various types of gym flooring for garage, each offering distinct features and benefits. The material you choose will depend on your workout needs, budget, and aesthetic preferences. Here are some of the most popular types of gym flooring for garage:
Rubber Flooring Rubber flooring is one of the most common choices for garage gyms. It’s durable, impact-resistant, and provides excellent cushioning for heavy equipment and intense workouts. Rubber mats or tiles come in various thicknesses, allowing you to customize your flooring based on the level of protection you need. One of the biggest advantages of rubber flooring is its noise-dampening qualities, which is why it's ideal for weightlifting areas.
Foam Flooring Foam tiles or mats are lightweight and easy to install, making them a popular option for home gyms. They provide a cushioned surface for exercises that involve a lot of movement, such as yoga, Pilates, or bodyweight exercises. Foam flooring is also more affordable compared to rubber options, but it may not be as durable, especially under heavy weights.
Vinyl Flooring For those who prefer a sleek, modern look, vinyl flooring can be a stylish option. Vinyl is durable, easy to clean, and offers a smooth surface that works well for cardio exercises or lighter workout routines. Vinyl flooring for your garage gym is available in interlocking tiles or rolls, and it’s relatively easy to install.
Interlocking Tiles Interlocking tiles are a versatile option for gym flooring for garage. They can be made from rubber, foam, or PVC, and they lock together to create a seamless, custom-fit floor. The interlocking design makes installation simple, and the tiles can be easily replaced if needed. This type of flooring is ideal for people who want to customize their gym layout or need to transport the flooring.
Hardwood or Laminate Flooring While less common for home gyms, hardwood or laminate flooring can work well in a garage if you’re setting up a low-impact gym with light cardio and stretching areas. It’s essential to use a protective mat or area rug for equipment to prevent damage to the floor. However, these types of flooring are not recommended for heavy lifting or intense workout routines due to their vulnerability to scratches and dents.
Choosing the Right Gym Flooring for Your Garage
When selecting gym flooring for garage, there are several factors to consider:
Durability Durability is one of the most important factors when choosing gym flooring. You want a floor that can withstand the weight of heavy equipment, weights, and constant foot traffic. Rubber flooring is the most durable and can last for years with minimal wear and tear.
Thickness The thickness of your gym floor will depend on the type of workouts you’re doing. For activities like weightlifting, a thicker floor (around 8-12mm) provides extra protection. For low-impact exercises like yoga or stretching, a thinner floor may suffice.
Comfort If comfort is a top priority for your workout, consider foam flooring. Foam is softer and more comfortable underfoot, making it ideal for exercises like Pilates, yoga, or aerobics. Rubber flooring is also a good option for comfort, but it offers more firmness than foam.
Ease of Installation If you're a DIY enthusiast, look for gym flooring for garage that’s easy to install. Interlocking tiles or roll-out mats are simple to lay down without the need for adhesives or professional help.
Budget Your budget will also play a significant role in your decision. While rubber flooring is highly durable and offers excellent protection, it can be more expensive than foam or vinyl options. However, it’s an investment that will pay off in the long run.
Installing Gym Flooring for Garage
Once you've selected the right gym flooring for garage, the next step is installation. While professional installation is an option, many flooring types, such as interlocking tiles and roll-out mats, can be installed by yourself without much hassle.
Here are some installation tips:
Prepare the Garage Floor Before installing your gym flooring, ensure that the garage floor is clean and dry. Sweep away any debris or dirt, and if necessary, use a cleaner to remove stubborn stains.
Start from the Center If you're using interlocking tiles or roll-out mats, start from the center of the garage and work your way outwards. This will help you achieve a more even and symmetrical layout.
Cut the Flooring In some cases, you may need to cut the flooring to fit the edges of your garage. This is particularly true for roll-out mats or large tiles. Use a utility knife or floor cutter to trim the material as needed.
Leave Some Space for Expansion Depending on the material, some flooring types may expand or contract with temperature changes. Leave a small gap between the flooring and the wall to allow for this natural movement.
Conclusion
When setting up a home gym, investing in high-quality gym flooring for garage is essential for comfort, safety, and durability. Whether you choose rubber, foam, vinyl, or interlocking tiles, the right flooring will protect your garage floor, reduce noise, and enhance your overall workout experience. Be sure to consider factors like durability, thickness, comfort, and ease of installation when making your decision. With the right gym flooring for garage, you can create a functional and enjoyable workout space that helps you stay motivated and achieve your fitness goals.
0 notes
Text
Choosing the Best Gym Flooring for Your Fitness Center
When designing a gym or fitness center, one of the most crucial aspects to consider is the type of flooring to install. Gym flooring is not only essential for creating an aesthetically pleasing environment but also for ensuring safety, durability, and comfort. Whether you are building a home gym or setting up a commercial fitness center, choosing the right gym flooring can make all the difference in the overall experience for users.

Flooring - parquet flooring - floor cushion - sports vinyl flooring dubai - wooden flooring - resin flooring dubai
What is Gym Flooring?
Gym flooring refers to the materials used to cover the floor of a fitness space. These materials are designed specifically to withstand the demands of intense physical activity, including weight lifting, cardio exercises, and high-impact movements. Unlike standard flooring, gym flooring is engineered to offer shock absorption, reduce noise, and protect both users and the underlying surface.
The type of gym flooring chosen depends largely on the activities that will be performed in the space. Some flooring options are better suited for cardio areas, while others may be more appropriate for weightlifting or yoga zones. The versatility and functionality of gym flooring make it a key element in the overall design and success of a gym.
Types of Gym Flooring
Rubber Flooring
Rubber gym flooring is one of the most popular and widely used materials in fitness centers. It is durable, slip-resistant, and highly effective in absorbing shock. Rubber tiles or rolls are commonly used in both commercial and home gyms due to their ability to withstand heavy foot traffic, equipment, and weights.
Rubber gym flooring comes in various thicknesses, offering different levels of cushioning. For high-impact areas, thicker rubber mats are ideal, as they provide superior protection to both the floor and users. Additionally, rubber flooring is easy to maintain and clean, making it a practical choice for any gym.
Interlocking Tiles
Interlocking tiles are another popular choice for gym flooring. These tiles are designed to click together seamlessly, creating a stable and secure surface. Interlocking tiles are available in various materials, including rubber, foam, and PVC, making them suitable for different gym activities.
One of the main advantages of interlocking tiles is their ease of installation. They do not require glue or nails, and they can be laid down quickly and efficiently. This makes them an excellent option for gyms that need to be set up or modified quickly. Additionally, interlocking tiles offer flexibility, as they can be removed and replaced individually if damaged.
Vinyl Flooring
Vinyl gym flooring is another popular choice for fitness centers. It is smooth, durable, and easy to clean. Vinyl floors are typically used in areas with light to moderate activity, such as aerobic studios, cardio zones, and even yoga spaces. While vinyl flooring may not offer the same level of shock absorption as rubber flooring, it is a more cost-effective option for many gym owners.
Vinyl gym flooring is available in rolls or tiles, and it can be customized with various designs and colors to suit the aesthetics of the gym. This type of flooring is resistant to stains and spills, making it an excellent choice for areas that require frequent cleaning.
Foam Flooring
Foam flooring is often used in areas where comfort is a priority, such as yoga studios, Pilates rooms, and stretching zones. It is softer and more cushioned than rubber or vinyl, providing users with a comfortable surface for floor-based exercises. Foam mats or tiles are lightweight and easy to install, and they offer excellent shock absorption, making them ideal for low-impact activities.
However, foam flooring may not be as durable as rubber or vinyl and is not suitable for areas with heavy gym equipment or high-impact exercises like weightlifting. It is best used in low-traffic areas where comfort and cushioning are essential.
Wooden Flooring
Wooden gym flooring, often referred to as hardwood or sport court flooring, is another option for gyms that want to create a more traditional or upscale look. This type of flooring is typically used in basketball courts, multipurpose sports halls, or dance studios. Wooden floors offer a professional appearance and a smooth, even surface that is ideal for activities that require agility and footwork.
While wooden floors can be elegant and functional, they require regular maintenance to prevent wear and tear. They are also more expensive than other flooring options, making them a less cost-effective choice for many gym owners.
Key Benefits of Gym Flooring
Safety
One of the primary reasons gym flooring is so important is safety. Gym flooring helps reduce the risk of injuries by providing a stable, slip-resistant surface. It also absorbs shock, which helps to protect joints and muscles during high-impact exercises. For weightlifting areas, gym flooring ensures that weights and equipment do not damage the floor or cause accidents.
Durability
Gym flooring is designed to withstand the heavy usage typical of fitness spaces. Whether it's a high-intensity workout, heavy equipment, or the constant movement of users, gym flooring is built to last. Materials like rubber and vinyl are particularly durable, making them ideal for environments where the floor is subjected to heavy loads.
Noise Reduction
Another benefit of gym flooring is its ability to reduce noise levels. Whether it's the sound of weights hitting the floor, feet pounding during cardio exercises, or the noise of equipment, gym flooring helps to absorb and dampen noise. This creates a more pleasant and less disruptive environment for both users and nearby spaces.
Comfort
Comfort is an important consideration when selecting gym flooring. The right flooring can make a significant difference in the comfort level of users, particularly during activities that involve long periods of standing or floor exercises. Rubber flooring, for instance, provides enough cushioning to reduce the strain on feet, legs, and joints, ensuring that users can perform their exercises without discomfort.
Easy Maintenance
Gym flooring is designed to be easy to clean and maintain, which is essential for any gym. Fitness centers experience heavy traffic, and the floor must be cleaned regularly to maintain hygiene and functionality. Materials like rubber and vinyl are resistant to dirt, stains, and moisture, making them simple to maintain. Routine cleaning can help extend the life of the gym flooring and keep it looking new.
Choosing the Right Gym Flooring
Selecting the right gym flooring involves considering several factors, including the type of activities performed in the gym, the amount of traffic the space will receive, and the budget available for flooring. Here are a few key considerations:
Type of Activity: Determine the activities that will take place in the gym. If the gym focuses on weightlifting, thicker, shock-absorbing rubber flooring may be necessary. For areas that focus on cardio or aerobics, vinyl or foam flooring may be more appropriate.
Traffic Levels: The more people that use the gym, the more durable and low-maintenance the flooring should be. Rubber and vinyl are ideal for high-traffic areas, while foam may be better suited for smaller spaces or low-traffic zones.
Budget: Gym flooring comes in a variety of price ranges. Rubber flooring is durable but can be more expensive, while vinyl or foam options may be more affordable. It's important to balance quality and budget when making a decision.
Aesthetic Appeal: While functionality is the primary concern, aesthetics also play a role in the selection of gym flooring. Many gym owners choose flooring that complements the overall design of the space. Vinyl flooring, in particular, offers a wide range of colors and designs to choose from.
Conclusion
In conclusion, gym flooring plays a critical role in ensuring the safety, durability, and comfort of any fitness space. The right flooring can enhance the overall user experience, reduce the risk of injuries, and provide long-lasting value. With so many options available, gym owners can choose from a variety of materials to find the best fit for their needs. Whether you opt for rubber, vinyl, foam, or wood, selecting the appropriate gym flooring will ensure that your fitness center provides a safe, comfortable, and functional environment for all users.
0 notes
Text
Choosing the Best Home Gym Flooring for Your Fitness Needs
In recent years, home gyms have become an essential part of fitness enthusiasts' lifestyles. Whether you’re an experienced weightlifter or someone who enjoys yoga, having a dedicated space for working out is incredibly valuable. However, to ensure your workouts are both safe and efficient, choosing the right home gym flooring is a critical factor to consider. This guide will explore the importance of home gym flooring, the best materials for it, installation tips, and how to maintain it to ensure long-term durability.

arabic majlis floor seating dubai - epoxy flooring dubai - pvc wall panels - rubber flooring dubai - rubber flooring
Why Home Gym Flooring is Essential
When setting up your home gym, home gym flooring is one of the first things you should think about. It provides a protective layer for your floor, enhances your comfort, and reduces the risk of injury. Having the right flooring also helps to minimize noise, absorb shock, and provide proper traction for various exercises, such as lifting weights, cardio, or stretching.
Many people overlook the importance of home gym flooring, thinking that any regular flooring will suffice. However, hard surfaces such as tile or wood can be slippery, uncomfortable, and may even get damaged by heavy equipment or weights. The wrong type of flooring can also lead to joint pain due to lack of cushioning, especially during high-impact activities.
Types of Home Gym Flooring Materials
There are several materials available for home gym flooring, each with unique features and benefits. Depending on your specific needs and the type of exercises you do, you might opt for one material over another. Let’s take a look at the most common options for home gym flooring.
1. Rubber Flooring
Rubber is one of the most popular choices for home gym flooring. It is durable, shock-absorbent, and provides a non-slip surface. Rubber flooring is ideal for areas where heavy weights are used, as it can withstand the impact of dropped dumbbells or barbells. Additionally, rubber tiles or rolls are easy to clean and maintain, making them an excellent choice for home gym flooring.
Rubber flooring is also highly versatile. It is available in various thicknesses and colors, allowing you to customize your gym’s look and feel. If noise is a concern, rubber can also help dampen the sounds of weights being dropped or equipment being used. The durability of rubber makes it one of the best materials for high-traffic home gyms.
2. Foam Tiles
Foam tiles are another popular choice for home gym flooring, particularly for activities that require less heavy impact. They are softer than rubber and provide a comfortable surface for floor exercises like yoga, pilates, or stretching. Foam tiles are often interlocking, making them easy to install and rearrange if necessary.
Although foam tiles are not as durable as rubber, they offer excellent cushioning and shock absorption. They are also lightweight, which makes them easy to move and store. For those who prefer a softer surface for their workouts, foam tiles can be a great option for home gym flooring.
3. Vinyl Flooring
Vinyl flooring is another great choice for home gyms, especially in spaces where aesthetics and easy maintenance are priorities. Vinyl offers a smooth, easy-to-clean surface that works well for cardio workouts or stretching. It’s also durable enough to handle moderate exercise equipment without sustaining damage.
Vinyl flooring is available in a variety of designs, including wood or tile looks, so you can still achieve a stylish appearance while maintaining the functionality needed for a home gym. However, it does not offer the same level of shock absorption as rubber or foam, so it may not be the best choice for high-impact exercises or heavy lifting.
4. Carpet Tiles
Carpet tiles are a softer and more comfortable option for home gym flooring, offering a plush surface that can cushion joints during floor exercises. While not as common as rubber or foam, carpet tiles are an excellent option for home gyms that are primarily used for lighter workouts like yoga or cardio.
One of the main benefits of carpet tiles is that they are available in various designs and colors, which can help personalize your home gym. Carpet tiles are also easier to install and replace if one tile gets damaged. However, they are not ideal for heavy weights or high-impact exercises because they do not offer as much support as other flooring materials.
Choosing the Right Home Gym Flooring
When deciding on home gym flooring, there are several factors to consider. Here are some essential considerations to help you make the best choice for your fitness space.
1. Exercise Type
The type of workouts you do should play a significant role in your flooring choice. If you’re planning to lift heavy weights or use exercise equipment like treadmills or stationary bikes, you’ll need a flooring material that is durable and can handle impact. Rubber flooring is perfect for these situations.
On the other hand, if your primary focus is yoga, pilates, or low-impact exercises, you may prefer softer materials like foam tiles or carpet. These materials provide comfort for floor exercises and gentle support for your body.
2. Budget
Your budget will also influence your choice of home gym flooring. Rubber flooring can be more expensive than foam or vinyl, but it offers greater durability and protection. If you’re looking for an affordable option, foam tiles are generally the cheapest. However, if you’re willing to invest more, rubber or high-quality vinyl may offer better long-term value.
3. Durability and Maintenance
Consider how much traffic your home gym will see. If you’re using your gym regularly, you’ll want a flooring option that can withstand constant use. Rubber and vinyl flooring tend to be more durable and require minimal maintenance, making them ideal for long-term use. Foam tiles and carpet tiles, while comfortable, may need to be replaced more often if they get damaged.
4. Aesthetic Preferences
While functionality is the most important aspect of home gym flooring, aesthetics also matter. Choose a material and design that complements the rest of your home gym decor. Rubber comes in various colors and finishes, allowing you to match it with your workout gear or overall design. Vinyl and carpet tiles also offer plenty of customization options in terms of color and style.
Installation of Home Gym Flooring
Installing home gym flooring is a relatively simple process, especially with materials like foam tiles or interlocking rubber mats. Many flooring options come with easy-to-use installation kits, and some can be done without professional assistance.
For rubber flooring rolls or tiles, it is essential to make sure the surface is clean and dry before installation. Depending on the material, you may need adhesive or may rely on the interlocking system to keep the flooring in place. Follow the manufacturer’s instructions for proper installation to ensure that your flooring lasts and provides the necessary support for your workouts.
Maintenance Tips for Home Gym Flooring
Proper maintenance is crucial to keep your home gym flooring in good condition. Here are a few tips to help you extend the life of your flooring:
Regular Cleaning: Sweep or vacuum your flooring regularly to prevent dirt and debris from accumulating. This is especially important for materials like carpet tiles or foam, which can trap dirt.
Mopping: For rubber or vinyl flooring, mop with a damp cloth to remove stains and spills. Avoid using harsh chemicals, as they may damage the flooring.
Protective Mats: Use protective mats or pads under heavy equipment to prevent damage to the flooring.
Inspect for Wear: Regularly check for signs of wear, especially in high-traffic areas, and replace damaged tiles or sections as needed.
Conclusion
Home gym flooring is an essential part of setting up a safe, functional, and comfortable workout environment. Choosing the right material, whether it’s rubber, foam, vinyl, or carpet, depends on your specific needs, budget, and workout preferences. Home gym flooring not only protects your floors but also enhances your performance, reduces injury risk, and contributes to the overall aesthetic of your space.
0 notes
Text
How gym mats enhance your workout space naturally
When it comes to fitness equipment, gym mats are often overlooked in favor of weights, machines, and treadmills. However, gym mats play a critical role in providing a safe, comfortable, and effective workout environment. Whether you are setting up a professional gym, a home fitness area, or a yoga studio, gym mats are indispensable. In this article, we will explore the importance of gym mats, the different types available, how to choose the right ones, and maintenance tips to keep them in top condition.

terrazzo tiles - spc flooring dubai - parquet flooring - epoxy flooring dubai - lvt flooring - porcelain tiles
Why Are Gym Mats Important?
Gym mats provide essential support and cushioning during physical activities. They protect your joints from hard surfaces, reduce the risk of injuries, and enhance overall performance. Without gym mats, exercises such as stretching, yoga, pilates, and weightlifting could put excessive strain on your body, leading to discomfort or long-term damage.
Safety is a primary concern in any fitness space, and gym mats significantly contribute to creating a safe workout environment. They prevent slips, cushion falls, and offer stability during dynamic movements. For children’s play areas, martial arts studios, and high-intensity gyms, gym mats are not just useful — they are essential.
Types of Gym Mats
There is a wide variety of gym mats designed for different activities and spaces. Understanding the types can help you choose the best option for your needs:
1. Exercise Mats
Exercise mats are versatile gym mats used for general workouts, including stretching, aerobics, and bodyweight exercises. They are typically lightweight and easy to move around.
2. Yoga Mats
Yoga mats are thinner gym mats that provide a non-slip surface for yoga practices. They offer just enough cushioning to support poses while maintaining balance and stability.
3. Weightlifting Mats
Weightlifting mats are heavy-duty gym mats designed to withstand the impact of dropped weights. They are thicker and denser, providing maximum shock absorption and protecting both the floor and the equipment.
4. Martial Arts Mats
Martial arts gym mats are designed to cushion falls and minimize injuries during practices like judo, taekwondo, and Brazilian jiu-jitsu. They are often interlocking foam mats that create a large, seamless surface.
5. Kids’ Play Mats
For children's gyms and play areas, special gym mats are made with soft, colorful foam to ensure safety during active play. These mats often come in fun designs to make fitness enjoyable for kids.
6. Folding Mats
Folding gym mats are convenient for small spaces. They can be folded and stored away when not in use, making them perfect for home gyms or mobile fitness trainers.
Materials Used in Gym Mats
The material of gym mats determines their durability, comfort, and suitability for different activities. Common materials include:
PVC (Polyvinyl Chloride): Durable, easy to clean, and water-resistant.
EVA Foam (Ethylene Vinyl Acetate): Lightweight, soft, and perfect for kids’ play mats and yoga mats.
Rubber: Highly durable, excellent shock absorption, and ideal for weightlifting areas.
Polyurethane: Comfortable and supportive, often used in thicker mats for gymnastic activities.
Choosing the right material is crucial depending on the usage of your gym mats.
How to Choose the Right Gym Mats
Selecting the appropriate gym mats involves considering several factors:
1. Type of Exercise
The kind of workouts you plan to do should dictate the type of gym mats you purchase. For instance, weight training requires thick rubber mats, while yoga benefits from thinner, sticky mats.
2. Thickness
Thickness is critical for comfort and protection. Thin gym mats are ideal for yoga and stretching, whereas thicker mats are necessary for impact-heavy activities like gymnastics and weightlifting.
3. Size
Ensure the gym mats cover the workout area adequately. Larger mats or interlocking pieces are better for full gym coverage, while smaller, individual mats work for personal spaces.
4. Grip and Stability
A good gym mat should offer a stable, non-slip surface to prevent accidents. Look for mats with textured surfaces that grip the floor and your body securely.
5. Portability
If you need to move your gym mats frequently, opt for lightweight or foldable designs.
6. Ease of Cleaning
Hygiene is vital in fitness environments. Choose gym mats that are easy to clean and resistant to moisture and bacteria.
Benefits of Using Gym Mats
Using gym mats provides numerous benefits beyond injury prevention:
Enhanced Comfort: Cushioned support reduces strain on joints and muscles.
Improved Performance: Stable surfaces improve balance and technique.
Noise Reduction: Thick gym mats absorb sound, making gyms quieter.
Floor Protection: Mats protect floors from heavy equipment and high-impact activities.
Aesthetic Appeal: Well-chosen gym mats can enhance the look and feel of your fitness area.
Maintenance Tips for Gym Mats
To ensure your gym mats last long and remain hygienic, follow these maintenance tips:
Regular Cleaning: Wipe down gym mats after each use with mild soap and water or disinfectant sprays.
Deep Cleaning: Perform deep cleaning weekly if mats are heavily used.
Dry Thoroughly: Allow mats to air dry completely before rolling or stacking them to prevent mold.
Proper Storage: Store gym mats flat or rolled up in a dry, cool place.
Inspect for Damage: Regularly check for tears or excessive wear, and replace mats as needed.
Setting Up a Gym Space with Gym Mats
When designing your gym space, gym mats should be a fundamental part of your layout. Here are a few tips:
Plan the Layout: Decide where different activities will happen and select appropriate mats for each zone.
Mix and Match: Use different types of gym mats for strength training, cardio, stretching, and kids’ play areas.
Secure Mats: Ensure mats do not slide by using adhesives, anchors, or interlocking systems.
Color Coordination: Choose colors that match your gym’s theme for a professional look.
Gym Mats for Home Gyms
Home gyms are becoming increasingly popular, and gym mats are a must-have component. They create a professional atmosphere while ensuring safety. Whether you are lifting weights in the garage or practicing yoga in your living room, the right gym mats will elevate your workout experience.
For small spaces, consider using portable, foldable gym mats. For more permanent setups, thicker rubber flooring provides durability and protection.
Eco-Friendly Gym Mats
As sustainability becomes a global concern, eco-friendly gym mats are gaining popularity. These mats are made from natural rubber, recycled materials, or biodegradable foams. Choosing eco-conscious gym mats helps reduce your environmental impact while still providing the performance you need.
Conclusion
In summary, gym mats are much more than simple floor coverings; they are essential equipment for anyone serious about fitness. From protecting your body to enhancing performance and maintaining a clean environment, gym mats offer multiple benefits. Choosing the right gym mats depends on your specific needs, the type of exercises you perform, and the environment in which you train.
Investing in high-quality gym mats ensures your workouts are safe, effective, and enjoyable. Whether you are setting up a large commercial gym, a home workout corner, or a kids’ play area, never underestimate the importance of gym mats. They are a foundational piece of fitness equipment that supports every step, stretch, and lift on your fitness journey.
0 notes
Text
Choosing the best gym floor mats for your fitness space
When it comes to creating a safe and efficient workout environment, gym floor mats play a crucial role. Whether you are setting up a home gym, a commercial fitness center, or a specialized training facility, the right gym floor mats can make a significant difference. They not only protect the flooring beneath but also offer comfort, reduce noise, and enhance the overall workout experience. In this guide, we will explore everything you need to know about gym floor mats, including their types, benefits, installation tips, and maintenance advice.

epoxy basement flooring dubai - porcelain tiles - porcelain tiles - floor cushion sofa - epoxy basement flooring dubai
What Are Gym Floor Mats?
Gym floor mats are specialized flooring products designed to withstand the heavy impact, weight, and movement associated with exercise equipment and fitness activities. Made from durable materials such as rubber, foam, PVC, or vinyl, gym floor mats provide a non-slip, cushioned surface that protects both the user and the underlying floor. Their versatility makes them an essential addition to any fitness space.
Types of Gym Floor Mats
Choosing the right type of gym floor mats depends largely on the intended use of the space. Here are the most common types:
1. Rubber Gym Floor Mats
Rubber gym floor mats are among the most popular choices. They are highly durable, resistant to wear and tear, and ideal for high-traffic areas. These mats can absorb shock efficiently, making them perfect for weightlifting zones and cardio equipment areas.
2. Foam Gym Floor Mats
Foam gym floor mats are lightweight and offer excellent cushioning, making them suitable for activities like yoga, Pilates, and martial arts. However, they may not be as durable as rubber mats under heavy equipment.
3. Interlocking Gym Floor Mats
Interlocking gym floor mats come in tile form and can be easily assembled and customized to fit any room size. They are easy to install and replace, offering flexibility for expanding or modifying workout areas.
4. Vinyl Gym Floor Mats
Vinyl-coated gym floor mats are resistant to moisture and easy to clean, making them ideal for environments where hygiene is a top priority. They are often used in multi-purpose fitness rooms.
Benefits of Using Gym Floor Mats
Investing in high-quality gym floor mats offers numerous advantages:
1. Floor Protection
Gym floor mats act as a barrier between heavy equipment and the underlying floor, preventing dents, scratches, and cracks. This is particularly important in home gyms where the flooring may not be designed to handle such stresses.
2. Safety Enhancement
Slip-resistant surfaces provided by gym floor mats reduce the risk of injuries caused by slipping or falling, especially during intense workouts.
3. Noise Reduction
Dropping weights or using heavy machines can generate a lot of noise. Gym floor mats help dampen these sounds, creating a quieter and more enjoyable workout environment.
4. Comfort and Support
Standing, jumping, or running on hard surfaces can cause strain and fatigue. Gym floor mats offer a cushioned layer that absorbs impact and reduces stress on joints and muscles.
5. Easy Maintenance
Most gym floor mats are designed to be low-maintenance. Regular sweeping, vacuuming, and occasional mopping are usually enough to keep them clean and in good condition.
How to Choose the Right Gym Floor Mats
Selecting the appropriate gym floor mats involves considering several factors:
1. Type of Exercise
Think about the primary activities that will be performed. Weightlifting requires heavy-duty rubber mats, while yoga and stretching exercises may benefit more from foam mats.
2. Space and Layout
Measure the workout area carefully. Modular or interlocking gym floor mats are ideal if you need a customizable setup, while roll-out mats work well for larger, continuous spaces.
3. Thickness
The thickness of gym floor mats determines their level of protection and cushioning. Thicker mats offer better shock absorption, essential for areas with heavy equipment or high-impact exercises.
4. Budget
There is a wide price range for gym floor mats. Setting a budget will help narrow down options without compromising on quality.
Installation Tips for Gym Floor Mats
Installing gym floor mats is generally straightforward, but following a few tips can ensure the best results:
Prepare the surface: Ensure the floor is clean, dry, and level before installation.
Plan the layout: Arrange mats before securing them to ensure they fit properly.
Use adhesives if needed: In high-traffic areas, using double-sided tape or adhesive can prevent mats from shifting.
Allow expansion gaps: Leave a small gap around the edges to accommodate material expansion, especially for rubber mats.
Maintaining Gym Floor Mats
Proper care and maintenance will extend the life of your gym floor mats:
Regular cleaning: Sweep or vacuum daily to remove dirt and debris.
Spot cleaning: Use a damp cloth and mild detergent for spot cleaning spills.
Deep cleaning: Periodically mop the mats with a gentle cleaning solution to remove sweat and grime buildup.
Avoid harsh chemicals: Stick to mild cleaners to avoid damaging the mats’ surface.
Common Mistakes to Avoid
When buying or installing gym floor mats, avoid these common mistakes:
Choosing the wrong material: Using foam mats under heavy equipment can result in premature wear.
Ignoring floor preparation: Placing mats on an uneven or dirty surface can reduce their lifespan.
Overlooking thickness requirements: Too-thin mats may not provide adequate protection or cushioning.
Skipping maintenance: Neglecting cleaning can lead to odors and deterioration over time.
Gym Floor Mats for Home Gyms
Setting up a home gym? Gym floor mats are essential for protecting your home's floors and creating a professional workout atmosphere. Choose mats that are easy to install, fit the space available, and suit the types of exercises you plan to perform.
Interlocking foam or rubber gym floor mats are often preferred for home gyms due to their convenience and affordability. They are easy to replace or expand as your home gym evolves.
Gym Floor Mats for Commercial Gyms
Commercial fitness centers have different needs compared to home gyms. They require gym floor mats that can endure constant use, heavy equipment, and diverse workout activities. High-density rubber mats, thick vinyl mats, and durable interlocking tiles are commonly used.
Durability, hygiene, and appearance are critical considerations for commercial gym floor mats. Investing in high-quality options can enhance member satisfaction and reduce long-term maintenance costs.
Eco-Friendly Gym Floor Mats
If sustainability is important to you, many manufacturers now offer eco-friendly gym floor mats made from recycled rubber or non-toxic materials. These mats provide the same benefits as traditional ones while reducing environmental impact.
Choosing eco-conscious gym floor mats not only benefits the planet but can also appeal to environmentally-minded clients if you're running a commercial facility.
Conclusion
In conclusion, gym floor mats are a foundational component of any workout space, providing protection, comfort, and safety. With various types available, including rubber, foam, interlocking, and vinyl options, it's easy to find mats that fit your specific needs.
Investing in the right gym floor mats can significantly enhance the effectiveness and enjoyment of your fitness routine. Whether for a home setup or a commercial gym, choosing high-quality gym floor mats, maintaining them properly, and installing them correctly will ensure a superior workout experience for years to come.
0 notes
Text
How vinyl sheet flooring installation transforms your space beautifully
Vinyl sheet flooring installation has become a popular choice for both residential and commercial properties due to its durability, affordability, and aesthetic versatility. Whether you are renovating your home or designing a commercial space, vinyl sheet flooring installation can offer a seamless and stylish solution. In this comprehensive guide, we will walk you through everything you need to know about vinyl sheet flooring installation, from preparation to maintenance tips.

epoxy garage flooring dubai - spc flooring - wall panel - sports flooring dubai - linoleum flooring
What Is Vinyl Sheet Flooring?
Vinyl sheet flooring is a resilient flooring material made primarily from PVC (polyvinyl chloride) with added plasticizers for flexibility. It comes in large, continuous, flexible sheets, unlike vinyl tiles or planks. Vinyl sheet flooring installation provides a waterproof, durable, and easy-to-maintain surface that can mimic the look of wood, stone, ceramic, or even carpet.
Benefits of Vinyl Sheet Flooring Installation
One of the main reasons people choose vinyl sheet flooring installation is the wide range of benefits it offers:
Affordability: Vinyl is cost-effective compared to natural wood or stone.
Durability: It is resistant to scratches, dents, and stains.
Water Resistance: Perfect for kitchens, bathrooms, and laundry rooms.
Comfort: Softer underfoot compared to hardwood or tile.
Easy Maintenance: Regular sweeping and occasional mopping keep it looking new.
Because of these advantages, vinyl sheet flooring installation is often recommended for high-traffic areas and households with children or pets.
Preparing for Vinyl Sheet Flooring Installation
Preparation is key to a successful vinyl sheet flooring installation. Here are the essential steps:
1. Measure the Area
Accurate measurements ensure you purchase the right amount of material. Add a little extra (around 5-10%) to account for mistakes and waste.
2. Choose the Right Vinyl
Select a design and thickness that match the room’s needs. Heavier traffic areas may require thicker, more durable vinyl.
3. Prepare the Subfloor
The subfloor must be clean, dry, and smooth. Vinyl sheet flooring installation requires an even surface, so patch any holes or cracks and remove any debris or old adhesive.
4. Gather Your Tools
Essential tools for vinyl sheet flooring installation include:
Utility knife
Measuring tape
Adhesive (if required)
Seam roller
Chalk line
Straightedge
Having all tools ready makes the vinyl sheet flooring installation smoother and more efficient.
Common Mistakes During Vinyl Sheet Flooring Installation
Even with careful planning, mistakes can happen. Here are common pitfalls to avoid during vinyl sheet flooring installation:
Skipping subfloor preparation: Imperfections underneath will show through the vinyl.
Incorrect adhesive use: Using too much or too little adhesive can cause bubbles or lifting.
Poor measurements: Incorrect cuts waste material and can leave unsightly gaps.
Ignoring acclimation: Vinyl that hasn’t adjusted to the room’s temperature and humidity may shrink or warp.
By being aware of these mistakes, your vinyl sheet flooring installation can proceed smoothly.
Caring for Your New Vinyl Sheet Flooring
After completing your vinyl sheet flooring installation, proper care will extend its life and beauty.
Daily Maintenance
Sweep or vacuum regularly to remove dirt and grit.
Mop with a damp cloth and mild cleaner designed for vinyl flooring.
Preventive Measures
Place mats at entryways to catch dirt and moisture.
Use felt pads under furniture legs.
Avoid dragging heavy furniture across the floor.
Vinyl sheet flooring installation results in a resilient surface, but it still benefits from protective measures.
Vinyl Sheet Flooring Installation vs. Other Flooring Types
When deciding between vinyl sheet flooring installation and other options, consider the following:
Hardwood: More expensive and less water-resistant.
Tile: More durable but harder and colder underfoot.
Laminate: Cheaper, but less water-resistant.
Vinyl sheet flooring installation offers a balanced solution, particularly where budget, durability, and aesthetics are all priorities.
Environmental Impact
Modern vinyl flooring manufacturers are increasingly producing eco-friendlier options. Look for products with low VOC emissions and recycling initiatives. A responsible vinyl sheet flooring installation contributes to a healthier home environment.
Conclusion
Vinyl sheet flooring installation provides an attractive, durable, and cost-effective flooring option for many spaces. With proper preparation, careful installation, and regular maintenance, your vinyl flooring can last for decades. Whether you choose to install it yourself or hire a professional, understanding the process ensures better results and satisfaction with your new floor.
If you're considering a renovation or new construction project, vinyl sheet flooring installation is a practical choice worth exploring. Thanks to its combination of beauty, resilience, and affordability, it's no wonder that more and more homeowners and businesses are opting for vinyl sheet flooring installation.
0 notes
Text
Why Tile Flooring Installation is the Best Choice for Your Home
Tile flooring installation is one of the most popular choices when it comes to upgrading the look and functionality of any space. Whether you are renovating your home or designing a new construction, tile flooring installation offers a durable, versatile, and stylish solution. In this guide, we will explore the various aspects of tile flooring installation, from selecting the right tiles to the step-by-step process of laying them down. We’ll also highlight some key tips and considerations to help ensure that your tile flooring installation is a success.

schools nurseries vinyl flooring - epoxy garage flooring dubai - spc flooring - floor - floor cushions uae
Why Choose Tile Flooring Installation?
Tile flooring installation has become a go-to option for many homeowners and commercial spaces due to its many advantages. First and foremost, tiles are known for their durability. They are resistant to wear and tear, making them a great choice for high-traffic areas. Tiles are also easy to clean and maintain, which is essential for spaces prone to spills or dirt accumulation, such as kitchens, bathrooms, and entryways.
Moreover, tile flooring installation offers a variety of design options. Tiles come in numerous materials, colors, patterns, and sizes, allowing you to customize the look of your floor to match your style preferences. Whether you want a classic, elegant look with marble or a modern touch with sleek, geometric patterns, tile flooring installation provides endless possibilities.
Choosing the Right Tiles for Your Space
The first step in the tile flooring installation process is choosing the right type of tile for your needs. There are several materials available, each with its unique features and benefits:
Ceramic Tiles: These are the most common and cost-effective option for tile flooring installation. Ceramic tiles are available in a wide range of colors and styles, and they are highly durable, water-resistant, and easy to maintain.
Porcelain Tiles: Porcelain tiles are similar to ceramic tiles but are denser and more durable. They are perfect for high-traffic areas and are often used for both indoor and outdoor tile flooring installation.
Natural Stone Tiles: Materials such as marble, granite, and slate offer a sophisticated and luxurious finish. However, natural stone tiles require more maintenance than ceramic or porcelain tiles and may need sealing to protect them from stains.
Glass Tiles: Glass tiles are an elegant choice for areas where you want to create a visually striking effect. They are often used as accents or for decorative purposes in tile flooring installation.
Vinyl Tiles: While vinyl tiles may not offer the same aesthetic appeal as natural stone or ceramic, they are affordable, durable, and comfortable underfoot. They are a great choice for budget-friendly tile flooring installation.
Preparing for Tile Flooring Installation
Before you begin the tile flooring installation process, it is crucial to prepare the area properly. This ensures that your tiles will adhere securely and create a smooth, even surface.
Clear the Room: Start by removing any existing flooring, such as carpet or old tiles. Ensure the subfloor is clean, dry, and level.
Check for Moisture: Excess moisture in the subfloor can lead to issues with tile adhesion. Make sure the subfloor is dry and free of water damage before proceeding with the installation.
Measure the Area: Measure the dimensions of the room to calculate the number of tiles you will need. Always purchase extra tiles to account for cuts and mistakes during installation.
Acclimate the Tiles: If you are using stone or ceramic tiles, it is a good idea to let them acclimate to the room temperature by leaving them in the installation space for 24 to 48 hours before beginning the tile flooring installation.
Tools and Materials for Tile Flooring Installation
To ensure a smooth and successful tile flooring installation, make sure you have the following tools and materials:
Tiles
Tile adhesive or thin-set mortar
Notched trowel
Tile cutter or wet saw
Tile spacers
Grout
Grout float
Sponge and bucket of water
Measuring tape
Level
Rubber mallet
Chalk line (optional)
Step-by-Step Guide to Tile Flooring Installation
Now that you are prepared, let’s walk through the steps of the tile flooring installation process.
1. Plan Your Layout
Begin by planning the layout of your tiles. The key to a professional-looking installation is ensuring that the tiles are arranged symmetrically and evenly. Start from the center of the room, snapping chalk lines to guide your tile placement. This will prevent the tiles from looking off-center, especially around the edges.
2. Apply the Tile Adhesive
Using a notched trowel, spread a thin layer of tile adhesive (or thin-set mortar) on the subfloor. Apply the adhesive to a small section of the floor to avoid it drying out before you can lay the tiles. Be sure to spread the adhesive in one direction to create a uniform surface for the tiles to stick to.
3. Lay the Tiles
Starting from the center, place the first tile on the adhesive, pressing it down gently. Use tile spacers between each tile to ensure consistent spacing for grout. As you lay each tile, make sure it is level and aligned with the chalk lines. You can use a rubber mallet to tap the tiles into place for a snug fit.
4. Cut Tiles as Needed
When you reach the edges of the room, you may need to cut some tiles to fit. Use a tile cutter or wet saw to cut tiles to the required size. Take your time and measure carefully to ensure that the cuts are accurate.
5. Allow the Tiles to Set
Once all the tiles are in place, allow the adhesive to dry for at least 24 hours before walking on the tiles or applying grout. This ensures that the tiles are securely bonded to the subfloor.
6. Apply the Grout
After the adhesive has set, it’s time to apply the grout. Use a grout float to spread grout over the tiles, pressing it into the gaps between the tiles. Make sure to remove any excess grout and clean the surface of the tiles with a damp sponge.
7. Clean and Seal the Tiles
Once the grout has dried, clean the tiles thoroughly to remove any grout residue. Some types of tiles, particularly natural stone, may require sealing to prevent stains and damage. Apply a tile sealer as recommended by the manufacturer.
Tile Flooring Installation: Maintenance and Care
To keep your tiles looking their best, regular maintenance is necessary. Here are a few tips to ensure your tile flooring installation stays in top condition:
Clean Regularly: Sweep or vacuum the floor regularly to remove dirt and debris. Use a damp mop with a mild cleaner to avoid damaging the tiles or grout.
Seal Grout: Grout can become stained over time, so sealing it periodically will help protect it from dirt and moisture.
Repair Damaged Tiles: If a tile becomes cracked or damaged, it’s important to replace it as soon as possible to maintain the integrity of the floor.
Common Mistakes to Avoid During Tile Flooring Installation
While tile flooring installation is a manageable DIY project, there are common mistakes that can affect the outcome of your project:
Not Preparing the Subfloor Properly: If the subfloor is not level or clean, it can cause tiles to shift or crack over time.
Using the Wrong Adhesive: Ensure you choose the right type of adhesive for the specific tiles you are using.
Not Allowing Enough Drying Time: Rushing the process and not allowing the adhesive and grout to dry properly can result in shifting tiles and uneven grout lines.
Incorrect Tile Spacing: Using inconsistent tile spacers can lead to uneven grout lines, affecting the overall appearance of the floor.
Conclusion
Tile flooring installation is an excellent choice for homeowners looking to enhance the beauty and functionality of their spaces. Whether you choose ceramic, porcelain, or natural stone, tile flooring installation offers a variety of styles and materials to suit any design preference. By carefully preparing the space, selecting the right tiles, and following the proper installation steps, you can achieve a professional-looking result that will last for years to come.
0 notes
Text
The Role of Flooring Installation Contractors in Home Renovations
When it comes to transforming the interior of your home or commercial space, one of the most important decisions you will make is the choice of flooring. The floor not only enhances the aesthetic appeal of a space but also contributes to its functionality and comfort. To ensure that your new floor looks great and lasts for years, it's crucial to hire professional flooring installation contractors who can deliver high-quality service.

vinyl flooring - floor cushions dubai - terrazzo flooring dubai - lvt flooring - vinyl sheet flooring dubai
What Are Flooring Installation Contractors?
Flooring installation contractors are specialized professionals who handle the installation of various types of flooring materials, such as hardwood, laminate, tile, vinyl, and carpet. They possess the necessary expertise to manage all aspects of the flooring installation process, from subfloor preparation to the final touch-ups. Whether it's for a residential home, office, or commercial building, flooring installation contractors are responsible for ensuring that the flooring is installed correctly, with attention to detail and precision.
The Importance of Hiring Professional Flooring Installation Contractors
While DIY flooring installation might seem like an option to save money, it can often lead to mistakes, poor installation quality, and costly repairs. Professional flooring installation contractors bring years of experience and expertise to the job, which ensures that the floor is installed correctly the first time. Here are several reasons why hiring professionals is essential:
Expertise and Experience: Flooring installation requires skill, precision, and knowledge of various flooring materials. Professional flooring installation contractors understand the intricacies of each material and know how to install it for the best results.
Time-Saving: Installing flooring can be time-consuming and requires specific tools and techniques. Hiring professional flooring installation contractors ensures that the job is completed efficiently and within a reasonable timeframe, so you don’t have to worry about delays.
High-Quality Results: Professional installers use the right tools, techniques, and adhesives to ensure the floor is durable, smooth, and secure. This leads to a more polished and high-quality finish than a DIY attempt.
Cost-Effective: While hiring professionals might seem like an upfront expense, it can save you money in the long run. Properly installed flooring reduces the need for repairs or replacements, which could cost you more over time if the floor is improperly installed.
Warranty Protection: Many flooring installation contractors offer warranties on their work, giving you peace of mind that your floor will be repaired or replaced if any issues arise within a certain time frame.
Types of Flooring Installed by Flooring Installation Contractors
There are various types of flooring that flooring installation contractors can install, depending on your style preferences, budget, and the intended use of the space. Some of the most common types include:
Hardwood Flooring: Hardwood floors are a classic and elegant choice for any space. They are durable, easy to maintain, and add significant value to a home. Flooring installation contractors specializing in hardwood flooring will ensure the wood is properly acclimated and installed to avoid issues like warping or expansion.
Laminate Flooring: Laminate flooring is a cost-effective alternative to hardwood. It mimics the look of natural wood or stone but is easier to install and maintain. Professional flooring installation contractors can ensure that laminate floors are aligned and properly fitted.
Tile Flooring: Tiles come in various materials, such as ceramic, porcelain, and natural stone. Flooring installation contractors skilled in tile installation have the expertise to handle the cutting and arrangement of tiles to create a seamless and visually appealing surface.
Vinyl Flooring: Vinyl flooring is popular for its durability and affordability. It comes in a wide range of styles, including options that mimic wood, stone, and tile. Flooring installation contractors specializing in vinyl installation will ensure the material is correctly adhered to the subfloor and free of wrinkles or bubbles.
Carpet: Carpeting adds warmth and comfort to any room. Flooring installation contractors who work with carpet have the tools to stretch and fit the carpet perfectly, ensuring a snug and professional finish.
Steps in the Flooring Installation Process
The process of installing new flooring is an intricate one that requires precision. Here’s a look at the typical steps flooring installation contractors follow when installing new floors:
Consultation and Measurement: The first step in the process is a consultation with the client. During this visit, flooring installation contractors will measure the space and discuss the type of flooring that will best suit the room’s design, function, and budget.
Preparation of the Subfloor: Before installing new flooring, the subfloor must be thoroughly prepared. This may involve removing old flooring, cleaning the surface, or making repairs to ensure the subfloor is level, dry, and clean. Flooring installation contractors will assess the condition of the subfloor and make necessary adjustments.
Acclimating the Flooring Materials: If you’re installing hardwood or certain types of laminate or vinyl, flooring installation contractors will allow the materials to acclimate to the room’s temperature and humidity. This prevents the flooring from expanding or contracting after installation.
Installation: Once everything is prepared, the flooring installation process begins. Flooring installation contractors will follow the manufacturer’s guidelines to install the flooring properly. This step requires a keen eye for detail to ensure the flooring is aligned correctly and all edges are trimmed neatly.
Finishing Touches: After the floor is installed, flooring installation contractors will add finishing touches, such as installing baseboards, quarter rounds, or thresholds. These elements give the floor a polished look and help to seal the edges for a neat appearance.
Cleanup and Inspection: The final step is cleaning the area of any debris and ensuring the installation is flawless. Flooring installation contractors will inspect the work to make sure there are no gaps, seams, or imperfections in the flooring.
Factors to Consider When Choosing Flooring Installation Contractors
When choosing flooring installation contractors, it’s essential to do your research and consider several factors to ensure you hire the right professionals for the job:
Experience: Look for contractors with extensive experience in installing the type of flooring you want. Experienced flooring installation contractors will have a solid track record of quality work and satisfied clients.
Reputation: Read reviews, ask for references, and check online ratings to get an idea of the contractor’s reputation. Reputable flooring installation contractors will be transparent about their work and committed to customer satisfaction.
License and Insurance: Ensure that the contractors are licensed and insured. This protects you in case of accidents or damage during the installation process.
Pricing: While it’s tempting to go with the cheapest option, it’s essential to consider the overall value. Quality flooring installation requires skilled labor and quality materials, so be wary of very low quotes. Compare pricing from multiple flooring installation contractors to ensure you’re getting a fair deal.
Warranty: Check if the contractor offers a warranty for their work. A warranty provides peace of mind knowing that the installation is covered in case of issues with the floor in the future.
Conclusion
Hiring professional flooring installation contractors is one of the best decisions you can make when installing new flooring in your home or office. With their expertise, experience, and attention to detail, they ensure the flooring is installed correctly and lasts for years. Whether you choose hardwood, laminate, tile, vinyl, or carpet, flooring installation contractors have the skills and tools to deliver exceptional results. Take the time to research and choose the right contractor, and you’ll enjoy a beautifully installed floor that enhances the look and functionality of your space.
0 notes
Text
How to Choose the Right Wood Flooring Installation for Your Home
Wood flooring is one of the most popular choices for homeowners and businesses alike due to its timeless appeal, durability, and ability to enhance any interior. Whether you're renovating your home or setting up a new space, wood flooring installation can significantly transform the look and feel of the room. This article will explore the various aspects of wood flooring installation, from types of wood floors to the step-by-step process and the benefits that come with choosing wood floors for your property.

parquet flooring - wpc flooring dubai - hardwood flooring - terrazzo flooring dubai - vinyl flooring
Types of Wood Floors for Installation
Before you dive into the process of wood flooring installation, it’s important to understand the different types of wood flooring available. The main types are solid wood flooring and engineered wood flooring, and each comes with its own set of characteristics.
Solid Wood Flooring: Made from a single piece of wood, solid wood flooring is the traditional choice for homeowners. It provides an authentic and natural look, and because it's made from solid wood, it can be sanded and refinished multiple times. However, solid wood flooring is susceptible to moisture, so it’s best suited for dry environments.
Engineered Wood Flooring: Engineered wood consists of a top layer of hardwood veneer bonded to multiple layers of plywood. This design makes it more stable and less prone to expansion and contraction compared to solid wood flooring. Engineered wood is a great option for areas with higher humidity, such as basements and kitchens.
Laminate Wood Flooring: Although not technically wood, laminate wood flooring mimics the appearance of wood and is a more budget-friendly option. It is durable, easy to clean, and comes in various designs that replicate different wood species.
Benefits of Wood Flooring Installation
Choosing to go with wood flooring installation offers several key advantages, making it a top choice for both aesthetic and functional reasons.
Aesthetic Appeal: Wood floors have a warm, inviting look that complements any interior style, from traditional to modern. They add an element of elegance and luxury to your home or office.
Durability: One of the greatest benefits of wood flooring is its durability. High-quality wood floors, especially solid hardwood, can last for decades with proper care. Even if they get scratched or worn, they can be sanded and refinished to restore their original appearance.
Easy to Maintain: Wood floors are relatively easy to maintain compared to carpets. They can be swept, vacuumed, or mopped to keep them looking their best. Regular cleaning ensures longevity and preserves the look of the wood.
Increased Property Value: A professionally done wood flooring installation can increase the resale value of your home. Many homebuyers are attracted to properties with wood floors, as they are seen as more high-end and durable compared to other flooring options.
Eco-Friendly: Wood is a renewable resource, and many wood flooring products are sourced sustainably. When maintained properly, wood flooring can have a minimal environmental impact.
Preparation for Wood Flooring Installation
Before beginning the wood flooring installation, several steps need to be completed to ensure the floor is prepared properly. These include choosing the right wood, acclimating the wood, and preparing the subfloor.
Choosing the Right Wood: When selecting wood for flooring, consider factors such as the color, grain, and hardness of the wood. Hardwoods like oak, maple, and cherry are popular choices for wood flooring due to their strength and timeless appeal. Your choice of wood will impact the final look and feel of your space, so choose a wood species that complements your home’s aesthetic.
Acclimating the Wood: Wood is a natural material that expands and contracts with changes in temperature and humidity. Therefore, it’s important to let your wood flooring acclimate to the temperature and humidity of the room where it will be installed. Leave the wood in the room for at least 48 hours before starting installation to prevent warping or buckling.
Preparing the Subfloor: The subfloor should be clean, dry, and level before starting the wood flooring installation. Any imperfections, such as cracks or moisture, should be addressed before laying the wood flooring. If the subfloor is concrete, it may need to be sealed or treated for moisture resistance.
Tools and Materials Needed for Wood Flooring Installation
To begin the wood flooring installation, ensure you have the right tools and materials:
Wood Flooring: Choose your desired wood type and quantity based on the size of the area being covered.
Underlayment: An underlayment provides a moisture barrier and helps reduce noise. It is especially important when installing engineered wood or laminate floors.
Tape Measure: To accurately measure the space and plan your flooring layout.
Mallet: Used for tapping the boards into place without damaging the wood.
Saw: A circular or miter saw is essential for cutting the wood to fit the space.
Hammer and Nails: Used for securing the wood planks to the subfloor.
Wood Floor Adhesive: For glue-down installations, a special adhesive is used to bond the planks to the subfloor.
Spacers: Spacers are essential for leaving an expansion gap between the wall and the flooring, allowing for natural wood movement.
The Step-by-Step Process of Wood Flooring Installation
Now that you have prepared the space and gathered the necessary tools, you can begin the wood flooring installation process. Here’s a general step-by-step guide to help you get started:
Layout the Floor: Start by determining the layout of the flooring. It’s often best to begin installation from the longest wall in the room. Use spacers to leave a gap of about 1/4 inch between the wall and the floor to allow for expansion.
Install the First Row: Begin placing the first row of planks along the wall, ensuring that the tongue and groove of each piece fit tightly together. Use a mallet to tap the boards into place. If you're using glue-down installation, apply the adhesive to the subfloor before laying each board.
Cutting the Planks: As you reach the end of the first row, you may need to cut the last plank to fit. Measure the space accurately and use a saw to cut the plank to the right size. Continue with the next row, ensuring the seams between rows are staggered for a more natural appearance.
Continue Installation: Continue laying the planks row by row, using the mallet to fit them together tightly. Keep checking the alignment and ensure the flooring remains level throughout the installation process.
Finishing Touches: Once the entire floor is installed, remove the spacers and install the baseboards to cover the expansion gap. If necessary, apply a finish to the wood to enhance its durability and shine.
Maintenance and Care of Wood Floors
After your wood flooring installation is complete, proper care and maintenance will help preserve the beauty of your floors for years to come.
Regular Cleaning: Sweep or vacuum the floor regularly to remove dust and debris. Use a soft cloth or mop to clean the surface, ensuring that no excess water is left on the floor.
Refinishing: Over time, wood floors may become scratched or worn. Refinishing your floors every few years will restore their original appearance and add a layer of protection against future wear and tear.
Prevent Scratches: Place rugs or mats in high-traffic areas and under furniture legs to prevent scratches. Additionally, make sure to trim your pets’ nails to avoid damage.
Humidity Control: Since wood is sensitive to moisture, it’s important to maintain a consistent humidity level in your home to prevent warping or buckling of the floorboards.
Conclusion
Wood flooring installation is an excellent choice for homeowners seeking to add elegance, warmth, and value to their property. By choosing the right type of wood, properly preparing the space, and following the installation process step-by-step, you can enjoy beautiful, durable wood floors for years to come. Whether you opt for solid wood or engineered wood, the timeless beauty and functional benefits of wood floors will undoubtedly enhance your home or business. Make sure to maintain your floors properly to keep them looking their best for the long term.
0 notes
Text
How to Choose the Right Vinyl Flooring Installation Service
Vinyl flooring installation has become one of the most popular options for homeowners and businesses due to its durability, ease of maintenance, and wide range of design options. Whether you're updating an old floor or setting up a new space, vinyl flooring installation provides an affordable and effective way to enhance the look of any room. This comprehensive guide will take you through the process of installing vinyl flooring, the benefits of choosing vinyl, and tips to ensure a successful project.

industrial epoxy flooring dubai - marble flooring dubai - marble flooring dubai
Why Choose Vinyl Flooring?
Before diving into the steps of vinyl flooring installation, it's important to understand why vinyl is a favored choice. Vinyl flooring is versatile and comes in a variety of styles, including sheets, tiles, and planks. These different types of vinyl flooring can replicate the look of natural materials like wood, stone, or ceramic at a fraction of the cost.
Durability: Vinyl floors are highly resistant to scratches, stains, and moisture, making them a great option for high-traffic areas, kitchens, bathrooms, and even basements.
Cost-Effective: Compared to other flooring options, vinyl is an affordable choice without compromising on style or quality.
Ease of Maintenance: Vinyl floors are easy to clean and maintain, requiring only regular sweeping and occasional mopping to keep them looking their best.
Variety of Styles: Vinyl is available in a range of designs and finishes, from realistic wood-look planks to marble or stone-inspired tiles.
Preparing for Vinyl Flooring Installation
Proper preparation is key to ensuring a smooth vinyl flooring installation. Follow these steps to get started:
Clear the Area: Begin by removing any furniture, appliances, or obstacles from the space where you'll be installing the vinyl. This will give you a clean and open area to work in.
Inspect the Subfloor: Vinyl flooring needs a smooth, clean, and dry subfloor. Check for any damage or irregularities in the subfloor, such as holes or bumps, and repair them before proceeding. If you’re installing over existing flooring, make sure the surface is level and free from debris.
Acclimate the Vinyl: Vinyl flooring should be acclimated to the room's temperature and humidity before installation. Leave the vinyl planks or sheets in the room for at least 48 hours to allow them to adjust to the environment.
Choosing the Right Type of Vinyl Flooring
There are three main types of vinyl flooring that you can choose from:
Vinyl Sheet Flooring: This type of vinyl comes in large sheets that are rolled out over the subfloor. It is ideal for rooms with large, open spaces and is perfect for waterproof applications. Vinyl sheet flooring installation requires precise cutting and measuring to fit the room's dimensions.
Vinyl Plank Flooring: Vinyl planks are designed to resemble hardwood flooring and come in individual planks. These are often click-lock planks, which means they can be installed without glue or nails. This makes vinyl plank flooring installation easier and quicker.
Vinyl Tile Flooring: Vinyl tiles mimic the appearance of ceramic or stone tiles. They come in squares or rectangular shapes, and like vinyl planks, they often feature a peel-and-stick or click-lock installation method.
The choice of vinyl type will depend on the space, budget, and the look you want to achieve.
Step-by-Step Guide to Vinyl Flooring Installation
The process of vinyl flooring installation can vary slightly depending on the type of vinyl you choose. Below is a general step-by-step guide for installing vinyl plank or tile flooring:
Step 1: Measure the Room
Accurate measurements are essential to ensure that you have enough vinyl to cover the floor. Measure the length and width of the room, and then multiply the two numbers to find the square footage. Add 10% to the total to account for cuts and mistakes.
Step 2: Prepare the Subfloor
Ensure that the subfloor is clean, dry, and free from debris. For concrete subfloors, consider applying a moisture barrier to prevent any potential damage from water vapor. If you're installing vinyl over existing flooring, it must be smooth and securely attached.
Step 3: Lay the Vinyl
Start by laying the first row of vinyl planks or tiles along the longest wall in the room. This ensures a straight alignment and minimizes the need for cutting. If you’re using vinyl planks with a click-lock system, simply click them together without the use of glue.
For vinyl sheet flooring installation, roll out the sheet, and use a utility knife to trim the edges for a perfect fit. Make sure to leave a small gap around the perimeter of the room to allow for expansion.
Step 4: Cut and Fit
As you lay the vinyl, you’ll need to cut it to fit around obstacles like doorways, vents, and corners. Use a utility knife or a vinyl cutter for precise cutting. For more complex cuts, a jigsaw or handsaw may be required.
Step 5: Secure the Vinyl
For vinyl planks and tiles, once all the pieces are in place, press them down firmly to ensure they adhere to the subfloor. If you're using peel-and-stick vinyl tiles, peel the backing off and press each tile firmly into place.
Step 6: Finish the Edges
Once the vinyl is installed, trim any excess material from the edges of the room using a utility knife. Consider installing baseboards or quarter-round moldings to cover the expansion gap and provide a finished look.
Step 7: Allow the Floor to Settle
After installation, avoid heavy foot traffic for at least 24 hours to allow the vinyl to fully settle into place. This is especially important for vinyl plank flooring installation with a click-lock system, as it needs time to bond and settle.
Common Mistakes to Avoid in Vinyl Flooring Installation
Skipping Subfloor Preparation: One of the most common mistakes is not properly preparing the subfloor. Ensure it is clean, dry, and level to avoid issues with the vinyl floor’s installation and longevity.
Not Acclimating the Vinyl: Failing to acclimate the vinyl flooring to the room's temperature and humidity can cause expansion or contraction after installation, leading to gaps or buckling.
Incorrect Cutting: When cutting vinyl to fit around corners or obstacles, precision is key. Measure and cut carefully to avoid gaps or misalignment in the flooring.
Ignoring Expansion Gaps: Vinyl needs room to expand and contract, so always leave a small gap (about 1/8 inch) around the edges of the floor to avoid warping.
Maintaining Your Vinyl Floor
Once the vinyl flooring installation is complete, it’s important to maintain it properly to ensure its longevity:
Regular Cleaning: Sweep or vacuum the floor regularly to remove dirt and debris. Mop with a damp mop and mild detergent for a deeper clean.
Avoid Excessive Water: While vinyl is waterproof, avoid flooding the floor with excessive water, which can eventually seep into seams or edges and cause damage.
Use Protective Pads: Place felt pads under furniture legs to prevent scratches and scuffs.
Conclusion
Vinyl flooring installation offers a cost-effective, durable, and stylish solution for homeowners and businesses alike. Whether you choose vinyl sheets, planks, or tiles, following the proper installation procedures ensures a successful outcome. With its easy maintenance and long-lasting qualities, vinyl flooring is a great choice for any room in your home or office.
By taking the time to prepare the subfloor properly, choosing the right type of vinyl, and following the correct installation steps, you can achieve a professional-quality floor that enhances the look and functionality of your space.
0 notes
Text
The Basics of Tile Installation in Your Home
Tile installation is an essential skill in both home renovations and new constructions. Whether you're remodeling your bathroom, kitchen, or flooring, tile installation offers a versatile and stylish solution that can transform any space. This process may seem challenging at first, but with the right tools, materials, and techniques, it can be done efficiently and effectively. In this article, we will explore the importance of tile installation, the different types of tiles, the steps involved, and tips for a successful installation project.

wall panels - pvc vinyl flooring dubai - laminate flooring - industrial epoxy flooring dubai - microcement
The Importance of Tile Installation
Tile installation is not just about aesthetics; it plays a crucial role in the functionality of a space. Tiles are durable, water-resistant, and easy to clean, making them an ideal choice for high-traffic areas, kitchens, bathrooms, and even outdoor spaces. They are available in a variety of materials, colors, and finishes, allowing homeowners and designers to create unique and personalized looks. Moreover, tiles can improve the value of a property due to their long-lasting nature and timeless appeal.
Proper tile installation is crucial for ensuring the longevity and durability of the tiles. When done incorrectly, tiles can crack, shift, or become loose over time, leading to costly repairs. On the other hand, a well-executed installation ensures that your tiles remain secure and functional for years to come.
Types of Tiles
Before diving into the installation process, it is important to understand the different types of tiles available. Each type of tile has its own unique properties, which can influence the installation technique and the overall look of the finished project.
Ceramic Tiles Ceramic tiles are one of the most common choices for tile installation. They are made from clay and fired at high temperatures. These tiles are durable, versatile, and come in a wide variety of shapes, sizes, and colors. Ceramic tiles are ideal for both walls and floors and are easy to maintain, making them a popular choice for kitchens and bathrooms.
Porcelain Tiles Porcelain tiles are a type of ceramic tile, but they are denser and less porous. They are highly resistant to moisture and stains, making them an excellent choice for areas with high water exposure, such as bathrooms and kitchens. Porcelain tiles are also available in a variety of finishes, including glossy, matte, and textured, and can mimic the look of natural stone or wood.
Natural Stone Tiles Natural stone tiles, such as granite, marble, limestone, and travertine, are prized for their unique appearance and luxurious feel. These tiles are ideal for creating elegant and timeless spaces. However, they require more maintenance than ceramic or porcelain tiles due to their porous nature. Proper sealing is necessary to protect natural stone tiles from staining and moisture damage.
Glass Tiles Glass tiles are a popular choice for creating modern and sleek designs. They are often used for backsplashes, accent walls, and decorative purposes. Glass tiles come in various colors and finishes, and their reflective surface can help brighten up a space. However, glass tiles can be more challenging to install due to their fragility and need for precision.
Vinyl Tiles Vinyl tiles are an affordable and easy-to-install option for those looking to update their floors on a budget. These tiles are available in a variety of designs, including patterns that mimic natural stone or wood. Vinyl tiles are durable, water-resistant, and comfortable underfoot, making them a great choice for areas like bathrooms, kitchens, and laundry rooms.
Tools and Materials Needed for Tile Installation
Successful tile installation requires the right tools and materials. Here is a list of essential items you will need for the job:
Tiles: Choose the right tiles based on the area of installation and your design preferences.
Tile Adhesive: Thin-set mortar is commonly used for most tile installations, but you may need different adhesives for specific tiles or surfaces.
Tile Cutter: A manual or electric tile cutter is necessary for cutting tiles to fit around edges and corners.
Notched Trowel: A notched trowel is used to spread adhesive evenly across the surface.
Tile Spacers: These help maintain consistent gaps between tiles for grout application.
Level: A level ensures that the tiles are installed evenly.
Rubber Mallet: A rubber mallet helps gently tap tiles into place without damaging them.
Grout: Grout fills the gaps between tiles and provides a finished look.
Grout Sealer: Sealing grout prevents moisture and dirt from penetrating and staining it.
Sponge: A sponge is essential for cleaning excess grout and adhesive from the surface.
Steps for Tile Installation
Now that we have covered the basics, let's look at the step-by-step process of tile installation. While the steps may vary depending on the type of tile and the surface, the general procedure remains the same.
Prepare the Surface The first step in tile installation is preparing the surface. Whether you’re tiling a floor or a wall, ensure that the surface is clean, smooth, and dry. If the surface is uneven, use a leveling compound to smooth it out. For floors, remove any old flooring materials, and for walls, ensure that the surface is free of dust and debris.
Layout the Tiles Before applying adhesive, dry-lay the tiles to determine the best arrangement. This step helps you visualize the pattern and ensures that tiles are cut to fit the edges. Start from the center of the room or wall and work your way outward. This will help create a balanced and symmetrical layout.
Apply Tile Adhesive Using a notched trowel, spread a layer of tile adhesive over a small section of the surface. Make sure the adhesive is applied evenly and consistently. The notched trowel will leave ridges in the adhesive, which helps create a strong bond between the tiles and the surface.
Place the Tiles Begin placing the tiles on the adhesive, starting from the center of your layout. Press each tile down firmly and use a slight twisting motion to ensure good contact with the adhesive. Insert tile spacers between each tile to maintain consistent gaps for grout.
Cut Tiles as Needed As you approach the edges of the surface, you will likely need to cut tiles to fit. Use a tile cutter to measure and cut the tiles to the appropriate size. Be sure to wear safety goggles and gloves when cutting tiles to protect yourself from sharp edges.
Allow the Adhesive to Dry After all the tiles are in place, allow the adhesive to set for at least 24 hours. Avoid walking on the tiles during this time to prevent any shifting.
Grout the Tiles Once the adhesive has dried, remove the tile spacers and prepare to grout. Mix the grout according to the manufacturer’s instructions, and using a rubber float, spread the grout over the tiles, ensuring that all gaps are filled. Work in small sections to prevent the grout from drying too quickly.
Clean the Tiles After grouting, use a damp sponge to wipe away excess grout from the surface of the tiles. Be careful not to remove grout from the joints. Once the grout has set, polish the tiles with a clean, dry cloth to remove any grout haze.
Seal the Grout Once the grout has fully cured (usually after 48 hours), apply a grout sealer to protect it from moisture and stains. This step is particularly important for areas like bathrooms and kitchens, where grout is exposed to water regularly.
Tips for Successful Tile Installation
Take Your Time: Tile installation is a detailed process that requires patience and precision. Rushing through it can lead to mistakes and subpar results.
Use a Level: To ensure that your tiles are straight and level, use a level frequently throughout the installation process.
Check for Square: Periodically check your layout to make sure that the tiles are aligned properly. A square layout will ensure that the finished result looks professional.
Plan for Cuts: When measuring for tile cuts, leave enough room for grout joints. This will make cutting easier and prevent tiles from looking misaligned.
Maintain Consistency: When applying grout, make sure it is evenly distributed across all the joints. This creates a clean and uniform look.
Conclusion
Tile installation can be a rewarding DIY project that enhances the look and functionality of your home. Whether you are installing ceramic, porcelain, natural stone, or glass tiles, following the correct steps and using the right tools will ensure a smooth and successful installation process. With careful planning and attention to detail, tile installation can be completed with stunning results that last for many years.
Tile installation is a valuable skill that can save you money on professional labor costs while allowing you to personalize your space. Whether you’re tackling a small project or an entire room, the tips and techniques discussed in this guide will help you achieve a beautiful and durable tile installation that adds value to your home.
0 notes
Text
Vinyl Plank Flooring Installation Steps
When it comes to flooring options, homeowners and business owners alike are increasingly choosing vinyl plank flooring installation due to its durability, aesthetic appeal, and ease of maintenance. Vinyl plank flooring offers the perfect balance between practicality and style, making it a top choice for both residential and commercial spaces. This guide will walk you through the essential steps and considerations involved in vinyl plank flooring installation, providing you with the knowledge to complete the process successfully.

wooden flooring - sports flooring dubai - terrazzo tiles - lvt flooring - large floor cushion - sports flooring dubai
What is Vinyl Plank Flooring?
Before diving into the installation process, it’s essential to understand what vinyl plank flooring is and why it is so popular. Vinyl plank flooring is a type of synthetic flooring made from polyvinyl chloride (PVC). It is designed to mimic the look of natural materials, such as wood or stone, without the associated cost or maintenance requirements. Vinyl planks come in various designs, colors, and textures, offering a versatile flooring option for a wide range of interior styles.
One of the key benefits of vinyl plank flooring installation is its water-resistant nature, making it an excellent choice for areas that experience high moisture, such as kitchens, bathrooms, and basements. Additionally, vinyl plank flooring is softer underfoot compared to hardwood or tile, providing a more comfortable walking surface.
Benefits of Vinyl Plank Flooring Installation
Before getting into the specifics of vinyl plank flooring installation, let’s explore some of the key benefits of choosing this flooring option:
Durability: Vinyl planks are highly resistant to scratches, stains, and wear, making them ideal for high-traffic areas. This durability ensures that your flooring will remain attractive for years to come.
Water Resistance: One of the standout features of vinyl plank flooring is its water resistance. Unlike hardwood, vinyl planks won’t warp or swell when exposed to moisture, making them perfect for kitchens, bathrooms, and laundry rooms.
Affordability: Vinyl plank flooring is typically more cost-effective than hardwood, stone, or tile flooring. The lower material cost, combined with the ease of installation, makes it a budget-friendly choice for many.
Ease of Maintenance: Vinyl plank flooring requires minimal maintenance. Regular sweeping and occasional mopping are enough to keep it looking pristine.
Comfort: Vinyl plank flooring offers more cushion than traditional tile or hardwood, which can make it more comfortable to stand on for long periods.
Preparing for Vinyl Plank Flooring Installation
Proper preparation is crucial when it comes to vinyl plank flooring installation. Taking the time to properly prepare your space will ensure a smooth and successful installation process. Follow these steps to get ready:
Measure Your Space: Begin by accurately measuring the area where you plan to install the vinyl plank flooring. This will help you determine how many planks you need to purchase, preventing any excess or shortages during the installation.
Check the Subfloor: The condition of your subfloor is critical for a successful installation. Vinyl plank flooring can be installed over most existing floors, including concrete, plywood, and tile. However, ensure that the subfloor is clean, dry, and level. Any imperfections, such as bumps or dips, should be smoothed out to avoid issues with the vinyl planks.
Acclimate the Vinyl Planks: It’s essential to acclimate your vinyl planks before installation. Allow the planks to sit in the room where they will be installed for at least 48 hours. This will help the planks adjust to the temperature and humidity levels of the space, preventing them from expanding or contracting after installation.
Gather Tools and Materials: Make sure you have all the necessary tools and materials for vinyl plank flooring installation. Some of the key items you’ll need include:
Vinyl planks
Tape measure
Utility knife
Spacers
Pull bar
Rubber mallet
Underlayment (if necessary)
Adhesive (if necessary)
Step-by-Step Vinyl Plank Flooring Installation
Once your space is prepared, it’s time to start the actual vinyl plank flooring installation. The process can vary slightly depending on the type of vinyl planks you’ve purchased, but here’s a general guide:
Step 1: Lay the First Row
Start by placing the first row of vinyl planks along one edge of the room. Make sure to leave a small gap (typically 1/8 inch to 1/4 inch) between the planks and the wall to allow for expansion. Use spacers to maintain this gap throughout the installation. For the best appearance, it’s a good idea to stagger the seams of the planks, which can create a more natural look.
Step 2: Continue Installing Rows
After laying the first row, continue installing subsequent rows of vinyl planks. Each plank should click into place easily, thanks to the interlocking mechanism that most vinyl plank flooring systems use. Use a rubber mallet to tap the planks into place gently, ensuring a tight fit.
If you need to cut a plank to fit along the wall, use a utility knife to score the vinyl, then snap it along the cut line. Measure carefully before making any cuts to avoid wasting material.
Step 3: Trim and Fit Planks as Needed
As you reach the last row, you may need to trim the planks to fit the remaining space. Measure the gap carefully, and then use a utility knife to cut the planks to the correct size. Again, remember to leave the expansion gap between the planks and the wall.
Step 4: Install Trim and Transitions
Once the planks are installed, the final step in the vinyl plank flooring installation process is to install baseboards and transition strips. These will cover the expansion gap and provide a clean, finished look.
If you’ve installed vinyl plank flooring in multiple rooms, transition strips can also be used to create a smooth transition between different types of flooring.
Tips for Successful Vinyl Plank Flooring Installation
Here are a few additional tips to ensure that your vinyl plank flooring installation goes smoothly:
Work in small sections: Don’t try to install too many planks at once. Working in small sections will allow you to focus on ensuring each plank fits properly.
Use spacers consistently: The expansion gap is critical for the success of the installation. Be sure to use spacers throughout the process to maintain the correct gap between the planks and the walls.
Install underlayment (if needed): Some vinyl planks come with a built-in underlayment, but if yours do not, consider installing a separate underlayment. This can help reduce noise, improve comfort, and prevent moisture damage.
Take your time: While vinyl plank flooring installation can be a quick process, it’s important to take your time to ensure everything is done correctly. Rushing can lead to mistakes, so be patient and double-check your work.
Common Mistakes to Avoid
Even though vinyl plank flooring installation is a relatively straightforward process, there are some common mistakes that can affect the final result. Here are a few things to watch out for:
Not acclimating the planks: Failing to acclimate the planks before installation can cause them to expand or contract once installed, leading to gaps or buckling.
Incorrect measurements: Always double-check your measurements before making any cuts. Cutting a plank too short or too long can throw off the entire installation.
Skipping the expansion gap: The expansion gap is essential for allowing the vinyl planks to expand and contract with changes in temperature and humidity. Skipping this step can lead to warped or damaged planks.
Conclusion
In conclusion, vinyl plank flooring installation is an excellent option for anyone looking to upgrade their floors with a durable, cost-effective, and stylish material. The installation process itself is straightforward, especially with proper preparation and attention to detail. By following the steps outlined in this guide, you can achieve a professional-looking result that enhances the beauty and functionality of your space. Whether you’re installing vinyl planks in a residential or commercial setting, this type of flooring offers long-lasting performance with minimal maintenance, making it a top choice for many homeowners and businesses alike.
0 notes
Text
Choosing the right materials for hardwood floor installation
When it comes to upgrading the aesthetics and functionality of a home, hardwood floor installation stands out as one of the best investments homeowners can make. Hardwood floors bring timeless elegance, durability, and an increase in property value. This comprehensive guide will walk you through everything you need to know about hardwood floor installation, from planning and preparation to finishing touches.

Flooring - parquet flooring - floor cushion - sports vinyl flooring dubai - wooden flooring - resin flooring dubai
Why Choose Hardwood Floor Installation?
Hardwood floor installation is a popular choice for many reasons. First, hardwood flooring offers a natural, warm beauty that enhances the look of any room. Unlike other types of flooring, hardwood can last for decades with proper care. It is also easier to clean and maintain compared to carpet, making it a healthier option for households with allergies.
Moreover, hardwood floor installation can significantly increase a home's resale value. Many prospective buyers prefer homes with hardwood floors because of their classic appeal and durability. In fact, studies show that homes with hardwood flooring sell faster and for higher prices compared to those with other types of flooring.
Types of Hardwood Flooring
Before starting the hardwood floor installation process, it’s important to understand the types of hardwood flooring available:
Solid Hardwood: This type of flooring is made from a single piece of wood and can be sanded and refinished multiple times.
Engineered Hardwood: Made from layers of wood pressed together, engineered hardwood is more resistant to moisture and temperature changes.
Prefinished vs. Unfinished Hardwood: Prefinished hardwood comes ready to install, while unfinished hardwood requires sanding and finishing after installation.
Choosing the right type of hardwood is crucial for ensuring the success of your hardwood floor installation project.
Preparing for Hardwood Floor Installation
Preparation is key to a successful hardwood floor installation. Here are the main steps involved:
Acclimate the Wood: Hardwood needs to adjust to the room’s temperature and humidity. Leave the wood in the room for 5-7 days before installation.
Inspect the Subfloor: Ensure the subfloor is clean, dry, and level. Any imperfections can affect the final result of your hardwood floor installation.
Remove Existing Flooring: Old carpets, tiles, or wood must be removed. Any nails or debris should also be cleared.
Gather Tools and Materials: Essential tools include a flooring nailer, tape measure, chalk line, and a circular saw.
Proper preparation minimizes issues during the hardwood floor installation process.
Steps in Hardwood Floor Installation
The hardwood floor installation process generally follows these steps:
1. Layout Planning
Plan the layout carefully. Start by measuring the room and deciding the direction of the planks. Typically, planks are installed parallel to the longest wall or the main source of natural light.
2. Install the First Row
Begin by installing the first row of hardwood planks. Use spacers between the wall and the flooring to allow for expansion. This initial step is critical to the success of the entire hardwood floor installation.
3. Nail or Glue the Flooring
Depending on the type of hardwood, you may nail, staple, or glue the boards to the subfloor. Solid hardwood usually requires nailing, while engineered hardwood can be glued.
4. Stagger the Seams
For a natural look and better stability, stagger the seams of the planks. Avoid creating H-patterns or stair-step patterns during the hardwood floor installation.
5. Continue Across the Room
Work row by row, making sure to maintain a tight fit between boards. Tap them gently with a mallet if needed.
6. Cut Planks as Needed
Use a circular saw to cut planks to fit at the ends of rows or around obstacles like vents and doorways.
7. Install the Final Row
The last row may require trimming the planks lengthwise. Ensure a snug fit without forcing the boards into place.
8. Finish with Baseboards and Trim
After the hardwood floor installation is complete, install baseboards and trim to cover expansion gaps around the perimeter of the room.
Common Challenges in Hardwood Floor Installation
While hardwood floor installation can seem straightforward, several challenges may arise:
Uneven Subfloors: Can cause the hardwood to flex or make noise.
Moisture Issues: Wood can warp or swell if moisture is present.
Improper Acclimation: Failure to acclimate wood can lead to gaps or buckling after installation.
Incorrect Nailing or Gluing: Can result in squeaky floors or loose boards.
Hiring a professional can help avoid these issues, but DIY enthusiasts can succeed with careful planning and attention to detail during their hardwood floor installation.
Cost of Hardwood Floor Installation
The cost of hardwood floor installation varies depending on several factors:
Type of Hardwood: Exotic woods cost more than domestic species like oak or maple.
Installation Method: Gluing and nailing have different costs associated with labor and materials.
Room Size: Larger rooms naturally cost more to floor.
Subfloor Preparation: If extensive repairs are needed, costs can rise significantly.
Maintenance After Hardwood Floor Installation
Maintaining your floors properly will preserve the beauty of your hardwood floor installation for years to come. Key maintenance tips include:
Regular Cleaning: Sweep or vacuum floors frequently to remove dirt and debris.
Use Rugs and Mats: Protect high-traffic areas and entryways.
Avoid Water Damage: Clean up spills immediately and avoid wet-mopping.
Re-Finishing: Over time, floors may need refinishing to restore their original luster.
Proper maintenance is essential for maximizing the lifespan and beauty of your hardwood floor installation.
DIY vs. Professional Hardwood Floor Installation
Deciding whether to tackle a hardwood floor installation project yourself or hire a professional depends on your skills, time, and budget.
DIY Installation:
Lower cost
Greater personal satisfaction
Requires significant time and precision
Professional Installation:
Guaranteed quality and faster completion
Higher upfront cost
Less stress and risk of mistakes
Ultimately, the choice comes down to your confidence in handling tools and following precise installation steps.
Environmental Considerations
Eco-friendly hardwood floor installation is gaining popularity. Many manufacturers offer sustainable wood options certified by organizations like the Forest Stewardship Council (FSC). Additionally, reclaimed hardwood flooring offers a green alternative by reusing wood from old buildings.
Choosing sustainable materials and methods for your hardwood floor installation can reduce your environmental footprint and contribute to global conservation efforts.
Final Thoughts
Hardwood floor installation is a rewarding project that transforms the look and feel of any home. Whether you choose to do it yourself or hire a professional, understanding the process is crucial for achieving the best results. From selecting the right type of hardwood to careful planning, preparation, and finishing, every step is vital.
0 notes
Text
Step by step guide for laminate flooring installation
When it comes to transforming the look of a home, few options offer the affordability, durability, and aesthetic appeal of laminate flooring installation. Over the past few decades, laminate flooring has gained immense popularity among homeowners, builders, and designers alike. The process of laminate flooring installation can be straightforward if approached with the right preparation and knowledge. In this comprehensive guide, we will walk you through everything you need to know about laminate flooring installation, including its benefits, tools needed, step-by-step instructions, and useful tips to ensure a professional finish.
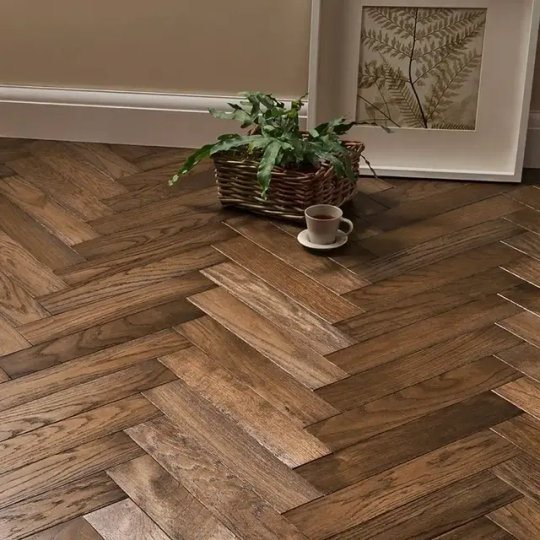
arabic majlis floor seating dubai - epoxy flooring dubai - pvc wall panels - rubber flooring dubai - rubber flooring
What is Laminate Flooring?
Before diving into laminate flooring installation, it’s important to understand what laminate flooring is. Laminate flooring is a multi-layer synthetic flooring product fused together through a lamination process. Typically, it includes a photographic layer that mimics wood, stone, or other materials, protected by a clear wear layer on top. Beneath this is a core made of high-density fiberboard (HDF) and a stabilizing bottom layer.
Laminate flooring is not only cost-effective but also highly resistant to scratches, impacts, and moisture, making it an ideal choice for high-traffic areas. Because of its versatility and realistic look, laminate flooring installation has become a top choice for those seeking both beauty and functionality.
Benefits of Laminate Flooring Installation
There are numerous advantages to opting for laminate flooring installation:
Affordability: Compared to hardwood or natural stone, laminate flooring is much more budget-friendly.
Durability: Thanks to its tough wear layer, laminate flooring can withstand heavy foot traffic and resist scratches.
Easy Maintenance: Cleaning laminate flooring is simple—sweeping and occasional mopping is usually enough.
Variety: Laminate flooring comes in a vast range of styles, colors, and textures.
DIY-Friendly: With the click-lock systems available today, many homeowners find laminate flooring installation manageable on their own.
Tools and Materials Needed for Laminate Flooring Installation
For a successful laminate flooring installation, having the right tools and materials is crucial. Here’s what you’ll typically need:
Laminate flooring planks
Underlayment
Tape measure
Utility knife
Jigsaw or laminate floor cutter
Spacers
Hammer and tapping block
Pull bar
Safety goggles
Pencil
Level
Moisture barrier (if required)
Proper preparation can make your laminate flooring installation faster and smoother.
Preparing for Laminate Flooring Installation
Before beginning your laminate flooring installation, it's essential to prepare the subfloor and the room properly:
Acclimate the Flooring: Leave your laminate flooring planks in the room where they will be installed for 48-72 hours. This allows them to adjust to the room’s temperature and humidity.
Prepare the Subfloor: Ensure the subfloor is clean, dry, and level. Remove old flooring if necessary, and fix any imperfections.
Install Underlayment: Most laminate flooring installation projects require an underlayment to provide moisture protection and sound absorption.
Plan Your Layout: Measure the room and plan the layout to minimize small plank sizes along the walls, which can be visually unappealing.
Step-by-Step Guide to Laminate Flooring Installation
Now let's delve into the actual process of laminate flooring installation:
Step 1: Laying the First Row
Start along the longest wall and place spacers between the wall and the planks to maintain a 1/4 inch expansion gap. This gap is crucial as laminate flooring expands and contracts with changes in temperature and humidity.
Place the first plank with the tongue side facing the wall. Continue laying the first row, clicking each plank into the next. You might need to cut the last plank to fit, using a jigsaw.
Step 2: Installing Subsequent Rows
Begin the second row with a plank cut to a shorter length than the first plank of the first row. This will stagger the seams for a more natural look.
Angle the tongue of the new plank into the groove of the previous row and press down to lock it. Continue this process across the room.
Step 3: Fitting Around Obstacles
During your laminate flooring installation, you may encounter obstacles like pipes, door frames, or columns. Carefully measure and cut the planks to fit around these obstructions using a jigsaw.
Step 4: Installing the Final Row
The last row may need to be cut lengthwise to fit. Use a pull bar to gently pull the planks together without damaging them.
Remember to maintain the expansion gap along all walls and obstacles.
Step 5: Finishing Touches
Once the planks are all in place, remove the spacers and install baseboards or quarter-round molding to cover the expansion gaps.
Congratulations—you’ve completed your laminate flooring installation!
Tips for a Successful Laminate Flooring Installation
Double-check measurements: Measure twice, cut once.
Mix planks: Open several boxes of laminate flooring and mix the planks to vary patterns and shades naturally.
Keep your workspace clean: Debris can interfere with plank fitting.
Use the right tapping tools: Always use a tapping block designed for laminate flooring to avoid damaging the planks.
Consider door clearance: You might need to trim the bottom of doors to allow them to open smoothly after the new floor is installed.
Common Mistakes to Avoid in Laminate Flooring Installation
Even a simple laminate flooring installation can go wrong if not handled carefully. Here are mistakes to avoid:
Skipping the acclimation period: This can lead to warping after installation.
Neglecting the expansion gap: Without a proper gap, flooring can buckle.
Ignoring subfloor issues: An uneven subfloor can result in an unstable floor.
Wrong tools: Using inappropriate tools can damage the planks.
Taking time to plan and using the right techniques can make your laminate flooring installation a success story.
Laminate Flooring Installation vs. Professional Installation
While DIY laminate flooring installation is possible for many, some homeowners may prefer hiring professionals. Professional installers have the experience and equipment to handle complex layouts, stairs, or intricate cuts. They can also complete the work faster and often provide warranties on their labor.
However, if you are handy and follow best practices, DIY laminate flooring installation can save a significant amount of money while giving you the satisfaction of completing a major home improvement project yourself.
How Long Does Laminate Flooring Installation Take?
The duration of laminate flooring installation depends on various factors, such as room size, complexity, and your skill level. Generally, a single room (about 300 square feet) can be completed in one or two days. If there are many obstacles or detailed cuts, it may take a bit longer.
Proper preparation before starting—such as leveling the subfloor and gathering all necessary tools—can significantly speed up the laminate flooring installation process.
Caring for Your New Laminate Floor
After your laminate flooring installation, proper care ensures the floor remains beautiful for years:
Sweep or vacuum regularly: Use a soft brush attachment to avoid scratches.
Use damp mops sparingly: Too much water can damage laminate flooring.
Avoid harsh cleaners: Stick to products recommended by the flooring manufacturer.
Protect from furniture: Use felt pads under furniture legs to prevent scratches.
Mind the humidity: Use a humidifier in dry seasons and a dehumidifier in wet seasons to maintain stable conditions.
Following these care tips can prolong the life of your floor and maintain the beauty achieved through your laminate flooring installation.
Conclusion
Embarking on a laminate flooring installation project is a fantastic way to enhance the beauty and value of your home. Whether you are motivated by cost savings, the desire for a personal project, or simply the need for new flooring, understanding the process and preparing adequately are key to success.
From choosing the right materials and tools to carefully laying each plank, every step plays an important role. By following the guidelines in this article, you can tackle laminate flooring installation with confidence, achieving professional results even as a DIY enthusiast.
0 notes
Text
Best tips for flooring installation Dubai
When it comes to enhancing the beauty and functionality of any space, flooring plays a vital role. In a vibrant and ever-evolving city like Dubai, homeowners and business owners alike understand the importance of selecting the right flooring material and ensuring professional installation. Flooring installation Dubai services have become synonymous with quality, precision, and aesthetic appeal. Whether you're renovating a villa, upgrading an office space, or fitting out a retail store, choosing the right flooring installation Dubai company is crucial for achieving the best results.

terrazzo tiles - spc flooring dubai - parquet flooring - epoxy flooring dubai - lvt flooring - porcelain tiles
Why Choose Professional Flooring Installation Dubai?
Professional flooring installation Dubai services guarantee not just visual beauty but also long-lasting durability. The climate in Dubai, characterized by high temperatures and occasional humidity, demands materials and techniques that can withstand harsh conditions. Experienced flooring specialists in Dubai understand these challenges and recommend the best solutions accordingly.
When opting for flooring installation Dubai, you benefit from:
Expert Guidance: Professionals help you choose the right materials based on your lifestyle, budget, and aesthetic preferences.
Precise Installation: Proper subfloor preparation, accurate measurements, and flawless fitting ensure that your flooring looks and performs its best.
Time Efficiency: Skilled teams complete the project swiftly without compromising on quality.
Warranty Protection: Many companies offering flooring installation Dubai provide warranties on their workmanship and materials, giving you peace of mind.
Popular Types of Flooring in Dubai
There are various flooring options available to suit different tastes and purposes. Some of the most sought-after choices for flooring installation Dubai include:
1. Porcelain and Ceramic Tiles
Ideal for Dubai’s hot climate, porcelain and ceramic tiles are popular for their durability, easy maintenance, and cooling properties. Whether for residential villas or commercial complexes, tile flooring remains a top choice for flooring installation Dubai projects.
2. Hardwood Flooring
For a touch of elegance and warmth, hardwood flooring never goes out of style. Modern technologies allow hardwood floors to adapt better to Dubai’s climate, making them a viable option for luxury homes seeking premium flooring installation Dubai services.
3. Vinyl and Laminate Flooring
Cost-effective, stylish, and versatile, vinyl and laminate floors are perfect for busy households and high-traffic areas. They mimic the look of wood or stone at a fraction of the cost, making them a preferred choice in the flooring installation Dubai industry.
4. Marble Flooring
Nothing spells luxury like marble. Many upscale residences and hospitality venues opt for marble when considering flooring installation Dubai, as it delivers a timeless and sophisticated appeal.
5. Carpeting
Although less common due to the hot weather, carpeting still finds its place in hotels, offices, and residential bedrooms. Soft underfoot and sound-absorbing, carpets remain a niche yet important sector within flooring installation Dubai.
Steps in Professional Flooring Installation Dubai
Understanding the flooring installation process can help you appreciate the importance of hiring professionals. Here’s a brief overview:
Step 1: Consultation and Site Inspection
The first stage in any flooring installation Dubai project involves a consultation where experts visit the site, understand your needs, and suggest the best flooring options.
Step 2: Material Selection
Based on your budget, style, and functional needs, you’ll select the perfect flooring material. Reputed flooring installation Dubai companies offer a wide range of samples to choose from.
Step 3: Subfloor Preparation
The success of any flooring installation Dubai depends largely on subfloor preparation. This includes cleaning, leveling, and sometimes even applying moisture barriers.
Step 4: Installation
With meticulous attention to detail, the flooring materials are laid down according to the manufacturer’s specifications, ensuring a flawless finish.
Step 5: Final Inspection and Handover
Post-installation, the team conducts a thorough inspection to ensure everything meets quality standards before handing over the project.
Choosing the Best Company for Flooring Installation Dubai
Selecting the right contractor is vital for a successful flooring project. Here are some tips to help you choose the best flooring installation Dubai service provider:
Experience: Opt for companies with a proven track record and years of experience in Dubai.
Portfolio: Review their past projects to gauge the quality of their work.
Certifications and Insurance: Always ensure the company is licensed and insured to safeguard your investment.
Customer Reviews: Look for testimonials and reviews from previous clients to measure customer satisfaction.
Warranty: A good flooring installation Dubai company will offer warranties on both labor and materials.
Costs Involved in Flooring Installation Dubai
Pricing for flooring installation Dubai varies based on several factors:
Material Type: Luxury materials like marble and hardwood cost significantly more than vinyl or ceramic tiles.
Project Size: The larger the area, the higher the overall cost, although many companies offer discounts for bigger projects.
Complexity of Installation: Intricate designs, patterns, or special techniques may add to the labor charges.
Subfloor Condition: If extensive preparation is needed, it can impact the overall cost.
On average, you can expect to pay anywhere between AED 70 to AED 500 per square meter depending on the material and the company you choose for your flooring installation Dubai.
Trends in Flooring Installation Dubai
Dubai is a city that embraces luxury, innovation, and sustainability. Current trends in flooring installation Dubai reflect these values:
Eco-Friendly Flooring: Bamboo, cork, and recycled materials are gaining popularity.
Smart Flooring Solutions: Heated floors and integrated smart sensors are increasingly being installed in premium homes.
Bold Patterns and Textures: Geometric designs, mixed-material floors, and textured finishes are in vogue.
Large Format Tiles: Minimal seams and expansive tiles create a seamless, modern look that many Dubai property owners now prefer.
Maintenance Tips After Flooring Installation Dubai
To preserve the beauty and longevity of your floors after your flooring installation Dubai project, follow these tips:
Regular Cleaning: Dust and clean floors regularly using the recommended cleaning agents for your specific flooring type.
Avoid Water Damage: Quickly wipe up spills, especially on hardwood and laminate flooring.
Protect High-Traffic Areas: Use rugs and mats in busy areas to minimize wear and tear.
Furniture Pads: Place pads under furniture legs to avoid scratches and dents.
Professional Maintenance: Schedule periodic professional cleaning and maintenance through your flooring installation Dubai provider to keep floors looking new.
Conclusion: Achieving the Perfect Floor with Flooring Installation Dubai
The flooring of any space plays a crucial role in defining its character, comfort, and functionality. In a city like Dubai, where style meets substance, selecting the right materials and entrusting the job to skilled professionals is a smart move. Whether you prefer the timeless elegance of marble, the cozy warmth of hardwood, or the versatile practicality of vinyl, there’s a perfect solution waiting for you with flooring installation Dubai services.
Choosing professional flooring installation Dubai ensures that every detail, from material selection to final polishing, is handled with expertise and care. The right flooring not only enhances the aesthetic value of your property but also increases its market value. By investing in top-quality flooring installation Dubai, you are investing in a beautiful, durable, and comfortable future for your home or business.
0 notes
Text
Top floor installation companies near you
When it comes to upgrading or renovating a property, the choice of flooring is one of the most critical decisions you can make. Whether you are constructing a new home, renovating an office, or simply refreshing your living space, floor installation companies play a vital role in ensuring that your floors are durable, beautiful, and properly installed. In this comprehensive guide, we will explore everything you need to know about floor installation companies, from the services they offer to the factors you should consider when choosing the right one for your project.

epoxy basement flooring dubai - porcelain tiles - porcelain tiles - floor cushion sofa - epoxy basement flooring dubai
What Are Floor Installation Companies?
Floor installation companies are specialized businesses that focus on the professional installation of various types of flooring. These companies employ trained technicians who have the expertise to handle different flooring materials, including hardwood, laminate, vinyl, carpet, ceramic tile, and more. The primary goal of floor installation companies is to deliver high-quality flooring solutions that meet the aesthetic and functional needs of their clients.
Many floor installation companies also offer additional services, such as floor repair, maintenance, refinishing, and consulting on the best flooring options for specific environments. Some may even assist with removing old flooring and preparing the subfloor before installing new materials.
Types of Flooring Offered by Floor Installation Companies
Different properties require different flooring solutions. The best floor installation companies offer a wide range of flooring types to meet the diverse needs of residential, commercial, and industrial clients. Here are some of the most popular types of flooring they install:
Hardwood Flooring: Known for its natural beauty and durability, hardwood flooring is a classic choice. Many floor installation companies specialize in installing various species of hardwood, including oak, maple, and walnut.
Laminate Flooring: An affordable and versatile option, laminate flooring mimics the look of hardwood or stone at a lower cost.
Vinyl Flooring: Popular for its water resistance and easy maintenance, vinyl flooring is ideal for kitchens, bathrooms, and commercial spaces.
Tile Flooring: Ceramic and porcelain tiles are highly durable and available in countless designs, making them a favorite for bathrooms, kitchens, and high-traffic areas.
Carpet Installation: Many floor installation companies also offer carpet installation services, providing warmth and comfort underfoot, especially in homes and hotels.
Why You Should Hire Professional Floor Installation Companies
While DIY projects can be rewarding, installing a floor is a complex task that demands precision, experience, and the right tools. Hiring professional floor installation companies ensures that:
The flooring is installed correctly and efficiently.
Potential issues, like uneven surfaces or moisture problems, are addressed beforehand.
The project adheres to building codes and manufacturer guidelines.
You receive warranties and guarantees on both materials and labor.
By working with floor installation companies, you can save time, avoid costly mistakes, and achieve a superior finished product.
How to Choose the Best Floor Installation Company
With so many options available, selecting the right floor installation partner can be challenging. Here are key factors to consider when evaluating floor installation companies:
1. Experience and Expertise
Look for floor installation companies with extensive experience and a proven track record. Companies that have been in business for many years are more likely to deliver consistent results and have handled a wide range of projects.
2. Range of Services
The best floor installation companies offer comprehensive services, including material sourcing, subfloor preparation, installation, and post-installation support. A one-stop shop saves you the hassle of coordinating with multiple contractors.
3. Customer Reviews and Testimonials
Researching online reviews and asking for client testimonials can provide valuable insights into the quality of work and customer service provided by different floor installation companies.
4. Licensing and Insurance
Always verify that the floor installation companies you are considering are properly licensed and insured. This protects you in case of accidents or damage during the installation process.
5. Quality of Materials
Some floor installation companies partner with leading manufacturers to offer high-quality flooring materials. Others may allow you to purchase materials independently. Either way, ensure that you are getting durable, warrantied products.
6. Cost and Estimates
Request detailed estimates from multiple floor installation companies. Compare not just the total cost but also what is included in the price, such as material costs, labor, removal of old flooring, and cleanup.
7. Warranty and Aftercare
Reliable floor installation companies stand behind their work with warranties on installation and products. They should also provide guidance on maintenance and care to extend the life of your new floors.
Trends in the Floor Installation Industry
Floor installation companies are continuously evolving to meet changing consumer demands and technological advancements. Some notable trends include:
Sustainable Flooring: Eco-friendly materials like bamboo, reclaimed wood, and recycled tiles are becoming increasingly popular.
Smart Floors: Integration of underfloor heating systems and sensors that monitor moisture and temperature levels.
Luxury Vinyl Tile (LVT): A fast-growing category due to its durability, ease of installation, and realistic wood and stone designs.
Customization: More customers are seeking personalized flooring solutions, such as custom patterns, colors, and textures.
Top floor installation companies are keeping pace with these trends to offer modern, innovative options to their clients.
Common Challenges Faced by Floor Installation Companies
Even the best floor installation companies encounter challenges during projects. These may include:
Subfloor Issues: Uneven or damaged subfloors must be repaired before installation can proceed.
Moisture Problems: Moisture barriers and proper sealing techniques are necessary to prevent future damage.
Logistical Hurdles: Coordinating deliveries, managing site access, and scheduling can pose logistical difficulties.
Client Expectations: Miscommunication about timelines, costs, or final results can lead to dissatisfaction if not managed properly.
Experienced floor installation companies anticipate and address these challenges proactively to ensure smooth project execution.
Floor Installation Companies for Commercial Projects
Commercial flooring projects often have unique requirements compared to residential installations. Floor installation companies that specialize in commercial work understand the importance of durability, compliance with safety standards, and minimizing disruption to business operations.
Industries that frequently rely on professional floor installation companies include:
Retail and shopping centers
Hospitality (hotels, restaurants)
Healthcare facilities
Educational institutions
Corporate offices
Industrial facilities
Selecting the right partner for a commercial flooring project can impact not only the aesthetic appeal of the space but also its functionality and safety.
The Future of Floor Installation Companies
Looking ahead, the future of floor installation companies appears promising. Advances in installation techniques, materials technology, and customer service models are reshaping the industry. Here’s what we can expect:
More Green Building Initiatives: Expect more emphasis on sustainable practices and materials.
Improved Installation Tools: Technological advancements will continue to make floor installation quicker, more accurate, and less labor-intensive.
Virtual Consultations and 3D Planning: Some floor installation companies now offer virtual consultations and 3D floor planning tools, allowing clients to visualize their projects before work begins.
Expansion of Services: Companies may expand into related areas like wall paneling, deck installation, and outdoor flooring solutions.
As competition increases, floor installation companies that embrace innovation, provide outstanding customer service, and deliver exceptional results will thrive.
Conclusion
Choosing the right flooring can dramatically transform the look and feel of any space, and selecting the right professionals to install it is equally important. Floor installation companies bring expertise, efficiency, and peace of mind to what can otherwise be a complex and daunting process. By understanding what these companies offer and how to evaluate them, you can ensure that your next flooring project is a resounding success.
Whether you're installing new hardwood floors in your home, upgrading your office with durable vinyl tiles, or launching a major commercial renovation, floor installation companies are your trusted partners. Take your time to research, ask the right questions, and partner with a company that aligns with your vision and needs.
0 notes