
Don't wanna be here? Send us removal request.
Statistics
We looked inside some of the posts by runningrhino and here's what we found interesting.
Average Info
Notes Per Post
64
Likes Per Post
54
Reblog Per Post
10
Reply Per Post
0
Time Between Posts
16 hours
Number of Posts By Type
Text
15
Last Seen Tumblr Blogs


Fun Fact
Tumblr.com is the 103rd most visited website in the world.
Text
Minecraft Animal How to tame a camel
For those of you who are avid players of the popular sandbox game Minecraft, you know that wandering around the world and exploring isn’t just about building. You also have to worry about living creatures that inhabit your world, such as animals! If you're looking for a new challenge in the game or just want to add a pet to your inventory, one animal to consider is the camel. But how do you tame a camel? Don’t worry; we’ve got you covered. In this blog post, we'll discuss the basics of taming camels in Minecraft Animal and provide some helpful tips along the way. So let’s get started!

How to tame a camel in Minecraft
To tame a camel in Minecraft, you will need: - A golden carrot - A bowl - A lead 1. First, find a camel in the desert. Right-click on it with an empty hand to mount the camel. 2. Feed the camel a golden carrot from your inventory. The camel will now follow you around. 3. Hold a bowl of water in front of the camel's face and it will drink from it. You can now lead the camel around by attaching a lead to its neck.
The benefits of taming a camel in Minecraft
Taming a camel in Minecraft can have many benefits. For one, you will have a loyal companion that can help you explore the world. Camels are also very helpful when it comes to transportation, as they can store a lot of items in their inventory. Additionally, taming a camel can provide you with some extra security, as they will attack any hostile mobs that come near you.
How to use a camel in Minecraft
To use a camel in Minecraft, you will need to first tame the camel. This can be done by feeding the camel a golden apple or carrot. Once the camel is tamed, you can then mount the camel and ride it around. The camel can also be used to store items in its inventory, which can be accessed by pressing the 'e' key while riding the camel.
Conclusion
With the right strategies and techniques, any player can easily tame a camel in Minecraft. Taming camels is an exciting way to obtain transportation, storage, and a great companion for your adventures. From gathering items with the help of its inventory to riding it through deserts or just simply making sure you have enough food by having nearby farms - there are many ways to utilize those special animals! So if you ever find yourself in need of a loyal companion while exploring the world of Minecraft make sure to give taming a camel a try!
platforms Facebook,Pinterest,YouTube,Twitter,Game bloggers,get the latest game guide
10 notes
·
View notes
Text
how to play minecraft education edition
Minecraft Education Edition is a version of the popular sandbox video game Minecraft, designed specifically to be used in an educational environment. It provides an immersive, fun way to learn and explore new concepts, while also enabling teachers to assess their students' progress. In this article, we’ll provide you with a comprehensive guide on how to play Minecraft Education Edition. We’ll walk you through the basics of the game, from setting up your server to creating your first world. Additionally, we’ll cover some additional features that make this version of Minecraft unique and help you get the most out of your educational experience.
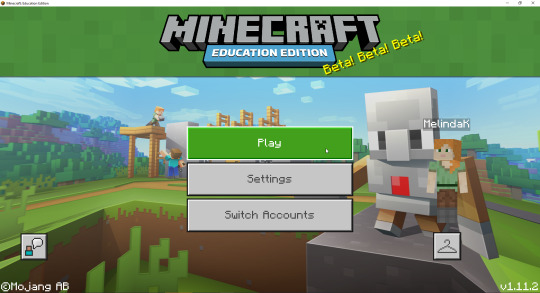
What is Minecraft Education Edition?
Minecraft: Education Edition is a version of Minecraft that was created specifically for educational purposes. It is similar to the regular version of Minecraft, but includes a number of features that make it more suitable for use in schools. Some of the key features of Minecraft: Education Edition include: -A user-friendly interface that makes it easy to get started -A library of resources, such as lesson plans and tutorials, that can be used by teachers to integrate Minecraft into their curriculum -The ability to easily connect with other players around the world, making it ideal for collaborative learning -A safe and secure environment that is monitored by staff to ensure appropriate behaviour
How to Get Started with Minecraft Education Edition
Minecraft: Education Edition is a version of the popular sandbox game designed specifically for classrooms. The game is available for free to anyone with a Microsoft account, and there are no in-app purchases. To get started with Minecraft: Education Edition, you'll need to create a class in the app. Once you've done that, you can invite students to join your class and start playing together. There are a few things to keep in mind when playing Minecraft: Education Edition. First, the game is intended for educational purposes, so there are some features that are different from the regular version of Minecraft. For example, players can't hurt each other in Minecraft: Education Edition, and there's a built-in chat system that lets students communicate with each other without leaving the game. Second, because Minecraft: Education Edition is designed for classrooms, it's important to follow the rules set by your teacher. For example, your teacher may want everyone to stay on the same level or may want players to build only certain types of structures. Third, while Minecraft: Education Edition can be played offline, it's best to play it online with other people. That way, you can take advantage of all the features the game has to offer, like collaboration and communication tools. Finally, have fun! Playing Minecraft: Education Edition is a great way to learn about teamwork, problem-solving, and digital literacy.
Tips for Using Minecraft Education Edition
Minecraft: Education Edition is a game-based learning platform that promotes creativity, collaboration, and problem-solving in an immersive environment. The game is free to download and play, and there are no in-app purchases. Here are some tips for using Minecraft: Education Edition in the classroom: 1. Establish ground rules with your students before starting to play. Discuss expectations for behavior and teamwork, and set up a system for dealing with problems that may arise during gameplay. 2. Use the built-in tutorials to introduce students to the basics of the game. These can be found in the world editor after creating a new world. 3. Encourage students to collaborate and communicate with each other while playing. One way to do this is by setting up teams of students and assigning specific tasks to each team. 4. Utilize the many resources that are available online for Minecraft: Education Edition. There are lesson plans, printables, and videos that can be used to supplement your instruction. 5. Take advantage of the feedback feature in Minecraft: Education Edition to give students immediate feedback on their work. This is a great way to help them improve their skills and understanding of the game mechanics.
Conclusion
Minecraft Education Edition is a great way to learn and have fun at the same time! By following this guide, you now know how to set up your game and make sure that it runs smoothly. With its vast array of features, Minecraft Education Edition can be an incredibly powerful tool for learning. So go ahead and start exploring new worlds with your friends or even using it in the classroom—the possibilities are endless!
platforms Facebook,Pinterest,YouTube,Twitter,Game bloggers,get the latest game guide
5 notes
·
View notes
Text
minecraft animals how horses are tamed
If you’re playing Minecraft, then you know how important Minecraft animals can be to your game. Horses are one of the most popular animals that players use in the game, and they offer a variety of benefits such as transportation and combat assistance. However, before you can utilize these perks, you must first learn how to tame them. Taming horses in Minecraft isn’t as simple as just walking up to them; it requires some knowledge, practice and patience. In this blog post, we will explore the steps involved in taming horses in Minecraft and provide some tips for mastering this skill.

How to Tame a Horse in Minecraft
Horses can be tamed in Minecraft by using a saddle and then riding them. Right-clicking on a horse with a saddle equipped will cause the horse to buck, but after a few seconds it will become tame and allow you to ride it. You can also feed horses golden apples or carrots to make them easier to tame.
The Different Types of Horses in Minecraft
There are many different types of horses in Minecraft. The most common type is the regular horse, which can be found in the wild. There are also donkeys and mules, which can be tamed and used for transportation. There are also undead horses, called skeleton horses, which can be found in the Nether. Finally, there are also chestnut horses, white horses, and black horses. Each type of horse has different stats, so it's important to choose the right one for your needs.
Conclusion
Taming horses in Minecraft is a great way to add some adventure and excitement to your world. With the right strategy, you can easily take control of wild horses and build a strong bond with them. Whether you want extra travel speed or just the companionship of a majestic animal, taming horses in Minecraft can help make your game even more enjoyable. With this guide, we hope that you now have all the information necessary for successful horse taming adventures!
platforms Facebook,Pinterest,YouTube,Twitter,Game bloggers,get the latest game guide
2 notes
·
View notes


Text
What is the most useful animal to tame in Minecraft?
If you’re a Minecraft player, then you know that taming animals is an important part of the game. Whether it’s wolves or horses, these creatures can offer valuable resources and protection. But which animal is the most useful to tame in Minecraft? In this blog post, we will explore the various animals available for taming in Minecraft. We will discuss their uses, pros and cons, and why they may be essential additions to your gaming experience. By the end of this article, you will have a better understanding of which animal is the best companion for your virtual world.
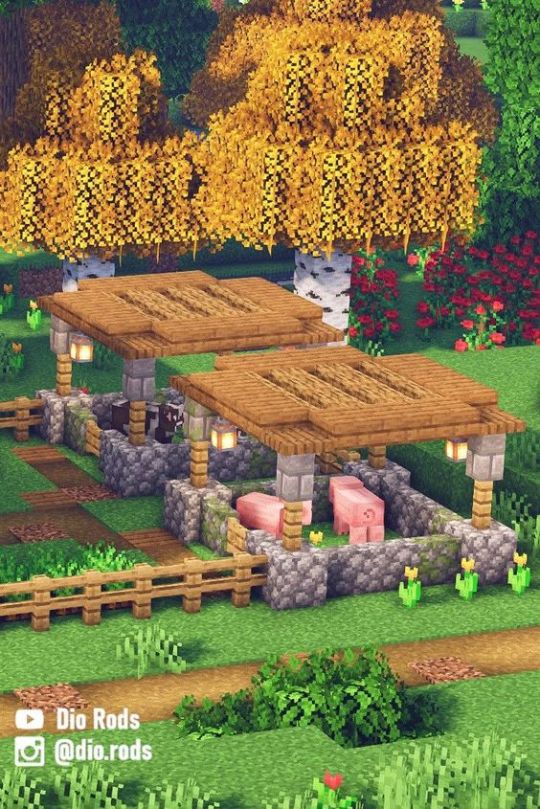
The Pig
Pigs are one of the most useful animals that you can tame in Minecraft. They provide you with a renewable source of food and porkchops, as well as a means of transportation. Pigs can also be used to breed other animals, such as cows and chickens.
The Sheep
There are many animals that can be tamed in Minecraft, but the most useful one is the sheep. Sheep are a valuable source of food and wool, and can be easily bred to create more sheep. When killed, a sheep will drop 1-3 pieces of wool, which can be used to make clothing or other items. Sheep can also be sheared to produce even more wool.
The Cow
Cows are one of the most useful animals in Minecraft, providing a steady source of food and leather. They can be found in most biomes, making them easy to find and tame. Cows also have a chance to drop a piece of cooked beef when they die, making them even more valuable.
The Chicken
The chicken is often considered the most useful animal to tame in Minecraft due to its many uses. Chickens can be used for food, feathers, and even eggs. Eggs can be used to hatch more chickens or cook meals. Feathers can be used to make arrows or to craft beds. Chickens are also one of the few mobs that don't attack players, making them ideal for farms and other peaceful purposes.
The Wolf
In Minecraft, wolves are one of the most useful animals that you can tame. Wolves will help you attack and kill other animals and mobs, making them a valuable ally in combat. You can also use a wolf to help you teleport by right-clicking on the wolf while holding a bone.
Conclusion
Taming animals in Minecraft is a great way to have some extra help around your world, and the best animal to tame really depends on what kind of help you need. For those who want an efficient way to travel, horses are the top choice for their speed and durability. If you’re looking for a companion during your adventures, wolves make loyal companions that can be trained to fight by your side. With all the various types of animals available in Minecraft, there’s sure to be one that fits your needs perfectly!
platforms Facebook,Pinterest,YouTube,Twitter,Game bloggers,get the latest game guide
1 note
·
View note


Text
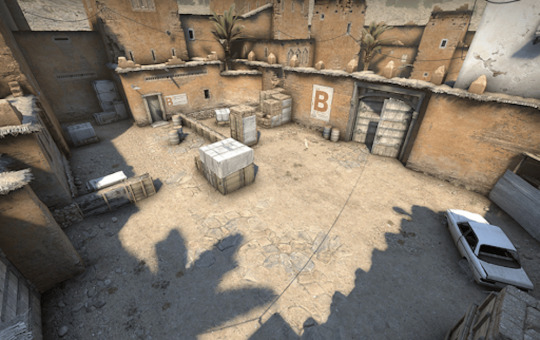
What is the best weapon to use in CSGO Dust 2
CSGO Dust 2 is one of the most popular and iconic maps in Counter-Strike: Global Offensive. If you’ve ever wanted to play a competitive game of CSGO, chances are it was on Dust 2. But what kind of weapon should you be using on this iconic map? This article will explore the best weapons for Dust 2 and explain why they work so well in this context. So if you’re looking to maximize your performance on this classic map, read on for some insight into which weapons you should be using!

The Different Weapons in CSGO
There are a variety of weapons available in CSGO Dust, each with its own unique advantages and disadvantages. In this section, we will take a look at the different types of weapons available in the game and what makes them stand out. The first type of weapon is the assault rifle. Assault rifles are the most common type of weapon in the game and are typically used at medium to long range. They are accurate and have a high rate of fire, making them deadly in the hands of a skilled player. However, they are also expensive and can be difficult to control if you are not used to them. The second type of weapon is the submachine gun. Submachine guns are smaller and lighter than assault rifles, making them easier to control. They also have a higher rate of fire, making them more effective at close range. However, they are less accurate than assault rifles and can be difficult to use if you are not used to them. The third type of weapon is the sniper rifle. Sniper rifles are designed for long-range combat and excel at taking down enemies from afar. They are very accurate but slow to fire, making them vulnerable if you are not careful. Additionally, they are very expensive and can only be used by experienced players. The fourth and final type of weapon is the shotgun. Shotguns fire a large number of pellets at once, making them devastating at close range but inaccurate at long range. They also tend to be quite bulky
The Best Weapon for Dust 2
The answer to this question may vary depending on who you ask but we think the best weapon to use on Dust 2 is the AK-47. The AK-47 is a great all around gun that can be used in most situations. It has a high damage output and is very accurate even at long range. It also has a good rate of fire which makes it great for spraying down enemies. The only downside to the AK-47 is that it can be expensive, but it is definitely worth the investment.
How to Use the Best Weapon in Dust 2
In order to use the best weapon in Dust 2, you will need to have a good understanding of the map and its features. Once you know where all the key locations are, you can start to think about which weapon would be best for each situation. The AK-47 is often considered the best overall weapon in Dust 2 due to its high damage and good accuracy. It is particularly effective on the long sightlines on the map, making it a great choice for mid-range combat. If you are planning on engaging enemies at close range, however, you may want to consider using a different weapon. The M4A4 is another popular choice for Dust 2 due to its high firepower and good accuracy. It is a better option than the AK-47 at close range, but it does not have the same long-range potential. The M4A1-S is a variant of the M4A4 that has a silencer attached, which can be useful for hiding your position when engaging enemies at long range. The AWP is the most powerful sniper rifle in the game and it is very effective on Dust 2 thanks to its large number of long sightlines. If you are planning on playing as a sniper on Dust 2, then this is definitely the weapon for you. Just be aware that you will be an easy target if someone sees you first, so make sure to stay hidden when possible.
Conclusion
As we have seen, there are a variety of weapons that can be used on the Dust 2 map in CSGO. There is no single “best” weapon – it all depends on personal preference and playstyle. Each weapon has its own strengths and weaknesses, so choosing the right one for your style and situation will go a long way towards improving your game and giving you an edge over your opponents. So before jumping into a round, it pays to figure out which gun is best-suited for you!
Follow us on social media platforms Facebook,Pinterest,YouTube,Twitter,Game bloggers,get the latest game guide
2 notes
·
View notes
Text
Infinity Cube: Idle Tower Defense How to play
If you’re looking for a new and challenging way to keep your mind busy, then Infinity Cube: Idle Tower Defense may be just what you need. This game is the perfect combination of puzzle-solving, strategy, and time management. The goal is to build towers to defend against infinite waves of attacks from enemies, while managing resources and upgrading your defenses. It’s no wonder this game has become so popular — it offers hours of entertainment for both casual players and hardcore gamers alike. To help you get started on your journey in Infinity Cube: Idle Tower Defense , we’ll show you how to play and provide some tips for success.

What is Infinity Cube?
When it comes to tower defense games, there are few that can match the excitement and challenge of Infinity Cube. In this game, you must defend your tower against an onslaught of enemy attacks. To do this, you will need to use your wits and strategies to keep your tower standing. The game is set in a futuristic world where you are the last line of defense against the forces of evil. You will need to use all of your skills to build the strongest possible defenses against these enemies. There are numerous ways to achieve this, but it will ultimately be up to you to find the best way to play the game. One of the most important aspects of Infinity Cube is resource management. You will need to carefully consider how you spend your resources in order to ensure that you have enough left over to defend your tower. This can be a difficult task, but it is one that is essential if you want to win the game. If you are looking for a challenge, then Infinity Cube is definitely the game for you. With its unique gameplay and intense challenges, this game is sure to provide you with hours of fun. So, what are you waiting for? Go out there and start building your defenses!
How to play Infinity Cube
Assuming you have already downloaded the Infinity Cube: Idle Tower Defense app and have it open on your device, here are the instructions for how to play: The objective of the game is to protect your tower from the never-ending onslaught of enemies. Each enemy that reaches your tower will deal damage to it. If your tower's health points reach zero, the game will end. You do this by building defenses around your tower. There are four kinds of defenses you can build: archers, cannons, walls, and traps. Each has its own purpose and advantages. Archers shoot arrows at enemies, cannonballs bounce around and deal damage to multiple enemies, walls block enemies' path, and traps cause damage when enemies step on them. You can also upgrade your defenses to make them more effective. To do this, tap on the Upgrade button in the bottom left corner of the screen. This will bring up a menu where you can choose which defense you want to upgrade and see how much it will cost. Keep in mind that each defense can only be upgraded a certain number of times. Finally, you'll need to manage your resources wisely. You earn gold by defeating enemies and completing levels. You use gold to buy new defenses and upgrades. You also earn mana by defeating enemies and completing levels. Mana is used to cast spells which can help turn the tide of battle in your favor. With these tips in mind, you should be well on
Follow us on social media platforms Facebook,Pinterest,YouTube,Twitter,Game bloggers,get the latest game guide
1 note
·
View note
Text
Subway Surfers Beginner's Guide
Introduction to Subway Surfers
Subway Surfers is a popular mobile game that challenges players to collect coins and other items while avoiding obstacles and enemies. The game is free to download and play, but there are in-app purchases available. This beginner's guide will teach you the basics of how to play Subway Surfers, including how to control your character, how to collect coins and other items, and how to avoid obstacles and enemies.

The Objective of the Game
The objective of Subway Surfers is to score as high as possible by collecting coins and avoiding obstacles. The game is endless, so the player's goal is to see how far they can get before they are caught by the Inspector. There are various ways to increase your score, such as picking up power-ups and completing missions.
The Controls
Assuming you are playing on an iOS or Android device, the controls for Subway Surfers are relatively simple and straightforward. On the left side of the screen, you will see a virtual joystick. This is used to control the character's movement from left to right. On the right side of the screen, you will see two buttons. The upper button is used to make your character jump, and the lower button is used to make your character slide. That's really all there is to it! With these simple controls, you can navigate your way through the treacherous subway tracks and escape the grumpy Inspector and his dog. Just be sure to watch out for obstacles and collect as many coins as you can along the way!
Power-Ups
There are a few different types of power-ups that you can collect while playing Subway Surfers. These can help you to improve your score and get further in the game. The first type of power-up is the coin magnet. This will attract all of the coins near you, making it easier to collect them. You can also find score multipliers and head start power-ups. These will temporarily double your score or give you a head start in the game. You can also purchase hoverboards and character upgrades with real money. These can make the game easier or more fun to play, but they are not necessary to complete the game.
Tips and Tricks
If you're just starting out in Subway Surfers, you might feel overwhelmed by all the different things going on. But don't worry, we've got you covered with this beginner's guide. In this section, we'll give you some tips and tricks to help you get started. First of all, make sure you're familiar with the controls. You can move your character left and right by swiping in those directions. You can also jump and duck by tapping on the screen. These are the basic moves you'll need to know in order to play the game. Once you've mastered the controls, it's time to start thinking about strategy. One important tip is to never run into obstacles head-on. Instead, try to swipe around them or jump over them. This will save you valuable time and help you avoid getting caught by the police. Another useful tip is to collect as many coins as possible. Coins can be used to buy power-ups and other items that will help you survive longer in the game. So whenever you see a group of coins, make sure to grab them! Finally, don't forget to have fun! Subway Surfers is a fast-paced and exciting game, so make sure to enjoy yourself while playing it. With these tips in mind, we're confident that you'll be able to become a pro surfer in no time!
Follow us on social media platforms Facebook,Pinterest,YouTube,Twitter,Game bloggers,get the latest game guide
1 note
·
View note
Text
csgo callouts dust 2 how to play
Introduction
Counter-Strike: Global Offensive (CS:GO) is one of the most popular team-based first person shooter games available. It features a myriad of maps and game modes, each with its own set of rules and tactics. The franchise has been around since 1999, making it among the oldest competitive shooters out there. One of the most iconic maps in CS:GO is Dust 2, which has become synonymous with Counter-Strike itself in many ways. This particular map requires knowledge on various callouts in order to strategize effectively and best your opponents. In this blog post, we'll explore the basics of Dust 2 callouts and how to use them to give you an advantage over your opponents.
The Counter-Terrorist Spawn
When playing Counter-Strike: Global Offensive, it is important to be aware of your surroundings at all times. One way to do this is to learn the callouts for each map. Callouts are simply the names of key locations on a map that help players communicate with each other. The Counter-Terrorist spawn is located at the bottom left of the Dust II map. It is important to know where this location is as it can be used as a strategic advantage. For example, if you are playing as a Counter-Terrorist and your team has control of the bombsite B, you can use theCounter-Terrorist spawn to quickly move up and defend the bombsite. As always, communication with your team is key in Counter-Strike: Global Offensive. By learning the callouts for each map, you will be able to better communicate with your teammates and strategize accordingly.
The Terrorist Spawn
The terrorist spawn is one of the most important aspects of the game. It can be the difference between winning and losing. Here are some tips on how to play the terrorist spawn: -When spawning, always try to stay close to cover. This will make it harder for the counter-terrorists to kill you. -If you are spawning in an open area, try to stay away from the center of the map. This will make it easier for you to find cover when the round starts. -Always be aware of your surroundings. If you see a counter-terrorist coming, try to hide or run away. -If you are in a group, always stay close to your teammates. This will make it easier for you to communicate and coordinate your attacks.
Mid
If you're playing on Dust II, there are a few key callouts you should know. Here's a quick guide to help you get started. The most important thing to remember when playing Dust II is that communication is key. Calling out enemy positions and coordinating with your team is the best way to secure victory. Here are some of the key callouts for Dust II: Mid: This is the area between the two bomb sites, where most of the action takes place. Call out enemy positions and be aware of potential flanking routes. Catwalk: The catwalk is a raised platform that runs along the back wall of the map. It's a popular sniping spot, so be sure to watch for enemies lurking up there. B Tunnel: The B tunnel is another popular sniping spot, located at the back of the B bomb site. Keep an eye out for enemies coming through here. Long A: Long A is a long stretch of open ground that leads from the A bomb site to mid. It's dangerous to cross without cover, so be careful when advancing through this area.
B Site
The B site on Dust II is one of the most iconic sites in all of Counter-Strike. It is also one of the most popular places to play the game. There are many different ways to take control of the B site, but it all starts with understanding the basic callouts. There are three main callouts for the B site on Dust II: Short: This is the area closest to where you spawn as Terrorist. It is also known as 'connector' or 'the door'. Middle: Middle is the long stretch of hallway that connects Short to Long. It is a very important chokepoint and taking control of it will give your team a big advantage. Long: Long is the area at the very end of Middle. It consists of two rooms, an upper room (balcony) and a lower room (bombsite). The balcony overlooks Bombsite and can be used to spot and pick off enemies trying to take control of it.
CT Ramp Room
The CT Ramp Room is one of the most important rooms on the map Dust II. It provides cover from enemy fire, and also allows you to get a clear view of the bomb site. When playing as Counter-Terrorist, it is important to hold this room and prevent the Terrorists from taking control of it. Here are some tips on how to do just that: 1. Use cover wisely. The CT Ramp Room has plenty of cover available, so use it to your advantage. Peek out and take shots when you can, but be sure to duck back behind cover when the enemy starts firing at you. 2. Watch the doors. There are two ways into the CT Ramp Room, so be sure to keep an eye on both doors. If one door starts getting too much traffic, consider switching your focus to the other door. 3. Control the high ground. There is a raised platform in the CT Ramp Room that gives you a better view of the bomb site. Use this to your advantage by picking off enemies as they try to approach the bomb site. 4. Communicate with your teamates [teammates]. The CT Ramp Room can be a tough room to hold on your own, so be sure to communicate with your teammates and coordinate your efforts. Call out enemy positions and work together to keep them out of the room!
Follow us on social media platforms Facebook,Pinterest,YouTube,Twitter,Game bloggers,get the latest game guide
1 note
·
View note


Text
Games Guides, Walkthroughs And Cheats
For any hardcore gamer, the search for game guides, walkthroughs and cheats is never-ending. It’s not just about getting through a level or two – it’s about striving to be the best. And it’s no wonder why; gaming has become an industry worth billions! Whether you’re playing a new release or an old classic, having access to the right resources can make all the difference in your experience. In this article, we will explore what kind of game guides, walkthroughs and cheats are available out there, as well as how you can use them to get a leg up on the competition.
The Different Types of Games Guides
There are all sorts of different types of games guides available these days. Some are free and some you have to pay for. Some are officially sanctioned by the game’s developers and some are created by fans. But what all these guides have in common is that they can help you get the most out of your gaming experience. Here’s a quick guide to the different types of games guides out there: Official game guides: These are created by the game developers themselves and usually come bundled with the game when you buy it. They contain information on everything from the storyline to the gameplay mechanics, and can be an essential resource if you want to get the most out of a game. Fan-made guides: As the name suggests, these are created by fans of the game who want to share their knowledge with others. They can be just as comprehensive as official guides, and sometimes even more so, since they’re often written by people who have spent hundreds of hours playing the game. Walkthroughs: These types of guides take you step-by-step through a game, telling you what you need to do in order to progress. They’re usually quite detailed, and can be very handy if you’re stuck on a particular section of a game. Cheats: Cheats are basically codes that you can enter into a game to give yourself an advantage. They can do things like make you invulnerable or
How to Use Games Guides
Assuming you would like a content section for a blog article discussing video game guides: Video game guides come in a few different forms, but they all serve the same purpose: to help you get through a game. Whether it’s an online forum, a PDF, or a book, these guides can provide tips on anything from how to beat a boss to where to find the best weapons. While some people might think they’re cheating by using a guide, they can actually be quite helpful. After all, not everyone has the time to devote hours upon hours to playing a single game. And even if you do have that kind of time, there’s no shame in needing a little help every now and then. The first thing you need to do is decide what kind of guide you want to use. If you’re looking for something quick and easy, an online forum might be the way to go. You can search for specific questions and usually get helpful answers from other players pretty quickly. Just be sure to take everything with a grain of salt—not everyone knows what they’re talking about. PDFs and books are great if you want something more comprehensive. These will often have maps as well as step-by-step instructions on what to do. The downside is that they can take longer to read through and find the information you need. But if you have the patience, they can be
The Pros and Cons of Games Guides
There are a variety of guides available for purchase or online that offer cheat codes, walkthroughs, and other information for video games. Some people swear by them, while others find them to be a waste of money. Here are some pros and cons of using games guides. Pros: – They can help you get past a difficult level or boss. – They can help you understand the game mechanics. – They can help you uncover all the secrets in the game. Cons: – They can be expensive. – They can take away from the fun of discovery. – They can make the game too easy.
How to Get the Most Out of Games Guides
If you're new to the world of games guides, walkthroughs and cheats, there's a lot to learn. But don't worry, we're here to help. Here are some tips on how to get the most out of game guides: 1. Choose the right guide for you There are tons of different game guides out there, so it's important to choose one that's right for you. Consider things like your gaming experience, what type of game you're playing and your budget. 2. Follow the guide step-by-step Most game guides are designed to be followed step-by-step, so make sure you do just that. Don't skip ahead or try to take shortcuts, as this could jeopardize your chances of success. 3. Use cheat codes wisely Cheat codes can be a great way to get ahead in a game, but they should be used sparingly. If you abuse them too much, it takes away from the challenge and fun of the game. So use them wisely! 4. Take advantage of online resources There are tons of great online resources available for gamers these days. From forums and FAQs to YouTube walkthroughs, there's no shortage of helpful information out there if you know where to look for it.
Conclusion
Games guides, walkthroughs and cheats have been around for years and are great ways to get the most out of any game. Whether you’re looking for tips on how to beat a hard level or just want to make sure you don’t miss anything in an open world game, there is something available for everyone. With so many options out there, finding the right guide or cheat can help make your gaming experience even more enjoyable. So next time you find yourself stuck on a difficult part of a game, be sure to check out what kind of guides may be available online - it could wind up making all the difference!
Follow us on social media platforms Facebook,Pinterest,Game bloggers,get the latest game guide
2 notes
·
View notes
Text
Last Escape: Survival game description
Are you ready for the ultimate challenge? Last Escape is an exciting, fast-paced survival game where your skills will be tested to the limit as you fight your way to safety. Set in a post-apocalyptic world overrun by zombies, Last Escape puts players in an intense and thrilling race for their lives. From scavenging for supplies to battling hordes of monsters and managing limited resources, Last Escape offers a unique experience that tests your resourcefulness and courage. With dynamic environments, challenging puzzles and fierce enemies, this game will keep you on the edge of your seat until you reach the end!
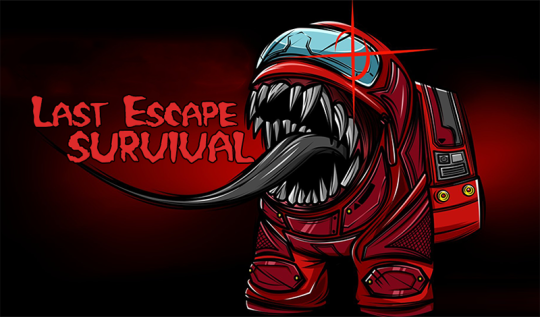
What is Last Escape?
Last Escape is a post-apocalyptic survival game set in the year 2035. The world has been ravaged by a nuclear war, and only a handful of survivors remain. In the game, players must scavenge for food and supplies, build shelter, and fight off hostile factions in order to survive. Last Escape is a challenging and unforgiving game that will test the player's endurance and resourcefulness.
How to play the game
Assuming you are playing the game on a computer, Last Escape can be controlled with either a keyboard and mouse or a game controller. To move your character around, use the WASD keys on your keyboard or the left joystick on your controller. To look around, use your mouse or the right joystick. To jump, press spacebar or the A button on your controller. To interact with objects in the environment, press E or the X button on your controller. This will allow you to pick up items, open doors, etc. To attack enemies, press left mouse button or the right trigger on your controller. To block enemy attacks, press right mouse button or the left trigger on your controller. There are numerous other gameplay mechanics not covered here, but those are the basics of how to play Last Escape. If you want to learn more, be sure to check out our other articles and guides for more information. Thanks for reading!
The different game modes
There are four different game modes in Last Escape: - Story Mode: In this mode, you'll play through the main story of the game. You'll need to complete all of the objectives in each level to progress. - Survival Mode: This is a more difficult mode where you'll need to survive for as long as possible. There will be no break between levels, and the enemies will be tougher. - Time Attack Mode: In this mode, you'll need to hurry and complete each level as fast as possible. The faster you finish, the more points you'll get. - Endless Mode: This is the hardest mode of all, where you'll need to keep surviving for as long as you can. The enemies will be even tougher than in Survival Mode, and there will be no break between levels.
Follow us on social media platforms Facebook,Pinterest,Game bloggers,get the latest game guide
2 notes
·
View notes
Text
EA SPORTS™ FIFA 23 Game Information Introduction
Get ready to play the most realistic soccer game yet – EA SPORTS™ FIFA 23. With improved gameplay, more immersive graphics and a variety of new features, this is the ultimate game for any soccer fan. From exclusive deals with major clubs across Europe to features that let you customize your team’s kits and logos, EA SPORTS™ FIFA 23 offers an experience unlike any other. Read on to learn more about what this game has to offer its players.

About EA SPORTS FIFA 23
EA SPORTS FIFA 23 is the latest installment in the EA SPORTS FIFA franchise. The game was released on September 28, 2020, and is available for PlayStation 4, Xbox One, Nintendo Switch, and PC. FIFA 23 builds on the success of previous entries in the series with new features and improvements across the board. On the pitch, players will notice an increased level of realism thanks to the inclusion of more accurate player models and animations. In addition, the game's physics have been fine-tuned to provide a more realistic experience. Off the pitch, FIFA 23 introduces a host of new features and improvements. The most prominent of these is the all-new Career Mode, which gives players greater control over their team's fortunes. In Career Mode, players can now interact with their team's staff and make important decisions that will shape their season. In addition to Career Mode, FIFA 23 also includes an updated version of Ultimate Team. Ultimate Team is EA SPORTS' popular online mode where players build their dream teams from scratch and compete against others from around the world. In FIFA 23, Ultimate Team has been expanded with new features and gameplay modes. With its wealth of new content and improved gameplay, FIFA 23 is the most comprehensive FIFA game to date and is sure to keep fans of the series hooked for hours on end.
Game Modes
There are four primary game modes in FIFA: Career Mode, Ultimate Team, Pro Clubs, and Online Seasons. Career Mode: In Career Mode, you take control of a professional footballer over the course of their career, making decisions about which club to join, which players to buy or sell, and how to manage your team. You can play Career Mode offline or online. Ultimate Team: In Ultimate Team mode, you create your own dream team of players from around the world. You can buy and sell players on the transfer market, and compete in both online and offline tournaments. Pro Clubs: In Pro Clubs mode, you create or join a club with up to 11 other players. You will be assigned a position on the field, and must work together with your teammates to win matches. Pro Clubs is an online only mode. Online Seasons: Online Seasons is similar to Pro Clubs, but instead of playing with your friends in a club, you play against other teams of players from around the world in a season-long competition.
Follow us on social media platforms Facebook,Pinterest,Game bloggers,get the latest game guide
2 notes
·
View notes
Text
How to tame Minecraft animals
Minecraft is a game that allows players to explore, craft, build and create their own worlds. One of the most popular aspects of the game is the ability to tame and domesticate animals – from horses to wolves. Taming animals in Minecraft can be quite challenging, but this article will provide strategies that make it easier. We will also discuss the different types of animals you can find in-game and how to catch them, as well as some tips for keeping your tamed creatures happy and healthy. With these tips and tricks, you’ll be able to fill your world with all kinds of friendly critters!
How to find animals in the wild
In order to find animals in the wild, you must first know where to look. The majority of animals can be found in biomes, with certain ones being exclusive to specific biomes. For example, wolves can only be found in taiga and forest biomes, while rabbits can be found in nearly any biome. Once you have an idea of which biome you need to be in, the next step is simply to explore until you find the animal you're looking for.
Of course, this isn't always as simple as it sounds. Some animals are quite rare, and may take a while to find even if you're in the right biome. If you're having trouble finding a specific animal, try asking other players or looking up guides online. With a little patience and perseverance, you'll eventually find the animal you're looking for!
How to train your animals
When you first start playing Minecraft, the animals can be a bit daunting. There are so many of them, and they all seem to have their own personalities. But don't worry, with a little time and patience you can train them to do whatever you want!
The first thing you need to do is find an animal that you want to train. Once you've found one, approach it slowly and calmly. Don't make any sudden movements, or the animal will get scared and run away.
Once you're close enough, start giving it some food. Animals in Minecraft love food, so this is a great way to get their attention. Just hold out some food in your hand and wait for the animal to come over and start eating.
Once the animal is eating from your hand, you can start trying to tame it. This is done by right-clicking on the animal while holding a piece of meat in your hand. If done correctly, a message will appear saying that the animal is now tamed.
Now that your animal is tamed, you can start training it to do things that you want it to do. The possibilities are endless! You can train your animals to follow you around, sit down when told, stand up on command, play dead... anything you can think of! Just be creative and have fun with it!
Summarize
When it comes to taming animals in Minecraft, there are a few different ways to go about it. The most common method is to simply feed the animal its favorite food until a hearts icon appears above its head, indicating that it is now tamed. Another way to tame an animal is to use a lead, which can be crafted from string and slimeballs. Once you have a lead, simply Right-click on the animal while holding the lead and it will follow you around. Finally, you can also breed two of the same kind of animal together by giving them each food until love mode is activated (indicated by two hearts above their heads) and then Right-clicking on one with the other following close behind. After a few seconds, baby animals will appear!
Follow us on social media platforms Facebook,Pinterest,Game bloggers,get the latest game guide
2 notes
·
View notes