
Don't wanna be here? Send us removal request.
Statistics
We looked inside some of the posts by scottbarnetto-blog and here's what we found interesting.
Average Info
Notes Per Post
0
Likes Per Post
0
Reblog Per Post
0
Reply Per Post
0
Time Between Posts
3 days
Number of Posts By Type
Text
1
Photo
16
Last Seen Tumblr Blogs


Fun Fact
Tumblr Inc. has $15.1M in annual revenue.
Text
REFERENCE LIST
Kaltsogiannis. (2018). Division Blindée. Available: https://www.artstation.com/artwork/PzNP3. Last accessed 12th Oct 2018.
Pichler, M. (2018). Mario + Rabbids Assets WIP. Available: https://www.artstation.com/artwork/YXgRV. Last accessed 12th Oct 2018.
Thornton, J. (2018). Island Hut Props. Available: https://www.artstation.com/artwork/O86qy. Last accessed 12th Oct 2018.
Tokkun Studio. (2018). Assets photorealistic - 3D / Pack 1. Available: https://www.artstation.com/artwork/n3o0X. Last accessed 12th Oct 2018.
Wilke, A. (2018). Handheld Telescope (a.k.a. Pirate Brass Telescope with a Wooden Box). Available: https://stargazerrock.com/handheld-telescope-a-k-a-pirate-brass-telescope-with-a-wooden-box/. Last accessed 12th Oct 2018.
0 notes
Photo


Here are the mood boards I created when I began production on my two assets. The mood boards helped provide me with reference material to use when modelling as well as provide overall inspiration when designing both assets.
The mood board for the hand held telescope focuses on the design of the asset, the materials used for the asset and the setting that this asset is found in. Equipment like this would be found on a pirate ship, the website ‘stargazer rock’ provided me with this piece of information: “ Although often referenced as Pirate Telescope, those were regular captain navigation telescopes and pirates happened to steal them along other treasures.” (Wilke, 2018). This shows how this asset was heavily used by pirates and what influenced my decision to use pirate related images in the mood board. “Most retractable telescopes only work when fully opened to their full distance.” (Wilke, 2018) also talks about how the telescopes were retractable, therefore images to show this function where vital to include in the mood board. The materials used for the asset consists mostly of metals as well as glass for the eyepiece, these are materials I plan to replicate when texturing.
The mood board for my shark asset mostly included general images of sharks and toy sharks sold today. As a result of this, I could study the body shape of sharks: specifically great white sharks. Looking at shark toys also allowed me to look at the differences between a toy shark when compared to a real shark, things like the texture of the toys and what makes them less realistic. This is because my asset is going to be a toy shark, therefore looking at toys on the market today will prove valuable to me when I produce this asset.
0 notes
Photo


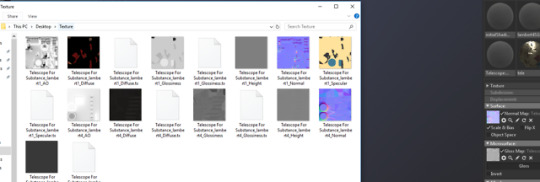


Finally, creating a turntable animation for each of my asset’s. This was a nice, clean way to showcase the assets from every angle. The software used for this was ‘Marmoset Toolbag’ which was downloaded online. To tackle this process the model must first be imported into the software, next, the textures must be added. To do this the textured must be exported from Substance Painter and are exported as a texture map. This map consists of many different properties which all make up the texture. Reference 1 shows the texture map of the telescope, each aspect must then be imported into the software to make up the final texture (Ref2).
Next, clicking on the model and going into the ‘material’ drop down menu and selecting the ‘Turntable’ function will create a turntable animation for that asset (Ref3). This was very simple and worked instantly, this could be previewed using the play function on the timeline. Finally, some settings could be tweaked in the environment such as lighting, scene backgrounds and camera settings (Ref4). This process was then repeated for the shark asset and the turntable was exported as a video file (Ref5).
0 notes
Photo


In conclusion, the shark asset consists of mainly one polygon but proved complicated and was more time consuming than I had expected. The asset used a simple cylinder polygon from the start and was extruded into the complex shape seen in the final renders. The shape caught me off guard because it was more time consuming than I had imagined, this was due to the creation of the fins, teeth and facial features of the shark. Keeping it as a one main polygon was difficult and sometime’s changing one thing on the model would trigger a change elsewhere. Despite time consuming, complicated and needing lots of problem solving, I am very happy with the outcome of this asset. The body is smooth and the transition into the fins are seamless: something I was concerned about during the concept art stage of this asset. The small teeth are very simple but add a lot to the asset making it look much more realistic and solidify to viewers what the asset is. The squeeze hole is also a great small detail that adds purpose and context to the asset, however I am concerned it is not clear what the detail is.
After reflecting on this asset, I believe it would be a good idea to try and make this more clear through some text on the body reading ‘squeeze me’ or something along those lines. If I had more time, this would be something I would add.
One thing I was concerned about during the concept creation of this asset was the idea that this is a toy shark, and this must be clear visibly. I aimed to do this by making the shark look static, colourful and less realistic. I believe I did this fairly well through the vibrant textures used in the texturing process and I avoided complex skin textures to look less realistic. I also avoided giving the shark gill’s during the texturing process to again make it look less realistic, I believe this was effective.
0 notes
Photo


In conclusion, the telescope looks how it was planned in the original concept art and idea’s. The model consists of lots of small complex shape’s which did lead to some problems, however, all of the issues could be solved for the most part. For the first asset I have modelled using the Substance Painter software I was extremely with the outcome of the texturing process as well as the software in general. The software has a pleasant user interface (UI) and getting a grasp of the software took only a few sessions and practice attempts. The shape of the telescope looks realistic and it is clear the reference image used was a significant guideline. I believe the small details of the asset contribute a lot to the outcome of this asset and gives people lots to look at and appreciate. I believe the key reason I am happy with the outcome of this asset is the tentacles. This is because this was a part of the concept I did not know how to tackle and something that seemed complicated, however, playing around with different techniques and just trying proved that it can be done. Overcoming this issue of not knowing how to tackle this detail is what I am most proud of.
The animation of the asset also in my opinion looks great because of effectiveness despite its simplicity. I believe the animation showcases the complex individual parts of the telescope and demonstrates how the asset would work in a game environment. The animation also includes the tentacles heavily, the detail I am most proud of.
If I had more time on this project I would have liked to experiment with different ways of tackling the suction cups on the tentacles and the fact that they could not be textured. This took away from the tentacle’s depth and detail so it was not something I wanted to get rid of, however, purely due to time I had to use the ‘bake’ technique. It would have been in the asset’s best interest to keep these suction cups but the deadline of this project did not allow me to further explore possibilities.
0 notes
Photo


The final task of the process was texturing my telescope, previously texturing other assets helped speed up this process. All asset textures require a base material, this is usually the key material to the asset: the material that features the most. Therefore, creating a metallic gold base was a great foundation for the texturing of this model (Ref1).
Moving on to the glass parts of the telescope, starting by selecting the parts needed. This is done by using the UV shell selector, this allows the user to select specific faces and UV shells to be textured. The faces can be selected on the model viewer or on the UV map seen in reference 2. Adding the ‘glass visor’ material which is a highly reflective blue material worked really well on the model and looked realistic as well as unique (Ref3 and Ref4).
The leather band of the telescope used a ‘Fabric Soft Denim’ material displayed in reference 5. Initially the material when placed onto the model was far too zoomed in, therefore, zooming out the texture in the properties menu fixed this instantly and it looked much more subtle. As this part of the model was a separate polygon, there was no need for selecting the specific faces using the UV shell selection, making it much more simple. The same material was used for the rope, just using a lighter shade. This part of the model was now done and is showcased in reference 6.
Next, tackling the texturing of the tentacles proved difficult due to the complex shapes of the suction cups. Applying textures to the cups was complicated and would often distort in parts, talking with a tutor and weighing up options of how to tackle this task it was decided to ‘bake’ the model. This is done by going into the original model file and creating a new version of the model without the complex suction cups followed by exporting the model. Next, using the ‘bake’ feature in Substance Painter imports the model with the suction cups but as a flat image, this means there is no physical polygons in the suction cups but they are still appear. This results in no distortion of the textures. Continuing with the texturing, creating another fill layer (Reference 7) and painting the tentacles finished the texturing process off (Reference 8).
0 notes
Photo


Finally, for the production of the telescope I tackled the task of duplicating my singular tentacle into three. They needed to be duplicated in a circular way so that they wrapped around the telescope body. To do this I went into Maya's ‘wire-frame’ mode which shows only the edges of the model and no hard surfaces. This means there is no blocking of visibility from solid surfaces and the environment’s grid is much more clear (Ref1).
To duplicate the tentacles the command ‘ctrl+D’ is used and using the centre pivot point alongside the rotation tool allows the user to move the tentacle around the telescope (Ref2). Making sure the intervals between the tentacles fit well and duplicating this process for three tentacles finished this task. The outcome can be seen in reference 3, and in my opinion it concluded the telescopes shape very well and solidified that cylindrical shape.
0 notes
Photo


The next step of the creation process was by far the most difficult due to its complexity. This was the production of the tentacles that are going to be wrapped around the main body in a spiral direction with suction cups covering the tentacles, the goal was to have three of each.
Starting with the same step that all of the production processes started with, inserting a good reference image of a tentacle in a wrapping position. Placing it where the tentacles where going to be, began the creation of the tentacles. Starting with a small rectangle and extruding the face to create the tentacle shape getting thinner and thinner as the tentacle gets longer (Ref1). I also changed the pivot point of the tentacle to the centre of the cylinder, this was the biggest help for this process and what made this process possible. Placing the pivot point in the centre allows for rotating the tentacle around the cylinder giving it that effect of the tentacle wrapping around the telescope, this worked extremely effectively. Using the shortcut of ‘3′ allows for a preview of the object when smoothed, doing this showcased how much more tentacle like the shape looked when smoothed, this can be seen in reference 2.
Reference 3 shows the tentacle at full length before being smoothed. The tentacle gets thinner as it gets longer and it wraps around the cylinder in a very subtle yet effective way. Reference 4 shows the tentacle after being smoothed, in which it looked exactly as I wanted. Furthermore, the outstanding problem that the model faced was that these tentacles appeared from nowhere, having no entrance point or a place to exit when it comes to animating the tentacles. To tackle this, a hole needed to be created in the model at the start of the tentacles. This was done by creating a small rectangle that was slightly wider and taller than the tentacles largest point, this was so that all of the tentacle could fit inside (Ref5). Using the mesh ‘difference’ function deleted the rectangle and cut in the main body of the telescope, creating the hole needed for the tentacles to fit inside (Ref6).
Next, began the production of the tentacles suction cups. This was extremely time consuming and tedious but the final result of the process proved worth while. The suction cups where created using two simple cylinders with a cone like shape placed on top of each other. This shape was then randomly rotated and duplicated down the tentacle, making each suction cups position and rotation random. This was how I originally imagined the tentacles to look, being realistic and as close to the reference image as possible. The suction cups also become smaller along the tentacle to accompany the tentacles thinness (Ref7).
Finally, I created some small borders around the tentacle connector (Ref8) to make it look a bit more structured. One tentacle was now created and finished and looked as intended, this tentacle now needs to be duplicated into three.
0 notes
Photo


Today, I was introduced to the ‘duplicate special’ function in Maya whilst following a tutorial on www.youtube.com. This function is used to duplicate a polygon in a certain way; whether that be in a line, in intervals, in a circle. It is a more advanced version of the simple ‘duplicate’ function.
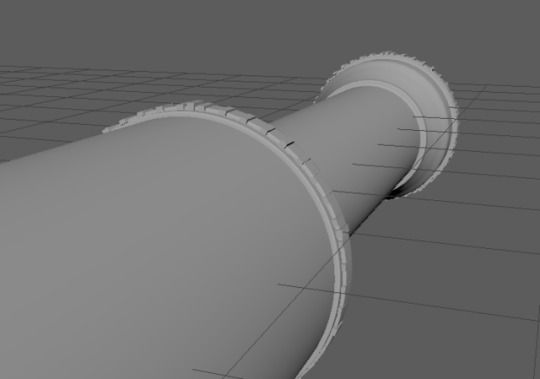
This was used in the telescope asset for the small bumps used in various places on the telescopes body. The purpose of these parts where to add texture and depth to the telescope which I believe worked effectively. They also acted as connecting pieces between the individual cylinders that made up the telescope body. They can be seen in reference 1.
Selecting the individual piece and using the duplicate special function opens up the window seen in reference 2. This is where the previous options of this function can be selected, for this model the goal is to duplicate in a circular motion. This was done by tweaking various settings such as how many items are going to be duplicated and on what axis will the assets duplicate on. Furthermore, changing the pivot point of the piece into the centre of the model meant the duplication will use the centre as a pivot point (Ref2). The outcome of this function can then be seen in reference 3, working very effectively and being relatively simple to do, I then repeated this process in various other places on the telescope body.
0 notes
Photo


Starting the creation of the telescope asset using the same method of the shark began the production of this mode. Using the reference seen in my reference images was used as a guideline for the basic shape of the telescope. In comparison to the shark, the telescope consists of more parts than the shark however the actual shape of the parts are much simpler (most of them being simple cylinders).
Starting from the smallest end piece of the telescope seen in reference 1, and adding more cylinders seen in reference 2, the shape of the telescope became clear. Extruding the faces of the telescope created bumps and borders on the asset using the reference as a guideline, furthermore, creating edge loops in the appropriate places and smoothing the asset made the asset appear smooth and polished whilst still maintaining its structure (Ref3 and Ref4).
The body of the telescope was now created and smoothed so the creation of smaller details could begin. Starting by using the mesh ‘difference’ function to create holes in the ends of the telescope were done to show where the glass eyepieces will fit (Ref5). Finally, creating a slightly larger cylinder and placing over the largest cylinder piece created the leather band (Ref6). This leather band was going to be held together using rope so creating the holes in the band showcased where the pieces of rope will go (Ref6).
0 notes
Photo


Texturing the shark model in ‘Substance Painter’ was not too difficult, consisting of mostly two main colours. I started with a base fill layer of the blue (Ref1), this gave the shark its primary body colour. Using an artistic brush for a more textured look (Ref2) and creating a new layer allowed for the production of the white bottom of the body. The messy look of the brush is well demonstrated in reference 3 and makes the model look more realistic.
Finally, adding a black layer for some of the individual shapes like the eyes and squeeze hole (Ref4) brought the texturing of the shape to a close and the final asset can be seen in reference 5.
0 notes
Photo


Next adding the final small detail onto the shark brought the asset to a close, this was the ‘squeeze hole’. To do this I created a small cylinder on the top of the model making a ring shape. Then, duplicating lots of smaller cylinders, seen in reference 1, and using the ‘mesh’ ‘difference’ function created the shape I wanted (Ref2). The modelling for this asset was now finished.
0 notes
Photo


Now that the sharks body was finished, the model (like any) needed to be UV mapped. This is something I have learnt through some lectures we had this term so tackling this was not too difficult. This task approaches lots of problem solving as lots of small errors occur when trying to unfold the UV shells, simply through trial and error and experimenting the task was done. This task was very time consuming.
Starting with the fins (Ref1), creating UV shells using the ‘cut’ function allows for specific parts of the model to have a separate UV shell meaning the ‘unfold’ function was much more effective when used. This task is all about simplifying the model as much as possible so that surfaces are not stretched or manipulated. Once a UV shell was created, the unfold function could be used which makes the shell flat so that it can become a map. This process was repeated on the rest of the model (Ref2). This then created the map seen in reference 3, using the ‘format’ function condenses the small maps into one grid format which is the ultimate goal (Ref4).
0 notes
Photo

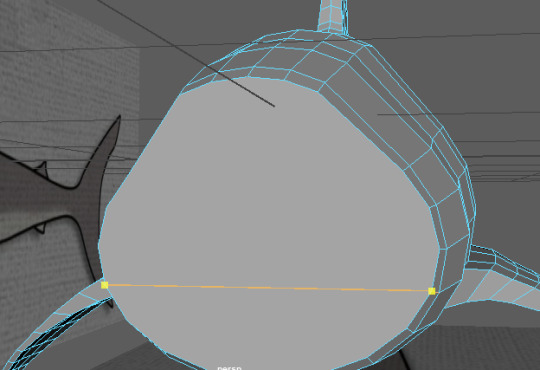


Continuing the development of the shark, creating the head was a complex but essential task that closed the model body off well. Starting by adding an edge loop (Ref1) allowed for splitting the body into two parts, these could then be developed into the top and bottom jaw using the extrude method (Ref2).
I then created the gums for the shark by using a simple curve and extruding it into a polygon (Ref3), duplicating this on the top and bottom gave me the gums and guidelines for the jaw. Creating individual teeth, as seen in reference 4, and then mirroring them to the other side created the bottom jaws teeth (Ref5). Using the mirror function on the ‘y’ axis created the top set of teeth (Ref6).
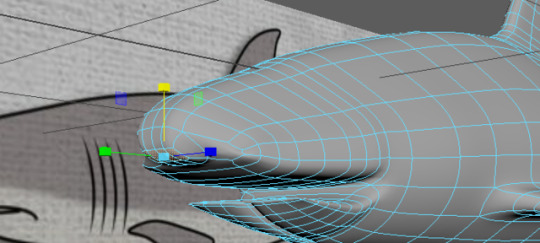
Finally, creating some nostrils and eye holes have the face some structure and two small spheres for eyes were placed in the holes. This brought the model to life and it started to look much more realistic (Ref7).
0 notes
Photo


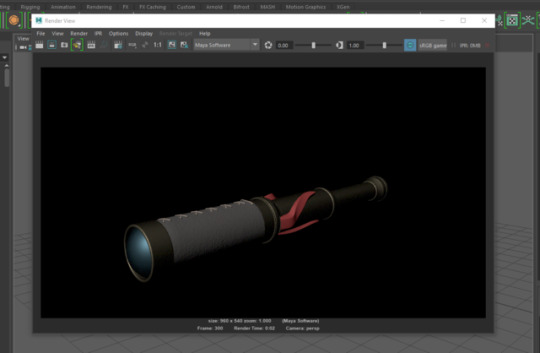


Today’s lesson focused on the exporting process for animations created in Maya, starting with preparing the render software and animation export function. Firstly, opening the quick render view allows the user to preview the view of the object, this is using the default camera: the perspective camera in this example. If the lighting and positioning of the asset is correct then the animation is ready to be rendered (Ref1).
In the quick render menu, the user has access to the render settings. For an export a few settings must be changed, they can be seen in reference 2 and 3. The ‘frame/animation ext:’ setting is sets the naming of the frame exports, this is important as the software that uses these frames to create the animation must be able to read the sequence in the correct order. Selecting the ‘name.#.ext’ option means the file will use the project name, frame number and finally the file type. This will be easily read by the software and also allows for file organisation for the user. Finally, for assets that use reflections such as the telescope, it is a good idea to select the ‘Ray-Tracing’ option, which helps render reflections. The quality of the image sequence can also be set in this menu.
The software will then start to render the individual frames of the animation, these are exported to the project file under the ‘images’ folder. The animation render can take a few minutes because of the amount of image’s that need to be exported. The exports can be seen in reference 4.
Finally, using the software ‘VirtualDub’ the image sequence can be imported into the software. VirtualDub will then automatically create the image sequence using the file names to order the sequence. Going into the ‘video’ drop down menu and navigating to the ‘frames’ setting will allow the user to change the frames per second (FPS) rate from the default 10 fps to the animations 30 fps. Going to file and selecting ‘Save As .AVI’ will export the sequence as a video. The animation can now be viewed.
Overall, this is a key process of the asset production brief and helped me immensely, using my own model as example meant first hand experience and concluded the work produced from this brief well.
0 notes
Photo


Firstly, following from the previous After Effects lecture which demonstrated how to create a composition, a new shortcut for the process was found. This is done by importing a video and dragging it to the composition shortcut in the media browser, this triggers the software to automatically create a composition suited to the media (Ref1 and Ref2).
This lesson aimed to look at introducing shapes using masks, this was to explore how name reveals used in modern day media is created in a software like After Effects. With the composition created, the first thing to do is to create a solid, this is essentially a shape. As seen in reference 3, the solid has many properties, the most useful for this is the colour of the mask. When the solid is created it will automatically fill the screen with the chosen colour, the aim is to make this a good size for some text. To do this a mask is created by double clicking the ‘rectangle’ shortcut, this enables the solid to be re-shaped and sized (Ref4). I then created some text using the ‘text’ button shortcut which allows any text to be created. This is where the user would type their name or the name of the object being showcased, creating two texts gives some depth to the box. Similar to the software Photoshop, the text has its own properties menu which allows things like the font size and font spacing to be edited.
Now that the name tag has been created and the mask is shaped appropriately, it is time to group the contents together into a new composition. This is tackled by selecting all of the contents (mask, text) and using the keyboard shortcut ‘Ctrl + Shift + C’ which generates a new composition with the contents selected. This essentially groups the contents (Ref6).
Finally, the transition of the text entering the screen needs to be animated. This was done by creating a new mask, its purpose to reveal the text box. This was done with the same process seen previously in reference 4. Now that the mask has been created, this could be used to hide the text box and reveal the text box: this will be done using key frames. Using the movement properties of the mask allowed for creating two different key frames and two different stages of the movement, this successfully creates the reveal movement (Ref7). To take this further, easy ease are used to make the animation more smooth. This automatic function in the software takes the key frame movement and smooths it out to be look more polished. Using this on the mask worked very successfully and it looked professional and smooth. The final touch made was using the ‘feather’ property. This is found in the properties movement and makes the mask reveal much less harsh by adding a more soft border, this is perfectly showcased in reference 10.
Finally, as all this was created in our composition folder, this meant it could all be used grouped together and placed on the side of the screen (Ref10). Overall, this was a great and useful skill to learn as its extremely common in modern day media and something I imagine myself using in the future. I can see this most being used in a portfolio or showcase of my work, that is the reason I chose an example portfolio to practice on. This task also showcased how important organising using folders or compositions is, allowing for everything to be moved in one simple movement without effecting any key frame movements. I was very happy with the results of this lesson and the animation I created looked professional and smoothly done: thanks to the ‘Easy Ease’ function.
0 notes
Photo


Today’s lesson looked at animating in Maya, more specifically animating objects like a ball. Firstly, briefly looking at the timeline layout gave a good understanding of the functions available and some settings that needed to be changed (All seen in Ref1). The default frames per second (fps) setting for the animation is 24 fps, this is considered poor for industry standard so it was changed to 30 fps. However, this only changed the fps rate for the final animation, the playback must also be 30 fps to be accurate. Playback is the term used to describe the real time presentation of your data (animation). Therefore, clicking the animation preferences allowed me to change this under the playback menu (Ref2). Clicking the button labelled ‘auto-frame’s’ means the software will automatically create a key frame when the object selected is transformed or moved. A key frame is a point in the timeline that allows the user to change properties for that object at that specific point. The two tabs next to the timeline contain two numbers, the first one determines how many frames the timeline contains, on the other hand, the second number determines how frames the actual animation is. The timeline also still uses copy and paste functionality, this allows key frames, and their data, to be cut, copied and pasted in the timeline.
To animate this ball the transform tools were used. This includes the rotate tool, scale tool and move tool. Using the shortcut ‘S’ key allows the user to enter a key frame into the timeline, this can be seen in reference 3. Moving a few frames forward and scaling the ball to be squashed created an automatic key frame in the timeline. Repeating this process to make the ball squash, jump and return to its original position created a moving ball animation. Copying the first key frame and pasting it as the final frame ensures the animation has a smooth looping effect, showcasing the usefulness of the copy and paste functions (Ref5).
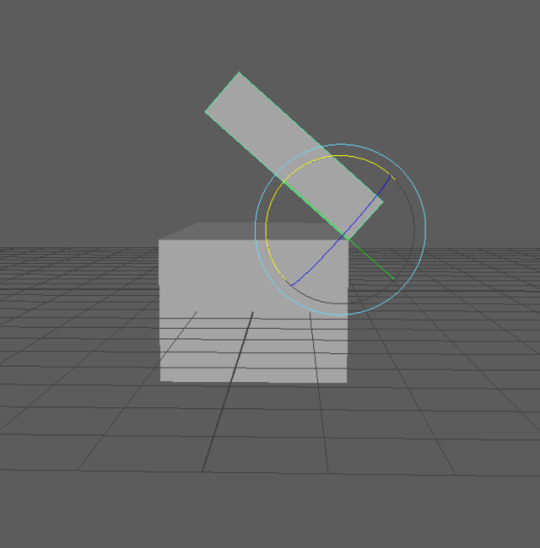
Next, creating a chest object would show how this animation skill could be used in a game environment. The first thing to do is to change the pivot point as this is what the rotating of the lid will use. To do this, the user must press the ‘D’ key which allows the pivot point to be moved. Using the side view allows for precise movement and making sure the lid is connected to the chest. This allows the pivot point to act like a hinge, keeping the lid connected to the chest whilst simultaneously allowing movement (Ref7). Rotating the lid to an open position (Ref8) created an automatic key frame at the end of the timeline and the animation is then created. The animation can become more and more complicated by adding more complex movement and timing, for example, making the chest open twice. From reference 9, the animation can be seen for the chest’s lid and the animation worked perfectly.
Overall, this introduction into animating seemed fairly simple, but seems like something that could be complicated very quickly. These skills will now be used in my modelling brief as the brief states to animate one object. I am fairly confident after this lesson this is something I will be able to do myself.
0 notes