
Don't wanna be here? Send us removal request.
Statistics
We looked inside some of the posts by shawnwerner and here's what we found interesting.
Average Info
Notes Per Post
1
Likes Per Post
1
Reblog Per Post
0
Reply Per Post
0
Time Between Posts
1 month
Number of Posts By Type
Text
1
Photo
6
Last Seen Tumblr Blogs


Fun Fact
The “We are the 99%” Tumblr blog became the slogan for the Occupy Wall Street movement.
Text
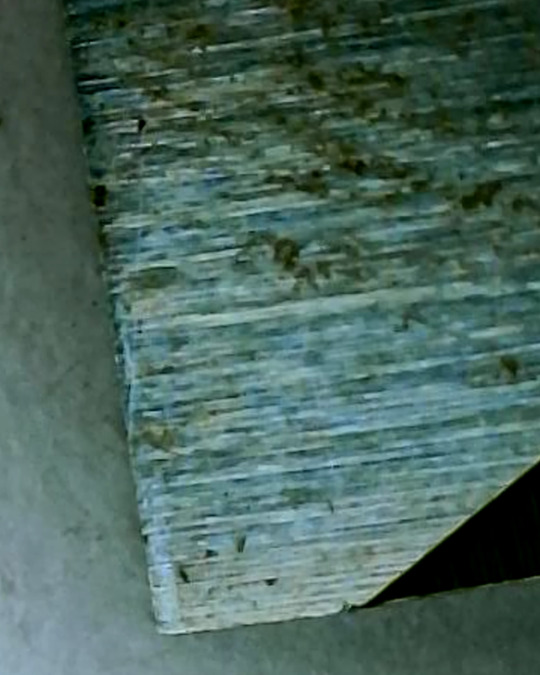

Narex Premium Before/After Stropping
This is my 1" Narex Premium unhandled chisel.
The first photo is the bevel from the wood after chopping/paring. Gunk is likely wood fiber with a touch of rust since they sat in the shop for a day or two prior to the photo.
The second is after stropping w/ 15K compound on 2mm buffalo leather glued to plywood.
I've never sharpened the side bevels so we can compare to the grind straight from the factory, which was and is very consistent and sharp.
I strop frequently, though my approach is slow and methodical. I put my finger as close to the edge as possible to keep the bevel flat and then with firm downward pressure slowly draw the chisel across the compound.
After I see iron swarf start to collect in the wax I'll check my bevel and usually I'm about 1/2 there. Once I'm satisfied I'll flip it over the edge and pull the back flat across a few times, careful not to pull it over the edge.
0 notes
Photo
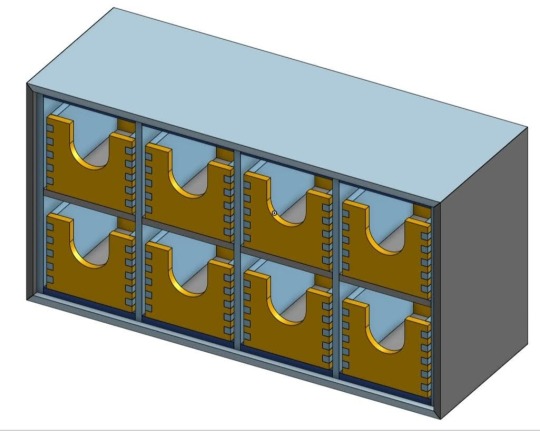


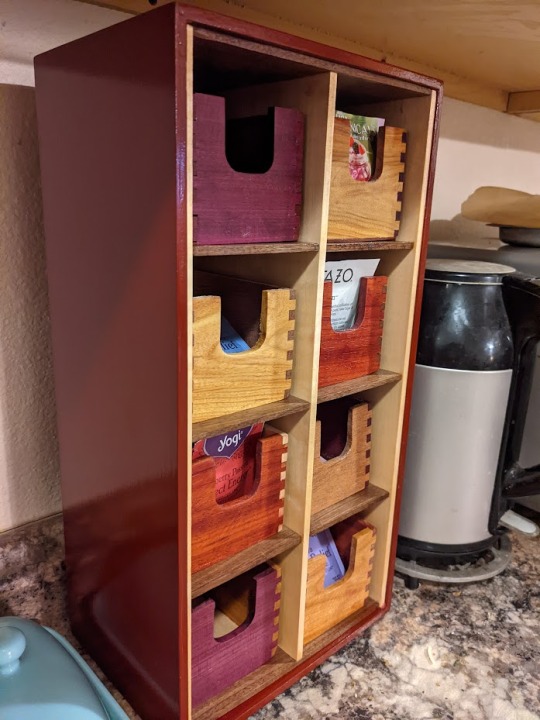
I made this tea organizer as a Christmas gift for my wife. It's nice making things that see everyday use. This was the first project I modeled using 3D/CAD software (OnShape to be specific). It was tough getting started at first, since I had no experience using such software, but now it's become a great tool for prototyping and making adjustments. I used a box joint jig for the router made by Rockler for the finger-joints. I also used the router to cut the recess in the face, which was a mistake. The router bit liked to grab the edge and split the wood in catastrophic fashion. I ended up making quite a few extras. The exterior is 1/4" baltic birch and finished with General Finishes' Milk Paint. I like Milk Paint because it undergoes hardening and becomes very durable, to the point where you can buff it out. The shelves are walnut, and the liners are maple. The boxes are composed of purpleheart, canarywood, padauk, mahogany and walnut. The finish for the interior and boxes, as well as the topcoat over the milkpaint is my favorite oil-varnish Waterlox Original. I like Waterlox because it wipes well, and the phenolic resin looks more natural and less plastic than finishes with poly resins while remaining durable.
0 notes
Photo


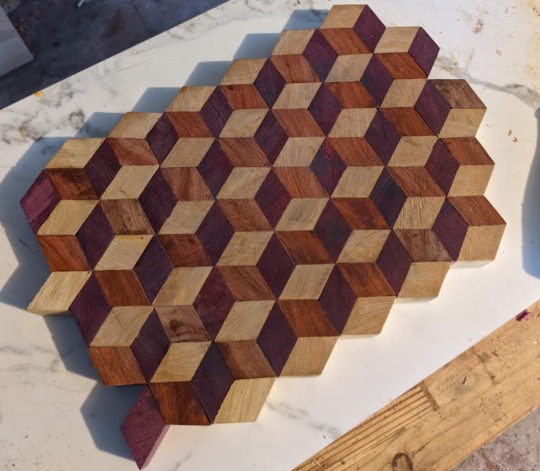
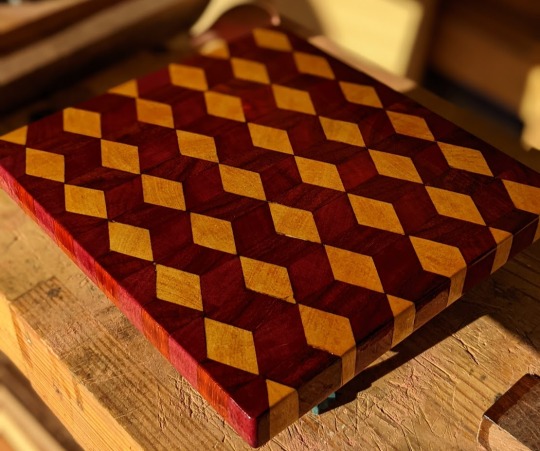

This was an overly ambitious project for my skill level at the time, but I wanted to make a 3D cutting board for my former boss as a wedding gift. I cut the lozenges using a miter saw, which was a mistake. Even though I had constructed a jig, the sizes ended up being wildly inconsistent. Unfortunately I hadn't figured this out by the time I had started gluing them up, thus began the difficult and time-consuming task of paring each face individually to get a good fit. Of course, what I should have done was planed and ripped the strips to equal sizes and then cut the bevel on a table saw (which I didn't have at the time). The other complication was the colors bleeding from the solvents in the finish. I sanded most of it back, then used acetone prior to the finish which worked well, but the end grain of wood is very absorbent so some of the color was deeply embedded at that point. What I thought would be a weekend project ended up taking a few months. Even though the fitting was time intensive the finishing ended up being the primary reason for the timeframe. I soaked the board in pure tung oil since it's foodsafe. But with endgrain the oil can ultimately soak from end to end. When the oil polymerizes, this gives the fibers additional strength throughout, but oxygen is required for the process and oxygen diffuses very slowly through the top layers that have already polymerized. As such, this board took about 6 weeks to cure enough to ship. Sadly, the board was lost in the mail and never received by the intended recipient. Hopefully it's being used in the postal employee breakroom or something.
0 notes
Photo

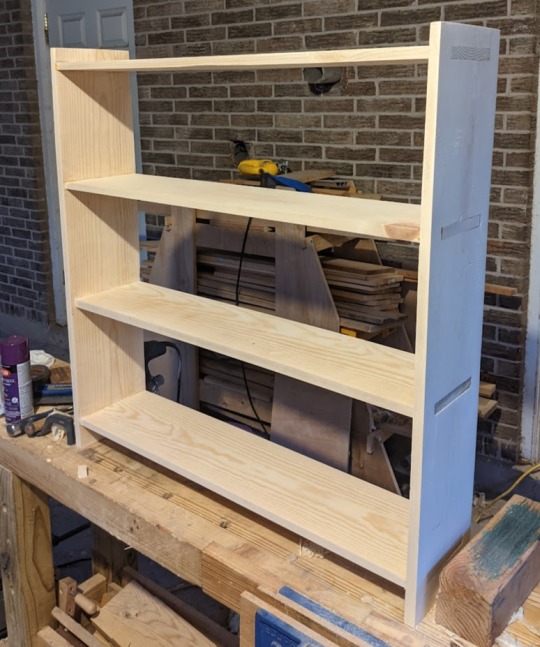
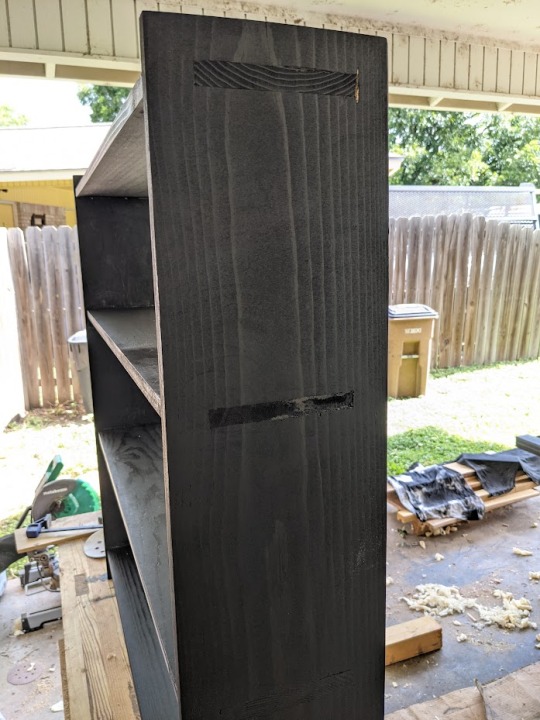
My daughter asked me to build them a shelf for their room. I had some extra white pine lying around so we put this together. The through mortice and tenon joints really add stability to something like white pine. While I did the woodworking part she helped with the painting (rattle cans from the hardware store). For being a cheap build I'm pretty happy with how it turned out, and it was fun working on a project together.
0 notes
Photo
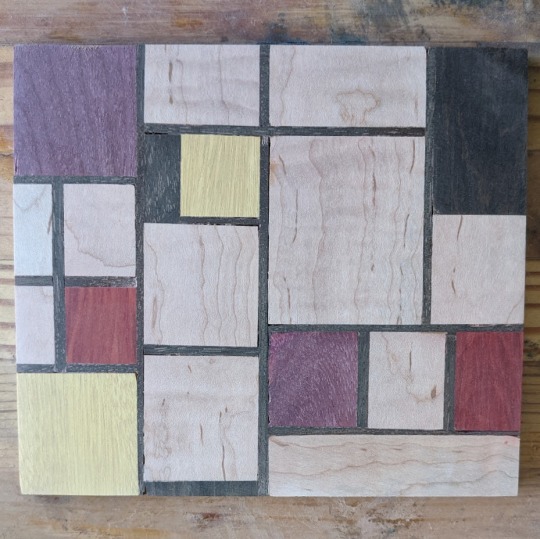
I was going for a Piet Mondrian inspired lamination. As you might have surmised from the sloppy glue lines and inconsistent grain direction this was one of my earlier woodworking experiments. There's purpleheart, bloodwood, yellowheart, maple, and wenge. I tried using oxaclic acid to bleach the maple but it mostly made it more pink in hue. Even though this didn't turn out like I'd hoped, I had fun doing it and the concept might be worth revisiting now with a little more experience. Another tricky aspect to these kinds of laminations is that the colored woods often like to bleed when solvents are added.
0 notes
Photo
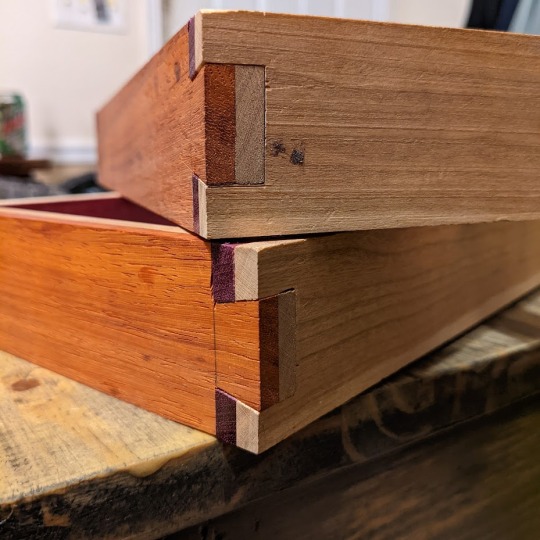
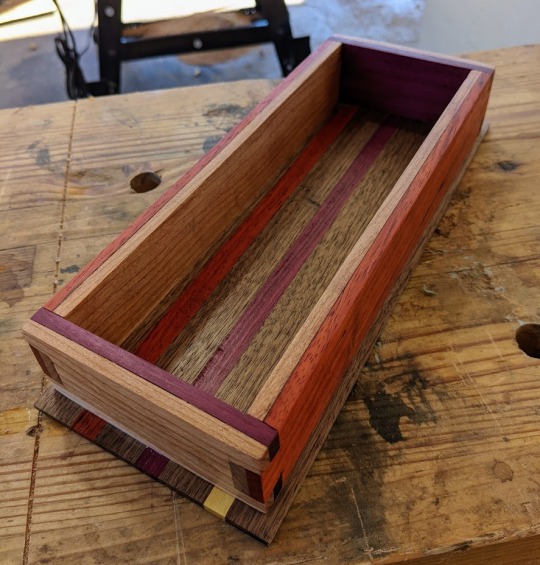

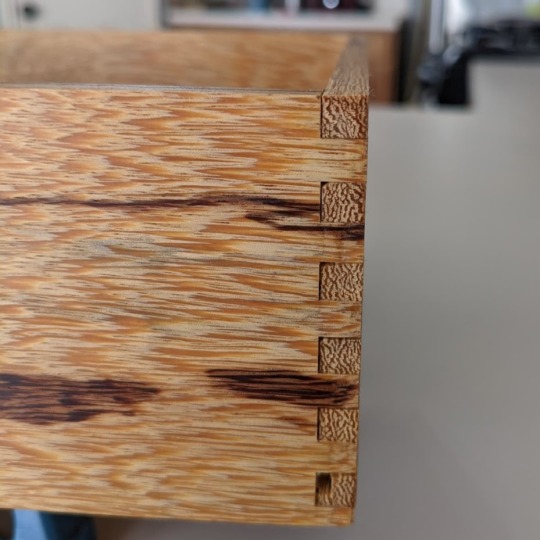
Couple of boxes I made for my chisels and some dovetail practice. I prefer a pullsaw for dovetails. Wish I had my cabinet scraper when I made these, it would've probably meant a lot less tearout in the purple/yellow chevrons.
1 note
·
View note
Photo
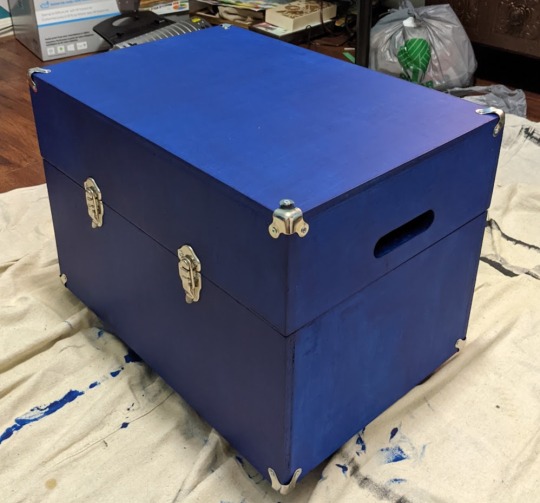
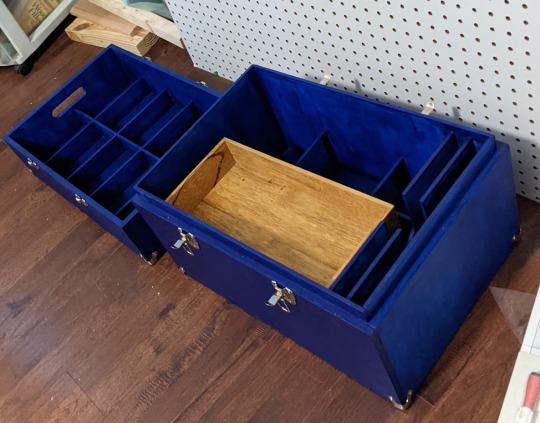
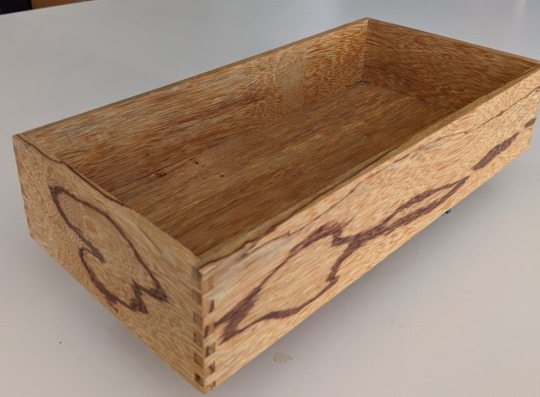
My son asked me if I could build him a tray for his art supplies. I thought I might do him one better and make him an organizer with a lid that doubles as a tray. The pencil box is made of marblewood and uses finger joints whereas the larger box has simple butt joints. The box features two large dividers for sketchbooks/notebooks and six smaller dividers for supplies. The top/tray has eight dividers. All the dividers were made with cross lap joints. Overall I'm pretty happy with how it turned out. If I could change anything, I would've used 1/4" baltic birch for the box exterior instead of 1/2" as the box ended up being a little heavier than I imagined. Also, I would've used a paint roller for the milk paint. General Finishes notes on the can that foam brushes can be used, but in practice they quickly became saturated and limp making it nearly impossible to distribute evenly. I found a chip brush towards the end that worked much better, and I would've sanded it back and added another coat had I not been up against a birthday party deadline. Despite the mottled look, the milk paint cured strong and is incredibly durable. Well suited to the dents and dings of a carefree six year old.
0 notes