
Don't wanna be here? Send us removal request.
Statistics
We looked inside some of the posts by sifstuff and here's what we found interesting.
Average Info
Notes Per Post
6
Likes Per Post
6
Reblog Per Post
0
Reply Per Post
0
Number of Posts By Type
Text
1
Last Seen Tumblr Blogs


Fun Fact
28.6 is the average number of monthly visits per US mobile user.
Text
Weight Painting
Note: Please don’t reblog this, I only posted it here because someone requested it and the private link wasn’t working - it’s a WIP and I have like zero time to actually fix it. Thank you. <3
I’ve noticed a lot of people struggle with weight painting, which I empathize with – not understanding weights kept me from making the kind of CC I wanted to make for years! Most CC tutorials don’t really explain much beyond «do a weight transfer», which isn’t always sufficient, so I decided to write up what I do when I weight paint. I’m sure there are ways of doing this that work just as well (and better!), but through copious trial and error, this is what I’ve found works for me.
I’m mostly going to focus on long dresses and gowns (aka 90% of my CC), but a lot of this should be useful for other types of CC as well.
This isn’t going to be a full, detailed guide to weight painting because, honestly, I don’t actually understand Blender that well. I’m also not going to cover meshing, UV maps, basic weight transfers and stuff like that – if you need advice on those things, check out the Sims4Studio forums. :)
I use Blender 2.76 – things might work/look different in other versions!
1. Vertex groups and mesh explosions
Okay, so this was without a doubt my biggest hurdle back in the day. My meshes kept getting all spiky and deformed in game and I couldn’t for the life of me understand why.
Turns out vertex groups are, like, really important. This is probably obvious to a lot of people, but it took me about two years to figure out, so I’m gonna talk about it.
Your mesh needs to have the same vertex groups as the base mesh you’re cloning, and not all EA meshes use the same ones. If you’re doing a weight transfer from the mesh you originally cloned, this shouldn’t be a problem. Most tutorials will tell you to clone an EA package that’s as similar to yours as possible, and this is a huge part of the reason for that.
However, I don’t do that! This is because I don’t want to use too many mesh cuts (for a guide to mesh cuts, look at this Sims4Studio guide) because they confuse me. In fact, I clone 99% of my dresses from the base game chemise so that they’ll be both base game compatible and only use one mesh cut.
Now, the chemise looks nothing like a gown, so if I was going to do a weight transfer from that for a long dress, it... wouldn’t work. That means I have to use something else, and that means paying attention to vertex groups. Let me explain why.
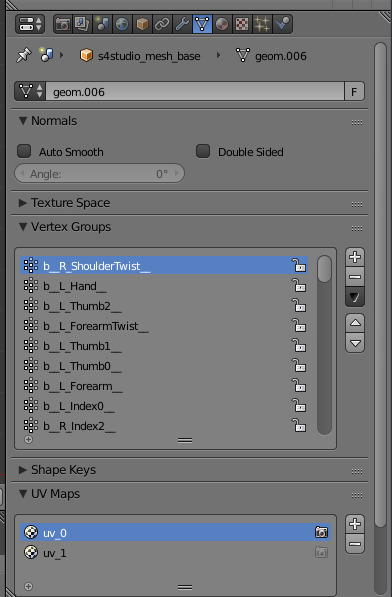
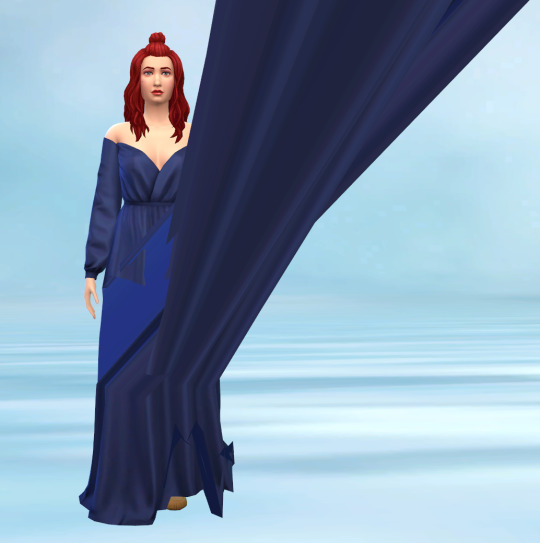
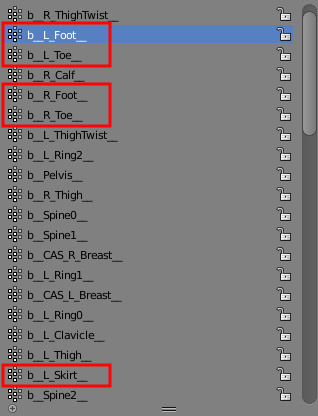
If you export the chemise and open it in Blender, you can see the list of vertex groups on the right. If you try to import a mesh that has additional vertex groups into your package, you’ll get distortions and weird spikes in-game. Most notably when it comes to making long dresses, the chemise does not have Skirt, Foot or Toe bones, but most of EA’s long dresses use one or more of these. So, for instance, if you do a weight transfer from this Holiday Celebration gown:
And import the mesh into a package cloned from the chemise...
Your result will be something like this:
This is because these vertex groups don’t exist in the original cloned mesh:
The easiest way to avoid this is, as I already mentioned, cloning and doing you weight transfer from the same mesh. A lot of the time, that’s going to work just fine. As I also said, though, I don’t do that. So what do I do instead?
2. How to manually fix weights
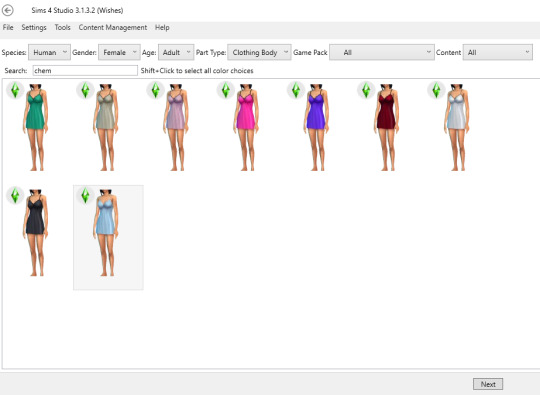
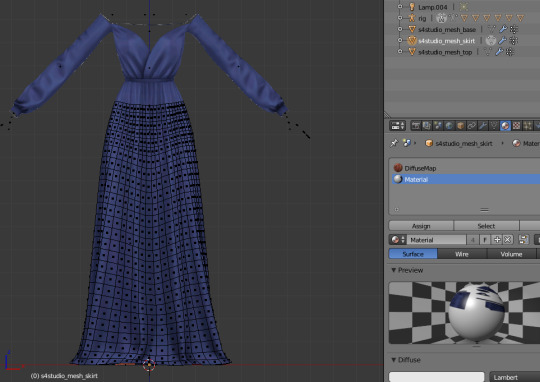
This is the dress I want to weight paint. My .package file is cloned from EA’s chemise. As you can see, they look nothing alike.

Now, I’ve been doing this for a while, so I already have an old piece of CC that I can do a weight transfer from that’s not going to have any vertex group issues (full disclosure: all my skirt weights these days are transferred from my Hannah dress and then adjusted slightly). For the purposes of this guide, however, that’s not how I’m doing it.
The first thing I’ll do is separate the dress from the body so I don’t mess up any weights unnecessarily. Then I’m going to split the mesh one more time so that I can do individual weight transfers for the top and the skirt.
I do this because it’s usually really hard to find a mesh to do a transfer from that’s similar enough to both parts to give a good result, and since I’m aware of what vertex groups I can use, this isn’t going to be a problem. Sidenote: I also recommend splitting meshes like this for UV1 transfers.
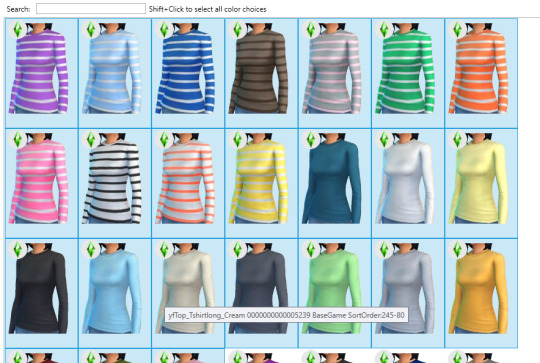
Next, I need to find base meshes to do weight transfers from. For the top, I almost always use this base game sweater because, in my experience, it works for almost anything:
Finding a long dress or skirt is harder, though. I don’t want to use the Skirt, Foot or Toe bones, but just about all EA meshes use them. So what I’m going to do is find a mesh that uses them anyway and then manually remove them.
Note: If you’re completely new to weight painting, you’re going to be much better off finding meshes that use the same bones/vertex groups! I’m doing it this way to demonstrate manual weight painting and editing in general, not the most efficient way of weight painting this particular dress.
I’m going to use the long gown from the Holiday Celebration pack because the skirt has a similar-ish shape.
Let’s take a look at the vertex groups in Blender. This has a lot of bones that I don’t want, but okay!
The next step is to do weight transfers as usual, which I’m assuming I don’t need to cover. Merge the mesh back together (if you split it), and let’s talk about the most important, magical, amazing button in all of weight painting. That’s this one:
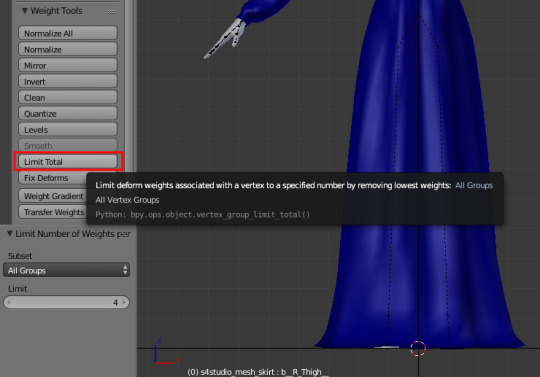
See, The Sims 4 only allows vertices to be attached to 4 bones and automatically limits them if there are too many. This can result in weird deformations and spikyness in-game. However, Blender’s «Limit Total» button will, well, limit the number of bones per vertex for you. You can do this manually as well, of course, but I very, very rarely feel the need to. Generally, using this tool regularly during weight painting will fix SO MANY problems. Click it immediately, and keep clicking it every so often.
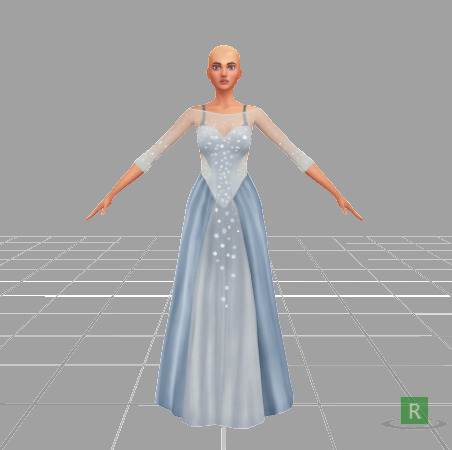
Next, I’ll pose the rig so I can see what the mesh is going to look like when it moves. This looks pretty good right now, but of course, it’s not going to look like this in-game because it has too many bones. It also looks pretty jagged and doesn’t move very smoothly.

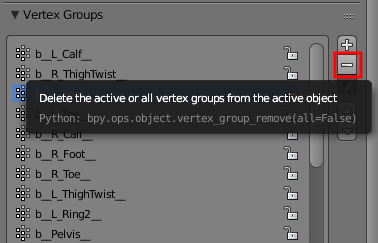
Let’s start with the vertex groups. What I’m going to do next is straight up delete the groups I don’t want. In this case, that would be the Skirt, Foot and Toe bones – compare it to the vertex groups in your cloned mesh if you’re not sure.
Then hit «Normalize All». We just removed a bunch of weights without replacing them with anything, which will result in a whole bunch of weirdness and deformations. Normalizing the weights will automatically make sure all the vertices have the right values to work properly.

Once I’ve got that sorted out, it’s time to do the actual painting. In this case, what I want to do is smooth out some of the jaggedness and fix some spikes that have appeared.
In this case, there appears to be a problem with the left calf. The bone related to this is named, appropriately, enough, b_L_Calf. By clicking this vertex group in Weight Paint mode, we get an view of how the weights are painted on the bone.
Note: All the vertex groups are quite reasonably named. If there’s a problem with the shoulders, for instance, the b_L/R_ShoulderTwist bones are most likely the ones that needs fixing.
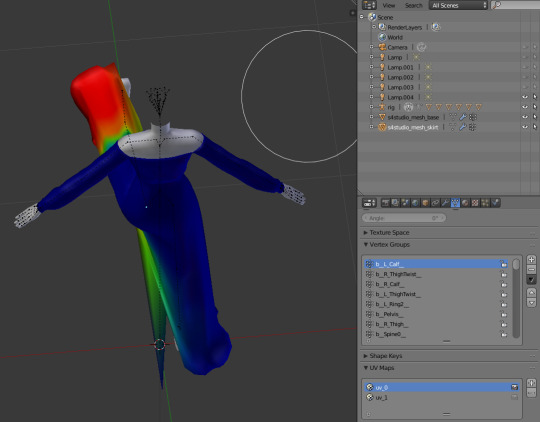
Dark blue means the vertexes aren’t weighted to the bone, red means they’re heavily weighted to it. In the image above, it looks like the weird spike should be moving with the rest of the calf, but it’s hasn’t been painted to do so.
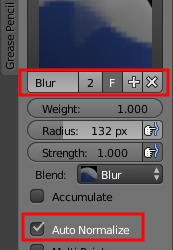
There are a couple of ways to fix this, the easiest of which is probably using the «Add» Weight Painting Tool. The exact settings aren’t super important and fairly intuitive, so go ahead and play around with them. Make sure Auto-Normalize is active, though. Then use the tool on the offending vertex, and the weird spike disappears.

The Blur tool is by far the one I use most, though, and it works great for things like this as well. It gives you less precise control than the Add/Subtract tools, though, so it’s mostly a matter of preference.
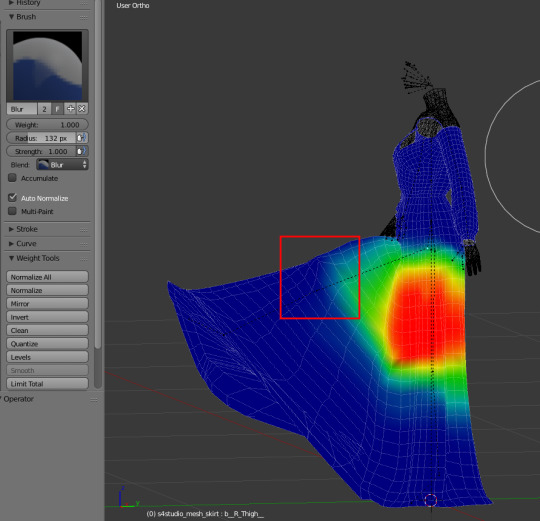
My next step is going to be smoothing out some jagged edges with the Blur tool, starting with the upper thigh area, which has some spikyness going on.
Note: The mesh I weight transferred from doesn’t use the Thigh bones at all, so with the Skirt bone gone, the skirt is purely weighted to the ThighTwist and Calf bones. This is how I weight paint long, flowy dresses as well. These types of meshes don’t really require a precise distinction between the Thigh and ThighTwist bones, and it’s easier to weight paint two vertex groups than three. Tighter and shorter dresses generally require using all three, though.
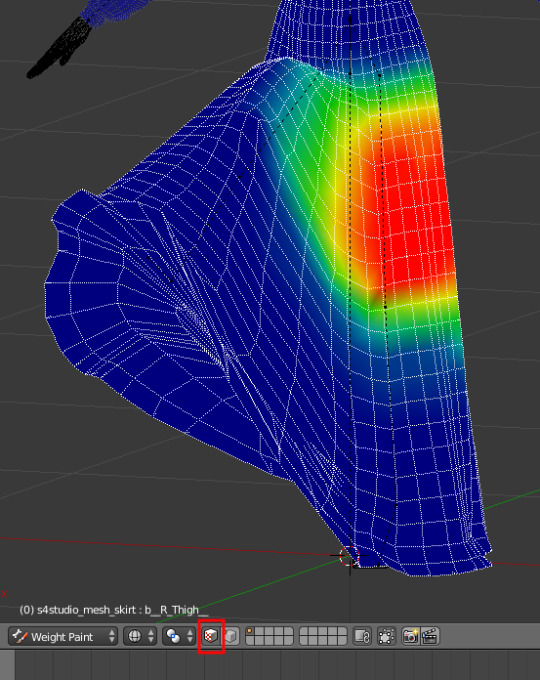
To make sure you don’t accidentally start weight painting the arms or unrelated parts of the mesh, you can select the part of the mesh you want to focus on in Edit mode and activate Face selection masking for painting by clicking the tiny red/white cube at the bottom of the screen in Weight Paint mode.
So, back to the actual weight painting – once you understand the basics, it’s really not that hard. Here, I’ve selected the different bones on the leg (b_R_ThighTwist, b_R_Calf b_Pelvis near the top) and gone over them with the Blur tool, and it looks much smoother already.
The next step is to do this, well, everywhere! This involves moving the rig into different positions to see how the mesh moves and rigorous use of the «Limit Total» button to make sure what I see in Blender is what I’m going to see in-game.
I’m not going to give a step-by-step guide here because it’s basically just the same steps over and over until I get a result I’m happy with – using the Add, Subtract and Blur tools on the appropriate vertex groups where I want to fix something, and hitting Limit Total a. lot.
Once I’m happy with how it looks in Blender, I’m going to import my mesh into Sims4Studio and test it in-game...

Aaaand we have a working dress. :)
6 notes
·
View notes