
Don't wanna be here? Send us removal request.
Statistics
We looked inside some of the posts by siliconblog689 and here's what we found interesting.
Average Info
Notes Per Post
1
Likes Per Post
1
Reblog Per Post
0
Reply Per Post
0
Time Between Posts
3 days
Number of Posts By Type
Text
4
Last Seen Tumblr Blogs


Fun Fact
China blocked Tumblr because of pornography and censorship problems in 2013.
Text
Mini Vmac Android

Mini vMac
Mini Vmac Ds
Mini Vmac Android Camera
Mini Vmac Android Phone
Mini Vmac Android Setup
Mini Vmac Android Download
Options
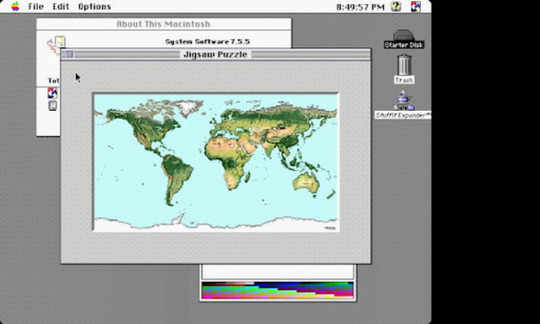
Mini vmac 26 boot. While it’s not as full featured as Basilisk II, it is a.LOT. smaller, and easier to work with. By default it’ll emulate a Macintosh II with 8 MB of ram. Hard disks & floppies are only supported through the shim method of the older Mini vMac, so you can just drag & drop your images onto the screen. Mini vMac for Android is based on Mini vMac 3.2.3 by Paul C. Mini vMac for Android is written and built using Android SDK, Android NDK and Eclipse. Mini vMac main page; You can download this project source in either zip or tar formats. You can also clone the project with Git by running. Mini vMac cannot find vMac.ROM/There is no keyboard. Make sure the file vMac.ROM and the uigfx folder are in their proper location. This should be /vmac/ unless you modified the working directory in your config file. It says Failed to initialize filesystem. Make sure that Mini vMac has been patched with the proper DLDI driver. NOTICE: YOU MUST HAVE A VALID 128KB MAC PLUS ROM FILE IN ORDER TO USE THIS APPLICATION! This is a port of the Mini vMac emulator for the Android platform. It supports almost any Android device, starting from android version 1.6. Full screen (scaled down if needed) or scrolling if needed (full size).
The main Download page provides the standard variation of Mini vMac. But much of the power of Mini vMac comes from the many other possible variations.
Mini vMac has no preference settings that persist across quitting and relaunching. This helps to keep the program simple, small, and reliable. But Mini vMac does have options that can be chosen at compile time. You can compile your own variations with precisely the combinations of options you want, following the instructions on the Build page.
Or, the Variations Service can compile it for you in seconds:
Mini vMac Variations Service . . . try it out!
Mini vMac does not create preference files or change registry settings or make any other changes to your computer. So there is no problem in having multiple variations of Mini vMac installed.
.. Options Index ..
What kind of computer do you want to run Mini vMac on? Choose one of these lines:
By default, the user interface of Mini vMac is in English. Other languages can be chosen with one of these lines:
If you would be interested in translating the user interface into some other language, see the Localization page for more details.
By default, Mini vMac emulates a Macintosh Plus. But it also can be compiled to emulate a few other computers, with one of these lines:
* The Macintosh II emulation is incomplete, and should not be relied on to give accurate results, particularly numeric results. (Emulation of the Floating Point Unit is the main incomplete part.) It does seem suitable for games, many of which appear to work perfectly well.
The Macintosh II emulation is not available on a Macintosh 680x0 target (“-t m68k”), because the compiler used doesn’t support 64 bit integers currently needed for FPU emulation.
Since a Macintosh II can be hard to find, the Macintosh II emulator will accept the ROM from Macintosh IIx. The Macintosh IIx ROM appears to work with Macintosh II hardware. The Macintosh IIcx, the Macintosh II FDHD, and the Macintosh SE/30 all have the same ROM as the Macintosh IIx.
You can choose the emulated screen size with lines such as:
Mini vMac requires that the horizontal resolution be a multiple of 32.
For the Macintosh Plus, and other Macintosh computers without Color Quickdraw, this is a hack implemented with numerous ROM patches. It emulates a computer that never existed, so there will definitely be compatibility issues with some software. Also keep in mind that most games that will work on the Macintosh Plus are designed for 512x342, and don't benefit from a larger screen. You can also set the emulated screen smaller than 512x342, which could be useful on portable devices, but that will really cause compatibility issues.
Mini Vmac Ds
For the Macintosh II emulation, these options specify the resolution of the external monitor, and shouldn't cause compatibility problems, at least if you choose values that were common on real monitors of the era. On the other hand, the Macintosh II emulation is unfinished, and not really usable yet.
Some example screen sizes:
common old Macintosh screen sizes
common current screen sizes, but divided by two, so can use Magnify in full screen
Mini vMac allows up to 4 Megabytes of Video RAM in the Macintosh II emulation. Anything over 1 Megabyte requires a hack, since each NuBus slot only gets 1 Megabyte of the address space in 24 bit mode. Space from adjacent NuBus slots is given to the emulated video card.
You can choose the emulated screen color depth with lines such as:
These options only work for Macintosh models that support Color Quickdraw, which currently means Mac II emulation only.
To use thousands or millions of colors in System 6, you need to have 32-Bit QuickDraw, which is available from the System 6.0.8 installer, under Customize.
Color depth is a compile time option, instead of run time option, to help keep Mini vMac simple and small. However, regardless of the chosen color depth, Black and White is also available, and can be selected from the 'Monitors' control panel. (In fact, you may not see color until selecting it from the 'Monitors' control panel.)
'-var-fullscreen 0' combines with -fullscreen like so:
In both cases, the 'F' control mode command disappears.
The magnification factor can be changed:
Disabling magnification with '-mf 1' removes the Control-M command.
The Macintosh, Windows, Linux, FreeBSD, and NetBSD versions have sound emulation on by default. The Dragonfly BSD and OpenIndiana version can be compiled with sound, but this hasn't been tested. The OpenBSD version can be compiled with sound, but it doesn't work. (Other versions don't implement sound.)
One reason to disable sound is to avoid the Macintosh start up beep. Another reason is to get a few percent better performance.
A Macintosh Plus outputs 8 bit sound (256 possible levels), which is then modulated by the sound volume setting (8 possible levels), and also by the square wave generator. By default Mini vMac currently outputs 8 bit sound, but there is an option to output 16 bit sound, which allows more accurate output when the sound volume setting is less than maximum, and when the square wave generator is used.
By default, Mini vMac can mount up to 6 disk images (but for the Mac 128K/512K emulation the default is 2). This is because the replacement disk driver is trying to match the size of a data structure used by the real disk driver (on the Macintosh 128K/512K this structure is smaller). You can at compile time choose to support more disk images, up to 32, which makes this data structure larger, at some slight decrease in authenticity, and some slight memory and time overhead. Use a line such as:
According to Apple’s Technical Note FL530, some versions of the System Software will not work correctly with more than 20 mounted volumes. The Standard File dialogs will corrupt the stack and may crash.
One reason for using the “-drives” option is that the installer programs for some Macintosh applications don't cope very well with multiple floppy drives, and insist on constantly ejecting the boot or destination disks rather than the install disks it has finished with. Some installers with this problem work much better if all installation disks can be mounted at once before starting.
As of branch 37, Mini vMac will check if a disk image that is being mounted looks like a Macintosh disk image format (HFS or MFS), and if not decline to mount it, showing an error message. This helps prevents accidentally corrupting other files, especially when using ImportFl.
But there are some other disk image formats that you might want to mount, such as Fat16 and ISO (which can be used by the emulated Macintosh with additional software). Or, you may be trying to create your own new disk image and want the emulated Macintosh to initialize it. In these cases you can use a version of Mini vMac compiled with the “-ndp 0” option to turn off this protection.
If a Branch option prior to 37 is chosen for compatibility with an earlier version, the default is “-ndp 0”, and you can use “-ndp 1” to turn on this protection.
With the above line, Mini vMac will update the checksum in a Disk Copy 4.2 disk image when it is unmounted. This prevents other programs that deal with such images from complaining about an invalid checksum. (I didn't include this by default, because it makes Mini vMac slightly bigger and slower.)
With the above line, Mini vMac tries to support file tags, for disk image formats that support them. There are an additional 12 bytes for each 512 byte block on a 400K or 800K floppy disk, containing some additional information that was supposed to aid in recovering damaged disks, but was never actually used much. The Disk Copy 4.2 disk image format can support these tags. (The more usual raw format, such as found in Blanks, does not.)
For full support of Disk Copy 4.2 format, enable both checksums and tags:
The above line completely disables support for disk images in disk copy 4.2 format. This could be useful when trying to compile the smallest and simplest version of Mini vMac possible for some specific purpose. It should not be used when compiling a version of Mini vMac for general distribution, because a primary goal of Mini vMac is that disk images that work with any past version of the program should also work with the current and any future version (at least when default compile options are used).
Normally the OS X and Windows versions will display a save dialog when the Mini vMac extension to create a file is used. A save dialog is not implemented in the Linux version, instead it will create the file in a folder named “out” in the application directory. When this option is used to disable the save dialog, the OS X and Windows version will also save to an “out” folder in the same fashion as the Linux version. This is helpful when using Mini vMac in automated scripts.
When this feature is enabled, if the Control key is held down and a number key from ‘1’ to ‘9’ is pressed, then Mini vMac will try to mount a disk image named from 'disk1.dsk' to 'disk9.dsk' in the folder containing the application.
This is the same series of disk image names that are automatically mounted when Mini vMac is launched. But it stops at the first image not found. So if you leave a name unused, then you can use a control-number key to mount disks after launch. Or, you can use a control-number key to remount a disk that was automatically mounted at launch and then later ejected.
One example use is if you have one copy of Mini vMac running a development environment (such as MPW) that is used to compile a program to a disk image. The disk image is then unmounted and mounted on another copy of Mini vMac running a testing environment. If the compiled program crashes badly, the development environment is not disturbed. The control-number key feature makes it easier to move the disk image back and forth between the two copies of Mini vMac.
You can swap the emulated Command and Control keys with:
This could be useful for people who are used to Windows, so that you can use Control-C to copy instead of Command-C (or actually Alt-C, as Alt is located where the Command key is on a Macintosh keyboard).
It can also be useful for people used to Macintosh who have remapped the keys on their Windows machine to swap Control and Alt. Using '-ccs' will swap them back for Mini vMac.
Linux is the same as Windows in this way, as far as I have seen.
The '-ccs' option does not affect F1 and F2, but should affect any other keys that get mapped to Control and Command.
Change the mapping between keys on the real Keyboard and keys on the emulated Keyboard, or the Mini vMac Control Mode. For example:
The first -km above allows using the Escape Key for the Mini vMac Control Mode. The second -km allows using the Control Key to mean Control Key instead of the Mini vMac Control mode.
The general format is “-km <src> <dst>”, where <src> and <dst> can be one of:
In addition <dst> can be “CM”, which means the key for the Mini vMac Control Mode.
Also in addition, <src> can be one of:
Which means the keys on the right hand side of the keyboard, when both the operating system and the keyboard hardware permit distinguishing them from the left hand keys.
It is an error to have no key mapped to the control mode.
Where <dst> can be any of the values allowed for the -km option, except “CM”.
Chooses which emulated key is toggled by the ‘K’ command of the Mini vMac Control Mode.
When this option is not used, the build system will pick an emulated key that is not mapped to any real key. That will be the control key if no “-km” options are used.
Some commonly used keys, such as the arrow keys, are a bit of a stretch to reach, and more importantly, their positions can be different on different keyboards. The Alternate Keyboard Mode provides an alternate way to type some of these keys.
The program starts with the mode on. Pressing the 'm' key leaves the mode. The intent is that you only leave the mode temporarily to type text. (I believe this is a similar idea to how the vi text editor works.) The alternate keyboard mode is entered by pressing the ';' key. Pressing ';' has no effect when in the alternate keyboard mode, so it can be used at any time to bring the program to a known state.
In the Alternate Keyboard Mode, the letter keys are remapped as follows (non letter keys are unchanged):
j - Left arrow l - Right arrow i - Up arrow k - Down arrow
s - Shift d - Option f - Command
z - F1 (often means Undo) x - F2 (often means Cut) c - F3 (often means Copy) v - F4 (often means Paste)
e - BackSpace r - Return t - Tab g - Enter y - Escape
a - SemiColon u - ( o - ) b - BackSlash h - Equal n - Minus q - Grave
There is a visual indication when the mode is off, intended to be easy to see in peripheral vision, without covering up where text is normally typed.
Holding down the command, option, or shift keys will temporarily turn off the Alternate Keyboard Mode. So if you have the mode on, commands like Command-S will still work, and anything except lowercase letters can be typed without leaving the mode.
The Virtual-Key Codes of Microsoft Windows, that are independent of differences in keyboard hardware, turn out not to be independent of the choice of Keyboard Layout. Changing the Keyboard Layout to something other than 'US' may scramble the Virtual-Key Codes, strangely enough. Mini vMac will check the current Keyboard Layout, and attempt to unscramble the codes, so that the Keyboard Layout chosen in Macintosh operating system running within Mini vMac will work properly. You can disable this fix with:
Mini Vmac Android Camera
One reason for disabling it is because this is fairly large amount of code and US only users don't need it. But also it can be disabled because I'm not sure I really understand this. Why did no one complain about this issue in a decade?

This option is only for Microsoft Windows.
You can use one of these lines to set initial speed:
The default speed is usually 8x. For the Macintosh II the default speed is 4x. (A Macintosh II has twice the clock rate, so the actual number of instructions per second executed by default is the same. Actually, a real Macintosh II has a 68020 which executes more instructions per clock cycle than a 68000, but Mini vMac doesn’t account for that yet.)
You can use one of these lines to set initial value of the Run in Background option:
You can use one of these lines to set initial value of the AutoSlow option:
For Macintosh II emulation, AutoSlow is disabled by default. AutoSlow may need some further tuning to work well with Mac II emulation. (Beta) AutoSlow is now enabled by default for Macintosh II emulation (unless a prior Branch option is chosen).
Mini vMac estimates the number of clock cycles used by each instruction excuted. There are three levels of accuracy.
In '-ta 0' all instructions are assumed to take the same number of cycles. This closely matches Mini vMac 3.1.3 and earlier.
For '-ta 1', Mini vMac assigns an average number of cycles for each of the 65536 primary opcodes. This table is generated using timings from Motorola documentation. When a range of timings are possible for a primary opcode, an average was just guessed. In some future version of Mini vMac, this table should be tested and calibrated by comparing to real hardware.
For '-ta 2', Mini vMac supplements the cycles table by computing more accurate estimates for certain instructions depending on the current data. It is still not completely accurate. Completely accurate timing would be exceedingly difficult. For example, the CPU and video output conflict for accesses to RAM, and that would seem very complex to model.
Currently 68000 timings are used even in the 68020 emulation. More accurate timing for 68020 should be added in a future version. Truly accurate timing for 68020 would be much more difficult than for the 68000 because of pipelining and caching, probably to the point of being unfeasible for Mini vMac. But more accurate averages should be possible.
Most computers emulated by Mini vMac have a 68000 processor. But you can force Mini vMac to emulate a 68020 processor with:
By default, Mini vMac emulates a Macintosh Plus with 4M of memory. But it also can be compiled to emulate other memory sizes, depending on model:
The build system checks that the memory size you specify is supported by the Macintosh model you have chosen to emulate.
The “Rate of Insertion Point Blinking” is stored in the Parameter RAM. The default is 3 (Fast), except for Macintosh II emulation where it is 8 (Medium). Must be between 1 and 15.
The “Double Click Time” (the maximum time between mouse button clicks which will be treated as a double click) is stored in the Parameter RAM. The default is 5 (Fast), except for Macintosh II emulation where it is 8 (Medium). Must be between 1 and 15.
The number of times the selected menu item blinks when when the mouse button is released, which is stored in the Parameter RAM.
The delay after a key is held down until it begins to automatically repeat, which is stored in the Parameter RAM. Must be between 0 and 15.
The rate at which a key automatically repeats when it is held down, which is stored in the Parameter RAM. Must be between 0 and 15.
The Sound Volume is stored in the Parameter RAM. The default is 7 (Maximum) when sound is enabled, otherwise it is 0.
The color that is used for selected text, for example. It is stored in the Parameter RAM. There are three separate options for the red, green, and blue components. Each component value must be betwen 0 and 65535. If its option is not present, the value of the component is 0. These options are only allowed for Macintosh II (or IIx) emulation.
The “GetPRAM” tool can be used to get values for these options. That is, first set the desired highlight color in the “Color” Macintosh Control Panel, and then run GetPRAM.
The Parameter RAM has fields for Latitude and Longitude, which can be set with the Map control panel, and are only used by a few programs. Mini vMac tries to automatically set these fields by asking the host operating system. This is currently implemented only for older Macintosh, not including the latest port for Cocoa. When not implemented, both fields are set to zero. The automatic setting of these fields can be disabled by:
With the above option, the Latitude and Longitude can be set manually:
The above example is for New York city. The Latitude and Longitude in degrees is devided by 90 and then multiplied by 2 to the 30th power. The “GetPRAM” tool can be used to get values for these options. That is, first set the desired highlight location in the “Map” Macintosh Control Panel, and then run GetPRAM.
If ‘-alc 0’ is not used, then the ‘-lcy’ and ‘-lcx’ options will be ignored without warning. This is so the output of GetPRAM can be used directly without always disabling Automatic Location.
These options may not be used when emulating a Mac 128K, 512K, or 512Ke, which do not have Extended Parameter RAM.
The Parameter RAM has fields for Time Zone, which include an offset in seconds from Greenwich mean time, and a flag for whether daylight saving time is in effect. The offset can be set with the Map control panel, and the flag can be set with the Data and Time control panel in System 7.5. These fields are only used by a few programs. (The system clock is kept in local time, and most programs use only local time.) Mini vMac tries to automatically set these fields by asking the host operating system. This is implemented for Macintosh, Windows, Linux. When not implemented, both fields are set to zero. The automatic setting of these fields can be disabled by:
With the above option, the Time Zone field can be set manually:
When the offset is even multiple of 3600, as is almost always the case, you can use:
The “GetPRAM” tool can be used to get values for these options. That is, first set the desired highlight location in the “Map” Macintosh Control Panel, and if desired set the Daylight Savings flag in the “Data and Time” Macintosh Control Panel, and then run GetPRAM.
If ‘-alc 0’ is not used, then the ‘-lcd’, ‘-lczs’, and ‘-lcz’ options will be ignored without warning. This is so the output of GetPRAM can be used directly without always disabling Automatic Time Zone.
These options may not be used when emulating a Mac 128K, 512K, or 512Ke, which do not have Extended Parameter RAM.
This option turns off all but the minimum Mini vMac extensions, such as importing and exporting the clipboard, and creating new disk images and files, leaving just what is needed for the replacement disk driver to operate.
This makes the program smaller, and perhaps reduces potential security concerns. So it could be worth doing for when the extensions aren't needed, such as for most games.
This option disables the more accurate mouse emulation normally used in Full Screen Mode, which looks at the motion of the real mouse rather than its absolute position. This allows Mini vMac to work somewhat better on tablet computers without a mouse. But such computers are still not really supported.
Normally, when in Full Screen Mode, Mini vMac will try to “grab” the keyboard, preventing the operating system from intercepting keys. So in the Windows version, the ‘windows’ key can be used as an ‘option’ key, instead of popping up the “Start” menu. And in the OS X version, Command-Tab won't switch away from Mini vMac. This is also implemented in the X version.
This option disables grabbing the keyboard, allowing the operating system to intercept keys when Mini vMac is in Full Screen Mode.
The ‘I’ command of the Mini vMac Control Mode, which presses the emulated Interrupt Button, can be disabled.
In a future version, it may be disabled by default. (In the original Macintosh, the Interrupt Button was disabled by default. You needed to install the “Programmer’s Switch” to use it.)
The ‘R’ command of the Mini vMac Control Mode, which presses the emulated Reset Button, can be disabled.
In a future version, it may be disabled by default. (In the original Macintosh, the Reset Button was disabled by default. You needed to install the “Programmer’s Switch” to use it.)
The ‘K’ command of the Mini vMac Control Mode, which toggles the emulated control key, can be disabled.
In a future version, it may be disabled by default. (The original Macintosh did not have a control key. And, using this command accidentally would be confusing.)
This option is only for Linux and other X versions, when color depth is zero. Passing single bit per pixel images to the operating system is suspected to be unreliable, so Mini vMac now always passes 32 bit images. This option forces it to use single bit images, which may be more efficient, when you know that it works (i.e. there weren't problems in Mini vMac 3.4 and earlier).
This option is only for the Cocoa version for OS X. On computers with more than one GPU, it allows the operating system to choose which one is used. Otherwise on a MacBook pro, it is reported that the higher power discrete GPU is always used instead of the lower power integrated GPU, and that besides wasting power for no noticable benefit, it also takes time to switch on the discrete GPU when Mini vMac starts.
This will probably become the default in a future version.
This option is only for the Cocoa version for OS X which, as of Mini vMac 36, is normally signed with a certificate from Apple, so that the Gatekeeper feature of OS X will permit it to run.
Gatekeeper was added in OS X Mountain Lion (10.8). By default, the operating system will refuse to run applications downloaded from the internet, unless Apple considers it trustworthy (because it is digitally signed by a developer registered with Apple). Gatekeeper is in some ways a good idea, but some people consider it as one step along the way to making OS X like iOS, where no software can be installed without Apple's permission, and emulators are forbidden, including Mini vMac.
When Mini vMac is signed, Apple can at any time choose to revoke the certificate, and Mini vMac will stop working.
Another issue is that, since Mini vMac doesn’t use Apple’s time stamp server (because that would break reproducible builds, among other problems), Mini vMac will probably stop working when the certificate expires, 5 years after being issued. (The plan is to renew the certificate every year, so that a compile of Mini vMac should work for at least 4 years.)
To avoid these issues, you can disable code signing. The disadvantage is that OS X will by default refuse to run it. One way to override Gatekeeper, giving an application permission to run, is to hold down the control key and click on its icon (or right click) to get a contextual menu, then choose the Open item, and in the warning dialog that comes up click on the Open button. (This only needs to be done the first time Mini vMac is run.)
This option is only for the Cocoa version for OS X. It enables “Sandboxing”, an Apple security mechanism, so that any bugs, or even maliciousness, in Mini vMac can only do limited harm. However, it does remove some capabilities. The single requested “entitlement” allows Mini vMac to read and write files that the user has selected, with the Open File dialog, or by dragging into the Mini vMac window or icon.
But Mini vMac’s ability to automatically find files by name in special locations is severely restricted. It is prevented from finding “vMac.ROM”, “disk1.dsk”, “disk2.dsk”, etc. in the folder containing the application. It can find such files in a “mnvm_dat” folder created inside the application, but only read only. It does not have access to “~/Library/Preferences” to find “vMac.ROM” (but it does get access to the corresponding folder inside its container folder, which is obscure). It does have read only acces to “/Library/Application Support/”. Furthermore, if these named files are links, that won’t work unless the file linked to is in one of the few places that a Sandboxed application has access to.
This may become the default in a future version.
Patch the ROM to replace the “Happy Mac” icon displayed on boot when a disk is inserted, with one of the images designed by Steve Chamberlin for his Mac ROM-inator (used with permission).
The build system will normally select the correct ROM Size for the Macintosh model you have chosen to emulate. But you can override this, such as to use a ROM image for Steve Chamberlin’s Mac ROM-inator. If you use this option, you will also need “-chr 0” as described below. (You may also want “-drc 0 -drt 0 -speed z -ta 2 -sony-sum 1 -sony-tag 1” to test the image with maximum accuracy.)
The first 4 bytes of a Macintosh ROM contain a checksum of the remaining bytes, and there is code in the ROM to check the checksum on boot. Mini vMac patches the ROM image, so it disables this checking code. Mini vMac does the check itself before patching the ROM. It also checks that the 4 byte checksum matches one of the known ROM images for the model you have chosen to emulate. If you want to have Mini vMac use a ROM image that has been modified you can disable these checks with:
There is code in the Macintosh ROM to checksum the ROM at boot. Since Mini vMac patches the ROM, it also patches out this check. If you are using a ROM image with Mini vMac that is already patched (such as for Steve Chamberlin’s Mac ROM-inator ), this check may already be patched out. In that case Mini vMac doesn't need to, and probably shouldn't, to avoid interference in case a different method of patching out is used.
Mini Vmac Android Phone
There is code in the Macintosh ROM to test proper operation of RAM at boot. Mini vMac normally patches the ROM to disable this test, to speed up booting. For greater realism, you can leave this test in.
This enables Mike Fort's LocalTalk emulation. There are currently some limitations. It is only implemented for OS X. It requires running the command “sudo chmod ugo+rw /dev/bpf*” to allow Mini vMac (and everyone else) access to all network traffic. The “-lt” option also causes Mini vMac to run in the background by default, because Mini vMac can't be a proper LocalTalk node if it isn't running. And you need to manually turn on AppleTalk in the chooser - I can set the PRAM flags to boot with AppleTalk already on, but it doesn't work properly.
There is a now a second option for transporting LocalTalk packets, using UPD, by Rob Mitchelmore. It does not require setup or administrative privileges (no “sudo chmod ugo+rw /dev/bpf*” needed). The options are:
The new UPD option is the default as of Mini vMac branch 37. But if a prior Branch option is chosen for compatibility with an earlier version, the default is BPF.
When compiled with the 'Icon Master' setting turned on, Mini vMac will try to take ownership of Disk Image files and ROM Image files. It is better to have at most one copy of Mini vMac compiled with '-im 1' on a single computer. It may be preferred to have no copies of Mini vMac compiled with '-im 1', to avoid possible conflicts with other programs.
In Mac OS X, Windows, and Mac OS 9 and earlier, double clicking on a Disk Image icon will open it with a copy of Mini vMac compiled with '-im 1'. Also, Disk Image and ROM Image files will be given Mini vMac icons.
Mini Vmac Android Setup
In Mac OS 9, and early versions of OS X, Disk Image files should have the creator type set to “MnvM” for double clicking to work (see “SetFType”). Also, the file type should be “MvIm” to see the Mini vMac Disk Image icon. ROM Image files should have the creator type “MnvM” and the file type “ROM!” to see the Mini vMac ROM Image icon.
In Windows and later versions of Mac OS X, Disk Images files should have a name that ends in “.dsk” for double clicking to work and to see the Mini vMac Disk Image icon. ROM Images files should have a name that ends in “.ROM” to see the Mini vMac Disk Image icon.
In Windows, a copy of Mini vMac compiled with '-im 1' will install itself in the registry when it is launched. So it will not take ownership of Disk Image and ROM Image files until after the first launch. (And the Mini vMac document icons may not appear until the computer is rebooted.) Mini vMac can only install itself in the registry if it is launched from an administrator account.
This setting currently has no effect in the Linux and other X versions.
When enabled, Mini vMac will display a warning message when it encounters an unexpected situation. The warning will include a 4 digit hexadecimal number that indicates the particular situation. A warning is displayed only after the first abnormal situation Mini vMac encounters, thereafter it is suppressed.
This is not enabled by default, because in the final stable version, it mostly reports about harmless bugs in Macintosh 680x0 software. Enabling it can be useful for programmers working on Mini vMac, and perhaps also for programmers writing Macintosh 680x0 software.
When trying to emulate some aspect of Macintosh hardware, my current strategy is not to try to figure it all out and then implement the entire emulation as best I can. Because if I did that, inevitably there would be a mistake somewhere, and when that causes some software to malfunction, I won’t have any clue of where to look for the mistake. Instead I would start with a place holder Abnormal Situation report. Then I find some Macintosh software that reaches that report, and look at that area of its code, and try to figure out what it is trying to do. Then I try to implement just enough emulation for it to work correctly, and give an Abnormal Situation report for code that does something else. If the Macintosh software still doesn't work, the problem is probably in the code I just wrote. If it does work, then I next try find some other Macintosh software that hits one of the new Abnormal Situation reports. And iterate. The result is code that is usually correct for what it does, and will tell you exactly where to look when it reaches something that hasn’t been implemented yet.
If this option is present, the build system will generate source code that causes the compiler to generate an error. This is for testing the variation service.
If this option is present, the build system will treat it as an error. This is for testing the variation service.
Normally it is an error for the same option to be used twice. If this option is present, then options to the right of it will override options to the left of it. It is still an error for an option to be used twice on the same side of ‘!’.
This option is for future use. It currently has no effect. (Beta) It is now used in Mini vMac 37.
It tells the build system that the requested options were from a specific branch (version) of Mini vMac. The ‘P’ command of the Mini vMac Control Mode gets the options from an existing variation, and includes this Branch setting. If the default settings have changed from since that older version, then the build system will use defaults of the old version, rather than the current defaults. So the newly generated variation behaves as close as possible to the earlier variation.
The ‘P’ command retrieves the options in a canonical form. It always generates a “-br” option for the current version, rather than copying any “-br” option passed to the build system.
:
If you find Mini vMac useful, please consider helping the Gryphel Project.
Next - Options for developers
www.gryphel.com/c/minivmac/options - feedback copyright (c) 2020 Paul C. Pratt - last update 3/2/2020
Mini Vmac Android Download
0 notes
Text
Virtual Android On Mac

I'm trying out using VirtualBox and Android x86 as a faster alternative to the emulator that comes with the Android SDK, which is so laggy as to be unusable on my 2GHz quad core Mac with 16GB ram. Sep 22, 2021 Believe it or not, you can actually use VirtualBox to create your own Android emulator for Mac. Download VirtualBox on your Mac machine, and then set it up with the necessary ISO image from. Version 2.0 BETA-1 R7 AVAILABLE Game Emulator For Mac Multiplatform. Is there an age of empires for mac os catalina. Finally, Retro Virtual. Download Virtual Android - Game Emulator & Dual Space PC for free at BrowserCam. Parallel Space Technology Inc. Published Virtual Android - Game Emulator & Dual Space for Android operating system mobile devices, but it is possible to download and install Virtual Android - Game Emulator & Dual Space for PC or Computer with operating systems such as Windows 7, 8, 8.1, 10 and Mac.
Click on releases option and download the latest preview version by clicking of android emulator m1 preview.dmg. It will download a DMG file. Click on the DMG file in downloads folder of your Mac.
How to Play Android Games and Run Android Apps on PC or Mac. Many times, you try to play some of the larger memory-consuming Android games on your phone, but suddenly find that your phone is overheating or cannot run the game you want properly, and has to pause or wait for it to recover. VirtualBox doesn’t typically fall under emulators, but it helps you create one though. The tool you need to use in order to be able to run Android apps on your device is called ARC Welder. Originally ARC, which stands for App Runtime for Chrome was an experiment specifically.
Many times, you try to play some of the larger memory-consuming Android games on your phone, but suddenly find that your phone is overheating or cannot run the game you want properly, and has to pause or wait for it to recover. For a game enthusiast, this is very maddening!
The solution, in this case, is to try to overcome Android phone overheating or to search for a way to play Android games on PC instead of your mobile phone to save your battery, storage and avoid Android phone overheating.

Luckily, there are some ways and software that allow you to run Android apps on PC and MaC, and in this article, I will explain the 7 best ways to play Android games on PC whether by installing a virtual Android system on PC or by using one of the Android emulators available.

Run Android Apps on Mac #1 BlueStacks — Best for Running Apps. BlueStacks (also called BlueStacks App Player) is the oldest and the most popular way of running Android apps for Mac. You will be able to run almost any Android app using this simple emulator. It’s the best choice if you want to run WhatsApp on your Mac or access your Instagram. Android emulators for macOS make it possible to run Android apps on a Mac.With this, one can enjoy over 2.8 million apps from the Play Store and elsewhere. There are several Android emulators for Mac, but BlueStacks is one of the best and easiest for general users.
Also Read: How to Play PS4 Games on Any Android Phone with Ease
Install Virtual Android System to Play Android Games on PC
The first method we are going to talk about is installing a virtual Android system on your Windows or macOS PC. You may want to know that these virtual Android systems are developed to help developers testing their Android Apps before publishing it on Google Play Store, but luckily, it runs Android games properly, and some of them even run high-end Android games like PUBG or the Call of Duty for Mobile.
1.GenyMotion
GenyMotion is a software that allows you to run Android system on your PC by using your virtual machine-like Oracle VirtualBox or VMware, or by downloading the full bundle of GenyMotion that contains a VirtualBox already.
The best thing of GenyMotion is that it’s available on Windows, macOS and Linux operating systems, so you will be able to run and play Android games on PC whatever the operating system you are using.
GenyMotion is a free software with some in-app purchases, it’s made for developers but allows you to use an Android system on your PC.
You will have the option to run whether the Android 4.2 system that’s used on Nexus One, or Android 6.0 that’s used on Nexus 6, and you can easily switch between them.
Moreover, GenyMotion’s best feature is that it’s available also for PC and the cloud, which means that you will be able to play AAA Android games even if you don’t have a high-end PC by playing over the network via the internet browser like Google Chrome or Mozilla Firefox.
2.Android-x86
This is an unofficial tool that allows you to run the Android system on devices powered by AMD and Intel x86 processors instead of having to run them on ARM chips that can be founded on smartphones.
You will have to allow Android-x86 to install applications from Unknown sources as it doesn’t have access to Google Play Store, so you can install your applications and games by using APK files.
Also, you can run Android-x86 inside a virtual machine like VirtualBox, but make sure of enabling either VT-x or AMD-V in your host operating system’s BIOS to be able to run this version of Android over the VirtualBox software.
By default, you will find applications like Alarm Clock, Calendar, Browser, Camera, Email and others installed on your Android virtual system, and you can install your applications either by enabling Unknown Sources as mentioned before or by using AndAppStore client that contains a huge library of Android Apps.
https://siliconblog689.tumblr.com/post/665564697831096320/architect-3d-mac-free. Also Read: How to Disable Notifications While Playing Games on Android
Download Best Android Emulators for PC and Mac
Wd app setup macos. The second method to play Android Games on your PC is using one of the emulators we are going to recommend.
Virtual Android On Mac Desktop
First, you need to know the difference between an Emulator and a Virtual Machine, as the first one only emulates hardware without relying on the CPU running your PC. On the other hand, Virtual Machines modifies the system to allow it to run on your CPU and its architecture like changing the architecture of Android system from ARM to AMD and Intel x86 as we have seen on Android-x86 software.

3.Android Studio’s emulator
This is the default and official development console for Android and it’s developed by Google. It comes with many tools that help developers to run and test their Android Apps before proposing it to Google Play Store, but it also allows you to deal with your games as if you were a developer.
The weak point of Android Studio’s Emulator is that its installation takes more time than the others and it’s not recommended for consumer level, but I put it here as it still allows you to play your games for free and without Ads nor in-App purchases.
4.Nox App Player
Nox App Player is one of the best Android emulators for PC that help you run your games easily and with some features that you might find in any other software like Screen Recording.
Run Ipad App On Mac
All you have to do to use Nox App Player is to download, install and run it, and you will be ready to play Android Games on PC for free.
Android On A Virtual Machine
It has a simple and easy-to-handle user interface along with some buttons distributed over its window to provide you with a touchscreen-like experience.
And it also has a Keyboard Mapping that helps you improve the performance of high-end games.
After installing Nox App Player, you will first need to enable root on it by heading into the Settings and select On from the drop-down menu. Once you perform the previous steps, restart the application, drag your APKs from the desktop into its screen and start playing.
Moreover, Nox App Player is available for both Windows OS and macOS so you can use it whatever the operating system you are running your PC on.
5.AMIDuOS
AMIDuOS is a simple application that allows you to play both Android games and FireOS games by downloading and installing the games you want via the Amazon App Store and Google Play Store.
The application offers you the gaps packages for Android 4.4.2 Jellybean, Android 5.0.1 Lollipop and Android 5.1.1 Lollipop, you can install the version you want based on the version of AMIDuOS you do have, and once downloaded and installed you will be able to download and install Apps from Google Play Store directly.
You can also get the root access to your Android OS on AMIDuOS by going to Settings, AMIDuOS Configuration Tools, and check the box next to RootMode, so you will have all the permissions to install and uninstall what you want.
Run Ios Apps On Mac Os
6.BlueStacks 4
We can’t write about emulating Android OS or playing Android Games on PC without mentioning the most popular emulation software in the world, BlueStacks.
BlueStacks does not emulate the complete Android OS experience, but it’s almost the easiest and one of the best solutions to run Android Apps on PC and Mac too.
The best part of BlueStacks is that it allows you to directly sync your phone’s Apps and games without having to download them manually, and you can even sync photos, text messages, settings and more from your phone to BlueStacks.
BlueStacks has the best and the simplest user interface among the other applications, with the ability to use your laptop’s touch screen to control it, and it has a stretch and fit to screen function that makes your laptop works like a Kindle.
Syncing your phone with your PC via BlueStacks will help you not having to hold your phone every time you receive a message as it will be shown directly on your PC specifically on BlueStacks window.
And above that all, it also allows you to install applications from outside your phone which means that you have much more options for games and Apps.
7. Remix OS Player
Remix OS Player was a truly new player on the field that allowed you to emulate Android 6.0 Marshmallow on your PC.
It’s developed by Jide and it has a very simple installation process which makes its one of the best Android Emulators for consumers and gamers who are not keen on developing Android Apps and games.
Unfortunately, Remix OS Player is no more supported as the company that developed it has turned from ordinary users to enterprises, but you can still download an old version of it and have some good time via SOURCEFORGE.
Conclusion
By reaching this line, you now have the best and the most trusted methods to play Android Games on PC for free either by using Android Virtual Machine or by downloading and installing one of the Android emulators I have shown you above.
The best part of having your Android games on PC is that you can play with the full keyboard of your laptop and even can use a joystick, which will help you rank between your friends and family whom you should share this article with them to play together on your PCs.
How To Run Android Apps On A Mac
Pro Tips – Recover Lost Data from Android Phone

How To Install Android Apps In Mac
If you are searching for a method to root your phone to recover some data that you have lost due to wrong formatting your phone or an error happened while installing a custom ROM or any other reason, I advise you to stop looking for that.
As now, and with Gihosoft Free Android Data Recovery software, you will be able to recover any type of data without rooting your phone or paying a penny.
Virtual Android On Mac Download
Whether you are looking for your photos, videos, call logs, contacts or WhatsApp Messages, I recommend you using Gihosoft Free Android Data Recovery, which will help you recover all your lost data just be connecting your phone to your PC via USB within minutes.
Open Android On Mac
Related Articles
Please enable JavaScript to view the comments powered by Disqus.
Download Virtual Android - Game Emulator & Dual Space PC for free at BrowserCam. Parallel Space Technology Inc. published Virtual Android - Game Emulator & Dual Space for Android operating system mobile devices, but it is possible to download and install Virtual Android - Game Emulator & Dual Space for PC or Computer with operating systems such as Windows 7, 8, 8.1, 10 and Mac.
Virtual Android On Mac Computers
Let's find out the prerequisites to install Virtual Android - Game Emulator & Dual Space on Windows PC or MAC computer without much delay.
Select an Android emulator: There are many free and paid Android emulators available for PC and MAC, few of the popular ones are Bluestacks, Andy OS, Nox, MeMu and there are more you can find from Google.
Virtual Android On Mac Laptop
Compatibility: Before downloading them take a look at the minimum system requirements to install the emulator on your PC.
For example, BlueStacks requires OS: Windows 10, Windows 8.1, Windows 8, Windows 7, Windows Vista SP2, Windows XP SP3 (32-bit only), Mac OS Sierra(10.12), High Sierra (10.13) and Mojave(10.14), 2-4GB of RAM, 4GB of disk space for storing Android apps/games, updated graphics drivers.
Finally, download and install the emulator which will work well with your PC's hardware/software.
How to Download and Install Virtual Android for PC or MAC:
Open the emulator software from the start menu or desktop shortcut in your PC.
Associate or set up your Google account with the emulator.
You can either install the app from Google PlayStore inside the emulator or download Virtual Android APK file from the below link from our site and open the APK file with the emulator or drag the file into the emulator window to install Virtual Android - Game Emulator & Dual Space for pc.

You can follow above instructions to install Virtual Android - Game Emulator & Dual Space for pc with any of the Android emulators out there.
0 notes
Text
Sims 1 For Mac Free

The Sims 4 Mac Free download Repacklab
The Sims 4 Mac is a 2014 life simulation video game developed by the Redwood Shores studio of Maxis and published by Electronic Arts. It is the fourth major title in The Sims series and was originally announced on May 6, 2013. It was released in North America on September 2, 2014, for Microsoft Windows. Repackalb.com sexy games
The Sims 4 Free Download For MAC With All DLCs 2021 UPDATED Control smarter Sims with unique appearances, personalities, behaviors, and emotions. Experience new levels of creativity when you sculpt Sims with the powerful Create A Sim and design beautiful homes with tactile, room-based Build Mode.
A Mac-compatible version of the game was released on February 17, 2015. The Sims 4 is the first PC game to top all-format charts in two years. The game has received mixed reviews since its release, with the majority of criticism directed towards its lack of content.
Gameplay
The Sims 1 Windows 7 Graphics For; The Sims 1 Free Download The; Windows Android Mac iPhone PWA Web Apps Advertisement Download The Sims - Best Software Apps The Sims 4 1. 3.5 (32709 votes) Download The Sims 4 for Windows The Sims 4 for Mac The cartoony life simulators latest outing The Sims 4 is a simulation game that gives you total control over. 8/10 (573 votes) - Download The Sims 4 Mac Free. Create your own avatar and live the life of your dreams. Have fun playing The Sims 4 with a new installment full of realistic and sensitive characters. Living a new life isn't always possible, but you can always resort to social networks to invent. Skins, Clothing & Heads. As noted above, these instructions also apply to the skins worn by NPC's and for 3D mesh parts which belong to some objects (these are rare but we do have some on the site). Add ALL.bmp.cmx and.skn files in the zip you download to: c: Program Files (x86) Maxis The Sims Gamedata Skins.
The Sims 4 is a life simulation game, similar to its predecessors. Players create a Sim character and control their life to explore different personalities which change the way the game plays out. Sims can multitask. Sims’ moodlets change the gameplay by influencing the Sims’ emotional state, introducing new interaction options. Planet Nomads
Similar to previous Sims games, player-created challenges abound. One of the most prevalent is the Legacy Challenge, in which players create a single Sim and try to make its family line last for ten generations.
The Sims 4 Mac Free download Repacklab
Sims 1 For Mac Free Download
Create a Sim
One major change to Create a Sim functionality is that sliders have been replaced by direct mouse manipulation. By clicking, dragging, and pulling with the mouse, players may directly manipulate the facial features of a Sim. Players can directly manipulate any body part including the abdomen, chest, legs, arms and feet. In previous Sims games, only the fitness and fatness can be manipulated on a Sim’s body; however, fitness and fatness levels may still be adjusted in The Sims 4 with sliders as in previous games. Yu-Gi-Oh! Legacy Of The Duelist Link Evolution
The base game comes with over 40 hairstyles for both male and female Sims. There are up to 18 hair color options per hairstyle. Selections of premade designs of Sims are available to choose from, and range in body shape and ethnicity.
Seven life stages are available including baby, toddler, child, teenager, young adult, adult and elder. The baby life stage is accessible only through the birth of a Sim and not available in Create a Sim. Toddlers were initially absent from the original game release, but were added in the January 2017 patch.
Build/Buy mode
In The Sims 4, build and buy modes have been combined and are treated as a single feature. A detailed build-and-buy system is included along with neighborhoods and landscaping. Some locked buy mode items may be unlocked through the progression of career levels. Entire buildings and rooms can be moved across a lot. Becastled
The Sims 4 Mac Free download Repacklab
There is a search option to search for build and buy mode options. There are premade rooms that can be placed instantly. Wall heights can be adjusted. There is a pool tool feature with triangular, square and octagonal pool tools. There are build mode cheat codes such as “motherlode”, which enables the player to automatically gain §50,000 (Simoleons) added to a Sim’s household. HuniePop 2: Double Date
Add-ons (DLC): The Sims 4 Mac
Digital Deluxe Plus Seasons BundleStar Wars™: Journey to Batuu Bundle Cats & Dogs BundleSnowy Escape Expansion PackParanormal Stuff PackNifty Knitting Stuff PackCreate A Sim DemoStar Wars™: Journey to Batuu Game PackEco LifestyleLife of the PartyAwesome Animal HatsUp All NightDigital SoundtrackDigital Deluxe Edition – KeyMovie Hangout StuffTiny Living StuffHoliday Celebration PackKids Room StuffToddler StuffLaundry Day StuffBackyard StuffSpooky StuffRomantic Garden Stuff Bowling Night StuffCool Kitchen + Moschino + Luxury Party + My First Pet StuffPerfect Patio + Vintage Glamour + Fitness + Dine Out StuffRealm of Magic + Parenthood + Jungle Adventure + Vampires + StrangerVille + Outdoor RetreatSpa Day + Get To Work + Seasons + Get Together + City Living + Island LivingDiscover University + Cats & Dogs + Get Famous
Requires a 64-bit processor and operating system OS: Metal required. Mac OS® X 10.11 (El Capitan) CPU: Intel Core 2 Duo 2.4GHz Processor or better RAM: At least 4 GB RAM HARD DRIVE: At least 15 GB of free space with at least 1 GB additional space for custom content and saved games VIDEO: NVIDIA GeForce GTX 680, AMD Radeon RX 560 or better INPUT: Keyboard and Mouse ONLINE REQUIREMENTS: Internet connection required for product activation.
Requires a 64-bit processor and operating system OS: Mac OS® X 10.11 or later PROCESSOR: Intel Core i5 or better VIDEO CARD: NVIDIA GeForce GTX 680, AMD Radeon RX 560 or better MEMORY: 8GB RAM HARD DRIVE: 18 GB of Hard Drive space
The Sims 4 Free Download For MAC With All DLCs 2021 UPDATED
Control smarter Sims with unique appearances, personalities, behaviors, and emotions. Experience new levels of creativity when you sculpt Sims with the powerful Create A Sim and design beautiful homes with tactile, room-based Build Mode. Use The Gallery to browse, share, and download new content without ever leaving your game. Control the mind, body, and heart of your Sims and explore your new gameplay possibilities in vibrant neighborhoods that bring your stories to life.
Life of the Party Digital Content – Features the Flaming Tiki Bar and sleek, stylized outfits for your Sims.
Up All Night Digital Content – Features the Laser Light Show, fun decorations, and outrageous party costumes.
Awesome Animal Hats Digital Content – Features a collection of fun animal hats for your Sims to wear and show off!
The Sims 4 Digital Soundtrack – A digital soundtrack featuring music from the game.
Release name: The Sims 4 Mac.zip
Size: 9.91 GB
Language: Český, Dansk, Deutsch (DE), English (US), Español (ES), suomi, Français (FR), Italiano, 日本語, 한국어, Nederlands, Norsk, Polski, Português (BR), Русский язык, Svenska, 中文(繁體)
Following are the main features of The Sims 4 that you will be able to experience after the first install on your Operating System.
Single player multi task game.
Stunning visuals.
Can create your own sims.
Can control their 24 hours activities.
Elegant and absorbing life simulation game.
Sims 1 For Mac Free Downloads

Before you start The Sims 4 Free Download make sure your Mac meets minimum system requirements.
OS: Mac OS® X 10.7.5 (Lion)
PROCESSOR: Intel Core 2 Duo 2.4Ghz Processor or better
VIDEO CARD: NVIDIA GeForce 320M, 9600M, 9400M,ATI Radeon HD 2600 Pro or better. Video RAM of 256MB or better.
MEMORY: 4GB RAM
HARD DRIVE: 12 GB of Hard Drive space
INPUT: Keyboard and Mouse
Click the “CLICK HERE TO DOWNLOAD” button below and you should be redirected to the download page.
Once the download is done, install the game (To do this you must have WineSkin, which you can get here).
Double click inside the folder & run the setup
Click on The Sims 4 on desktop & play!
Sims 1 For Mac Free Download
Before installing the game you must watch this video
Sims 1 For Mac Free Full
You will get the Sims 4 (Full Version) including these expansion packs:
The Sims 4 Up All Night Digital Content - Features the Laser Light Show, fun decorations, and outrageous party costumes.
The Sims 4 Life of the Party Digital Content - Features the Flaming Tiki Bar and sleek, stylized outfits for your Sims.
The Sims 4 Awesome Animal Hats Digital Content - Features a collection of fun animal hats for your Sims to wear and show off!
The Sims 4 Digital Soundtrack - A digital soundtrack featuring music from the game.
-Never Ending Reward (World Adventures)
Shine On Reward (Ambitions)
UV Light Reward (Late Night)
Beacon Of Ages Reward (Generations)
Paws Anonymous Reward (Pets)
Your Name In Lights Reward (Showtime)
Enchanted Aurora Reward (Supernatural)
Whatever The Weather Reward (Seasons)
Alma Mater Reward (University)
Truly Tropical Reward (Island Paradise)
Time Travelers Reward (Into the Future)
The Ultimate Freezer Bunny Award
Luxury Party Stuff DLC
Perfect Patio Stuff
Cool Kitchen Stuff
The Sims 4 Outdoor Retreat Add-on
The Sims 4 Get to Work Add-onThe Sims 4 Spa Day Add-on
The Sims 4 Spooky Stuff DLC
The Sims 4 Get Together Add-on
SNOWY ESCAPE LATEST
Click on the below button to start The Sims 4 For Free on your Mac. It is full and complete game with all DLC. Just download and start playing it. We have provided direct link full setup of the game.
Sims Game Mac
0 notes
Text
Architect 3d Mac Free
House Design Software Mac
3d Max Free Download
3d Design Programs For Mac
3d Home Architect Mac Free Download
Architect 3d Mac Free Download
Part 1
Stunning design that speaks to an audience is paramount for brands of all sizes. Whether you need this software to help you start a blog like this one or edit product photos for your ecommerce business, selecting the best graphic design software can take your brand identity to the next level. Luckily, there are also many free applications out there that can do the same kind of job that Photoshop could do for you. This article rounds up the best 15 free Mac Programs for Graphic Designers. Some of these applications can even do stuff that can't be achieved using Photoshop,.
House Design Software Mac
Mac desktop app. 2D and 3D designing. Import 3D models. Allows you to map terrains. Cons: Dated interface – hasn’t been updated for a long time. Can’t upload your own photos. Gardena Garden Planner. Gardena Garden Planner is a free landscape design software for Mac with a surprisingly slick and well designed interface. Download Home Design 3D for macOS 10.9 or later and enjoy it on your Mac. With Home Design 3D, designing and remodeling your house in 3D has never been so quick and intuitive! Accessible to everyone, Home Design 3D is the reference interior design application for a professional result at your fingertips! Live Interior 3D Pro. This is free home design software for Mac which lets you design your home or interiors in 2D and 3D formats. It comes with a huge catalog of obxjects and also preset designs. This detailed software lets you create exact multi-story projects, ceiling height, and also slab thickness etc.
Best Designing App For Mac
1. Sweet Home 3D
Here, we’re going to look at some of the best free t-shirt design software options available and how you can make these tools work for you. 2 Million+ Digital Assets, With Unlimited Downloads Get unlimited downloads of 2 million+ design resources, themes, templates, photos, graphics and more. Mac App Store is the simplest way to find and download apps for your Mac. To download apps from the Mac App Store, you need a Mac with OS X 10.6.6 or later.
Features and functions:
· Sweet Home 3D isfree home design software for Macwhich lets you design each aspect of your house.

· It allows you to do both 3D and 2D rendering and offers drag and drop features.
· It enables you to take feedback from professionals about your designs.
Pros of Sweet Home 3D
3d Max Free Download
· One of the best things about this software is that it has drag and drop features for many things like doors, furniture, windows etc.
· This home design software also lets you to design your interiors in 3D and this gives the designs a realistic effect.
· Using this software, you can also import and modify ob_x_jects.
Architectural Design Programs For Mac
Cons of Sweet Home 3D
· The one negative point about it is that it is a little sluggish to use when using large files.

· Thisfree home design software for Macdoes not have a very big catalog of ob_x_jects to choose from
· Another drawback of this software is that it doesn’t offer a good selection of textures for walls, flooring and ceilings.
User reviews:
1. Simple, easy to use and works really well. they provide li_x_nks to some really good 3D furniture etc
Best Design Programs For Mac
2. Love what you can do with a simple drawing. Don't know how the software calculate the length of a line but again, I haven't used it enough
3d Design Programs For Mac
3. Works for both US and Metric which is a BIG plus. Once you get the hang of it, it's easy to use and scale the image.
Free Graphic Programs For Mac
http://download.cnet.com/Sweet-Home-3D/3000-2191_4-10893378.html
3d Home Architect Mac Free Download
House Design Program For Mac
Architect 3d Mac Free Download
Screenshot
1 note
·
View note