
Warning: This blog may contain verbose ramblings intermingled with corgi pictures. I try to make my walls of text as compelling as possible, but if you have a short attention span (no judgement), this blog may not be for you.Donate Here
Don't wanna be here? Send us removal request.
Statistics
We looked inside some of the posts by sirfrogsworth and here's what we found interesting.
Average Info
Notes Per Post
50K
Likes Per Post
29K
Reblog Per Post
21K
Reply Per Post
435
Time Between Posts
7 hours
Number of Posts By Type
Text
17
Last Seen Tumblr Blogs


Fun Fact
Total funding amounts to $125.3M.
Text
@haveabowlofweedies I'd like to ask you a couple of questions. I am genuinely curious.
Where did you get this information?
Why did you believe it?
Did you ever think to verify what you were told?
You seem to be very confident and I would like to understand why.
Aside from that, I'd like to give you some accurate information.
In 2020, there were 3,383,729 total deaths reported in the US.
COVID-19 was directly attributed to 350,831 deaths.
The number of deaths with COVID-19 as a contributing factor was 33,705.
So, despite your ALL CAPS declaration, over three million deaths were attributed to something other than COVID. 697,000 were attributed to heart disease.
You can verify that here.
I'd also like to briefly explain how death certificates work.
A U.S. death certificate typically includes two parts.
Part 1 is the immediate cause of death, along with a chain of underlying causes.
Part 2 is significant conditions that may have contributed to the death, but were not part of the causal chain.
So, for example, a certificate might say:
Part I a. Acute respiratory distress syndrome b. Pneumonia c. COVID-19
Part II a. Hypertension b. Type 2 diabetes
COVID-19 caused the pneumonia and the pneumonia caused the respiratory distress and the distress caused death. A clear chain of events.
The hypertension and diabetes were extra things that made it harder for the body to fight the infections.
This is a COVID death. If the person did not have COVID, they would probably still be alive. But all of those factors worked together to cause the deadly outcome.
Now let's say someone died of a heart attack while infected with COVID. The death certificate might look something like this...
Part I a. Myocardial infarction
Part II a. COVID-19
It's very possible that COVID put the body into distress and was a factor in the heart attack. But the immediate cause is still listed as a heart attack. So this would be classified as a contributing factor and not a direct COVID death.
Many people came up with conspiracies because COVID-19 was put on death certificates in this way, but they did not understand that almost all deaths are multifactorial. For the sake of accuracy, the death certificates list every factor that may have contributed.
The truth is, many COVID deaths were probably not counted in the total.

If we eliminate COVID, we still had 130,000 excess deaths in 2020.
Data scientists believe many of these were COVID deaths that were improperly classified.
TL;DR
3.4 million people died in 2020.
700,000 people died of heart disease.
350,000 people died of COVID-19.
Not all deaths were attributed to COVID—a fraction of them were.
And that fraction is probably smaller than it should be.
27 notes
·
View notes
Text
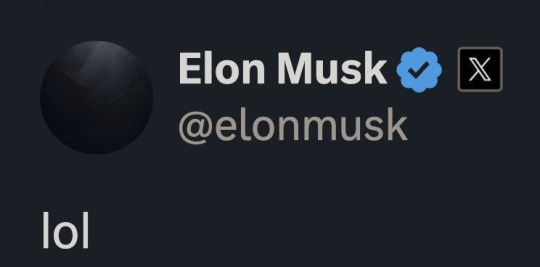
This is not how testing for drug abuse works.
Typically you get a random screening several times over a period of weeks or months. And you must be supervised when giving a sample.
This proves pretty much nothing.
Though I am hoping he actually went through 5 days of agonizing withdrawal to beat this test, rather than having little X pee into a cup.
46 notes
·
View notes
Text
Ok

I knew outsourcing all of our banana factories would come back to bite us in the potassium.
9K notes
·
View notes
Text
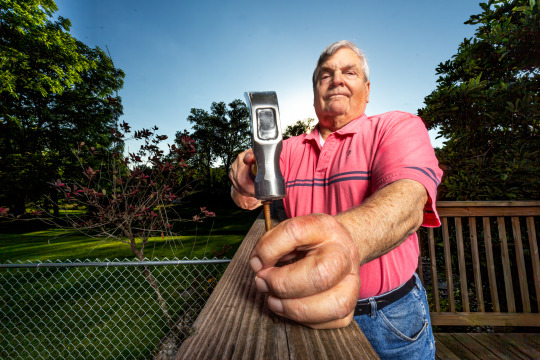
Instagram loves showing me posts with "ingenious repairs" that are actually "very bad ideas."
Didn't even use duct tape.
144 notes
·
View notes


Text
That could be part of it. The other problem is in order to not damage the streets, all of the heavy vehicles could only go a few miles per hour. Which really slowed the pace of the parade.
Trump was really hoping to have a North Korea military demonstration. And I guess he thought that is a thing any military can slap together.
The truth is, North Korea has special parade units. Some are soldiers but not all. They select people for specific height and weight requirements. And then they send them all to a sort of parade concentration camp for up to 6 months. They exhaust these parade units for 10 hours every day—getting everything synchronized and perfect. Even the movement of the artillery and missiles is choreographed to perfection.
The US military tends to be more functional and less parade-driven.
Though I have been to a few parades in my youth and I remember the soldiers really taking pride in getting their marching tight. And I think that is why you are probably on to something. When I saw the Army Rangers shuffling by, walking like they were being punished, it really did feel like everyone was just phoning it in.
This parade is one of the most thrown-together low-energy events I've ever seen. Our high school float parade had more enthusiasm.
The best part... Trump is bored out of his skull.
Though every once in a while he stands up and salutes.
It's really weird.
Also, they just paused the presentation to thank a sponsor.

Classy.
6K notes
·
View notes
Text
Lee Greenwood *wishes* he could get this kind of crowd participation.
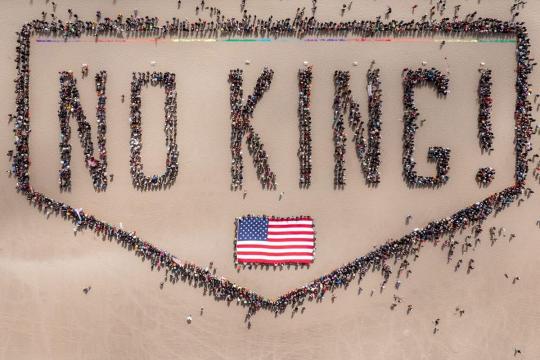
Great job, San Francisco and the millions of other people who showed up to protests.
This parade is one of the most thrown-together low-energy events I've ever seen. Our high school float parade had more enthusiasm.
The best part... Trump is bored out of his skull.
Though every once in a while he stands up and salutes.
It's really weird.
Also, they just paused the presentation to thank a sponsor.
Classy.
6K notes
·
View notes
Text
They started playing some 80s rock music to pep things up. But then I noticed none of the songs have vocals.
They are karaoke tracks!
One of which was Fortunate Son. And it is a good thing they didn't actually play the lyrics because, umm...
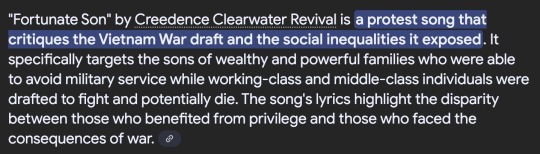
This really is the weirdest parade.
The audience is bored, the soldiers are waving to their moms, and Trump keeps saluting.
"I am the most Army-friendly President in history, from the standpoint of saluting."
Oh, brought to you by...

This parade is one of the most thrown-together low-energy events I've ever seen. Our high school float parade had more enthusiasm.
The best part... Trump is bored out of his skull.
Though every once in a while he stands up and salutes.
It's really weird.
Also, they just paused the presentation to thank a sponsor.
Classy.
6K notes
·
View notes
Text
Let's check in with Marco Rubio to see how he is enjoying the parade.

This deep sigh was brought to you by...

This parade is one of the most thrown-together low-energy events I've ever seen. Our high school float parade had more enthusiasm.
The best part... Trump is bored out of his skull.
Though every once in a while he stands up and salutes.
It's really weird.
Also, they just paused the presentation to thank a sponsor.
Classy.
6K notes
·
View notes
Text
And now we present...
This slow moving truck!

Brought to you by...
Coinbase!

The President's app of choice to launder money from his dipshit followers.
This parade is one of the most thrown-together low-energy events I've ever seen. Our high school float parade had more enthusiasm.
The best part... Trump is bored out of his skull.
Though every once in a while he stands up and salutes.
It's really weird.
Also, they just paused the presentation to thank a sponsor.
Classy.
6K notes
·
View notes
Text
This parade is one of the most thrown-together low-energy events I've ever seen. Our high school float parade had more enthusiasm.
The best part... Trump is bored out of his skull.
Though every once in a while he stands up and salutes.
It's really weird.
Also, they just paused the presentation to thank a sponsor.
Classy.
6K notes
·
View notes
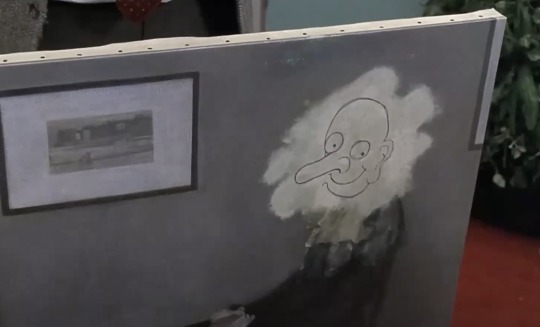
Text

Like, I know he is being racist.
But he is so stupid, I can't figure out how he is intending to be racist.
It's like some kind of horrible racist riddle.
The only way this makes sense is if he thinks we speak "American" in the US and the general public is unaware that much of North America speaks the language of colonizers.
225 notes
·
View notes
Text
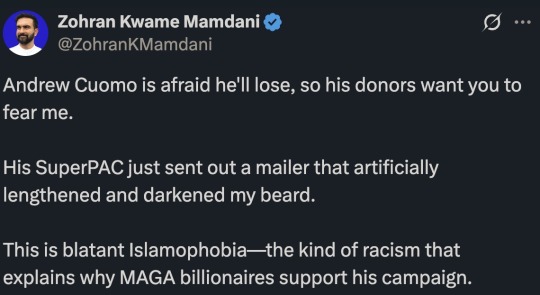
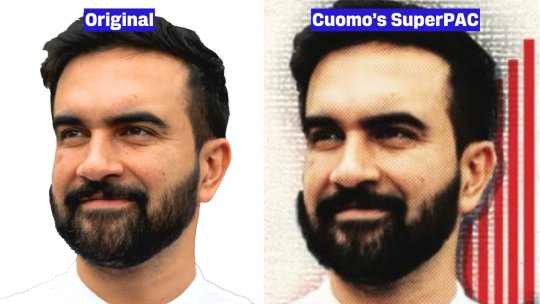
Soooooo...
Don't attribute to malice what can be explained by Photoshop incompetence.
This is a story of two staffers who knew just enough about Photoshop to be dangerous.
First, Zohran had someone do a basic cutout for his campaign materials. He uses this for his avatar and his website.
They did a bad job.

Maybe they had an old version of Photoshop or used the wrong selection tool, but the cutout is... rough.
I mean, it's fine.
It's a small grassroots campaign. They probably had to delegate to someone who took a single graphic design course in college.
You do what you gotta do.
I'm not hating.
I'm just saying they didn't have the experience to do this task properly.
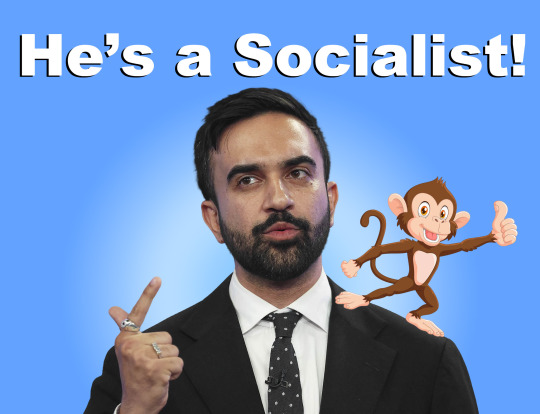
Okay, now some dipshit at the Cuomo SuperPAC is like, "We need to make an attack ad! Make sure to mention he's a socialist! And add a monkey!"
So they task someone even worse at Photoshop to slap this together.
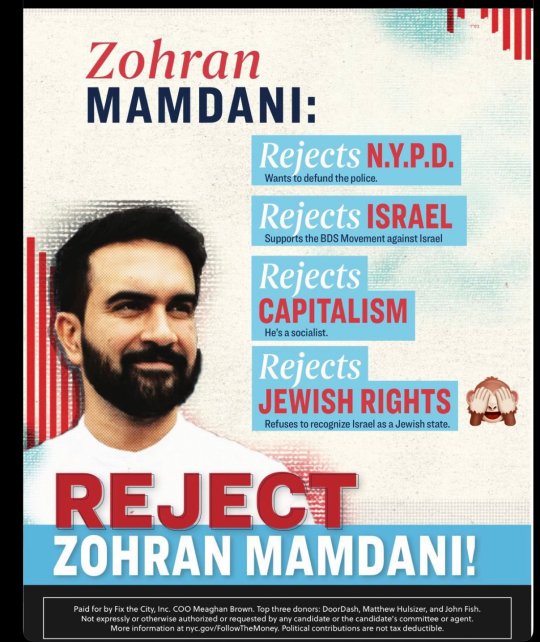

This is mostly a template. The template was designed by an actual artist, but the person who used the template is very much not.
You can tell by the addition of a monkey that does not fit the aesthetic.
With these templates, you just add in your assets and type words that seem negative and scary, but are actually all good things.
It's graphic design on a budget.
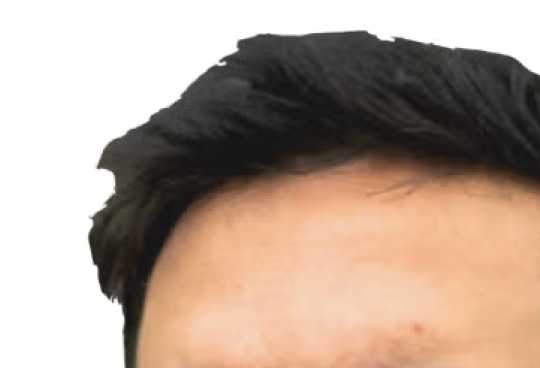
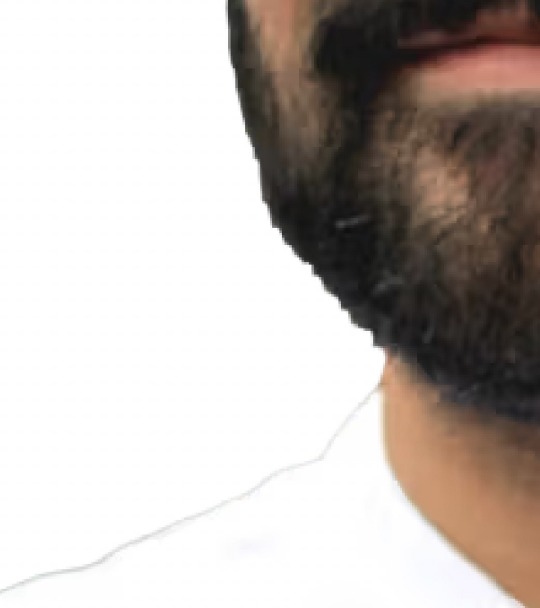
But there was a problem...

Oh no!
They used the magic wand tool and the previous bad selection caused things to get worse.
There are many ways to deal with this. Contract the selection. Feathering. A soft eraser. Remove the white matte. Basic masking. Refine hair. A stronger tolerance on the magic wand. Remove background. Select subject using the cloud.
You could even download a brush that emulates beard hair and carefully paint over the white edge.

SO MANY OPTIONS!
But for some reason, they chose the clone stamp tool with a large soft brush. They chose to paint over his beard using another part of his beard.
This is like a 1997 solution to this problem.

I tried it myself just to make sure my suspicions were correct.

Yep, that's what they did.

The darkening of the beard is a side effect of the template they used. It's a halftone effect meant to emulate old printers.
The effect increased the contrast which makes the whites brighter and the blacks darker. I doubt the person even realized.
I'm pretty sure people supporting Cuomo are a bunch of racists. But I don't know if this horrible beard cloning was an intentional act.
I think they used a template, did a bad selection of a bad cutout, and then use Mr. Bean-esque methods to fix their mistake.
In any case, if Zohran needs any help from a selection specialist, I'm happy to help.
70 notes
·
View notes
Text

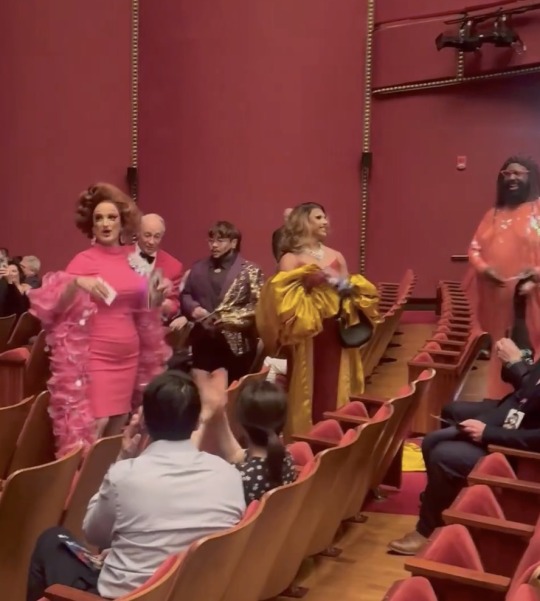
Things just keep getting gayer.
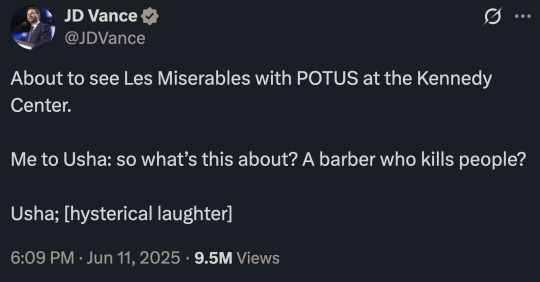

Trump is oblivious to the fact that he loves entertainment that is very popular with gay men. And now he is dragging JD Vance with him and JD is trying way too hard to signal he doesn't want to be there.
"I DON'T KNOW ANYTHING ABOUT THE GAY MUSICALS! HAHAHAHAHA! HERE IS A DETAIL ABOUT A GAY MUSICAL THAT I WOULD ONLY KNOW IF I HAD SEEN THAT GAY MUSICAL. AHAHAHAHA. PLEASE LAUGH AT MY FUNNY JOKE, WIFE. I AM NOT GAY. PLEASE DON'T PUT IN THE NEWSPAPER THAT I AM GAY."
Meanwhile, Trump...
"I love YMCA. It's the greatest song ever recorded. The Village People were the last great band. Very catchy beats, from the standpoint of dancing. And I love that they were just regular working class guys with normal jobs. I tried to hire the construction worker to build Trump Tower, but he told me that wasn't the kind of tower he was into.
Broadway musicals are the highest form of entertainment from the standpoint of making me feel things. Les Mis, such a beautiful play. It's about bread, can you believe it? A whole musical about bread! You gotta pay for your bread, folks. Just give them $200 or whatever bread costs, show them your ID for buying groceries, and then you don't have to worry about the bread police, okay?
Later we're going to a wonderful bar called "The Bulge." Isn't that a funny name? I assume that is because all the men have big bulging muscles. Very fit, these guys. You'll never see more manly men. Very strong, very shiny guys. They could probably lift some heavy stuff, from the standpoint of weight.
Not quite as manly as the people over at Lumberjacked. Those are some very very hairy men. Very manly. Very good at handling wood, or so they tell me. The lumber industry is very important. 900% tariffs. We're bringing wood handling back to America.
They play a lot of Elton John there. My favorite musician and a great dresser, from the standpoint of sparkles. Lotta sparkly outfits, I love it."
906 notes
·
View notes
Text
To My Yelp Reviewers
I have been struggling to find the energy to write personal thank yous to everyone who wrote a nice thing about me to show to my uncles. Between photo restorations, fixing my A/C, an ear infection, doctor appointments, and just a lot of annoying life stuff, I've had my attention split a hundred different ways.
I've decided maybe the best way to show my appreciation is to share what I wrote in the letter about the people in this community who have supported me over the years.
I have a section I call "The Caregiving Avengers" in which I talk about my support system. And the last entry is about all of you.
------------------------
The Internet - Motivational Cheerleader Collective
It’s hard to describe what it’s like to have half a million people following along with your personal story. Most of them just watch from afar and never say a word. They just add a little heart to your posts. But there are many who send messages and replies and comments. At times thousands of people would send me words of encouragement. I used my personal website to talk about the care I gave to my parents. I talked about when I failed. I talked about when I succeeded. And when I had some intractable problem I couldn’t find a solution for, my collective audience usually came through with helpful information. They gave me advice on products that could make caregiving a little easier. They gave me tips for how to accomplish laborious tasks with very little energy. But most of all they saw me. They saw my pain and struggles and heartbreak and trauma and they kept me from falling into a dark hole of despair.
There is always a time when a caregiver fears they can’t continue. The experience overwhelms the body and mind and everything in you just wants to shut down. The urge to give up poisons your mind and you feel guilty and ashamed for even entertaining the idea. But then hundreds of people, strangers on the internet, come together and say, “We love you. We got you. You can do this.” It put the wind back in my sails every single time.
I built this community over 16 years. My followers are some of the kindest and most generous people in my life. And I don’t even know most of their names. They were my caregiving cheerleaders and one day I’ll figure out how to dispense 500,000 thank yous.
----------------------------------
To the following specific people who wrote something for me...
@lindamaria @greytune @dreamofbecoming @chippish @nounsy @dalekpoetryreading @theotherdibbler-blog @mathcat345 @pinkangel725 Jason @boyslit Hayley @zthroo
I actually had trouble reading your kind words on my own and had to have Katrina read them aloud. I've been quite emotional lately and I read two sentences before my eyes filled with tears and I couldn't actually see the words.
Thank you so much.
36 notes
·
View notes
Text
I was leaving the doctor's office and saying goodbye to everyone and the office manager said, "Enjoy your weekend. Happy Fahhh..." and then she just went quiet.
She realized mid-sentence that I didn't have any children and that I didn't have a father. It was like she hit the pause button on her brain and wasn't sure how to handle it.
I walked out pretending I didn't hear it.
I figured telling her it didn't bother me and drawing attention would have felt more awkward.
I am very fragile. I won't deny that. But I don't think people understand emotional fragility when it comes to grief. I don't need anyone to pretend I didn't lose my parents. I like remembering they existed.
And there is this thing where people will refrain from talking about their own still-alive parents to keep me from being sad. I am okay with parents not being dead. That isn't necessary.
It's like when people feel like they can't complain about how tired they are around me. YOU CAN! Being tired sucks!
I get upset at the tragic circumstances. Being reminded of the trauma and pain and my brother's neglect and abuse.
But I like talking about my parents and how kind and supportive they were. I like talking about my dad's bad dad jokes. My mom's love of HSN jewelry. They were cool people and I don't want folks to forget who they were.
So I guess my advice when talking to people in grief is to avoid talking about how a loved one died.
Instead, talk about how they lived.
Be curious and interested in who they were as people.
Hopefully that makes sense.
188 notes
·
View notes
Text
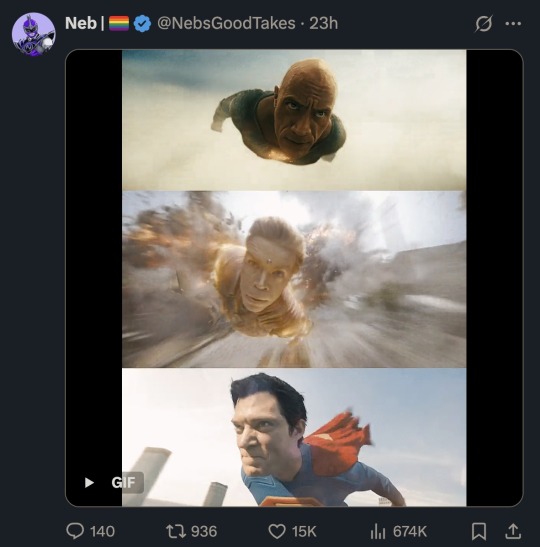
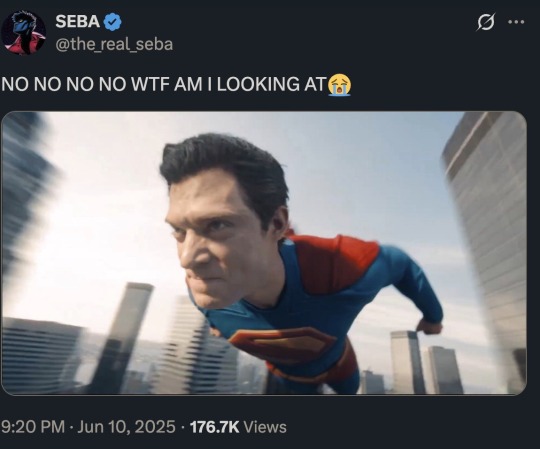
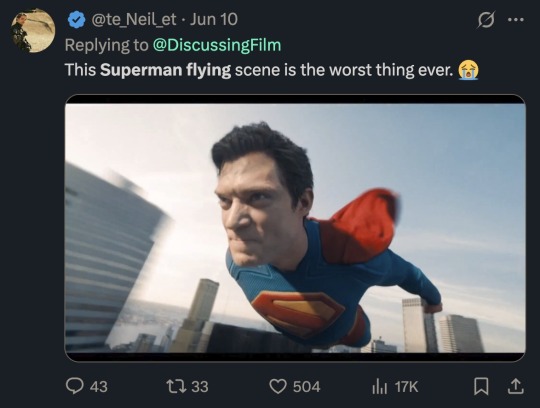
Wide angle lenses distort the image so close things are big and far things are small.
I personally think this is a really cool creative choice because wide angle lenses are great at depicting speed. The large stuff turns into tiny stuff very rapidly.
You can even do it with still photography.
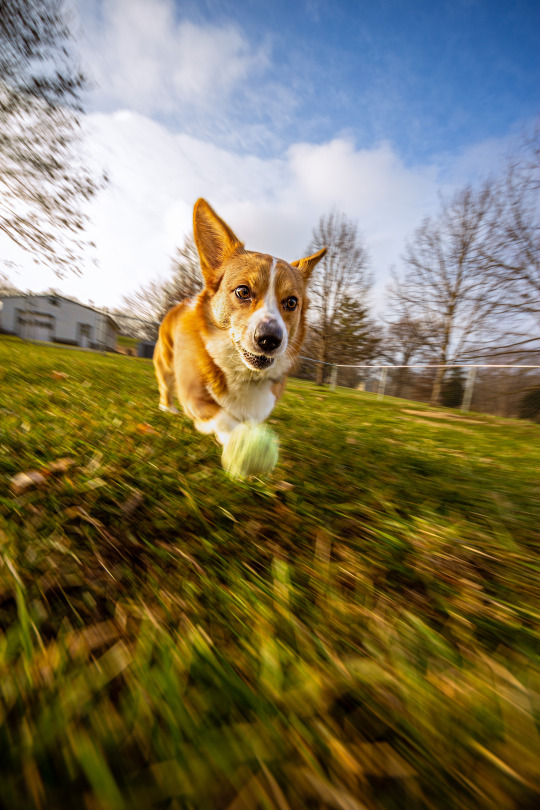
It's like how your sense of speed changes from a car to a go-kart. The car is going faster, but the go kart *feels* faster just because of your change in perspective.
It's weird that people with anime avatars are complaining about this effect because this is how flight is depicted in many shows.
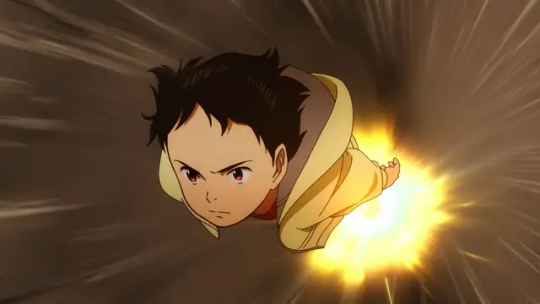
And I also hate this trend of singling out a frame of video. You cannot judge video that way. It removes the entire context.
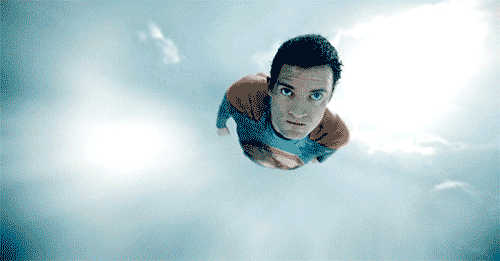
I think that looks cool. It's very similar to FPV drone footage and I think that grounds it to a reality we are familiar with.
The Superman flying scenes immediately reminded me of the world's fastest drone vs an F1 car video.
The sense of speed would not have been as impactful and immersive without the wide perspective.
I love wide angle.
My ultra wide angle lens is the most fun lens of all my lenses.
Embrace the ultra wide!
261 notes
·
View notes