
Statistics
We looked inside some of the posts by spac3andb3yond-blog and here's what we found interesting.
Average Info
Notes Per Post
0
Likes Per Post
0
Reblog Per Post
0
Reply Per Post
0
Time Between Posts
13 minutes
Number of Posts By Type
Photo
3
Text
14
Last Seen Tumblr Blogs


Fun Fact
If you dial 1-866-584-6757, you can leave an audio post for your followers.


Text
Movie poster
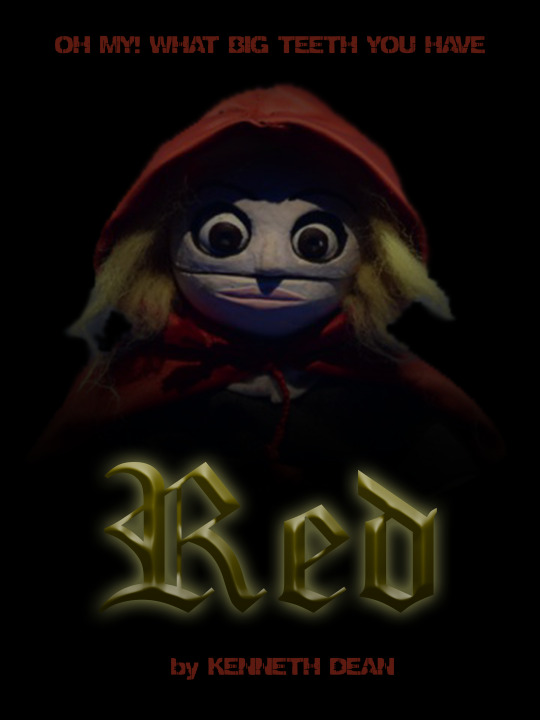
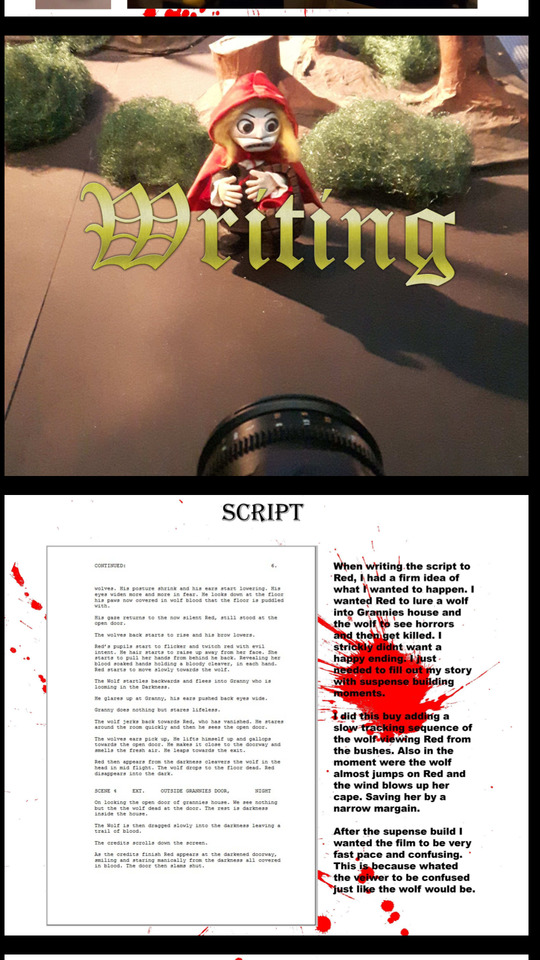
Creating my movie poster was very easy. I looked at a number of horror movies posters. Alot of the poster were one image with a dark background. The title would be either across the image or under. They would then have a quote at the top of the poster and the creater at the bottom.
Theae in mind i took a picture of red against a blue screen. I keyed out the blue and filled it with black. I then took half her body out. I added a dark to light mask over the top of Red. This made an image of Reds upper torso and head appear from the darkness.
I then created a golden embossed text to look like a traditional fairy tale book title. This gave me a title to overlay the bottom of my Red image.
I then simple put in red above, "Oh my, what big teeth you have?" And below, "by Kenneth Dean". All on a simple black background, conpleting my movie poster.
0 notes
Text
Premire pro editing
When putting my film into premire pro i found it quite easy to put my film together. However it was over 4 mins long. My breif asked for 3mins. I had alot of trouble cutting this. Until my lecturer, Mario advised me on several cuts. I made these cuts and had my complete film finished
0 notes
Text
Sound recording and editing
My narrator was voiced by myself and so was the wolf. Red was voiced by an actress from UCLan, herr name is Elie Collins. All the recordings went very well.
My only issue when editing the audio only came through one speak. I edited this in premire pro.
The rest of my sound went great, or so i thought. Until my lecturer Mario played my video through a tv. He showed me that my sound levels needed re working. I quickly edited these in premire pro.
0 notes
Text
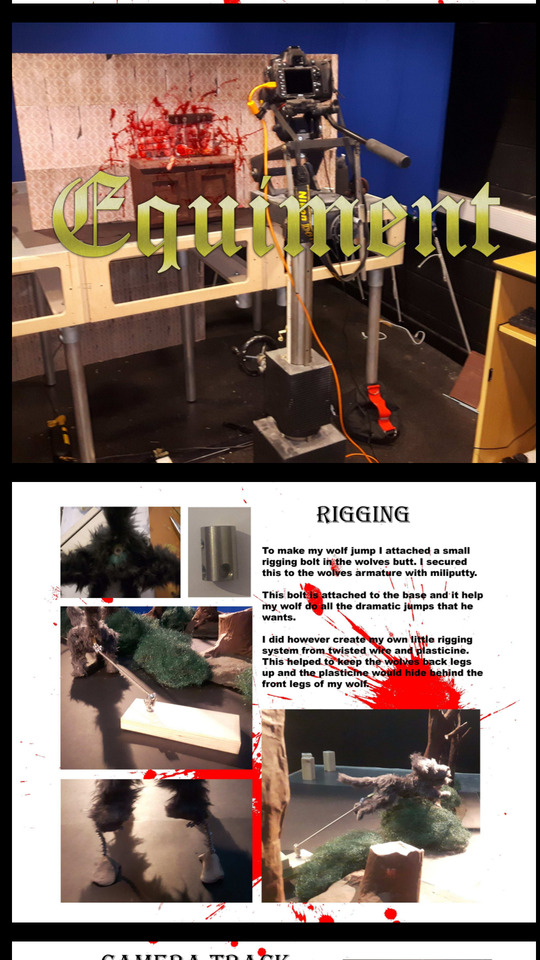
Camera track
To create several shots inside grannies house. I have to use a camera track. This helped me to shoot pan shots in grannies house across the fire place to the front door. It also helped shot the forward tracking shots to show illusions of traveling towards the door.


0 notes
Text
Hidden wall
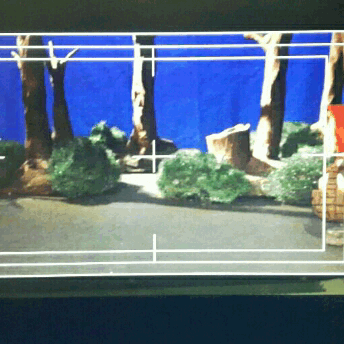
When shooting in grannies i had to do a couple of tricky shots. So i had to stand infront of the camera, move my puppet and then duck behind the table. To beable to do this, the back wall couldnt be there. So i shot it against a blue screen. I then keyed out the blue and changed it to a picture of the back wall. Creating the illusion of an hidden wall.


0 notes
Text
Secret string
When shooting a shot in grannies house. I need to have the wolf leap away from the cauldron. I found this quite hard to balance my wolf with magnets and as i perviously stated i wanted to use the large rigging system as little as possible. So to get my wolf to balance on his hind legs and to move away from the cauldron. I tied a bit white string to his tail. I would pull this down from behind and under the table, little by little. This acchevied the shot i needed with little editing later.

0 notes
Text
Lighting Grannies Cauldron
The forest shoot was very straight forward afterwards. My next problem was lighting grannies cottage through the fireplace. I simply shone a light low across the table, through the fireplace. The cauldron will block some of the light out. This gave the illusion of a lit fireplace. To successfully shoot this i only shot these shots with the fireplace always side on or close up to the cauldron.


0 notes
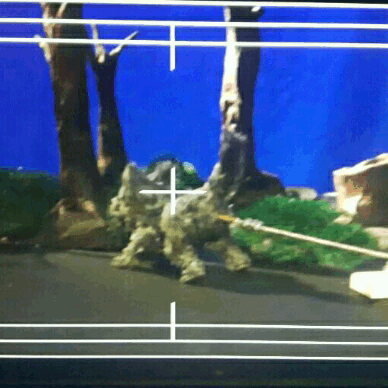
Text
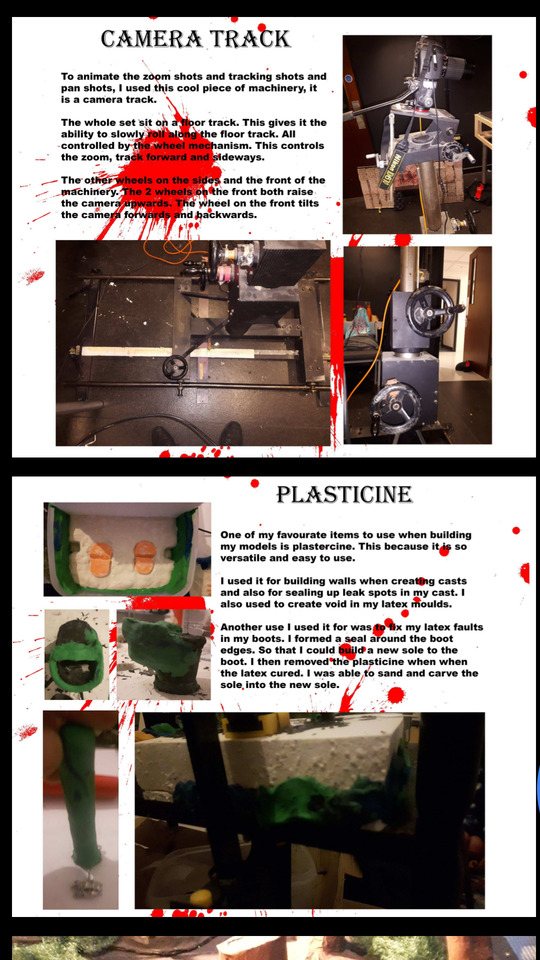
Make shift rig
To avoid taking out the rigging out of every run shot i tried to use it as little as possible. This was quite easy with some shots as my wolf had metal in his feet and i used magnets to keep him in place. This help to balance my wolf in most positions. This includes running shots when he is balancing on the back or front legs.

However, some of the balance shots. I could not balance the wolf. So i had create my own make shift rigging. To do this i twisted some lenghts of wire together and then i added some plasticine at the bottome of the wire. The wire will hold up the wolf and the plasticine will be hidden behind the other legs.


0 notes
Text
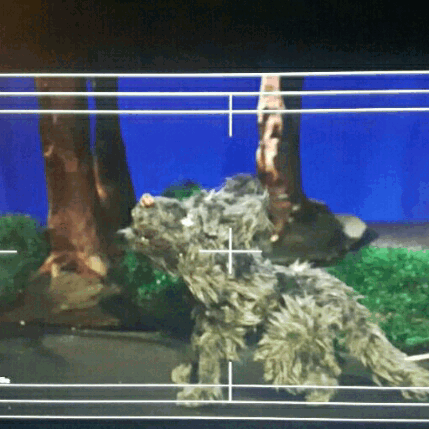
Wolf staulking scene
During this scene i hit a little bit of a wall on how to film this shot. The idea of the shot is to see through the eyes of the wolf. The wolf is hidden in the bushes and is following Red. Red moves in and out of focus behind trees. The trees behind Red in the shot are also moving alone.
To shoot this i fixed the camera in one position. I put one set of trees and bushes close to the camera and drew the full focus of the camera onto this line. This line will be pulled along the front of the camera in a straight line. The camera will be tilted down and up to make the movement more real.
Red is then placed behind the first tree line. Red will do a one the spot walk, but her body is out of focus. Giving the illusion of Red walking along the path.
The tree line behind Red will also be pulled along at the same speed as the front tree line. This tree line will very out of focus.
The three different specs of focus gives a better illusion that we are veiwing through the wolves eyes. Completing this scene.
0 notes
Text
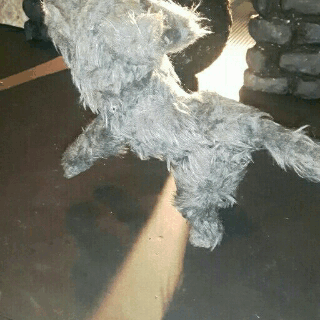
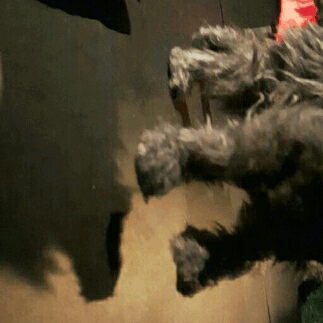
Wolf rigging jump
Shooting the wolf was very fun. It was the firat time i used this type of rigging system. To do this i simply screwed the base into the rigging point in the wolves bottom. I then shot a flat plate of the scene before i shot the rigging jump shot. I will the place the flat plate at the back of the seen and simple scrub the rig out of the images when editing later.


0 notes
Text
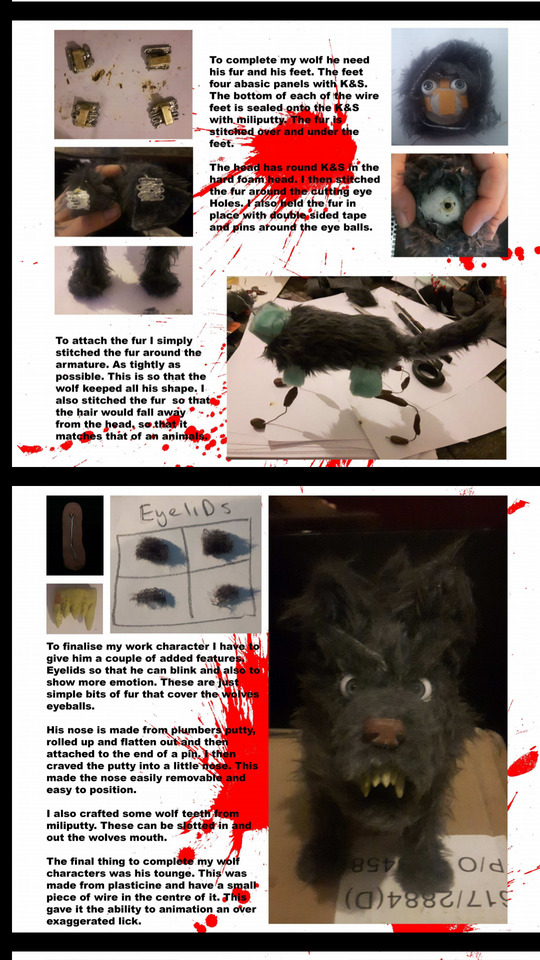
Wolf features
To help create emotion and life to my wolf puppet, he needed eye lids and a tounge. The eye lids will be little semi circles of fur, that will be placed over the top of his eyes. 1 set of half eyes and 1 set smaller lids.

The tounge will be made from plasticine with a little bit of wire in. This bit of wire will help to hold the tounge up vertical when animating.

0 notes
Text
Fixing
Well filming my Red puppet fell from the table. The face broke into pieces. Luckily the pieces broke cleanly, so i just stuff them together with epoxy resin. I then put these pieces on to a rounded bit of plasticine. This helped to keep the face stuck together and in position while it dried. After it was dry i paint over the little cracks and it was like new.


I also had an issue with the wolves head. The K&S in the neck was too slick. This made the head slide down whilst animating. To fix this i pinched the K&S in the back of the head. This resulted in the soft foam head being damaged. So the K&S fell out. To fix this back in place i filled the area with milliputty and placed the K&S in place. This fixed my problem.


0 notes
Text
Red walk
In the opening scene to the forest Red walks in. I had a few set backs with Reds walk. This is because her legs are too short compared to the size of her boots. However this is the style i wanted her to look, but this made her walk very hard to animate.


0 notes
Text
Pop up book
For my first scene i created a pop up book. I did this tell a rough story of the well known red riding hood story.
To create this i used my animatic images. I coloured then more and then hand each printed on to firm card. I also printed little Red characters and cut them out. I stuck them onto other lenghts of cards. These will help more red through the book and scenes. The other pages will be will be card doors to reveal images. All will be placed in a hand made book binder.


0 notes