my main is http://gfghv.tumblr.com | DM me for commissions | Accepting requests ☺ | This SFW | I will take requests | :V | I'm currently into Invader Zim, Transformers, Sonic The Hedgehog (i love shadow,,), NITW, Undertale, Life is strange, Stardew Valley, TS4, TF2, and Treasure Planet
Don't wanna be here? Send us removal request.
Statistics
We looked inside some of the posts by spacegoatart and here's what we found interesting.
Average Info
Notes Per Post
845K
Likes Per Post
509K
Reblog Per Post
335K
Reply Per Post
447
Time Between Posts
23 days
Number of Posts By Type
Text
11
Note
4
Photo
2
Last Seen Tumblr Blogs


Fun Fact
The total number of visits Tumblr.com received during January 2021 is 327 million.
Text

The “Great” War - Comic cover/poster
If you told me I’d be at a point to start making this into a comic, I think I’d call you insane! But I’m on the way for it to be released sometime soon, so hope you guys are just as excited as I am!
75 notes
·
View notes
Text
The “Great” War - Comic cover/poster
If you told me I’d be at a point to start making this into a comic, I think I’d call you insane! But I’m on the way for it to be released sometime soon, so hope you guys are just as excited as I am!
75 notes
·
View notes


Note
HI I LOVE EVERYTHING YOUVE MAKE AND I JUST WOULD LIKE TO KNOW WHAT KIND OF BRUSHES YOU USE??? THE STREAKS ON THEM ARE SO PROMINENT AND CHALKY LIKE A CRAYON BUT BETTERRR!! THANK YOU AND I LOVE YOU 💕💕💕💕💕
aww thank you! i switched over to using krita a couple months ago, so the brushes i use are different now - i use a brush i made myself for lineart, and for the soft chalky shading i use this "pencil-6 quick shade" from their default brush set

also let me shill for krita for a moment - if you have ever cursed photoshop for not being able to move a lasso selection across multiple layers, or for not being able to stack multiple masks on a single layer, or for not being able to do complex clipping mask stuff without your file becoming a rat's nest of layer groups - krita does all of that effortlessly, and it's free and open source and not shackled to a frankly evil subscription service
211 notes
·
View notes
Photo
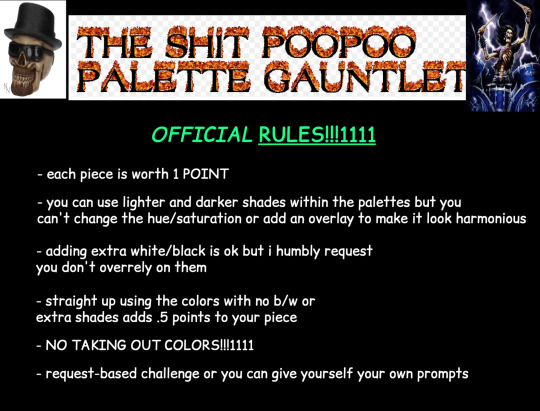
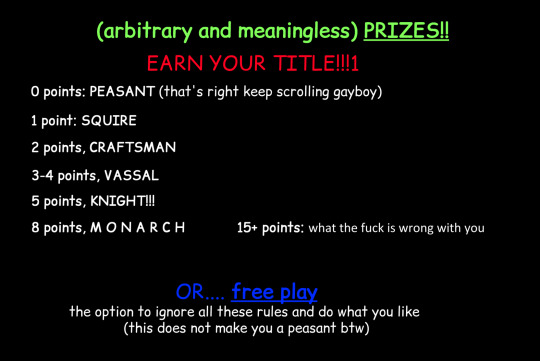

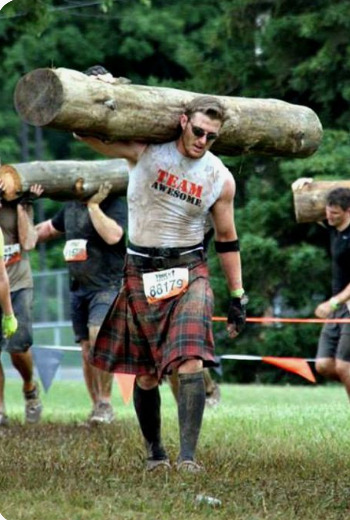
on a whim I made a palette game dedicated to…. UNUSUAL color palettes. feel free to participate in any way you’d like
anyways send me some requests and a palette combo and i’ll try to draw stuff for my own challenge lmao (though i might just draw stuff on my own idk)
30K notes
·
View notes
Text
Resources for Writing Injuries

Patreon || Ko-Fi || Masterlist || Work In Progress
–
Head Injuries
General Information | More
Hematoma
Hemorrhage
Concussion
Edema
Skull Fracture
Diffuse Axonal Injury
Neck
General Information
Neck sprain
Herniated Disk
Pinched Nerve
Cervical Fracture
Broken Neck
Chest (Thoracic)
General Information
Aortic disruption
Blunt cardiac injury
Cardiac tamponade
Flail chest
Hemothorax
Pneumothorax (traumatic pneumothorax, open pneumothorax, and tension pneumothorax)
Pulmonary contusion
Broken Ribs
Broken Collarbone
Abdominal
General Information
Blunt trauma
Penetrating injuries (see also, gunshot wound & stab wound sections)
Broken Spine
Lung Trauma
Heart (Blunt Cardiac Injury)
Bladder Trauma
Spleen Trauma
Intestinal Trauma
Liver Trauma
Pancreas Trauma
Kidney Trauma
Arms/Hands/Legs/Feet
General Information | More
Fractures
Dislocations
Sprains
Strains
Muscle Overuse
Muscle Bruise
Bone Bruise
Carpal tunnel syndrome
Tendon pain
Bruises
Injuries to ligaments
Injuries to tendons
Crushed Hand
Crushed Foot
Broken Hand
Broken Foot
Broken Ankle
Broken Wrist
Broken Arm
Shoulder Trauma
Broken elbow
Broken Knee
Broken Finger
Broken Toe
Face
General Information
Broken Nose
Corneal Abrasion
Chemical Eye Burns
Subconjunctival Hemorrhages (Eye Bleeding)
Facial Trauma
Broken/Dislocated jaw
Fractured Cheekbone
Skin & Bleeding
General Information (Skin Injuries) | More (Arteries)
femoral artery (inner thigh)
thoracic aorta (chest & heart)
abdominal aorta (abdomen)
brachial artery (upper arm)
radial artery (hand & forearm)
common carotid artery (neck)
aorta (heart & abdomen)
axillary artery (underarm)
popliteal artery (knee & outer thigh)
anterior tibial artery (shin & ankle)
posterior tibial artery (calf & heel)
arteria dorsalis pedis (foot)
Cuts/Lacerations
Scrapes
Abrasions (Floor burns)
Bruises
Gunshot Wounds
General Information
In the Head
In the Neck
In the Shoulders
In the Chest
In the Abdomen
In the Legs/Arms
In the Hands
In The Feet
Stab Wounds
General Information
In the Head
In the Neck
In the Chest
In the Abdomen
In the Legs/Arms
General Resources
Guide to Story Researching
A Writer’s Thesaurus
Words To Describe Body Types and How They Move
Words To Describe…
Writing Intense Scenes
–
Masterlist | WIP Blog
If you enjoy my blog and wish for it to continue being updated frequently and for me to continue putting my energy toward answering your questions, please consider Buying Me A Coffee, or pledging your support on Patreon, where I offer early access and exclusive benefits for only $5/month.
Shoutout to my $15+ patrons, Jade Ashley and Douglas S.!
64K notes
·
View notes
Text
i hate that every time i look for color studies and tips to improve my art and make it more dynamic and interesting all that comes up are rudimentary explanations of the color wheel that explain it to me like im in 1st grade and just now discovering my primary colors
152K notes
·
View notes
Text
Some Quick Character Tips
Here are a handful of quick tips to help you write believable characters!
1. A character’s arc doesn’t need to grow linearly. Your protagonist doesn’t have to go from being weak to strong, shy to confident, or novice to professional in one straight line. It’s more realistic if they mess up their progress on the way and even decline a bit before reaching their goal.
2. Their past affects their present. Make their backstory matter by having their past events shape them into who they are. Growing up with strict parents might lead to a sneaky character, and a bad car accident might leave them fearful of driving.
3. Give reoccurring side characters something that makes them easily recognizable. This could be a scar, a unique hairstyle, an accent, or a location they’re always found at, etc.
4. Make sure their dialogue matches their personality. To make your characters more believable in conversation, give them speech patterns. Does the shy character mumble too low for anyone to ever hear, does the nervous one pace around and make everyone else on edge?
5. Make your characters unpredictable. Real people do unexpected things all the time, and this can make life more exciting. The strict, straight-A student who decides to drink at a party. The pristine princess who likes to visit the muddy farm animals. When character’s decide to do things spontaneously or in the heat of the moment, it can create amazing twists and turns.
6. Give even your minor character’s a motive. This isn’t to say that all your characters need deep, intricate motives. However, every character should need or want something, and their actions should reflect that. What’s the motive behind a side character who follows your protagonist on their adventure? Perhaps they’ve always had dreams of leaving their small village or they want to protect your protagonist because of secret feelings.
Instagram: coffeebeanwriting
24K notes
·
View notes
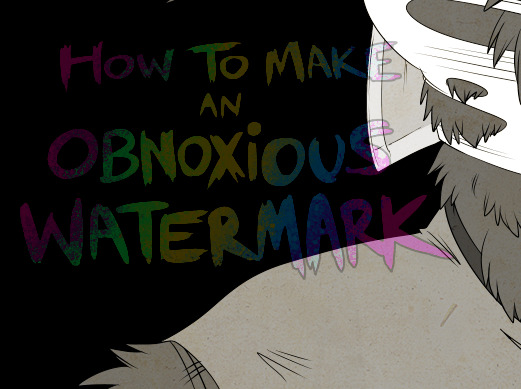
Text
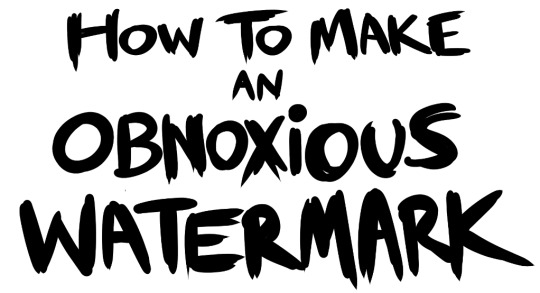
...that your audience won't hate.
This is a method I started using when NFTs were on the rise - thieves would have to put actual work into getting rid of the mark - and one that I am now grateful for with the arrival of AI. Why? Because anyone who tries to train an AI on my work will end up with random, disruptive color blobs.
I can't say for sure it'll stop theft entirely, but it WILL make your images annoying for databases to incorporate, and add an extra layer of inconvenience for thieves. So as far as I'm concerned, that's a win/win.
I'll be showing the steps in CSP, but it should all be pretty easy to replicate in Photoshop.
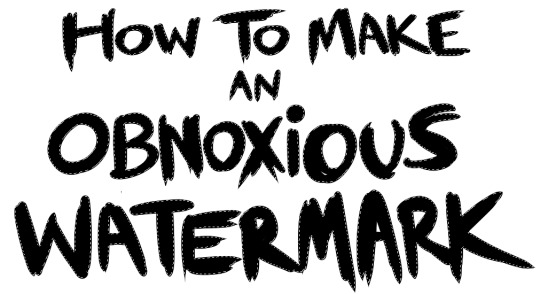
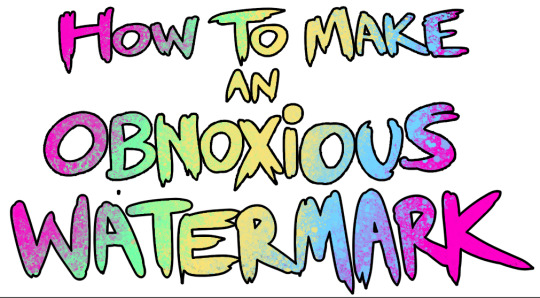
Now: let's use the above image as our new signature file. I set mine to be 2500 x 1000 pixels when I'm just starting out.
Note that your text should not have a lot of anti-aliasing, so using a paint brush to start isn't going to work well with this method. Just use the standard G-Pen if you're doing this by hand, or, just use the text tool and whichever font you prefer.
Once that's done, take your magic wand tool, and select all the black. Here are the magic wand settings I'm using to make the selections:

All selected?
Good.
Now, find a brush with a scattering/tone scraping effect. I use one like this.
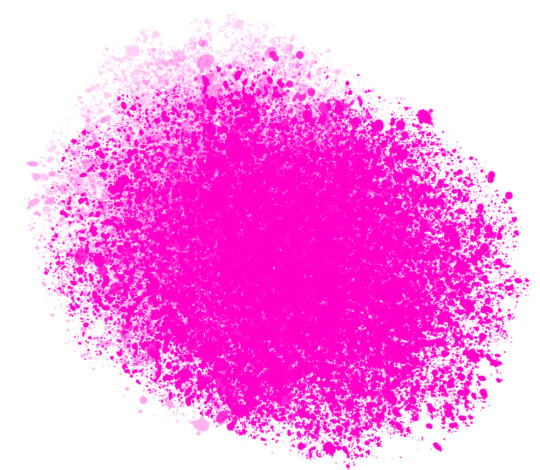
You can theoretically use any colors you want for this next part, but I'd recommend pastels as they tend to blend better.
Either way, let's add some color to the text.
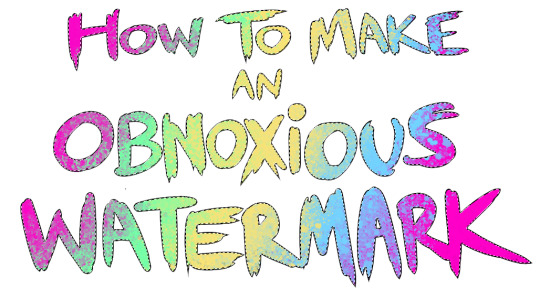
Once that's finished,
You're going to want to go to Layer Property, and Border Effect

You'll be given an option of choosing color and thickness. Choose black, and go for at least a 5 in thickness. Adjust per your own preferences.

Now create a layer beneath your sig layer, and merge the sig down onto the blank layer.
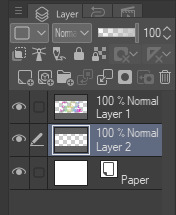
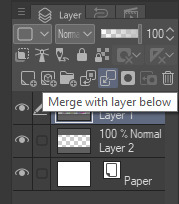
This effectively 'locks in' the border effect, which is exactly what we want.
Hooray, you've finished your watermark!
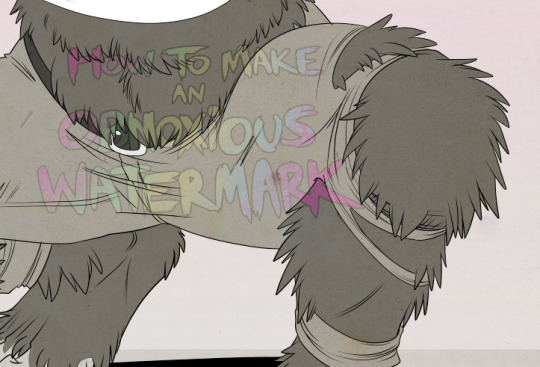
Now let's place that bad boy into your finished piece.

You'll get the best mileage out of a mark if you can place it over a spot that isn't black of white, since you'll get better blending options that way. My preference is for Overlay.
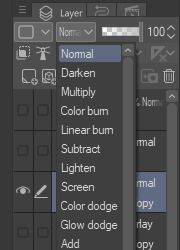

From here, I'll adjust the opacity to around 20-25, depending on the image.
If you don't have a spot to use overlay, however, there's a couple other options. For white, there's Linear Burn, which imho doesn't look as good, but it still works in a pinch.

And for lots of black, you have Linear Light
Either way, you're in business!
As a note, I know it's a bummer for some people to "ruin" their work with watermarks, which is part of the reason I developed this mark in particular. Its disruption is about as minimal as I can make it while still being effective.
There's other methods, too, of course! But this is the one I use, and the one I can speak on. Hope it helps some of you!
52K notes
·
View notes
Text
I forgot I have to be active here so here’s my Twitter tutorial on how to draw folds I made a while back to help a friend!
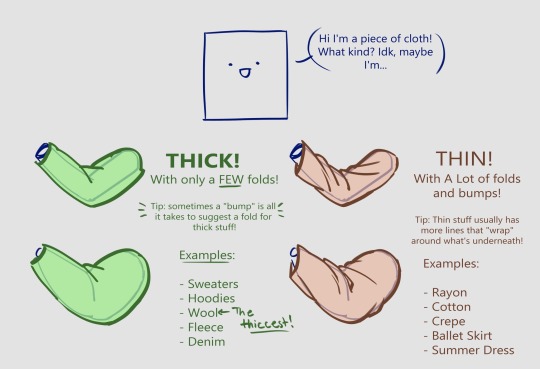
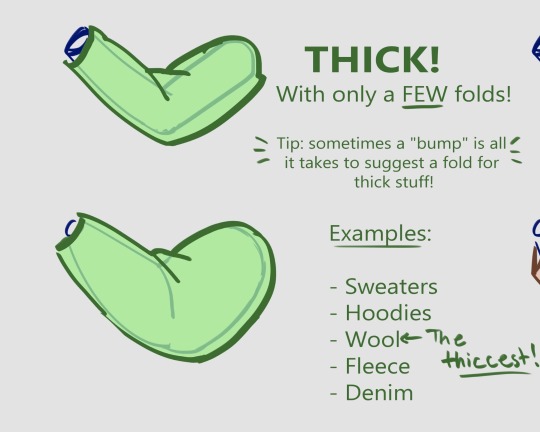

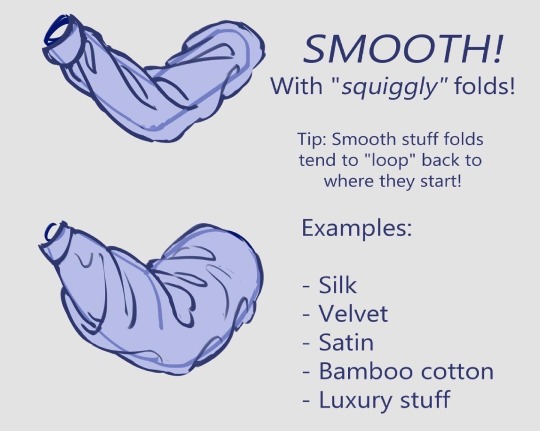
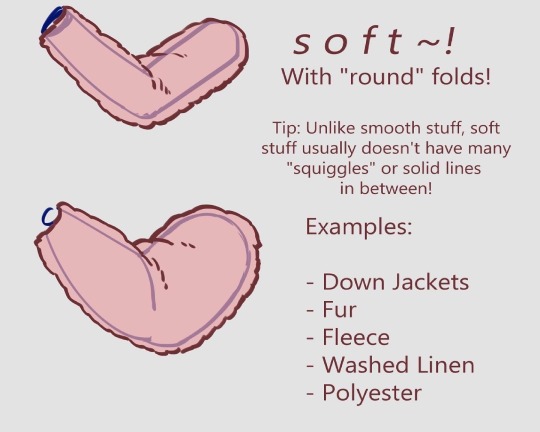
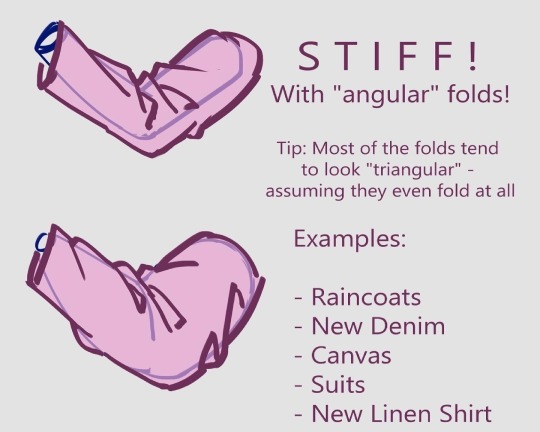
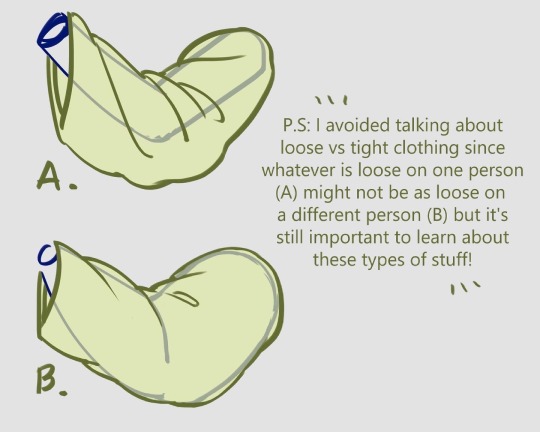

180K notes
·
View notes
Photo
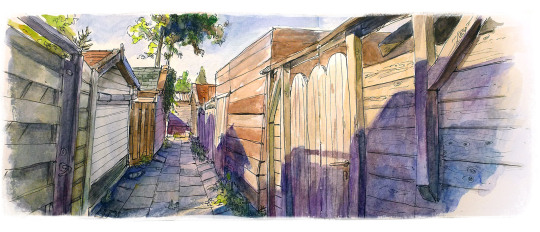
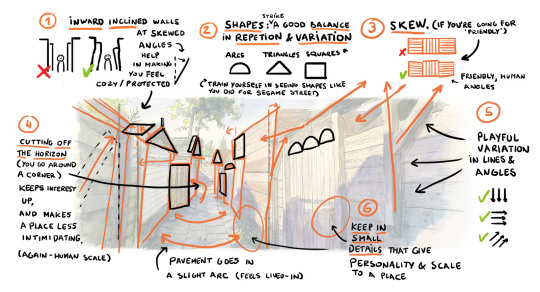

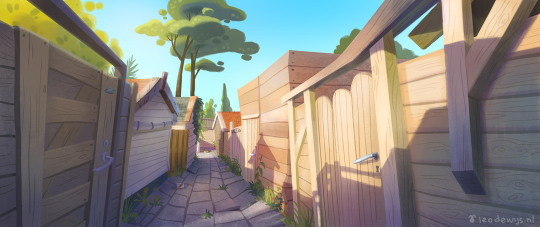
Some images from my last tutorial on background art. If you’re interested you read the full article here: http://bakenius.blogspot.nl/2015/11/backgrounddesign-how-to-look-for-visual.html
27K notes
·
View notes
Note
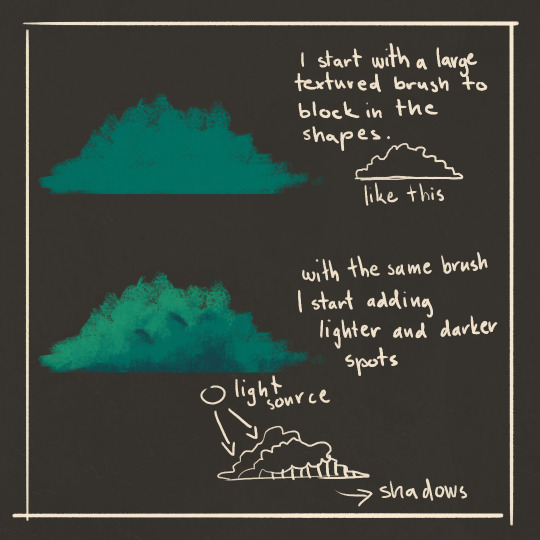
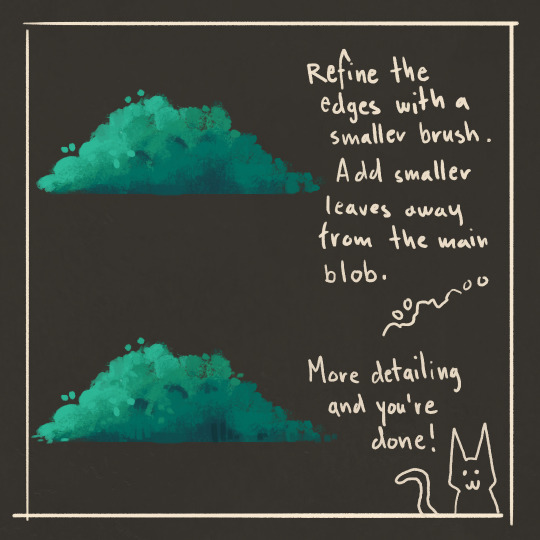
Hello! If it's not too much to ask, could I request for a little view of your painting progress? I'm thinking of starting practising painting with your style and I'd like to see how to do it!

???? uh I hope this helps
200 notes
·
View notes
Note
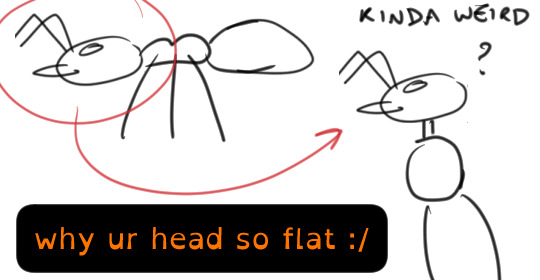
Do you have any tips/thoughts on drawing stylized bug mandibles?? I have an anthro bug character and I am sTRUGGLING with their weird face (I remember a little while ago you mentioned not being a big fan of drawing realistic bugs so. Thought I'd ask lol)
alright here we go!!
== WARNING FOR CLOSE-UP INSECT PHOTOGRAPHY BELOW THE CUT and also hilarious plastic skulls that i slapped some mandibles on ==
my blog contains so many bugs anyway but i am just being polite in case of people who (understandably) find them scary to look at. however there's also some of my cartoony art under here too so hopefully that balances
SO as with all things i find it extremely helpful to use a reference. the original ref of my character (which i can't seem to find) was even more insecty than the current one - bug has been through a few iterations while getting simpler/easier for me to handle each time, and now they look kind of cuter and more concise than they did back then. BUT while the design got simpler, the basics have stayed more or less in place, so let's look at the original first
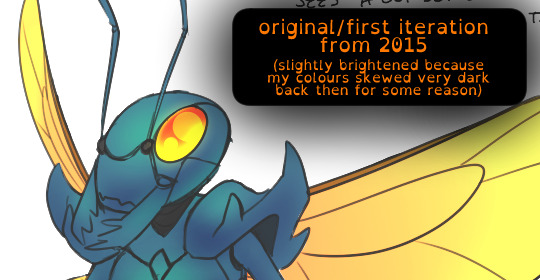
the first thing you should know is that Bug is, as i've mentioned before, kind of a mixed up amalgam of lots of different bugs. but i based their main face structure on an ant, because i like their faces and they often have bigger mandibles than wasps and such
(on with the show!)
if you run an image search for "ant face close up" you'll get a lot of useful macro photos of ant heads. (some are other insects wildly mislabelled but that's the fault of the search engine and people not knowing what bugs are which. as with any image search, use discretion). real-ass ant faces up ahead, scroll at your liesure!

ATTRIBUTION: morganglines @ Flickr accessed 15/08/2022
the first problem i ran into was that ants are kind of.. flat. their heads are angled the way they are because they aren't bipedal - they're bugs that walk close to the ground on six legs, so it's like this:
it felt weird to me to just slap a flat ant shape head onto an upright body. i eventually made bug's head a lot taller, and allocated the eyes/mouth/antennae to that new space however it felt right, which inevitably meant a slightly more "human" distribution of features (that's anthro art, babyyyy)

now let's talk about that weird seam line thing. rather, let's look at some more ant pictures!

ATTRIBUTION: PaDIL/Simon Hinkley & Ken Walker/Museum Victoria @ cabi.org accessed 15/08/2022
you won't find this as clear or even extant on every single type of ant ever, but a lot of them seem to have it, and i make some important use of it when i draw my character!
the seam dictates where i start my antennae, where i put the eyes, and helps me place the mouth/mandibles.
here's the modern ref. i decided i wanted to go Full Furry and give Bug a bit of a snout. because it's more fun for me to draw and it's my character and i hold all the cards and the reins and i can't be stopped. i like drawing Shaped Faces instead of circles, what can i say

SO what i did was, i used that "seam" thing as a sort of facial divider. drawing bug goes like this: the seam is like a "glasses bridge" between the eyes (which also look like glasses. bug's face is just a big secret pair of glasses, shh)
then from the seam i build the nose. if you draw your bugs with the flatter faces like up above, you can still use the same logic! just don't draw a big snoot on it, job done
THEN i fill the rest of the space with an imaginary pikachu cheek circle. and then i attach the mandibles there.
it also helps to think of the mandibles in terms of a real, 3d fursuit head (not that i can afford one lmao). i designed Bug so that if the jaws open, the mandibles HAVE to also be open. Bug's jaw is hinged, and the mandibles are a solid part of the workings of the jaw.

this is just a personal rule i set for my own character, and of course you can make whatever rule you want about how the mandibles/jaws work. but i'm including it here because i think it helps to show how my brain works when it comes to attaching the mandible "pieces" to the face.
i also try to remember at all times that Bug is a creature with an exoskeleton. basically Bug is a suit of armour with all the soft and squishy parts kept inside that.
you can see it here on the body: i draw Bug similarly to a kind of ball jointed doll! where the joints are mostly hidden because the parts are fit together very snugly - but not so snugly that i don't hint at there being joints and seams in there:

(i'm talking about the black bits. and the orange bits on the mandibles! which i also sometimes draw black because i'm inconsistent, oops)
the blue "over-armour" and the black "under-armour" are like a running rule that i also apply to the face. the nose-bridge seam and the mandible seams are the same rule, just applied to finer details
tl;dr what i do about the mandibles is: i set up some rules based on ants, these decide how the face is built, and then i tweaked/simplified them over time. my original design 2015 will probably help you understand this a lot more than the current one, but even the current one follows the same rules!
nosebridge, jaws, mandibles sit on the jaws' hinge. THE HINGE IS THE KEY now look at these fake plastic skulls from a stock image website whose license allows me to edit the image

ATTRIBUTION: Halloween @ freeimageslive.co.uk accessed 15/08/2022
check those out. now look at this:


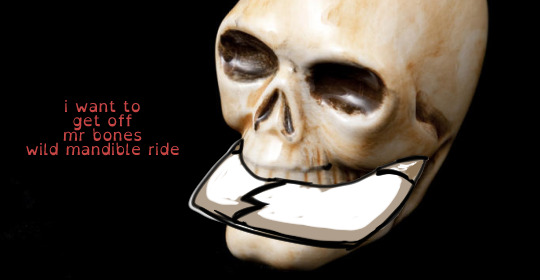
these are wonky (no bones about it) but hopefully you can see my process a bit more clearly!
CANNOT EMPHASISE THIS ENOUGH to anyone reading this: I DRAW FUNNY CARTOON BUGS that i have tweaked and pushed and pulled like chewing gum to look more anthro/humanlike and allow for fun facial expressions. i do not care about making them particularly Species Accurate or adhere 100% to the laws of physics or biology or whatever. i draw funny cartoons and that's my thing, that's what i do. so take all of this with hefty heapings of salt and the full context that i draw cartoon furries, NOT anatomically accurate real insects for use in science papers. thank you!
there are squazillions of types of bugs and arthropods and etc out there with wildly variant faces, mandibles, mouthparts, and everything else. i just took a bunch of ants, chewed them a bit, and spat out a face inspired by them that worked for me and i found fun/interesting to draw. i encourage everyone to do this with any insect face and see what happens!
this got really long. if you made it this far, thank you for reading!
special thanks to the OpenDyslexic font, which i picked to try and keep things as clear/legible as possible. i could have just used comic sans or something but i like the look of OpenDyslexic :] it's pay what you want on gumroad
EDIT: OH AND!!!
don’t worry about getting mandibles symmetrical. mandibles in nature are pretty much never symmetrical. check out this Bigheaded Ant

ATTRIBUTION: Eli Sarnat, PIAkey: Invasive Ants of the Pacific Islands, USDA APHIS PPQ, Bugwood.org via insectimages.org accessed 15/08/2022
(damn they didnt lie that ant can bighead) anyway what i’m saying is mandibles will meet in the middle in very strange ways sometimes. sometimes one will be bigger than the other, sometimes the “serration” at the meeting edges will be lopsided like one mandible will be > and the other will also be > so it’ll look like one is pointy and the other has a triangle cut out of it. that’s just the way of the world
70 notes
·
View notes
Note
You’ve probably answered this before, but do you have any advice for anyone wanting to make their own spec bio species? I tried making my own but I feel like they’re too humanoid of designs but that’s also what I’m most comfortable with😔
Don’t worry, I’m happy to answer! 🤲🏼
I found that finding a shape, even the most ‘unusable,’ ‘un-animal-able’ shape around you, and then replicating that shape as accurately as you can in a sinch (no streamlining! Shaky messed up lines are ENCOURAGED, living things are all imperfect squiggles, so minimize your erases and undos!) can help with silhouette ideas.
(The reason for that is that instead of deleting a ‘bad’ drawing outright, you can start anew or copy only the parts you liked, and then boom! You’ve got one drawing you’re happy with and another you’ll more likely than not return to in the future, however far.)
(A dozen fast, improvised designs can beat out a single painstakingly planned one. It seems counterintuitive that quantity can be better than quality, but that’s only if you know the quality ahead of time! When it comes to concept art, more is better at the very beginning.)
Once you’ve replicated a handful of shapes, don’t add eyes and ears. In fact, don’t draw anything you’d think of as something an animal would have. The frequent fallbacks are tails, claws, paws, toes, ears, horns, fur, wings, joints, teeth, snouts, and hexapedal, quadrupedal, and bipedal bodies with heads in the front. These things are not universal, they are just our earthly scope of our closest relatives.
Modeling an alien species after insects, birds, reptiles, or sea life will make your alien nonhuman, but still earthling. These categories won’t necessarily arise in an alien world. Evolution doesn’t produce birds as we know them, evolution takes the most convenient source material and produces something to fill the niches birds occupy, and birds happened to be that source material.
I like to think about building a species like building a robot. How does a robot know where it’s going? Light sensors, maybe. Those don’t need to be orbs, or even at the front. How do some robots move? They don’t necessarily need spines or toes or claws or tails. How is fuel acquired? Lots of earth animals happen to have a hole in the front that sucks it in and breaks it up for refinement. Does it only have to be this way?
The more you separate life from Earth and relate it more to processes, means to the goal of continuing one’s design’s existence, creating more and more alien but still feasibly alive creatures becomes easier.
Above all, it should be fun. Researching biological precedent and basis from actual animals isn’t absolutely required, because those processes are based on logic—through which you can invent (or accidentally independently replicate) your own symbioses, organs, life cycles, and body chemistries.
Earth nature is like a template: working too closely from it can make you something that’s feasible, but could be recognizably earthly. Imagination is like raw resources: difficult to refine into something that makes total sense at first (from a lack of reference and guidance), but, with the right balance of templates and shots in the dark—you can make something positively, confidently alien!
You don’t have to do this if you don’t want to of course! It’s not a rule set, and you aren’t doing anything wrong if you don’t do them. The ultimate goal is to enjoy creating, not just the end result. Your aliens should be fun for you to draw. The amount of worldbuilding you want to do is your choice alone and no one else’s. Stopping at a single species, culture, planet is perfectly OK. Don’t let guides or other worlds pressure you into making more than you’re craving to.
If you ever make any drafts, however small, I’d love to see them. I’m always down to hear about people’s alien ideas, I sometimes throw in some fan art to help out. I wish you the best of luck, fun, and ease.
176 notes
·
View notes
Text

Another tutorial for you guys!
Let me know if there's anything specific you'd like me to do a tutorial on next :)
6K notes
·
View notes
Text
ayo i found 2 pages with head angles of humans and animals, could be useful to anyone reading this
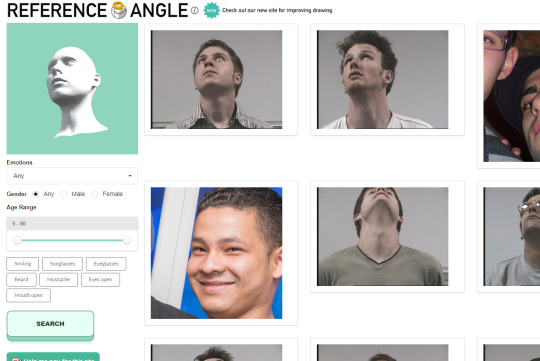
hoomans

animals
182K notes
·
View notes
Text


This got big on Twitter but I never posted it here! A silly little presentation I made about drawing babies 👶
11K notes
·
View notes