#(but I decided to try and clean up the Jpeg artifacts and it was making the whole process take 400% longer)
Text
Learning to Create
It’s really difficult for me to admit that I’m an artist of any capacity. A lot of times, I consider that sort of term to be dedicated only to the working artist. You know, the ones who actually get paid for their work. The ones who end up creating things for everyone. The ones I admire greatly, to the point that I consider them to be living on Mt. Olympus while I’m stuck at a temple waiting for a chariot up a very steep road.
The place I work at now is a place where I don’t get to really create for myself. I create for other people. When I’m done there, I seldom get to make things for myself at home. There is an effort, of course, when I’m able to do so, but it’s hard to be that focused after toiling a retail job for 7 hours a day. You end up taking the opportunity to decompress and that ends up becoming an 8-hour decompress and you need to go to bed. That’s how it is for an adult, I guess. Don’t recommend growing up.
And that “9-5 Job, Now Do Nothing For Hours” mindset is something I need to work on, to be sure. In my mind, I see myself as someone who needs to be able to do something. I can’t make art to decompress, because art is supposed to be something important. I toil and toil, thinking about the process I need to decide on doing. “How do I become an artist like my favorite artists?” “What is the correct methods of learning it?”
How do I climb the mountain and join the greats?
In my monthly stint of introspection, I was watching a friend play Paper Mario: The Thousand-Year Door. To this day, it may still be my favorite game. Watching it again brings back a lot of genuinely good memories, both inside and outside of the game. The charm that filled the game’s varied and interesting world and cast has still yet to be matched for my personal tastes. And for years, it was the game I played whenever I needed a good pick-me-up.
Watching him play it for the first time and getting to hear the same sort of reactions I had to it 14 years ago ended up bringing an...odd memory back to me. And it involves this image.
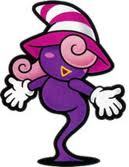
Low-Quality Vivian For The Low-Quality Needs
Perhaps not this specific image in particular - the internet could have phased out that one- but something similar to it.
See, back in 2004 I was just getting in on the whole Internet thing. This was back when people used what was called an “internet forum”. This was a place where people can post their thoughts on a wide range of topics, such as: “How do you jump in Metroid?”, “This game sucks”, and “Do you think Kingdom Hearts 2 will be on Gamecube?”.
I was part of one forum for a good part of my teenage life. I started at around January of 2004, in fact. I suppose I consider that a turning point in my life if I remember it to that degree.
I was fairly active in that forum. And as I began to make my posts, I began to notice something. At the bottom of every post was what you called a signature.

Copyright Falcon 2018, filed under the Trademark of Best Girl 2004
They were a cute little way to signify that you were the one who was making the post. It was one of the small creative outlets this particular forum had given users, though you still needed it to be both 45-ish pixels tall and kept at a low file size to help those with 56k modems.
Typing that out makes me feel really old.
There were people who were making these small images underneath their posts and the cool, hip guy I was as a teenager was like “OH BOY I WANNA DO THAT TOO!”. Of course, in order to create this sort of stuff I had to be...sneaky.
Back then, I found a pirated copy of Paint Shop Pro 7. It worked decently enough for me, but as I was a young lad with strong moral values - I didn’t even curse until well into my later teens, the frickin’ twit - I felt extremely guilty doing this. So for my birthday that year, I ended up getting a legit copy of Paint Shop Pro 8. It was at that point, I suppose, that my desire to create stuff was ignited. I was thrown into the wide world of graphic design, making sigs for myself and others.
I eventually upgraded to Photoshop 7 - after throwing away all of those moral values and growing the confidence to say the fuck-word - walking even further into this new world for me. I started making signatures for people in flashier ways, abused lens flare to the point of blinding half of Nintendo fanboys, and even dabbled in creating wallpapers for people to use. This was back when 1024x768 was the norm, if you can believe that.
I talk about this because when my friend was playing TTYD, I decided to look up art of some characters again, and found Vivian - one of the party members in the game - once more. Only, this time, in a way higher fidelity than I had 14 years ago.

Best Girl in A Good Resolution.
In general, I’d consider TTYD as the game that first got me encroaching into graphic design. This was not due to the game’s art, which is still fantastic, but because of so many people suddenly wanting signatures of their favorite new party members in that restrictive 48 pixel height.
I would get private messages in the forum asking for sigs with Mario, Goombella, Koops, Yoshi, Vivian, Bobbery, the X-Nauts, Bowser, Peach...Rawk Hawk a few times...even had Zess T. the cook in there. It was wild.
So imagine my surprise going through Google Image Search for a post about Vivian and finding an image of her that was extremely close to the kind of art I had to work with back then. I worked for a long time trying to figure out how to deal with the blur of the pisspoor scan with its low resolution and JPEG artifacts. Back then, finding official art was pretty difficult alone, and official art that actually looked like it was scanned with proper care? You were basically stuck with what you had and needed to figure out how to hide it. The people who could find clean concept art became our dealer providing the good shit while we provided our services to others.
Otherwise, you just worked with what you had. This was problem solving. Back then, you didn’t have access to as many tutorials as you do now. You absolutely didn’t have as much access to tablets. Those were from Wacom only and they were expensive. So you were essentially on your own, only getting help from the occasional artist who decided to make small tutorials on the forum.
Thankfully most of the people for signature requests were also teenagers as well, who just thought you were amazing for doing this for them.
I suppose all this reminiscing got me thinking about that mountain again. The paths up the mountain are long but they’re rarely ever getting longer or shorter, just easier to traverse. Nowadays, tablets are so much easier to acquire and art programs have gotten a lot more manageable. Art you want to look at or study or even use for your small projects are readily available, with services that makes buying personalized art easy and supporting artists even easier.
The knowledge about art programs and processes is nigh-infinite at this point. You can get a young artist’s commentary about their own virtues of art in a single tweet at lunch and get an experienced artist’s commentary at dinner. You can get atelier-level art lessons for free on Youtube.
Almost anything you want to learn is feasible now. Climbing the mountain is easier than ever.
So naturally, with my inferiority complex in full swing, I always have to ask myself why I haven’t started climbing the mountain yet. Why haven’t I just started the trek up the mountain pass already towards becoming a technically-skilled artist?
And the answer is, I am.
It’s just at my pace.
When I was a kid playing make-believe with others in the playground, I was making steps. Throughout all my teenage years of making signatures for people, making wallpapers for others, and even making a properly-awful sprite comic, I was making steps. When I was getting people stealing my sketchbook and making marks over my drawing of a Sonic character at lunch in high school, I was still making steps. When I was being critiqued by people for my skills in ways I felt were unfair or spiteful, I was still making steps. Every time I open Photoshop or SAI and stare at a blank canvas and will myself into making a mark on there, I’m still making a step.
Every step further from the start point, which is far and away from where I am now.
In my mind, I still can’t help but feel like where I should be is as some sort of master of art, but it’s really not fair to me. In hindsight, if I had drawn something every single day with intent, I could be a technical genius with knowledge of all the principles of design lodged firmly in my mind. It sounds amazing, but that’s not something I did.
Considering “what could have been” ignores what I am now. I am someone with knowledge in these various programs for over 14 years. I’ve dabbled in multiple projects, some in my own design. I can consider those things invariably shit, but the stuff I did there was stuff I did on my own terms, which I learned from. I wrote fanfics, did signatures for people, made wallpapers and webcomics, designed websites, did roleplaying, made a storyline based on friends’ characters in an MMO, and played tabletop games creating characters that became some of my favorite creations in my lifetime.
I would never want to trade that away for some sort of technical skill level-up. I’ve made too many great friends because of all of this. I am who I am because of how I’ve gotten here.
Learning how to create is all about taking the opportunities as they come along. Even this post is, essentially, me seeing one image online after a game session with friends and getting a nostalgia blast for something completely unrelated to the game itself.
The act of creating is simply doing. If you do, you create. If you create, you create art.
If you create art, you are an artist.
Don’t let your inner thoughts dissuade you from that fact, ever.
Thanks for reading.
7 notes
·
View notes
Text
Photoshop Tutorial
Plenty of people have inquired how exactly I really do lots of my characterizations and peculiar aliens, and so I thought I would finally sit back and write a new tutorial.
I presumed a pleasure image to concentrate on is my face-off image for the Alien Nation 3 competition.
To begin with, I thought I d explain a bit about my strategy. I do a lot of modification layers, curing brush combined with a little liquefy, and cloning. My theory with characters is I try to leave as a number of the pixels. What I attempt to accomplish is create them a color that is different. I scarcely hotel to doing some other paint pops that are destructive.
First things first, I did not have the full concept in your mind once I started this image, and sometimes what the alien had been about to appear to be. In reality, I even plan for this to function as Tom Cruise for almost just about any reason other than that I enjoy the high end photo retoucher intense look in his head and it turned out to be a resolution record to govern without needing to work around .jpeg artifacts.
That said it evolved to some ridiculous goof on Mr. Cruise that wound up having a fantastic reaction from the Republicans thus, go figure!
Let us start...
Mr. Storm has too much hair to generate a persuasive alien, therefore, enables take it off!
Start by cloning out of the middle of the eyebrow outside developing a digital bald-cap.
Remember it doesn't fundamentally matter how far how to wash that your cloning is. It we'll fix it.
(Hint ) I sporadically un-check the aligned button towards the very top once I find an excellent subject of eyebrow which pits to function as a standard skin feel.
After roughing into a new mind contour from the eyebrow outside, then replicate in the gray backdrop from the surface, in creating a new border for the form of the mind.
Following Tom's new eyebrow is glistening and it could still look somewhat like a demanding patchwork of both skin-tones and feel.
Establish the magnitude of the healing brush into something moderate like 20 pixels or so and get started targeting the obvious of one's lousy trademark marks. Clone from the middle of the forehead. (preferably from the unaffected parts ) Magically up on letting upward out of each brush stroke, it's going to set the feel you've set merely there, and then auto color-correct it into to coincide with the nearby pixels! (obtained Id love that curing brush! ) )
Time and energy to eradicate a few of the pesky facial features...
To begin with, let's keep on with the rubber stamp tool and demanding from the removals of Tom's eyebrows in addition to his nose. Once those are all gone, I want to get rid of the piece of stubble and feel on his brow to acquire a complete smoother face.
Measure 4: Much like measure two we are likely to go straight back during these areas with the healing brush and find yourself a beautiful mixture of skin-tone and feel. (for all those wondering why that can be really just a two-step procedure involving the rubber stamp and also the healing brush, then the reply is relatively straightforward. I've gotten a better result from regions of the facial skin having a closest to my result color. Like that once the healing brush does its magical color-correction into the nearby pixels that you don't have any lingering color from the initial pixels inhabiting that place )
Time and energy to get started making his face a little more alien...
I decided I needed to bisect his head having a slit which travels the course of his head in addition to alter the functionality of the mouth.
To accomplish so I generated a new modification layer setting it into degrees.
At the degrees dialog box that I took in the low right white triangle to the middle of the histogram. This left the high lights of how the image rip-off.
Today every time a flat's modification coating is inserted into an image it creates a new clean white coating mask. Target this mask from the layers dialogue box and then invert it shifting. (Command/or Control Id )
Your image should look as if you inserted the degrees adjustment layer. You are all set to begin painting. Then I placed two vertical lines, then one on both sides of the lip of the mouth area.
(that is precisely what the coating mask appears like if you've completed painting )
Today I wish to provide these lines somewhat of thickness. Therefore, I will bring a layer style to the alteration coating.
Either tap into a negative subject of the coating in the coating's pouch or click onto the layer and select Blending Options from the menu that arises to match a coating style.
Here are the configurations that I've selected:
Fundamentally I only noodled up until the light also matched it gave the illusion of thickness into the traces of the facial skin.
I want to provide the traces some modeling to signify there are arteries at the borders of the trails. Therefore went to bring another alteration layer with levels. Now my guideline to be able not to adjust their color. The means to get this done would be to take away the difference of the color I am attempting to incorporate. Therefore that I can take away blue and green, in cases like this, I need a wash.
From the RGB slider that I shoot out high lights together with the underside white arrow taken towards the middle. And that I take out mid tones by slipping the gray shaft to the best. I am the green histogram and choose out green from the high lights, (underside white arrow, then go on into the left) I then do the same with all the gloomy. Even though I take more blue out to compel at the color into more of the opposed to your red. Reach fine from the dialogue box and then aim the mask at the modification layer and invert it.
Today, we're prepared to paint with all the reddish color correction. Make use of a soft border brush 20 30 pixels in size and gently color in approximately every one the traces of the facial skin. Im by applying this particular color correction to begin a number of the bone workaround the eyes together with to generate several shadow locations.
That is a measure that's going to become replicated again and again! I tend to possess heaps of modification layers every serving a color-correction which advertisements or remove from the coating before it. If things get somewhat tricky. .Sorry!
I initially thought I would desire this alien to become aquatic, and so I started down the trail of bright coloring to produce him fish just such as (apparently at any time after I decided to change directions somewhat ).
We are going to accomplish a little shading with a turquoise green tone.
I need this alien to possess a wrinkled feel to his head, rather than glue within a feeling will use my same procedure just like the former modification layers and go to town along with my Wacom tablet computer and stick to the contours of his head and begin to introduce some intriguing shapes and lines that'll start to shape the personality.
With this modification layer Im color adjusting to your rusty orange tone.
Continuing the simulating of the facial skin, I make a dark reddish color correction and get started painting squiggles all around the face area. You'd be amazed how effective that is when warmed on while inside the quantities that are ideal. I discovered this method called figure eights with the way of a make. (They do that kind of item to find skin blotchiness for good special effects makeups, and so I figured why not check it out for virtual blushes, huh?)
Fundamentally what I do will work in tight nit spots with varying amounts of pressure in my pill computer.
Eliminate a couple of other pesky body parts.
Only at that point, I started getting an adequate idea of the way I needed the final piece to check and that I chose people ears to go!
A great deal more color!
I inserted red into the slits of the head to produce them stand out more.
A little cardiovascular work. I included a few darkish veins.
Produce a glowing whitish, yellowish adjustment coating and then sew the mask to paint having a huge feathered brush. Do the shadow areas using a dark brownish color correction focusing into the shadow and light regions of the face being careful not to place shadows where they don't belong.
Another highlight color-correction that time around stained with a 10-pixel brush to essentially make textured lines around the base of the eyes and also at the borders of the lips.
Another dark color-correction to create a few colored stripes and wrinkles to the lips and forehead, creating shining lines into the face area.
Another accent color-correction to put twist specular hi-lights on the newly generated wrinkles.
Full color to a light green. I made the decision now I wasn't going to help keep him. Therefore, a muted coloration was generated by me and then also did a coating mask to sweep it.
I followed up this with a dark reddish color to generate darkly shaded sections of the head and put in comparison to the bone restructuring.
His face appeared too high now, and I am a sucker for older StarTrek type extraterrestrial beings, therefore that I thought I'd opt for a beautiful seen Trill-like pattern (if you watched STNG or even DS9 the mention is eloquent.)
I wanted to possess stains which were trimmed having a darker color and also maintain a lighter color at the middle. I Command/Control-clicked onto the layer mask for the stains color-correction loading its coating mask. I then produced a new adjustment layer which brightened the last one building an outside stroke to my stains and a green tone.
My idea once I began directing this alien to get a peculiar form of species was I would displace Tom's eyes. It looked interesting nonetheless it rendered him unrecognizable. And that I picked the intense look in his eyes which steered me to the image since the origin from the first location. I merely shifted to reddish to the color of the eyes.
Now I had been happy with the cryptic face, and I chose to proceed and produce a scene outside of it.
Therefore I spared my multi-layered color-correction alien and then piled all of my layers together and blended them that I might work somewhat faster (things get somewhat slow with this numerous layers!).
After consolidating the layers that I stored this for a new version and proceeded on into the upcoming few information.
With hardly any modification I watched this as a rubber mask that was lost that was perfect to place to the dining table facing the newly revealed alien.
Then I moved to Liquefy.
I flexed and warped the facial skin area into squish it and also make it seem like churns up rubberized putting onto a desk.
Then, also that I understand in this time sef mccullough, this could shock you...I inserted a modification layer!
I started using a darkish color and gently slit in certain huge wrinkles to signify the folds of the mask.
Then I emphasized those traces with another modification layer.
Then I went over the new springs using a sizable brushed dark color-correction to smooth out things a little.
Another glowing color correction to get things to appears shiny.
And a super-dark color correction to the shadow.
I packed most this up into friends, replicated it and then merged the copy bunch.
Then put the mask onto its side and left a dark gray solid to be a symbol of a desktop for it to lay.
Then following some more Google hunts for several Scleral lenses, some spirit gum glue, and a few sponges for application of the adhesive, I put all together using some vertical blurring to the flopped reflections onto the desk... Done!
1 note
·
View note
Text
As usual, my mage was one of the first alts I levelled once I had a spare moment to do so. I do like my mage a lot – she was my first ever toon, and the first toon I raided with, too. She’s been a whole bunch of different races and has dabbled with both factions. Right now she’s back to being a human named Cinderlily (named after Lily Potter). I keep switching between the 3 specs because I can’t decide which I like better. So naturally I had to get the appearance for all 3 specs! And today I got the last one I needed.
~*~*~*~*~ SPOILERS AHEAD ~*~*~*~*~
Arcane
My arcane appearance was the first one I got. I was so unbelievably lucky with getting this one. I had just ported into the Mage Order Hall when a little dialogue popped up saying something about a Volatile Sheep. I frantically searched for it but couldn’t find it, only to remember that I hadn’t done all the bits before that part of the acquisition anyway. (the dialogue pop up is a bug – it will pop up for almost everyone in the order hall when someone else gets it). I decided right then and there that I needed to go get started on that appearance because I’d probably have a long time to wait.
I went and found the guide on wowhead, then trotted off around the Broken Isles polymorphing everyone I needed to. From there it would be RNG, but that was ok, at least I’d started the process. I figured I’d be in for a bit of a wait. So you can imagine my surprise when only a few days later the volatile sheep spawned for me! I was so excited! I clicked him until he exploded (HILARIOUS!! So bummed I didn’t get a pic of it exploding, though…)
This is what it looks like with RNG smiles upon you and the Extremely Volatile Sheep spawns for you in your Order Hall.
Then it was off to Stormheim to find the next Volatile sheep to click on. There are loads of places this little guy might be hiding, but RNG was my friend again, and there he was, right near the Valdisdall flight path!
The sheep are getting angry now… Except silly me didn’t get a pic of the sheep AGAIN!!! (I was just so darn excited)
The next part of the chain takes you Elwynn Forest. What follows is an absolutely hilarious series of events. For me, this bugged out – RNG had blessed me enough that day, and the scenario would not trigger. Thankfully everything worked out after the server reset and I was able to to complete the quest. It really made me laugh so much!!
At the end of it, I got my sheep staff!
One sheep staff acquired!
Of course I immediately had to test it out and sheeped a nearby wolf. The sheep burst into life and quite literally screamed. I laughed until I cried – it’s SO damn funny!!
Of course I had to make a new transmog to match my “shepherd” ways, so here’s my Farmer Cinderlily transmog :)
Fire
The second appearance that dropped for me was the fire appearance. This one is hands down one of my most favourite artifact appearances in game out of all of them. I love it! It’s relatively easy to get, in that it’s a random drop from mobs in Suramar. I didn’t go out of my way to farm it – I figured if I didn’t have it by the time I Was done with the Suramar story line that I’d spend some time farming it after that. But as luck would have it, I didn’t need to do that. The appearance dropped off a random mob while I was cleaning out Thalyssra’s house.
I made sure I was in a safe place to learn it (and in fire spec, of course!)
Look how beautiful it is!
Frost
The frost artifact is one of the more frustrating appearances to try and get. Like the arcane one, there’s only 1 chance per day that you can get this by being in certain places in your order hall. For the frost appearance it’s running down the stairs to your mission map. I had been tracking this appearance chance every day for a really long time – it was the first one that I wanted to get, but was not having any luck with it.
Then today, whilst chatting away with Z, I zoned into my order hall, ran down the stairs… and there it was! The summons. I went through a portal and ended up in Frostfire Ridge where I was given the frost appearance. <3
The Frost hidden artifact appearance.
I just love the blue and fire together – is so beautiful!
So the hunting for my hidden mage appearances is now complete. I still don’t have all 3 on my shaman yet (the restoration one just doesn’t exist!)
I’m not sure what to work on next… I might go a little crazy and try for the Corrupted Ashbringer! :D
The journey to find all 3 mage hidden artifact appearance is complete! As usual, my mage was one of the first alts I levelled once I had a spare moment to do so.
1 note
·
View note
Last Seen Blogs

jxhntaylxr-blog
hot dad band>you


mandigo
southern-dissolution

freyaxx
freya

cjdtkidh
방과후 술래잡기 사망신 모바일