#Aadhaar authentication applications
Explore tagged Tumblr posts
Visit Tumblr Blog
Explore Tumblr blogs with no restrictions, modern design and the best experience.
Last Seen Tumblr Blogs


Fun Fact
The Tumblr office adopted Tommy, an 11-year-old Pomeranian.
Text

Steps to Legally Transfer Property to a Wife After Husband’s Demise: A Complete Guide
Losing a loved one is always difficult, and dealing with legal formalities in the aftermath can be overwhelming. One of the key concerns for a surviving spouse is the transfer of property after the husband's demise. In this comprehensive guide, we will explore the necessary steps to legally transfer property to a wife, preparations before property transfer, essential documents, and how to navigate the legal process.
Also Read: Wife's Property Rights After Husband's Death
Preparations Before Property Transfer
Before initiating the process of transferring property after a husband's demise, certain preparations are necessary to ensure the process goes smoothly. Proper preparation can prevent delays and avoid disputes among legal heirs.
Gather All Relevant Documents
Start by collecting all the relevant documents that will be needed during the transfer process. These include:
The husband’s death certificate.
The original property documents (sale deed, title deed, etc.).
Identification proofs of the wife and other legal heirs.
Marriage certificate to prove the wife’s relationship with the deceased.
Any existing will, if applicable.
Review Debts and Liabilities
Check if the property is free from encumbrances or loans. If the property is mortgaged, you may need to settle the outstanding loan or arrange for the loan to be transferred in the wife’s name.
Understand the Type of Property
Determine whether the property is self-acquired or ancestral, as different laws may apply. Also, check if the property is jointly owned, as this can simplify the transfer process.
Essential Documents for Property Transfer
To ensure a smooth property transfer, you will need to submit a set of important documents to the authorities. Here is a list of essential documents required for transferring property to the wife:
Death Certificate: A copy of the husband's death certificate issued by the local municipal authority.
Legal Heir Certificate: If there is no will, this certificate identifies the legal heirs of the deceased.
Succession Certificate: Required for movable assets like bank accounts and shares.
Will (if available): If the husband left a will, submit a copy along with the probate order.
Marriage Certificate: To establish the wife’s legal relationship with the deceased.
Property Ownership Documents: The title deed or sale deed of the property.
Identification Proofs: Aadhaar card, PAN card, or voter ID of the wife and other legal heirs.
Tips for Organizing Your Estate Affairs
Proper estate planning can help reduce confusion and ensure the smooth transfer of assets. Here are a few tips:
Create a Will: A well-drafted will can simplify the property transfer process for surviving family members.
Update Legal Documents: Regularly update ownership records, nominee details, and any outstanding loans.
Discuss with Family: Make sure your loved ones are aware of your property and estate arrangements.
Seek Legal Advice: Consult with a lawyer to ensure that your estate planning is legally sound.
The Legal Process of Property Transfer
The legal process of property transfer depends on whether the deceased left behind a will or not. Let's explore both scenarios.
If the Husband Left a Will:
File for Probate: Probate is the legal process through which a will is authenticated by the court. This process involves submitting the will to the district or high court, depending on the value of the property.
Executor Transfers Property: Once the probate is granted, the executor named in the will transfers the property to the wife.
Mutation of Property: The wife needs to apply for the mutation of property in her name by submitting the probate order and relevant documents to the local municipal authority.
If There Is No Will (Intestate Succession):
Obtain Legal Heir Certificate: The wife will need to apply for a Legal Heir Certificate to establish her legal right to the property.
Apply for Succession Certificate (for Movable Property): In cases involving movable assets, the wife must obtain a Succession Certificate from the court.
Mutate the Property: Once the legal heir certificate is obtained, the wife can apply for the mutation of the property in her name.
How to Initiate the Process of Transfer
To initiate the process of transferring property after the husband’s demise, follow these steps:
Get the Death Certificate: Obtain the husband’s death certificate from the local municipal authority.
File for Probate (if there is a will): Submit the will to the court to get it authenticated through probate.
Apply for Legal Heir Certificate: If there is no will, submit an application to the local revenue or civil court to obtain the Legal Heir Certificate.
Submit Necessary Documents for Mutation: Provide all required documents to the land revenue office or municipal authority to mutate the property in the wife’s name.
Probate and Its Role in Property Transfer
Probate is the judicial process of validating a will in court. It is required to ensure that the will is legally binding and that the executor can proceed with the transfer of property. Probate is necessary in some states, such as Maharashtra and West Bengal, even if the will is undisputed. The process involves:
Filing the will in court.
Verifying the will's authenticity.
Granting the executor the right to distribute the deceased's assets.
Factors Affecting Property Transfer
Several factors can affect the smooth transfer of property:
Existence of a Will: The presence of a valid will simplifies the process.
Legal Disputes: Disputes between legal heirs can delay the transfer.
Outstanding Loans: If the property has a mortgage, the loan must be settled before the transfer.
Debts and Liabilities Impacting Transfer
Before transferring property, it’s crucial to settle any outstanding debts or liabilities on the property, such as:
Home Loans or Mortgages: The wife must either repay the loan or transfer it to her name.
Unpaid Taxes: Property taxes or other dues must be cleared before the property can be transferred.
Joint Ownership and Rights of Survivorship
If the property was jointly owned by the husband and wife, the process of transfer is simpler. In such cases:
The wife becomes the sole owner of the property automatically upon the husband’s death, thanks to the right of survivorship.
The only legal requirement is to mutate the property records to reflect the change in ownership.
Step-by-Step Guide to Transfer Property
Here is a quick step-by-step guide to transferring property:
Obtain the death certificate.
Gather all property and legal documents.
File for probate (if necessary).
Apply for Legal Heir or Succession Certificate (if no will exists).
Submit documents for mutation to transfer property ownership.
How to File the Deceased’s Will
To file the deceased's will, follow these steps:
Locate the Will: Ensure that you have the original copy of the will.
Submit to Court for Probate: File an application with the local court to initiate the probate process.
Provide Executor Information: Include details about the executor named in the will.
Navigating Inheritance Laws and Regulations
India has different inheritance laws based on religion. Understanding these laws is crucial to determining how property is distributed:
Hindu Succession Act, 1956: Governs Hindus, Buddhists, Jains, and Sikhs.
Muslim Personal Law (Shariat): Governs Muslims.
Indian Succession Act, 1925: Applies to Christians, Parsis, and Jews.
Tax Implications and Considerations
When property is transferred, tax implications must be considered:
Inheritance Tax: India does not have an inheritance tax, but stamp duty and capital gains tax may apply.
Capital Gains Tax: If the wife decides to sell the inherited property, she may be liable for capital gains tax on the appreciation of the property value.
Understanding Estate Taxes and Exemptions
While India does not levy an estate tax, inheriting property may still involve taxes such as stamp duty and registration fees during the transfer process. These taxes vary depending on the state and property value.
Tips for Minimizing Tax Burden on Inherited Property
To minimize the tax burden on inherited property:
Consider holding onto the property for a longer period to reduce capital gains tax.
Explore exemptions under the Income Tax Act, such as Section 54, for reinvestment in another property.
Common Challenges and Solutions
a) Disputes Among Heirs
Disagreements among legal heirs can delay the property transfer process. If disputes arise, the wife may need to file a partition suit or negotiate a settlement.
b) Missing Documents
If property documents are missing, apply for certified copies from the land registry office or municipal authority.
Dispute Resolution Among Heirs
If disputes arise among heirs, mediation or legal intervention may be required. Courts can intervene to ensure fair distribution under the applicable succession laws.
Avoiding Delays in Property Transfer
To avoid delays, ensure that all necessary documents are in order and that no outstanding debts or legal disputes exist. Engaging a lawyer early in the process can help smoothen the procedure.
Conclusion
Transferring property to a wife after a husband's demise can be a complex and emotional process, but by following the correct legal procedures and preparing the necessary documents, the process can be made smoother. Whether a will exists or not, understanding the legal framework, tax implications, and the steps involved will help ensure a seamless transfer of ownership, allowing the wife to secure her rightful inheritance with ease. If in doubt, consulting with a legal expert can provide additional clarity and assistance.
#Transfer Property from Husband to Wife After Death#legal services#legal advice#family law#legalhelp#legal consultation
2 notes
·
View notes
Text
Delhi High Court Orders FIR for Forged GST Documents, Mandates Stricter Scrutiny
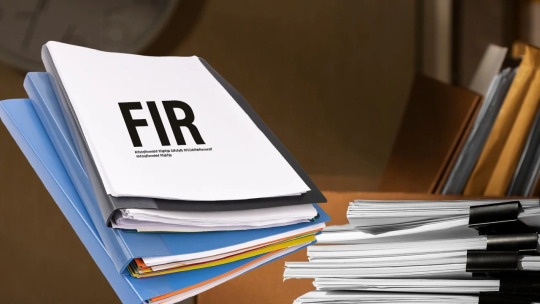
Delhi High Court Orders FIR Against Petitioners for Forged GST Documents
In a significant ruling, the Hon’ble Delhi High Court has directed the registration of a First Information Report (FIR) against petitioners who obtained Goods and Services Tax (GST) registration using forged documents. This decision came in the case of M/s. S.R. Enterprises v. Principal Commissioner of Goods and Service Tax East Delhi [Writ Petition (Civil) No. 685, 1314, 2461 and 2867/2025 dated May 29, 2025], where four writ petitions filed by GST-registered entities were dismissed after it was discovered they were based on forged Aadhaar cards, fabricated Show Cause Notices (SCNs), and fictitious identities.
The court emphasized the severity of the matter, not only ordering an FIR under multiple penal provisions but also mandating stricter verification protocols for future GST litigation to prevent such “gross abuse of process.”
The Unraveling of a Scam
The case began with M/s S.R. Enterprises filing four writ petitions, each supported by SCNs challenging the cancellation of their GST registrations. The petitioners claimed the SCNs lacked specific reasons for cancellation. Initially, a predecessor bench, relying on the presented SCNs and a similar past ruling, had set aside the GST registration cancellation orders, assuming the authenticity of the documents.
However, on April 17, 2025, the Delhi High Court was alerted by the Respondent to similar fabrications in other writ petitions. This led to a swift recall of a previous order that had given effect to the setting aside of the cancellation. All four writ petitions were then heard together.
The investigation revealed shocking details:
Untraceable and Fictitious Identities: Reports showed that the individuals named as petitioners were either untraceable or entirely fictitious.
Forged Aadhaar Cards: An individual named Mr. Aman, whose Aadhaar card was linked to one of the enterprises (M/s Compact Enterprises), was found to be a domestic helper whose photograph didn’t match the one on the Aadhaar card submitted to the court. His family confirmed he had not filed any such case.
Suspicious Financial Transactions: M/s Compact Enterprises’ bank account showed a credit of over Rs. 19.40 crore between January and April 2025, despite the nominal presence of Mr. Aman.
Oath Commissioner’s Testimony: The Oath Commissioner, Ms. Shilpa Verma, could not recall if the petitioners had physically appeared before her for affidavit attestation, citing a large crowd in her office.
Direct Confirmation of Forgery: Mr. Sahib Alam, proprietor of M/s Royal Enterprises, revealed that a scrap dealer had taken his Aadhaar and PAN cards under the guise of offering employment, and opened a bank account without his knowledge. While his Aadhaar details were accurate, the photograph on the card filed with the petition was different and unrecognized by him, a fact corroborated by the Directorate General of GST Intelligence (DGGI).
Court’s Stern Directives
In its ruling, the High Court not only dismissed all four petitions and disposed of pending applications but also issued the following directives:
FIR Registration: The DGGI officials are to conduct a thorough investigation within one week and file a complaint with the Crime Branch, Delhi Police, for immediate FIR registration.
Review of Attestation Protocols: The order will be communicated to the Law Secretary and the Ministry of Law & Justice to consider mandating photographs when affidavits are attested by Oath Commissioners and Notaries to ensure the physical presence of deponents.
Precautionary Measures for Counsels: Lawyers filing GST matters are now required to take precautionary measures and verify documents through the GST portal to ensure their authenticity.
Recall of Previous Orders: The court explicitly recalled its earlier orders dated February 3, 2025, February 27, 2025, and March 6, 2025, which were based on the fabricated documents.
Inquiry into Forgery: The Registrar General has been directed to lodge a complaint against all petitioners under the Bharatiya Nagarik Suraksha Sanhita, 2023 (BNSS) and the Bharatiya Nyaya Sanhita, 2023 (BNS) for offenses related to forgery and fabrication.
This judgment serves as a strong deterrent against the misuse of legal processes and highlights the judiciary’s commitment to upholding the integrity of the system, echoing a similar stance taken by the Calcutta High Court in Suresh Kumar Chaudhary vs. Assistant Commissioner [Mat No. 2012 of 2023 January 09, 2024], where a writ petition was dismissed due to the use of forged documents for GST registration.
0 notes
Text
How to Open Angel One Account Online: Step-by-Step Demat Guide

How to Open Angel One Account Online – Full Digital Guide
If you're ready to start investing in the stock market, knowing how to open Angel One account online is a smart first step. Angel One is a leading stockbroker in India, offering a seamless and fully digital experience. With zero paperwork and fast verification, opening a demat account has never been easier. This guide will walk you through the Angel One demat account opening process step by step, helping you get started within minutes.
Why Choose Angel One for Your Investments?
Before diving into the signup process, it’s important to understand what makes Angel One a preferred broker for lakhs of investors:
Zero brokerage on equity delivery (up to ₹500/month)
Flat ₹20/order on intraday and derivatives
Smart investing with AI-based tools like ARQ Prime
Easy access through mobile, web, and desktop platforms
Fully digital KYC process for faster verification
Because of these features, many new and experienced investors choose Angel One as their trading partner.
Step-by-Step Guide: How to Open Angel One Account Online
The process to open your account is completely online and typically takes just 10–15 minutes. Make sure you have your essential documents handy, and let’s get started.
Step 1: Visit the Official Website
First, go to the Angel One website and click on the “Open Demat Account” button. This action takes you to a secure page to begin registration.
Step 2: Enter Basic Personal Details
Fill in your name, email ID, and mobile number. You’ll then receive OTPs on your phone and email, which you must verify before moving ahead.
Step 3: Complete e-KYC Using Aadhaar
Next, input your PAN card number and verify your identity using DigiLocker, which links to your Aadhaar. This step is vital in the Angel One demat account opening process, as it ensures your details are legally authenticated.
Step 4: Link Your Bank Account
Now, enter your bank account details. You can either upload a cancelled cheque or use UPI for verification. This account will be used for all your future trading transactions.
Step 5: Upload Your Signature and Live Selfie
Here, you’ll be asked to upload your signature on white paper. Additionally, use your phone or webcam to capture a live selfie for identity confirmation.
Step 6: Nominee & Income Details (Optional)
Though optional, adding a nominee is recommended for account safety. If you’re planning to trade in derivatives like F&O, then upload income proof such as a salary slip or ITR as per SEBI guidelines.
Step 7: Review and E-Sign Your Application
Lastly, double-check all the provided information. Then, e-sign your application using Aadhaar OTP. Within 1–3 business days, your account will be active and ready for use.
Angel One Account Opening Documents Checklist
To ensure a smooth experience, prepare the following before starting the process:
Mandatory Documents:
PAN Card
Aadhaar Card (linked with mobile number)
Bank proof (cancelled cheque or passbook/statement)
Signature on white paper
Live selfie
Optional (For F&O or Margin Trading):
Income proof (ITR, payslip, or bank statement)
Additional address proof if requested
What to Do After Your Account Is Active
Once your account is live, you gain access to a range of investment services directly through Angel One’s platforms. You can:
Buy/sell stocks, IPOs, mutual funds, and ETFs
Trade in Futures and Options with leverage
Explore global investments, including US stocks
Invest in bonds and fixed income products
Track corporate actions and receive dividends
Apply for loans against securities if needed
All of this is available via Angel One’s intuitive mobile app and website.
Final Thoughts
To summarize, understanding how to open Angel One account online empowers you to begin your investment journey effortlessly. Thanks to a completely paperless system and a simplified Angel One demat account opening process, you can be market-ready in no time.
Start by keeping your documents ready, follow the 7 easy steps, and you'll soon be trading from the comfort of your home. If you need help picking a plan or uploading your documents, just ask—we’re here to guide you through.
0 notes
Text
Angel One Demat Account Opening Process Guide Step by Step
Step-by-Step Guide to Angel One Demat Account Opening Process
Opening a Demat account has become essential for modern investors, and Angel One provides a seamless experience for anyone looking to invest in the stock market. If you're new to online trading or switching brokers, understanding the angel one demat account opening process is the first step. In this article, we’ll walk you through the entire procedure in a clear, structured, and easy-to-follow format.
Why Choose Angel One?
To begin with, Angel One is a trusted name in the Indian financial sector. It offers advanced tools, zero brokerage on delivery trades, and a user-friendly interface. Moreover, the brand has built a reputation for simplifying the Angel One account opening process, even for first-time users. Their tech-driven platform ensures that most procedures are completed online without any paperwork hassles.
Documents Required for Account Opening
Before you start the angel one demat account opening process, ensure that you have the necessary documents ready. These include:
Aadhar Card linked with your mobile number
PAN Card
A recent passport-size photo
Cancelled cheque or bank statement (for account verification)
Digital signature or live photo (captured during the process)
Although this may sound like a lot, each document plays a role in verifying your identity and enabling a secure trading environment.
How to Start the Angel One Demat Account Opening Process
To get started, visit the official Angel One website or download their app. Then follow these steps:
Sign Up Online: Enter your name, email, and mobile number. You’ll receive an OTP to verify your number.
Provide PAN and Bank Details: Next, enter your PAN card details and banking information for fund transfer purposes.
Complete eKYC Verification: Upload your documents and complete the eKYC by validating your Aadhar via OTP. This is a vital step in the angel one demat account opening process.
In-Person Verification (IPV): You’ll need to record a short video or click a live photo as part of the IPV step. It ensures authenticity and is now mandatory.
E-Sign Application: Finally, digitally sign the application using Aadhaar-linked OTP. Once you submit everything, your application goes into review.
Through each of these steps, Angel One ensures that the Angel One account opening process remains secure, fast, and fully digital.
What Happens After Submission?
After completing the process, you typically receive confirmation within 24–48 hours. You will be granted login credentials to access the Angel One trading platform. At this stage, you can begin trading and investing in stocks, mutual funds, IPOs, and more.
Importantly, the angel one demat account opening process is paperless and can be done from the comfort of your home. Additionally, you can track your application status directly on their portal, making it easy to stay informed.
Key Benefits of the Angel One Platform
Besides the ease of account opening, Angel One offers several features that benefit new and experienced traders alike:
Smart investing tools and real-time analytics
Free Demat account with no annual maintenance charges for the first year
Learning resources and stock market tutorials
Mobile-friendly interface for trading on-the-go
Thus, once you complete the Angel One account opening process, you gain access to a robust investment ecosystem.
Tips for a Smoother Account Opening
Double-check your Aadhaar and PAN details before starting
Make sure your Aadhaar is linked to your mobile number
Keep scanned copies of required documents in JPEG or PDF format
Use a high-speed internet connection for uninterrupted processing
Using these tips, the angel one demat account opening process can be completed even faster without errors or delays.
Conclusion
To summarize, the angel one demat account opening process is simple, fast, and entirely online. With a few documents and guided steps, anyone can begin their trading journey effortlessly. Whether you're a beginner or a seasoned investor, the Angel One account opening process is designed to get you started with minimal effort and maximum security. Take the first step today and unlock the potential of smart investing with Angel One.
#angel one account opening documents#angel one demat account opening process#angel one free demat account#how to open angel one account online#angel one open demat account#angel one pe demat account kaise khole#angel one account opening process
0 notes
Text
What is the Meaning of Self Attested? A Complete Guide
In today’s digital and paperwork-driven world, the term “self-attested” comes up frequently—especially in official documentation, job applications, visa processes, and financial services. But many still wonder, what is the meaning of self attested? In this blog, we’ll break down the term, explain its significance, how to self-attest documents, and why it’s important in both personal and professional settings.

What is the Meaning of Self Attested?
Let’s start with the basics. What is the meaning of self attested? Self-attested means that a person verifies a document to be a true copy of the original by signing it themselves. It does not require a gazetted officer, notary, or any other authority to validate the copy. Instead, the person declaring the document's authenticity takes full responsibility by signing and, in most cases, writing “self-attested” on it.
So when you’re asked to submit self-attested copies, you're simply expected to:
Write “Self-attested” on the photocopy.
Sign next to or below the statement.
Mention the date (optional but recommended).
Why is Self Attestation Needed?
Now that we understand what is the meaning of self attested, let’s discuss why it’s needed.
Government departments, universities, banks, and visa offices often ask for document copies. Instead of flooding these institutions with original documents, which can be risky or inconvenient, they accept photocopies with a self-declaration of authenticity. This reduces administrative burden and speeds up processing while still holding applicants accountable.
Some common scenarios where self-attestation is required:
Job applications (government and private sector)
Bank account opening
Passport or visa applications
College or university admissions
Income tax or KYC submissions
How to Self Attest Documents?
If you’re wondering how to self-attest a document after learning what is the meaning of self attested, here’s a simple step-by-step process:
Make a photocopy of the original document (e.g., Aadhaar card, passport, marksheet).
Write “Self-attested” on the copy—typically on the front, preferably near a corner.
Sign your name in ink just below or next to the statement.
Include the date (this can help for time-sensitive applications).
If multiple pages are submitted, sign on each page to prevent tampering.
Self Attestation vs Notary Attestation
Many people confuse self-attestation with notarization. While both involve document verification, they are not the same.
Self-attestation: Done by the document holder. No external authority needed.
Notary attestation: Performed by a certified notary public. Requires a fee and official seal.
In most routine cases, self-attestation is sufficient. But for legal matters, international documents, or court proceedings, notarized documents may be mandatory.
Is Self Attestation Legally Accepted?
Yes, in India and many other countries, self-attestation is legally accepted for a wide range of administrative processes. In fact, to reduce bureaucracy, the Indian government in 2014 encouraged self-attestation for documents in many public services. However, it’s always best to verify with the concerned authority before submission.
Common Mistakes to Avoid
Forgetting to sign the copy
Signing only the first page in multi-page submissions
Using a pencil or non-permanent ink
Not writing “self-attested” clearly
Signing a document without verifying the original
Being cautious while self-attesting prevents rejection or delays in processing your application.
Final Thoughts
To sum up, what is the meaning of self attested? It simply means affirming the authenticity of a document copy with your own signature. This simple act empowers individuals to submit verified documents without the need for third-party approval, making administrative processes faster and easier. Whether you're applying for a job, bank account, or visa, understanding how and when to self-attest documents is a useful life skill.
0 notes
Text
DSC Registration: A Complete Guide to Digital Signature Certificate in India
In today’s digital era, security and authenticity are paramount, especially when it comes to signing documents online. A Digital Signature Certificate (DSC) provides a secure and legally recognized way to sign documents digitally. It plays a vital role in various online services, including company registration, income tax filing, e-tendering, and other related processes.
This article walks you through the essentials of DSC registration, including its meaning, types, benefits, eligibility, and registration process.
What is a Digital Signature Certificate (DSC)?
A Digital Signature Certificate is an encrypted electronic signature that is used to validate the identity of the sender and ensure that the content of the document is unaltered. It is issued by Certifying Authorities (CAs) in India under the guidelines of the Information Technology Act, 2000.
Types of DSC
There are three types of Digital Signature Certificates:
Class 1 DSC
Used for email communications and basic user identification.
Not used for official or legal documents.
Class 2 DSC (Discontinued from January 2021)
Earlier used for ROC filing, income tax returns, etc.
Class 3 DSC
Most secure type.
Used for e-Tendering, e-Procurement, patent filing, trademark registration, etc.
Currently, Class 3 DSC is used for most government-related online services.
Who Needs a DSC?
A DSC is required for:
Directors and professionals during company or LLP registration.
Individuals or firms filing income tax returns or GST returns.
Business owners participating in e-Tenders or e-Procurement.
Trademark or patent applicants.
Company secretaries, chartered accountants, and consultants.
Benefits of DSC Registration
Legally valid and recognized by Indian law.
Ensures document integrity and authenticity.
Saves time with paperless transactions.
Essential for e-governance and online compliance.
Enhances security and reduces the risk of forgery or tampering.
Documents Required for DSC Registration
For Individuals:
PAN Card (mandatory)
Aadhaar Card / Passport / Driving License
Passport-sized photograph
Email ID and mobile number
For Organizations:
Company PAN Card
Certificate of Incorporation
Board Resolution (for authorizing signatory)
Authorized signatory’s ID and address proof
How to Register for a DSC in India
Follow these steps to apply for DSC:
Step 1: Choose the Type and Validity
Select the class (Class 3) and the validity period (1, 2, or 3 years).
Step 2: Select a Certifying Authority
Choose a licensed Certifying Authority (CA), such as eMudhra, Sify, NIC, or Capricorn.
Step 3: Fill out the Application Form
Apply online through the CA’s website. Fill in personal and contact details.
Step 4: Upload Documents
Submit scanned copies of the required documents for identity and address verification.
Step 5: Complete Video/OTP Verification
You may need to complete a quick video recording or OTP-based verification to confirm your identity.
Step 6: Download or Receive DSC
Once approved, you will receive the DSC on a USB token (dongle) or may be able to download it, depending on the service provider.
Validity and Renewal of DSC
A DSC is valid for 1 to 3 years, depending on the plan chosen.
You must renew your DSC before expiry to avoid interruptions in digital transactions.
Conclusion
Digital Signature Certificates are essential for secure, fast, and legally binding digital transactions in India. Whether you're an individual professional or a business owner, registering for a DSC simplifies your compliance journey and ensures your digital identity remains protected.
0 notes
Text
Unlock Financial Freedom with FinCrif Personal Loans: Fast, Flexible, and Fully Online
In today's fast-paced world, financial needs can arise unexpectedly. Whether it's a medical emergency, education expense, home renovation, or that much-needed family vacation, having quick access to funds is critical. This is where FinCrif comes in – your trusted partner for fast, secure, and hassle-free personal loan solutions.
What Is a Personal Loan?
A personal loan is an unsecured loan offered by banks and Non-Banking Financial Companies (NBFCs) based on an individual's creditworthiness, income, and repayment ability. Unlike secured loans, a personal loan doesn't require any collateral. It is typically used for personal expenses like weddings, education, travel, home improvement, or debt consolidation.
With FinCrif, applying for a personal loan becomes a simplified digital experience, ensuring you can secure funds without unnecessary stress or delays.
Why Choose FinCrif for Your Personal Loan?
FinCrif stands out in the financial marketplace with its customer-first approach and digital ease. Here's why thousands of users trust FinCrif for their personal loan needs:
1. Instant Loan Disbursal
Need money fast? FinCrif enables personal loan approval and disbursal within just 3 hours—perfect for emergencies or time-sensitive goals.
2. Competitive Interest Rates
Get the most out of your personal loan with interest rates starting from just 10.25%. You can compare multiple offers and choose what suits you best.
3. Minimal Documentation
Forget tedious paperwork. FinCrif requires only essential documents, ensuring a smooth and quick loan processing experience.
4. Flexible Repayment Options
Select flexible repayment tenures ranging from 6 months to 6 years, and tailor your personal loan EMI based on your monthly budget.
5. Wide Network of Lenders
FinCrif collaborates with over 60 trusted banks and NBFCs to bring you the best personal loan offers—all in one place.
6. 100% Online Application
No more queues or branch visits. Apply for your personal loan entirely online from anywhere, at any time.
Eligibility Criteria for Personal Loans
Before applying for a personal loan through FinCrif, ensure you meet the basic eligibility criteria:
Age: 21 to 60 years
Income: ₹20,000 minimum monthly income for salaried professionals
Employment: Salaried with a public/private organization or self-employed
Credit Score: Preferably 650 or above
Documents Required for Personal Loan Application
The documentation process with FinCrif is simple and fast. Here’s what you’ll need:
Identity Proof: Aadhaar, PAN, Passport, or Voter ID
Address Proof: Utility bill, rental agreement, or Aadhaar
Income Proof: Salary slips or Income Tax Returns
Bank Statements: Last 6 months' bank statements
Photographs: Two recent passport-sized photographs
Business Documents (for self-employed): GST returns or business registration
How to Apply for a Personal Loan with FinCrif
Follow these simple steps to apply for your personal loan through FinCrif:
Visit the FinCrif Website: Go to www.fincrif.com.
Fill Out Personal Details: Name, PAN, date of birth, employment type, and income.
Verify Mobile Number: Enter your mobile number and authenticate via OTP.
Select Loan Amount & Tenure: Choose the desired personal loan amount and repayment period.
Upload Documents: Submit your KYC and income documents online.
Receive Offers: Instantly get pre-qualified personal loan offers from multiple lenders.
Compare & Choose: Pick the best offer that fits your needs.
Loan Disbursal: Once approved, your personal loan amount is credited to your bank account.
Types of Personal Loans Offered by FinCrif
FinCrif offers a wide array of personal loan products to match different financial needs:
1. Standard Personal Loan
A lump sum personal loan ideal for planned expenses like weddings, education, or travel.
2. Flexi Personal Loan
Withdraw money as you need it from a pre-approved credit line. Pay interest only on the used amount.
3. Credit Limit Loan
A flexible credit option that allows you to borrow up to a set limit as per your convenience.
4. Loan Balance Transfer
Transfer your existing personal loan to a lender offering a lower interest rate and save on EMIs.
5. Loan Top-Up
Already have a loan? Get extra funding with minimal documentation and quick approval.
6. Bank Overdraft Loan
A pre-approved overdraft linked to your bank account to handle short-term cash flow needs.
Benefits of Choosing FinCrif for Your Personal Loan
✅ Instant Approval: Receive personal loan approval within minutes.
✅ Lowest Interest Rates: Access competitive rates starting at 10.25%.
✅ No Hidden Charges: Transparent fee structure with no surprises.
✅ Secure Online Platform: Your data is protected with advanced encryption.
✅ Expert Loan Assistance: Dedicated support team to guide you through the process.
✅ Financial Education Tools: Access resources to enhance your financial literacy.
Whether you’re a salaried employee, self-employed professional, or a first-time borrower, FinCrif ensures your personal loan experience is smooth, reliable, and transparent.
Tips to Improve Your Loan Approval Chances
Maintain a High Credit Score: Aim for a score of 750 or above by paying existing loans and credit card bills on time.
Provide Complete Documentation: Ensure all your documents are accurate and up-to-date.
Choose a Suitable Loan Amount: Opt for an amount that aligns with your repayment capacity.
Use Our EMI Calculator: Plan your repayment schedule in advance to avoid financial stress.
Conclusion: Make the Smart Choice with FinCrif
FinCrif is more than just a loan comparison platform—it’s a trusted financial partner. By offering easy access to personalized personal loan offers from India’s top banks and NBFCs, FinCrif empowers individuals to manage their financial needs with confidence.
From urgent emergencies to planned expenditures, a personal loan through FinCrif is your gateway to financial freedom. So why wait?
#PersonalLoan#InstantLoan#EasyLoanApproval#QuickLoans#LoanWithoutCollateral#UnsecuredLoan#OnlineLoanApplication#FastLoanDisbursal#LoanForAllNeeds
0 notes
Text
Easy Angel One Demat Account Opening Process Online – 2025 Guide

How to Open Angel One Demat Account Online in 2025 – Step-by-Step Guide
Starting your stock market journey in 2025 has never been easier. With Angel One, a leading name in the Indian brokerage industry, you can now complete the Angel One demat account opening process in just a few minutes. Whether you’re a beginner or an experienced trader, Angel One’s user-friendly digital setup ensures a fast and secure experience.
In this guide, you’ll find a clear, step-by-step breakdown of the Angel One account opening process, highlighting everything from document requirements to final approval.
Why Choose Angel One?
Angel One (formerly Angel Broking) is one of India’s most reliable brokerage firms, operational since 1987. Its popularity stems from features like:
Zero brokerage on equity delivery
Flat ₹20 charges for intraday and F&O trades
AI-based advisory with ARQ Prime
Easy-to-navigate mobile and web platforms
Because of these benefits, the angel one demat account opening process has gained significant attention among modern traders.
Step-by-Step Angel One Demat Account Opening Process
Thanks to Angel One’s 100% digital system, opening your demat account is completely paperless. Here’s how to go through the process smoothly:
1. Start with Mobile Number Verification
Begin by visiting the Angel One website. Enter your mobile number and verify it using an OTP. This ensures your mobile number is securely linked to your account right from the start.
2. Provide Personal Details
After verifying your mobile number, you’ll be asked to enter your full name and email address. Confirm the email through another OTP to enable important communication from Angel One.
3. Complete eKYC with PAN and Aadhaar
One of the most crucial steps in the angel one demat account opening process is eKYC. You’ll connect your PAN and Aadhaar via Digilocker, which instantly validates your identity online. No physical paperwork is needed.
4. Link Your Bank Account
Enter your bank account number and IFSC code. Occasionally, a small refundable verification transaction may occur, or you can authenticate it quickly using UPI. This step ensures smooth fund transfers.
5. Upload a Selfie and Signature
Next, you’ll need to upload a clear selfie and your signature on white paper. These uploads are used to verify your photo identity against official documents.
6. Add Employment and Income Details
In this step, select your employment status—salaried, self-employed, student, etc.—and mention your income range. This part of the Angel One account opening process aligns with SEBI’s regulatory requirements.
7. Select a Brokerage Plan
Angel One keeps it straightforward by offering the ₹20 iTrade Prime Plan. This cost-effective model is ideal for frequent traders aiming to minimize trading costs.
8. Enable F&O and Commodities (Optional)
If you wish to trade in Futures & Options or commodities, you’ll need to upload income proof such as your salary slip or income tax return. While optional, this step unlocks advanced trading options.
9. Finalize with Aadhaar eSign
Once all the details are filled in, review your application and complete the process using Aadhaar-based eSign with OTP. After submission, account activation typically takes 1–3 business days.
Documents Needed for a Smooth Account Opening
To streamline the angel one demat account opening process, keep the following documents ready:
PAN Card (mandatory for identity verification)
Aadhaar Card (linked to your mobile for eKYC)
Bank proof (cancelled cheque or recent statement)
Selfie and signature
Optional: Income proof for F&O/commodity trading
In certain cases, Angel One may request an additional document like a utility bill for address verification.
What Happens After Activation?
Once your account is active, Angel One gives you access to a powerful suite of trading features:
Zero brokerage on delivery trades
AI-powered ARQ Prime stock suggestions
Real-time portfolio tracking
Fast settlements and share transfers
Margin trading and account security tools
Everything can be managed easily via the Angel One mobile app or web platform.
Final Thoughts
The angel one demat account opening process in 2025 is designed to be fast, secure, and hassle-free. From eKYC to trading, everything is digital and takes only a few minutes to complete—provided you have your documents ready. By following the steps outlined above, you’ll be able to open your Angel One account smoothly and start your investment journey without delay.
So, don’t wait—embrace the new-age Angel One account opening process and make your entry into the stock market smarter, quicker, and more efficient.
0 notes
Text
How to Register Your Company Online in Noida: The Ultimate Service Guide
Starting a business in Noida, one of India’s fastest-growing industrial and IT hubs, has never been easier. Thanks to digital transformation and government initiatives like Digital India, online company registration is now a streamlined process. Whether you're a startup founder, small business owner, or investor looking to set up operations, this guide walks you through everything you need to know about registering your company online in Noida.

Why Register a Company in Noida?
Noida (New Okhla Industrial Development Authority) in Uttar Pradesh has rapidly become a commercial hotspot, offering modern infrastructure, excellent connectivity, skilled manpower, and investor-friendly policies. Registering your company in Noida allows you to:
Gain legal recognition
Build business credibility
Open corporate bank accounts
Apply for GST and other licenses
Protect brand identity
Attract investors and funding
Types of Business Entities You Can Register
Before beginning the registration process, it’s crucial to understand the types of business structures available:
Private Limited Company (Pvt Ltd) – Ideal for startups and businesses aiming for growth and investments.
Limited Liability Partnership (LLP) – Suitable for professional services or partnerships wanting limited liability.
One Person Company (OPC) – Best for solo entrepreneurs looking for corporate structure benefits.
Sole Proprietorship – Simple to set up, though less preferred due to limited legal distinction.
Partnership Firm – Suitable for small businesses with two or more co-founders.
Public Limited Company – Meant for large-scale businesses with plans to raise public capital.
Step-by-Step Process to Register Your Company Online in Noida
Step 1: Obtain Digital Signature Certificate (DSC)
The registration process is entirely online, so digital authentication is required.
Who needs it: Directors, shareholders, and authorized signatories.
Where to get it: Licensed Certifying Authorities like eMudhra, Sify, or NSDL.
Step 2: Apply for Director Identification Number (DIN)
A DIN is mandatory for all directors.
Where to apply: Ministry of Corporate Affairs (MCA) portal using SPICe+ form.
Documents needed: PAN card, Aadhaar, passport-sized photo, and proof of residence.
Step 3: Choose and Reserve Your Company Name
Your company name should be unique and compliant with MCA naming guidelines.
Tool to use: RUN (Reserve Unique Name) service on the MCA portal.
Tips: Have 2-3 backup names ready in case your preferred name is unavailable.
Step 4: File the Incorporation Application (SPICe+ Form)
The SPICe+ (Simplified Proforma for Incorporating a Company Electronically Plus) is a comprehensive form that covers:
Incorporation
PAN and TAN allotment
EPFO, ESIC, GST, and bank account opening
Documents required:
MOA (Memorandum of Association)
AOA (Articles of Association)
Identity and address proof of directors and shareholders
Registered office proof (rent agreement or NOC from owner)
Utility bill of office premises (not older than 2 months)
Step 5: Company Verification and Certificate of Incorporation
Once the documents are verified, the Registrar of Companies (RoC) will issue:
Certificate of Incorporation (CoI)
Corporate Identity Number (CIN)
PAN and TAN
This usually takes 5–7 working days if documents are correct and complete.
Best Online Company Registration Services in Noida
If you prefer expert assistance, several online service providers offer end-to-end registration support:
1. Global Jurix
Top Law firms in Delhi offer best Legal services.
Ideal if you want face-to-face consultation.
2. Company Registration Services
Offers packages for OPC, LLP, Pvt Ltd, and more.
3. ClearTax
Popular for tax-related services, it also offers company registration for startups.
Seamless MCA form filing and name approval support.
Key Compliance After Registration
Registration is just the beginning. Your company must comply with several post-incorporation formalities:
Open a current bank account in the company’s name.
File GST registration, if applicable.
Apply for Shops & Establishment License in Noida.
Maintain books of accounts and comply with tax regulations.
Annual ROC filings – Submit annual returns, financial statements, and other reports.
Income Tax filings and TDS compliance.
Common Mistakes to Avoid
Choosing a name too similar to an existing company.
Submitting incomplete or incorrect documents.
Ignoring post-registration compliance.
Not hiring a professional when unsure about the legal process.
Not verifying the credibility of online service providers.
Final Thoughts
Company registration online in Noida is a strategic move, and with the right knowledge and tools, the process can be smooth and efficient. Whether you go DIY through the MCA portal or hire a professional service provider, make sure your documentation is accurate, and you understand your compliance obligations post-registration.
The journey of entrepreneurship starts with legal recognition—and Noida’s business-friendly environment offers the perfect ecosystem to help your startup thrive. Take the first step with confidence and set up your company the smart way—online and hassle-free.
0 notes
Text
Documents Required For GST Registration
Introduction to GST Registration

Getting your business GST-registered is not just a legal formality—it’s your ticket to running a credible and compliant operation in India. But before you jump in, it’s important to understand the documents required for GST registration, because even a small mistake can lead to delays or rejection. GST (Goods and Services Tax) has streamlined the indirect tax system, making compliance easier for businesses of all sizes. Whether you're a freelancer, shop owner, or running a growing enterprise, having your paperwork in order is the first big step toward becoming a recognized player in the market.
Why GST Registration is Mandatory
So, why is it such a big deal? Because without GST registration:
You can't legally collect GST from customers.
You can’t claim input tax credits on purchases.
You're vulnerable to penalties under GST law.
Business expansion becomes harder due to compliance issues.
The government has made GST registration mandatory for businesses whose turnover exceeds ₹40 lakhs (₹20 lakhs for services), or ₹10 lakhs for northeastern and hill states. Also, any e-commerce seller or interstate supplier must register regardless of turnover.
Who Needs to Register for GST?
The following categories are required to obtain GST registration:
Businesses crossing the prescribed turnover limit
Casual taxable persons
Agents of suppliers
Input service distributors (ISD)
Non-resident taxable persons
E-commerce operators and aggregators
Anyone required to deduct tax at source (TDS)
Those supplying through e-commerce platforms
Even if you don’t fall into one of these, voluntary registration is possible and often beneficial, especially for input tax credit eligibility.
Categories of Taxpayers Under GST
GST doesn’t treat all taxpayers the same. Based on turnover, business structure, and operational nature, the system classifies registrants into specific categories, each with unique compliance and documentation requirements.
Regular Taxpayers
This is the most common category. Regular taxpayers need to file monthly returns and maintain detailed records. Their GST documentation includes:
PAN and Aadhaar
Proof of business registration
Principal place of business proof
Bank account proof
Photographs and authorization documents
Composition Scheme Holders
Smaller businesses (turnover up to ₹1.5 crore) can opt for the Composition Scheme to pay tax at a flat rate. Their documentation requirements are slightly simplified but still include:
PAN and Aadhaar
Business proof
Declaration of turnover
Bank details
This scheme restricts you from issuing taxable invoices and limits interstate transactions.
Casual Taxable Persons and Non-Resident Taxpayers
These individuals conduct business occasionally or without a fixed place in India. Their documents should include:
Passport and Visa (for foreigners)
Temporary business place proof
Bank authorization
Advance tax payment under GST
This category requires an advance deposit of the estimated tax liability.
Basic Documents Required for GST Registration
Let’s dig into the heart of the matter—the core documents you’ll need to get registered under GST. Without these, your application might get rejected or returned for rectification.
PAN Card of the Applicant
The PAN (Permanent Account Number) card is the foundation of GST registration. It's used to link your business to your tax profile. For businesses, the PAN must be in the name of the entity, not the proprietor. All legal entities, including companies, LLPs, and trusts, need a PAN for GST.
Key Points:
Must be a scanned copy (clear and colored)
Details must match business records
PAN is used to generate the GSTIN (Goods and Services Tax Identification Number)
Aadhaar Card of the Applicant
Aadhaar authentication has become a critical part of GST registration to avoid fake identities and shell companies. With Aadhaar-based authentication, you can even skip physical verification.
Why it matters:
Speeds up the GST approval process
Avoids additional document scrutiny
Helps in verifying identity during filing
Ensure the mobile number linked to Aadhaar is active for OTP verification.
Photograph of the Applicant
This might seem minor, but it’s a mandatory requirement:
Proprietor: One passport-size photo
Partners/Directors: Photos of all
Authorized Signatory: Photo of the person filing the application
The photo must be recent, high-quality, and preferably on a white background.
Business-Related Documents
In addition to personal documents, the government needs to verify your business’s legal status. This ensures you're a legitimate operation.
Proof of Business Registration/Incorporation Certificate
This document proves that your business is officially recognized. Depending on the business type:
Sole Proprietor: No separate certificate, PAN serves the purpose
Partnership: Partnership deed
Company: Certificate of Incorporation from MCA
LLP: LLP Agreement and incorporation certificate
Without these, the business isn’t considered valid in the eyes of GST.
Partnership Deed or MOA & AOA
These foundational documents define the internal structure and operation of your business.
The MOA (Memorandum of Association) outlines business objectives.
AOA (Articles of Association) defines rules and responsibilities.
The partnership deed declares the terms between partners.
These are vital for businesses that have multiple stakeholders.
Authorization Form for Authorized Signatory
If someone else is filing the GST application on your behalf, you'll need to authorize them legally. This applies especially to companies, LLPs, and partnerships.
This form must:
Be signed by a competent authority
Include PAN and Aadhaar of the authorized person
Be uploaded along with other documents
Address Proof of the Business Place
The government wants to know where your business operates. The type of address proof depends on whether the premises are owned, rented, or shared.
Own Premises: Electricity Bill or Property Tax Receipt
For owned property, any government-issued document showing ownership and address will work. This includes:
Latest electricity bill
Property tax receipt
Municipal khata certificate
These documents should be:
Not older than 2 months
Clear and legible
Matching with the application address
Rented/Leased Premises: Rent Agreement and NOC
Renting your business place? Then you must provide:
A registered rent agreement
NOC (No Objection Certificate) from the owner
This assures the tax authorities that you have legal occupancy of the place.
Shared Property: Consent Letter and Utility Bill
If you're operating from a co-working space or shared address:
A consent letter from the original owner is mandatory
Attach a utility bill as address proof
Mention the co-working space agreement, if applicable
Without this, your GST registration can face scrutiny or rejection.
Bank Account Proof
Every GST registrant must furnish valid bank account details to receive tax refunds and ensure compliance with return filings. Here’s what you’ll need:
Cancelled Cheque
A cancelled cheque is often the simplest way to prove your bank account’s existence. It should include:
Account holder’s name
Account number
IFSC and MICR code
Bank name and branch
Ensure the cheque is from a current or savings account under the business name (for companies or partnerships). If your business is new and you haven’t received cheque books yet, don’t worry—there are alternatives.
Bank Statement
A recent bank statement (not older than 2 months) serves as solid proof of account ownership. Make sure:
The document is in PDF or scanned format
It includes your business name and address
There are visible transactions (for authenticity)
This is particularly helpful for startups that haven’t ordered cheque books yet.
Passbook’s First Page
Another acceptable option is the front page of your bank passbook, which displays:
Account number
Account holder’s name
Bank IFSC and branch
Make sure the scan is high-quality and legible. This is a go-to option when both cheques and bank statements are unavailable.
Additional Documents for Specific Business Types
While the core set of documents remains similar, some businesses require additional paperwork based on their structure.
LLP Documents
Limited Liability Partnerships (LLPs) must submit:
LLP Incorporation Certificate
LLP Agreement
PAN of LLP
Address proof
Authorization form (if the signatory is not a partner)
These documents should reflect the LLP’s legal identity and operational structure. Even if you’re a small LLP, all formalities apply the same.
HUF Documents
HUFs (Hindu Undivided Families) have unique identity requirements:
PAN of HUF
Aadhaar of Karta (head of the HUF)
Declaration by Karta
Bank details in the HUF name
In these cases, the Karta is treated as the authorized person, and all compliance rests on them.
Foreign Companies and Branches
Foreign businesses operating in India must provide:
Passport of the authorized signatory
Indian business address proof
Bank account details in India
Certificate of incorporation from the home country (translated if not in English)
Additionally, notarization or an apostille may be required depending on the origin country's laws.
GST Registration Documents for Different Entities
Documentation needs vary depending on your business type. Here’s a detailed breakdown:
Sole Proprietorship
For sole proprietors, GST registration is straightforward:
PAN and Aadhaar of the proprietor
Photo of pthe roprietor
Address proof of the business place
Bank account proof (in the proprietor’s name)
Since there’s no legal separation between the business and the owner, all documents are in the individual’s name.
Partnership Firm
A partnership firm needs a few more things:
PAN of a partnership firm
Partnership deed
Aadhaar and PAN of all partners
Photograph of all partners
Address proof
Authorization form for the signatory
Be cautious to ensure that the deed is signed and stamped correctly; this is often where mistakes happen.
Private Limited Company
For Pvt Ltd companies, documentation is a bit more comprehensive:
PAN of the company
Certificate of incorporation (from MCA)
MOA and AOA
PAN and Aadhaar of directors
Board resolution authorizing the signatory
Bank details and address proof
Ensure the directors' details on the MCA match those submitted under GST.
Trusts and Societies
Trusts and societies often overlook GST, but if they engage in commercial activity, it’s mandatory. Required documents include:
PAN of the trust/society
Trust deed or registration certificate
PAN and Aadhaar of trustees
Authorization letter
Address proof
Even NGOs involved in trade must comply.
Common Mistakes to Avoid During Document Submission
Your GST application can get rejected or delayed due to simple document-related errors. Let’s tackle the most common ones:
Mismatched Details
One of the top reasons for rejection is a mismatch of information between PAN, Aadhaar, bank details, and the GST application. To avoid this:
Double-check spelling of names
Ensure address formats are consistent
Use updated Aadhaar and PAN info
Don’t assume small inconsistencies won’t matter—they do.
Outdated Utility Bills
Only the latest utility bills are accepted as address proof. Make sure:
The bill is not older than 60 days
It matches the business address
The file is in a readable format (PDF or JPG)
Expired documents often result in system rejection, especially for rented premises.
Unclear Scanned Documents
Blurry or poorly scanned documents are a big no-no. Common issues include:
Cropped images cutting off key details
Photos with glare or reflections
Handwritten or smudged pages
Always scan in colour, ensure clarity, and preview before uploading. A rejected application adds unnecessary delays to your business plans.
Digital Signature Certificate (DSC) Requirements
In many GST cases, uploading a Digital Signature Certificate (DSC) is mandatory, especially for companies and LLPs.
Who Needs a DSC?
You’ll need a DSC if:
You’re a private limited company
You’re an LLP
You’re registering through a professional (like a CA)
Proprietors or individuals applying with Aadhaar OTP usually don’t need DSC.
How to Get a DSC?
You can purchase a Class 2 or Class 3 DSC from licensed certifying authorities (like eMudhra, Sify, or NSDL). To get a DSC:
Submit your PAN, Aadhaar, and photograph
Undergo video verification
Download and install DSC software
Once obtained, plug it into your system during the final stage of GST application and digitally sign the form.
Conclusion
In conclusion, having all the right documents in place is essential for a smooth GST registration process, and avoiding delays or rejections can save you valuable time and effort. Whether you're a startup, small business, or growing enterprise, ensuring your paperwork is complete and accurate lays a solid foundation for compliance and credibility. If the process feels overwhelming, platforms like JustStart Technologies Private Limited can simplify your journey by offering expert assistance, document verification, and end-to-end support to make your GST registration hassle-free and efficient.
FAQs
1. Can I apply for GST registration without a PAN card?
No, having a PAN card is mandatory for all Indian applicants. For foreigners, an alternative document, like a passport, may be used.
2. What if my documents are not in my name?
You must provide a NOC or consent letter from the document holder, along with a utility bill or lease agreement as proof.
3. How long does GST Registration take?
With complete and correct documentation, it usually takes 3–7 working days for approval. Aadhaar-based verification can speed this up.
4. Is Aadhaar authentication mandatory?
It’s optional, but recommended. Aadhaar authentication can bypass the need for physical verification, saving time and effort.
5. Can a minor be a GST Registrant?
No, GST registration requires the applicant to be at least 18 years old. However, a guardian can act as an authorized signatory for a minor-owned business.
#GST#GST Registration#GST Registration Online#GST Registration Documents#Documents Required For GST Registration
0 notes
Text
What Is a Simple Way to Start Investing in Crypto in India?

Cryptocurrency is no longer just a buzzword – it’s a global financial revolution. From Bitcoin to Ethereum, digital currencies are changing the way people think about money and investment. In India too, more and more people are showing interest in crypto investments. But if you're new to this space, you might be wondering: What’s the easiest and safest way to get started?
The good news is, investing in crypto doesn’t have to be complicated. Thanks to digital platforms like UPB – Universal Payment Bank, Indians now have a reliable and user-friendly way to begin their crypto journey. In this blog, we’ll show you exactly how.
1. Understand What Cryptocurrency Is
Before jumping in, it’s important to know what you’re investing in.
Cryptocurrency is a digital currency that runs on blockchain technology. Unlike traditional currencies, it is decentralized, meaning no central authority like a bank or government controls it. Popular cryptocurrencies include:
Bitcoin (BTC) – The original and most well-known crypto.
Ethereum (ETH) – Known for smart contracts and DeFi applications.
Tether (USDT) – A stablecoin pegged to the US dollar.
Polygon (MATIC) and Solana (SOL) – Fast-growing blockchain networks.
Knowing the basics will help you invest wisely and avoid common beginner mistakes.
2. Choose a Trusted Platform Like UPB
One of the simplest and safest ways to start investing in crypto in India is by using a reliable digital platform. This is where UPB (Universal Payment Bank) comes in.
✅ Why Choose UPB?
User-Friendly Interface: Even if you’re a first-time investor, UPB’s app is simple to navigate.
Instant KYC & Onboarding: Set up your account in minutes with Aadhaar and PAN verification.
Seamless INR Transactions: Fund your account through UPI, bank transfers, or debit cards with ease.
Crypto Investment Access: UPB collaborates with trusted partners to give you exposure to top cryptocurrencies.
With UPB, you don’t need to worry about technical complexity. It brings crypto investment to your fingertips in a secure and regulated environment.
3. Fund Your Account Safely
Once you’ve signed up on UPB, the next step is to add funds to your wallet. UPB makes it simple:
Use UPI for quick deposits.
Opt for NEFT/IMPS bank transfers.
Track your balance and transactions in real-time.
Start with small amounts — even ₹100 or ₹500 is enough to begin your crypto journey. UPB encourages responsible investing, so you can grow your portfolio without pressure.
4. Pick the Right Crypto Assets
UPB provides access to a selection of top-performing and trusted cryptocurrencies, making it easier for beginners to make informed decisions.
Recommended Starter Coins:
Bitcoin (BTC) – Reliable for long-term holding.
Ethereum (ETH) – Ideal for those interested in future tech like DeFi and NFTs.
Stablecoins (USDT, USDC) – Less volatile, perfect for cautious investors.
UPB may also offer educational tips and suggestions within the app to help you choose wisely.
5. Use Built-in or External Crypto Wallets
UPB offers secure in-app wallets, so you can store your crypto safely. For long-term holders, you also have the option to connect to external wallets for added security.
Wallet Options:
UPB In-App Wallet – Easy to use and protected with security layers.
External Wallets – Trust Wallet, MetaMask, or hardware wallets for offline storage.
If you’re unsure which to choose, UPB’s support and learning resources can guide you.
6. Monitor and Learn as You Grow
The crypto market can be volatile, but with UPB, you have access to real-time tracking, portfolio insights, and regular updates. This helps you stay informed and make smart decisions.
Also, UPB provides financial literacy support, including blogs, beginner guides, and helpdesk assistance – perfect for first-time investors.
7. Stay Safe and Invest Responsibly
UPB ensures strong encryption, two-factor authentication, and compliance with Indian regulations to keep your investments secure. But remember:
Never invest more than you can afford to lose.
Start small and scale gradually.
Keep learning about the market.
UPB’s ecosystem makes it easy to invest safely while focusing on long-term wealth building.
✅ Conclusion: Crypto Investment Made Simple with UPB
Investing in crypto in India doesn’t have to be overwhelming. Thanks to Universal Payment Bank (UPB), you can start with confidence, even with a small amount. Its secure, user-friendly, and transparent platform is designed for beginners who want to explore digital assets without the headache of complex tools or risky decisions.
Whether you’re a college student, working professional, or homemaker – UPB empowers you to take control of your financial future with smart, simple investing.
🔍 Frequently Asked Questions (FAQ)
Q1. Can I invest in crypto with just ₹100 on UPB?
Yes! UPB allows you to start investing in crypto with as little as ₹100, making it perfect for beginners.
Q2. Is it safe to invest in crypto through UPB?
Absolutely. UPB follows RBI-compliant practices and partners with secure crypto service providers. Your data and funds are protected.
Q3. Do I need a separate wallet to store my crypto?
No. UPB provides a secure in-app wallet. You can also use an external wallet if you prefer.
Q4. Is KYC mandatory to use UPB?
Yes, you’ll need to complete a quick KYC process using your Aadhaar and PAN card to comply with government regulations.
Q5. Can I withdraw money from my crypto investments through UPB?
Yes. You can sell your crypto through the app and withdraw your INR balance directly to your bank account.
If you're ready to start your crypto journey, download the UPB app today and take the first step toward financial freedom.
Invest smart. Invest safe. Invest with UPB. 🚀
0 notes
Text
What is Aadhaar-PAN Verification API?
In today’s fast-paced digital economy, regulatory compliance and secure onboarding have become essential for any business dealing with financial transactions or identity-based services. NifiPayments introduces a seamless and reliable Aadhaar-PAN Verification API — a powerful solution designed to help businesses authenticate user identity quickly and accurately.
🔍 What is Aadhaar-PAN Verification API?
The Aadhaar-PAN Verification API enables businesses to verify if an individual’s Aadhaar number is correctly linked with their PAN (Permanent Account Number). This verification is vital for KYC compliance, fraud prevention, and ensuring the legitimacy of user data.
🚀 Key Features of NifiPayments Aadhaar-PAN Verification API
✅ Instant Verification Real-time API response allows you to instantly check Aadhaar-PAN linkage status.
✅ Easy Integration Flexible API that can be easily integrated with any mobile app, web application, or internal system.
✅ High Accuracy & Security Our systems use secure protocols and advanced validation methods to ensure data integrity and compliance with privacy norms.
✅ Supports Compliance Meet government and RBI-mandated KYC requirements effortlessly.
✅ Boosts Customer Trust By ensuring secure and verified identity data, your business builds more trust with users and partners.
🧾 Use Cases
Fintechs & NBFCs – For KYC verification before offering credit or financial services.
E-commerce Platforms – To verify seller identity.
Insurance & Investment Platforms – Ensure legal and identity verification during onboarding.
Gig Economy Apps – Onboard delivery agents or freelancers with verified identity.
🔐 Why Choose NifiPayments?
NifiPayments is a trusted name in financial APIs, known for delivering robust, developer-friendly, and compliant digital solutions. Our Aadhaar-PAN Verification API is built with scalability and reliability at its core, ensuring smooth operations for businesses of all sizes.
📞 Get Started Today
Whether you're a startup or an enterprise, integrating identity verification doesn’t have to be complex. 🔗 Contact us to get a demo or explore our developer-friendly documentation to start your integration journey today.
Secure. Reliable. Compliant. — That's the NifiPayments promise.
#AadhaarPANVerification #KYCAPI #DigitalVerification #FintechSolutions #NifiPayments #SecureAPI #CustomerOnboarding
0 notes
Text
Embracing Digital Transformation: Enhancing Pradhan Mantri Yojana with Smart Financial Solutions
In the fast-paced world of financial services, digital technology is more than just an advantage—it’s a necessity. Particularly in the context of government-led schemes like Pradhan Mantri Yojana, digital tools are playing a pivotal role in improving efficiency, transparency, and outreach. As the financial landscape modernizes, Digital Financial Services and specialized tools such as Revenue Reconciliation Software are helping streamline operations at every level. Companies like Winsoft Technologies are leading this transformation with advanced, purpose-built solutions.
How Digital Solutions Empower Pradhan Mantri Yojana
The Pradhan Mantri Yojana umbrella includes several welfare initiatives aimed at financial inclusion, rural development, social security, and entrepreneurship. However, the effectiveness of these schemes hinges on the ability to reach beneficiaries quickly and securely.
This is where digital solutions for Pradhan Mantri Yojana come into play. Through technologies such as mobile banking, Aadhaar-based authentication, and direct benefit transfers (DBT), the government can now disburse subsidies and benefits directly into citizens' accounts—cutting out inefficiencies and reducing corruption.
According to recent financial inclusion data, the number of active bank accounts under the Pradhan Mantri Jan Dhan Yojana (PMJDY) has crossed 54 crore, showcasing the power of digital integration in public finance.
The Role of Digital Financial Services in Expanding Reach
Digital Financial Services encompass mobile wallets, online banking, UPI payments, and more—all of which have made banking accessible to even the most remote corners of India.
For beneficiaries of Pradhan Mantri schemes, this means:
Easy access to funds without visiting a bank branch
Real-time updates on subsidies or loan disbursements
Secure, Aadhaar-verified authentication for transactions
Improved financial literacy through mobile apps and helplines
From an institutional perspective, these digital tools reduce paperwork, improve data tracking, and ensure regulatory compliance.
Why Revenue Reconciliation Software is Essential
Handling large volumes of government transactions comes with its own set of challenges—errors, mismatches, and delays in reconciliation can derail the efficiency of welfare schemes.
That’s where Revenue Reconciliation Software proves invaluable.
Solutions like SmartRecon by Winsoft Technologies automate the process of matching transactions, generating GST-compliant invoices, and forecasting revenue with high precision. This is especially crucial for financial institutions involved in managing funds under Pradhan Mantri schemes, as it:
Eliminates manual reconciliation errors
Speeds up the financial close process
Ensures compliance with audit and tax regulations
Offers transparent reporting for government and regulatory bodies
Whether you’re a public sector bank or a non-banking financial company (NBFC), having robust revenue reconciliation in place ensures smooth operations and builds trust with stakeholders.
Winsoft Technologies: Powering Financial Efficiency
When it comes to delivering scalable, efficient, and secure digital banking solutions, Winsoft Technologies has carved a niche in the financial technology domain. Their tools are designed specifically for banking and financial institutions, keeping in mind the regulatory complexities and operational challenges unique to this sector.
Key solutions include:
SmartRecon – An advanced Revenue Reconciliation Software tailored for financial reporting and payout accuracy.
SmartASBA – A tool for streamlined IPO application processing.
SmartLocker – A secure locker management system that’s redefining physical asset security in banks.
SmartWealth – A comprehensive solution for digital Wealth Management and client advisory services.
These tools aren’t just feature-rich—they are built for integration, automation, and performance, ensuring institutions can scale effortlessly while staying compliant.
Conclusion
As India pushes forward with ambitious schemes under the Pradhan Mantri Yojana, the role of technology becomes more central than ever. From Digital Financial Services that bring banking to people’s fingertips, to Revenue Reconciliation Software that ensures financial accuracy, digital solutions are enhancing the efficacy of welfare programs nationwide.
Winsoft Technologies is at the forefront of this digital evolution. With smart, integrated tools that support financial institutions across the board, Winsoft is helping shape a future where government schemes reach the right people—faster, safer, and smarter.
#Digital Financial Services#Revenue Reconciliation Software#digital solutions for Pradhan Mantri Yojana#Winsoft Technologies
0 notes
Text
Sole Proprietorship Registration : A Step-by-Step Guide

How to Register a Sole Proprietorship in India Online — Process, Documents, Fees, and Expert Assistance
Are you a small business owner looking to start your entrepreneurial journey in India? Registering as a sole proprietorship is the simplest and most economical way to begin. With minimal compliance and straightforward registration, it’s ideal for individual entrepreneurs. In this blog, we’ll guide you through the sole proprietorship registration process, required documents, fees, and how to obtain a sole proprietorship certificate online in India. Whether you’re running a shop, offering freelance services, or operating a consultancy, registering your sole proprietorship is essential to legitimize your business.
And the best part? You don’t have to navigate the legalities alone. Real Tax India offers expert help for sole proprietorship registration, ensuring accuracy and timely compliance.
✅ What is a Sole Proprietorship?
A sole proprietorship is a type of business structure where a single individual owns and operates the business. It’s not considered a separate legal entity, meaning the owner is personally liable for business debts and obligations. Despite that, it remains the most popular and flexible choice for small businesses and startups in India.
📋 Why Register a Sole Proprietorship?
While a sole proprietorship can operate without formal registration, registering provides several benefits:
Business legitimacy and trust with clients or customers
Access to business bank accounts and UPI payments
Ability to apply for government tenders
Eligibility for GST registration
Smooth operations for e-commerce, supply chains, or vendor onboarding
Availing startup benefits and subsidies
🛠️ Sole Proprietorship Registration Process (Online)

You can easily register your sole proprietorship online in India with professional support. Here’s a simplified breakdown of the sole proprietorship online process:
Step 1: Choose a Business Name
Pick a unique business name that is not already in use or trademarked.
Step 2: Obtain Required Licenses & Registrations
Depending on your business type and turnover, you may need one or more of the following to establish proof of proprietorship:
GST Registration Mandatory if your turnover exceeds the threshold or you sell online.
Shop & Establishment Registration Required by most state governments for businesses with physical offices.
Udyam/MSME Registration Recommended for availing subsidies, loans, and MSME benefits.
Professional Tax Registration Applicable in select states like Maharashtra and Karnataka.
FSSAI Registration Required for food-related businesses.
Step 3: PAN Card & Aadhaar Card of Proprietor
You must have a valid PAN card and Aadhaar card for authentication and verification.
Step 4: Open a Business Bank Account
Once you obtain your sole proprietorship certificate or proof like GST or MSME registration, you can open a current account in your business name.
📁 Documents Required for Sole Proprietorship Registration

Here are the essential documents required for sole proprietorship online registration in India:
PAN card of the proprietor
Aadhaar card of the proprietor
Passport-size photo
Registered office proof — Rent agreement, utility bill, NOC from the owner
Bank account details (if applicable)
Business address proof
Email ID and mobile number for OTP verification
Depending on the registration type (GST, Udyam, etc.), Real Tax India will guide you through the precise list of documents required.
💰 Sole Proprietorship Registration Fees/Cost in India
The cost of registering a sole proprietorship can vary depending on the services opted and the state. However, with Real Tax India, the process is simplified and made affordable:
GST Registration — ₹500 to ₹1000 (one-time fee)
Udyam/MSME Registration — FREE or nominal fee
Shop & Establishment Registration — ₹1000 to ₹2000 (varies by state)
FSSAI Registration — ₹1000 to ₹2000 (basic license)
👉 For the most accurate and budget-friendly pricing, get in touch with Real Tax India for a customized quote based on your requirements.
📨 How to Apply for a Sole Proprietorship Certificate Online

The term sole proprietorship certificate usually refers to any document that proves your business’s legal existence — such as GST registration, MSME certificate, or Shop & Establishment certificate.
Here’s how to apply:
Visit the official registration portal or use a trusted service provider like Real Tax India
Submit your application form and upload documents
Complete OTP/email verification
Pay applicable government and service fees
Receive the certificate on your registered email ID
You can also apply for these certificates with the assistance of experts who will complete the end-to-end process for you.
🛡️ Why Choose Real Tax India for Sole Proprietorship Registration?
Registering your sole proprietorship correctly is crucial. Mistakes in application or document submission can delay your operations. Here’s why you should trust the experts at Real Tax India:
��� Expert Guidance — Trained professionals will handle all legal formalities ✅ Affordable Pricing — No hidden fees ✅ Quick Turnaround — Get registered within days ✅ PAN-India Support — Available across India ✅ Free Consultation — Know what’s best for your business
📞 Get Started with Real Tax India Today!
Don’t let confusion delay your registration. Trust Real Tax India to register your startup on time and with 100% accuracy.
📞 Call: 9899767300 📧 Email: [email protected] 🌐 Website: https://realtaxindia.com
Whether you need help with a sole proprietorship certificate, understanding the online process, or estimating your registration cost, Real Tax India is your one-stop solution.
🏁 Final Thoughts
Starting a business as a sole proprietor in India is a smart and straightforward move. With low costs, minimal compliance, and complete control, it suits small traders, freelancers, and service providers. However, to operate professionally and avoid legal hassles, proper registration is essential. Let Real Tax India take care of it while you focus on growing your business.
1 note
·
View note
Text
Top Benefits of Opening an Instant Zero Balance Account Online
In today’s digital world, managing your money is easier than ever before. One of the most convenient ways to start your banking journey is by opening an instant zero balance account. This type of account not only saves you time but also gives you access to modern banking tools without the burden of maintaining a minimum balance.
If you’re wondering why so many people are choosing this option, here’s a guide to the top benefits of opening an instant zero balance account online — and why it may be the right fit for you.
What Is an Instant Zero Balance Account?
An instant zero balance account is a type of savings account you can open online without the need to keep a minimum balance. As the name suggests, you can operate the account even if the balance drops to zero — without worrying about penalty fees.
Such accounts are perfect for students, first-time account holders, freelancers, or anyone looking for a secondary account for managing personal expenses.
Why Open an Instant Zero Balance Account Online?
Here are the key benefits you can enjoy when you open an instant zero balance account online:
Convenience and Speed
With an online application process, you can open your account anytime, anywhere — whether you’re at home, at work, or even on the go. There’s no need to visit a branch or fill out lengthy paperwork.
The process is typically fast, and many banks provide instant account activation, so you can start using your account almost immediately.
Paperless Process
The account opening process is fully digital. You only need to upload scanned copies or photos of basic documents such as your Aadhaar card and PAN card. Many banks use e-KYC or video KYC, which means you don’t have to submit any physical paperwork.
No Minimum Balance Requirements
The biggest advantage of an instant zero balance account is that you can maintain a zero balance without worrying about penalties or fees. This gives you financial freedom and makes it easier to manage your money, especially if you’re just starting out or if you have irregular income.
Access to Digital Banking Tools
When you open an instant zero balance account online, you gain access to a wide range of digital banking services, including:
Internet banking
Mobile banking apps
UPI payments
Virtual debit cards
These tools allow you to manage your account, transfer money, pay bills, and shop online with ease.
Earn Interest on Savings
Even though you’re not required to maintain a minimum balance, most instant zero balance accounts still offer competitive interest rates on the money you keep in the account. This means your savings can grow over time, even with small deposits.
Easy Account Management
You can easily track your balance, monitor transactions, set up bill payments, and manage your debit card — all through the bank’s app or website. You can also set transaction alerts and enable two-factor authentication to keep your account secure.
Suitable for a Wide Range of Customers
An instant zero balance account is ideal for:
Students looking for their first account
Salaried employees wanting a secondary account
Freelancers and gig workers with variable income
Senior citizens who want a simple, easy-to-use account
With no minimum balance requirement, it’s a flexible option for almost anyone.
How Platforms Like Kotak811 Improve the Experience
In the digital banking space, platforms like Kotak811 have made it even easier to open an instant zero balance account online.
With Kotak811, you can complete the entire process on your smartphone, access a virtual debit card immediately, and enjoy mobile-first banking features designed for today’s customers. While you should always compare different options, many users appreciate the seamless, paperless experience that platforms like Kotak811 offer.
Additional Benefits You Should Know
Here are some additional advantages you may enjoy with your instant zero balance account:
Free digital transactions: Many banks offer unlimited free transactions via UPI, internet banking, or mobile banking.
Debit card offers: You may receive discounts or cashback on online shopping, food delivery, or bill payments.
Upgrade flexibility: Some banks allow you to upgrade your account later to enjoy premium features if your financial needs grow.
How to Apply for an Instant Zero Balance Account Online
The process is typically straightforward:
Visit the bank’s website or download its mobile app.
Click on “Open Account” or “Apply Now.”
Fill out your personal details and contact information.
Complete the e-KYC or video KYC process.
Receive your account details and virtual debit card.
Log in to internet or mobile banking and start using your account.
Final Thoughts
Opening an instant zero balance account online is one of the smartest financial steps you can take today. It gives you flexibility, convenience, and access to modern digital banking — all without the stress of maintaining a minimum balance.
0 notes
Text
Get the Right Personal Loan with FinCrif Fast Easy and 100% Online
In today's fast-paced world, unexpected financial needs can arise at any time. Whether it’s a medical emergency, education expense, home renovation, or that much-needed family vacation, having quick access to funds is critical. This is where FinCrif comes in – your trusted partner for fast, secure, and hassle-free personal loan solutions.
What is a Personal Loan?
personal loan is an unsecured loan offered by banks and NBFCs based on an individual's creditworthiness, income, and repayment ability. Unlike secured loans, a personal loan doesn’t require any collateral. It is typically used for personal expenses like weddings, education, travel, home improvement, or debt consolidation.
With FinCrif, applying for a personal loan becomes a simplified digital experience, ensuring you can secure funds without unnecessary stress or delays.
Why Choose FinCrif for Your Personal Loan?
FinCrif stands out in the financial marketplace with its customer-first approach and digital ease. Here's why thousands of users trust FinCrif for their personal loan needs:
1. Instant Loan Disbursal
Need money fast? FinCrif enables personal loan approval and disbursal within just 3 hours—perfect for emergencies or time-sensitive goals.
2. Competitive Interest Rates
Get the most out of your personal loan with interest rates starting from just 10.25%. You can compare multiple offers and choose what suits you best.
3. Minimal Documentation
Forget tedious paperwork. FinCrif requires only essential documents, ensuring a smooth and quick loan processing experience.
4. Flexible Repayment Options
Select flexible repayment tenures ranging from 6 months to 6 years, and tailor your personal loan EMI based on your monthly budget.
5. Wide Network of Lenders
FinCrif collaborates with over 60 trusted banks and NBFCs to bring you the best personal loan offers—all in one place.
6. 100% Online Application
No more queues or branch visits. Apply for your personal loan entirely online from anywhere, at any time.
Eligibility Criteria for Personal Loans
Before applying for a personal loan through FinCrif, ensure you meet the basic eligibility criteria:
Age: 21 to 60 years
Income: ₹20,000 minimum monthly income for salaried professionals
Employment: Salaried with a public/private organization or self-employed
Credit Score: Preferably 650 or above
Documents Required for Personal Loan Application
The documentation process with FinCrif is simple and fast. Here’s what you’ll need:
Identity Proof: Aadhaar, PAN, Passport, or Voter ID
Address Proof: Utility bill, rental agreement, or Aadhaar
Income Proof: Salary slips or Income Tax Returns
Bank Statements: Last 6 months' bank statements
Photographs: Recent passport-sized photos
Business Documents (for self-employed): GST returns or business registration
How to Apply for a Personal Loan with FinCrif
Follow these simple steps to apply for your personal loan through FinCrif:
Visit the FinCrif Website: Go to www.fincrif.com.
Fill Out Personal Details: Name, PAN, date of birth, employment type, and income.
Verify Mobile Number: Enter your mobile number and authenticate via OTP.
Select Loan Amount & Tenure: Choose the desired personal loan amount and repayment period.
Upload Documents: Submit your KYC and income documents online.
Receive Offers: Instantly get pre-qualified personal loan offers from multiple lenders.
Compare & Choose: Pick the best offer that fits your needs.
Loan Disbursal: Once approved, your personal loan amount is credited to your bank account.
Types of Personal Loans Offered by FinCrif
FinCrif offers a wide array of personal loan products to match different financial needs:
1. Standard Personal Loan
A lump sum personal loan ideal for planned expenses like weddings, education, or travel.
2. Flexi Personal Loan
Withdraw money as you need it from a pre-approved credit line. Pay interest only on the used amount.
3. Credit Limit Loan
A flexible credit option that allows you to borrow up to a set limit as per your convenience.
4. Loan Balance Transfer
Transfer your existing personal loan to a lender offering a lower interest rate and save on EMIs.
5. Loan Top-Up
Already have a loan? Get extra funding with minimal documentation and quick approval.
6. Bank Overdraft Loan
A pre-approved overdraft linked to your bank account to handle short-term cash flow needs.
Benefits of Choosing FinCrif for Your Personal Loan
✅ Instant Approval
✅ Lowest Interest Rates
✅ No Hidden Charges
✅ Secure Online Platform
✅ Expert Loan Assistance
✅ Financial Education Tools
Whether you’re a salaried employee, self-employed professional, or a first-time borrower, FinCrif ensures your personal loan experience is smooth, reliable, and transparent.
Tips to Improve Your Loan Approval Chances
Boost Your Credit Score: Timely repayments and low credit usage help maintain a good credit rating.
Stable Employment: A consistent income source increases your loan eligibility.
Avoid Multiple Applications: Applying with many lenders at once can lower your credit score.
Repay Existing Loans: A lower debt-to-income ratio enhances your approval odds.
Conclusion: Make the Smart Choice with FinCrif
FinCrif is more than just a loan comparison platform—it’s a trusted financial partner. By offering easy access to personalized loan offers from India’s top banks and NBFCs, FinCrif empowers individuals to manage their financial needs with confidence.
From urgent emergencies to planned expenditures, a personal loan through FinCrif is your gateway to financial freedom. So why wait?
#PersonalLoan#LoanApproved#ApplyForLoan#LoanSolutions#QuickLoan#InstantLoan#FlexibleLoan#LowInterestLoan#LoanAdvice#InstantPersonalLoan#LoanApproval#OnlineLoan#ApplyLoanOnline#EasyLoan#LoanWithoutCollateral#LoanInMinutes
0 notes