#After effects trapcode
Explore tagged Tumblr posts
Visit Tumblr Blog
Explore Tumblr blogs with no restrictions, modern design and the best experience.
Last Seen Tumblr Blogs


Fun Fact
The average Tumblr user visits about 67 pages every month.
Text

🔺 Feeling Stripes 🔺 source files
#pyramid#loop#seamless#visuals#trapcode#trapcodetao#mir#motion#geometry#stripes#color#color theory#artists on tumblr#vj#trippy#egypt#waves#flow#after effects#source files#patreon
2K notes
·
View notes
Text
Animation Test
here is an animation test based on the sentence "submissions pour in from around the globe" I used my storyboard idea and just made a motion graphics version in after effects to see what techniques i could use

I started off with a sphere and then i made a shape and filled it in with blue and then made the sphere layer into a track matte for the shape and animated the shape moving upwards. I added a turbulent displace effect and played around with the settings until i was happy with them. I duplicated the shape layer and offset it slightly and flipped it horizontally so it would be the opposite of the first shape layer and would rise a couple frames after the first one. Then from there i added a stroke leading down and used trim paths to animate it as if it was water filling the sphere.
I do like this animation however in my original storyboard i imagined that it would be little letters flowing down and filling the globe. I would achieve this through trapcode but my brief experimentation with it didn't work out very well but i would like to come back to it in the future if i do decide to go down that path.
I also feel as though this is quite boring and if i was to take it up a level i might add some textures or gradients just to add interest. Looking into pes makes me think of paper and pencil textures but i am not sure how i would add this into after effects.
2 notes
·
View notes
Text
0 notes
Text
0 notes
Text
0 notes
Text
0 notes
Text
0 notes
Text
0 notes
Video
Awards Motion Design from Antony Parker on Vimeo.
✔️ Get it here: templatesbravo.com/vh/item/awards/55791338
Awards Main Feature Need Trapcode Particle(V15) and Option flare plugins 3840×2160 resolutions &1920×1080 resolution is also included The particles will change according to the character image Includes two color versions After Effects CC2021 or Above You can easily change the texts, photos and logos. Tutorial including Very easy to customize
Music is not included. Soundtrack by here
Thanks!
0 notes
Text
hi
ActionVFX What It Offers: High-quality VFX stock footage, including explosions, smoke, fire, debris, and other elements perfect for enhancing action scenes. They provide pre-keyed elements that are easy to integrate into any video editing software. Ideal For: Filmmakers needing realistic, customizable VFX elements without the need for extensive 3D rendering. Website: ActionVFX
Film Riot What It Offers: An extensive library of tutorials, VFX packs, and practical effects solutions tailored to indie filmmakers. Film Riot offers DIY solutions and paid resources like VFX assets that help filmmakers achieve professional results on a budget. Ideal For: Filmmakers looking to learn and apply VFX techniques in a hands-on way with guidance from tutorials. Website: Film Riot
Red Giant (Maxon) What It Offers: Red Giant offers a suite of VFX tools, including Trapcode, VFX Suite, Magic Bullet, and Universe. These plugins integrate with Adobe After Effects and Premiere Pro, offering powerful tools for creating effects like explosions, fire, and motion graphics. Ideal For: Filmmakers who are hands-on with post-production and need versatile VFX software plugins. Website: Red Giant
ProductionCrate What It Offers: A vast library of VFX elements, sound effects, and assets that can be easily downloaded and used in films. ProductionCrate also offers tutorials on how to use their elements within popular editing software. Ideal For: Filmmakers seeking an affordable subscription service for VFX elements like energy blasts, weather effects, and magic spells. Website: ProductionCrate
Video Copilot What It Offers: Known for its Element 3D plugin for After Effects, Video Copilot provides 3D rendering capabilities and VFX packs like explosions, lens flares, and more. It’s great for filmmakers who want to create their own VFX sequences. Ideal For: Filmmakers with some experience in After Effects who want to push their VFX to the next level with high-quality assets and plugins. Website: Video Copilot
Fiverr What It Offers: A marketplace where indie filmmakers can hire freelance VFX artists for custom work, ranging from simple effects to complex CGI. Fiverr offers a variety of price points, making it accessible for low-budget projects. Ideal For: Filmmakers needing custom VFX work without committing to large studio costs. Website: Fiverr
Envato Elements What It Offers: Offers a huge collection of stock footage, VFX templates, motion graphics, and sound effects that can be used in indie films. It’s subscription-based, giving unlimited access to a vast array of digital assets. Ideal For: Filmmakers needing quick and customizable VFX templates for a variety of scenes. Website: Envato Elements
Blender What It Offers: A free and open-source 3D creation suite that includes modeling, rigging, animation, simulation, rendering, compositing, and motion tracking. Blender’s powerful capabilities make it an excellent choice for filmmakers looking to create custom VFX. Ideal For: Indie filmmakers on a tight budget who are willing to learn 3D modeling and animation to create custom effects. Website: Blender
HitFilm Pro (FXhome) What It Offers: Combines video editing, compositing, and VFX tools into a single application. HitFilm Pro provides features like particle effects, green screen removal, and 3D model rendering, making it a great all-in-one solution. Ideal For: Filmmakers looking for a budget-friendly, integrated solution for editing and VFX without needing multiple software licenses. Website: HitFilm Pro
Artgrid & Artlist What It Offers: Although primarily known for stock footage and music, Artgrid and Artlist also offer high-quality VFX elements and video templates that can help elevate the production value of indie films. Ideal For: Filmmakers who need cinematic VFX footage to complement their storytelling. Website: Artgrid | Artlist
0 notes
Text
Creative Ways to Use a Music Visualizer
In the digital age, music is no longer just an auditory experience; it’s a visual one as well. The fusion of sound and visuals has given birth to an exciting creative tool known as the music visualizer. Whether you’re a musician looking to enhance your tracks, a DJ aiming to captivate an audience, or a visual artist exploring new dimensions, creating a music visualizer can elevate your work to new heights. This guide will take you through the entire process, from the initial concept to the final product, ensuring that you can create a music visualizer that truly resonates with your audience.
Understanding Music Visualizers
Before diving into the creation process, it’s essential to understand what a music visualizer is. A music visualizer is a tool or software that generates animated imagery based on the frequencies, amplitudes, and rhythms of an audio track. These visuals can range from simple geometric shapes pulsating in time with the beat to complex, dynamic scenes that evolve with the music.
Music visualizers have been popularized by media players, DJ software, and live performance setups. They serve to enhance the listening experience by providing a visual representation of the music, making it more engaging and immersive.
Types of Music Visualizers
There are various types of music visualizers, each offering different styles and capabilities:
Waveform Visualizers: These visualizers display the audio waveform, showing how the sound fluctuates over time. It’s a simple yet effective way to represent the music visually.
Spectral Visualizers: Spectral visualizers show the frequency spectrum of the music, breaking down the audio into different frequency bands and representing them with color-coded bars or lines.
Particle Systems: These visualizers use particle effects that move and change based on the music’s dynamics. They can create a sense of depth and motion that complements the audio.
3D Visualizers: These are more complex visualizers that use 3D models and environments. They can create an immersive experience where the visuals move in sync with the music, creating a virtual world for the audience to explore.
Custom Visualizers: These visualizers allow creators to design their own visuals from scratch, offering complete control over the style and behavior of the visual elements.
Tools and Software for Creating a Music Visualizer
Creating a music visualizer requires the right tools and software. Here are some of the most popular options available:
After Effects: Adobe After Effects is a powerful tool for creating custom visualizers. It offers a wide range of effects and plugins specifically designed for music visualization, such as Trapcode Sound Keys and Audio Spectrum.
Blender: Blender is a free, open-source 3D creation suite that can be used to create intricate 3D visualizers. With its animation tools and real-time rendering, Blender is ideal for creating visually stunning music videos.
Processing: Processing is an open-source programming language and environment specifically for visual arts. It allows for the creation of custom visualizers with code, offering endless possibilities for unique designs.
VSDC Video Editor: VSDC offers a built-in music visualizer tool that’s easy to use and doesn’t require extensive technical knowledge. It’s perfect for beginners who want to create simple yet effective visualizations.
Winamp MilkDrop: For those who want a more nostalgic approach, Winamp’s MilkDrop plugin is a classic visualizer that has been used for decades. It offers a wide variety of presets that can be customized to create your own visual experience.
Step-by-Step Process to Create a Music Visualizer
Creating a music visualizer involves several key steps. Here’s a detailed guide to help you bring your vision to life:
Conceptualize Your Visualizer
Begin by deciding on the style and theme of your visualizer. Consider the genre and mood of the music you’ll be working with. A calming ambient track might benefit from smooth, flowing visuals, while a high-energy EDM track might call for fast-paced, dynamic visuals.
Sketch out ideas for the visuals, thinking about color schemes, shapes, and movement. This will help guide your design process and ensure consistency throughout the project.
Choose the Right Software
Based on your concept, choose the software that best suits your needs. If you’re looking for advanced 3D effects, Blender or After Effects might be the best choice. For simpler, code-based visuals, Processing could be ideal.
Import Your Music
Import the audio track you want to visualize into your chosen software. Most visualizer tools allow you to analyze the audio file, extracting data on frequency, amplitude, and rhythm to drive the visuals.
Design the Visual Elements
Start designing the visual elements that will respond to the music. This could include shapes, colors, particle effects, or 3D models. Ensure that these elements align with the mood and style of your track.
Set up the visuals to react to specific aspects of the music. For example, you might have shapes that pulse with the bass or colors that shift with the melody.
Synchronize the Visuals with the Music
Use your software’s timeline or scripting tools to synchronize the visuals with the music. This step is crucial as it ensures that the visuals move in harmony with the sound, enhancing the overall experience.
Add Finishing Touches
Refine your visualizer by adding effects like motion blur, glow, or transitions between scenes. These finishing touches can make your visualizer more polished and professional.
Test your visualizer with the full audio track to ensure everything is in sync and functioning as intended.
Export and Share
Once you’re satisfied with the visualizer, export it in a suitable format for your intended platform, whether it’s YouTube, social media, or a live performance setup.
Share your creation with your audience, and consider gathering feedback to improve future projects.
Tips for Creating an Effective Music Visualizer
Creating a music visualizer that resonates with your audience requires attention to detail. Here are some tips to keep in mind:
Stay True to the Music: The visualizer should enhance the music, not overshadow it. Ensure that the visuals complement the audio and reflect its mood and energy.
Keep It Dynamic: A static visualizer can quickly become boring. Use a variety of visual effects and transitions to keep the audience engaged throughout the track.
Consider the Platform: Tailor your visualizer to the platform where it will be shared. For example, a visualizer for YouTube might require different considerations than one for a live performance.
Experiment and Innovate: Don’t be afraid to experiment with new ideas and push the boundaries of what a visualizer can be. Innovation can set your visualizer apart from the rest.
Conclusion
Creating a music visualizer is a rewarding process that combines artistic creativity with technical skill. By following this guide, you can create a visualizer that not only enhances your music but also captivates your audience. Whether you’re a musician, DJ, or visual artist, a well-crafted music visualizer can elevate your work to new levels and provide a unique, immersive experience for your audience.
0 notes
Text
On my 37th birthday, I made a tool to trace orbital paths Realized later the source file was gone But a mistake saved me from the loss I had imported it into another project by accident That one was archived and I found it today So I'll play with it a little bit more DIGITAL ARCHIVE
#orbits#draw#paths#loop#seamless#visuals#trapcode#trapcodetao#after effects#artists on tumblr#geometry#math art#motion#expressions
649 notes
·
View notes
Text
Introduction to Motion Graphics Design: Tools and Techniques for Beginners
In the dynamic realm of visual storytelling, motion graphics design stands as a powerful medium for captivating audiences and conveying messages with creativity and impact. From animated logos and title sequences to explainer videos and advertisements, motion graphics infuse life and movement into static visuals, bringing them to life in mesmerizing ways. If you're a beginner looking to explore the exciting world of motion graphics design, this article serves as your gateway, introducing you to essential tools and techniques to kickstart your journey.
Understanding Motion Graphics Design:
Motion graphics design is the art of combining graphic design, animation, and visual effects to create dynamic and engaging motion sequences. Unlike traditional animation, which typically involves character movement, motion graphics focus on animating text, shapes, and images to communicate ideas and evoke emotions. Motion graphics are widely used in various mediums, including film, television, advertising, and digital media, to enhance storytelling and capture audience attention.
Essential Tools for Motion Graphics Design:
Adobe After Effects: Adobe After Effects is the industry-standard software for motion graphics design. It offers a comprehensive set of tools for creating animations, compositing footage, and adding visual effects. With features like keyframe animation, masking, and motion tracking, After Effects empowers designers to bring their creative visions to life with precision and control.
Adobe Illustrator and Photoshop: Adobe Illustrator and Photoshop are indispensable tools for creating and preparing assets for motion graphics projects. Illustrator is ideal for creating vector-based graphics and logos, while Photoshop excels at editing and enhancing raster images. Seamless integration with After Effects allows designers to import assets directly into their motion graphics compositions.
Cinema 4D: Cinema 4D is a powerful 3D modeling and animation software widely used in motion graphics design. While optional for beginners, mastering Cinema 4D opens up opportunities to create intricate 3D animations and visual effects, adding depth and realism to motion graphics projects.
Plugins and Scripts: Various plugins and scripts can extend the functionality of motion graphics software and streamline workflow processes. Popular plugins like Trapcode Suite, Element 3D, and Plexus offer advanced features for creating complex animations, particle effects, and 3D motion graphics.
Key Techniques for Motion Graphics Design:
Typography Animation: Typography animation involves animating text to convey messages in dynamic and visually engaging ways. Techniques such as kinetic typography, text reveals, and typographic transitions add interest and emphasis to motion graphics projects.
Motion Graphics Principles: Understanding fundamental motion graphics principles such as timing, easing, and anticipation is essential for creating smooth and impactful animations. By mastering these principles, designers can create animations that feel natural and fluid, enhancing the overall user experience.
Composition and Layout: Effective composition and layout are critical for guiding the viewer's eye and creating visual hierarchy in motion graphics projects. Principles such as rule of thirds, balance, and contrast help designers arrange elements in a visually pleasing and cohesive manner.
Color and Visual Style: Color plays a crucial role in conveying mood, tone, and brand identity in motion graphics design. Choosing an appropriate color palette and visual style enhances the overall impact of the animation and reinforces the intended message.
Conclusion:
Aspiring motion graphics designers, equipped with essential tools and techniques, embark on a creative journey filled with endless possibilities and opportunities for experimentation and innovation. You can begin by mastering the fundamentals of graphics design and honing their skills through practice and exploration, and then slowly transition to more complex principles of motion graphics. Enrolling for graphic design courses can be a great start to experiment fearlessly, and let your imagination take flight in the dynamic world of motion graphics design.
0 notes
Text
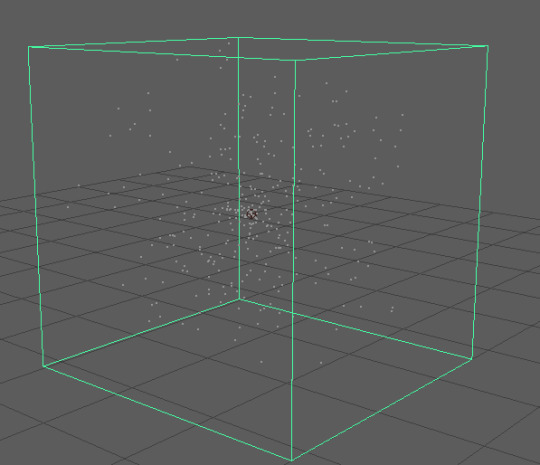
Trying out Nparticles
Now it's time to start playing with the different Nparticle option in maya, I started by creating an emitter, which is in the FX tab within maya, it then brings up a menu where you can select the different emitter types, this is what changes the type of particles, omni will spawn particles that come out from the centre

There's a lot to try out with particles, it's an area in maya that I have never touched before this, so I'm sure there's lots that I'm still missing

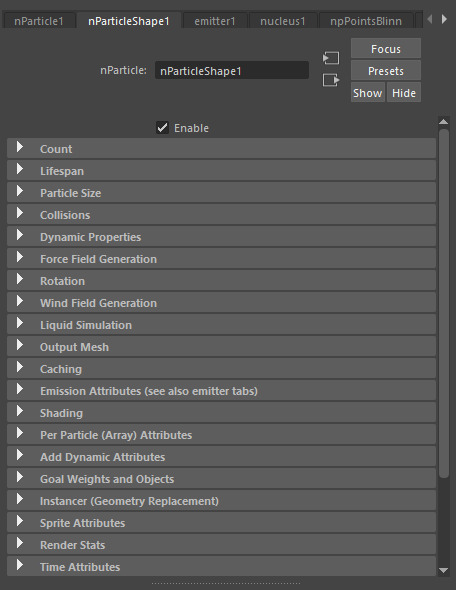
It's a little bit like after effects trapcode plugin, particular, the main settings tab to change how the particles interact is in the nParticleShape tab but some of the settings can be accessed by some of the other tabs, it's just a case of swapping tabs until you find the settings that you are looking for. Things like lifespan is what can change how long your particle lives for, this is important because if it set to zero then the particles will live forever, so if you have them generating for a long amount of time, then it will take up a lot of your resources
So I tested out all the different available options, the default is a bunch of small dots, this can be increased or changed colours so that it's a bit more visible

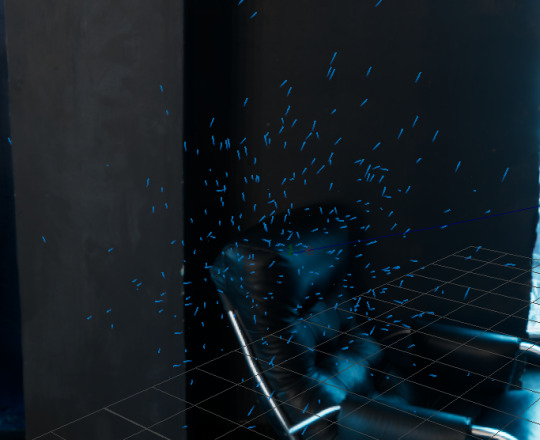
So I tried increasing the size in some of the settings, which looks like this in render view, it's not exactly the type of style that I was hoping to get, so I think I'm going to play around with the types of particles to see if I can find something that fits better

there was this streak looking one, but when I rendered it, it just looked like dots again, I'm sure why this happens but I can't seem to find a way to get the streaks to show up in the render view. My guess for why this isn't working is because I must have some sort of incompatible version or am missing an extension to get this to work, there's still a lot more types of particles so I think I'll have a look at some of the others to see if they work better
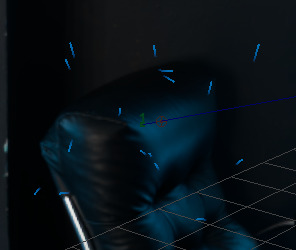

I found another variation of the streak type called multi streak, but it seems to be doing the same thing as the regular streak option

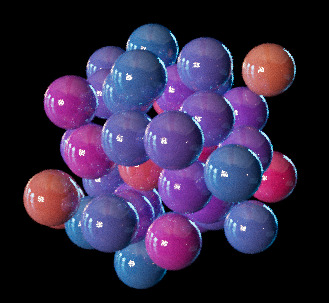
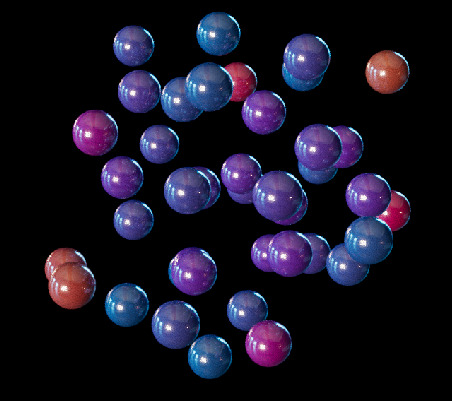
Then this is the sphere option, I really like how this one looks, it's very cool compared to the other, as it has more actually geometry over dots and dashes. The self collide on these particles is quite noticeable with these particles so I think I'll have to find a setting that stops them from clipping into each other
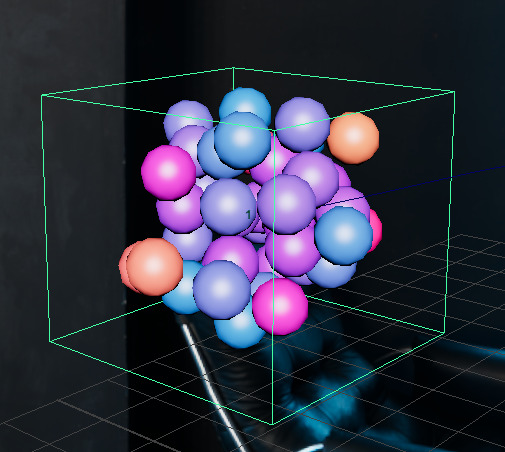
Looking at these ones in the shader view, they look really good compared to the other particles, the geometry allows for them to have their own reflective material, which I think would make for a really cool effect as particles that move through my scene, almost like bubbles of connectivity. There's just something about these spheres that look really cool

The shading tab is what lets you change the appearance of the particles, this means the colour, the type, the opacity all things relating to the appearance

it also has gradient option, which let me apply a 4 point gradient, so I was able to get the sky colours to apply to my particles, it took a little bit of tweaking to get it to look good on my scene because at first it wasn't applying to all the particles, but that was because I needed to change the colour input to randomized ID which spreads it equally across all the particles
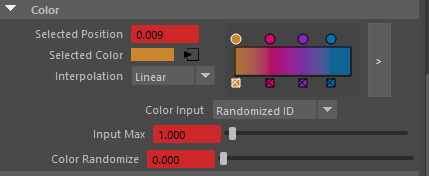

which looks like this, now it's fully randomised across the particles,

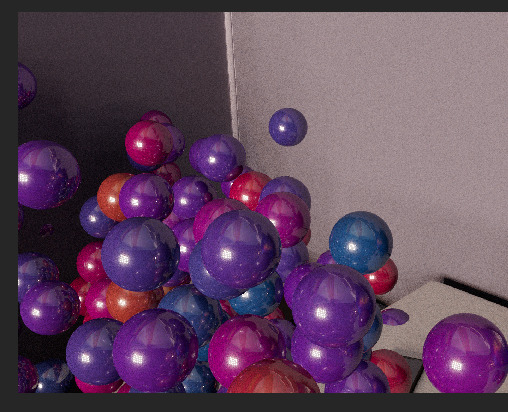
The bubbles are my favourite type because of how unique they look compared to the others, so I've decided that I'm going to use them for my scene, here is how the bubbles are looking with the Sky gradient
Lifespan determines how long the particles live, meaning they will start disappearing after the specified time, otherwise they will just go on forever, also having them random means that they don't all disappear at the same time, this makes it look more natural
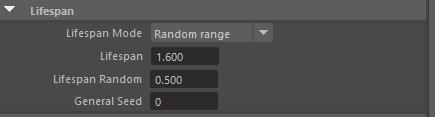
These settings can adjust the size, which is important because a lot of these particle tend to start quite small, so upping the radius can make them look better. Another thing you can also do is set the radius scale to randomise, what this will do is make your particles slightly different sizes, giving them variety

The size can also be changed in the Arnold tab, another thing that I turned off straight away was the casts shadows option, because then it will cast a shadow for each one of your particles

This really messes with the look of the particles and it creates this really ugly looking black shadow on every surface that it passes

Here's what it looks like without the shadow, it's much cleaner and doesn't make the scene look like it's been surrounded in darkness
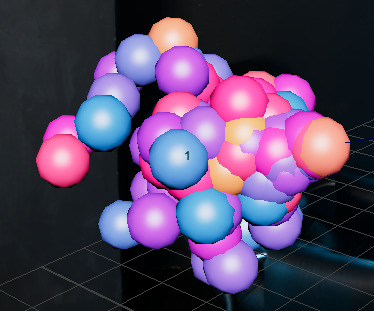
Collisions determines what it collides with, self collide is good because it means that the particles will bounce off each other, otherwise they just clip into each other
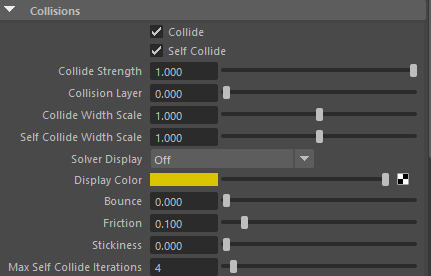
here's what it looks like without self collide, they are very clustered
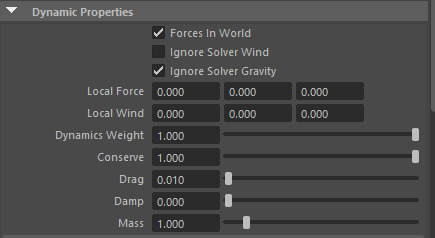
This settings determines how it reacts to the scene, meaning the way it's effected by gravity, wind etc. I've mostly left this untouched for now because I'm going to attempt to attach it to a curve which is when I will then play around with the gravity settings then
here's what they look like without lifespan, they just just keep creating forever, this clutters the scene and takes up more computing power

I had a brief go with this cloud particle as well, but it kept giving me errors when rendering, so this must mean that it isn't compatible with the version of Maya that I'm using

I've tried re applying from the start, re-opening but I can't get it to work

So after I've explored all the different options in Maya nParticles sections, I've decided to go with the sphere particles that look likes bubbles. This is because they are by far the best working particles that Maya has to offer and they also look really appealing compared to the others, I'm also happy with all the settings that I've chosen and how it's going to look in my scene
0 notes
Text
The blue hat
For the blue hat I've taken more of a literal approach towards process of the space industry. A lot of research would be involved to fully understand the process of building a rocket or sending one to space. So, with this in mind, I want to convey the complexity of the space industry.
What i envision is large amounts of coding and mathematical equations. Also, blue prints and design of rockets. So, I've been looking back at mood boards and other work to get some inspiration.
I had made a start with testing out using code in After Effects, experimenting with the displacement effect. I did like those, but I'd like to try doing something else, to what i can come up with.
I came across this tutorial while i was searching for another hat. It looked exactly like the type of thing I wanted to do for the blue hat, using coding data. The tutorial was quite complicated, using 3D displacement and fractal noise, and it took a few attempts to get any decent outcomes.
youtube
Compilation of first outcomes:
I experimented around with trapcode form which I used following the tutorial. I already like these first outcomes. I think could work on their own for this hat. They're definitely the type of think I was envisioning for this hat.
I think before i settle on one of these tests, I'm going experiment a little more to see if i can create anything i like more.
0 notes
Text
Development
youtube
To find some inspiration for some abstract visuals I had a look at the intro sequence for Dolby Digital I saw at the cinema as a possible starting point for ideas.
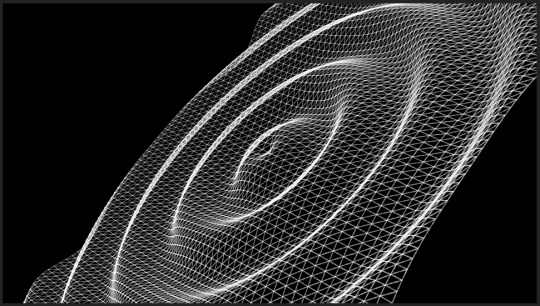
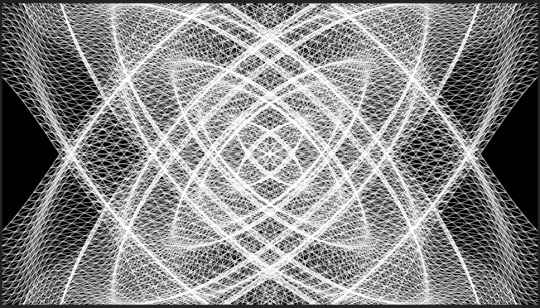
Here are some tests I got playing around with Form Trapcode in After Effects but I couldn't find a way to animate this ripple shape unfortunately. For this imagery I was thinking about the future, putting things into perspective, our effects to change or prevent anything are just another drop in the bucket.


This is some of the feedback I got after a one on one crit, my initial idea was too literal and I was simply recycling someone else's ideas and applying it to the theme of AI which, would give me an opportunity to explore different animation techniques but it wouldn't be something new and experimental.
0 notes