#AmigaOS3.2
Explore tagged Tumblr posts
Visit Tumblr Blog
Explore Tumblr blogs with no restrictions, modern design and the best experience.
Last Seen Tumblr Blogs


Fun Fact
Tumblr was acquired by Yahoo for $1.1B in 2013.
Text
Installing AmigaOS 3.2 - First Impressions!
So, AmigaOS 3.2 is available, at the moment as a physical installation from selected resellers. No matter your opinion of Hyperion, I hope people are at least in favour of supporting the resellers who keep the Amiga dream alive by purchasing the CD (yes, CD!) and any rom chips needed.

It arrived fresh from my chosen reseller this morning. Let's boot it up and see what it's like to install! I'll be using WinUAE today because my physical Amigas are all currently in bits, and none have a CD drive. More on that in a bit...
WinUAE Config:
Basic A1200 + 8Mb Z2 RAM
3.1 KS ROM (from the Amiga Forever package) - I could have used the 3.2 ROM straight from the CD but as I've not purchased any physical ROMs for my 'real' Amigas, this is how I'm going to do it.
100 MiB Hardfile, with boot priority set to -128 and controller set to 'UAE (uaehf.device)', in 'full RDB mode'
CD image mounted as an .iso image, that I'd created from my CD.
Make sure the 'CDFS automount CD/DVD drives' box is ticked!
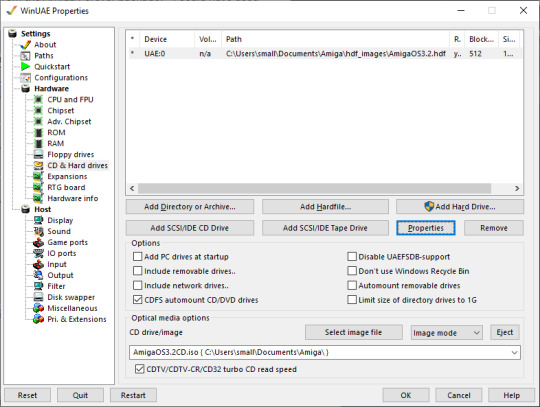
Why mounted as an .iso? As none of my Amigas have CD drives, I'll be able to pop this on a CD card and mount it using something like ImageMount, and then install from there. The boot priority of the hard disk has been set to -128 so it should boot up from the .iso straight into the 'Amiga PE'.

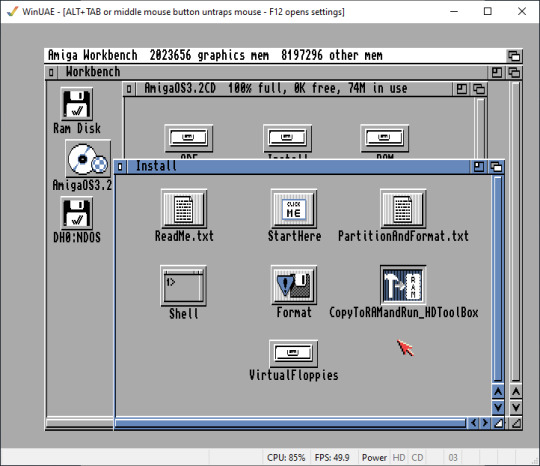
Opening up the AmigaOS3.2CD icon, we find an 'Install' folder, and under that a likely-lookin icon with a snappy name:
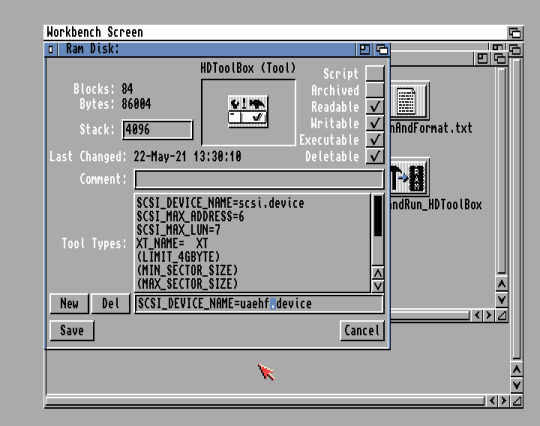
Because we selected the HD controller to be the UAE device, HDToolBox can't find the drive. Go into the RAM disk, right click the icon, and go to the Information menu. Edit SCSI_DEVICE_NAME to be uaehf.device, press return, then click save.
Click the icon again and it will this time find our hard disk. Change drive type => Define New and add the drive
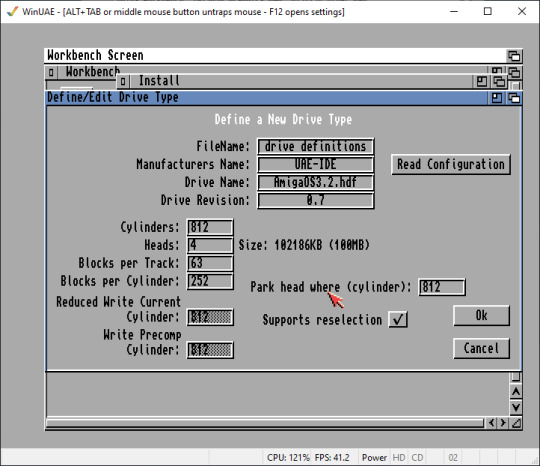
Create a new drive type and partition it.
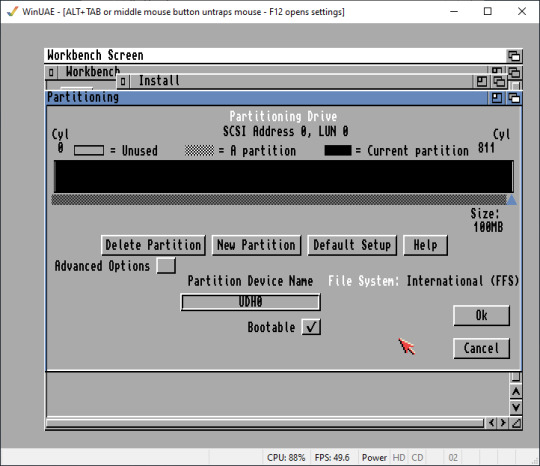
Click "OK", then "Save to device" then exit; it will reboot, and when it restarts go to AmigaOS3.2CD/Install, click on “format” and do a quick format, giving the volume a name. Finally we can begin the installation!
Click the “Start Here” icon, which will mount the Install3.2 disk; open that and click Install. Chose your language and click that. Eventually you’ll get to the installer:

Proceed! It will ask questions about where you want things installed (choose our freshly formatted drive) and some other options. I chose the defaults and selected “yes” to the GlowIcons.
It will start copying files. This takes a while, auto-mounting all of the various ADF files as virtual floppies as it goes. It certainly is easier than doing a lot of disk swapping, virtual or real.

And it’s done!
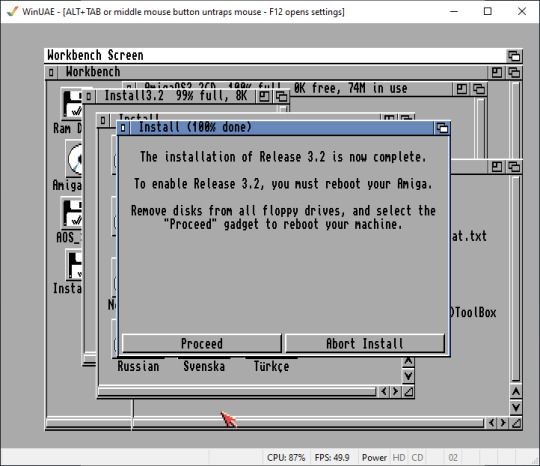
Press F12 in WinUAE to get back to the configuration menu and eject the CD image. Go back into the emulation, click Proceed, let it reboot, and boom!
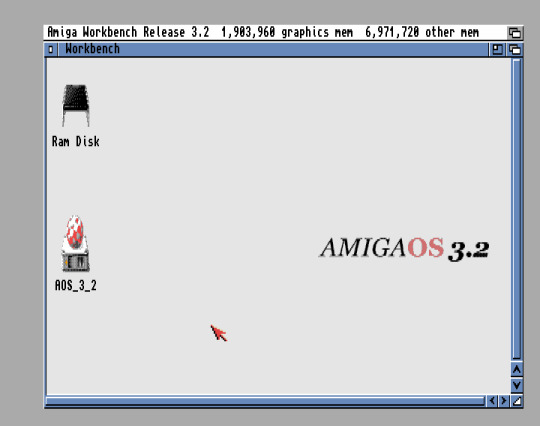
Well, there you are. I think it could benefit from a higher resolution and more colours. For now I’ve put it into high-res laced mode and turned up the colours to 256. On my real Amigas with RTG cards I imagine this would look lovely; on the ones without maybe better off without the GlowIcons unless you have something like an Indivision to allow you to use HighGFX to give better resolutions.

I’m sure there’s a lot of customisation still to be done - I can’t move windows off-screen at the moment. Probably there are instructions on the CD I should read. Still, the installation was straight forward enough and boots happily on the 3.1 ROM, updating via the LoadModule approach, seemingly transparently.
I look forward to installing in on the real Amigas!
------------------------
Update: It turns out that the off-screen windows is activated under Prefs/IControl and clicking a button. I should really RTFM ;)
5 notes
·
View notes