#Berserker warpwolf
Photo

On Tuesday evening I dropped Morvahna 2 into Siege 2 Gravediggers. It was a Circle loss via concession (currently 3 wins, 2 losses).
However, this battle report was written by my opponent! The “Me” in this is Cygnar opponent, and the “Opponent” is me, the Morv player. I took the photos though, so reverse the usage of ‘right’ and ‘left’ Thanks, opponent!
Siege 2 (Gravediggers)
- Cyclone
- Ironclad
- Triumph
Captain Maxwell Finn
Commander Anson Hitch
Trench Buster
Trench Buster
Max Trencher Commandos
Max Trencher Commandos
- Scattergunner
- Scattergunner
- Scattergunner
Trencher Express Team
Trencher Express Team
Max Trencher Infantry
Scenario: Spread The Net. I won the dice roll and chose to go first.
Turn 1 (Me)
Siege allocates one to Triumph, walks forward, uses Desperate Pace on the Commandos, and jumps behind the wall. Commandos run forward, just outside of charge range on my side of the central forest. Ironclad runs right towards my rectangular zone, Cyclone runs a bit left and forward, Triumph runs behind the wall. Hitch moves forward, staying central. Finn moves just behind the commandos, Infantry move forward and dig in. Express Team get dug in on the hill. Trench Buster on my left runs to flag, where he sits all game, the one on the right moves behind the commandos.
Turn 2 (Opponent)
Blood Trackers run forward, jamming my congo line of commandos with a congo line of their own. Warp Wolves move to his rectangular zone, with stalker a bit farther forward. Morvahna casts Carnivore on the Wolf Riders and Fog of War on her self before moving forward and staying central, a couple inches behind the forest. Blood Trackers run forward, jamming my congo line of commandos with a congo line of their own.
Warp Wolves move to his rectangular zone, with stalker a bit farther forward. Morvahna casts Carnivore on the Wolf Riders and Fog of War on her self before moving forward and staying central, a couple inches behind the forest. Wolf Riders reposition into the forest, staying safe. Blood Pack advances out into the open on the right, one tags a Trencher, but it toughs. Death wolves move forward in preparation for killing commandos.
Turn 3 (Me)
Triumph takes his Sentry Fire shot, tagging one of the warpwolves for a bit of damage. Siege allocates one to Triumph. Infantry activates, some move forward to deny great charge lanes, all but one stay dug in, kill a single blood tracker, which was super important, and CRA to kill two Blood Packs. Hitch moves up to extend his Tactician bubble. Commandos activate, one of the Scattergunners moves into the bit of space cleared by the dead Blood Tracker, and I minifeat. Mat 7+Prey+Finn for Mat 10, auto-wounding finishes off most of them. The one line up spray kills I think 4 of 6 models in front of it, and clips one of my commandos, who also dies. In the end, Nuala, the model he kept farther back, in the forest, was the only one to live. The Commandos reposition to spread out, hoping to avoid being Berserked to death by the aptly named Death Wolves.
After a bit too much hemming and hawing, I activate Siege, walk forward, put down the turret, cast Razor Wall in front of the Death Wolves to make them spend a corpse getting to me, and Feat. Most everything moves up a bit further, Finn spends all 3 inches getting closer to Nuala. I end Siege's movement a bit further left that I should have. Finn walks the rest of the way with Tactician, gets to Nuala, destroys her, and uses Killing Spree and Reposition to move back 4 inches. The Ironclad gets into my Rectangular Zone, and I don't measure Control, which his ends up being outside of. Cyclones drops a Covering Fire template partially on top of the Razor Wall. Triumph tramples forward, lines up a shot on Morvahna and spikes the damage, having it transferred to one of the two warpwolves. Both Express Teams shoot at the Feral Warpwolf, but fail to knock him down or push him out of the zone. Flag Trench Buster does nothing, Other Trench Buster runs near Finn and Hitch to Shield Guard if necessary. I score my flag, opponent scores his Rectangular zone.
Turn 4 (Opponent)
Chef runs to try and camp opponent's flag, but can't make it there. Night Witch is forced to either stand of the flag or go after infantry. Opponent chooses infantry, and it kills 3 or 4. In this turn, my opponent learns that both Triumph and Rocket Turret can fire while engaged. I didn't realize his intent was to jam me and prevent shooting, or else I would have mentioned it. Triumph takes his maintenance shot at the Stalker, does some damage. Siege allocates two to the Cyclone. Express Team tags Morvahna, applying Grievous Wounds, and doing something like 3 damage. Rocket Turret kills the Death Wolf in front of it. The remaining commandoes, Finn, a Trench Buster, and Hitch are all required to kill the Death Wolves Officer. The last Death Wolf gets a corpse slapped off of it by Triumphs shield, shoots at Morhvana and misses.
The Ironclad moves over and kills one of the two Wolf Riders in the Zone. Having that power up focus could have allowed me to clear the zone and score a point. Siege walks forward, kills the last Death Wolf, and jumps to get the Ironclad in control while also staying forward and within 3 inches of the Trench Buster. Cyclone walks to get the stalker in range, rolls 4 shots, misses the first two, boosts attack and damage on the second, and attack on the first, doing decent damage. The lone Express Team Spotter runs into my opponent's Zone to contest. Infantry kill a Wolf Rider, a Blood Pack, and the Night Witch on assault charges. I score my flag, my opponent doesn't score. My opponent doesn't like having a feat that damages his warlock while under the effects of grievous wounds. Blood Pack move forward and kill some Commandos and Infantry, Wolf Riders do the same. Morvahna moves to cast Death Knell on the Express Team Spotter, ands feat back the three Blood Pack models in awkward spots. He repositions back towards the center. Stalker charges and leaves my Cyclone on 1 box. Feral sits to score his zone. I can't remember what happened to the Chef, it either got to the flag or got shot and killed. I score my flag, my opponent scores his zone and maybe flag?
Turn 5 (Me)
I check the board state, declare that I can get Siege onto Morvahna, and my opponent concedes. Looking at the table afterwards, I could get 4 commandos, an express team, and Triumph on her before Siege would need to go in.”
Final Thoughts
This is me again, Bloody Benjamin!
This was a rough game. I already find the Gravediggers match up exceptionally difficult because of sheer quality of models. This list out threatens mine, out damages mine, and has just as many, if not more positioning tricks than mine. As a personal fault, I struggle to maintain large indices of minutia, and despite having played Gravediggers many many times, I frequently forget its myriad rules and interactions.
I made a handful of crucial mistakes, deployed weirdly in an attempt to not auto-lose on Spread The Neat, and forgot crucial rules. And this was exarcerbated by turns of absolutely like warm dice. It was one of those games where you roll dice over and over and nothing is really happening. That’s dice though.
This game would suggest that my list cannot go second into Siege 2 Gravediggers, but it’s only been two games against it. I have a feeling this will be a brutal series, as both my opponent and I intend to be playing these lists for a while.
0 notes
Photo
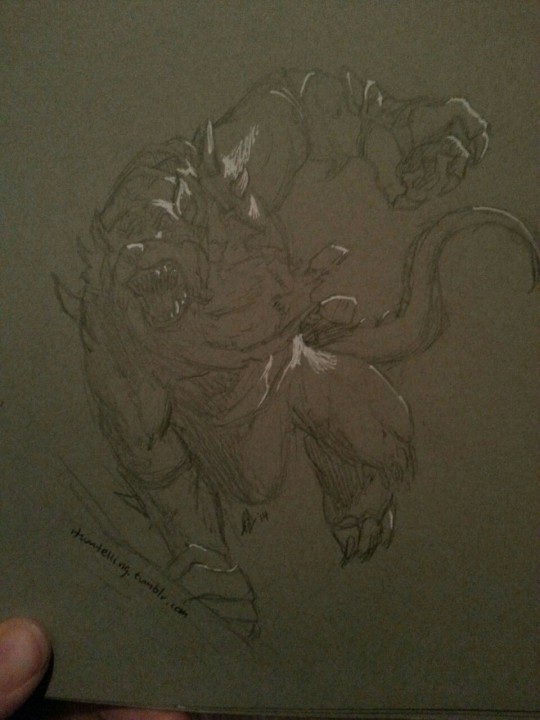
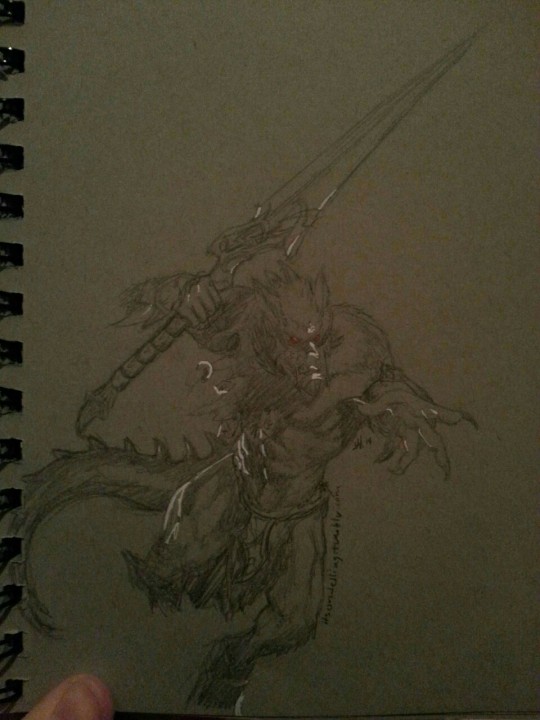
Also shoddy pictures. I believe it's a feral warpwolf, and berserker warpwolf. From tabletop game Hordes. Circle Orboros. Sketched looking at the books.
#Hordes#Feral warpwolf#Berserker warpwolf#Circle orboros#Warmachine#Shoddy pics#Art#Bar lighting#Uugghhh#Phone pics
0 notes
Photo

(18th August 2018)
List Update September 5, 2018: I replaced the max unit of Blood Pack with a second max unit of Wolf Riders.
It is a routine exercise of mine when considering lists for a pair to put together a list based on the demands of my meta, and to play it 10 times, into any and all comers, without making changes to the list.
The goal is not just to gain an understanding of what it’s effective into, but also to gain an understand of what it’s ineffective into.
Right now I’m digging into Morvahna 2 in Devourer’s Host.

List
Theme: Devourer’s Host
Morvahna 2 ( Morvahna The Dawnshadow):
- Feral Warpwolf
- Warpwolf Stalker
Bloodweaver Night Witch (Free)
Swamp Gobber Chef
Max Tharn Bloodtrackers
- Nuala (Free)
Max Tharn Wolf Riders
Max Tharn Blood Pack
Death Wolves
Shifting Stone
Why
Competitive list pairings in the Phoenix Area tend to follow a Infantry/Battlegroup scheme, where one list is force multiplying troops and one list is doing the same to the battlegroup. Not uncommon, I’m sure! But the Circle instinct to run two battlegroup lists in Phoenix is fraught.
And after playing 35-ish Bradigus games, I just grew fatigued of it. I didn’t get into Circle at the beginning of MK3 to play slow, tanky construct warbeasts. Much love! But not my style.
Furthermore, this list is only set to improve with the upcoming Circle CID cycle.
How
This list aims to win on Scenario/Attrition. In 2018, I believe Circle’s ability to mutilate single wound infantry has climbed in value. I aimed to create a list that:
A. Has fast and long threat projection. It skews gun warriors with melee potential.
B. Has some multi-wound infantry to revive with Morvahna’s feat, which itself is a form or threat projection and attrition fuel re-uptake. The ability to place models onto the board in key positions is not to be underestimated.
C. Does not suffer uphill when going second, hence the gun skew.
Note from page 59 of the Primal Hordes Rules Digest:

Piece Roles
Morvahana The Dawnshadow is defined largely by her feat, which returns models to play. She hits hard in melee and can force friendly models to re-roll attack or damage rolls, both at the cost of her life. When her friendlies die, Imperishable Conviction triggers and she gets health back, but I also utilize Shifting Stones, the Objective, and her own fury to keep her health at acceptable levels at all times. Fog Of War is her core piece of defensive tech. In this gun line list, it is often prudent to drop Fog Of War, activate her after guns have fired, and then re-cast. Since she generally has 6 fury to play with after upkeeping Carnivore, this is rarely detrimental in the early game, and becomes far more flexible in the late game melee.

Bloodtrackers with Nuala have surprising offensive output. The combination of Quick Work and Swift Hunter means a Bloodtracker can charge, kill a model, fire a ranged attack, and then advance two inches. It’s a finesse combination that requires some brainwork, but it’s powerful. It’s strengthening the strategic vector of slowly pushing further and further into the opponent’s side. Most crucially, the Bloodtrackers have stealth and advanced deployment. They are projecting 14 inches of ranged threat from the 13 or 16 inch lines and are not easily shot at. When going first, they are capable of setting the line of scrimmage at the 27 inch line.


The Tharn Blood Pack, while still the ugly black sheep of the Tharn sub faction, have one critical ability that has surprising power in the terrain rich tables of 2018; Treewalker. The Blood Pack wants to be in or behind a forest, where they threaten enemy models at range that cannot threaten them back, and they can now do this far more often than not. They are overly costed as is, which hurts the efficiency of the list, at least until Morvhana brings the dead frontline back. It remains to be seen what happens to them in CID, but for now, they are getting work done and generally don’t die until I give them to my opponent.

The Death Wolves. Morvahana activates their Prowl with Fog Of War and they get two corpses each at the beginning of the game as per theme. If you’ve ever seen what the Death Wolves do, then you understand. If not, take a peep.

Upon delivery, they will routinely chew through entire units of living single wound infantry. Stealth and Cannibal Magic means they are extraordinarily difficult to kill. Avoid the temptation to use their last corpse and they become frustrating, 3 point road blocks. Within this list, they will always get delivered unless the opponent goes out of their way to kill them (which they should).
Tharn Wolf Riders are absurdly fast, and project 19 inches of ranged weapon master threat. Assault means their power to punch up is non-trivial. Wolf Riders, even at their steep cost, are there as premium recursion targets, and so that I can pressure/contest on Spread The Net and Mirage. When returning Wolf Riders to play during feat, they can be placed in positions where Annoyance will affect living enemy models in surprising ways. Generally, they’re great when returned deeper into the enemy lines.

The Bloodweaver Night Witch is a great natural Stealth piece that can be used to hold a flag or contest a zone with a 14 inch run. She can also charge 10 1/2 inches into warrior models and go on a killing spree while the gobber chef takes her place on the flag. This lady does sometimes explode herself, but generally earns her points back first.

With the list’s ability to create a weirdly durable, recurring frontline, the beasts are free to stalk the backlines, picking off contesting or misstepping enemy beasts and jacks. While the Feral is there simply to brawl on other heavies and carry Primal, the Stalker’s ability to step out, Berserk through groups of enemy warrior models, and sprint away is key.

The Lightning Strike animus also means that Morvahna is free to use her speed to hit and run all over deeply positioned enemy warriors.
What The List Doesn’t Want To See
Obviously, the ability to remove my warrior models from play mitigates the power of the feat, so it’s good to avoid widespread Take Down lists or defining RFP spells or effects. A list with a low amount of living models takes some important properties off the table, like snacking, heart eater, carnivore, and annoyance.
This is the thought and intent behind this list, and following will be battle reports and musings from the 10 trial games I play with it.
0 notes
Last Seen Blogs

sporadicbeauty
Grace

becspeight
Bec

grahammom
Grahammom

calcifersparks
Mana

acynosure
Art of Cynthia