#DIY Tutorial
Explore tagged Tumblr posts
Visit Tumblr Blog
Explore Tumblr blogs with no restrictions, modern design and the best experience.
Last Seen Tumblr Blogs


Fun Fact
Tumblr was named as a finalist in Lead411’s New York City Hot 125 in Aug 2010.
Text
IDK WHO NEEDS THIS
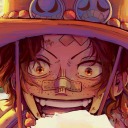
But here's how to make diy pins with a bottle cap!
☆ You will need: A bottle cap, a soda tab, and a safety pin first
☆ Then: Pliers, paint (optional), and clear nail polish later

Put the safety pin through the soda tab like this, make sure the part of the safety pin that opens is facing up


Place the soda tab with safety pin in the bottle cap, double check to make sure the opening part of the safety pin is facing up!
Then use pliers to crunch the sides of the bottle cap down on the soda tab
This will keep the tab and safety pin in place!


Then you can paint whatever you want onto the bottle cap or keep it plain
If you paint it you might want to sand the surface first or cut it up lightly to make the paint stick better
After you're done painting you can use clear nail polish as a top coat!


#diy pins#bottle cap pins#diy pin tutorial#diy tutorial#punk diy#pin diy#pin making#traditional art#art#illustration#artists on tumblr#art tutorial#tutorial#how to make pins#how to make bottle cap pins#recycling pins#ace artist#trans artist#x man pins#recycling#recycling bottle caps#romanisweirdart
164 notes
·
View notes
Text
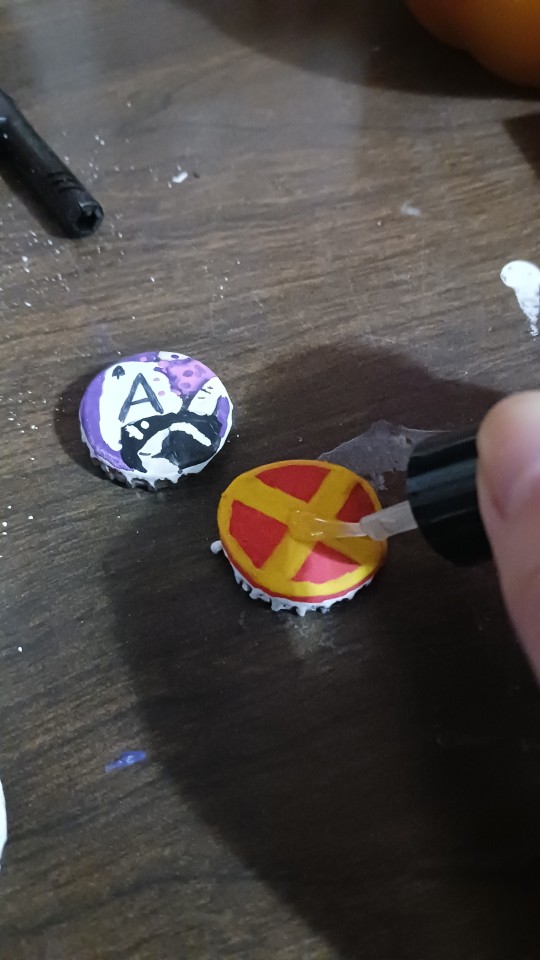
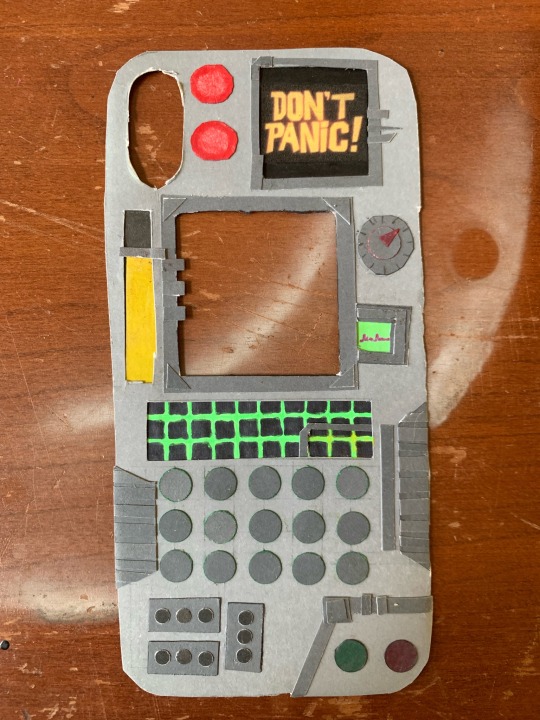
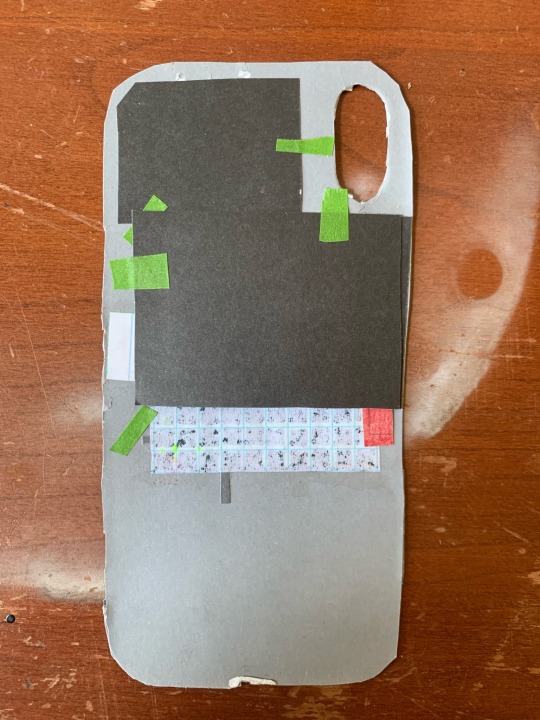
Last winter I made this Hitchhiker’s Guide to the Galaxy phone case and I’ve been waiting for today to share it!
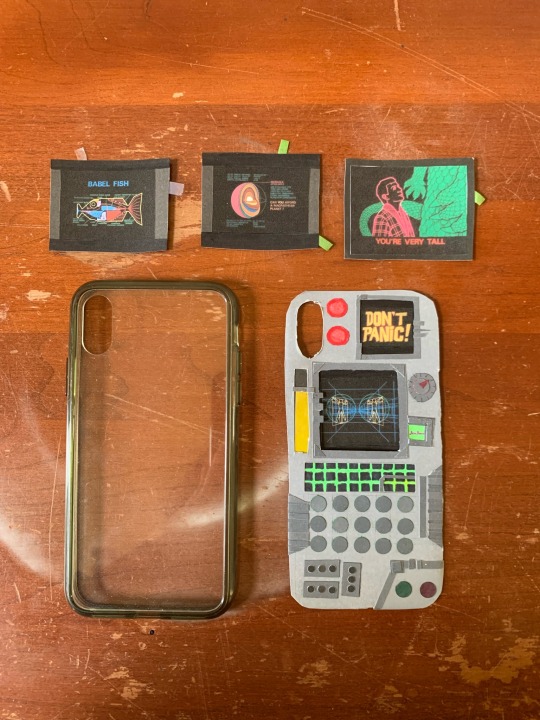
I started with this rough plan. I kinda based it off the one in the tv show but mainly pulled from my own imagination.
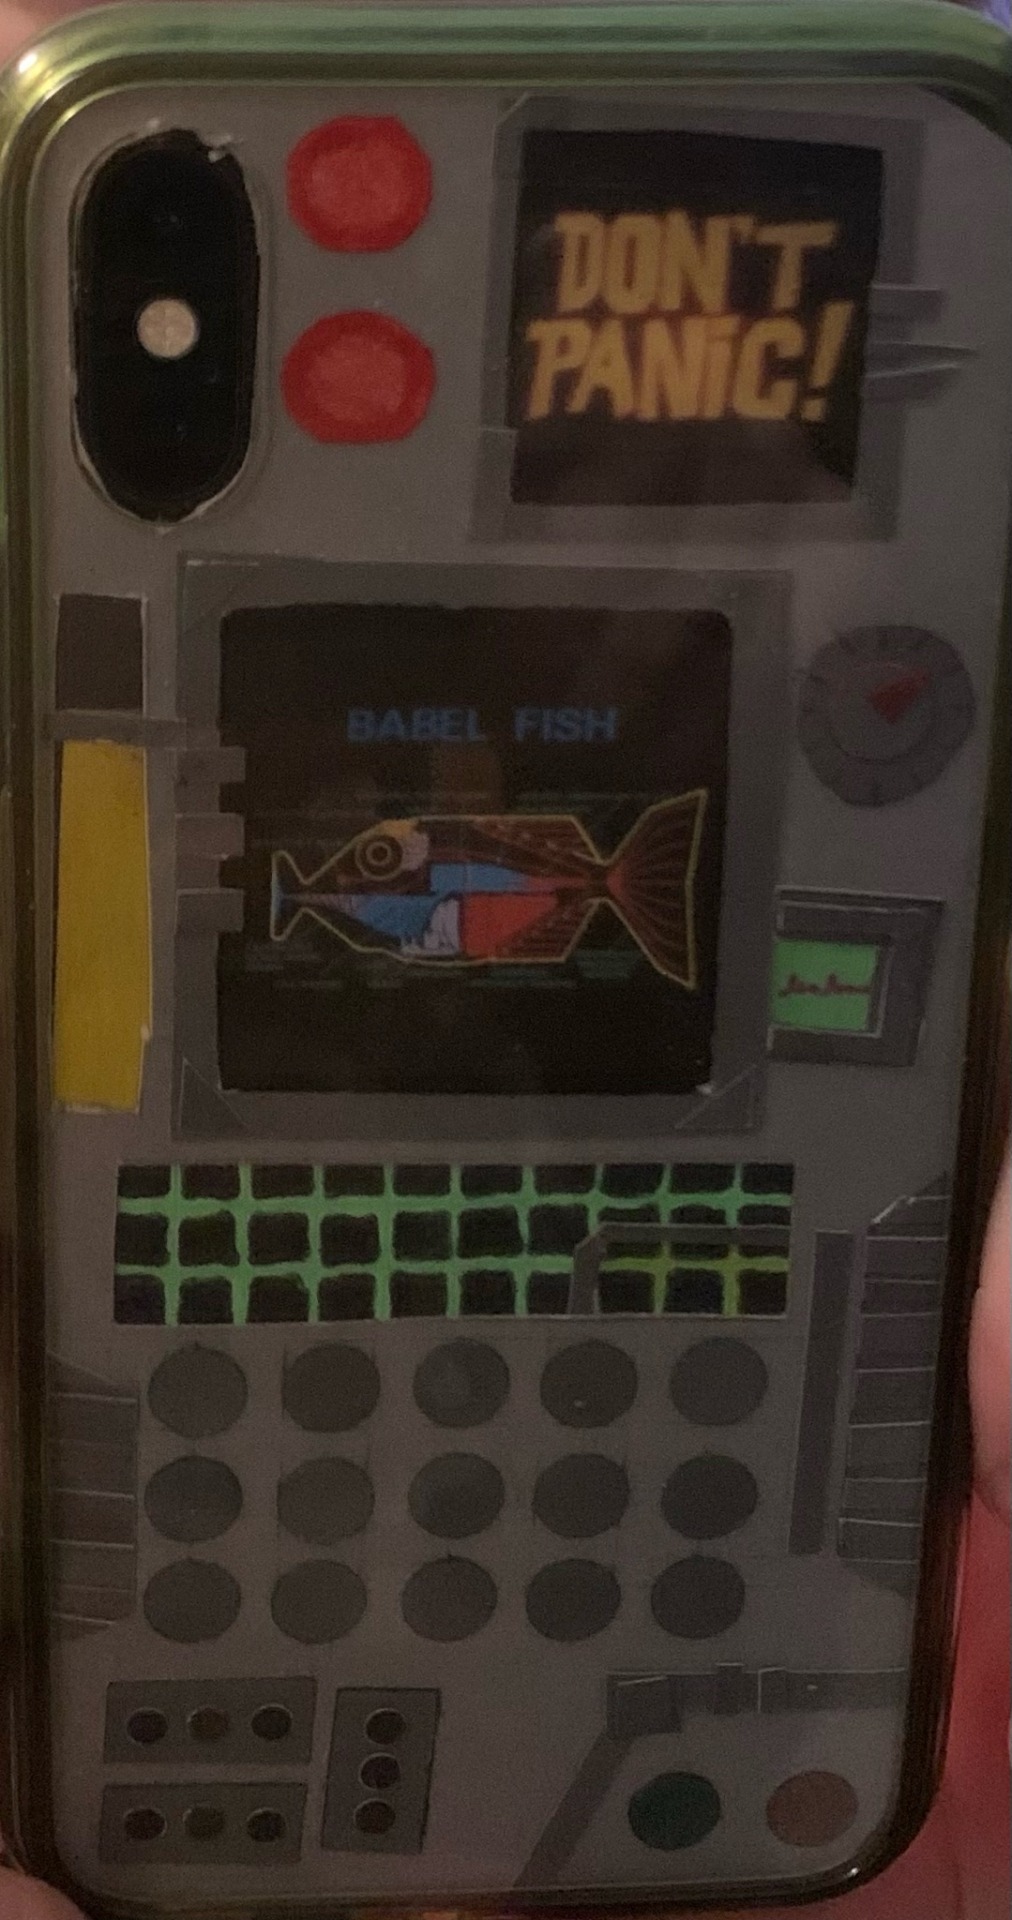

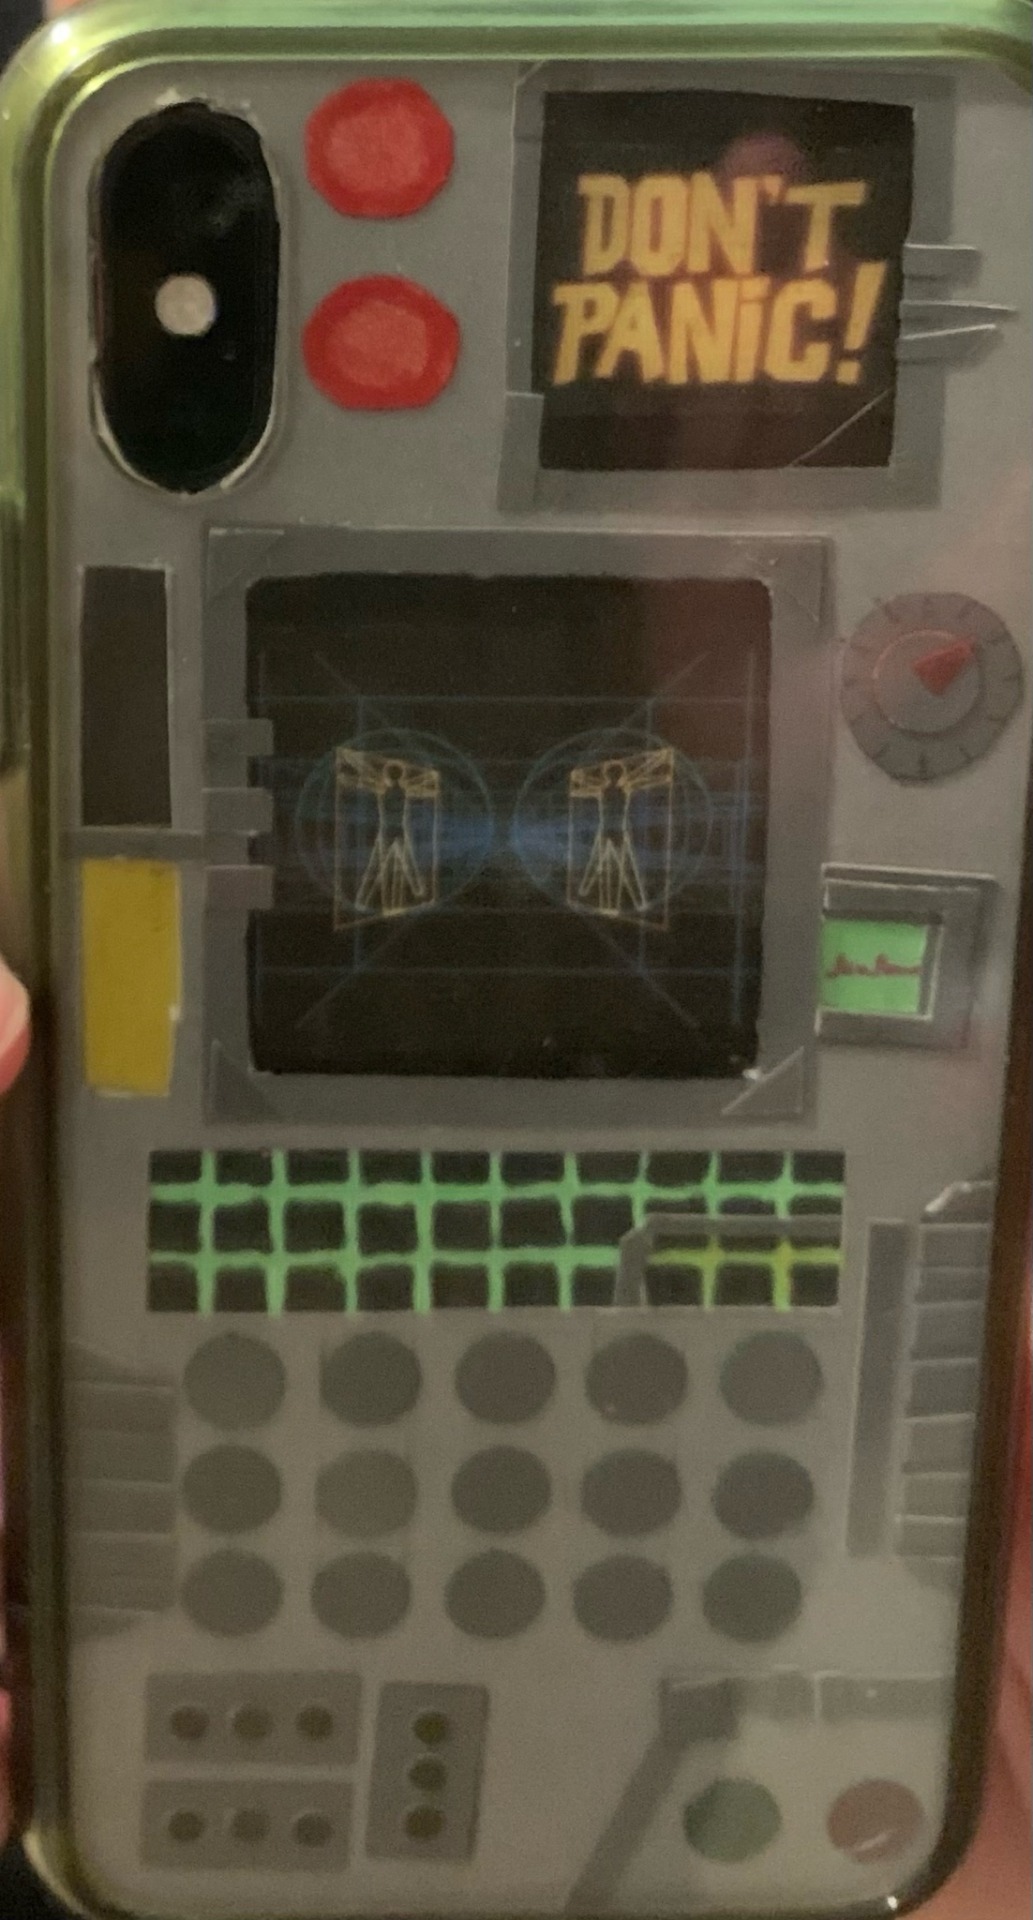
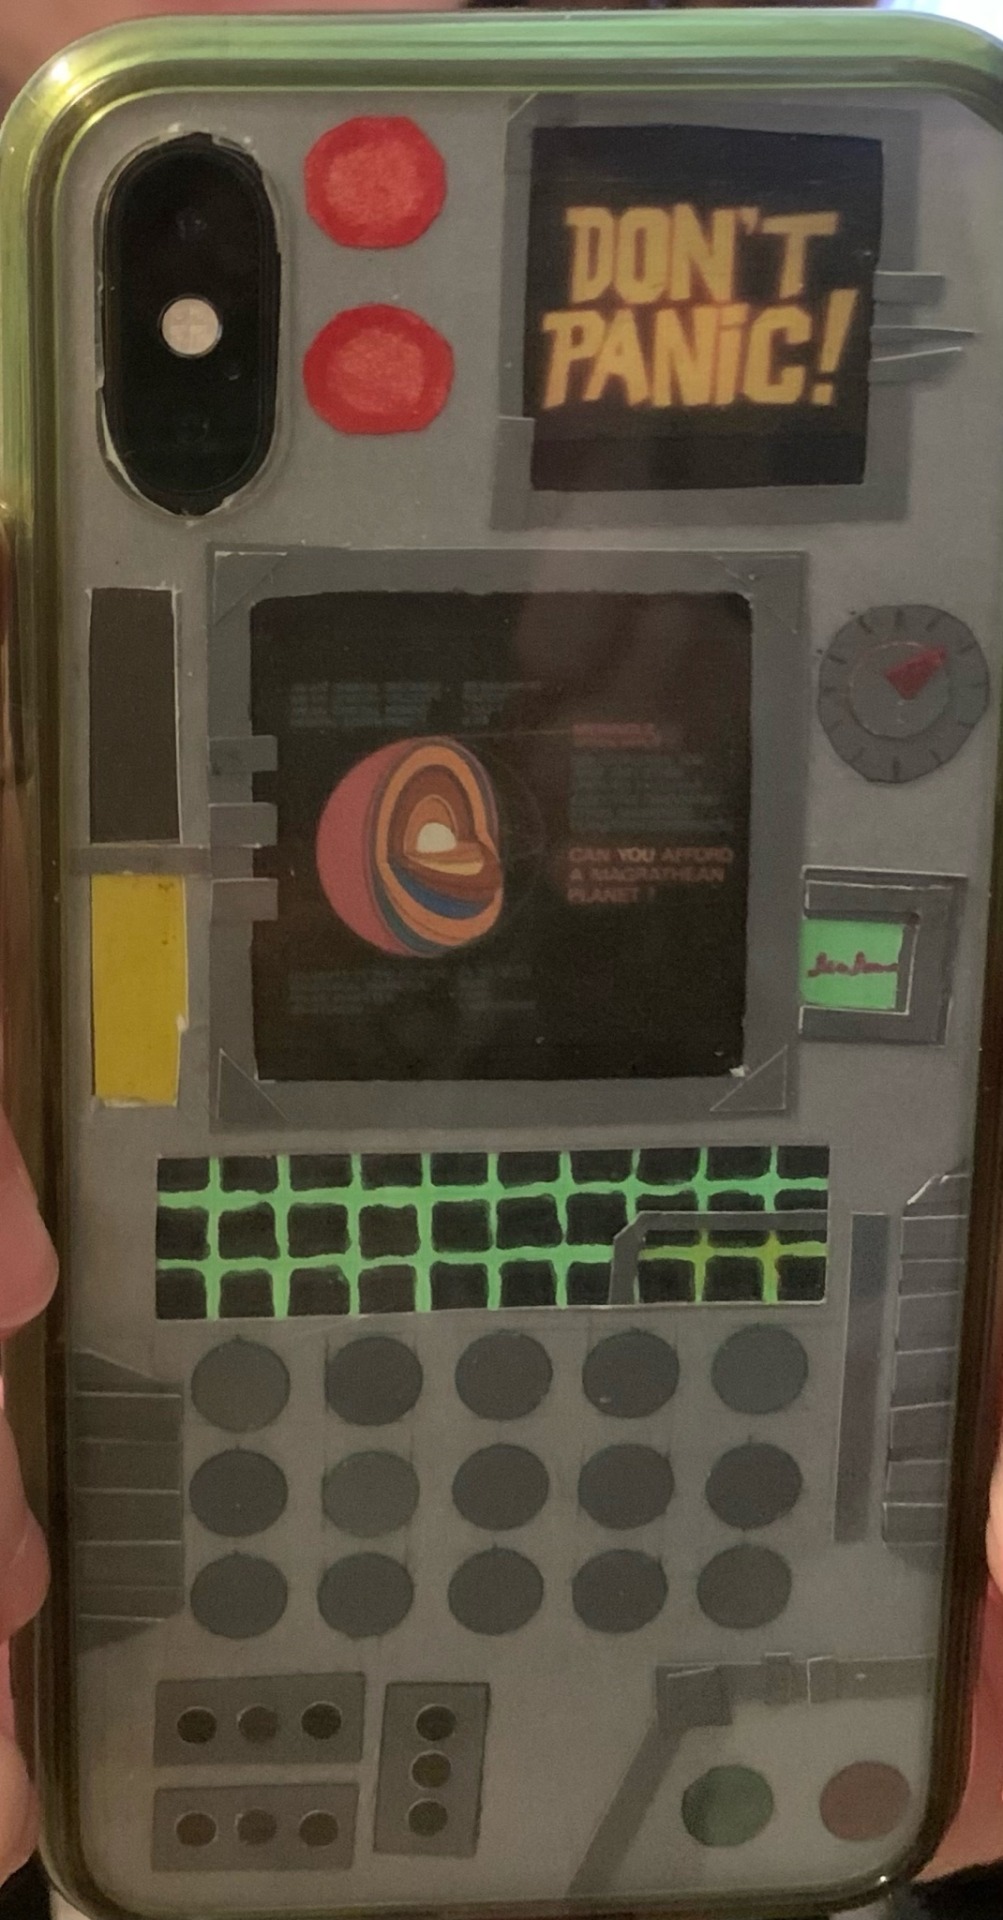
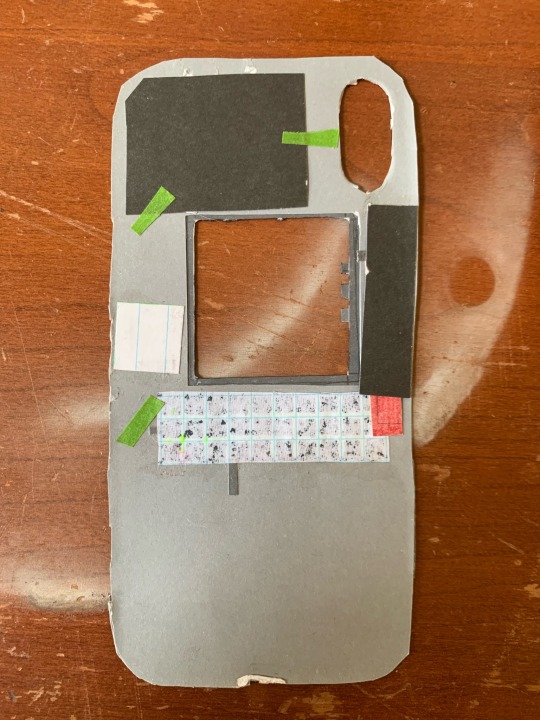
Best part! The interchangeable screen! Right now I have four screens from the tv show. Pinterest has a lot of high quality images of them. I have a few more saved that I’ll eventually size and print. My favorite is the babel fish.
You may also notice the bar on the right moves up and down. It doesn’t do so very elegantly but it was a last minute thought that I really like.
And here’s backstage! I have lots of layers for a more realistic effect. It was my first time doing a paper craft like this so maybe I’ll be able to make an even better one in the future!
Happy towel day!
#h2g2#towel day#may 25#papercraft#diy craft#diy tutorial#the hitchhiker's guide to the galaxy#thgttg#hgttg
203 notes
·
View notes
Text
Hey yall please don’t roast me for this, but does anyone know how shoe polish works?
I work in very wet conditions, and my shoes are in fine condition but they get stripped cause of the water. I’m not gonna buy new ones and I want to keep these in good condition for as long as possible
I don’t know how to use it and what to do, and I’m too embarrassed to ask anyone in real life cause they always act like I’m fucking stupid for not knowing
Thanks, sorry
#punk#anti facist#punk rock#baby punk#crust punk#alt aesthetic#diy or die#punk fashion#punx#too scared to ask#leather#diy punk clothes#punk diy#diy tutorial#help#no buy
54 notes
·
View notes
Text
Turn your tiniest scraps into snazzy, stuffed bugs! - perfect for making a wall a little less boring
youtube
#solar punk#solarpunk#bugs#insects#scrap fabric#sewing#hobbies#crafts#crafting#art and craft#diy#diy projects#upcycle#upcycling#cute#beetles#tutorial#diy tutorial#diy sewing#no waste#Youtube
45 notes
·
View notes
Text
@notaspectator
Ask and you shall receive!!
This is quickly becoming my catchline—
Keychain Tutorial

Below Cut
Here are the materials you’ll need:
Lobster Claw Clasp
A Jump ring
Eye pins
Beads
A Blank Acrylic Keychain (Get these in bulk, it’s so worth.)
Pliars
Scissors
Paper
Drawing materials or a printer
When prying the cover of the blank keychain open, be careful! It may break off tiny shards that can and will cut you if you aren’t careful. If you’re using something like a box cutter to pry it, note that it may ruin and dull the blade or even chip it. Please dispose of sharp debris carefully and properly.
I scuffed my keychain while trying to pry the lid but leaned into it as I thought it was fitting for Omen.

Put your beads on your eye pin and make sure not to fill it to the brimstone. Using pliers, bend the end into a loop and connect it to your next eye pin.
Use long nose pliers, not like the cutters I used. I make my own life difficult by not buying the proper tools.


Repeat the process to attach more eye pins, your jump ring for your tassel/end piece, and your lobster claw at the very top. Then you can attach it to your keychain.

Next, trace your opening/cover on a piece of paper. Use this as your perimeter for the art you’re gonna draw and put into the keychain.
Alternatively, print out your drawing and guess what the proper sizing is lol


Afterwards, cut the art out and place it inside of the keychain. Pop the cover back on and there you go! You’ve made a keychain!

For the people who don’t have access to these materials, don’t worry! You can still make keychains with just paper and tape. If any of you want a tutorial on that, I’ll gladly make one :]
#Buy Valorant Merch? Oh ho ho… little do you know I AM the merch.#Make the merch you want to see in the world.#valorant#art#cypher#cypher valorant#yours truly nameless#valorant cypher#valorant fanart#omen#valorant art#cypher and omen#omen valorant#valorant omen#diy craft#diy keychain#keychain#diy tutorial#amir el amari
25 notes
·
View notes
Text
PLARN (Plastic Bag Yarn) TUTORIAL!
You Will Need:
Plastic grocery bags (though you can also use plastic packaging if it didn’t contain food, or really just any plastic if it’s long enough and clean.)
Scissors
Pen that can mark the plastic
Something to measure with
I’m not the best at describing things, so I’m going to do my best to supplement with images. I would put alt text but I don’t honestly know how to meaningfully describe the images that’s not what I write in the tutorial. Also don’t mind my dirty desk!
Instructions!
Grab your bag! I’m using this blue one because I thought it would show up better on camera and I have a bunch.

Flatten it out, like so! I like to hook one thumb in the bottom flap thing, where it’s sealed shut, and the other in the handle.

Fold it up! I fold it in half, twice, hot dog style. Should get you a nice long rectangle. Make sure the edges are nice and lined up, especially the bottom and the handles.

Chop off the sealed bottom as close as you can to the seam, and the handles as straight as possible. You want nice square corners. You’ve basically got a cylinder of plastic, now.

Unfold one side. It should have only one layer of plastic. If it has more, refold it up and flip it over, and unfold it again.

Measure and mark the width you want your plarn to be! I use an old staples box for the perfect width for my use, but you might want it thinner or thicker depending on. Too thin might cause issues with stretching while working, though.

Cut off any excess. This is where I’m discarding the damaged part!

Mark the top edge, staggered from the bottom marks. Exactly half way! This will be a guideline later.

Cut the marks on the folded side. DO NOT CUT ALL THE WAY ACROSS! Only cut the folded parts, into strips.

Unfold it! Everything should be attached on one side only. It’s time to Spiralize This Bitch.
Cut on a diagonal where one cut ends and the next begins. Hopefully that makes sense? You’re trying to take this tube and make it into a long spiral.

Ta da! You have 1 bag worth of plarn! Tie any subsequent strips together, and have fun working with your plarn!
PRO TIP: this is pretty labor-intensive but I’ve been reinforcing the plarn by single-crocheting the whole length of it, weaving tied ends in as you go. It’s worth it, because I’m making a granny square tote bag out of this, and I don’t want it to break when I’m done.
#keruucrafts#diy craft#diy tutorial#diy projects#crochet#knitblr#yarn crafts#yarnblr#crochet yarn#yarn#zero waste#low waste#zero waste craft#zero waste diy#reduce reuse recycle#solarpunk#solarpunk diy#creative reuse#reuse#recycle reuse renew rethink
46 notes
·
View notes