#DIY large workbench
Explore tagged Tumblr posts
Visit Tumblr Blog
Explore Tumblr blogs with no restrictions, modern design and the best experience.
Last Seen Tumblr Blogs


Fun Fact
The “We are the 99%” Tumblr blog became the slogan for the Occupy Wall Street movement.
Text
The Harris Sawmill


The Harris Sawmill, a prominent structure at the edge of town, stands as a testament to the community's industrious spirit. It’s one of the primary sources of employment in the small town, providing essential materials and craftsmanship that support both local needs and exports. Through many generations, the Harris family has owned this sawmill, and as of today, Michael Harris continues this tradition.

The heart of the operation is the expansive sawmill floor, filled with the hum of machinery and the rhythmic sound of saws cutting through timber. Here, logs are transformed into beams, planks, and various wood products.
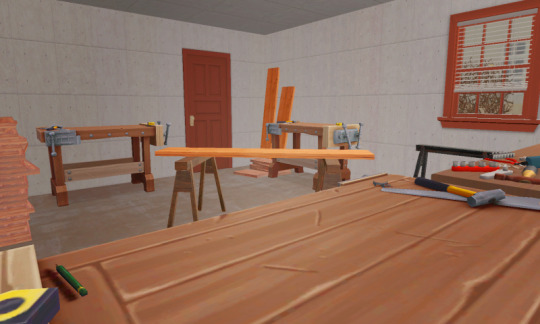
Adjacent to the main floor is a workshop where workers build and assemble various wooden structures. This area is stocked with tools and workbenches, creating a space where creativity and craftsmanship converge. From custom furniture to intricate carvings, the workshop showcases the town’s skilled artisans.
As of year 2, the employees of the sawmill are:

Markus Estrada: Foreman. As the foreman, Markus oversees the day-to-day operations on the floor. He ensures that the work is done safely and efficiently, balancing the demands of Michael with the needs of the workers. His leadership is respected, providing a buffer between the workers and Michael’s stringent expectations.
Bill Kwon: Welder. Bill handles all the metalwork, ensuring that the machinery is well-maintained and that any custom metal fittings or repairs are expertly executed. His precision and skill are vital to the smooth running of the sawmill.
Nasir Bahij. Crane Operator. Nasir skillfully operates the crane, moving large logs and heavy materials with ease. His role is critical in maintaining the flow of raw materials into the sawmill and finished products out to customers.
Max Ford. Cladding Installer. Max specializes in cladding, applying finishes and protective layers to wood products. Her attention to detail ensures that the sawmill’s output meets the highest standards of durability and aesthetics.
Damian Murphy. Drill Press Operator. Damian operates the drill press, creating precise holes and cuts needed for various wood products. His meticulous nature and technical expertise contribute significantly to the quality of the mill’s craftsmanship.

At the front of the sawmill is a small hardware store managed by Michael Harris. The store is well-stocked with tools, building materials, and supplies needed for both professional projects and DIY endeavors.
50 notes
·
View notes
Text
5 Ways to Get Your Garage Ready for Summer
Summer is the perfect time to use your garage, but first, your garage needs to be in good shape. Whether you plan to install cabinet garage storage or you want a better floor to protect it from your summer projects, now is the perfect time to prep. Here are a few projects that can make your garage cleaner, more practical, and organized, so you can enjoy it all summer long.
Clean Your Garage
Your first task is to clean your garage. Get everything off the floor that you can, and blow or sweep out all of the leaves and debris that have built up over the winter and spring. Take the time to make sure any surfaces are clean, from your workbench to your shelves. If your garage feels like a cluttered mess, you’ll be less likely to work and hang out in there, so make a deep clean your top priority this weekend.
Install New Storage Systems
What does your tool storage situation look like? From mobile toolboxes that you can wheel around the garage to work on cars, boats, or other projects to wall-spanning cabinets for tools that surround a workbench, you have options to help organize your tools. Plus, this gets the tools off of shelves and the ground, making your garage look cleaner. With everything neat and tidy, you can spend more time working on your projects rather than searching for miscellaneous tools.

Get a Better Floor
Upgrading the floor, especially with a coating like epoxy, can make it much easier to keep your garage floor clean while protecting the concrete. It’s an excellent choice if you’re working on your car and are worried about oil leaking. Whether you’re turning your garage into a home gym or just want to work on hobbies and home improvement projects, a better floor can significantly improve your garage’s form and function.
Upgrade Your Lighting
If you spend a lot of time in your garage this summer, it makes sense to upgrade your lighting. Bright lighting is essential for hobbies and projects, so you can see what you are doing. You might want lights that you can move around while also installing more ceiling lights for better overall lighting.

Create a Work Area
Whether you’re upgrading your deck to deck boards composite instead of natural or refinishing furniture, it pays to have a dedicated workspace with all of your power tools organzied. Everyone’s workspace is different. Some people just need a bench and a tool chest, while others need a large space for breaking down large sheets of plywood. Consider the types of projects you work on most, and organize and set up your workspace so it fits your needs.
About Menards®
Whether breathing new life into your home with a fresh coat of paint or renovating your backyard deck, you can trust Menards® for quality service and products to bring your ideas to life. Menards® is every fixer-upper, do-it-yourselfer, and remodeler’s one-stop home improvement shop. With high-quality tools, materials, and supplies to transform the inside and outside of your home, Menards® can help you turn your DIY ideas into successful home improvement projects. You can find everything you need to improve, organize, and protect your home, from electric hot water heaters to tool storage and locks to a gun safe on sale. With over 300 locations across the Midwest, from West Virginia to Wyoming, you can find friendly store associates ready to help you brainstorm new projects, answer questions, and Save Big Money at Menards®.
Get your garage ready for summer with help from Menards® at https://www.menards.com/
Original Source: https://bit.ly/4423yYz
0 notes
Text
Price: [price_with_discount] (as of [price_update_date] - Details) [ad_1] We Deal In All Type Of Furniture Like Bed,Chair, Dining,Bedside,Coffee & Center Table,Night Stand,Rocking Chair,Iron Furniture,Dressing Table, Wooden Temple,Trunk, Bar Cabinet, Bar Stool, Bar Chair, Changing Table, Drawing Board, Writing Desk, Monks Bench, Refectory Table, Folding Table, Poker Table, Trestle Table, Wine Table, Workbench, Closet, Pantry, Kitchen Cabinet, Vanity Set, Modular Furniture, Arm Chair, Wooden Rocking Chair, Wooden Designer Bed, Wooden Single Bed, Wooden Carved Sofa Set, Wooden Rack, Wood Chest, Portable Wordrobe, Wicker Sofa, Bamboo Dining Table, Foldable,Patio,Longue,Balcony Furniture,Computer,Laptop,Study Table,Kids Furniture,Garden Outdoor,Indoor,Bedroom & Living Room,Wardrobe Furniture,Kitchen,Hallway,Hotel Furniture,Cafe & Resturant Product Dimensions: 100Cm(W) X 45Cm(H) X 50Cm(D); Primary Material: Sheesham Wood Give Your Home A Luxurious Look With Sheesham Wooden Coffee Table | Fits In Your Space, Fits On Your Budget. We Provide The Best Quality Products. Every Product Goes Through A Tough Quality Check To Ensure That We Can Serve Our Best Way. Only Made In India Products. Full Transparency Throughout The Process Unlike Other Furniture Sellers! Item Shape: Rectangular; Top Material Type: Rose Wood; Assembly Instructions: Diy; Size Name: Large [ad_2]
0 notes
Text
The Ultimate Guide to Choosing the Perfect Shed for Your Needs
Sheds are an essential addition to any home, providing extra storage, workspace, or even a cozy retreat. Whether you need a place to store tools, garden supplies, or outdoor furniture, a well-chosen shed can enhance both functionality and aesthetics in your backyard. This guide will help you navigate the options available and select the perfect shed for your needs.
1. Understanding the Purpose of Your Shed
Before purchasing a shed, consider how you plan to use it. Some common uses include:
Storage Shed: Ideal for keeping gardening tools, lawnmowers, bicycles, and seasonal decorations organized.
Workshop Shed: A great space for DIY projects, woodworking, and hobbies.
Garden Shed: Designed for potting plants, storing soil, and organizing garden tools.
Office or Studio Shed: A peaceful retreat for working from home, painting, or reading.
Entertainment Shed: Transformed into a mini bar, man cave, or outdoor lounge area.
Defining your shed’s primary purpose will help you choose the right size, design, and features.
2. Choosing the Right Shed Material
Sheds come in various materials, each with unique benefits and drawbacks:
Wood Sheds
Pros: Classic, attractive, and customizable with paint or stain.
Cons: Requires regular maintenance to prevent rot, termites, and weather damage.
Metal Sheds
Pros: Durable, resistant to pests, and often more affordable than wood.
Cons: Can be prone to rust and may not be as visually appealing.
Plastic (Resin or Vinyl) Sheds
Pros: Low maintenance, weather-resistant, and easy to assemble.
Cons: Limited customization options and may not be as sturdy as wood or metal.
3. Picking the Perfect Shed Size
The size of your shed depends on your available space and intended use. Here are some general guidelines:
Small (4x6 to 6x8 feet): Ideal for garden tools and basic storage needs.
Medium (8x10 to 10x12 feet): Suitable for lawn equipment, bikes, and workbenches.
Large (12x16 feet and above): Great for workshops, office spaces, and extensive storage.
Be sure to check local zoning laws and property restrictions before purchasing a shed to ensure compliance.
4. Shed Design and Features
Roof Styles
Gable Roof: Traditional and allows for good water runoff.
Flat Roof: Modern and space-efficient but may require additional waterproofing.
Barn (Gambrel) Roof: Provides extra storage space in the attic area.
Doors and Windows
Double Doors: Essential for storing large equipment like lawnmowers.
Windows: Provide natural light and ventilation.
Skylights: Enhance brightness inside the shed.
Shelving and Storage Solutions
Add wall-mounted shelves to maximize vertical space.
Use hooks and pegboards to organize tools and accessories.
Consider a loft for additional overhead storage.
5. Foundation and Flooring Options
A solid foundation is crucial for shed longevity. Consider these options:
Gravel Base: Affordable and provides drainage but may require maintenance.
Concrete Slab: Durable and long-lasting but more expensive.
Wooden Platform: Easy to install but may need treatment against moisture and pests.
6. Shed Maintenance and Care
To keep your shed in excellent condition, follow these maintenance tips:
Wood Sheds: Repaint or stain every few years, check for termites, and inspect for rot.
Metal Sheds: Prevent rust by applying protective coatings and keeping the shed dry.
Plastic Sheds: Clean with mild soap and water; ensure proper anchoring in windy areas.
7. Budgeting for Your Shed
Shed prices vary based on size, material, and features. Here’s a general cost breakdown:
Basic Storage Shed: $300 - $1,000
Mid-Range Shed: $1,000 - $3,000
High-End Custom Shed: $3,000 and up
Consider whether you’ll need professional installation or if a DIY shed kit is a better option to save costs.
Final Thoughts
Choosing the right shed involves careful planning, from selecting the right size and material to considering design and maintenance requirements. Whether you need extra storage, a workspace, or a backyard retreat, investing in the right shed will enhance your outdoor space and provide long-term utility.
0 notes
Text
Make Your Garage More Functional With These Tricks
Make Your Garage More Functional With These Tricks | The Listing Team
Make Your Garage More Functional With These Tricks
Your garage is more than just a place to park your car or stash random belongings—it’s an extension of your home. A functional garage improves your daily life and adds significant value to your property. Whether you’re a homeowner looking to maximize utility, an investor focused on boosting equity, or a DIY enthusiast ready to optimize your space, these tricks will help you make your garage a more functional, appealing space.
Optimize Space With Smart Storage Solutions
A cluttered garage can quickly become an unusable one. To make the most of your space, focus on storage solutions that use your walls and ceiling strategically. Consider installing wall-mounted shelving to keep items off the floor while maintaining easy access. Pegboards are excellent for organizing tools and other small equipment.
Overhead storage is another practical solution. Suspended shelves can hold seasonal items, such as holiday decorations and camping gear, freeing up valuable ground-level space. For a truly customized experience, modular storage systems allow you to mix and match cabinets, drawers, and hooks to suit the unique size and contents of your garage. A well-organized garage maximizes its functionality.
Create Comfort With the Right Heating Options
If your garage is more than just a storage area, comfort becomes a key factor—especially if you’re using it as a workshop, home gym, or office. When temperatures drop, working in cold conditions is challenging. Choosing the right infrared garage heater can make a significant difference in usability and function.
Infrared heaters warm objects and floors directly instead of wasting energy heating the air, making them efficient and effective for large spaces. These heaters also operate quietly and provide instant heat, which allows you to enjoy a cozy garage no matter the weather.
Improve Lighting for a Productive Space
Proper lighting can dramatically enhance the functionality of your garage. Too often, garages rely on dim, outdated bulbs that make simple tasks cumbersome chores. Upgrading to LED lights can brighten the entire area while reducing energy consumption.
Focus on creating layers of lighting. Overhead lights should be bright and evenly distributed, ideally covering the entire garage. For task-oriented areas like workbenches, under-cabinet or focused task lighting is a must. Motion-sensor lights are also worth considering for convenience and efficiency, especially if you use your garage frequently at night.
Enhance Security To Safeguard Your Garage
Security is often overlooked when upgrading a garage, but it’s important for overall functionality. Start with a solid-quality garage door that features strong locking mechanisms. Smart garage systems are an advanced option as they offer remote control and monitoring capabilities through your smartphone.
A functional garage is an achievable goal for every homeowner. By optimizing space with innovative storage solutions, ensuring comfort with the right heating options, upgrading your lighting, and enhancing security, you can unlock your garage’s full potential. Use these tips and tricks to make your garage more functional and reap the rewards of a more profitable home remodel.
0 notes
Text
Why a Heavy Duty Workbench with Storage is Essential for Your Workshop

A heavy duty workbench with storage is an indispensable addition to any workshop, whether you're a professional tradesperson, a DIY enthusiast, or someone who uses a garage for heavy-duty tasks. Combining strength and organization, this type of workbench enhances both the functionality and efficiency of your workspace. If you’ve been using a basic workbench or struggling with clutter, it might be time to consider upgrading to a heavy duty workbench with built-in storage.
Organization and Accessibility
One of the primary benefits of a heavy duty workbench with storage is organization. In a workshop, tools, parts, and materials can quickly accumulate, leading to disorganization and wasted time searching for the right tool. A workbench with drawers, cabinets, or shelves provides dedicated spaces for all your tools, making them easily accessible when needed. This storage solution allows you to keep everything in its place, so you can focus on your tasks rather than spending time looking for the necessary equipment.
Maximizing Workspace Efficiency
A heavy duty workbench that offers ample storage doesn’t just help with organization; it also maximizes the available workspace. Without proper storage, your workbench can become cluttered, reducing the space available for projects. By incorporating storage, you can free up space on the work surface, allowing you to work efficiently without distractions. Whether you’re working on a large project or need space to layout materials, a workbench with storage helps ensure that your workspace is optimized for productivity.
Durability and Longevity
Heavy duty workbenches are designed to withstand the rigors of daily use, especially in demanding environments like workshops, garages, or industrial spaces. A durable steel workbench with storage can support the weight of heavy tools and machinery, ensuring stability even under heavy use. This longevity not only improves your workflow but also saves you money in the long run, as you won’t need to replace the workbench frequently.
Customization and Versatility
Another advantage of a heavy duty workbench with storage is its versatility. Many workbenches come with customizable features such as adjustable heights, additional shelves, or modular storage units. This flexibility allows you to tailor your workbench to your specific needs, whether you're using it for woodworking, construction, or general repairs. A customizable workbench is an investment that adapts as your projects evolve.
Increased Safety
Finally, a heavy duty workbench with storage can improve safety in your workshop. Having a designated space for tools reduces the chances of accidents caused by clutter. With tools and materials securely stored in cabinets or drawers, you can minimize the risk of tripping or damaging equipment, creating a safer work environment.
In conclusion, a heavy duty workbench with storage is a must-have for any workshop. It provides organization, enhances productivity, and improves safety. With its durability and customization options, this workbench is built to last and can make any project easier and more efficient.
Author: Spaceguard
Who We Are
Spaceguard is a UK based workspace equipment manufacturer. Spaceguard manufactures bespoke industrial workbenches, workstations and conveyors. If you're looking for warehouse equipment such as workbenches, industrial trolleys, standard and bespoke packing tables or conveyor belts, Spaceguard is your ideal manufacturing partner.

Contact Us
Spaceguard
Unit 15A Bergen Way, Hull, HU7 0YG, United Kingdom
+44 1482 363445
Find Us On Social Media
Facebook
Instagram
To Know More
Brand Map
1 note
·
View note
Text
Home Additions Made Easy with BP Remodeling
Are you considering a home addition but feel overwhelmed by the process? Whether you’re a homeowner looking to expand your living space, a DIY enthusiast eager for your next project, or a property investor aiming to increase property value, home additions can seem daunting. But fear not! BP Remodeling is here to demystify the process and make your dream home a reality.
Why Consider Home Additions?
Expand Your Living Space
Most homes eventually outgrow their original design. Maybe your family is growing, or perhaps you need a dedicated home office. Home additions are the perfect solution to expand your living space without the hassle of moving. Imagine a sun-filled breakfast nook, a spacious family room, or an extra bedroom for guests. The possibilities are endless!
Increase Property Value
Did you know that specific home additions can significantly increase your property’s market value? Adding an extra bedroom, a garage, or even a deck can yield a high return on investment. According to the National Association of Realtors, homeowners can see up to a 75% return on investment for certain types of additions. This makes home additions not only practical but also financially savvy.
Understanding the Home Addition Process
Initial Consultation
The first step in your home addition journey with BP Remodeling is the initial consultation. This is where we get to know you, your needs, and your vision for the project. We’ll discuss your goals, budget, and timeline. This stage is crucial for setting clear expectations and ensuring that we’re aligned with your vision.
Design and Planning
Once we have a clear understanding of your needs, our expert team of designers will create a detailed plan for your home addition. This involves architectural drawings, 3D renderings, and selecting materials. We’ll walk you through each step, making adjustments as needed to ensure the final design is perfect.
Types of Home Additions
Room Additions
One of the most popular types of home additions is adding a new room. Whether it’s a bedroom, home office, or playroom, room additions provide immediate benefits. They offer additional space and can be tailored to meet your specific needs. Plus, they blend seamlessly with your home’s existing structure.
Garage Additions
Need more space for your vehicles or tools? A garage addition could be the perfect solution. Not only does it provide practical storage space, but it also enhances your home’s curb appeal. Garages can be customized with additional features like workbenches, storage racks, and even living quarters above.
Benefits of Working with BP Remodeling
Expert Curation and Craftsmanship
At BP Remodeling, we pride ourselves on our expert curation and craftsmanship. Our team consists of experienced professionals who are dedicated to delivering high-quality results. We use only the best materials and the latest techniques to ensure your home addition stands the test of time.
The BP Remodeling Difference
Commitment to Client Satisfaction
At BP Remodeling, client satisfaction is at the heart of everything we do. We’re not just building structures; we’re building relationships. Our team is committed to delivering results that exceed your expectations. From the initial consultation to the final walkthrough, we’re with you every step of the way.
Comprehensive Services
We offer a wide range of services to cater to different business needs. Whether it’s a small room addition or a large-scale renovation, we have the expertise and resources to handle it all. Our services include:
Room additions
Garage additions
Bathroom and kitchen remodels
Outdoor living spaces
Custom projects
The Importance of Choosing the Right Partner
Choosing the right partner for your home addition project is crucial. You need a team that understands your vision, respects your budget, and delivers high-quality results. BP Remodeling is that partner. We bring years of experience, a commitment to excellence, and a passion for transforming homes.
Contact Us Today
Ready to start your home addition project? Call BP Remodeling today at 520-760-8771 to schedule your free consultation. Our team is here to answer any questions and help you get started on your home improvement journey.
Final Thoughts
Home additions don’t have to be overwhelming. With the right partner, you can transform your home into the space you’ve always dreamed of. At BP Remodeling, we’re committed to making the process easy, enjoyable, and rewarding. Contact us today to learn more about our services and how we can help you achieve your home improvement goals.
Remember, your dream home is just a phone call away. Call 520-760-8771 and get started with BP Remodeling today!
0 notes
Text
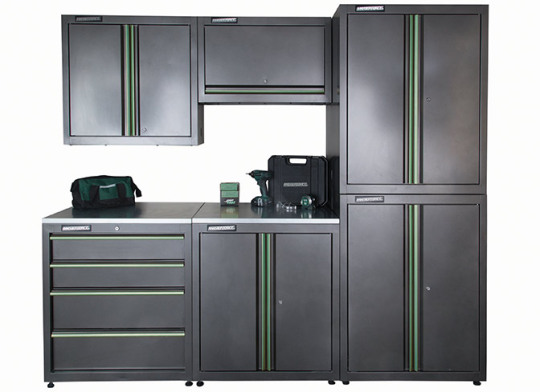
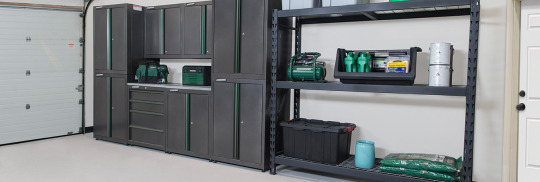
Efficient and Customized Garage Storage System in Indian Trail, NC
If you’re considering upgrading your garage storage system in Indian Trail, NC, Signature Closets offers high-quality, customized solutions to help you transform your garage into a functional, organized space. Whether you need extra storage for tools, sports equipment, gardening supplies, or seasonal items, their expertly designed garage systems can meet your unique needs. Signature Closets is dedicated to maximizing the available space in your garage and providing durable, aesthetically pleasing storage solutions that stand the test of time.
Key Features of a Garage Storage System
1. Customizable Shelving: Signature Closets offers adjustable shelving options that allow you to organize your garage efficiently. These shelves are strong enough to hold heavy items like power tools, paint cans, and gardening equipment while being flexible enough to adapt to your changing storage needs. You can customize the shelves to store anything from small accessories to large, bulky items, ensuring everything has its place.
2. Durable Cabinets and Drawers: Their garage storage systems include heavy-duty cabinets and Metabox drawers, perfect for securely storing tools, screws, and other small items. The cabinets are designed to handle the rigors of everyday use while keeping everything neatly tucked away. These storage options provide easy access to frequently used items, helping you stay organized.
3. StoreWall Panels: For those who want to keep their garage floor clutter-free, Signature Closets offers StoreWall panels. These wall-mounted systems allow you to hang items like bicycles, lawn equipment, and sports gear on the walls, freeing up valuable floor space. StoreWall is designed to be sturdy and versatile, providing flexible storage options that can easily be rearranged as your needs change.
4. Workbenches: In addition to providing storage, Signature Closets also offers workbenches with durable surfaces such as laminated tops or maple butcher block. This makes your garage not just a place for storage but also a functional workspace for DIY projects, repairs, or hobbies. Having a dedicated work area allows you to maintain organization while pursuing your interests in a clutter-free environment.
Benefits of a Garage Storage System in Indian Trail, NC
1. Maximize Space: One of the main advantages of installing a garage storage system is that it helps maximize your available space. Instead of letting your garage become a dumping ground for random items, Signature Closets helps you create a well-organized area where everything has a designated spot.
2. Improve Organization and Efficiency: Having a system in place makes it easier to find what you need, when you need it. With tools, sports equipment, and seasonal items neatly organized, you’ll save time and reduce the frustration of searching through clutter.
3. Increase Home Value: Installing a well-designed garage storage system can increase the overall value of your home. A clean, organized garage appeals to potential buyers and shows that the space is functional and well-maintained.
4. Custom Design for Your Needs: Every garage storage system designed by Signature Closets is customized to fit your specific needs and space. Their design team works closely with you to assess your requirements, ensuring the final product not only meets but exceeds your expectations.
5. High-Quality, American-Made Products: Signature Closets uses only top-quality, American-made materials for their custom storage systems. This guarantees durability and longevity, so you can be confident that your investment will last for years to come.
Why Choose Signature Closets for Your Garage Storage System?
With over 32 years of experience, Signature Closets is a trusted provider of garage storage systems in Indian Trail, NC. As a local, family-owned business, they prioritize customer satisfaction and attention to detail. Their team of experienced designers and installers will guide you through the entire process, from initial consultation to final installation, ensuring a seamless experience.

For more information :-
Address - 6550 Denver Industrial Park Rd, Denver, NC 28037, United States Contacts - 704-543-3100 website - https://www.mysignatureclosets.com/garage-storage-in-indian-trail-nc/
0 notes
Text
Workbenches: The Essential Guide to Choosing the Right One for Your Needs
A workbench is more than just a flat surface to work on—it’s the cornerstone of productivity for anyone from hobbyists to professional tradespeople. Whether you’re a DIY enthusiast, a woodworker, or a mechanic, a sturdy and well-designed workbench can significantly enhance your efficiency and organization. However, with so many types and styles available, choosing the right workbench can be daunting. In this guide, we’ll cover everything you need to know about workbenches, from materials and features to specific types tailored for different tasks.
Types of Workbenches
1. Traditional Woodworking Bench: A classic choice for woodworkers, the traditional woodworking bench is built from hardwood, making it strong enough to withstand heavy use. These benches often feature built-in vises and dog holes for holding materials in place, making them ideal for sawing, chiseling, and planing wood. Many woodworking benches also include storage options such as drawers or shelves to keep tools organized and within reach.
2. Metalworking Bench: For those who work with metal, a specialized metalworking bench is essential. These benches are typically made of steel or heavy-duty materials to handle the weight and stress of metal fabrication tasks like cutting, welding, and shaping. Metalworking benches often feature heat-resistant surfaces and heavy-duty vises, ensuring they can withstand the intense heat and force of metalworking processes.
3. Mechanic’s Workbench: Mechanics require durable and versatile workbenches to handle various automotive tasks. Mechanic’s benches often come with built-in toolboxes, pegboards, and electrical outlets for easy access to power tools and equipment. Many also have heavy-duty casters, making them mobile so they can be moved around the garage or workshop as needed.
4. Portable Workbench: If you’re someone who needs flexibility, a portable workbench might be the best option. These benches are lightweight, collapsible, and easy to transport, making them perfect for jobsites or small workshops where space is at a premium. Despite their compact size, many portable workbenches feature adjustable surfaces and clamps for versatility.
5. Multi-Purpose Workbench: For the all-around handyman or DIYer, a multi-purpose workbench provides versatility across a range of tasks. These benches typically offer a combination of storage options, adjustable surfaces, and built-in vises to accommodate a variety of projects. They’re perfect for anyone who works with multiple materials, from wood and metal to electronics.
Key Features to Look for in a Workbench
When choosing the right workbench, it’s important to consider several key features that can make or break its functionality. Here are some of the most important ones to keep in mind:
1. Material: The material of the workbench plays a crucial role in determining its durability and intended use. Wood is commonly used for woodworking benches due to its resilience and ability to absorb vibrations, while metal or steel is preferred for more heavy-duty tasks like metalworking. If you work with a variety of materials, consider a bench with a mixed material top, such as wood with a steel frame for added stability.
2. Surface Size: The size of the workbench surface will determine how much workspace you have. For large projects, a bigger surface is ideal, but if you’re limited on space, a smaller or adjustable bench might be more appropriate. Think about the types of projects you typically work on and choose a surface size that accommodates them.
3. Storage: A good workbench should have ample storage for tools and supplies. This could include built-in drawers, shelves, pegboards, or cabinets. Having tools easily accessible can save time and reduce clutter in your workspace.
4. Weight Capacity: Depending on the type of work you do, the weight capacity of your bench may be a critical factor. For instance, metalworking or automotive tasks often require a bench that can support heavy equipment and materials. Be sure to check the weight capacity of a workbench before making your purchase to ensure it meets your needs.
5. Height Adjustability: Some workbenches offer adjustable height options, which can be beneficial for ergonomics and comfort. Being able to raise or lower the bench ensures that you’re working at a comfortable level, reducing strain on your back and arms. Adjustable-height workbenches are especially useful for those who perform a variety of tasks that require different working positions.
6. Stability: Stability is a key factor in any workbench. A bench that wobbles or moves around while you’re working can be both frustrating and unsafe. Look for benches with sturdy legs and solid construction to ensure it remains steady during use.
7. Mobility: If you need to move your workbench around frequently, consider a model with wheels or casters. Some workbenches come with lockable wheels, allowing you to easily transport the bench and then lock it in place for stability.
Workbench Accessories
To maximize the functionality of your workbench, you may want to invest in a few accessories:
1. Bench Vises: A vise is an essential accessory for any workbench. It holds your materials in place, allowing you to work with both hands. Look for vises that are easy to install and adjust for different tasks.
2. Clamps: Clamps help secure materials to the bench, especially when you need to make precise cuts or adjustments. There are various types of clamps, including bar clamps, C-clamps, and pipe clamps, depending on the material and project type.
3. Tool Racks or Pegboards: To keep your workspace organized, a tool rack or pegboard mounted to the back of your bench can make it easy to hang and access frequently used tools.
4. Power Strips and Outlets: Having electrical outlets built into or near your workbench is convenient for powering tools, charging batteries, or setting up lights. Many modern workbenches come with built-in power strips for easy access.
5. Lighting: Proper lighting is crucial when working on detailed projects. Consider adding task lighting or overhead lights to ensure your workspace is well-lit.
Choosing the Right Workbench for Your Space
Before purchasing a workbench, take time to assess your workspace. If you’re working in a garage or workshop, measure the available space to ensure your chosen bench fits comfortably without overcrowding the area. In small spaces, a wall-mounted or foldable bench may be more practical.
If your work requires portability, choose a lightweight or wheeled workbench that can be easily transported or stored. For large workshops, stationary benches with ample storage and heavy-duty surfaces are ideal for long-term, intensive projects.
Conclusion
A good workbench is an investment in productivity and efficiency. Whether you’re a professional tradesperson or an avid DIYer, selecting the right workbench can make a world of difference in your work environment. From traditional woodworking benches to heavy-duty metalworking benches and versatile portable options, there’s a workbench designed for every need. Take the time to consider your specific requirements, workspace, and budget to find the perfect fit. With the right workbench, you’ll have a solid foundation to tackle any project, big or small.
0 notes
Text
Monster Racking Galwix Workbench Shelving Unit
Create an infinite amount of storage space for your DIY projects with this galvanised workbench shelving unit! Supporting a MASSIVE 900kg of evenly distributed weight, you can store almost anything without having to worry. With 3 large bottom shelves and 2 smaller top shelves, you will have enough space to store any tools and parts whilst also having room to work from the unit. As if that wasn’t…
0 notes
Text
Versatile and Strong: Steel Garages for Every Need!
In today’s world, versatility and strength are two qualities that define the ideal structure, and when it comes to garages, steel stands out as the material of choice. Steel garages offer a unique blend of durability, customization, and practicality that makes them the perfect solution for a wide range of needs. Whether you're looking for a secure space for your vehicle, a workshop for your hobbies, or additional storage, steel garages can deliver on all fronts. Here’s why steel garages are an excellent investment for virtually any application.
Unmatched Durability
One of the most compelling reasons to choose a steel garage is its durability. Steel is renowned for its strength, which makes it highly resistant to various environmental factors that can damage other types of structures. Unlike wood, steel does not warp, crack, or rot over time. This resilience means that steel garages can withstand extreme weather conditions, including heavy snowfall, strong winds, and intense heat. Additionally, steel is fire-resistant, providing an added layer of safety and peace of mind.
Low Maintenance
Another significant advantage of steel garages is their low maintenance requirements. Traditional materials such as wood or brick often need regular upkeep, including painting, sealing, and inspections for signs of damage. Steel, however, requires minimal maintenance. Its surface can be treated to resist rust and corrosion, and a simple wash is usually sufficient to keep it looking new. This ease of maintenance not only saves time and effort but also reduces long-term costs.
Customizable and Adaptable
Steel garages are highly customizable, allowing you to design a structure that meets your specific needs. Whether you need a small single-car garage or a large multi-car facility, steel can be tailored to fit your requirements. The flexibility of steel construction also means that you can easily add features like windows, doors, insulation, and ventilation systems. If your needs change in the future, steel garages can often be modified or expanded with relative ease, making them a versatile choice for long-term use.
Cost-Effective Solution
When compared to other materials, steel often proves to be a more cost-effective option. Although the initial investment might be higher than wood or vinyl, the long-term savings are considerable. Steel's durability and low maintenance requirements translate into lower upkeep costs over the lifespan of the garage. Furthermore, many steel garages are pre-fabricated, which can reduce construction time and labor costs.
Sustainability and Eco-Friendliness
Steel is a highly sustainable material. It is one of the most recycled materials in the world, and its production involves less energy compared to other materials like concrete. Choosing a steel garage supports eco-friendly practices by reducing waste and promoting recycling. Additionally, steel’s durability means that the structure will have a longer life span, further reducing the environmental impact over time.
Enhanced Security
Security is a crucial consideration for any garage, and steel excels in this area. The robustness of steel makes it difficult to break into, offering a high level of protection for your vehicles, tools, or other valuable items stored inside. Additionally, steel garages can be equipped with advanced locking systems and security features to further enhance safety.
Versatile Applications
Steel garages are incredibly versatile and can serve a variety of purposes beyond just storing vehicles. Here are a few examples of how steel garages can be adapted to meet different needs:
Workshop: If you enjoy DIY projects or need a dedicated workspace for your hobbies, a steel garage can be customized with workbenches, storage solutions, and proper lighting to create an efficient and comfortable workshop.
Storage Space: Steel garages are perfect for storing equipment, tools, or seasonal items. With ample space and customizable shelving options, you can keep your belongings organized and easily accessible.
Home Gym: Transform your steel garage into a personal fitness center. The spacious interior can accommodate exercise equipment, and you can add insulation and climate control to make the space comfortable year-round.
Office Space: For those working from home, a steel garage can be converted into a functional office space. With proper insulation, ventilation, and electrical installations, you can create a productive and quiet workspace away from the main house.
Entertainment Area: Use your steel garage as an entertainment venue for family gatherings, game nights, or even a home theater. With the right modifications, it can become a cozy and enjoyable space for socializing.
Conclusion
Steel garages offer an exceptional combination of strength, versatility, and practicality, making them an ideal choice for a wide range of uses. Their durability ensures they can withstand harsh conditions, while their low maintenance needs and cost-effectiveness provide long-term value. With customizable options and the ability to serve multiple purposes, steel garages can be tailored to fit any need, from vehicle storage to a dedicated workspace or personal retreat. Investing in a steel garage is not just about acquiring a structure; it's about securing a reliable, adaptable, and efficient solution that meets your evolving needs for years to come.
0 notes
Text
Home Storage Solutions for You DIY Project Station
If you always have a DIY project on the calendar, you likely have tons of supplies, materials, tools, and scraps. It can feel like they’re all over the place. Before starting your next project, invest some time and DIY expertise into setting up storage solutions in your workspace. Whether it’s an area for an extensive selection of tools or cabinet garage storage for materials, you can put together a top-notch storage solution that meets your DIY needs.
Ceiling Storage for Large Supplies
Sometimes, the only place you can look to store those larger supplies is up. Ceiling storage is an excellent option for a garage as long as you have an easily accessible ladder to reach the supplies. You can store planks of wood, bins with extra materials, and other items overhead and out of the way.
Some folks like to use ceiling storage for items they don’t need much throughout the year, but as the only person in your home working on DIY projects, it can help keep things out of the way of other family members. Plus, you might already have other storage areas in the garage filled with additional supplies and materials.
Tool Storage for Safety and Order
If you use any number of tools during DIY projects, you need a safe place to store them, especially if you have kids or pets. Depending on the size of your workspace, you can invest in tool chests, boxes, or bags. If you have a big workspace, you might also need a storage system with room for socket organizers and small parts bins.
In addition to tool storage in the garage, you might need an option like a tool belt to keep your tools organized while working. Keeping the space clean and safe throughout every step of your DIY plan is essential.
Cabinet Storage for Material Organization
As an expert DIY-er, you might use your garage as your workspace, so you need storage solutions to keep it clean and tidy so you have room to park your vehicles. A cabinet storage system is a great solution for organizing materials, tools, and even items from inside the house. You can put a cabinet garage storage on half of a wall in the garage or fill as much space as you need.
Garage storage can also double as a workstation. For maximum efficiency in the DIY workspace, you can assemble a cabinet garage storage area with a workbench and rolling cabinets.
Utility Shelving for Easy Access to Supplies
Your storage solutions might include utility shelving, which is a great area to store supplies like tiles for ceilings, smaller wooden planks, bins for smaller tools like sockets, and even work clothes, boots, and other items. They’re versatile, easy to install, and leave enough room in the garage for other household supplies.
Storage solutions vary by person, so if you have many small pieces, you may need more than utility shelves. Alternatively, they can be perfect for bin storage, clothing, shoes, and bulk materials.
About Menards®
With a little elbow grease and tools from your local Menards®, you can turn your house into your dream home. Since 1958, Menards® has provided friendly and knowledgeable customer service, high-quality materials, and handy tools to homeowners. Whether you’re refinishing your deck, finally organizing the garage, or improving your home safety with locks and safes, get started with a trip to Menards®. Their Design-It Center and online project planning tools can help you find the best materials for your next project. These handy resources can help you learn why deck boards composite are a great choice or discover what style of interior and front door locks are best for your household. From practical renovations to stylish remodels, Menards® has you covered.
Find high-quality storage solutions for your projects at https://www.menards.com/
Original Source: https://bit.ly/3XC7fB3
0 notes
Text
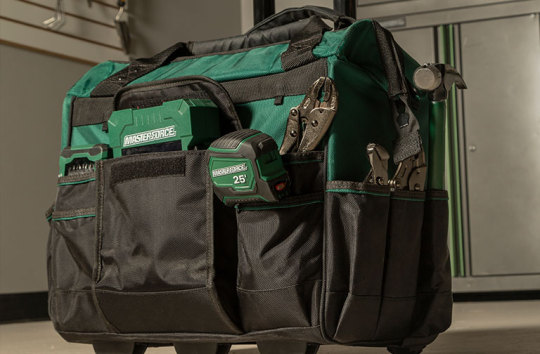
Guide to Choosing a Mobile Workbench Tool Chest in Brisbane
In the bustling workshops of Brisbane, where space and efficiency are at a premium, choosing the right mobile workbench tool chest can make all the difference. These versatile units combine storage and workspace mobility, enabling professionals and DIY enthusiasts to optimize their workflow and manage their tools effectively. Here’s a comprehensive guide to selecting the best mobile workbench tool chest in Brisbane to suit your specific needs.

1. Assess Your Space and Mobility Needs
Before investing in a mobile workbench tool chest, consider the size of your workspace and your mobility needs. If you frequently move around within a large workshop, look for a workbench with robust wheels that can handle the shop floor's terrain without faltering. Compact models might be more suitable for smaller spaces or crowded garages, offering easier maneuverability and storage.
2. Check for Sturdy Construction and Materials
The durability of a mobile workbench tool chest is crucial, especially in a professional setting where it might endure heavy use. Opt for workbenches made from high-quality steel or industrial-grade polymers that offer durability and stability. Check the load capacity to ensure it can support the weight of your tools and any projects you might undertake on the workbench surface.
3. Consider Storage Configuration
Storage needs vary from one professional to another, so it’s important to choose a mobile tool chest workbench in Brisbane that fits your specific tool storage requirements. Look for a model with a variety of drawer sizes to accommodate both large tools and smaller items. Drawers with secure locks are a bonus for added security, especially if you store valuable tools or work in shared spaces.
4. Look for Added Features
Modern mobile workbenches come with a variety of features that can enhance convenience and functionality. Features like built-in power strips, overhead lighting, or pegboards for hanging tools can greatly increase the utility of your workbench. Additionally, some workbenches offer customizable drawer organizers or modular components that can be adjusted as your tool collection grows.
5. Evaluate Portability and Ease of Use
Finally, consider how easily you can move the workbench. Test the mobility of the workbench in the store if possible, checking how smoothly the wheels move and how stable it feels when pushed. Also, consider the height and ergonomics of the workbench to ensure it is comfortable for extended use.
Conclusion
A mobile workbench tool chest is an invaluable addition to any Brisbane workshop, providing a portable and efficient solution for tool storage and workspace needs. By carefully considering your space, durability requirements, storage needs, additional features, and portability, you can choose a mobile tool chest workbench that will serve you effectively, enhancing your productivity and workspace organization.
#mobile workbench tool chest Brisbane#mobile tool chest workbench Brisbane#tool chest mobile workbench Brisbane
0 notes
Text
Top 10 Elective Purposes For Steel trailers
Steel trailers, at first expected sea cargo transport, have formed into adaptable plans used in various affiliations. Their determination, cost-sufficiency, and disposition make them a bewildering resource for innovative applications. Here are the genuinely 10 elective purposes behind transportation
Shipping Compartment Extensions
At times, moving compartments have been used to make bridges1. Stacked and gotten together, they can shape a limit and reasonable progression for eyewitness or light vehicular traffic. This inventive use consolidates the fundamental steadfast quality and flexibility of steel trailers. cargo container cost
Business Spaces
Changing over development compartments into business spaces like spring up shops, bars, or bistros has become interminably popular3. Their convenientce licenses relationship to easily move, and their uncommon elegant can attract clients. Retailers and restaurateurs regard the cost presence of mind and versatility of compartment based premises.
Moving Compartment Studios
Moving compartments can be changed into secure, flexible workshops7. They're great for gifted informed authorities, skilled workers, or DIY sweethearts requiring a serious space. The steel structure strengthens, and the compartment can be fitted with workbenches, racking, and power for a totally strong studio.
Schools and Informational Workplaces
Moving holders have been reused as homerooms in locales with limited resources or space1. They offer a clever response for valuable foundations, are quite easy to present, and can be associated ward upon the situation. A few schools have even made entire grounds from steel trailers.
Conveying Compartment Pools
An imaginative usage of transportation holders is transforming them into swimming pools3. The holder's game plan is unmistakably appropriate for holding water, and its size flawlessly fits a lap pool. With genuine security and covering, a steel trailer pool can be a speedy choice as opposed to standard pools.
Outside Theaters and Bistros
Getting back to between assessed compartments into open theaters and bistros has changed into a renowned trend4. These plans can have neighborhood, film screenings, or spring up eating experiences. The flexibility of compartments considers both incredibly extreme and brief foundations.
Conveying Compartment Wild rec centers
Conveying compartments can be reused into extraordinary metal wild action living spaces. Their solid game plan and surveyed quality make them ideal for making surprising play spaces. They can be painted in impossible assortments, fitted with climbing walls, slides, and more to fan out an attracting environment for kids.
Conveying Compartment Parking spaces
Conveying compartments are a marvelous choice for building garage spaces2. They can securely store vehicles, contraptions, and other stuff, shielding them from the parts. Various compartments can be used for more vital parking spaces, and inside can be changed as per suit unequivocal end needs.
Conveying Holder Private Homes
Conveying holders have changed into a lofty choice for making sensible and eco-obliging private homes1. Their withdrew nature contemplates imaginative game-plan possibilities, while their solid movement ensures life length. From single-compartment moderate living spaces to multi-holder domains, 'cargo tecture' is a making arrangement in the American housing market.
Home and Business Storing
Conveying holders are unmistakably appropriate for managing crude substances on the spot. They're by and large used in encounters like new turn of events, retail, gathering, designation focus, and making. Their strong improvement safeguards stock from natural circumstances and burglary. They are particularly a fair choice since Conex holders are supportively gotten, outrageous and versatile.
0 notes
Text
A Detailed Guide About Steps to Fit an Internal Door

Internal doors play a crucial role in defining spaces within buildings, offering privacy rather than security against external elements. They come in various materials and designs, such as wood, glass, or composites, catering to different aesthetic preferences and functional requirements. Whether in residential homes, offices, or commercial buildings, the installation of internal door fittings is a rewarding home improvement project that can elevate both the appearance and functionality of a space. This detailed guide outlines the step-by-step process of fitting an internal door, making it accessible to DIY enthusiasts with basic carpentry skills and essential tools.
Step 1: Take Accurate Measurements
The first step in fitting an internal door is to measure the dimensions of the door frame accurately. Measure the width and height of the existing frame, taking multiple measurements at various points to accommodate any irregularities. Once you have determined the dimensions, procure a door that fits within the existing frame. Standard door sizes typically have a height of 80 inches with various widths. You can opt for prehung doors with attached frames and hinges or install the hinges yourself.
Step 2: Remove the Old Door
If you're replacing an existing door, start by removing it from the frame. Unscrew the old hinges from both the door and the frame, then carefully remove the door. Take note of the hinge locations on the frame, as you will need this information when fitting the new door. This step may require assistance, especially if the door is heavy.
Step 3: Trim the Door to Fit
Place the new door on sawhorses or workbenches and lay it flat. If the door is too large for the frame, you may need to trim it down to size. Measure and mark the areas that need to be cut, ensuring an even gap on all sides of the door. Use a straightedge and pencil to trace the cutting lines, then trim the door using a wood plane or circular saw. Remember to wear safety goggles to protect your eyes from dust, and use sandpaper to smooth any rough edges.
Step 4: Mark Hinge Locations

While the door is still on the sawhorses, mark the locations for the hinges. Measure and mark where the hinge plates will be placed on the edge of the door, ensuring proper alignment with the hinges on the door frame. Use a chisel and hammer to create shallow mortises for the hinges on the door's edge, with the depth equal to the thickness of the hinge plates. Install the hinges to test their fit into the mortises.
Step 5: Install the Hinges
Secure the hinges to the door using screws, ensuring they are flush with the edge. Attach the hinges to the door frame using the existing hinge locations or the marks made earlier. Double-check that the hinges are correctly aligned and securely fastened.
Step 6: Hang the Door
With the hinges installed, lift the door and align it with the door frame. Carefully lower the door into place, ensuring even spacing around all sides. Have someone hold the door in position as you insert the hinge pins. Test the door to ensure it opens and closes smoothly, making any necessary adjustments to ensure proper alignment.
Step 7: Install the Door Handle and Latch
Once the door is hung, mark the height for the door handle and latch on both the door and the frame. Drill the necessary holes for the handle and latch according to the manufacturer's guidelines. Install the handle and latch using the supplied screws and hardware, following the manufacturer's instructions. Test the door to ensure that it closes and latches securely, making any adjustments as needed.
Maintenance Tips for Internal Doors
To keep your internal doors looking great and functioning smoothly, follow these maintenance tips:
Regularly clean the door surfaces with a soft cloth, sponge, and mild cleaning solution to remove dust, dirt, and marks.
Check the hinges and screws regularly to ensure they are firmly tightened, and lubricate them with a silicone-based lubricant for smooth operation.
Repair any scratches, dents, or chips promptly, touching up the paint or using appropriate wood sealers as needed.
Avoid slamming the door, as this can strain the hinges and cause misalignment. Handle the door gently to prolong its lifespan.
Conclusion
Fitting an internal door may seem intimidating, but with the right tools and guidance, it is entirely feasible for DIY enthusiasts. This comprehensive guide walks you through each step of the process, from taking accurate measurements to installing the door handle and latch. By following these steps and incorporating proper maintenance practices, you can ensure that your internal doors remain both functional and aesthetically pleasing for years to come.
0 notes
Text
How to Master the Art of Cutting with a Circular Saw

To cut with a circular saw, place the wood on a stable surface, align the blade with the mark, and slowly push the saw through the material. Cutting wood with a circular saw can be a straightforward and efficient process if done correctly. Whether you're a professional or a DIY enthusiast, knowing how to use this powerful tool can make your woodworking projects easier and more precise. By following the right steps and using the proper safety precautions, you can achieve clean and accurate cuts with a circular saw. We will guide you through the process of cutting with a circular saw, providing you with tips and techniques to get the best possible results. So, let's dive in and explore the fundamentals of using a circular saw for cutting wood.
Mastering Cutting With A Circular Saw
The circular saw is a versatile and powerful tool that can make precise and efficient cuts in various materials. Whether you are a seasoned woodworker or a DIY enthusiast, mastering the usage of a circular saw is essential for any project. In this guide, we will walk you through the process of cutting with a circular saw, covering everything from safety measures to pre-cut checks. By the end of this article, you will have the knowledge and confidence to handle a circular saw like a pro.

Safety First: Protective Gear And Workspace Setup Before you even think of cutting with a circular saw, it's crucial to prioritize safety. By following the right safety measures and setting up an appropriate workspace, you can minimize the risk of accidents and injuries. Here are some steps to ensure your safety: - Wear protective gear: Always wear safety goggles, ear protection, and a dust mask to safeguard your eyes, ears, and lungs from potential hazards. - Secure your workspace: Ensure that your workspace is clean, well-lit, and free from any clutter. This will provide a stable and safe environment for operating the circular saw. - Use a stable work surface: Make sure your work surface is stable and properly secured. It's advisable to use sawhorses or a workbench to provide a sturdy and level platform for cutting. - Secure the material: If you're cutting a large piece of material, secure it firmly using clamps and supports. This will prevent the material from shifting during the cutting process. - Maintain a safe distance: Keep a safe distance between your body and the cutting area to avoid accidental contact with the saw blade. Maintain a clear path for the material to prevent kickback. - Disconnect the power: When not in use, always unplug the circular saw from the power source. This prevents accidental startups and ensures your safety. Understanding Your Tool: Parts And Specifications Before you start cutting with a circular saw, it's essential to familiarize yourself with its parts and specifications. Knowing how the tool works and understanding its components will help you operate it efficiently. Here are the main parts of a circular saw: Part Description Blade The circular blade that cuts through the material. It's crucial to use the appropriate blade for the material you are working with. Motor The power source that drives the blade. Circular saws are available in different motor sizes, usually measured in amps. Base Plate Also known as the shoe, the base plate provides stability and support for the saw during operation. Depth Adjustment This feature allows you to adjust the depth of the blade, controlling the depth of the cut. Bevel Adjustment Some circular saws have a bevel adjustment, which allows you to tilt the blade, enabling angled cuts. Handle The handle provides a comfortable grip for precise control and maneuverability of the circular saw. Understanding these parts and their functions will enable you to make adjustments and operate the circular saw effectively. Pre-cut Checks: Ensuring Blade Sharpness And Alignment Prior to cutting with a circular saw, it's crucial to perform some pre-cut checks to ensure that your blade is sharp and properly aligned. Here's what you need to do: - Check blade sharpness: A sharp blade is essential for clean and accurate cuts. Examine the blade for any signs of dullness or damage. If necessary, remove and sharpen the blade or replace it with a new one. - Align the blade: Make sure the blade is aligned with the cutting line. Adjust the base plate and the bevel angle if required. A misaligned blade can result in inaccurate cuts and potential safety hazards. By conducting these quick checks, you can ensure that your circular saw is in optimal condition for cutting.
Circular Saw Cutting Techniques
Learn the essential circular saw cutting techniques to accurately and efficiently cut with a circular saw. Master the proper use of this powerful tool and achieve clean and precise cuts for your woodworking projects. Setting The Correct Blade Depth When it comes to using a circular saw, one of the most important factors is setting the correct blade depth. This determines how deep the saw will cut into the material you are working with. Setting the blade too deep can cause splintering and damage, while setting it too shallow may result in an incomplete cut. To set the blade depth correctly, first, unplug the saw for safety. Then, loosen the blade adjustment knob, usually located at the back of the saw. Slide the blade guard up and align the blade just below the thickness of the material you are cutting. Tighten the blade adjustment knob to secure the blade at the desired depth. It's recommended to conduct a test cut on a scrap piece to ensure the depth is set correctly. Marking And Measuring For Precision Cuts Precision is key when using a circular saw, and proper marking and measuring are essential for achieving accurate cuts. Before beginning, mark the material using a pencil or marker, indicating the desired cut line. Measure and mark the necessary dimensions with a tape measure or ruler, ensuring your marks are clear and visible. For straight cuts, using a straightedge or a guide with a clamp can help maintain a steady cutting line. Clamp the guide securely in place, aligning it with your marked cut line. This will provide stability and ensure a clean, precise cut. Guiding The Saw: Clamps And Cutting Guides When working with a circular saw, it's important to have proper control and guidance to prevent any mishaps or inaccuracies. One effective way to achieve this is by using clamps and cutting guides. Clamps are useful for securing the material firmly in place, preventing it from shifting during the cutting process. Ensure the clamps are positioned in a way that does not interfere with the saw's path. Cutting guides, such as a straightedge or a piece of scrap wood, can be used to guide the saw along the marked cut line. Align the edge of the saw's base plate with the guide, allowing it to glide smoothly and maintain a straight cut. Mitre Cuts, Bevel Cuts, And Straight Cuts A circular saw offers versatility in making different types of cuts, including mitre cuts, bevel cuts, and straight cuts. Mitre cuts involve cutting the material at an angle, typically 45 degrees, to create a joint with another piece of material. To achieve a precise mitre cut, use a mitre guide or set the bevel angle on the saw's base plate accordingly. Bevel cuts involve tilting the blade of the circular saw to create an angled cut. This is useful for creating bevelled edges or angled joints. Use the bevel adjustment feature on the saw to set the desired angle. Straight cuts are the most common type of cut and are made by guiding the saw along a straight line. Ensure the material is properly secured and use a cutting guide or straightedge to maintain a straight cutting path.
Preparing Materials For Cutting
When it comes to cutting materials with a circular saw, proper preparation is key. By taking the time to prepare your materials, you can ensure clean, precise cuts and avoid splintering or shifting. In this section, we will discuss different materials and appropriate blades, securing materials to prevent shifting or splintering, and adjusting speeds for optimal results. Different Materials And Appropriate Blades Before you begin cutting, it's important to consider the type of material you're working with. Different materials require different types of blades for optimal cutting performance. Here are some common materials and the appropriate blades to use: Material Appropriate Blade Wood Carbide-tipped or combination blade Metal Carbide-tipped or abrasive blade Plywood or MDF Fine-toothed blade with more teeth per inch (TPI) Plastic or acrylic Triple-chip or modified triple-chip blade Securing Materials To Prevent Shifting Or Splintering When cutting materials with a circular saw, it's important to secure them properly to prevent shifting or splintering. This will help you achieve clean, accurate cuts. Here are some tips to ensure your materials stay in place: - Use clamps or a workbench to secure your material. - Apply double-sided tape to the underside of the material to provide extra stability. - Place a sacrificial backing material, such as scrap wood, behind the workpiece to prevent splintering. - Mark the cutting line with a pencil or masking tape to guide your saw's path. Adjusting Speeds For Material Types Another important aspect of preparing materials for cutting is adjusting the circular saw's speed based on the type of material you're working with. This will help prevent overheating and ensure clean cuts. Here are some general guidelines for adjusting speeds: - Slow down the blade speed when cutting through harder materials, such as metal or dense wood. - Increase the blade speed when cutting through softer materials, such as plywood or plastic. - Refer to the manufacturer's instructions for specific speed recommendations for different materials. By understanding different materials and the appropriate blades, securing your materials properly, and adjusting speeds accordingly, you can ensure successful cuts with your circular saw. Taking the time to prepare your materials will not only result in professional-looking projects but also contribute to your safety while working with power tools.
Making The Cut
Learn how to cut with a circular saw effectively and safely with our step-by-step guide. Discover the right techniques and precautions to achieve precise cuts for your woodworking projects. Best Practices For Starting And Ending A Cut When it comes to using a circular saw, knowing how to start and end a cut properly can make all the difference in achieving a clean and precise result. Here are some best practices to follow: - Measure and mark: Before starting a cut, measure the intended length and mark it clearly on the material. This will help you stay on track and avoid any mistakes. - Align the saw: Position the circular saw blade at a point slightly away from the material's edge, ensuring that the blade is parallel to the marked line. - Apply gentle pressure: While maintaining a firm grip on the saw, apply gentle pressure to start the cut. Let the saw's blade gradually sink into the material as you guide it along the marked line. - Complete the cut: Once you reach the end of the cut, release the trigger to stop the blade. Ensure that the blade is clear of the material before moving the saw away. Managing Kickback: Techniques For Safe Handling Kickback, the sudden and forceful backward movement of the saw, can be dangerous if not properly managed. Here are some essential techniques for handling kickback safely: - Maintain a firm stance: Stand with your feet shoulder-width apart and keep a stable and balanced posture throughout the cut. This will help you maintain control and minimize the risk of kickback. - Use both hands: Always grip the circular saw with both hands firmly. The front hand should be on the main handle, while the other hand should stabilize the saw from the side. - Watch the cut line: Keep a sharp focus on the marked line while cutting, as this will help you guide the saw accurately and prevent the blade from binding. - Allow the saw to do the work: Avoid forcing the saw through the material. Instead, maintain a steady pace and let the saw's blade gradually cut through the material without exerting excessive pressure. Maintaining Control For Smooth, Straight Lines To achieve smooth and straight cuts with a circular saw, maintaining control is crucial. Consider the following tips: - Use a guide: Using a straightedge or a clamped guide can help you maintain a consistent and straight cutting line. This will prevent the saw from veering off course. - Keep a steady hand: Focus on maintaining a steady grip and hand movement while cutting. Avoid sudden jerks or movements that can compromise the quality of the cut. - Adjust the saw's speed: Depending on the material and thickness, adjusting the speed of the circular saw can enhance precision and control. Experiment with different speeds to find the optimal setting for your project. Troubleshooting Common Cutting Issues Even with the best techniques, occasional cutting issues may arise. Here are some common problems and how to troubleshoot them: Problem Solution Blade binding or getting stuck Ensure the saw is properly aligned and the blade is sharp. Take short breaks during long cuts to prevent overheating or binding. Rough or jagged edges Check the blade for any damage or dullness. Consider using a finer tooth blade for smoother cuts. Material splintering Place masking tape along the cut line before starting the cut. This can help prevent splintering and provide cleaner edges. Inaccurate cuts Double-check your measurements and ensure the material is properly secured. If necessary, use a guide or mark multiple reference points for improved accuracy. https://www.youtube.com/watch?v=vFP3jqFVf-k
Perfecting Your Circular Saw Skills
When it comes to cutting through wood and other materials, a circular saw is an essential tool for any DIY enthusiast or professional. However, like any power tool, using a circular saw requires skill and practice to achieve precision and safety. In this section, we will explore advanced cutting techniques, maintenance tips, and practice projects that can enhance your cutting prowess with a circular saw. Graduating To Advanced Cutting Techniques If you are already familiar with the basic cuts using a circular saw, it's time to take your skills to the next level. Here are some advanced cutting techniques to consider: - Ripping boards: Ripping refers to cutting a board lengthwise, parallel to the grain. To achieve clean and accurate rip cuts, ensure you have a sharp blade and use a straight guide or fence to guide the saw along the desired cut line. - Cross-cutting: Cross-cutting involves cutting a board across the grain. To make precise cross-cuts, utilize a square or speed square as a guide for accuracy. Additionally, consider using a clamp to secure the workpiece and minimize movement during the cut. - Bevel cuts: Bevel cuts are angled cuts that add versatility to your project. Mastering bevel cuts requires adjusting the saw's baseplate angle and using a bevel guide or protractor to establish the desired angle. Remember to make practice cuts and double-check the settings before tackling your project. Tips For Maintaining Your Circular Saw To ensure optimal performance and longevity of your circular saw, it is essential to keep it well-maintained. Here are some crucial maintenance tips: - Regular blade inspection: Inspect the blade before each use to ensure it is sharp, clean, and free from any damage. Replace any dull or damaged blades promptly to avoid compromising the quality of your cuts. - Lubrication: Apply a small amount of lubricating oil to the saw's moving parts, including the blade arbor and adjustment mechanisms, periodically. This helps reduce friction and ensures smooth operation. - Keep it clean: After each use, remove any sawdust or debris from the saw's housing, blade guard, and adjustment knobs. Regular cleaning prevents build-up that can affect the saw's performance and safety. Practice Projects To Enhance Your Cutting Prowess Practice makes perfect, and the more you use your circular saw, the better you'll become. Here are some practice projects that can help you refine your cutting skills: - Cutting plywood: Plywood is versatile and readily available. Experiment with making straight cuts, cross-cuts, and bevel cuts on different thicknesses of plywood. This will help you develop your accuracy and precision. - Creating angled joints: Practice cutting angles and bevels to create joints, such as miter and compound miter joints. By mastering these techniques, you'll be ready to tackle woodworking projects that require precise joints and angles. - Building a simple bookshelf: Constructing a small bookshelf is an excellent way to apply your newfound skills. It involves making various types of cuts and assembling the pieces together, giving you hands-on experience with using your circular saw. By practicing these advanced cutting techniques, maintaining your circular saw properly, and completing practice projects, you'll soon enhance your cutting prowess and achieve satisfying results in your woodworking endeavors.
Frequently Asked Questions Of How To Cut With A Circular Saw
How Do You Safely Use A Circular Saw? To safely use a circular saw, start by wearing protective gear such as safety glasses and gloves. Ensure the workpiece is securely clamped before cutting and position yourself to the side of the saw, not in front. Use a sawdust extractor or wear a mask to avoid inhaling debris. Always follow the manufacturer's instructions and use the appropriate blade for the material being cut. Can You Cut Metal With A Circular Saw? Yes, you can cut metal with a circular saw by using a metal-cutting blade. Make sure to use a blade with the appropriate tooth configuration and tooth count for cutting metal. Additionally, use cutting oil to lubricate the blade and prevent overheating. Read the full article
0 notes