#ErrorBoundary
Explore tagged Tumblr posts
Visit Tumblr Blog
Explore Tumblr blogs with no restrictions, modern design and the best experience.
Last Seen Tumblr Blogs


Fun Fact
In 2020, 44% of users from Denmark used Tumblr daily.
Text
Data Fetching in React 19: Insights from Memetic Solutions
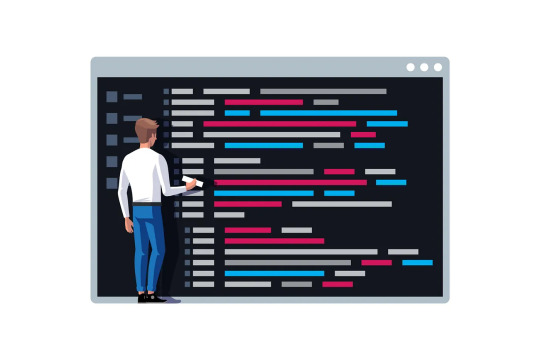
With the release of React 19, there are several enhancements that make data fetching and display more efficient and intuitive. Here’s how you can leverage these new features to get and display data in your React 19 applications.
1. Fetching Data with useData Hook
React 19 introduces the ‘useData hook’, which simplifies the process of fetching data. This hook abstracts the complexity of using ‘useEffect’ and ‘useState’ for data fetching, providing a more streamlined API.
This example demonstrates how you can quickly set up a data fetch with the ‘useData’ hook. It handles loading and error states automatically, making your code cleaner and more maintainable.
2. Server Components and Streaming Data
One of the most powerful features of React 19 is the improved support for Server Components and streaming data. Server Components allow you to render parts of your UI on the server, reducing the load on the client and improving performance. Here’s a simple example:
Server Components can be rendered on the server and streamed to the client as they become ready. This means users see your content faster, as they don’t have to wait for the entire page to load.
3. Automatic Error Boundaries
React 19 also brings automatic error boundaries, which help in catching errors during rendering, lifecycle methods, and in constructors of the whole tree below them. It will makes your app stable and user-friendly.
If an error occurs in ‘MyComponent’, it will be caught by the ‘ErrorBoundary’, and you can display a fallback UI.
How Memetic Solutions Helps Clients?
At Memetic Solutions, we understand that the key to a successful web application is not just cutting-edge technology but also simplicity and accessibility. By leveraging the latest features of React 19, we help our clients build web pages that are not only powerful but also easy for their audience to navigate and use.
Our expertise ensures that your web applications are fast, reliable, and user-friendly, creating a seamless experience for your users. Whether it’s through efficient data fetching, optimizing server performance, or ensuring error resilience, we make sure your web presence is both robust and approachable. Join us in your journey.
#React19#DataHandling#ReactJS#WebDevelopment#MemeticSolutions#DataDisplay#JavaScriptLibrary#FrontendDevelopment#WebAppOptimization#ReactBestPractices#TechInnovation#CodingTips#ReactDevelopers#DigitalTransformation
0 notes
Text
Mastering React: 10 Best Practices in Front-end Development

Source Image
This explains why React is a key concept in front-end development as it enables users to design engaging and interactive user interfaces. However, following best practices is necessary to utilize effectively such a framework. Now let’s talk about the top 10 activities to improve react coding while making it readable and easy to maintain.
1. Component-Based Architecture:
The structural framework of React is quite strong. Divide your UI into reusable parts for scalability and maintainability purpose.
import React from ‘react’;
const Header = () => {
return (
<header>
<h1>Website Title</h1>
</header>
);
};
export default Header;
2. State Management with Care:
Use React state carefully, as it’s only suited for simple state cases and Redux/ context API may be more suitable when handling complex state management.
import React, { useState } from ‘react’;
const Counter = () => {
const [count, setCount] = useState(0);
const increment = () => {
setCount(count + 1);
};
return (
<div>
<p>Count: {count}</p>
<button onClick={increment}>Increment</button>
</div>
);
};
export default Counter;
3. Immutable Data & Pure Components:
Make sure they are not modified in place and use pure components or implement shouldComponentUpdate if necessary to optimize the performance.
4. Avoid Direct DOM Manipulation:
Instead of directly accessing and modifying the DOM, make use of React’s virtual DOM. Use refs only when necessary.
5. Keys for Iterating Elements:
In order to facilitate the work of React’s reconciliation process, always utilize distinct keys while working with elements in an iteration mode.
const listItems = todos.map((todo) => (
<li key={todo.id}>{todo.text}</li>
));
6. Conditional Rendering:
Use conditional rendering to display or conceal elements depending on pre-determined situations.
const Greeting = ({ isLoggedIn }) => {
if (isLoggedIn) {
return <UserGreeting />;
}
return <GuestGreeting />;
};
7. Code Splitting and Lazy Loading:
For better efficiency, cut code and load components on demand.
const LazyLoadedComponent = React.lazy(() => import(‘./LazyLoadedComponent’));
8. Error Boundaries:
Gracefully handle your component errors using error boundaries.
class ErrorBoundary extends React.Component {
constructor(props) {
super(props);
this.state = { hasError: false };
}
static getDerivedStateFromError(error) {
return { hasError: true };
}
render() {
if (this.state.hasError) {
return <h1>Something went wrong.</h1>;
}
return this.props.children;
}
}
9. Performance Optimization:
Use of optimization tools such as React. memo, shouldComponentUpdate, and profile tools can be effectively used to optimise performance.
10. Testing and Documentation:
Ensure better maintainability by writing complete unit test with Jest and documenting for best practices.
Conclusion:
Adherence to such good practices during React development will be beneficial for the quality and performance of your code as well as its maintainability. Integrating with React’s principles, you will develop comprehensive platforms that stand strong under any circumstances in today’s web application. Remember, finding talent is essential. It is better to hire full-stack developers/hire remote developers for successful project development.
0 notes
Text
You can learn ReactJS easily, Here's all you need to get started:
1.Components
• Functional Components
• Class Components
• JSX (JavaScript XML) Syntax
2.Props (Properties)
• Passing Props
• Default Props
• Prop Types
3.State
• useState Hook
• Class Component State
• Immutable State
4.Lifecycle Methods (Class Components)
• componentDidMount
• componentDidUpdate
• componentWillUnmount
5.Hooks (Functional Components)
• useState
• useEffect
• useContext
• useReducer
• useCallback
• UseMemo
• UseRef
• uselmperativeHandle
• useLayoutEffect
6.Event Handling
• Handling Events in Functional Components
• Handling Events in Class Components
7.Conditional Rendering
• it Statements
• Ternary Operators
• Logical && Operator
8.Lists and Keys
• Rendering Lists
• Keys in React Lists
9.Component Composition
• Reusing Components
• Children Props
• Composition vs Inheritance
10.Higher-Order Components (HOC)
• Creating HOCs
• Using HOCs for Reusability
11.Render Props
• Using Render Props Pattern
12.React Router
• <BrowserRouter>
• <Route>
• <Link>
• <Switch>
• Route Parameters
13. Navigation
• useHistory Hook
• useLocation Hook
State Management
14.Context API
• Creating Context
• useContext Hook
15.Redux
• Actions
• Reducers
• Store
• connect Function (React-Redux)
16.Forms
• Handling Form Data
• Controlled Components
• Uncontrolled Components
17.Side Effects
• useEffect for Data Fetching
• useEffect Cleanup
18.AJAX Requests
• Fetch AP
• Axios Library
Error Handling
19.Error Boundaries
• componentDidCatch (Class Components)
• ErrorBoundary Component (Functional
Components)
20.Testing
• Jest Testing Framework
• React Testing Library
21. Best Practices
• Code Splitting
• PureComponent and React.memo
• Avoiding Reconciliation
• Keys for Dynamic Lists
22.Optimization
• Memoization
• Profiling and Performance Monitoring
23. Build and Deployment
• Create React App (CRA)
• Production Builds
• Deployment Strategies
Frameworks and Libraries
24.Styling Libraries
• Styled-components
• CSS Modules
25.State Management Libraries
• Redux
• MobX
26.Routing Libraries
• React Router
• Reach Router
0 notes
Text
Handling react component with error boundary
Use react-error-boundary package.
<ErrorBoundary FallbackComponent={ErrorFallback} onReset={handleReset} resetKeys={[pokemonName]} >
Re-render error boundary whenever resetKeys dependency array changes.
FallBackCompoenent has two parameter: error and resetErrorBoundary.
The parameter resetErrorBoundary calls onReset prop.
Read more at : https://github.com/kentcdodds/react-hooks/blob/main/src/final/06.extra-8.js
0 notes
Photo

Posted @withregram • @reactjsofficial Increase your react level by learning these concepts!👍 . . Follow us for more content like this and join our training program to learn Reactjs. 👉🏻👉🏻 @reactjsofficial #codegoals #programming #advancedreactconcepts #hooks #java #vuejs #axios #csstricks #css3 #lazyloading #errorboundaries #reactjsofficial #reactjs #reactdeveloper #topresources #topcourses #developers #learncodingfree #learnreactjs #fullstackwebdeveloper #angularjs #fullstack #computertechnology #softwaredevelopment #htmlcss #codingbootcamp #reactnative #zero2herotraining #rasimsen #careeritjob (at London, United Kingdom) https://www.instagram.com/p/CQ3AaYSjZb7/?utm_medium=tumblr
#codegoals#programming#advancedreactconcepts#hooks#java#vuejs#axios#csstricks#css3#lazyloading#errorboundaries#reactjsofficial#reactjs#reactdeveloper#topresources#topcourses#developers#learncodingfree#learnreactjs#fullstackwebdeveloper#angularjs#fullstack#computertechnology#softwaredevelopment#htmlcss#codingbootcamp#reactnative#zero2herotraining#rasimsen#careeritjob
0 notes
Text
To consider while building stuff
1. Environment? worker/window/node/jsdom 2. API Calls Show loader/retries/failure popup/tracking/timeout/error code handling/success case/failure case 3. Error logging window.onerror, window.onunhandledrejection, domObject.onerror, errorBoundary
4. Check on clicking a link if the user is actually taken to the url of the link and data is loading.
5. Check if after bundling your code is there image files (png/gif/jpeg), code splitting is there, and css file chunks are there.
6. Loading a certain URL, content should actually load up.
7. Test the app on real android and ios devices? Possible? Then do else just test on web. Some issues happen only on native devices
TBC...
0 notes
Text
React Error Handling And Reporting With Error Boundary And Sentry
About The Author
Awesome frontend developer who loves everything coding. I’m a lover of choral music and I’m working to make it more accessible to the world, one upload at a … More about Chidi …
In this article, we’ll explore the concept of error boundaries in a React application. We’ll work through an example app to see how we can use error boundaries to deliver a better app experience. Finally, we’ll integrate Sentry into our error boundary for realtime error reporting.
In this article, we’ll look at error boundaries in React. We’ll learn what they are and how to use them to deliver a better user experience, even when something breaks in our app. We’ll also learn how to integrate with Sentry for realtime error monitoring.
This tutorial is aimed at React developers of every level who wants to start using error boundaries in their react apps.
The only prerequisite is that you have some familiarity with React class components.
I will be using Yarn as my package manager for this project. You’ll find installation instructions for your specific operating system over here.
What Is An Error Boundary And Why Do We Need It?
A picture, they say, is worth a thousand words. For that reason, I’d like to talk about error boundaries using — you guessed it — pictures.
The illustration below shows the component tree of a simple React app. It has a header, a sidebar on the left, and the main component, all of which is wrapped by a root <App /> component.
Component tree. (Large preview)
On rendering these components, we arrive at something that looks like the picture below.
App render. (Large preview)
In an ideal world, we would expect to see the app rendered this way every single time. But, unfortunately, we live in a non-ideal world. Problems, (bugs), can surface in the frontend, backend, developer’s end, and a thousand other ends. The problem could happen in either of our three components above. When this happens, our beautifully crafted app comes crashing down like a house of cards.
React encourages thinking in terms of components. Composing multiple smaller components is better than having a single giant component. Working this way helps us think about our app in simple units. But aside from that won’t it be nice if we could contain any errors that might happen in any of the components? Why should a failure in a single component bring down the whole house?
In the early days of React, this was very much the case. And worse, sometimes you couldn’t even figure out what the problem was. The React repository on Github has some of such notable errors here, here, and here.
React 16 came to the rescue with the concept of an “error boundary”. The idea is simple. Erect a fence around a component to keep any fire in that component from getting out.
The illustration below shows a component tree with an <ErrorBoundary /> component wrapping the <Main /> component. Note that we could certainly wrap the other components in an error boundary if we wanted. We could even wrap the <App /> component in an error boundary.
Component tree with error boundary. (Large preview)
The red outline in the below illustration represents the error boundary when the app is rendered.
App rendered with error boundary. (Large preview)
As we discussed earlier, this red line keeps any errors that occur in the <Main /> component from spilling out and crashing both the <Header /> and <LeftSideBar /> components. This is why we need an error boundary.
Now that we have a conceptual understanding of an error boundary, let’s now get into the technical aspects.
What Makes A Component An Error Boundary?
As we can see from our component tree, the error boundary itself is a React component. According to the docs,
A class component becomes an error boundary if it defines either (or both) of the lifecycle methods static getDerivedStateFromError() or componentDidCatch().
There are two things to note here. Firstly, only a class component can be used as an error boundary. Even if you’re writing all your components as function, you still have to make use of a class component if you want to have an error boundary. Secondly, it must define either (or both) of static getDerivedStateFromError() or componentDidCatch(). Which one(s) you define depends on what you want to accomplish with your error boundary.
Functions Of An Error Boundary
An error boundary isn’t some dumb wall whose sole purpose in life is to keep a fire in. Error boundaries do actual work. For starters, they catch javascript errors. They can also log those errors, and display a fallback UI. Let’s go over each of \these functions one after the other.
Catch JavaScript Errors
When an error is thrown inside a component, the error boundary is the first line of defense. In our last illustration, if an error occurs while rendering the <Main /> component, the error boundary catches this error and prevents it from spreading outwards.
Logs Those Errors
This is entirely optional. You could catch the error without logging it. It is up to you. You can do whatever you want with the errors thrown. Log them, save them, send them somewhere, show them to your users (you really don’t want to do this). It’s up to you.
But to get access to the errors you have to define the componentDidCatch() lifecycle method.
Render A Fallback UI
This, like logging the errors, is entirely optional. But imagine you had some important guests, and the power supply was to go out. I’m sure you don’t want your guests groping in the dark, so you invent a technology to light up the candles instantaneously. Magical, hmm. Well, your users are important guests, and you want to afford them the best experience in all situations. You can render a fallback UI with static getDerivedStateFromError() after an error has been thrown.
It is important to note that error boundaries do not catch errors for the following situations:
Errors inside event handlers.
Errors in asynchronous code (e.g. setTimeout or requestAnimationFrame callbacks).
Errors that happen when you’re doing some server-side rendering.
Errors are thrown in the error boundary itself (rather than its children). You could have another error boundary catch this error, though.
Working With Error Boundaries
Let’s now dive into our code editor. To follow along, you need to clone the repo. After cloning the repo, check out the 01-initial-setup branch. Once that is done, run the following commands to start the app.
# install project dependencies yarn install # start the server yarn start
When started, the app renders to what we have in the picture below.
Browser view of starter app. (Large preview)
The app currently has a header and two columns. Clicking on Get images in the left column makes an API call to the URL https://picsum.photos/v2/list?page=0&limit=2 and displays two pictures. On the right column, we have some description texts and two buttons.
When we click the Replace string with object button, we’ll replace the text {"function":"I live to crash"}, which has been stringified, with the plain JavaScript object. This will trigger an error as React does not render plain JavaScript objects. This will cause the whole page to crash and go blank. We’ll have to refresh the page to get back our view.
Try it for yourself.
Now refresh the page and click the Invoke event handler button. You’ll see an error screen popup, with a little X at the top right corner. Clicking on it removes the error screen and shows you the rendered page, without any need to refresh. In this case, React still knows what to display even though an error is thrown in the event handler. In a production environment, this error screen won’t show up at all and the page will remain intact. You can only see that something has gone wrong if you look in the developer console.
Event handler error alert. (Large preview)
Note: To run the app in production mode requires that you install serve globally. After installing the server, build the app, and start it with the below command.
# build the app for production yarn build # serve the app from the build folder serve -s build
Having seen how React handles two types of errors, (rendering error, and event handler error), let’s now write an error boundary component.
Create a new ErrorBoundary.js file inside the /src folder and let’s build the error boundary component piece by piece.
import React, { Component } from 'react'; import PropTypes from 'prop-types'; export default class ErrorBoundary extends Component { state = { error: '', errorInfo: '', hasError: false, }; static getDerivedStateFromError(error) { return { hasError: true, error }; } componentDidCatch(error, errorInfo) { // eslint-disable-next-line no-console console.log({ error, errorInfo }); this.setState({ errorInfo }); } render() { // next code block goes here } } ErrorBoundary.propTypes = { children: PropTypes.oneOfType([ PropTypes.object, PropTypes.array ]).isRequired, };
We define both of the two lifecycle methods that make a component an error boundary. Whenever an error occurs inside the error boundary’s child component, both of our lifecycle methods are activated.
static getDerivedStateFromError() receives the error and updates the state variables, error and hasError.
componentDidCatch() receives the error, which represents the error that was thrown and errorInfo which is an object with a componentStack key containing information about which component threw the error. Here we logged the error and also update the state with the errorInfo. It’s totally up to you what you want to do with these two.
Then in the render method, we return this.props.children, which represents whatever component that this error boundary encloses.
Let’s add the final piece of code. Copy the following code and paste it inside the render() method.
const { hasError, errorInfo } = this.state; if (hasError) { return ( <div className="card my-5"> <div className="card-header"> <p> There was an error in loading this page.{' '} <span style= onClick={() => { window.location.reload(); }} > Reload this page </span>{' '} </p> </div> <div className="card-body"> <details className="error-details"> <summary>Click for error details</summary> {errorInfo && errorInfo.componentStack.toString()} </details> </div> </div> ); }
In the render() method, we check if hasError is true. If it is, then we render the <div className="card my-5"></div> div, which is our fallback UI. Here, we’re showing information about the error and an option to reload the page. However, in a production environment, it is not advised to show the error to the user. Some other message would be fine.
Let’s now make use of our ErrorBoundary component. Open up App.js, import ErrorBoundary and render ColumnRight inside it.
# import the error boundary import ErrorBoundary from './ErrorBoundary'; # wrap the right column with the error boundary <ErrorBoundary> <ColumnRight /> </ErrorBoundary>
Now click on Replace string with object. This time, the right column crashes and the fallback UI is displayed. We’re showing a detailed report about where the error happened. We also see the error log in the developer console.
View of error boundary in action. (Large preview)
We can see that everything else remains in place. Click on Get images to confirm that it still works as expected.
At this point, I want to mention that with error boundaries, you can go as granular as you want. This means that you can use as many as necessary. You could even have multiple error boundaries in a single component.
With our current use of Error Boundary, clicking Replace string with object crashes the whole right column. Let’s see how we can improve on this.
Open up src/columns/ColumnRight.js, import ErrorBoundary and render the second <p> block inside it. This is the paragraph that crashes the <ColumnRight /> component.
# import the component import ErrorBoundary from '../ErrorBoundary'; # render the erring paragraph inside it. <ErrorBoundary> <p> Clicking this button will replace the stringified object,{' '} <code>{text}</code>, with the original object. This will result in a rendering error. </p> </ErrorBoundary>
Now click on Replace string with object.
Improved error boundary usage. (Large preview)
This time, we still have most of the page intact. Only the second paragraph is replaced with our fallback UI.
Click around to make sure everything else is working.
If you’d like to check out my code at this point you should check out the 02-create-eb branch.
In case you’re wondering if this whole error boundary thing is cool, let me show you what I captured on Github a few days ago. Look at the red outline.
Error screen on Github. (Large preview)
I’m not certain about what is happening here, but it sure looks like an error boundary.
Error boundaries are cool, but we don’t want errors in the first place. So, we need to monitor errors as they occur so we can get a better idea of how to fix them. In this section, we’ll learn how Sentry can help us in that regard.
Integrating With Sentry
As I opened the Sentry homepage while writing this line, I was greeted by this message.
Software errors are inevitable. Chaos is not. Sentry provides self-hosted and cloud-based error monitoring that helps all software teams discover, triage, and prioritize errors in real-time.
Sentry is a commercial error reporting service. There are many other companies that provide similar services. My choice of Sentry for this article is because it has a free developer plan that lets me log up to 5,000 events per month across all my projects (pricing docs). An event is a crash report (also known as an exception or error). For this tutorial, we will be making use of the free developer plan.
You can integrate Sentry with a lot of web frameworks. Let’s go over the steps to integrate it into our React project.
Visit the Sentry website and create an account or login if you already have one.
Click on Projects in the left navigation. Then, click on Create Project to start a new project.
Under Choose a platform, select React.
Under Set your default alert settings check Alert me on every new issue.
Give your project a name and click Create project. This will create the project and redirect you to the configuration page.
Let’s install the Sentry browser SDK.
# install Sentry yarn add @sentry/browser
On the configuration page, copy the browser SDK initialization code and paste it into your index.js file.
import * as Sentry from '@Sentry/browser'; # Initialize with Data Source Name (dsn) Sentry.init({ dsn: 'dsn-string' });
And that is enough for Sentry to start sending error alerts. It says in the docs,
Note: On its own, @Sentry/browser will report any uncaught exceptions triggered from your application.
Click on Got it! Take me to the issue stream to proceed to the issues dashboard. Now return to your app in the browser and click on the red buttons to throw some error. You should get email alerts for each error (Sometimes the emails are delayed). Refresh your issues dashboard to see the errors.
Sentry issues dashboard. (Large preview)
The Sentry dashboard provides a lot of information about the error it receives. You can see information such as a graph of the frequency of occurrence of each error event type. You can also assign each error to a team member. There’s a ton of information. Do take some time to explore them to see what is useful to you.
You can click on each issue to see more detailed information about the error event.
Now let’s use Sentry to report errors that are caught by our error boundary. Open ErrorBoundary.js and update the following pieces of code.
# import Sentry import * as Sentry from '@sentry/browser' # add eventId to state state = { error: '', eventId: '', // add this to state errorInfo: '', hasError: false, }; # update componentDidCatch componentDidCatch(error, errorInfo) { // eslint-disable-next-line no-console console.log({ error, errorInfo }); Sentry.withScope((scope) => { scope.setExtras(errorInfo); const eventId = Sentry.captureException(error); this.setState({ eventId, errorInfo }); }); }
With this setup, Sentry sends all errors captured by our error boundary to our issue dashboard using the Sentry.captureException method.
Sentry also gives us a tool to collect user feedback. Let’s add the feedback button as part of our fallback UI inside our error boundary.
Open ErrorBoundary.js and add the feedback button just after the div with a className of card-body. You could place this button anywhere you like.
<div className="card-body"> ... </div> # add the Sentry button <button className="bg-primary text-light" onClick={() => Sentry.showReportDialog({ eventId: this.state.eventId }) } > Report feedback </button>
Now, whenever our fallback UI is rendered, the Report feedback button is displayed. Clicking on this button opens a dialog that the user can fill to provide us with feedback.
Sentry feedback form. (Large preview)
Go ahead and trigger an error, then, fill and submit the feedback form. Now go to your Sentry dashboard and click on User Feedback in the left navigation. You should see your reported feedback.
Sentry feedback dashboard. (Large preview)
Currently, we get alerts for every error, even those that happen during development. This tends to clog our issue stream. Let’s only report errors that happen in production.
On the left navigation click on Settings. Underneath the ORGANIZATION menu, click on Projects. In that list, click on your error boundary project. From Project Settings on the lefthand side, click on Inbound Filters. Look for Filter out events coming from localhost and enable it. This is just one of the numerous configurations that are available in Sentry. I encourage you to have a look around to see what might be useful for your project.
If you’d like to take a look at my code, the corresponding branch in my repo is 03-integrate-sentry.
Conclusion
If you haven’t been using error boundaries in your React app, you should immediately add one at the top level of your app. Also, I encourage you to integrate an error reporting service into your project. We’ve seen how easy it is to get started with Sentry for free.
The finished version of the app is hosted on Netlify.
Related Resources
(ks, ra, yk, il)
Website Design & SEO Delray Beach by DBL07.co
Delray Beach SEO
source http://www.scpie.org/react-error-handling-and-reporting-with-error-boundary-and-sentry/ source https://scpie.tumblr.com/post/619756913128767489
0 notes
Text
React Error Handling And Reporting With Error Boundary And Sentry
About The Author
Awesome frontend developer who loves everything coding. I’m a lover of choral music and I’m working to make it more accessible to the world, one upload at a … More about Chidi …
In this article, we’ll explore the concept of error boundaries in a React application. We’ll work through an example app to see how we can use error boundaries to deliver a better app experience. Finally, we’ll integrate Sentry into our error boundary for realtime error reporting.
In this article, we’ll look at error boundaries in React. We’ll learn what they are and how to use them to deliver a better user experience, even when something breaks in our app. We’ll also learn how to integrate with Sentry for realtime error monitoring.
This tutorial is aimed at React developers of every level who wants to start using error boundaries in their react apps.
The only prerequisite is that you have some familiarity with React class components.
I will be using Yarn as my package manager for this project. You’ll find installation instructions for your specific operating system over here.
What Is An Error Boundary And Why Do We Need It?
A picture, they say, is worth a thousand words. For that reason, I’d like to talk about error boundaries using — you guessed it — pictures.
The illustration below shows the component tree of a simple React app. It has a header, a sidebar on the left, and the main component, all of which is wrapped by a root <App /> component.
Component tree. (Large preview)
On rendering these components, we arrive at something that looks like the picture below.
App render. (Large preview)
In an ideal world, we would expect to see the app rendered this way every single time. But, unfortunately, we live in a non-ideal world. Problems, (bugs), can surface in the frontend, backend, developer’s end, and a thousand other ends. The problem could happen in either of our three components above. When this happens, our beautifully crafted app comes crashing down like a house of cards.
React encourages thinking in terms of components. Composing multiple smaller components is better than having a single giant component. Working this way helps us think about our app in simple units. But aside from that won’t it be nice if we could contain any errors that might happen in any of the components? Why should a failure in a single component bring down the whole house?
In the early days of React, this was very much the case. And worse, sometimes you couldn’t even figure out what the problem was. The React repository on Github has some of such notable errors here, here, and here.
React 16 came to the rescue with the concept of an “error boundary”. The idea is simple. Erect a fence around a component to keep any fire in that component from getting out.
The illustration below shows a component tree with an <ErrorBoundary /> component wrapping the <Main /> component. Note that we could certainly wrap the other components in an error boundary if we wanted. We could even wrap the <App /> component in an error boundary.
Component tree with error boundary. (Large preview)
The red outline in the below illustration represents the error boundary when the app is rendered.
App rendered with error boundary. (Large preview)
As we discussed earlier, this red line keeps any errors that occur in the <Main /> component from spilling out and crashing both the <Header /> and <LeftSideBar /> components. This is why we need an error boundary.
Now that we have a conceptual understanding of an error boundary, let’s now get into the technical aspects.
What Makes A Component An Error Boundary?
As we can see from our component tree, the error boundary itself is a React component. According to the docs,
A class component becomes an error boundary if it defines either (or both) of the lifecycle methods static getDerivedStateFromError() or componentDidCatch().
There are two things to note here. Firstly, only a class component can be used as an error boundary. Even if you’re writing all your components as function, you still have to make use of a class component if you want to have an error boundary. Secondly, it must define either (or both) of static getDerivedStateFromError() or componentDidCatch(). Which one(s) you define depends on what you want to accomplish with your error boundary.
Functions Of An Error Boundary
An error boundary isn’t some dumb wall whose sole purpose in life is to keep a fire in. Error boundaries do actual work. For starters, they catch javascript errors. They can also log those errors, and display a fallback UI. Let’s go over each of \these functions one after the other.
Catch JavaScript Errors
When an error is thrown inside a component, the error boundary is the first line of defense. In our last illustration, if an error occurs while rendering the <Main /> component, the error boundary catches this error and prevents it from spreading outwards.
Logs Those Errors
This is entirely optional. You could catch the error without logging it. It is up to you. You can do whatever you want with the errors thrown. Log them, save them, send them somewhere, show them to your users (you really don’t want to do this). It’s up to you.
But to get access to the errors you have to define the componentDidCatch() lifecycle method.
Render A Fallback UI
This, like logging the errors, is entirely optional. But imagine you had some important guests, and the power supply was to go out. I’m sure you don’t want your guests groping in the dark, so you invent a technology to light up the candles instantaneously. Magical, hmm. Well, your users are important guests, and you want to afford them the best experience in all situations. You can render a fallback UI with static getDerivedStateFromError() after an error has been thrown.
It is important to note that error boundaries do not catch errors for the following situations:
Errors inside event handlers.
Errors in asynchronous code (e.g. setTimeout or requestAnimationFrame callbacks).
Errors that happen when you’re doing some server-side rendering.
Errors are thrown in the error boundary itself (rather than its children). You could have another error boundary catch this error, though.
Working With Error Boundaries
Let’s now dive into our code editor. To follow along, you need to clone the repo. After cloning the repo, check out the 01-initial-setup branch. Once that is done, run the following commands to start the app.
# install project dependencies yarn install # start the server yarn start
When started, the app renders to what we have in the picture below.
Browser view of starter app. (Large preview)
The app currently has a header and two columns. Clicking on Get images in the left column makes an API call to the URL https://picsum.photos/v2/list?page=0&limit=2 and displays two pictures. On the right column, we have some description texts and two buttons.
When we click the Replace string with object button, we’ll replace the text {"function":"I live to crash"}, which has been stringified, with the plain JavaScript object. This will trigger an error as React does not render plain JavaScript objects. This will cause the whole page to crash and go blank. We’ll have to refresh the page to get back our view.
Try it for yourself.
Now refresh the page and click the Invoke event handler button. You’ll see an error screen popup, with a little X at the top right corner. Clicking on it removes the error screen and shows you the rendered page, without any need to refresh. In this case, React still knows what to display even though an error is thrown in the event handler. In a production environment, this error screen won’t show up at all and the page will remain intact. You can only see that something has gone wrong if you look in the developer console.
Event handler error alert. (Large preview)
Note: To run the app in production mode requires that you install serve globally. After installing the server, build the app, and start it with the below command.
# build the app for production yarn build # serve the app from the build folder serve -s build
Having seen how React handles two types of errors, (rendering error, and event handler error), let’s now write an error boundary component.
Create a new ErrorBoundary.js file inside the /src folder and let’s build the error boundary component piece by piece.
import React, { Component } from 'react'; import PropTypes from 'prop-types'; export default class ErrorBoundary extends Component { state = { error: '', errorInfo: '', hasError: false, }; static getDerivedStateFromError(error) { return { hasError: true, error }; } componentDidCatch(error, errorInfo) { // eslint-disable-next-line no-console console.log({ error, errorInfo }); this.setState({ errorInfo }); } render() { // next code block goes here } } ErrorBoundary.propTypes = { children: PropTypes.oneOfType([ PropTypes.object, PropTypes.array ]).isRequired, };
We define both of the two lifecycle methods that make a component an error boundary. Whenever an error occurs inside the error boundary’s child component, both of our lifecycle methods are activated.
static getDerivedStateFromError() receives the error and updates the state variables, error and hasError.
componentDidCatch() receives the error, which represents the error that was thrown and errorInfo which is an object with a componentStack key containing information about which component threw the error. Here we logged the error and also update the state with the errorInfo. It’s totally up to you what you want to do with these two.
Then in the render method, we return this.props.children, which represents whatever component that this error boundary encloses.
Let’s add the final piece of code. Copy the following code and paste it inside the render() method.
const { hasError, errorInfo } = this.state; if (hasError) { return ( <div className="card my-5"> <div className="card-header"> <p> There was an error in loading this page.{' '} <span style= onClick={() => { window.location.reload(); }} > Reload this page </span>{' '} </p> </div> <div className="card-body"> <details className="error-details"> <summary>Click for error details</summary> {errorInfo && errorInfo.componentStack.toString()} </details> </div> </div> ); }
In the render() method, we check if hasError is true. If it is, then we render the <div className="card my-5"></div> div, which is our fallback UI. Here, we’re showing information about the error and an option to reload the page. However, in a production environment, it is not advised to show the error to the user. Some other message would be fine.
Let’s now make use of our ErrorBoundary component. Open up App.js, import ErrorBoundary and render ColumnRight inside it.
# import the error boundary import ErrorBoundary from './ErrorBoundary'; # wrap the right column with the error boundary <ErrorBoundary> <ColumnRight /> </ErrorBoundary>
Now click on Replace string with object. This time, the right column crashes and the fallback UI is displayed. We’re showing a detailed report about where the error happened. We also see the error log in the developer console.
View of error boundary in action. (Large preview)
We can see that everything else remains in place. Click on Get images to confirm that it still works as expected.
At this point, I want to mention that with error boundaries, you can go as granular as you want. This means that you can use as many as necessary. You could even have multiple error boundaries in a single component.
With our current use of Error Boundary, clicking Replace string with object crashes the whole right column. Let’s see how we can improve on this.
Open up src/columns/ColumnRight.js, import ErrorBoundary and render the second <p> block inside it. This is the paragraph that crashes the <ColumnRight /> component.
# import the component import ErrorBoundary from '../ErrorBoundary'; # render the erring paragraph inside it. <ErrorBoundary> <p> Clicking this button will replace the stringified object,{' '} <code>{text}</code>, with the original object. This will result in a rendering error. </p> </ErrorBoundary>
Now click on Replace string with object.
Improved error boundary usage. (Large preview)
This time, we still have most of the page intact. Only the second paragraph is replaced with our fallback UI.
Click around to make sure everything else is working.
If you’d like to check out my code at this point you should check out the 02-create-eb branch.
In case you’re wondering if this whole error boundary thing is cool, let me show you what I captured on Github a few days ago. Look at the red outline.
Error screen on Github. (Large preview)
I’m not certain about what is happening here, but it sure looks like an error boundary.
Error boundaries are cool, but we don’t want errors in the first place. So, we need to monitor errors as they occur so we can get a better idea of how to fix them. In this section, we’ll learn how Sentry can help us in that regard.
Integrating With Sentry
As I opened the Sentry homepage while writing this line, I was greeted by this message.
Software errors are inevitable. Chaos is not. Sentry provides self-hosted and cloud-based error monitoring that helps all software teams discover, triage, and prioritize errors in real-time.
Sentry is a commercial error reporting service. There are many other companies that provide similar services. My choice of Sentry for this article is because it has a free developer plan that lets me log up to 5,000 events per month across all my projects (pricing docs). An event is a crash report (also known as an exception or error). For this tutorial, we will be making use of the free developer plan.
You can integrate Sentry with a lot of web frameworks. Let’s go over the steps to integrate it into our React project.
Visit the Sentry website and create an account or login if you already have one.
Click on Projects in the left navigation. Then, click on Create Project to start a new project.
Under Choose a platform, select React.
Under Set your default alert settings check Alert me on every new issue.
Give your project a name and click Create project. This will create the project and redirect you to the configuration page.
Let’s install the Sentry browser SDK.
# install Sentry yarn add @sentry/browser
On the configuration page, copy the browser SDK initialization code and paste it into your index.js file.
import * as Sentry from '@Sentry/browser'; # Initialize with Data Source Name (dsn) Sentry.init({ dsn: 'dsn-string' });
And that is enough for Sentry to start sending error alerts. It says in the docs,
Note: On its own, @Sentry/browser will report any uncaught exceptions triggered from your application.
Click on Got it! Take me to the issue stream to proceed to the issues dashboard. Now return to your app in the browser and click on the red buttons to throw some error. You should get email alerts for each error (Sometimes the emails are delayed). Refresh your issues dashboard to see the errors.
Sentry issues dashboard. (Large preview)
The Sentry dashboard provides a lot of information about the error it receives. You can see information such as a graph of the frequency of occurrence of each error event type. You can also assign each error to a team member. There’s a ton of information. Do take some time to explore them to see what is useful to you.
You can click on each issue to see more detailed information about the error event.
Now let’s use Sentry to report errors that are caught by our error boundary. Open ErrorBoundary.js and update the following pieces of code.
# import Sentry import * as Sentry from '@sentry/browser' # add eventId to state state = { error: '', eventId: '', // add this to state errorInfo: '', hasError: false, }; # update componentDidCatch componentDidCatch(error, errorInfo) { // eslint-disable-next-line no-console console.log({ error, errorInfo }); Sentry.withScope((scope) => { scope.setExtras(errorInfo); const eventId = Sentry.captureException(error); this.setState({ eventId, errorInfo }); }); }
With this setup, Sentry sends all errors captured by our error boundary to our issue dashboard using the Sentry.captureException method.
Sentry also gives us a tool to collect user feedback. Let’s add the feedback button as part of our fallback UI inside our error boundary.
Open ErrorBoundary.js and add the feedback button just after the div with a className of card-body. You could place this button anywhere you like.
<div className="card-body"> ... </div> # add the Sentry button <button className="bg-primary text-light" onClick={() => Sentry.showReportDialog({ eventId: this.state.eventId }) } > Report feedback </button>
Now, whenever our fallback UI is rendered, the Report feedback button is displayed. Clicking on this button opens a dialog that the user can fill to provide us with feedback.
Sentry feedback form. (Large preview)
Go ahead and trigger an error, then, fill and submit the feedback form. Now go to your Sentry dashboard and click on User Feedback in the left navigation. You should see your reported feedback.
Sentry feedback dashboard. (Large preview)
Currently, we get alerts for every error, even those that happen during development. This tends to clog our issue stream. Let’s only report errors that happen in production.
On the left navigation click on Settings. Underneath the ORGANIZATION menu, click on Projects. In that list, click on your error boundary project. From Project Settings on the lefthand side, click on Inbound Filters. Look for Filter out events coming from localhost and enable it. This is just one of the numerous configurations that are available in Sentry. I encourage you to have a look around to see what might be useful for your project.
If you’d like to take a look at my code, the corresponding branch in my repo is 03-integrate-sentry.
Conclusion
If you haven’t been using error boundaries in your React app, you should immediately add one at the top level of your app. Also, I encourage you to integrate an error reporting service into your project. We’ve seen how easy it is to get started with Sentry for free.
The finished version of the app is hosted on Netlify.
Related Resources
(ks, ra, yk, il)
Website Design & SEO Delray Beach by DBL07.co
Delray Beach SEO
source http://www.scpie.org/react-error-handling-and-reporting-with-error-boundary-and-sentry/
0 notes
Text
React Error Handling And Reporting With Error Boundary And Sentry
About The Author
Awesome frontend developer who loves everything coding. I’m a lover of choral music and I’m working to make it more accessible to the world, one upload at a … More about Chidi …
In this article, we’ll explore the concept of error boundaries in a React application. We’ll work through an example app to see how we can use error boundaries to deliver a better app experience. Finally, we’ll integrate Sentry into our error boundary for realtime error reporting.
In this article, we’ll look at error boundaries in React. We’ll learn what they are and how to use them to deliver a better user experience, even when something breaks in our app. We’ll also learn how to integrate with Sentry for realtime error monitoring.
This tutorial is aimed at React developers of every level who wants to start using error boundaries in their react apps.
The only prerequisite is that you have some familiarity with React class components.
I will be using Yarn as my package manager for this project. You’ll find installation instructions for your specific operating system over here.
What Is An Error Boundary And Why Do We Need It?
A picture, they say, is worth a thousand words. For that reason, I’d like to talk about error boundaries using — you guessed it — pictures.
The illustration below shows the component tree of a simple React app. It has a header, a sidebar on the left, and the main component, all of which is wrapped by a root <App /> component.
Component tree. (Large preview)
On rendering these components, we arrive at something that looks like the picture below.
App render. (Large preview)
In an ideal world, we would expect to see the app rendered this way every single time. But, unfortunately, we live in a non-ideal world. Problems, (bugs), can surface in the frontend, backend, developer’s end, and a thousand other ends. The problem could happen in either of our three components above. When this happens, our beautifully crafted app comes crashing down like a house of cards.
React encourages thinking in terms of components. Composing multiple smaller components is better than having a single giant component. Working this way helps us think about our app in simple units. But aside from that won’t it be nice if we could contain any errors that might happen in any of the components? Why should a failure in a single component bring down the whole house?
In the early days of React, this was very much the case. And worse, sometimes you couldn’t even figure out what the problem was. The React repository on Github has some of such notable errors here, here, and here.
React 16 came to the rescue with the concept of an “error boundary”. The idea is simple. Erect a fence around a component to keep any fire in that component from getting out.
The illustration below shows a component tree with an <ErrorBoundary /> component wrapping the <Main /> component. Note that we could certainly wrap the other components in an error boundary if we wanted. We could even wrap the <App /> component in an error boundary.
Component tree with error boundary. (Large preview)
The red outline in the below illustration represents the error boundary when the app is rendered.
App rendered with error boundary. (Large preview)
As we discussed earlier, this red line keeps any errors that occur in the <Main /> component from spilling out and crashing both the <Header /> and <LeftSideBar /> components. This is why we need an error boundary.
Now that we have a conceptual understanding of an error boundary, let’s now get into the technical aspects.
What Makes A Component An Error Boundary?
As we can see from our component tree, the error boundary itself is a React component. According to the docs,
A class component becomes an error boundary if it defines either (or both) of the lifecycle methods static getDerivedStateFromError() or componentDidCatch().
There are two things to note here. Firstly, only a class component can be used as an error boundary. Even if you’re writing all your components as function, you still have to make use of a class component if you want to have an error boundary. Secondly, it must define either (or both) of static getDerivedStateFromError() or componentDidCatch(). Which one(s) you define depends on what you want to accomplish with your error boundary.
Functions Of An Error Boundary
An error boundary isn’t some dumb wall whose sole purpose in life is to keep a fire in. Error boundaries do actual work. For starters, they catch javascript errors. They can also log those errors, and display a fallback UI. Let’s go over each of \these functions one after the other.
Catch JavaScript Errors
When an error is thrown inside a component, the error boundary is the first line of defense. In our last illustration, if an error occurs while rendering the <Main /> component, the error boundary catches this error and prevents it from spreading outwards.
Logs Those Errors
This is entirely optional. You could catch the error without logging it. It is up to you. You can do whatever you want with the errors thrown. Log them, save them, send them somewhere, show them to your users (you really don’t want to do this). It’s up to you.
But to get access to the errors you have to define the componentDidCatch() lifecycle method.
Render A Fallback UI
This, like logging the errors, is entirely optional. But imagine you had some important guests, and the power supply was to go out. I’m sure you don’t want your guests groping in the dark, so you invent a technology to light up the candles instantaneously. Magical, hmm. Well, your users are important guests, and you want to afford them the best experience in all situations. You can render a fallback UI with static getDerivedStateFromError() after an error has been thrown.
It is important to note that error boundaries do not catch errors for the following situations:
Errors inside event handlers.
Errors in asynchronous code (e.g. setTimeout or requestAnimationFrame callbacks).
Errors that happen when you’re doing some server-side rendering.
Errors are thrown in the error boundary itself (rather than its children). You could have another error boundary catch this error, though.
Working With Error Boundaries
Let’s now dive into our code editor. To follow along, you need to clone the repo. After cloning the repo, check out the 01-initial-setup branch. Once that is done, run the following commands to start the app.
# install project dependenciesyarn install # start the serveryarn start
When started, the app renders to what we have in the picture below.
Browser view of starter app. (Large preview)
The app currently has a header and two columns. Clicking on Get images in the left column makes an API call to the URL https://picsum.photos/v2/list?page=0&limit=2 and displays two pictures. On the right column, we have some description texts and two buttons.
When we click the Replace string with object button, we’ll replace the text {"function":"I live to crash"}, which has been stringified, with the plain JavaScript object. This will trigger an error as React does not render plain JavaScript objects. This will cause the whole page to crash and go blank. We’ll have to refresh the page to get back our view.
Try it for yourself.
Now refresh the page and click the Invoke event handler button. You’ll see an error screen popup, with a little X at the top right corner. Clicking on it removes the error screen and shows you the rendered page, without any need to refresh. In this case, React still knows what to display even though an error is thrown in the event handler. In a production environment, this error screen won’t show up at all and the page will remain intact. You can only see that something has gone wrong if you look in the developer console.
Event handler error alert. (Large preview)
Note: To run the app in production mode requires that you install serve globally. After installing the server, build the app, and start it with the below command.
# build the app for productionyarn build # serve the app from the build folderserve -s build
Having seen how React handles two types of errors, (rendering error, and event handler error), let’s now write an error boundary component.
Create a new ErrorBoundary.js file inside the /src folder and let’s build the error boundary component piece by piece.
import React, { Component } from 'react';import PropTypes from 'prop-types'; export default class ErrorBoundary extends Component { state = { error: '', errorInfo: '', hasError: false, }; static getDerivedStateFromError(error) { return { hasError: true, error }; } componentDidCatch(error, errorInfo) { // eslint-disable-next-line no-console console.log({ error, errorInfo }); this.setState({ errorInfo }); } render() { // next code block goes here }}ErrorBoundary.propTypes = { children: PropTypes.oneOfType([ PropTypes.object, PropTypes.array ]).isRequired,};
We define both of the two lifecycle methods that make a component an error boundary. Whenever an error occurs inside the error boundary’s child component, both of our lifecycle methods are activated.
static getDerivedStateFromError() receives the error and updates the state variables, error and hasError.
componentDidCatch() receives the error, which represents the error that was thrown and errorInfo which is an object with a componentStack key containing information about which component threw the error. Here we logged the error and also update the state with the errorInfo. It’s totally up to you what you want to do with these two.
Then in the render method, we return this.props.children, which represents whatever component that this error boundary encloses.
Let’s add the final piece of code. Copy the following code and paste it inside the render() method.
const { hasError, errorInfo } = this.state;if (hasError) { return ( <div className="card my-5"> <div className="card-header"> <p> There was an error in loading this page.{' '} <span style= onClick={() => { window.location.reload(); }} > Reload this page </span>{' '} </p> </div> <div className="card-body"> <details className="error-details"> <summary>Click for error details</summary> {errorInfo && errorInfo.componentStack.toString()} </details> </div> </div> );}
In the render() method, we check if hasError is true. If it is, then we render the <div className="card my-5"></div> div, which is our fallback UI. Here, we’re showing information about the error and an option to reload the page. However, in a production environment, it is not advised to show the error to the user. Some other message would be fine.
Let’s now make use of our ErrorBoundary component. Open up App.js, import ErrorBoundary and render ColumnRight inside it.
# import the error boundaryimport ErrorBoundary from './ErrorBoundary'; # wrap the right column with the error boundary<ErrorBoundary> <ColumnRight /></ErrorBoundary>
Now click on Replace string with object. This time, the right column crashes and the fallback UI is displayed. We’re showing a detailed report about where the error happened. We also see the error log in the developer console.
View of error boundary in action. (Large preview)
We can see that everything else remains in place. Click on Get images to confirm that it still works as expected.
At this point, I want to mention that with error boundaries, you can go as granular as you want. This means that you can use as many as necessary. You could even have multiple error boundaries in a single component.
With our current use of Error Boundary, clicking Replace string with object crashes the whole right column. Let’s see how we can improve on this.
Open up src/columns/ColumnRight.js, import ErrorBoundary and render the second <p> block inside it. This is the paragraph that crashes the <ColumnRight /> component.
# import the componentimport ErrorBoundary from '../ErrorBoundary'; # render the erring paragraph inside it.<ErrorBoundary> <p> Clicking this button will replace the stringified object,{' '} <code>{text}</code>, with the original object. This will result in a rendering error. </p></ErrorBoundary>
Now click on Replace string with object.
Improved error boundary usage. (Large preview)
This time, we still have most of the page intact. Only the second paragraph is replaced with our fallback UI.
Click around to make sure everything else is working.
If you’d like to check out my code at this point you should check out the 02-create-eb branch.
In case you’re wondering if this whole error boundary thing is cool, let me show you what I captured on Github a few days ago. Look at the red outline.
Error screen on Github. (Large preview)
I’m not certain about what is happening here, but it sure looks like an error boundary.
Error boundaries are cool, but we don’t want errors in the first place. So, we need to monitor errors as they occur so we can get a better idea of how to fix them. In this section, we’ll learn how Sentry can help us in that regard.
Integrating With Sentry
As I opened the Sentry homepage while writing this line, I was greeted by this message.
Software errors are inevitable. Chaos is not. Sentry provides self-hosted and cloud-based error monitoring that helps all software teams discover, triage, and prioritize errors in real-time.
Sentry is a commercial error reporting service. There are many other companies that provide similar services. My choice of Sentry for this article is because it has a free developer plan that lets me log up to 5,000 events per month across all my projects (pricing docs). An event is a crash report (also known as an exception or error). For this tutorial, we will be making use of the free developer plan.
You can integrate Sentry with a lot of web frameworks. Let’s go over the steps to integrate it into our React project.
Visit the Sentry website and create an account or login if you already have one.
Click on Projects in the left navigation. Then, click on Create Project to start a new project.
Under Choose a platform, select React.
Under Set your default alert settings check Alert me on every new issue.
Give your project a name and click Create project. This will create the project and redirect you to the configuration page.
Let’s install the Sentry browser SDK.
# install Sentryyarn add @sentry/browser
On the configuration page, copy the browser SDK initialization code and paste it into your index.js file.
import * as Sentry from '@Sentry/browser'; # Initialize with Data Source Name (dsn)Sentry.init({ dsn: 'dsn-string' });
And that is enough for Sentry to start sending error alerts. It says in the docs,
Note: On its own, @Sentry/browser will report any uncaught exceptions triggered from your application.
Click on Got it! Take me to the issue stream to proceed to the issues dashboard. Now return to your app in the browser and click on the red buttons to throw some error. You should get email alerts for each error (Sometimes the emails are delayed). Refresh your issues dashboard to see the errors.
Sentry issues dashboard. (Large preview)
The Sentry dashboard provides a lot of information about the error it receives. You can see information such as a graph of the frequency of occurrence of each error event type. You can also assign each error to a team member. There’s a ton of information. Do take some time to explore them to see what is useful to you.
You can click on each issue to see more detailed information about the error event.
Now let’s use Sentry to report errors that are caught by our error boundary. Open ErrorBoundary.js and update the following pieces of code.
# import Sentryimport * as Sentry from '@sentry/browser' # add eventId to statestate = { error: '', eventId: '', // add this to state errorInfo: '', hasError: false,}; # update componentDidCatchcomponentDidCatch(error, errorInfo) { // eslint-disable-next-line no-console console.log({ error, errorInfo }); Sentry.withScope((scope) => { scope.setExtras(errorInfo); const eventId = Sentry.captureException(error); this.setState({ eventId, errorInfo }); });}
With this setup, Sentry sends all errors captured by our error boundary to our issue dashboard using the Sentry.captureException method.
Sentry also gives us a tool to collect user feedback. Let’s add the feedback button as part of our fallback UI inside our error boundary.
Open ErrorBoundary.js and add the feedback button just after the div with a className of card-body. You could place this button anywhere you like.
<div className="card-body"> ...</div> # add the Sentry button<button className="bg-primary text-light" onClick={() => Sentry.showReportDialog({ eventId: this.state.eventId }) }> Report feedback</button>
Now, whenever our fallback UI is rendered, the Report feedback button is displayed. Clicking on this button opens a dialog that the user can fill to provide us with feedback.
Sentry feedback form. (Large preview)
Go ahead and trigger an error, then, fill and submit the feedback form. Now go to your Sentry dashboard and click on User Feedback in the left navigation. You should see your reported feedback.
Sentry feedback dashboard. (Large preview)
Currently, we get alerts for every error, even those that happen during development. This tends to clog our issue stream. Let’s only report errors that happen in production.
On the left navigation click on Settings. Underneath the ORGANIZATION menu, click on Projects. In that list, click on your error boundary project. From Project Settings on the lefthand side, click on Inbound Filters. Look for Filter out events coming from localhost and enable it. This is just one of the numerous configurations that are available in Sentry. I encourage you to have a look around to see what might be useful for your project.
If you’d like to take a look at my code, the corresponding branch in my repo is 03-integrate-sentry.
Conclusion
If you haven’t been using error boundaries in your React app, you should immediately add one at the top level of your app. Also, I encourage you to integrate an error reporting service into your project. We’ve seen how easy it is to get started with Sentry for free.
The finished version of the app is hosted on Netlify.
Related Resources
(ks, ra, yk, il)
Website Design & SEO Delray Beach by DBL07.co
Delray Beach SEO
Via http://www.scpie.org/react-error-handling-and-reporting-with-error-boundary-and-sentry/
source https://scpie.weebly.com/blog/react-error-handling-and-reporting-with-error-boundary-and-sentry
0 notes
Text
React Error Handling And Reporting With Error Boundary And Sentry
About The Author
Awesome frontend developer who loves everything coding. I’m a lover of choral music and I’m working to make it more accessible to the world, one upload at a … More about Chidi …
In this article, we’ll explore the concept of error boundaries in a React application. We’ll work through an example app to see how we can use error boundaries to deliver a better app experience. Finally, we’ll integrate Sentry into our error boundary for realtime error reporting.
In this article, we’ll look at error boundaries in React. We’ll learn what they are and how to use them to deliver a better user experience, even when something breaks in our app. We’ll also learn how to integrate with Sentry for realtime error monitoring.
This tutorial is aimed at React developers of every level who wants to start using error boundaries in their react apps.
The only prerequisite is that you have some familiarity with React class components.
I will be using Yarn as my package manager for this project. You’ll find installation instructions for your specific operating system over here.
What Is An Error Boundary And Why Do We Need It?
A picture, they say, is worth a thousand words. For that reason, I’d like to talk about error boundaries using — you guessed it — pictures.
The illustration below shows the component tree of a simple React app. It has a header, a sidebar on the left, and the main component, all of which is wrapped by a root <App /> component.
Component tree. (Large preview)
On rendering these components, we arrive at something that looks like the picture below.
App render. (Large preview)
In an ideal world, we would expect to see the app rendered this way every single time. But, unfortunately, we live in a non-ideal world. Problems, (bugs), can surface in the frontend, backend, developer’s end, and a thousand other ends. The problem could happen in either of our three components above. When this happens, our beautifully crafted app comes crashing down like a house of cards.
React encourages thinking in terms of components. Composing multiple smaller components is better than having a single giant component. Working this way helps us think about our app in simple units. But aside from that won’t it be nice if we could contain any errors that might happen in any of the components? Why should a failure in a single component bring down the whole house?
In the early days of React, this was very much the case. And worse, sometimes you couldn’t even figure out what the problem was. The React repository on Github has some of such notable errors here, here, and here.
React 16 came to the rescue with the concept of an “error boundary”. The idea is simple. Erect a fence around a component to keep any fire in that component from getting out.
The illustration below shows a component tree with an <ErrorBoundary /> component wrapping the <Main /> component. Note that we could certainly wrap the other components in an error boundary if we wanted. We could even wrap the <App /> component in an error boundary.
Component tree with error boundary. (Large preview)
The red outline in the below illustration represents the error boundary when the app is rendered.
App rendered with error boundary. (Large preview)
As we discussed earlier, this red line keeps any errors that occur in the <Main /> component from spilling out and crashing both the <Header /> and <LeftSideBar /> components. This is why we need an error boundary.
Now that we have a conceptual understanding of an error boundary, let’s now get into the technical aspects.
What Makes A Component An Error Boundary?
As we can see from our component tree, the error boundary itself is a React component. According to the docs,
A class component becomes an error boundary if it defines either (or both) of the lifecycle methods static getDerivedStateFromError() or componentDidCatch().
There are two things to note here. Firstly, only a class component can be used as an error boundary. Even if you’re writing all your components as function, you still have to make use of a class component if you want to have an error boundary. Secondly, it must define either (or both) of static getDerivedStateFromError() or componentDidCatch(). Which one(s) you define depends on what you want to accomplish with your error boundary.
Functions Of An Error Boundary
An error boundary isn’t some dumb wall whose sole purpose in life is to keep a fire in. Error boundaries do actual work. For starters, they catch javascript errors. They can also log those errors, and display a fallback UI. Let’s go over each of \these functions one after the other.
Catch JavaScript Errors
When an error is thrown inside a component, the error boundary is the first line of defense. In our last illustration, if an error occurs while rendering the <Main /> component, the error boundary catches this error and prevents it from spreading outwards.
Logs Those Errors
This is entirely optional. You could catch the error without logging it. It is up to you. You can do whatever you want with the errors thrown. Log them, save them, send them somewhere, show them to your users (you really don’t want to do this). It’s up to you.
But to get access to the errors you have to define the componentDidCatch() lifecycle method.
Render A Fallback UI
This, like logging the errors, is entirely optional. But imagine you had some important guests, and the power supply was to go out. I’m sure you don’t want your guests groping in the dark, so you invent a technology to light up the candles instantaneously. Magical, hmm. Well, your users are important guests, and you want to afford them the best experience in all situations. You can render a fallback UI with static getDerivedStateFromError() after an error has been thrown.
It is important to note that error boundaries do not catch errors for the following situations:
Errors inside event handlers.
Errors in asynchronous code (e.g. setTimeout or requestAnimationFrame callbacks).
Errors that happen when you’re doing some server-side rendering.
Errors are thrown in the error boundary itself (rather than its children). You could have another error boundary catch this error, though.
Working With Error Boundaries
Let’s now dive into our code editor. To follow along, you need to clone the repo. After cloning the repo, check out the 01-initial-setup branch. Once that is done, run the following commands to start the app.
# install project dependencies yarn install # start the server yarn start
When started, the app renders to what we have in the picture below.
Browser view of starter app. (Large preview)
The app currently has a header and two columns. Clicking on Get images in the left column makes an API call to the URL https://picsum.photos/v2/list?page=0&limit=2 and displays two pictures. On the right column, we have some description texts and two buttons.
When we click the Replace string with object button, we’ll replace the text {"function":"I live to crash"}, which has been stringified, with the plain JavaScript object. This will trigger an error as React does not render plain JavaScript objects. This will cause the whole page to crash and go blank. We’ll have to refresh the page to get back our view.
Try it for yourself.
Now refresh the page and click the Invoke event handler button. You’ll see an error screen popup, with a little X at the top right corner. Clicking on it removes the error screen and shows you the rendered page, without any need to refresh. In this case, React still knows what to display even though an error is thrown in the event handler. In a production environment, this error screen won’t show up at all and the page will remain intact. You can only see that something has gone wrong if you look in the developer console.
Event handler error alert. (Large preview)
Note: To run the app in production mode requires that you install serve globally. After installing the server, build the app, and start it with the below command.
# build the app for production yarn build # serve the app from the build folder serve -s build
Having seen how React handles two types of errors, (rendering error, and event handler error), let’s now write an error boundary component.
Create a new ErrorBoundary.js file inside the /src folder and let’s build the error boundary component piece by piece.
import React, { Component } from 'react'; import PropTypes from 'prop-types'; export default class ErrorBoundary extends Component { state = { error: '', errorInfo: '', hasError: false, }; static getDerivedStateFromError(error) { return { hasError: true, error }; } componentDidCatch(error, errorInfo) { // eslint-disable-next-line no-console console.log({ error, errorInfo }); this.setState({ errorInfo }); } render() { // next code block goes here } } ErrorBoundary.propTypes = { children: PropTypes.oneOfType([ PropTypes.object, PropTypes.array ]).isRequired, };
We define both of the two lifecycle methods that make a component an error boundary. Whenever an error occurs inside the error boundary’s child component, both of our lifecycle methods are activated.
static getDerivedStateFromError() receives the error and updates the state variables, error and hasError.
componentDidCatch() receives the error, which represents the error that was thrown and errorInfo which is an object with a componentStack key containing information about which component threw the error. Here we logged the error and also update the state with the errorInfo. It’s totally up to you what you want to do with these two.
Then in the render method, we return this.props.children, which represents whatever component that this error boundary encloses.
Let’s add the final piece of code. Copy the following code and paste it inside the render() method.
const { hasError, errorInfo } = this.state; if (hasError) { return ( <div className="card my-5"> <div className="card-header"> <p> There was an error in loading this page.{' '} <span style= onClick={() => { window.location.reload(); }} > Reload this page </span>{' '} </p> </div> <div className="card-body"> <details className="error-details"> <summary>Click for error details</summary> {errorInfo && errorInfo.componentStack.toString()} </details> </div> </div> ); }
In the render() method, we check if hasError is true. If it is, then we render the <div className="card my-5"></div> div, which is our fallback UI. Here, we’re showing information about the error and an option to reload the page. However, in a production environment, it is not advised to show the error to the user. Some other message would be fine.
Let’s now make use of our ErrorBoundary component. Open up App.js, import ErrorBoundary and render ColumnRight inside it.
# import the error boundary import ErrorBoundary from './ErrorBoundary'; # wrap the right column with the error boundary <ErrorBoundary> <ColumnRight /> </ErrorBoundary>
Now click on Replace string with object. This time, the right column crashes and the fallback UI is displayed. We’re showing a detailed report about where the error happened. We also see the error log in the developer console.
View of error boundary in action. (Large preview)
We can see that everything else remains in place. Click on Get images to confirm that it still works as expected.
At this point, I want to mention that with error boundaries, you can go as granular as you want. This means that you can use as many as necessary. You could even have multiple error boundaries in a single component.
With our current use of Error Boundary, clicking Replace string with object crashes the whole right column. Let’s see how we can improve on this.
Open up src/columns/ColumnRight.js, import ErrorBoundary and render the second <p> block inside it. This is the paragraph that crashes the <ColumnRight /> component.
# import the component import ErrorBoundary from '../ErrorBoundary'; # render the erring paragraph inside it. <ErrorBoundary> <p> Clicking this button will replace the stringified object,{' '} <code>{text}</code>, with the original object. This will result in a rendering error. </p> </ErrorBoundary>
Now click on Replace string with object.
Improved error boundary usage. (Large preview)
This time, we still have most of the page intact. Only the second paragraph is replaced with our fallback UI.
Click around to make sure everything else is working.
If you’d like to check out my code at this point you should check out the 02-create-eb branch.
In case you’re wondering if this whole error boundary thing is cool, let me show you what I captured on Github a few days ago. Look at the red outline.
Error screen on Github. (Large preview)
I’m not certain about what is happening here, but it sure looks like an error boundary.
Error boundaries are cool, but we don’t want errors in the first place. So, we need to monitor errors as they occur so we can get a better idea of how to fix them. In this section, we’ll learn how Sentry can help us in that regard.
Integrating With Sentry
As I opened the Sentry homepage while writing this line, I was greeted by this message.
Software errors are inevitable. Chaos is not. Sentry provides self-hosted and cloud-based error monitoring that helps all software teams discover, triage, and prioritize errors in real-time.
Sentry is a commercial error reporting service. There are many other companies that provide similar services. My choice of Sentry for this article is because it has a free developer plan that lets me log up to 5,000 events per month across all my projects (pricing docs). An event is a crash report (also known as an exception or error). For this tutorial, we will be making use of the free developer plan.
You can integrate Sentry with a lot of web frameworks. Let’s go over the steps to integrate it into our React project.
Visit the Sentry website and create an account or login if you already have one.
Click on Projects in the left navigation. Then, click on Create Project to start a new project.
Under Choose a platform, select React.
Under Set your default alert settings check Alert me on every new issue.
Give your project a name and click Create project. This will create the project and redirect you to the configuration page.
Let’s install the Sentry browser SDK.
# install Sentry yarn add @sentry/browser
On the configuration page, copy the browser SDK initialization code and paste it into your index.js file.
import * as Sentry from '@Sentry/browser'; # Initialize with Data Source Name (dsn) Sentry.init({ dsn: 'dsn-string' });
And that is enough for Sentry to start sending error alerts. It says in the docs,
Note: On its own, @Sentry/browser will report any uncaught exceptions triggered from your application.
Click on Got it! Take me to the issue stream to proceed to the issues dashboard. Now return to your app in the browser and click on the red buttons to throw some error. You should get email alerts for each error (Sometimes the emails are delayed). Refresh your issues dashboard to see the errors.
Sentry issues dashboard. (Large preview)
The Sentry dashboard provides a lot of information about the error it receives. You can see information such as a graph of the frequency of occurrence of each error event type. You can also assign each error to a team member. There’s a ton of information. Do take some time to explore them to see what is useful to you.
You can click on each issue to see more detailed information about the error event.
Now let’s use Sentry to report errors that are caught by our error boundary. Open ErrorBoundary.js and update the following pieces of code.
# import Sentry import * as Sentry from '@sentry/browser' # add eventId to state state = { error: '', eventId: '', // add this to state errorInfo: '', hasError: false, }; # update componentDidCatch componentDidCatch(error, errorInfo) { // eslint-disable-next-line no-console console.log({ error, errorInfo }); Sentry.withScope((scope) => { scope.setExtras(errorInfo); const eventId = Sentry.captureException(error); this.setState({ eventId, errorInfo }); }); }
With this setup, Sentry sends all errors captured by our error boundary to our issue dashboard using the Sentry.captureException method.
Sentry also gives us a tool to collect user feedback. Let’s add the feedback button as part of our fallback UI inside our error boundary.
Open ErrorBoundary.js and add the feedback button just after the div with a className of card-body. You could place this button anywhere you like.
<div className="card-body"> ... </div> # add the Sentry button <button className="bg-primary text-light" onClick={() => Sentry.showReportDialog({ eventId: this.state.eventId }) } > Report feedback </button>
Now, whenever our fallback UI is rendered, the Report feedback button is displayed. Clicking on this button opens a dialog that the user can fill to provide us with feedback.
Sentry feedback form. (Large preview)
Go ahead and trigger an error, then, fill and submit the feedback form. Now go to your Sentry dashboard and click on User Feedback in the left navigation. You should see your reported feedback.
Sentry feedback dashboard. (Large preview)
Currently, we get alerts for every error, even those that happen during development. This tends to clog our issue stream. Let’s only report errors that happen in production.
On the left navigation click on Settings. Underneath the ORGANIZATION menu, click on Projects. In that list, click on your error boundary project. From Project Settings on the lefthand side, click on Inbound Filters. Look for Filter out events coming from localhost and enable it. This is just one of the numerous configurations that are available in Sentry. I encourage you to have a look around to see what might be useful for your project.
If you’d like to take a look at my code, the corresponding branch in my repo is 03-integrate-sentry.
Conclusion
If you haven’t been using error boundaries in your React app, you should immediately add one at the top level of your app. Also, I encourage you to integrate an error reporting service into your project. We’ve seen how easy it is to get started with Sentry for free.
The finished version of the app is hosted on Netlify.
Related Resources
(ks, ra, yk, il)
Website Design & SEO Delray Beach by DBL07.co
Delray Beach SEO
source http://www.scpie.org/react-error-handling-and-reporting-with-error-boundary-and-sentry/ source https://scpie1.blogspot.com/2020/06/react-error-handling-and-reporting-with.html
0 notes