#Esplora Arduino game controller
Explore tagged Tumblr posts
Visit Tumblr Blog
Explore Tumblr blogs with no restrictions, modern design and the best experience.
Last Seen Tumblr Blogs


Fun Fact
The most popular pages on Tumblr are about Minecraft, GIFs, and David J. Peterson.
Text
Esplora Arduino game controller

The ESPLORA Arduino game controller Board is an Arduino-compatible microcontroller board based on the Arduino Leonardo. Unlike previous models, it comes equipped with a variety of built-in sensors for immediate use in interactions.
This guide is perfect for individuals interested in using Arduino, but who don’t want to dive into electronics right away. To learn how to use the ESPLORA Arduino game controller Board in a simple and clear manner, be sure to read the Getting Started with Esplora guide.
The ESPLORA Arduino game controller Board boasts onboard sound and light outputs, as well as multiple input sensors such as a joystick, slider, temperature sensor, accelerometer, microphone, and light sensor. Additionally, it offers the option to enhance its functions through two Tinker-kit input and output connectors and a socket for a color TFT LCD screen.
Similar to the Leonardo board, the ESPLORA Arduino game controller Board also utilizes an Atmega32U4 AVR microcontroller with a 16 MHz crystal oscillator. It features a micro USB connection that can function as a USB client device, such as a mouse or keyboard. Additionally, there is a reset push button located in the upper left corner of the board for restarting purposes.
There exist four indicators, each displaying a different status.
The green indicator shows if the board is currently being powered.
The L [yellow] connects directly to pin 13 on the micro-controller for easy accessibility.
The [yellow] LED indicates data being transmitted or received through the USB connection.
Within the board lies all the necessary components to support the microcontroller. To begin, just connect it to a computer using a USB cable. The ESPLORA Arduino game controller Board is also equipped with built-in USB communication, allowing it to function as a mouse or keyboard when connected to a computer. It also offers a virtual serial/COM port (CDC). This alters the behavior of the board, which is further explained on our getting started page. On this page, you can find all the instructions for configuring your board and utilizing the Arduino Software (IDE) for coding and electronics experimentation.
The transfer of data, both in and out.
The ESPLORA Arduino game controller Board features a classic gamepad design, including an analog joystick on the left and four push buttons on the right. It also comes equipped with several onboard inputs and outputs:
The analog joystick features a center push-button and two axes, designated as X and Y. There is also a central pushbutton for added functionality.
Arranged in a diamond formation are 4 push-buttons.
The slider for the linear potentiometer is located towards the bottom of the board.
A tool to capture the volume (amplitude) of the surrounding environment.
A sensor that detects light to measure brightness.
The temperature sensor measures the surrounding temperature.
A three-axis accelerometer detects the orientation of the board with respect to gravity, along the X, Y, and Z axes.
The buzzer has the ability to generate square-wave tones.
The RGB LED features Red, Green, and Blue elements that allow for color mixing and a bright display.
The TinkerKit Inputs allow for easy connection between the sensor modules and 3-pin connectors.
The TinkerKit Outputs allow for easy connection of the TinkerKit actuator modules via the 3-pin connectors.
The TFT display connector can be used for a color LCD screen, SD card, or any other devices utilizing the SPI protocol.
To fully utilize all available sensors, the board employs an analog multiplexer. This way, multiple input channels (excluding the 3-axis accelerometer) can share a single analog input of the microcontroller. Selecting which channel to read is done through four additional pins on the microcontroller.
Communication is essential in any relationship, whether it be personal or professional. It plays a crucial role in maintaining strong connections and fostering understanding between individuals. Effective communication allows for open and honest dialogue, facilitating problem-solving and building trust. Without good communication, misunderstandings can occur, leading to conflicts and strained relationships. Therefore, it is important to prioritize effective communication in every aspect of our lives.
The ESPLORA Arduino game controller Board for the Leonardo offers various features for connecting with a computer, another Arduino, or different micro-controllers. The ATmega32U4 enables serial (CDC) communication through USB and is recognized as a virtual com port on the computer. It also functions as a full speed USB 2.0 device and can be used with standard USB COM drivers. A .inf file is needed for Windows.
The Arduino software comes equipped with a serial monitor for easy transmission of text data to and from the board. Whenever data is being sent via the USB connection to the computer, the RX and TX LEDs will light up on the board. Additionally, the ATmega32U4 has SPI capability accessible through the SPI library. In addition, the Esplora can act as a standard keyboard and mouse, allowing you to use programming to manage these input devices via the Keyboard and Mouse libraries.
The act of creating computer software, also known as programming, involves writing code using various languages and tools. This process requires a combination of problem-solving skills, critical thinking and creativity. Programmers must constantly learn new techniques and adapt to ever-changing technology in order to produce high-quality programs.
To start using the Esplora with your Arduino software (download), simply choose “Esplora” from the Tools > Board menu. For more information, refer to the getting started page. The ATmega32U4 on the Esplora comes pre-loaded with a boot-loader, enabling you to upload new code without an external hardware programmer.
The AVR109 protocol is the chosen method of communication. To avoid using the bootloader, you can program the microcontroller through the ICSP header. Additional instructions are available for reference.
A dedicated library for the Esplora simplifies writing sketches, with methods available for reading sensors and controlling onboard outputs. These high-level methods also perform pre-processing of data, such as converting temperature readings to degrees Fahrenheit or Celsius. Additionally, the library allows easy access to outputs like the RGB LED. For further information and examples, please refer to the Esplora library reference page.
The automatic reset and bootloader activation are key components in the software’s functioning.
Rather than relying on the physical reset button, the Esplora utilizes a software-based reset triggered by opening and then closing the virtual serial/COM port (CDC) at 1200 baud. This initiates a processor reset, temporarily cutting off the USB connection to the computer and causing the virtual port to disappear. The boot-loader remains active for approximately 8 seconds before it can also be activated by pressing the reset button on the Esplora.
Please be aware that upon initial power up, the board will launch the user sketch instead of the boot-loader, if available. Due to the specific reset process of the Esplora, it is most effective to allow the Arduino software to attempt a reset before uploading, especially if you typically press the reset button before uploading on other boards. However, in the event that the software is unable to reset the board, you can manually initiate the boot-loader by pressing the reset button on the board.
The USB port is equipped with overcurrent protection to prevent any potential damage.
The ESPLORA Arduino game controller Board comes equipped with a re-settable poly-fuse to safeguard your computer’s USB ports against shorts and over-current. While most computers have built-in protection, the fuse adds an additional level of security. In the case of a short or overload exceeding 500 mA, the fuse will disconnect the connection until the issue is resolved.
Regarding the appearance of this object, its external features will be discussed.
The ESPLORA Arduino game controller Board PCB has a maximum size of 6.5 inches in length and 2.4 inches in width. The USB and TinkerKit connectors extend beyond the width dimension. Additionally, there are four screw holes that allow for attachment to a surface or case.
1 note
·
View note
Text
An Overlooked Arduino
This is a guest blog post from Andrew Shepherd. Andrew has been studying electronics in earnest for over a decade and loves working with his mind and hands. He specializes in analog electronics, but his interests are eclectic and span seemingly unrelated areas.
The Arduino Leonardo came out a few years ago but somehow flew under the radar to most people. There are rather few blogs and tutorials written about it around the web. Older boards like the Duemilanove, Arduino Uno and their clones are so ubiquitous that they are used in most projects where a basic microcontroller is needed. Later models like the Due and Yun fit the bill for more complicated computational needs. The Leonardo sits between these two extremes. It is more useful and more powerful than a standard Uno with the ATmega328 chip. It uses a different chip (ATmega32u4), which has a built in USB interface among other things. The cost is nearly the same as a ATmega328 model Arduino (like the Uno or Duemilanove), but is more capable.


The Arduino Uno R3 and Arduino Leonardo
What’s Better?
More analog pins – the Leonardo has 12. A0-A5 are dedicated analog pins, and A6-A11 are on digital pins. Just like the Uno, the input resolution is 10 bits.
All of the digital and analog pins can be used as digital inputs and outputs. There are also seven PWM pins instead of six, as with the Uno.
Since their is no external USB interface chip, the ATmega32u4 can directly talk to your computer. In other words, it can easily behave like a mouse or a keyboard. This makes for some interesting applications for hardware-software automation or video game controllers. There are handy libraries available for mice and keyboards.
Leonardo in Action
A very common way to use the Leonardo is to create a circuit that can press keys on your keyboard – for instance if you wanted some piece of hardware to trigger a repeatable event on screen. Maybe you want to advance slides in a PowerPoint presentation by pressing one of the arrow keys; it would be ideal to press the key by a serial command instead of a servo or solenoid pushing it. Any device using the ATmega32u4 chip and the keyboard library makes this a simple task.
A slightly more sophisticated use of this feature would be to make a controller or some sort of haptic device to control a p5 script or even a video game. There will not likely be a shortage of pins, since there are 20 available and 12 of those can be analog. You can experiment with new types of user interfaces and not worry as much about getting it to talk to your computer. In fact, the Arduino Esplora is basically a Leonardo in the form of a controller designed exactly for this purpose.
Other Devices with the ATmega32u4 Chip

Arduino Micro (or SparkFun Pro Micro) - SparkFun has a 5V and a 3.3V version.

SparkFun Fio - Similar to the Micro/Pro Micro but is LiPo battery-compatible and is even capable of charging the battery when plugged into a USB port. It also has an XBee socket for wireless capability in a small package.

Qduino Mini - Like the Fio, it can charge your battery, but it also has RGB LEDs and a library for a “battery fuel gauge.” Naturally, it’s slightly smaller than the Fio because it doesn’t have the XBee socket.

Arduino Esplora - It’s similar to a Leonardo but in the form of a video game controller. It has built-in buttons, a joystick and some other built-in hardware.

Arduino Yun - Basically Arduino’s attempt at a Raspberry Pi since it runs Linux. The ATmega32u4 is most likely ancillary and used for its serial communication capability.

LilyPad USB - Probably the smallest device listed here. Designed specifically for fabrics and wearable devices. They sell a 3.3V version so it can run from a single cell 3.8V LiPo battery.
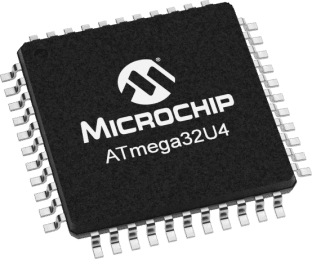
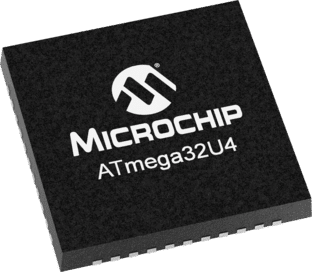
Two versions of the ATmega32u4 in non-PTH form.
Unfortunately, the ATmega32u4 chip does not come in a thru-hole package unlike the ATmega328. This might be a problem if you ever want to “roll your own” Arduino for size or cost purposes. However, the price for a Leonardo or similar device is comparable to that of an Uno, and the size can be made quite small with the Micro or LilyPad. In this regard, the inability to easily roll your own is almost a non-issue.
Caveats
Because the Leonardo has a different chip than the Uno, there will be some slight differences when it comes to compatibility. Certain shields and libraries might have discrepancies when used on the Leonardo. Usually, pre-existing products and libraries make sure to mention somewhere if they can be used or not. If you are planning on making your own libraries or shields however, be aware of the slight differences as you plan your design.
comments | comment feed
0 notes