#FRM file in MySQL
Explore tagged Tumblr posts
Visit Tumblr Blog
Explore Tumblr blogs with no restrictions, modern design and the best experience.
Last Seen Tumblr Blogs


Fun Fact
Mobile US users spent an average of 115.8 minutes on Tumblr app monthly.
Text
What is FRM file in MySQL
The.frm file in a MySQL database stores table metadata for a specific table. A file with the extension.frm stores the structure of a table created in MySQL, including column names, data types, indexes, and other table-related information.
Read Blog: https://techqy.com/how-to-access-or-read-frm-file-explain-frm-file-in-mysql/
Each.frm file corresponds to a unique MySQL table and resides in the database directory beneath the schema (database) folder.
For example, if the "company" database contains a "employees" table, the corresponding.frm file will be named "employees.frm" and stored in the "company" database folder.
3 notes
·
View notes
Text
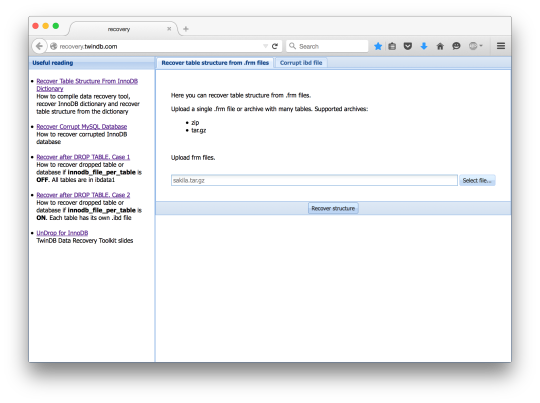
Recover Table Structure From InnoDB Dictionary
When a table gets dropped, MySQL removes the respective .frm file. This post explains how to recover the table structure if the table was dropped. You need the table structure to recover a dropped table from the InnoDB tablespace. The B+tree structure of the InnoDB index doesn’t contain any information about field types. MySQL needs to know that in order to access records of the InnoDB table. Normally, MySQL gets the table structure from the .frm file. But when MySQL drops a table the respective frm file removed too. Fortunately, there’s one more place where MySQL keeps the table structure. It’s the InnoDB dictionary. The InnoDB dictionary is a set of tables where InnoDB keeps information about the tables. I reviewed them in detail in a separate InnoDB Dictionary post earlier. After the DROP, InnoDB deletes records related to the dropped table from the dictionary. So, we need to recover deleted records from the dictionary and then get the table structure. Compiling Data Recovery Tool First, we need to get the source code. The code is hosted on GitHub. git clone https://github.com/twindb/undrop-for-innodb.git To compile it, we need gcc, bison and flex. Install these packages with a package manager (yum/apt/etc). Then, time to compile. # make cc -g -O3 -I./include -c stream_parser.c cc -g -O3 -I./include -pthread -lm stream_parser.o -o stream_parser flex sql_parser.l bison -o sql_parser.c sql_parser.y sql_parser.y: conflicts: 6 shift/reduce cc -g -O3 -I./include -c sql_parser.c cc -g -O3 -I./include -c c_parser.c cc -g -O3 -I./include -c tables_dict.c cc -g -O3 -I./include -c print_data.c cc -g -O3 -I./include -c check_data.c cc -g -O3 -I./include sql_parser.o c_parser.o tables_dict.o print_data.o check_data.o -o c_parser -pthread -lm cc -g -O3 -I./include -o innochecksum_changer innochecksum.c Recover The InnoDB Dictionary Now, let’s create dictionary tables in the sakila_recovered database. The data recovery tool comes with the structure of the dictionary tables. # cat dictionary/SYS_* | mysql sakila_recovered The dictionary is stored in the ibdata1 file. So, let’s parse it. ./stream_parser -f /var/lib/mysql/ibdata1 ... Size to process: 79691776 (76.000 MiB) Worker(0): 84.13% done. 2014-09-03 16:31:20 ETA(in 00:00:00). Processing speed: 7.984 MiB/sec Worker(2): 84.21% done. 2014-09-03 16:31:20 ETA(in 00:00:00). Processing speed: 8.000 MiB/sec Worker(1): 84.21% done. 2014-09-03 16:31:21 ETA(in 00:00:00). Processing speed: 4.000 MiB/sec All workers finished in 2 sec Now, we need to extract the dictionary records from the InnoDB pages. Let’s create a directory for the table dumps. # mkdir -p dumps/default And now we can generate table dumps and LOAD INFILE commands to load the dumps. We also need to specify the -D option to the c_parser because the records we need were deleted from the dictionary when the table was dropped. SYS_TABLES # ./c_parser -4Df pages-ibdata1/FIL_PAGE_INDEX/0000000000000001.page -t dictionary/SYS_TABLES.sql > dumps/default/SYS_TABLES 2> dumps/default/SYS_TABLES.sql SYS_INDEXES # ./c_parser -4Df pages-ibdata1/FIL_PAGE_INDEX/0000000000000003.page -t dictionary/SYS_INDEXES.sql > dumps/default/SYS_INDEXES 2> dumps/default/SYS_INDEXES.sql SYS_COLUMNS # ./c_parser -4Df pages-ibdata1/FIL_PAGE_INDEX/0000000000000002.page -t dictionary/SYS_COLUMNS.sql > dumps/default/SYS_COLUMNS 2> dumps/default/SYS_COLUMNS.sql SYS_FIELDS # ./c_parser -4Df pages-ibdata1/FIL_PAGE_INDEX/0000000000000004.page -t dictionary/SYS_FIELDS.sql > dumps/default/SYS_FIELDS 2> dumps/default/SYS_FIELDS.sql With the generated LOAD INFILE commands it’s easy to load the dumps. # cat dumps/default/*.sql | mysql sakila_recovered Now we have the InnoDB dictionary loaded into normal InnoDB tables. Compiling sys_parser ys_parser is a tool that reads the dictionary from tables stored in MySQL and generates the CREATE TABLE structure for a table. To compile it we need MySQL libraries and development files. Depending on distribution, they may be in -devel or -dev package. On RedHat based systems, you can check it with the command yum provides “*/mysql_config” . On my server it was the mysql-community-devel package. If all necessary packages are installed, the compilation boils down to a simple command: # make sys_parser /usr/bin/mysql_config cc `mysql_config --cflags` `mysql_config --libs` -o sys_parser sys_parser.c Recover Table Structure Now sys_parser can do its magic. Just run it to get the CREATE statement in the standard output. # ./sys_parser sys_parser [-h ] [-u ] [-p ] [-d ] databases/table It will use “root” as the username to connect to MySQL, “querty” – as the password. The dictionary is stored in SYS_* tables in the sakila_recovered database. What we want to recover is sakila.actor. InnoDB uses a slash “/” as a separator between database name and table name, so does sys_parser. # ./sys_parser -u root -p qwerty -d sakila_recovered sakila/actor CREATE TABLE `actor`( `actor_id` SMALLINT UNSIGNED NOT NULL, `first_name` VARCHAR(45) CHARACTER SET 'utf8' COLLATE 'utf8_general_ci' NOT NULL, `last_name` VARCHAR(45) CHARACTER SET 'utf8' COLLATE 'utf8_general_ci' NOT NULL, `last_update` TIMESTAMP NOT NULL, PRIMARY KEY (`actor_id`) ) ENGINE=InnoDB; # ./sys_parser -u root -p qwerty -d sakila_recovered sakila/customer CREATE TABLE `customer`( `customer_id` SMALLINT UNSIGNED NOT NULL, `store_id` TINYINT UNSIGNED NOT NULL, `first_name` VARCHAR(45) CHARACTER SET 'utf8' COLLATE 'utf8_general_ci' NOT NULL, `last_name` VARCHAR(45) CHARACTER SET 'utf8' COLLATE 'utf8_general_ci' NOT NULL, `email` VARCHAR(50) CHARACTER SET 'utf8' COLLATE 'utf8_general_ci', `address_id` SMALLINT UNSIGNED NOT NULL, `active` TINYINT NOT NULL, `create_date` DATETIME NOT NULL, `last_update` TIMESTAMP NOT NULL, PRIMARY KEY (`customer_id`) ) ENGINE=InnoDB; There are few caveats though. InnoDB doesn’t store all information you can find in the .frm file. For example, if a field is AUTO_INCREMENT, the InnoDB dictionary knows nothing about it. Therefore, sys_parser won’t recover that property. If there were any field or table level comments, they’ll be lost. sys_parser generates the table structure eligible for further data recovery. It could but it doesn’t recover secondary indexes, or foreign keys. InnoDB stores the DECIMAL type as a binary string. It doesn’t store the precision of a DECIMAL field. So, that information will be lost. For example, table payment uses DECIMAL to store money. # ./sys_parser -u root -p qwerty -d sakila_recovered sakila/payment CREATE TABLE `payment`( `payment_id` SMALLINT UNSIGNED NOT NULL, `customer_id` SMALLINT UNSIGNED NOT NULL, `staff_id` TINYINT UNSIGNED NOT NULL, `rental_id` INT, `amount` DECIMAL(6,0) NOT NULL, `payment_date` DATETIME NOT NULL, `last_update` TIMESTAMP NOT NULL, PRIMARY KEY (`payment_id`) ) ENGINE=InnoDB; Fortunately, Oracle is planning to extend the InnoDB dictionary and finally get rid of .frm files. I salute that decision, having the structure in two places leads to inconsistencies. Image credit: m.khajoo https://twindb.com/recover-table-structure-from-innodb-dictionary-recover-table-structure-from-innodb-dictionary/
1 note
·
View note
Text
Portable SysInfoTools MySQL Database Recovery is a revolutionary solution to retrieve MySQL database content with maximum accuracy. It can successfully repair MySQL database and restore database objects like tables, keys, table properties, data types, views, triggers, etc. This MySQL repair tool contains an intuitive user interface. Even a novice user can use it without any prior technical knowledge. Featured Features: Repair of InnoDB and MyISAM tablesThe advanced MySQL recovery tool can repair both tables i.e. InnoDB and MyISAM used in MySQL. The InnoDB table contains FRM, IBDATA, and IDB files. And the MyISAM table contains FRM, MYD and MYI files. Recover MySQL databaseThrough this software, you can successfully repair MySQL database and recover table properties, relationship constraints, and keys from MyISAM and InnoDB storage systems. Support database created on LinuxMySQL Repair Tool supports database files created on Linux systems. You need to bring the database folders and other important files from a Linux system to a Windows system to perform MySQL data recovery. Smart data previewOnce the database file is scanned successfully, you can check the preview of the database objects that you can actually recover. The list of database objects is displayed in a tree structure mode and the content is displayed separately in the list control window. Save as databaseThere are two saving modes in this software. You can save all the recovered data in a fresh new MySQL database. You only need to provide information such as server name, port, username and password. Also, you can test the connection before saving. save as scriptIn addition to saving to a new MySQL database, you can save the recovered data in the form of MySQL scripts. You can define a location where you want to save the folder containing the scripts. Interactive user interfaceMySQL Recovery software contains a simple and self-explanatory user interface that does not require prior technical knowledge. Any technical or non-technical user can use this software with ease. Support and compatibilityIt supports database created by all major MySQL versions like 3.x, 4.x, 5.x, 6.x etc. And being a Windows system utility, it works smoothly on Win XP, Vista, 7, 8, and all other versions including the latest Win 11. Windows 11, 10, 8.1, 7, Server
0 notes
Text
Up and Running Again
Up and Running Again
For the past day now I have been trying to restore all my websites due to my MySQL installation going screwing, the longest part of this was finding away of getting the data structure out of the .frm files. After much searching I managed to find several website with ways of doing it but want to put the details here so it is easier to find.
Step 1: Don’t Panic, Don’t Get Stressed
It’s easy…
View On WordPress
0 notes
Link
In this article, four methods will be shown on how to export MySQL data to a CSV file. The first method will explain the exporting process by using the SELECT INTO … OUTFILE statement. Next, the CSV Engine will be used to achieve the same. After that, the mysqldump client utility will be used and in the end, the Export to CSV feature from the ApexSQL Database Power Tools for VS Code extension will be used to export MySQL data.
Throughout this article, the following code will be used as an example:
CREATE DATABASE `addresses` CREATE TABLE `location` ( `address_id` int(11) NOT NULL AUTO_INCREMENT, `address` varchar(50) NOT NULL, `address2` varchar(50) DEFAULT NULL, PRIMARY KEY (`address_id`) ) ENGINE=InnoDB DEFAULT CHARSET=latin1 INSERT INTO location VALUES (NULL, '1586 Guaruj Place', '47 MySakila Drive'), (NULL, '934 San Felipe de Puerto Plata Street', NULL), (NULL, '360 Toulouse Parkway', '270, Toulon Boulevard');
Using SELECT INTO … OUTFILE to export MySQL data
One of the commonly used export methods is SELECT INTO … OUTFILE. To export MySQL data to a CSV file format simply execute the following code:
SELECT address, address2, address_id FROM location INTO OUTFILE 'C:/ProgramData/MySQL/MySQL Server 8.0/Uploads/location.csv';
This method will not be explained in detail since it is well covered in the How to export MySQL data to CSV article.
Using the CSV Engine to export MySQL data
MySQL supports the CSV storage engine. This engine stores data in text files in comma-separated values format.
To export MySQL data using this method, simply change the engine of a table to CSV engine by executing the following command:
ALTER TABLE location ENGINE=CSV;
When executing the above code, the following message may appear:
The storage engine for the table doesn’t support nullable columns
All columns in a table that are created by the CSV storage engine must have NOT NULL attribute. So let’s alter the location table and change the attribute of the column, in our case that is the address2 column.
When executing the ALTER statement for the address2 column:
ALTER TABLE location MODIFY COLUMN address2 varchar(50) NOT NULL;
The following message may appear:
Data truncated for column ‘address2’ at row 2
This message appears because NULL already exists in the column address2:
Let’s fix that by adding some value in that field and try again to alter the column.
Execute the following code to update the address2 column:
UPDATE `addresses`.`location` SET `address2` = "Test" WHERE `address_id`=2;
Now, let’s try again to execute the ALTER statement:
ALTER TABLE location MODIFY COLUMN address2 varchar(50) NOT NULL;
The address2 columns will successfully be modified:
After the column has been successfully changed, let’s execute the ALTER statement for changing the storage engine and see what happens:
ALTER TABLE location ENGINE=CSV;
A new problem appears:
The used table type doesn’t support AUTO_INCREMENT columns
As can be assumed, the CSV engine does not support columns with the AUTO_INCREMENT attribute. Execute the code below to remove the AUTO_INCREMENT attribute from the address_id column:
ALTER TABLE location MODIFY address_id INT NOT NULL;
Now, when the AUTO_INCREMENT attribute is removed, try again to change the storage engine:
ALTER TABLE location ENGINE=CSV;
This time a new message appears:
Too many keys specified; max 0 keys allowed
This message is telling us that the CSV storage engine does not support indexes (indexing). In our example, to resolve this problem, the PRIMARY KEY attribute needs to be removed from the location table by executing the following code:
ALTER TABLE location DROP PRIMARY KEY;
Execute the code for changing the table storage engine one more time:
Finally, we managed to successful change (alter) the storage engine:
Command executed successfully. 3 row(s) affected.
After the table engine is changed, three files will be created (CSV, CSM, and FRM) in the data directory:
All data will be placed in the CSV file (location.CSV):
Note: When exporting MySQL data to CSV using the CSV storage engine, it is better to use a copy of the table and convert it to CSV to avoid corrupting the original table.
Now, let’s create a table without indexes:
CREATE TABLE csv_location AS SELECT * FROM location LIMIT 0;
Then change the storage engine of the newly created table to CSV:
ALTER TABLE csv_location ENGINE=CSV;
And then load data into the newly created table from the location table:
INSERT INTO csv_location SELECT * FROM location;
Using the mysqldump client utility to export MySQL data
Another way to export MySQL data is to use the mysqldump client utility. Open the Windows command-line interface (CLI) not MySQL CLI. In case the MySQL CLI is opened, type and execute the mysqldump command, and the following error message may appear:
ERROR 1064 (42000): You have an error in your SQL syntax; check the manual that corresponds to your MySQL server version for the right syntax to use near ‘mysqldump’ at line 1
This happens because mysqldump is an executable command, not MySQL syntax command.
Let’s switch to Windows CLI and execute the mysqldump command. As can be seen from the image below, a new problem appears:
‘mysqldump’ is not recognized as an internal or external command, operable program or batch file.
To resolve this, navigate to the directory where is the mysqldump.exe is located:
cd C:\Program Files\MySQL\MySQL Server 8.0\bin
Now, execute the mysqledump.exe command. If the results are the same as from the image below, it means that mysqldump works correctly:
To export MySQL data execute the following code:
mysqldump -u <username> -p -T </path/to/directory> <database>
The -u is used as a flag after which you need to specify a username that will be connected to MySQL server.
The -p is used as a flag for a password for the user that wants to connect to the MySQL server.
The -T flag create a tab-separated text file for each table to a given path (create .sql and .txt files). This only works if mysqldump is run on the same machine as the MySQL server.
Note that specified path (directory) must be writable by the user MySQL server runs as, otherwise, the following error may appear when exporting data:
mysqldump: Got error: 1: Can’t create/write to file ‘ H:/ApexSQL/Test/location.txt (Errcode: 13) when executing ‘SELECT INTO OUTFILE’
By executing the following command:
mysqldump -u root -p -T H:/ApexSQL/Test addresses
All tables from the specified MySQL database (addresses) will be exported in the directory that you named. Every table will have two files; one is .sql and another is .txt:
The .sql files will contain a table structure (SQL for creating a table):
And the .txt files will contain data from a table:
If you want to export MySQL tables only as .txt files, then add -t flag to mysqldump command:
mysqldump -u root -p -t -T H:/ApexSQL/Test addresses
This will create a .sql file, but it will be empty:
In case, that want to export just one table from a MySQL database rather than all tables, in the mysqldump command add a name of the table that want to export next to a specified MySQL database:
mysqldump -u root -p -t -T H:/ApexSQL/Test addresses location
With -T flag in mysqldump command, exported data in the files will be separated with tab delimiter. A delimiter can be changed by using the –fields-terminated-by= flag.
In the example below comma (,) is used as value separator:
mysqldump -u root -p -t -T H:/ApexSQL/Test addresses location –fields-terminated-by=,
With the –fields-enclosed-by= flag it can be put quotes around all values (fields):
mysqldump -u root -p -t -T H:/ApexSQL/Test addresses location –fields-enclosed-by=” –fields-terminated-by=,
When executing the above code, the following error may appear:
mysqldump: Got error: 1083: Field separator argument is not what is expected; check the manual when executing ‘SELECT INTO OUTFILE’
To fix that, add \ in front of the quote “ under the –fields-enclosed-by flag:
mysqldump -u root -p -t -T H:/ApexSQL/Test addresses location –fields-enclosed-by=\” –fields-terminated-by=,
The exported MySQL data will look like this:
Using a third-party extension to export MySQL data
In this VS Code extension, execute a query from which results set wants to be exported:
In the top right corner of the result grid, click the Export to CSV button and in the Save As dialog enter a name for a CSV file, and choose a location where data should be saved:
Just like that, in a few clicks, data from the result set will be exported to CSV:
0 notes
Quote
The discussion in this section describes how to repair a Crashed MyISAM table by using myisamchk on MyISAM tables (extensions .MYI and .MYD). Before moving towards the solution we must know about possible reasons for the corrupted MyISAM table.MyISAM Tables are corrupted due to a number of reasons and some of these are:frm is locked and cannot be changedUnable to locate file tbl_name.MYI (Errcode: nnn)File ends unexpectedlyRecord file crashedReceived error nnn from table handlerFor error stating ‘nnn’, you can get more information by running the command perror nnn, where nnn describes the error number. A few perror numbers and their explanations are:shell> perror 126 127 132 134 135 136 141 144 145MySQL error code 126 = Index file is crashedMySQL error code 127 = Record-file is crashedMySQL error code 132 = Old database fileMySQL error code 134 = Record was already deleted (or record file crashed)MySQL error code 135 = No more room in record fileMySQL error code 136 = No more room in index fileMySQL error code 141 = Duplicate unique key or constraint on write or updateMySQL error code 144 = Table is crashed and last repair failedMySQL error code 145 = Table was marked as crashed and should be repairedAbove listed errors in MyISAM Tables can be fixed or repaired by using myisamchk repair method, with the exception of Perror 135 and 136 that cannot be fixed with this method. Such errors are caused due to space issues (no more room in record/index file) and are resolved by command Alter Tablespace, which increases maximum and average row length.ALTER TABLE tbl_name MAX_ROWS=xxx AVG_ROW_LENGTH=yyy;For errors listed in the table, use myisamchk or a MySQL Recovery Software to detect and fix MySQL database issues.Methods to Repair a Crashed MyISAM TablesThe following repair methods are involved:Easy safe repair.Difficult repair.Very difficult repair.To decide the type of repair process, you need to check MyISAM tables by using the following steps:Run the command – myisamchk *.MYI or myisamchk -e *.MYI Suppress unnecessary information by suffixing –s (silent) option.If the server MySQLd is shut down, use –update-state option to mark the table as checked.You have to repair only those MyISAM tables for which myisamchk announces an error and starts from ‘Easy Safe Repair’ ’. However, if myisamchk lists unexpected errors (out of memory errors) or it crashes, try to repair the Tables by using difficult repair or a very difficult repair process.Related PostsNote: Before starting the repair process, take a backup of the MySQL database to safeguard against data loss in case the repair process doesn’t work.1. Easy Safe Repair.Start with quick recovery mode or –r –q commands. Type the following command to repair the index file. It doesn’t make any changes to the data file.myisamchk -r -q tbl_name (-r -q means “quick recovery mode”)Verify the database to check if the file contains everything and ‘delete links’ point to correct locations within the data file. If it works, an easy repair process has fixed the Tables.Repeat the process to repair the next Table.You can also repair MyISAM table using an alternative method:Use myisamchk -r tbl_name (-r means “recovery mode”). This command helps remove incorrect rows and deleted rows from the data file and reconstructs the index file.If you found that the above step fails, then use safe recovery mode – myisamchk –safe-recover tbl_name.Safe recovery mode is a slower method and uses an old recovery method to handle a few cases that regular recovery mode cannot.Note: You can accelerate MyISAM table repair operation by setting the values of sort_buffer_size and key_buffer_size variables each to 25% of the available memory.2. Difficult Repair.Difficult Repair is required only if the first 16KB block in the index file is destroyed, contains incorrect information, or index file is missing. Then it is necessary to create a new index file with the help of following steps:Change the location of the data file and move it to a safe place.Use the table description file to create new data and index files:1shell> Mysql db_nameThis new data is empty.123mysql> SET autocommit=1;mysql> TRUNCATE TABLE tbl_name;mysql> quitCopy and not move the content of the old data file back onto the newly created data file. (Retain a copy of old data in case something goes wrong).Note: In the case of file replication, stop the process prior to performing the above steps, as it includes file system operations that are not logged by MySQL.After successfully completion of process verify it by using myisamchk -r -q and if it works, then your MyISAM table is repaired. If not, repaired then follow the next method.3. Very Difficult Repair.Very difficult repair is required method in case the .frm description file has crashed. Normally, this file doesn’t crash, as the file is not changed after the table is created.The best option is to restore the description file from a backup. You can also restore the index file and go back to Easy Repair. But what if the database backup is not available. In the absence of a backup file, reconstruct the replica of the Table and create its copy in another database. Remove the new data file and then move the .frm description and .MYI index files from the other database to the crashed database. The newly constructed database provides new descriptions and index files but doesn’t contain .MYD data file.To reconstruct a new database, go back to Easy Repair and try to build the index file. It is the last manual method to repair MyISAM tables and hopefully, this should work.Sometimes these above manual methods don’t work. In such a condition you have relied on a Professional Tool.ConclusionThis blog post highlights MyISAM errors and their probable causes. You can resolve a few errors by increasing the maximum and average row length but again, this is not the solution for all errors. The repair option requires changing the location of the database directory, checking the permissions of the Table file, and shutting down of MySQL server. Repairing with software eliminates the database-unavailability problem.
http://www.globalone.com.np/2019/12/how-to-repair-crashed-myisam-table.html
0 notes
Text
Percona XtraBackup Point-In-Time Recovery for the Single Database
Recovering to a particular time in the past is called Point-In-Time Recovery (PITR). With PITR you can rollback unwanted DELETE without WHERE clause or any other harmful command. PITR with Percona XtraBackup is pretty straightforward and perfectly described in the user manual. You need to restore the data from the backup, then apply all binary logs created or updated after the backup was taken, but skip harmful event(s). However, if your data set is large you may want to recover only the affected database or table. This is possible but you need to be smart when filtering events from the binary log. In this post, I will show how to perform such a partial recovery using Percona XtraBackup, mysql command-line client, and mysqlbinlog programs only. There is an alternative approach that involves creating a fake source server, that is described in MySQL Point in Time Recovery the Right Way. You may consider it, especially if you need to apply changes to a single table. Percona XtraBackup Point-In-Time Recovery For our example we will create data first, then run DROP and DELETE commands on two different tables. Then we will rollback these commands. First, let’s assume we have a server with two databases: test and sbtest. We are using GTIDs and row-based binary log format. We also run the server with the option innodb_file_per_table=1 and all our InnoDB tables use individual tablespaces. Otherwise, the individual restore method would not work.mysql> show tables from sbtest; +------------------+ | Tables_in_sbtest | +------------------+ | sbtest1 | | sbtest2 | | sbtest3 | | sbtest4 | | sbtest5 | | sbtest6 | | sbtest7 | | sbtest8 | +------------------+ 8 rows in set (0.00 sec) mysql> show tables from test; +----------------+ | Tables_in_test | +----------------+ | bar | | baz | | foo | +----------------+ 3 rows in set (0.00 sec)We will experiment with tables foo and bar. We assume that at the time of our first backup, each of the tables contained five rows. Tables in the database sbtest also contain data, but it does not really matter for our experiment.mysql> select count(*) from foo; +----------+ | count(*) | +----------+ | 5 | +----------+ 1 row in set (0.00 sec) mysql> select count(*) from bar; +----------+ | count(*) | +----------+ | 5 | +----------+ 1 row in set (0.00 sec) mysql> select count(*) from baz; +----------+ | count(*) | +----------+ | 0 | +----------+ 1 row in set (0.00 sec)Since we want to restore individual tables, we need to make a preparation before taking a backup: store database structure. We will do it with help of the mysqldump command. In this example, I store structure per database to make partial PITR easier, but you are free to use the option --all-databases.mysqldump --no-data --set-gtid-purged=OFF --triggers --routines --events test > test_structure.sql mysqldump --no-data --set-gtid-purged=OFF --triggers --routines --events sbtest > sbtest_structure.sqlThen we are ready to take the backup.xtrabackup --parallel=8 --target-dir=./full_backup --backupI am using the option --parallel to speed up the backup process. Now let’s do some testing. First, let’s update rows in the table foo.mysql> update foo set f1=f1*2; Query OK, 5 rows affected (0.01 sec) Rows matched: 5 Changed: 5 Warnings: 0 mysql> select * from foo; +----+------+ | id | f1 | +----+------+ | 1 | 2 | | 2 | 4 | | 3 | 6 | | 4 | 8 | | 5 | 10 | +----+------+ 5 rows in set (0.00 sec)And then drop it and delete all rows from the table bar.mysql> drop table foo; Query OK, 0 rows affected (0.02 sec) mysql> delete from bar; Query OK, 5 rows affected (0.01 sec)Finally, let’s insert a few rows into the tables bar and baz.mysql> insert into bar(f1) values(6),(7),(8),(9),(10); Query OK, 5 rows affected (0.01 sec) Records: 5 Duplicates: 0 Warnings: 0 mysql> insert into baz(f1) values(1),(2),(3),(4),(5); Query OK, 5 rows affected (0.01 sec) Records: 5 Duplicates: 0 Warnings: 0Assume that the DROP TABLE and DELETE command was an accident and we want to restore the state of the tables foo and bar as they were before these unlucky statements. First, we need to prepare the backup. Since we are interested in restoring only tables in the database test we need to prepare the backup with a special option --export that exports tablespaces in a way that they could be later imported:xtrabackup --prepare --export --target-dir=./full_backupNow the directory for the database test contains not only table definition files (.frm, only before 8.0) and tablespace files (.ibd) but also configuration files (.cfg). Since we want all changes that happened after backup and before the problematic DROP TABLE and DELETE statements were applied, we need to identify which binary log and position were actual at the backup time. We can find it in the xtrabackup_binlog_info file:$ cat full_backup/xtrabackup_binlog_info master-bin.000004 1601 0ec00eed-87f3-11eb-acd9-98af65266957:1-56Now we are ready to perform restore. First, let’s restore the table foo from the backup. Restoring individual tablespaces requires the ALTER TABLE ... IMPORT TABLESPACE command. This command assumes that the table exists in the server. However, in our case, it was dropped and therefore we need to re-create it. We will recreate the full database test from the file test_structure.sql Since we do not want these administrative tasks to be re-applied, I suggest disabling binary logging for the session which will recreate the database structure.mysql> set sql_log_bin=0; Query OK, 0 rows affected (0.00 sec) mysql> source test_structure.sql Query OK, 0 rows affected (0.00 sec) Query OK, 0 rows affected (0.00 sec) ....Once tables are recreated discard their tablespaces. I will show an example for the table foo. Adjust the code for the rest of the tables.mysql> alter table foo discard tablespace; Query OK, 0 rows affected (0.01 sec)Then, in another terminal, copy the tablespace and configuration files from the backup to the database directory:cp full_backup/test/foo.{ibd,cfg} var/mysqld.1/data/test/And, finally, import the tablespace:mysql> alter table foo import tablespace; Query OK, 0 rows affected (0.05 sec)Repeat for the other tables in the database test. Now you can enable binary logging back. You can do the same task in a script. For example:for table in `mysql test --skip-column-names --silent -e "show tables"` > do > mysql test -e "set sql_log_bin=0; alter table $table discard tablespace" > cp full_backup/test/$table.{ibd,cfg} var/mysqld.1/data/test/ > mysql test -e "set sql_log_bin=0; alter table $table import tablespace" > doneOur tables are recovered but do not have the updates made after the backup.mysql> select * from foo; +----+------+ | id | f1 | +----+------+ | 1 | 1 | | 2 | 2 | | 3 | 3 | | 4 | 4 | | 5 | 5 | +----+------+ 5 rows in set (0.00 sec) mysql> select * from bar; +----+------+ | id | f1 | +----+------+ | 1 | 1 | | 2 | 2 | | 3 | 3 | | 4 | 4 | | 5 | 5 | +----+------+ 5 rows in set (0.00 sec) mysql> select * from baz; Empty set (0.00 sec)Therefore, we need to restore data from the binary logs. To do it we first need to identify the GTID of the disaster event. It can be done if we dump all binary logs updated and created after backup into a dump file and then search for the DROP TABLE and DELETE statements and skipping them. First, let’s check which binary logs do we have.mysql> show binary logs; +-------------------+-----------+ | Log_name | File_size | +-------------------+-----------+ | master-bin.000001 | 1527476 | | master-bin.000002 | 3035 | | master-bin.000003 | 1987 | | master-bin.000004 | 2466 | | master-bin.000005 | 784 | +-------------------+-----------+ 5 rows in set (0.00 sec)So we need to parse them, starting from the log master-bin.000004 and position 1601:mysqlbinlog --start-position=1601 -vvv --base64-output=decode-rows --database=test master-bin.000004 master-bin.000005 > binlog_test.sqlI used options -vvv that prints SQL representation of row events, so we can find the one which we want to skip and --base64-output=decode-rows to not print row events at all. We will not use this file for the restore, only for searching the DROP TABLE and DELETE events. Here they are, at the positions 2007 and 2123, with GTID 0ec00eed-87f3-11eb-acd9-98af65266957:58 and 0ec00eed-87f3-11eb-acd9-98af65266957:59# at 2007 #210321 13:29:58 server id 1 end_log_pos 2123 CRC32 0xd1eb9854 Query thread_id=138 exec_time=0 error_code=0 use `test`/*!*/; SET TIMESTAMP=1616322598/*!*/; DROP TABLE `foo` /* generated by server */ /*!*/; # at 2123 #210321 13:30:08 server id 1 end_log_pos 2188 CRC32 0xfc9b2088 GTID last_committed=7 sequence_number=8 rbr_only=yes original_committed_timestamp=0 immediate_commit_timestamp=0 transaction_length=0 /*!50718 SET TRANSACTION ISOLATION LEVEL READ COMMITTED*//*!*/; # original_commit_timestamp=0 (1970-01-01 02:00:00.000000 EET) # immediate_commit_timestamp=0 (1970-01-01 02:00:00.000000 EET) /*!80001 SET @@session.original_commit_timestamp=0*//*!*/; /*!80014 SET @@session.original_server_version=0*//*!*/; /*!80014 SET @@session.immediate_server_version=0*//*!*/; SET @@SESSION.GTID_NEXT= '0ec00eed-87f3-11eb-acd9-98af65266957:59'/*!*/; # at 2188 #210321 13:30:08 server id 1 end_log_pos 2260 CRC32 0x1d525b11 Query thread_id=138 exec_time=0 error_code=0 SET TIMESTAMP=1616322608/*!*/; BEGIN /*!*/; # at 2260 #210321 13:30:08 server id 1 end_log_pos 2307 CRC32 0xb57ecb73 Table_map: `test`.`bar` mapped to number 226 # at 2307 #210321 13:30:08 server id 1 end_log_pos 2387 CRC32 0x6770a7e2 Delete_rows: table id 226 flags: STMT_END_F ### DELETE FROM `test`.`bar` ### WHERE ### @1=1 /* INT meta=0 nullable=0 is_null=0 */ ### @2=1 /* INT meta=0 nullable=1 is_null=0 */ ### DELETE FROM `test`.`bar` ### WHERE ...Note that decoded row event contains a DELETE command for each affected row. We may also find to which binary log this event belongs if search for the "Rotate to" event. In our case “Rotate to master-bin.000005” happened after the found positions, so we only need file master-bin.000004 In your case, you may need to skip events from the previous log files too. So to restore the data we need to run mysqlbinlog one more time, this time with parameters:mysqlbinlog --start-position=1601 --exclude-gtids=0ec00eed-87f3-11eb-acd9-98af65266957:58-59 --database=test --skip-gtids=true master-bin.000004 master-bin.000005 > binlog_restore.sqlI removed options -vvvbecause we are not going to examine this restore file and option --base64-output=decode-rows because we need row events to present in the resulting file. I also used option --exclude-gtids=0ec00eed-87f3-11eb-acd9-98af65266957:58-59 to exclude GTIDs that we do not want to re-apply. We also need to use --skip-gtids=true because otherwise updates will be skipped since such GTIDs already exist on the server. Now binlog_restore.sql contains all updates to the database test made after the backup and before the DROP statement. Let’s restore it.mysql test < binlog_restore.sqlRestore went successfully. Our tables have all past updates.mysql> select * from foo; +----+------+ | id | f1 | +----+------+ | 1 | 2 | | 2 | 4 | | 3 | 6 | | 4 | 8 | | 5 | 10 | +----+------+ 5 rows in set (0.01 sec) mysql> select count(*) from bar; +----------+ | count(*) | +----------+ | 10 | +----------+ 1 row in set (0.00 sec) mysql> select count(*) from baz; +----------+ | count(*) | +----------+ | 5 | +----------+ 1 row in set (0.00 sec) Conclusion You may save the time required for PITR if use the per-database restore method. However, you need to take into account the following considerations: mysqlbinlog does not support filtering per table, therefore you either need to restore the full database or use a fake server method, described in MySQL Point in Time Recovery the Right Way. Per-database filters depend on the USE statement in the statement-based binary log format. Therefore option --database can only be considered safe with a row-based format. If you do not use GTID you still can use this method. You will need to combine options --start-position and --stop-position to skip the event. Percona XtraBackup is a free, open source database backup solution for Percona Server for MySQL and MySQL. https://www.percona.com/blog/2021/04/02/percona-xtrabackup-point-in-time-recovery-for-the-single-database/
0 notes
Text
Overview of MySQL Alternative Storage Engines
For MySQL, MyISAM and InnoDB storage engines are very popular. Currently, we are mostly using InnoDB engines for high reliability and high performance. Apart from those engines, we also have some other alternative engines and they have some nice features in them. In this blog, I am going to explain some of those engines, which I have listed below. FEDERATED Storage Engine Merge or MRG_MyISAM Engine Blackhole Engine CSV Engine FEDERATED Storage Engine Overview: FEDERATED Storage Engine allows you to access the data remotely without replication and cluster technologies. Using the FEDERATED tables, you can scale your server load. Queries for the given table will be sent over the network to another MySQL instance. In this case, to scale the DB, you can use many MySQL instances without changing the application code. FEDERATED tables are a security concern because you will need to save the host and user information in the table. It can be viewed using SHOW CREATE TABLE command. Query optimization is limited and JOINs are slow. Doing the bulk transaction may crash the local server. By default, FEDERATED Storage Engine support is disabled. To enable it, you need to manually enable the variable “federated = ON” in the MySQL config file and restart the MySQL service. mysql> select * from information_schema.engines where engine='federated'G *************************** 1. row *************************** ENGINE: FEDERATED SUPPORT: NO COMMENT: Federated MySQL storage engine TRANSACTIONS: NULL XA: NULL SAVEPOINTS: NULL 1 row in set (0.00 sec) #vi /etc/my.cnf [mysqld] federated = ON [root@mass ~]# service mysqld restart Redirecting to /bin/systemctl restart mysqld.service [root@mass ~]# mysql> select * from information_schema.engines where engine='federated'G *************************** 1. row *************************** ENGINE: FEDERATED SUPPORT: YES COMMENT: Federated MySQL storage engine TRANSACTIONS: NO XA: NO SAVEPOINTS: NO 1 row in set (0.00 sec) How Does it work? FEDERATED tables need to be created on a local server and the remote table needs to be created on a remote server. Make sure that you have the MySQL port and user access between the local and remote servers. Remote tables can be created as MyISAM or InnoDB storage engines. The FEDERATED table will not store any data. Data will be stored on the remote server. Both local and remote servers should have the same columns and structure. You can execute the query on both local or remote servers to modify or retrieve the data. Example I have two servers: 172.28.128.16 (local server) 172.28.128.17 (remote server) On the local server, I am creating the FEDERATED table:mysql> create table fed_source(id int, name varchar(16)) engine=federated connection="mysql://fed:Fede4!i&[email protected]/percona/fed_destination"; Query OK, 0 rows affected (0.02 sec) mysql> show create table fed_sourceG *************************** 1. row *************************** Table: fed_source Create Table: CREATE TABLE `fed_source` ( `id` int(11) DEFAULT NULL, `name` varchar(16) DEFAULT NULL ) ENGINE=FEDERATED DEFAULT CHARSET=latin1 CONNECTION='mysql://fed:Fede4!i&[email protected]/percona/fed_destination' 1 row in set (0.00 sec)Syntax is: “connection=mysql://:@//”On the remote server, I am creating the table with InnoDB engine:mysql> create table fed_destination(id int, name varchar(16)); Query OK, 0 rows affected (0.00 sec) mysql> show create table fed_destinationG *************************** 1. row *************************** Table: fed_destination Create Table: CREATE TABLE `fed_destination` ( `id` int(11) DEFAULT NULL, `name` varchar(16) DEFAULT NULL ) ENGINE=InnoDB DEFAULT CHARSET=latin1 1 row in set (0.00 sec)As I mentioned earlier, the data will be physically stored on the remote server. FEDERATED tables will not store the data. From the below example, you can see the data file (.ibd) was created on the remote server and the local server just has the table structure file ( .frm ). Local server:[root@mass percona]# pwd /var/lib/mysql/percona [root@mass percona]# ls -lrth total 16K -rw-r-----. 1 mysql mysql 8.4K Mar 19 18:00 fed_source.frmRemote server:root@repl percona]# pwd /var/lib/mysql/percona [root@repl percona]# ls -lrth total 112K -rw-r-----. 1 mysql mysql 8.4K Mar 19 18:00 fed_destination.frm -rw-r-----. 1 mysql mysql 96K Mar 19 18:01 fed_destination.ibdLet’s do this experiment. On the local server, I am inserting the record. mysql> insert into fed_source values (1,'herc'); Query OK, 1 row affected (0.00 sec) mysql> select * from fed_source; +------+------+ | id | name | +------+------+ | 1 | herc | +------+------+ 1 row in set (0.00 sec)And on the remote server:mysql> select * from fed_destination; +------+------+ | id | name | +------+------+ | 1 | herc | +------+------+ 1 row in set (0.00 sec)Now, I am going to update the data on a remote server.mysql> update fed_destination set name='hercules7sakthi' where name='herc'; Query OK, 1 row affected (0.00 sec) Rows matched: 1 Changed: 1 Warnings: 0 mysql> select * from fed_destination; +------+-----------------+ | id | name | +------+-----------------+ | 1 | hercules7sakthi | +------+-----------------+ 1 row in set (0.00 sec)At the local server:mysql> select * from fed_source; +------+-----------------+ | id | name | +------+-----------------+ | 1 | hercules7sakthi | +------+-----------------+ 1 row in set (0.00 sec)It seems that you can execute the query on both local and remote servers. The FEDERATED Engine is mostly supported for data manipulation languages (INSERT/UPDATE/DELETE/TRUNCATE). Merge or MRG_MyISAM Engine Overview: The collection of identical MyISAM tables can be used as a single table for better performance. Only supported for MyISAM tables. Merge tables will use more file descriptors. You can’t perform the FULL TEXT SEARCH using the merge tables. Merge tables used extremely rare since partitions came around. How Does it work? It works only for the MyISAM tables. The columns order, index, data types should be the same on all the tables. Example I have created two tables:mysql> create table merge_1(id int, name varchar(16)) engine = myisam; Query OK, 0 rows affected (0.00 sec) mysql> create table merge_2(id int, name varchar(16)) engine = myisam; Query OK, 0 rows affected (0.01 sec)Inserting some data on both tables:mysql> insert into merge_1 values (1,'herc'),(2,'sakthi'),(3,'sri'); Query OK, 3 rows affected (0.00 sec) Records: 3 Duplicates: 0 Warnings: 0 mysql> insert into merge_2 values (4,'jc'),(5,'xxx'),(3,'yyy'); Query OK, 3 rows affected (0.00 sec) Records: 3 Duplicates: 0 Warnings: 0Now, creating the merge table:mysql> create table merge_1_and_2 (id int, name varchar(16)) engine = mrg_myisam union=(merge_1,merge_2); Query OK, 0 rows affected (0.01 sec)Let’s query the merge table:mysql> select * from merge_1_and_2; +------+--------+ | id | name | +------+--------+ | 1 | herc | | 2 | sakthi | | 3 | sri | | 4 | jc | | 5 | xxx | | 3 | yyy | +------+--------+ 6 rows in set (0.00 sec)It seems, when I query the merge table, it merges both the tables (merge_1, merge_2) and displays the results. Physically, the MERGE table will not occupy any disk space. When querying the table, it will just merge the data from the configured tables and display the result.[root@mass percona]# ls -lrth total 72K -rw-r-----. 1 mysql mysql 8.4K Mar 19 18:44 merge_1.frm -rw-r-----. 1 mysql mysql 1.9K Mar 19 18:51 merge_1.MYD -rw-r-----. 1 mysql mysql 1.0K Mar 19 18:51 merge_1.MYI -rw-r-----. 1 mysql mysql 8.4K Mar 19 18:44 merge_2.frm -rw-r-----. 1 mysql mysql 1.6K Mar 19 18:51 merge_2.MYD -rw-r-----. 1 mysql mysql 1.0K Mar 19 18:51 merge_2.MYI -rw-r-----. 1 mysql mysql 8.4K Mar 19 18:48 merge_1_and_2.frm -rw-r-----. 1 mysql mysql 16 Mar 19 18:48 merge_1_and_2.MRG Blackhole Engine Overview: Blackhole Engine will accept the data from SQL. The accepted data will not be stored, whenever you are querying the data it will give the empty result. Can be used for SQL syntax checking purposes. Can be used for the replication filter purpose. You have to be very careful when you use the table in a replication environment. Because the SQL will be logged in the binary log. How Does it work? Example Creating the blackhole table:mysql> create table black_hole (id int, name varchar(16)) engine = blackhole; Query OK, 0 rows affected (0.00 sec)Inserting and retrieving the data:mysql> insert into black_hole values (1,'sri'),(2,'jc'); Query OK, 2 rows affected (0.00 sec) Records: 2 Duplicates: 0 Warnings: 0 mysql> select * from black_hole; Empty set (0.00 sec)The data will be stored on the binary logs:# at 23445 #210319 19:19:15 server id 10 end_log_pos 23497 CRC32 0x36e22a05 Write_rows: table id 115 flags: STMT_END_F ### INSERT INTO `percona`.`black_hole` ### SET ### @1=1 /* INT meta=0 nullable=1 is_null=0 */ ### @2='sri' /* VARSTRING(16) meta=16 nullable=1 is_null=0 */ ### INSERT INTO `percona`.`black_hole` ### SET ### @1=2 /* INT meta=0 nullable=1 is_null=0 */ ### @2='jc' /* VARSTRING(16) meta=16 nullable=1 is_null=0 */ # at 23497 #210319 19:19:15 server id 10 end_log_pos 23573 CRC32 0x4d79cba4 Query thread_id=5 exec_time=0 error_code=0 SET TIMESTAMP=1616181555/*!*/; COMMITSyntax Checking Purposes If you want to check any syntax of the SQL statements, you can directly execute them against the blackhole tables as it is not going to do anything with the data. Replication Filter Purpose Let’s consider that I have a source-replica setup. At the source, I have created the below table.mysql> create table test_blackhole(id int, name varchar(16)) engine=innodb; Query OK, 0 rows affected (0.01 sec)I don’t want to replicate this table to replica nodes. In this case, I just converted the table to BLACKHOLE engine on the replica node. At replica node:mysql> alter table test_blackhole engine=blackhole; Query OK, 0 rows affected (0.00 sec) Records: 0 Duplicates: 0 Warnings: 0 mysql> show create table test_blackholeG *************************** 1. row *************************** Table: test_blackhole Create Table: CREATE TABLE `test_blackhole` ( `id` int(11) DEFAULT NULL, `name` varchar(16) DEFAULT NULL ) ENGINE=BLACKHOLE DEFAULT CHARSET=latin1 1 row in set (0.00 sec)Now, at source, I am inserting some records:mysql> insert into test_blackhole values (1,'aaa'); Query OK, 1 row affected (0.00 sec) mysql> select * from test_blackhole; +------+------+ | id | name | +------+------+ | 1 | aaa | +------+------+ 1 row in set (0.00 sec)At replica, the data is not available. The data has been ignored as the table was converted to the blackhole engine.mysql> select * from test_blackhole; Empty set (0.00 sec) CSV Engine Overview: The CSV storage engine stores data in csv files. If you need the data into a CSV file, you can just copy the table physical file and use it. No need to export the data using the command SELECT INTO OUTFILE. It will not support nullable columns. The data will store comma-separated values. Example Creating the CSV table:mysql> create table csv_test (id int not null, name varchar(16) not null, cur_time datetime default current_timestamp not null) engine = csv; Query OK, 0 rows affected (0.00 sec)Inserting data:mysql> insert into csv_test (id,name) values (1,'jc'),(2,'sri'),(3,'herc'); Query OK, 3 rows affected (0.00 sec) Records: 3 Duplicates: 0 Warnings: 0 mysql> select * from csv_test; +----+------+---------------------+ | id | name | cur_time | +----+------+---------------------+ | 1 | jc | 2021-03-19 19:40:40 | | 2 | sri | 2021-03-19 19:40:40 | | 3 | herc | 2021-03-19 19:40:40 | +----+------+---------------------+ 3 rows in set (0.00 sec)Physically, you can see the data is stored as the .csv file. You can view the data from the file itself. [root@mass percona]# ls -lrth | grep -i csv -rw-r-----. 1 mysql mysql 8.5K Mar 19 19:38 csv_test.frm -rw-r-----. 1 mysql mysql 90 Mar 19 19:40 csv_test.CSV -rw-r-----. 1 mysql mysql 35 Mar 19 19:40 csv_test.CSM [root@mass percona]# cat csv_test.CSV 1,"jc","2021-03-19 19:40:40" 2,"sri","2021-03-19 19:40:40" 3,"herc","2021-03-19 19:40:40"As you see, MySQL alternative engines are having some good features. Based on my point of view, I would not suggest having them on production until finding a valid reason. But, it is still good to know about those engines and understand their features. Percona Distribution for MySQL: An enterprise-grade solution for your most critical business applications. https://www.percona.com/blog/2021/03/26/overview-of-mysql-alternative-storage-engines/
0 notes
Text
Importing an Encrypted InnoDB Tablespace into MySQL
Transportable tablespaces were introduced in MySQL 5.6. Using this feature, we can directly copy a tablespace to another server and populate the table with data. This is a very useful feature for large tables. The transportable tablespace mechanism is faster than any other method for exporting and importing tables because the files containing the data just need to be copied to the target location using traditional Linux commands (cp, scp, rsync). Our post MySQL 5.6 Transportable Tablespaces best practices covers the best practices about transportable tablespaces. The feature also supports encrypted tablespaces, and in this article, I am going to explain how to use this feature with them. Requirements Below I am sharing my current setup and the requirements. I have two servers – s1 and s2. I am running Percona Server for MySQL 5.7.33 on both servers. Data-at-Rest Encryption is enabled on both servers. S1 has the encrypted table “percona.enc_EI_test”, which needs to be copied to s2 using a transportable tablespace feature. mysql> select @@version, @@version_commentG *************************** 1. row *************************** @@version: 5.7.33-36-log @@version_comment: Percona Server (GPL), Release 36, Revision 7e403c5 1 row in set (0.01 sec) mysql> show create table percona.enc_EI_testG *************************** 1. row *************************** Table: enc_EI_test Create Table: CREATE TABLE `enc_EI_test` ( `id` int(11) NOT NULL AUTO_INCREMENT, `name` varchar(16) DEFAULT NULL, `exec_time` datetime DEFAULT CURRENT_TIMESTAMP, PRIMARY KEY (`id`) ) ENGINE=InnoDB AUTO_INCREMENT=165520 DEFAULT CHARSET=latin1 ENCRYPTION='Y' 1 row in set (0.01 sec)The following steps will be helpful to understand the process involved. Step 1 (Prepare the table to copy): This step ensures that changes to that particular table have been flushed to disk so that binary table copies can be made while the server is running. At S1:mysql> flush table enc_EI_test for export; Query OK, 0 rows affected (0.00 sec)Once the command is executed, it will create two additional files (.cfg and .cfp) in the MySQL data directory. -rw-r-----. 1 mysql mysql 8.5K Mar 20 21:05 enc_EI_test.frm -rw-r-----. 1 mysql mysql 13M Mar 20 21:05 enc_EI_test.ibd -rw-r-----. 1 mysql mysql 100 Mar 20 21:05 enc_EI_test.cfp -rw-r-----. 1 mysql mysql 455 Mar 20 21:05 enc_EI_test.cfg The .cfg file is the metadata file, which contains metadata that is used for schema verification during the import operation. The .cfp file is only for the encrypted tables, the .cfp file contains a transfer key and an encrypted tablespace key. Step 2 (copy .ibd, .cfg, and .cfp files from s1 to s2): After executing step one, you need to copy the table files (.ib,.cfg,.cfp) to destination server s2.[root@s1 percona]# scp -r enc_EI_test.ibd enc_EI_test.cfp enc_EI_test.cfg 172.28.128.17:/tmp/export/ enc_EI_test.cfg 100% 455 492.5KB/s 00:00 enc_EI_test.cfp 100% 100 133.3KB/s 00:00 enc_EI_test.ibd 100% 13MB 84.0MB/s 00:00 Step 3 (Unlock table on S1): Once the table files are copied to the destination server (s2), you need to unlock the table on s1 to allow the operations.mysql> unlock tables; Query OK, 0 rows affected (0.00 sec) Step 4 (Create the table structure on s2): Now, you have to create the empty table on the destination server s2.mysql> CREATE TABLE `enc_EI_test` ( -> `id` int(11) NOT NULL AUTO_INCREMENT, -> `name` varchar(16) DEFAULT NULL, -> `exec_time` datetime DEFAULT CURRENT_TIMESTAMP, -> PRIMARY KEY (`id`) -> ) ENGINE=InnoDB AUTO_INCREMENT=165520 DEFAULT CHARSET=latin1 ENCRYPTION='Y'; Query OK, 0 rows affected (0.01 sec)Make sure that you have added the encryption on the table structure “ENCRYPTION=Y”. Otherwise, you will get the following error during the import process.mysql> alter table enc_EI_test import tablespace; ERROR 1808 (HY000): Schema mismatch (Encryption attribute in the file does not match the dictionary.) Step 5 (Remove the .ibd file): Once the empty table has been created on s2, it will have two files (.frm and .ibd). You need to remove the .ibd file so that you can import the tablespace which was copied from s1. [root@s2 percona]# ls -lrth total 112K -rw-r-----. 1 mysql mysql 8.5K Mar 20 21:08 enc_EI_test.frm -rw-r-----. 1 mysql mysql 96K Mar 20 21:08 enc_EI_test.ibd mysql> alter table enc_EI_test discard tablespace; Query OK, 0 rows affected (0.01 sec) [root@s2 percona]# ls -lrth total 16K -rw-r-----. 1 mysql mysql 8.5K Mar 20 21:08 enc_EI_test.frm Step 6 (Copy the tablespace to data directory): In this step, you need to copy the tablespace files (from s1) to the data directory under the database folder. [root@s2 percona]# pwd /var/lib/mysql/percona [root@s2 percona]# cp -r /tmp/export/enc_EI_test.ibd . [root@s2 percona]# cp -r /tmp/export/enc_EI_test.cf* . [root@s2 percona]# ls -lrth total 14M -rw-r-----. 1 mysql mysql 8.5K Mar 20 21:08 enc_EI_test.frm -rw-r-----. 1 root root 13M Mar 20 21:12 enc_EI_test.ibd -rw-r-----. 1 root root 100 Mar 20 21:12 enc_EI_test.cfp -rw-r-----. 1 root root 455 Mar 20 21:12 enc_EI_test.cfgMake sure that you are copying the .cfp file as well. Without the .cfp file, the import will not work, and you will get the following error.mysql> alter table enc_EI_test import tablespace; ERROR 1808 (HY000): Schema mismatch (Table is in an encrypted tablespace, but the encryption meta-data file cannot be found while importing.) Step 7 (Change ownership to MySQL user): [root@s2 percona]# chown -R mysql:mysql enc_EI_test.ibd enc_EI_test.cf* [root@repl percona]# ls -lrth total 14M -rw-r-----. 1 mysql mysql 8.5K Mar 20 21:08 enc_EI_test.frm -rw-r-----. 1 mysql mysql 13M Mar 20 21:12 enc_EI_test.ibd -rw-r-----. 1 mysql mysql 100 Mar 20 21:12 enc_EI_test.cfp -rw-r-----. 1 mysql mysql 455 Mar 20 21:12 enc_EI_test.cfg Step 8 (Import the tablespace): Now, we are good to run the import command.mysql> alter table enc_EI_test import tablespace; Query OK, 0 rows affected (0.08 sec) mysql> select count(*) from enc_EI_test; +----------+ | count(*) | +----------+ | 100000 | +----------+ 1 row in set (0.03 sec)This process is quite similar to the normal InnoDB tablespace export/import process. But, here you need to take care of the following two things: You need to copy the .cfp file as well to the destination servers. Your destination table also needs to be configured with encryption (ENCRYPTION = Y). Learn about Percona Distribution for MySQL, an enterprise-grade solution for your most critical business applications. https://www.percona.com/blog/2021/03/24/importing-an-encrypted-innodb-tablespace-into-mysql/
0 notes
Text
ALTER TABLE in MySQL: Friend or Foe?
The ALTER TABLE statement is one of the most frequently used statements in the MySQL world - the statement allows you to add, delete or modify columns in a table. In this blog post we will try to look deeper into what it is, what it does and when should it be used. What is ALTER TABLE and What Does it Do? As already mentioned above, the ALTER TABLE statement enables DBAs and developers to add, delete or modify columns in a table. Simply put ALTER TABLE changes the structure of a table - it enables you to add, delete columns, add or remove indexes, rename columns or change their type. When and How Do I Use ALTER TABLE? In order to use ALTER TABLE you generally need the ALTER, CREATE and INSERT privileges. For renaming a table, required privileges are ALTER and DROP for the old table, then CREATE, ALTER and INSERT privileges for the new table to be created. To assign the required privileges to a certain user, you can use the following query: GRANT ALTER, CREATE, INSERT ON database.* TO 'demo_user'; Replace database with your database name, the wildcard with the table name if you wish the privileges to only be applicable to certain tables (the wildcard makes the privilege applicable across all tables) and demo_user with the name of your user. If you want the privileges to be used across all databases and all tables within them, simply replace database with a wildcard: GRANT ALTER, CREATE, INSERT ON *.* TO 'demo_user'; In order to actually make use of the ALTER TABLE statement, run a query that changes the structure of a table - ALTER TABLE is used to add, delete or modify columns in a table: the query can also be used to add indexes to columns. Here’s a few basic examples of most frequently used queries: ALTER TABLE demo_table ADD column_name VARCHAR(255) NOT NULL DEFAULT ‘’; T his query would add a column column_name to a table demo_table. Add FIRST to the end of the query to make the column the first column in the table. ALTER TABLE demo_table ADD column_2 VARCHAR(255) NOT NULL DEFAULT ‘’ AFTER column_1; T his query would add a column column_2 after the column column_1 on a table demo_table. ALTER TABLE demo_table ADD COLUMN column_2 INT GENERATED ALWAYS AS (column_1 + 1) STORED; This query would add a generated column to the table. ALTER TABLE demo_table DROP COLUMN demo_column; This query would drop the column demo_column on a table demo_table. ALTER TABLE demo_table ADD INDEX demo_index(demo_column); This query would add an index named demo_index (names can be chosen) on a column called demo_column in a table called demo_table. ALTER TABLE demo_table ADD INDEX (demo_column), ADD UNIQUE (demo_unique); This query would add an index on a column demo_column and an unique index on the demo_unique column. ALTER TABLE demo_table MODIFY column_name VARCHAR(255) CHARACTER SET utf8mb4; This query would change the default character set of a specific column. ALTER TABLE demo_table CONVERT TO CHARACTER SET charset_name; This query would change the default character set of the table and all character (CHAR, VARCHAR and TEXT) columns. ALTER TABLE demo_table PARTITION BY HASH(demo_column) PARTITIONS 8; This query would partition the column demo_column into 8 partitions by hash. ALTER TABLE demo_table TABLESPACE tablespace_1 STORAGE DISK; This query would convert the table demo_table to disk-based storage. If you are adding indexes, keep in mind that you can add different types of indexes (for example, a BTREE index or a FULLTEXT index), you can also add an index that covers only a certain amount of characters in a column with a query like so: ALTER TABLE demo_table ADD INDEX demo_index(column_name(10)); The above query would add an index called demo_index on the first 10 characters of the column called column_name in a table called demo_table. Indexes in MySQL are a complex beast and they really deserve a topic of their own so we will not go into details here, but if you want to learn more, our earlier post about MySQL indexes should provide some more insight. How Does ALTER TABLE Work? ALTER TABLE in MySQL has its own subtleties. As of the most current version of MySQL, i.e. MySQL 8.0. There are 3 algorithms for which affects how the ALTER TABLE performs for such alterations. These are: COPY Operations are performed on a copy of the original table, and table data is copied from the original table to the new table row by row. In most cases, this algorithm can be very expensive in terms of resource usage especially for big and large tables. When this algorithm is chosen or selected, all concurrent DML is not permitted so therefore any subsequent queries referencing to the affected table will have to wait or queued into the process list. Chances are, you'll get your database stuck if connections are maxed out. INPLACE Operations avoid copying table data but may rebuild the table in place. An exclusive metadata lock on the table may be taken briefly during preparation and execution phases of the operation. Typically, concurrent DML is supported. INSTANT Operations only modify metadata in the data dictionary. No exclusive metadata locks are taken on the table during preparation and execution, and table data is unaffected, making operations instantaneous. Concurrent DML is permitted. (Introduced in MySQL 8.0.12) MySQL’s ALTER TABLE process might not be an issue with smaller tables, but if your data set is bigger you can run into issues - many people have experienced ALTER TABLE queries that have taken hours, days or even weeks to complete. In most cases, that happens because of MySQL’s table alteration process outlined above. However, there is a way to at least slightly reduce the time the query takes to complete: Create a new table like your source table with your desired structure by running CREATE TABLE demo_table_new LIKE demo_table; then adjusting its structure. In this case the demo_table is the source table and demo_table_new is the new table. Insert data into the new table. Rename the old table to demo_table_old (adjust the name according to your needs). Rename the new table to the former name of the old table. Finally, copy the rows from the old table to the new table and, if needed, create indexes. Although the steps above work fine. Yet, in real-world case scenarios, DBA's or developers take the lean to use Percona's pt-online-schema-change or using Github's gh-ost. You can take a look at our previous post Top Open Source Tools for MySQL & MariaDB Migrations which takes an overview of these schema-change tools. Anyway, what we have described above is frequently known as the “shadow copy” approach: in essence, you build a new table with the desired structure, then perform a rename and drop to swap the two tables. There also is another way: you can also swap servers around and run ALTER TABLE on servers that are not in production. For MyISAM, you can DISABLE KEYS, load data, then ENABLE KEYS. ALTER TABLE Gotchas If you are using the ALTER TABLE statement to create indexes (you can also use the CREATE INDEX statement), it is advised to create indexes after inserting the data because that’s a pretty well known way of speeding up processing not only in MySQL, but also in other database management systems, such as Oracle. In general though, keep in mind that most ALTER TABLE operations should be expected to cause some issues (interruption of service) to MySQL. There also is another way to speed up the entire process though, albeit it’s a little bit more advanced: if you can convince MySQL to only modify the table’s .frm file (.frm files describe the definition of the table) and leave the table alone, the process will be faster: Create an empty table with the same layout as the old table without modifying it. Close all tables in use and prevent all new tables from being opened by running FLUSH TABLES WITH READ LOCK. Swap the .frm files. Release the read lock by running UNLOCK TABLES. Also keep in mind that if you want to modify a column and the syntax seems correct but you still get an error, it might be time to look into a different syntax. For example: ALTER TABLE demo_table ADD long VARCHAR(255); A query like this would error out because long is a reserved word. In order to avoid such an error, escape the word with backticks: ALTER TABLE demo_table ADD `long` VARCHAR(255); It is also worth noting that the column names can only be escaped using backticks and not with single quotes or double quotes. For example, a query like so would error out too: ALTER TABLE demo_table CHANGE COLUMN ‘demo_column’ ‘demo_column_2’ VARCHAR(255); Summary MySQL uses the ALTER TABLE statement to add, delete or modify columns in a table. In order for the statement to be successfully executed, you must have the ALTER,CREATE and INSERT privileges for the table. The statement also has a few subtleties unique to itself: its performance can suffer when running on very large tables due to the way it works, but as long as you know how the statement works and what it does you should be just fine. Tags: MySQL https://severalnines.com/database-blog/alter-table-mysql-friend-or-foe
0 notes
Text
Using your FRM file to get Schema and then import idb files..
This is a topic that overall you never should have to do... Why? Because you created backups right... You have tested and know the backups work so you can just restore those backups and get your lost schema and related data... However that one instance in the corner office.. you never got around to setting up.. it not that important... just crashed and now you realize how you actually do use it... All is not lost.. MySQL released their MySQL utilities awhile back and since been replaced more with the MySQL Shell. https://downloads.mysql.com/archives/utilities https://dev.mysql.com/downloads/shell/ mysqlfrm is still very handy though when needing to pull out the schema from an FRM file in a quick and simple command and it is a simple install. mysqlfrm --diagnostic city.frm # WARNING: Cannot generate character set or collation names without the --server option. # CAUTION: The diagnostic mode is a best-effort parse of the .frm file. As such, it may not identify all of the components of the table correctly. This is especially true for damaged files. It will also not read the default values for the columns and the resulting statement may not be syntactically correct. # Reading .frm file for city.frm: # The .frm file is a TABLE. # CREATE TABLE Statement: CREATE TABLE `city` ( `ID` int(11) NOT NULL AUTO_INCREMENT, `Name` char(160) DEFAULT NULL, `CountryCode` char(12) NOT NULL, `District` char(80) NOT NULL, `Population` int(11) NOT NULL, PRIMARY KEY `PRIMARY` (`ID`), KEY `CountryCode` (`CountryCode`), KEY `popkey` (`Population`) ) ENGINE=InnoDB; #...done. So now that you have the schema you lost... rebuild the DB or table. For the sake of the example, I will say we just lost the city data from the world DB. $ cp city.ibd /tmp/ $ cp city.ibd /tmp/ mysql> LOCK TABLES city WRITE;mysql> ALTER TABLE city DISCARD TABLESPACE;cp city.ibd /edb/local/mysql/data/rundeck/chown tmdba:dba /edb/local/mysql/data/rundeck/city.ibdmysql> ALTER TABLE city IMPORT TABLESPACE;mysql> UNLOCK TABLES;mysql> SELECT COUNT(*) FROM city; https://anothermysqldba.blogspot.com/2020/11/using-your-frm-file-to-get-schema-and.html
0 notes
Text
How to Perform Rolling Upgrades for MySQL
There are different reasons for upgrading your databases. It could be to apply security fixes, to use new features, solve compatibility issues, or just to keep your system up-to-date. This upgrade can be a major upgrade or a minor one, and depending on the technology, there are different approaches to do this job, but if you need your systems running all the time with zero downtime, performing a rolling upgrade could be the best option. In this blog, we will see some considerations to take into account before upgrading and how to perform a rolling upgrade on MySQL. Minor vs Major Upgrades In general, minor upgrades are safe in the way that you can easily downgrade or rollback it and should be compatible with the previous packages and features. Major version upgrade involves some risks like database package removal, configuration and connectors compatibility, deprecated features, and more. So, even when testing is important for both scenarios, in case of major upgrades, it is a must if you want to avoid serious problems for your business. Before Upgrading Now, let’s see some considerations before upgrading, to avoid future issues. Backups Backups are always important, and even more if you want to upgrade your database. If something goes wrong, and other disaster recovery options fail, you will need a backup to restore your database. So, before starting the task, take a full backup (physical or/and logical) of your current database and keep it safe until make sure everything is working properly for a couple of days/weeks. Review Deprecated Features If you are using a feature that is deprecated in the new version, your application could fail, and you will need to rollback to recover your systems, which will generate downtime (depends on the approach) and a loss of time. Checking the deprecated feature and comparing them to the ones that you are using will avoid this failed upgrade attempt. Testing This is important not only for upgrades but also for any change in your database or application. Having a test environment that replicates the production environment could save your time and avoid unexpected issues during any upgrade or database change. Rollback In any upgrade, it is important to have a rollback ready to be used if needed to have your database up and running ASAP. Otherwise, it could affect your RTO (Recovery Time Objective) in case you need to recreate the cluster from a backup or another recovery plan option. Keep in mind that sometimes downgrades are not possible, so you should have a secondary plan in case you need to rollback your changes. Vendor Checks Depending on the vendor and version, you may use the mysqlcheck command to perform the preliminary check on your current installation and confirm that you are ready to go. $ mysqlcheck -u root -p --all-databases --check-upgrade Enter password: mysql.columns_priv OK mysql.db OK mysql.engine_cost OK mysql.event OK mysql.func OK mysql.general_log OK mysql.gtid_executed OK mysql.help_category OK mysql.help_keyword OK mysql.help_relation OK mysql.help_topic OK mysql.innodb_index_stats OK mysql.innodb_table_stats OK mysql.ndb_binlog_index OK mysql.plugin OK mysql.proc OK mysql.procs_priv OK mysql.proxies_priv OK mysql.server_cost OK mysql.servers OK mysql.slave_master_info OK mysql.slave_relay_log_info OK mysql.slave_worker_info OK mysql.slow_log OK mysql.tables_priv OK mysql.time_zone OK mysql.time_zone_leap_second OK mysql.time_zone_name OK mysql.time_zone_transition OK mysql.time_zone_transition_type OK mysql.user OK sys.sys_config OK This is a first check to perform before upgrading, and it will check that there is not: Tables using obsolete data types or functions Orphan frm files Triggers with missing or empty definer or an invalid creation context There are a few more things you need to check but to avoid an extensive blog post, you can refer to the official MySQL documentation for this. Manual Rolling Upgrades for MySQL There are different approaches to perform a rolling upgrade. It could be in place, using replication, or even a mix of them. In any case, if you want to avoid downtime you shouldn’t perform changes in your application during the upgrade. For this, you can add a Load Balancer in front of your databases. Your application will connect to your Load Balancer, and it will redirect the traffic to the available nodes. Let’s say you have a MySQL Replication with 1 master and 2 slave nodes, and 1 HAProxy node in front of them: A simplified way to perform a manual rolling upgrade on this environment could be: Disable one slave node from your HAProxy Make sure you don’t have traffic on this slave node Upgrade the slave node manually Check the replication status to make sure is up-to-date Disable the master node in your HAProxy Make sure you don’t have traffic on your master node Promote the upgraded slave node Enable it in your HAProxy Confirm that the new master is receiving traffic Reconfigure your second slave to replicate from the new master Disable the second slave from your HAProxy Make sure you don’t have traffic on this slave node Upgrade the slave node manually Check the replication status to make sure is up-to-date Enable it in your HAProxy Confirm that the slave node is receiving traffic (if needed) Reconfigure your old master to replicate from the new master Upgrade the old master node manually Check the replication status to make sure is up-to-date Enable it in your HAProxy Confirm that the old master (now slave) is receiving traffic (if needed) As you can see, even in a simplified way, this task requires many steps, and it means more possibilities of something going wrong. ClusterControl Rolling Upgrades for MySQL The best way to reduce the possibility of failure is by automating all (or almost all) these steps. Using ClusterControl you can perform a minor rolling upgrade of your MySQL cluster with just a few clicks. To do this, go to ClusterControl -> Select Cluster -> Manage -> Upgrades, where you see the Upgrade option. Upgrades are online and are performed on one node at a time. The node will be stopped, the software will be updated, and then the node will be started again. If a node fails to upgrade, the process is aborted. If you choose the Upgrade option, you will see a confirmation about the version that will be upgraded: And you just need to press on Upgrade to confirm this job. After this, you can monitor the upgrade process in the ClusterControl Activity Section: At the same time, ClusterControl will reconfigure your Load Balancers to send the traffic to the available nodes. ClusterControl only supports minor upgrades, because, as we mentioned before, a major upgrade is a risky task that requires testing and research to make sure that your application will work fine on the new major version. Conclusion Upgrading is an important task in all companies and it could be risky if you don’t take certain precautions and follow all the upgrade steps correctly. In this blog, we mentioned some considerations to take into account before upgrading your database, and we showed the difference between doing this task manually and using ClusterControl, which helps you to minimize the possibility of failure. Tags: MySQL upgrades database upgrade https://severalnines.com/database-blog/how-perform-rolling-upgrades-mysql
0 notes
Text
The WARP storage engine beta: columnar storage for MySQL 8 with automatic bitmap indexing
Oracle MySQL is in need of a columnar storage engine for analytics workloads. A columnar engine (or column store) stores data vertically, that is, it stores all the data associated with a column together, instead of the traditional RDBMS storage method of storing entire rows together, either in a index organized manner, like InnoDB, or in a heap, like MyISAM. Columnar storage has the benefit of reducing IO when only a subset of the row is accessed in a query, because only the data for the accessed rows must be read from disk (or cache) instead of having to read entire rows. Most columnar stores do not support indexes, but WARP does. WARP is open source You can find the WARP source code release on GitHub. Binaries can be provided upon request. Simply open an issue for your desired Linux distribution, and I will make them available as soon as I can. greenlion/warp WarpSQL Server, an open source OLAP focused distribution of the world's most popular open source database bundled with OLAP performance related plugins such as the WARP storage engine.. - green github.comWARP is beta quality WARP is based on Fastbit, which is currently version 2, and is used in production in a number of large scientific applications, such as grid computing analysis of particle accelerator data, working with genomic data, and other applications. WARP has been tested by a variety of alpha users. It is likely that there are still bugs or missing features in the MySQL storage engine interface, thus it is not suggested to use WARP for production critical data. It is suggested to test WARP against the same data in another storage engine to test for correctness. Bugs and feature requests can be reported on the GitHub issues page, at the GitHub link provided above. Support and consulting for WARP implementations is available through Swanhart Technical Services, as well as generic MySQL training and consulting services. I will provide information about those options in another blog post. Bitmap Indexing While columnar storage is uncommon to open source SQL RDBMs, bitmap indexing is not available at all. Bitmap indexes have characteristics that make them ideal for queries that traditional btree indexes can not answer efficiently (or at all), but they are not sorted, so they do not provide all of the same capabilities of btree indexes, such as the ability to provide pre-calculated sorting. WARP provides both columnar storage and automatic bitmap indexing of columns used in filters. The end user doesn't have to pick which specific columns to index. Compressed bitmap indexes are automatically created to support the queries run against the database. It is possible to exclude columns from automatic indexing if desired. The WARP storage engine WARP SE is an acronym for Word Aligned Relational Partitioned Storage Engine. WARP is a storage engine for MySQL 8.0, currently supporting MySQL 8.0.19. Data is partitioned vertically, and horizontally, automatically. WARP does not currently support distributing data over more than one node. WARP FS is a distributed file system in development to support this feature, but it is not currently available for public testing (yet). The WARP engine is based on an existing "nosql" database called Fastbit (https://sdm.lbl.gov/fastbit/). Fastbit is an open source columnar engine which features WAH (word aligned hybrid) compressed bitmap indexes. WARP is based on a slightly modified version of the Fastbit 2.0.3 code base. When you compile WARP, the Fastbit source code is automatically retrieved, patched, and compiled, as part of the build process. Technically pluggable The WARP engine does not require any modification to the MySQL source code, thus it is technically a pluggable engine, but the current source tree compiles it into the server like the InnoDB storage engine. This is because MySQL currently changes the storage engine interface in minor releases, so older versions of plugins, even for the same major release, may no longer work in later point releases. This is unfortunate, but that is a topic for another blog post. WARP storage engine in detail For my examples, I am going to use the Star Schema Benchmark test data. The Star Schema Benchmark test data creates a STAR schema. STAR schema are very common in data marts. The fact table is usually a very large table, and dimension tables are smaller "lookup" tables that are joined to the fact table. The following table is the "fact" table: The DDL associated with the LINEORDER table of the Star Schema Benchmark A note about indexes You do not need to define indexes ahead of time You will note that the table does not have any indexes defined on it. Indexes are automatically created and maintained transparently by WARP when a column is utilized in a filter (WHERE clause). It is, however, possible to explicitly define indexes for columns, which will then allow an EXPLAIN plan to show index usage. Keep in mind, however, that WARP may use indexes (even combining multiple indexes) in ways MySQL is not capable of doing so, so the EXPLAIN plan does not always accurately represent the execution plan of the WARP storage engine. It is possible to exclude columns from being indexed automatically, but that will be discussed in a future blog post. You do not need indexes for joins in MySQL 8 MySQL 8.0.19+ supports HASH joins, which are efficient for joining tables, and counter-intuitively, using bitmap indexes for joins may result in slower queries than using HASH joins, so it is not recommended to explicitly create indexes on columns that are going to be used in joins. Doing so will cause MySQL to choose to use nested loop joins instead of HASH joins. If it is desirable to have a UNIQUE key in a dimension table, it is suggested to store the column twice, once without KEY and once with, and to join on the column without the key. This limitation may change in a future version of WARP. Updates are not "in place" WARP does not update column data in place. When a row is deleted, the deleted RID is marked in the sparse bitmap (described below). When a row is updated, the original version of the row is marked as deleted, and a new row is appended to the table. This means that the old version of a row may be in a different partition than the new version. Rebuilding a table with OPTIMIZE TABLE or ALTER TABLE .. FORCE will remove the deleted rows. The primary reason for this is that WAH compressed bitmaps are extremely expensive to update, but disk space is relatively cheap. The second reason is that strings are stored adjacent to each other in a column, and increasing the length of a string would require relocating the whole row anyway. Filling in "holes" is fairly simple in a row store, but much more complicated in a column store. WARP RIDs (row ids) RID stands for "rowid". Every row in a WARP table has an associated RID. Note that RID values are not monotonic. A table may contain gaps in RID values, thus a WARP rid is a logical row address. RID values are 64 bit integers. The physical offset into a column in a partition is the physical RID of the row in that partition. But since a table may have many partitions, it is not possible to refer to a physical RID from the storage layer. If a table is modified or rebuilt with ALTER TABLE, the deleted rows are removed, and physical RID values will change, but logical RID values will not. RID values are not visible or usable from the MySQL storage layer. They are only used internally by the storage engine. Data in the data directory MySQL stores data on disk in a "data directory". Each schema (aka database) is a directory in the data directory. In this case, the tables for the ssb_warp schema are located in /data/mysql_data/ssb_warp. The .sdi file is conceptually similar to the .FRM file that would be found in older versions of MySQL, prior to MySQL 8. MySQL 8 has a transactional data dictionary, and has eliminated .FRM files. Files and directories inside of the table directory The table data itself is stored on disk in a table directory associated with the table. In this case the data for the "lineorder" table is located in /data/mysql_data/ssb_warp/lineorder.data Inside of the datafile directory, you will find additional directories which represent each partition of the table. WARP automatically partitions tables, by default, into horizontal partitions of a maximum size of one million rows. This is currently configurable on a per-instance, not per-table basis. WARP generally reads an entire column in a partition into memory at once. Every non-empty table has at minimum, one partition. In addition to the partitions, which are directories you will find a "-part.txt" file and a "deleted.rids" file. -part.txt The "-part.txt" file is a .ini like file which contains information about the table, including the data types for each column. You must not delete or modify this file manually. The "-part.txt" file also includes the index specifications for bitmap indexes. WARP supports a wide variety of different bitmap indexing methods. The default index method is suitable for a wide variety of data, but it is possible to choose the bitmap index characteristics via a comment on a column in the table DDL. This will be explored in a future blog post. deleted.rids sparse bitmap file The "deleted.rids" file is a simple sparse bitmap which indicates which rows in the table have been deleted. Simple sparse bitmaps are stored on disk, and can represent a bitmap of any size (up to the maximum file size on the filesytem) and do not need to be read completely into memory for querying or modification. Each RID is represented by one bit in the sparse bitmap. This bitmap is not WAH compressed because updating WAH bitmaps is very expensive. Instead it is a sparse file which means the OS will only use space in the bitmap for any blocks in which a deleted RID is written. Updates to the sparse bitmap are logged with a WAL (write ahead log) and are atomic. If you have a 1 billion row table with only one deleted row, the "deleted.rid" file will appear to be large, but will in fact only take up 4K (or your filesystem block size) of space on disk. Take care when backing up and restoring data, to preserve sparse files. The sparse bitmap header-only C++ library is available for use in other projects here. greenlion/simplesparsebitmap Simple compressing bitmap for bitmaps with long runs of zeroes (like a deleted RID bitmap) of any size (up to 4.3EB) - greenlion/simplesparsebitmap github.comColumn data files WARP stores each column in an individual data file. The data in the column is analogous to a raw C array. On disk, each column data file is named after the ordinal position of the column in the table, staring with zero, and prefixed by the letter c. Thus, a 17 column table will have sixteen data files c0 through c16. Files in a partition The "r" file is the column which contains the WARP RID. This column is fetched with every query, and each row RID is compared against the deleted rid simple sparse bitmap and skipped if the row has been marked as deleted. NULL marker data files NULL markers are stored in data files named nX, where X is an integer representing the ordinal position of the column. Because a SQL RDBMS supports the concept of NULL values, when a column is NULLABLE, the NULL marker is created to store a 1 if the column is null, or a 0 if it is not. When a column value is NULL, a 0 is stored in column data file, and a 1 is stored in the "null marker". The NULL marker is essentially a hidden TINYINT column, thus NULL values take up the storage size of the column, plus one extra byte. This is necessary because Fastbit does not support NULL values in the traditional RDBMS sense. The IS NULL and IS NOT NULL operators query the NULL markers, and bitmap indexes are automatically created for the markers to support these operations when necessary. Index files When WARP creates indexes, these files are stored in additional files, depending on if the data is character or integer based. For integer data, there will be one ".idx" file, named cX.idx where the X is again the ordinal position of the column in the table. For data stored as strings, "cX.sp" files are created, again named after the ordinal position of the column. It is possible to delete ".idx" or ".sp" files. They will be recreated automatically as necessary. Locking and ACID compliance WARP currently uses table level locking, and supports concurrent inserts, and querying data while loading. WARP is partially ACID compliant. Loading data commits periodically, and committed data is visible to new queries. WARP does not support transactions (yet). It is recommended to add an integer column to tables representing a batch of data, and if the data loading fails, or is interrupted, to delete the affected batch. The next version of WARP will support atomic loading so that this will no longer be necessary. DELETE and UPDATE queries block other queries. DELETE and UPDATE queries are uncommon in analytics systems. WARP does support DELETE and UPDATE so that "slowly changing dimensions" are supported, which is not possible on column stores like ClickHouse. DELETE and UPDATE operations are not in place. Old row versions are maintained in the table until it is rebuilt with OPTIMIZE TABLE.Thus WARP is somewhere between MyISAM and InnoDB in terms of ACID compliance, and the goal is full ACID compliance in a future release. A quick look at performance and automatic indexing. The lineorder table referenced above has ~70M rows: A COUNT(*) query with no WHERE clause The LO_OrderKey and LO_SuppKey columns are integers. Each order has on average 7 line items, but the number of lines differ (the SSB data is based on the TPC-H data generator). WARP reads only the necessary column data from disk You will notice that the following query is a lot faster than the COUNT(*) query. This is because only the LO_OrderKey column had to be read from disk. This is because WARP is a column store. In addition, an index was automatically constructed on the LO_OrderKey column. A filter is used on the LO_OrderKey column which constructs an index Automatic indexing for filtered columns The first time you query a column and use a filter (WHERE clause) on it, IO will be done to read the data from disk, and an index will be automatically constructed. Here is a filter for a single order: A 39K index is created for the 8.0 megabytes of data in partition 0 You will notice that the index is small. WARP uses WAH compressed bitmaps. This is the first partition in the table, but almost ever partition (save the last) contains the same amount of data because each partition has 1M rows. Thus the size of the LO_OrderKey on disk is ~544MB, but the size of the index is only 4.67MB. A btree index in InnoDB requires the whole column to be copied (and sorted) along with the primary key for the row. So an InnoDB index on this same data would be ~577MB. Read free index updates When a row is appended to a table only the last block of the index has to be updated, thus inserting new rows into the table does not incur the performance penalty of maintaining btree indexes. Indexes use very little space, and are negligible to insertion and modification performance. Querying the column again with the automatic index The bitmap index will be used the next time a filter is applied to the LO_OrderKey column. This query selects a different order from the table: Searching for LO_OrderKey = 100 uses the indexes with a 0.03 second response WARP didn't have to do any IO for the query, because the data is already cached from the previous query. The size of the cache is configurable and defaults to 4GB. But more importantly, the bitmap index was utilized, and instead of scanning the whole table (which takes 55 seconds) the query is resolved in 0.03 seconds. Unlike most MySQL engines, WARP can use more than one index to answer a query Bitmap indexes support bitmap intersection for fast query results that can not be satisfied with btree indexes. MySQL does support "index intersect" operations in some cases, but they are still not as fast as bitmap index intersection, and every btree index slows down data manipulation operations significantly. I first query the LO_SuppKey column to create an index on it. Note, I could just run the final query that references both columns, but again, I want to demonstrate the indexing performance and show that the intersection returns the right results. It takes 26.34 seconds to read the column from disk and construct the index I will use a disjunction (an OR clause) to combine results from both of the indexes. There are no rows with both LO_OrderKey = 100 and LO_SuppKey = 9988, thus the query result should include the 2974 rows where LO_SuppKey = 9988, and the five rows where LO_OrderKey = 100 rows, and indeed it does: Bitmap intersection returns results in 0.05 seconds for an OR query that btree indexes can not efficiently resolve Conclusion This concludes the introduction to the WARP storage engine. Questions and comments are welcome. Again, if you would like binaries for your preferred Linux distribution, open a GitHub issue requesting them, and I will make them available. https://swanhart.livejournal.com/142907.html
0 notes