#HandymanHacks
Text
How Can A Toilet Cistern Be Replaced?

Are you facing issues with your toilet cistern and thinking it might be time for a replacement? Replacing a toilet cistern can seem daunting, but with the right guidance, it can be a straightforward DIY project that saves you time and money. Our latest blog post demystifies the process of toilet cistern replacement, breaking it down into easy-to-follow steps. From selecting the right cistern for your bathroom to the final installation, we cover everything you need to know to ensure a smooth, hassle-free replacement. Whether you're a seasoned DIY enthusiast or a complete beginner, our guide is designed to equip you with the knowledge and confidence to tackle your toilet cistern replacement effectively. Don't let plumbing problems disrupt your daily routine any longer. Check out our guide and take the first step towards a fully functional bathroom today!
#diyplumbing#home improvement#ToiletRepair#CisternReplacement#BathroomRenovation#plumbingtips#DIYBathroom#FixItYourself#HandymanHacks#HomeMaintenance
0 notes
Text
How do I fix a kitchen sink sprayer?
🔧 Exciting News! Just discovered the ultimate solution to fix your kitchen sink sprayer hiccup. Say goodbye to leaks and inefficiency! 🚰✨
Ready to transform your kitchen experience? Here's a sneak peek into the magic:
💦 Quick Fixes: Learn instant remedies for common sink sprayer issues.
🔄 DIY Solutions: Empower yourself with easy-to-follow, do-it-yourself steps.
🛠️ Tools of the Trade: Discover the essential tools every kitchen wizard needs.
Have your own tips or tricks? Drop them in the comments below and let's read full article! 🤓💬
#KitchenHacks#HomeImprovement#DIYFixes#KitchenMagic#LifeHacks#SinkSprayerFix#DIYProjects#HomeRepairs#KitchenRenovation#ExpertTips#HandymanHacks#FixItYourself#InnovationInHome#SmartLiving#HomeMaintenance
0 notes
Text
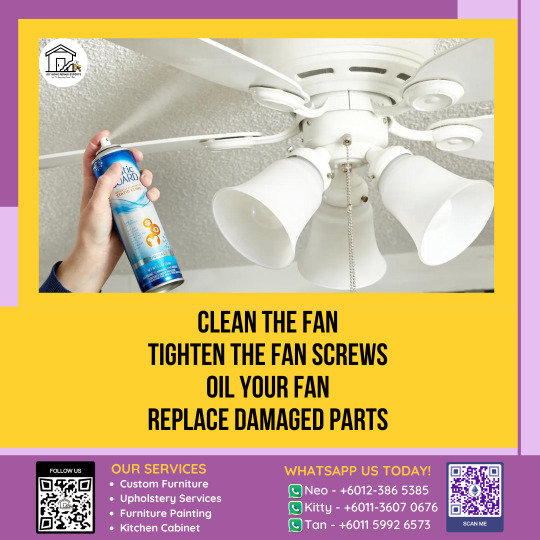
How to Fix a Noisy Ceiling Fan Once and for All
Your ceiling fan should be seen and not heard. In most cases, fixing a noisy ceiling fan should only involve a little time and patience. Since ceiling fan issues can range from quick fixes to more complex electrical issues, start by performing basic maintenance to use your time effectively.
1. Clean the Fan
Enough dirt and dust on your fan blades can upset the rotational balance of your fan, causing it to wobble, rattle, and run inefficiently.
To clean the blades, start by using a duster to remove the bulk of dust, dirt, and debris.
2. Tighten Fan Screws
It’s normal for screws and other fasteners to loosen over time due to the consistent rotational force of the fan. Carefully look over each part of your fan, including:
Blades
Fan arms
Brackets
Canopy
If you find any loose screws or fasteners, use a screwdriver or a wrench to tighten them. Some components may have been pushed out of place while the screws were loose, which can cause issues such as the motor cover obstructing the fan blades or the fan blades getting out of position. Make sure these parts are properly aligned and in place before tightening their screws.
3. Oil Your Fan
Depending on the model, your fan may need occasional oiling to keep its parts from overheating, rubbing, and sticking during rotation. Wipe any excess oil off before testing the fan.
4. Replace Damaged Parts
If you notice damaged parts or components at any point, it’s best to replace them to prevent excessive noise or premature wear on your fan components. Depending on your warranty, the manufacturer can generally provide replacement parts.
Check for these common issues:
Deformed brackets
Cracked or bent blades
Frayed wiring
#joyhomerepairexperts #HomeMaintenance #DIYHomeImprovement #SafetyFirst #HandymanHacks #HomeRepairHacks #QuickFixes #HomeDIYProjects #CraftyFixes #EcoFriendlyRepairs #FixItYourself #RepairWithEase #cleaning #ceilingfan


0 notes
Text
A cracked window can be an unwelcome surprise, often caused by accidents like stray baseballs or windstorm debris. However, repairing cracked glass is relatively simple with the right materials. If you find a crack in your window or other glass items, here's a step-by-step guide to fixing it.
Tools Needed:
- Safety glasses
- Cut-resistant work gloves
- Heat gun
- Utility knife or razor blade
- Cleaning cloths
- Putty knife (optional)
Supplies Needed:
- Dish soap
- Two-part epoxy
- Duct tape or painter’s tape
- Paper plate
- Wooden craft sticks
- Glass cleaner
- Cardboard
1. Removing the Glass:
- Remove the glass carefully to avoid injury.
- Clean the area thoroughly.
2. Cleaning the Cracked Glass:
- Use dish soap, warm water, and a cleaning cloth to wipe around the crack.
- Wear safety goggles and gloves to avoid deepening the crack.
3. Preparing the Epoxy:
- Lay out cardboard and mix the epoxy according to instructions.
- Apply the mixed epoxy swiftly before it hardens.
4. Applying the Epoxy:
- Use a craft stick or putty knife to spread the epoxy over the crack.
- For multiple pieces, apply epoxy to broken edges and press them together.
- Allow the epoxy to cure.
5. Cutting Away Excess Epoxy:
- Use a utility knife or razor blade to scrape excess epoxy off the glass.
6. Curing and Cleaning:
- Let the epoxy cure for 24 hours.
- Clean the glass surface with a glass cleaner and a cloth.
{Temporary Fixes for Cracked Windows}
- Glass Glue: Use automotive glass adhesive as per instructions.
- Super Glue: Fill cracks with super glue and wipe away excess.
- Plastic Cover: Cut and tape plastic over the crack to keep out elements.
- Masking or Packing Tape: Tape over the crack to prevent spreading.
- Nail Polish: Apply clear nail polish to small cracks to seal them.
#joyhomerepairexperts #DIYGlassRepair #FixCrackedWindow #TemporaryWindowFix #HomeMaintenance #GlassRepairTips #DIYHomeImprovement #EpoxyFix #WindowCare #SafetyFirst #HandymanHacks #GlassFixing101 #HomeRepairHacks #CrackedWindowSolution #QuickFixes #HomeDIYProjects #WindowRenovation #CraftyFixes #EcoFriendlyRepairs #FixItYourself #RepairWithEase


0 notes
Last Seen Blogs

socialmediamanage5
social media manager

rogeriinho
Dreaming is Believing

melissa0691
RANDOM STUFF

kanichia
Untitled is still Untitled

glosssazz
𝕭𝖗𝖎𝖑𝖑𝖔𝖘 & 𝖆𝖈𝖈𝖊𝖘𝖔𝖗𝖎