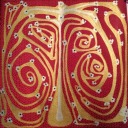
#I made sure the file was 11x17 so I could print it poster sized
Text
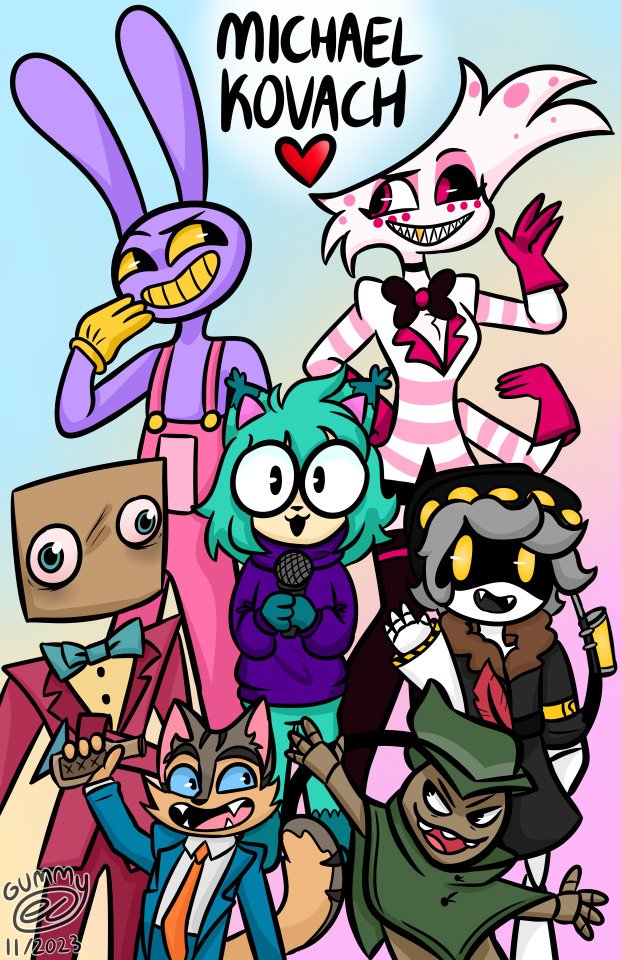
It's finished!
Pls reblog 💜
@kovox @actuallynickels
#I'm surprised I did it all in one day#I didn't think I would have the motivation lol#oh and I'm 100% printing this and putting it on my wall#I made sure the file was 11x17 so I could print it poster sized#also like#if I ever magically get the chance to meet Michael Kovach at a convention...#I would have him sign this#adsgklhsdflkgs#I worked so freaking hard on this oml#okay normal tag time so I can actually get notes lmao#gummyart💜#art#digital art#fanart#tadc#the amazing digital circus#tadc jax#hazbin hotel#angel dust#hazbin angel dust#darly boxman#gooseworx#n murder drones#murder drones#rocky rickaby#lackadaisy#billie bust up#fantoccio#michael kovach#voice acting
248 notes
·
View notes
Text
bookbinding: the dust jackets
@outpastthemoat, here is some more information on how i did the dust jackets!
so the dust jackets quite honestly were the right part to ask about, because they were the most finicky part of the process to figure out (and the most annoying XD). mostly this was because of the careful measurements required, and the restrictions of paper size and printer capabilities - if i had a printer that could handle long paper, i would’ve just found myself some 11x17″ glossy sheets and done it myself, but my printer can’t do that, so i had to outsource the printing part.
so the steps i ended up taking were basically this:
1) measure dimensions of your front and back covers, and your spine. if you want to have content on your inside flaps, you’ll need to measure dimensions for those as well. the height should be the same for everything, obviously, but the widths will differ.
2) using your measurements, design all the different sections in the editing program of your choice. (i used gimp, because it’s free.) i designed each element separately (and i only did the front cover, back cover, and spine, because my flaps were just the same black as the rest of the cover, and i didn’t need to make files for them.)
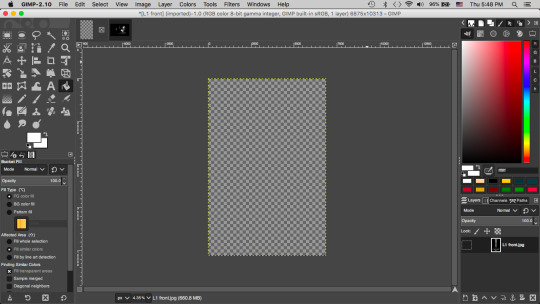
so first i would create a canvas in gimp that was the same dimensions as what i measured, though i would add a tiny bit of extra to the top and bottom - you can always trim it later, but you don’t want the dust jacket to come out too small. depending on the thickness of your cover boards, you may also have to budget a tiny bit of extra on the sides as well, to take into account the folds of the flaps.
so for the front cover i made a canvas that was like 5.5 x 8.25″.
then i would design the cover on that canvas. i mostly used really basic, minimalistic clipart type images, because my artistic abilities are limited, but people who are better at art than i am could do way more!
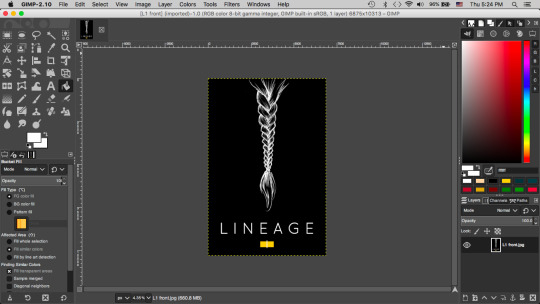
before you export each file, make sure to set the image resolution to 300 pixels per inch. otherwise the image might come out blurry when it’s printed, even if it looks okay on your screen. go to [image] > [print size], then change your x-resolution and y-resolution to 300 ppi.
then, export each file. [file] > [export as]
3) next, create a dust jacket template (also in gimp). what you need to do here is create a canvas that is the same size as your final printed document, so you’ll need to know what your paper options are beforehand. i needed to have my stuff printed outside my home (i used kinkos) but there are only certain types/sizes of paper you can use, so you have to do a little planning first.
my steps were like this:
measure what the entire length of the dust jacket will be. you can do this using a string - hold one end where you want the edge of the first inside flap to be, and then wrap it around the outside of the book the same way you would your dust jacket, until you get to the desired spot for the edge of the second inside flap.
my dust jackets came out with a length under 17″, so i was able to use 11x17 glossy paper, which was a nice, inexpensive option. if your dust jackets are longer, you might have to submit them as 12x18 posters (more expensive) or other, larger sizes.
now that i knew what size my final file would be, i went to gimp, and i created an 11x17 canvas. and then i imported my front cover, back cover, and spine file as new layers ([file] > [open as layers]) and arranged them next to each other, with equal space on either side for the flaps. (my flaps were the same color as everything else, so i didn’t need to make separate files for them; i just filled the background with black. but if you made custom flaps, you can import them and arrange them just like you did the other pieces.)
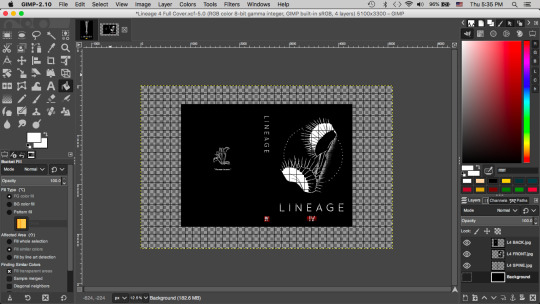
fill the extra background space with a contrasting color. you can just fill it with white if you want it to be easy to see where you need to cut once you have your printout, or choose a darker color if your cover is lighter.
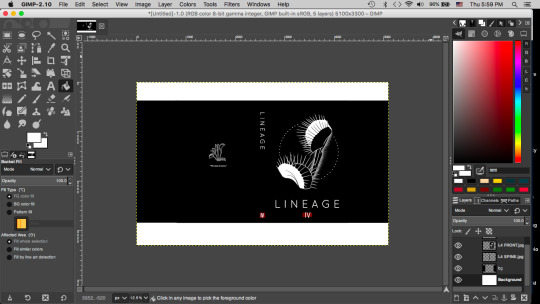
make sure your file is set to 300ppi (you ALWAYS need to do this before you export; gimp doesn’t retain your settings each time you open the file)
export your file.
4) send the file you created to the printer’s! i sent mine to kinko’s via their online print service, because they offered a thick, semi-glossy paper that was less than $3 per copy.
5) once you have your printout back, you’ll need to cut out the dust jacket. this is the most nerve-wracking bit - i used an 18″ straight edge and an exacto knife.
6.) after you have your dust jacket cut out, you wrap it around your book! i left my books under weights for a bit after this, so the jackets would meld to their positions.
and that’s basically the process i used! let me know if you have any questions or if anything needs more clarification - i had to fiddle around a lot to get a final product i liked, so this is definitely a more finicky part of the bookbinding process. X)
109 notes
·
View notes
Last Seen Blogs
claudinedaussyart
Claudine Daussy

this-ace-of-spades
Ace_of_Spades

ebugsdotjpeg
e bugs

bgnweb
Benedito Germano Neponuceno
visokixssd
Самуил