#I'll have another Palestinian flatbread recipe up soon which will be more beginner-friendly
Text
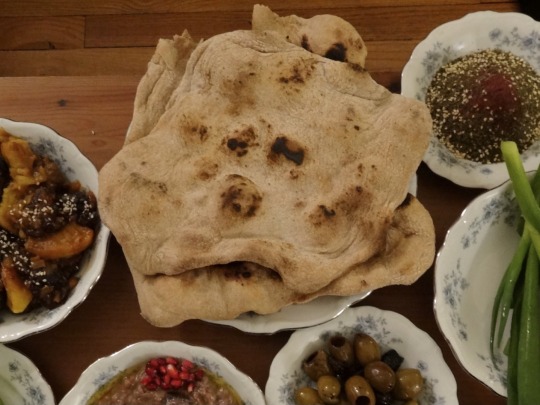
[ID: A plate of light brown bumpy flatbread with blackened spots, surrounded by za'tar and green olives. End ID]
خبز طابون / Khobz taboon (Palestinian flatbread)
Khobz taboon ("taboon bread") is a soft, chewy Palestinian flatbread. It may be eaten with olive oil and za'tar, but it is best known as the base of مسخن (musakhkhan), where it is topped with spiced aromatics and perhaps chicken.
Khobz taboon gets its name from the vessel it is traditionally cooked in—an outdoor, shallow conical oven with an opening at the top and a clay or metal cover to trap heat. Taboons may also have an opening at the side through which the fire can be stoked, especially in the east of Palestine. These ovens were historically made from a mixture of local clay and hay, but have more recently also been constructed from clay treated to be sturdier, or from metal.
A taboon is used by packing flammable material, such as hay, fabric, animal dung, wood, and charcoal, around the outside of the oven and letting it burn overnight; the fire transfers thermal energy to the clay, and to the river stones, sand, glass, or flint stones (صوان, "ṣawwān") that form the base of the oven. The ash is then brushed away, and the flattened dough is placed on the stones or stuck to the walls of the oven to cook. The clay and stones will continue to release thermal energy and cook things throughout the day. The clay and ash give a distinctive flavor to anything cooked inside the taboon, making this method a source of nostalgia for many people who have transitioned to cooking in indoor ovens.
Khobz taboon was traditionally made with whole wheat flour. Most people today use a blend of around two parts white flour to one part whole wheat, or else all white flour; they may even add milk or milk powder to ensure a very soft dough. This recipe uses a blend of flours to combine the nutty flavor of whole wheat dough with the pliancy of white dough. It also begins with an optional pre-ferment to mimic the traditional Palestinian method of including a piece of dough from the previous day's bread into each new batch (like a pâte fermentée) giving a rich and slightly sour flavor to the final bread. It calls for the use of rocks to imitate the bottom of a taboon; the rocks give the khobz its distinctive dimpled texture, and ensure that no interior pocket forms in the bread.
In the years following 2007, the siege Israel had imposed on Gaza caused a shortage of cooking gas that led to a resurgence in the use of taboons. The ovens were used to bake bread and to grill sweet potatoes during the time of their winter harvest. Meanwhile, in the West Bank, Israeli military forces repeatedly destroyed taboon ovens and assaulted villagers who tried to defend them, as Israeli settlers from nearby villages complained about the smoke that the ovens produced. Some of these ovens had been used to bake bread for entire families of 40 or more people. Palestinians continue to build, use, and defend these ovens, despite the fact that Israeli law de facto forbids Palestinians in the West Bank to build anything.
Today, Israel is deliberately targeting and destroying bakeries in refugee camps that had been supplying bread to tens of thousands of people in Gaza, continuing a long campaign of starvation of the Palestinian people.
Support Palestinian resistance by calling Elbit System's (Israel's primary weapons manufacturer) landlord; and donating to Palestine Action's bail fund.
Equipment:
A large, shallow mixing bowl, like a Moroccan qus'a
A large (12"), shallow clay cooking vessel, such as the bottom of a Moroccan tajine (one that is rated for very high temperatures), or a large baking tray
Assorted smooth river rocks of varying sizes, from 1 to 3" in diameter.
Make sure that your rocks have been thoroughly cleaned, and that they do not contain any fissures, cracks, or veins that could contain water (this water, once heated in the oven, could cause the rocks to crack open). Instead of river rocks, I used lava rocks designed for use in a clay tanoor. You just need something to provide thermal mass and give a bumpy texture.
Ingredients:
Makes 3 large breads.
For the pre-ferment:
140g whole wheat flour
1/2 tsp active dry yeast
140g water
You may also use a pâte fermentée that you already have (just adjust the ratio of white to whole wheat flour added later accordingly), or a sourdough starter. The hydration of the starter doesn't matter, since you will be adding water by eye later.
For the bread:
330g bread flour or all-purpose flour
30g whole wheat flour
5g salt
Water
If you skipped the pâte fermentée step, add 170g (rather than 30g) of wheat flour at this stage, as well as 1/2 Tbsp of active dry yeast. I have not tested the recipe this way.
Instructions:
For the pâte fermentée:
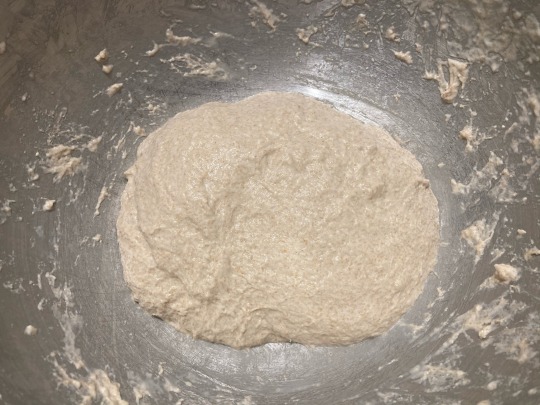
1. Mix flour and yeast in a small mixing bowl. Add water and stir to combine. Cover and leave out at room temperature for a day, or in the refrigerator for up to three days. At the end of the rising time, it should be about one and a half times its original size.
For the bread:
This recipe makes a high hydration dough that will need techniques such as slapping and folding to knead effectively.
1. Mix flours and salt in a very large, shallow mixing bowl. Add your pâte fermentée and mix to combine.
2. Add water until the flour comes together into a soft, sticky dough and continue keading. Have a bowl of water on your workstation. Every time the dough starts to stick to your hands or the sides of the bowl, wet your hands and rinse down the side of the bowl with some water. This will gradually add water to the dough.
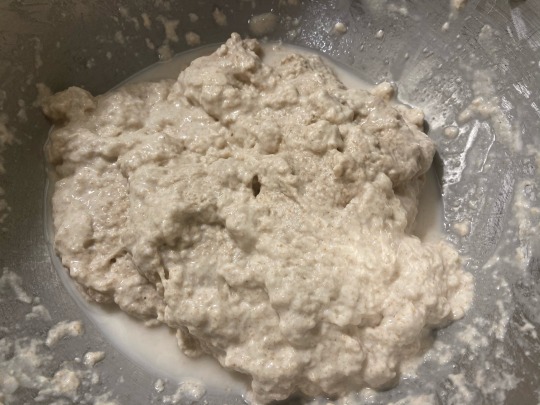
3. You will notice the dough growing smoother and laxer. At this point, start kneading by repeatedly folding the edges of the dough in towards the center. Do this by occasionally wetting your hands, then running a hand along the side of the bowl and under the edge of the dough to unstick it from the bowl; then fold. You will get stuck less often if you try to touch the dough as lightly and briefly as possible. Every few folds, dimple the surface of the dough all over with your fingertips. You will have been kneading for about 10 minutes at this point.
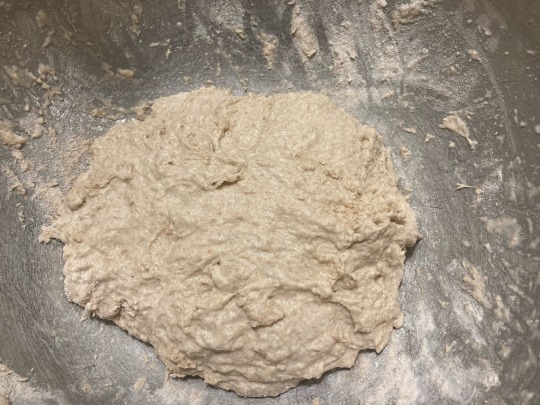
The dough should become more smooth and less bumpy—you will notice it holding its shape and becoming more stretchy as gluten forms. It should form into a ball when you fold the corners in and hold its shape for a minute, but then gradually expand to take the shape of the bowl. I added about 2 1/2 cups of water total (in dry conditions) during steps 2 and 3.
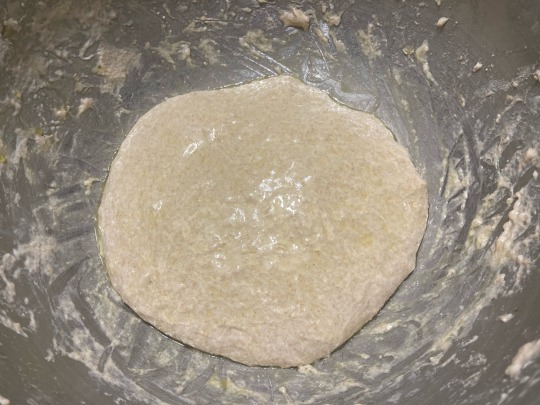
4. At this point, the dough is wet enough that the slap and fold method is the best way to knead. Wet your hands and again unstick the dough from the sides of the bowl. Hook your hands under the dough and quickly pull it all up into the air; fold the hanging bottom part of the dough under, and plop the dough back down, folding it on top of the part you plopped down earlier. Give the bowl a quarter turn and repeat. Do this continually for another few minutes.
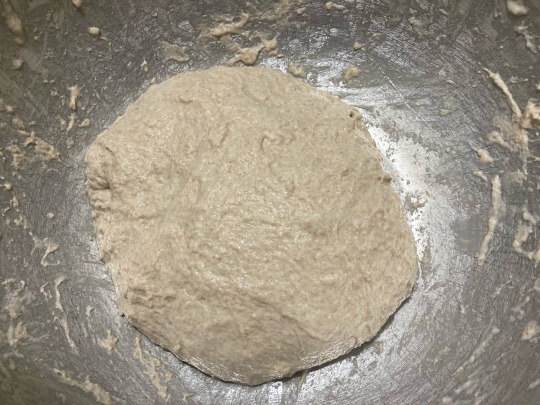
5. When the dough is very smooth and lax, smear some olive oil on the sides of the bowl and under the dough, and pat some oil on top.
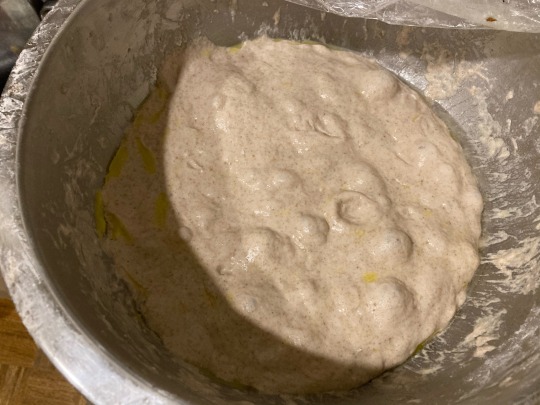
6. Cover the bowl and bulk ferment the dough at room temperature for 8 hours, or for 16-24 hours in the fridge. At the end of the rising time, you should see bubbles beginning to form on the surface of the dough.
To shape and bake:
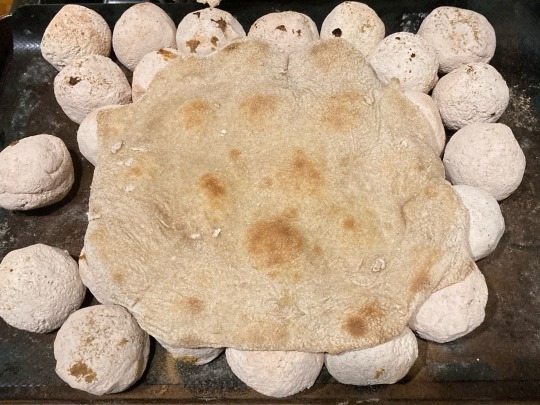
1. Place a layer of rocks at the bottom of a clay cooking vessel or baking sheet. Put the sheet in the top third of the oven and preheat your oven to 550 °F (290 °C), or as hot as it will go.
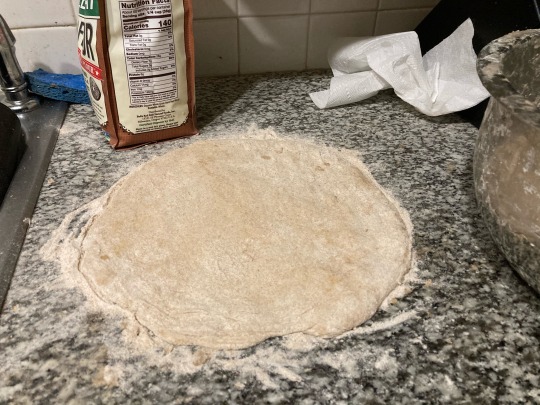
2. Meanwhile, fold the edges of the risen dough over into the middle a few more times with damp hands. Pinch off a large piece of dough (about the size of two fists), and fold the sides over into the middle to make a neat packet.
3. Drop the packet of dough onto a heavily floured surface, and flip to flour both sides. Pat the dough flat, then throw it back and forth between your hands, catching the edge each time as you spin it through the air, like a pizza crust, to stretch it into a circle about 1/4" (1/2cm) thick with a diameter of about 10" (25cm).
You may also stretch and pat the dough out on a flat surface.
4. Remove the tray from the oven. Flip the dough circle over the back of your hand to transfer it and lay it down over the hot rocks. Re-stretch it into a circle, if necessary.
5. Place the tray back in the oven and cook for 5-7 minutes, until the top of the bread has golden brown spots. Repeat with each piece of dough, leaving the rocks in the oven for a few minutes between each one to allow them to come back up to temperature.
6. (Optional): Hold each flatbread directly over a gas flame for a minute or two to blacken a few spots and mimic the flavor that a wood-fired oven would give to your khobz.
You may also use a method similar to the dhungar technique to smoke your bread. Place each piece of bread one at a time into a large vessel with a closely fitting lid, alongside a small bowl. Light a piece of wood on fire and drop it into the bowl; then cover the vessel with the lid as you allow the wood to smoke for a minute or two.
#note that I do not recommend this recipe to anyone who is not experienced with making bread#I'll have another Palestinian flatbread recipe up soon which will be more beginner-friendly#Palestinian#bread#khobz#flatbread
347 notes
·
View notes
Last Seen Blogs