#Linux mint vmware image
Explore tagged Tumblr posts
Visit Tumblr Blog
Explore Tumblr blogs with no restrictions, modern design and the best experience.
Last Seen Tumblr Blogs


Fun Fact
Tumblr was named as a finalist in Lead411’s New York City Hot 125 in Aug 2010.
Text
Linux mint vmware image

Next, run the Router and open the CLI prompt to check that the Cisco Router is running.Īfter you have completed the GNS3 installation, you can check the version of GNS3 in Help / About as follows. Now, click on the Idle-PC finder button to set the Cisco Router Idle-PC value.Ĭreate a new project on GNS3 and drag and drop the Cisco Router you added into the workspace. The Idle-PC value sets so that the Cisco Routers or Switches on GNS3 do not exhaust the computer’s processor too much. To add a Cisco Router, click the Browse button in the IOS image window to define the location of the Cisco IOS image.Īfter selecting Cisco Router c7200 IOS image, click the Open button.Īfter you have added the Cisco Router, click Next. In the Import an appliance template file window, select Add an iOS router using a real IOS image (supported by Dynamips) option and click OK. GNS3 has successfully connected to the Local Server and click Next to continue. Make sure the Host binding setting for GNS3 is as shown in the image below and wait while GNS3 connects to the Local Server. Now follow the steps below to add Cisco IOS to GNS3 on your Linux computer.Īfter the GNS3 program opens, in the Setup Wizard window, select Run the topologies on my computer and click Next. Just like adding Cisco IOS to GNS3 on Windows operating systems, adding the Cisco IOS image on the Linux system involves the same steps. In this step, we continue with No because we do not want Non-superusers users to perform packet analysis.Īfter installing GNS3, run the program by executing the gns3 command on the Terminal.Īdding Cisco IOS to GNS3 is easy. If you want non-superusers users to do packet capture using the Wireshark program, continue with the Yes option.

If you want non-superusers users to run the GNS3 program, enter Yes. To start the GNS3 installation, follow the command below and press Y to continue the installation, then press Enter. To update the Linux Mint software, use the sudo apt-get update command.

Open Terminal on the Linux desktop and execute the following command to add GNS3 to the Repository.
1 note
·
View note
Photo


06.06.20
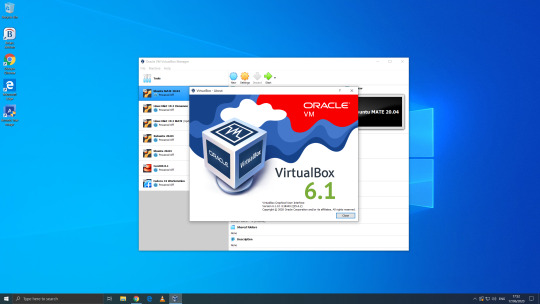
We went to the Oracle VirtualBox site and downloaded and installed VirtualBox 6.0. Oracle VM VirtualBox is free, open source virtual machine software maintained by Oracle Corp.
It was originally an Innotek product before Innotek was acquired by Sun Microsystems in 2008. Sun Microsystems was in turn acquired by Oracle in 2010. The alternative software to Oracle VM VirtualBox is VMware workstation.
I have been using Oracle VM VirtualBox since 2016 and have learnt a lot of information about how it works and how to install various operating systems.
Virtualbox can run Linux guest operating systems and Microsoft Windows guest operating systems. It can emulate both 64-bit operating systems and 32-bit operating systems.
Each operating system you add to VirtualBox is treated as a Guest. The guest operating system is running in its own virtual environment, which emulates a real machine on your PC. This means that anything you do in it does not affect your PC. The guest runs in a console:
About the VBox console: The VirtualBox console displays the active virtual machine. It shows the virtual guest operating system activity icons in the status bar. The console can be re-sized, minimised and forced closed from the title bar. It is not recommended to force close an active guest operating system as this acts like switching off mains power. Your guest operating system should be shut down cleanly. You can select different viewing modes in the view list or use the shortcut keys assigned with them. These mode include full screen mode, seamless mode and scaled mode. VirtualBox website link: https://www.virtualbox.org/ VirtualBox wiki link: https://en.wikipedia.org/wiki/VirtualBox
After setting it up, I went to find some Linux-based operating systems to download. Each download is a disc image file with the file extension .iso.
I chose:
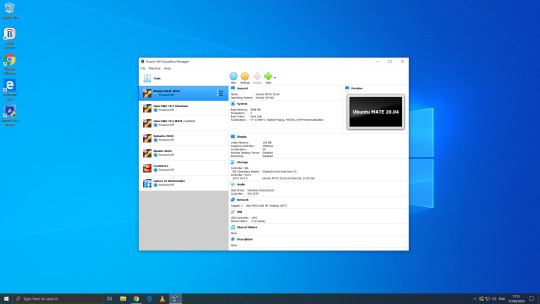
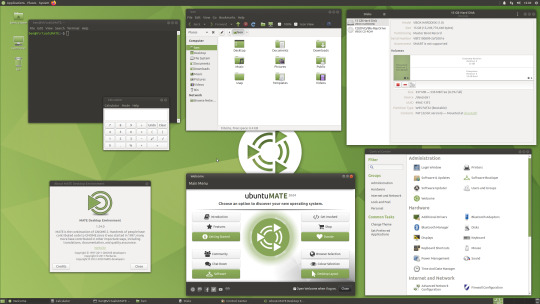
Ubuntu MATE 20.04 LTS (Long Term Support)
This operating system uses the MATE Desktop Environment, which is the continuation of the former GNOME 2 Desktop. I like this desktop environment because it has a very configurable interface.
Ubuntu MATE: https://ubuntu-mate.org/
Wiki link: https://en.wikipedia.org/wiki/Ubuntu_MATE
Linux Mint Cinnamon 19.3 Tricia (based on Ubuntu 18.04 LTS)
This operating system uses the Cinnamon Desktop Environment which is based on GNOME 3. Cinnamon uses MGSE (Mint Gnome Shell Extensions), which re-creates a more traditional desktop linux experience whilst also looking modern.
I like this desktop environment because it looks modern and feels familiar to those who come from Windows.
Linux Mint: https://www.linuxmint.com/
Wiki link: https://en.wikipedia.org/wiki/Linux_Mint
Linux Mint MATE 19.3 Tricia (based on Ubuntu 18.04 LTS)
Linux Mint edition featuring the MATE Desktop Environment. I like this desktop environment because like Ubuntu MATE, it is very configurable. It also features Linux Mints system updating utility.
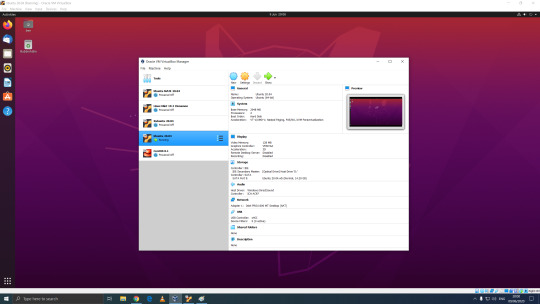
Ubuntu 20.04 LTS
This version of Ubuntu is the main version by Canonical Ltd. This operating system uses the GNOME 3 Desktop Environment.
Ubuntu came out in 2004 and used GNOME 2 as it’s desktop environment until 2011, when it changed to the now discontinued Unity Desktop. In 2017, Canonical announced it would return to GNOME. I like this desktop environment as unlike the GNOME 3 default interface, Ubuntu uses its own orange style theme and adds a Unity like dock on the left of the screen.
Ubuntu: https://ubuntu.com/
Wiki link: https://en.wikipedia.org/wiki/Ubuntu
Xubuntu 20.04 LTS
This operating system uses the XFCE Desktop Environment which aims to be lightweight on system resources and has a really configurable user interface. Xfce once stood for XForms Common Environment. The menu system is called the Whisker Menu. I like this desktop environment because like MATE it is very configurable.
The Ubuntu 20.04 Long Term Release is code named: Focal Fossa. All Ubuntu based distros use .deb (Debian Package Manager) for software installation.
Xubuntu: https://xubuntu.org/
Wiki link: https://en.wikipedia.org/wiki/Xfce
Fedora Workstation 32
Fedora is a Linux distribution developed by the community-supported Fedora Project which is sponsored primarily by Red Hat, a subsidiary of IBM, with additional support from other companies. Fedora is used by Linus Torvalds who is the creator of the Linux kernel.
Fedora is the upstream source of the commercial Red Hat Enterprise Linux distribution.
Since the release of Fedora 30, five different editions are currently available: Workstation, focused on the personal computer, Server for servers, CoreOS, focused on cloud computing, Silverblue, focused on an immutable desktop specialized to container-based workflows and IoT, focused on IoT devices.
I like this desktop environment because it looks fresh and modern. This operating system features the latest version of the GNOME Desktop Environment.
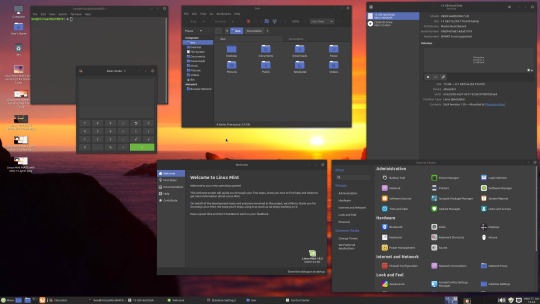
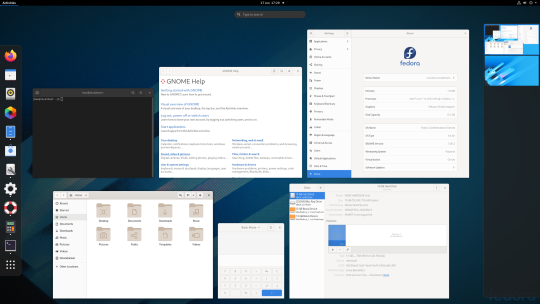
The screenshot of Fedora shows the ‘Activities’ dial screen which gives you a Visual overview of your GNOME Desktop.
With the Activities screen, you can see and control currently opened app windows, all installed applications, search system and switch desktop work spaces.
Fedora: https://getfedora.org/
Wiki link: https://en.wikipedia.org/wiki/Fedora_(operating_system)
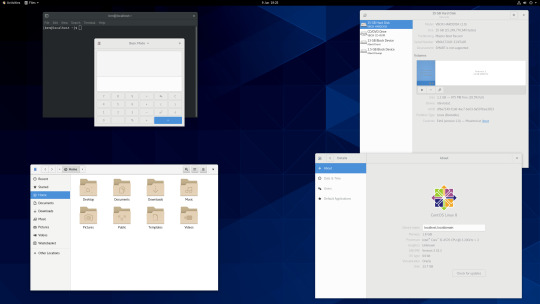
CentOS 8.1
CentOS (Community Enterprise Operating System) is a Linux distribution that provides a free, community-supported computing platform functionally compatible with its upstream source operating system, Red Hat Enterprise Linux (RHEL). It is maintained by The CentOS Project (affiliated with Red Hat). Both operating systems use GNOME 3 as their default desktop environment.
It is basically a free version of Red Hat Enterprise Linux, with the Red Hat branding removed and update servers pointing away from Red Hat servers.
Red Hat Enterprise Linux is a commercial focused Linux distro.
All Red Hat Linux based distros such as RHEL, CentOS and Fedora use .rpm (Red Hat Package Manager) for software installation.
CentOS and Red Hat Enterprise Linux can be installed on servers, workstations and desktops. Both are very popular on mission critical commercial server systems as it is designed to be flexible and very stable.
I thought this Linux distro is interesting because unlike the Ubuntu based distros above, installation of CentOS is more involved, you set up software sources, installed software, desktop and operating system components.
CentOS runs on a lot of web servers.
CentOS: https://www.centos.org/
RHEL:
https://www.redhat.com/en/technologies/linux-platforms/enterprise-linux
CentOS Wiki link: https://en.wikipedia.org/wiki/CentOS
RHEL Wiki link: https://en.wikipedia.org/wiki/Red_Hat_Enterprise_Linux
VirtualBox requires the installation of Guest Additions, which adds extra features to the virtual machine, such as the ability to scale the resolution of the guest operating system, better 3D acceleration and the ability to move files between the Guest and Host machine.
To install Guest Additions on a Linux guest, you will need to use the terminal. installation of this is different on .deb and .rpm builds of Linux.
4 notes
·
View notes
Text
BlackArch Linux is a penetration testing distribution based on Arch Linux. Its repository contains about 2808 tools that can be installed in groups or individually. These tools, developed along with their dependencies are used by penetration testers and security researchers around the world. In comparison, BlackArch Linux closely resembles Parrot and Kali Linux in use with the main difference being that this is an Arch-based system. BlackArch Linux can be installed in several ways. These include: ISO installation – BlackArch can be burned to a CD/USB and run as a Live system. The ISO installation offers two options: BlackArch Slim ISO: This ISO only provides the Xfce desktop environment. BlackArch Full ISO: Provides multiple preconfigured Window Managers. OVA image installation – This is the recommended method to install BlackArch on VMware, Virtualbox or QEMU Install to existing Arch Linux – It is possible to install and use BlackArch by adding the user repository to an existing Arch Linux installation. Here you can install and use the penetration testing tools just like you would do on any other BlackArch installation. By following this guide, you will be able to install BlackArch Linux on VirtualBox / VMWare Workstation using an OVA image. Getting Started. For this guide, you need to have VirtualBox or VMWare Workstation installed on your system. The dedicated guides below will help you install VirtualBox / VMWare Workstation on your system. Install VirtualBox How To Install VirtualBox on CentOS 8 / RHEL 8 Install VirtualBox on Debian How To Install VirtualBox on Fedora How To Install VirtualBox on Kali Linux / Linux Mint Install VirtualBox on Ubuntu Install VMware Workstation Install VMware Workstation on Debian Install VMWare Workstation on CentOS 8 Install VMware Workstation on Arch Linux / Manjaro Install VMware Player and Workstation on Kali Linux Once VirtualBox / VMWare Workstation is installed, proceed as below. Step 1 – Download the BlackArch OVA image The BlackArch OVA image can be downloaded from the official BlackArch Linux downloads page. There is a list of mirrors provided to help you download the OVA image easily. Alternatively, you can pull this 64 bit OVA image from the Linux terminal using Wget as below: wget https://mirrors.fosshost.org/blackarch/ova/blackarch-linux-2021.09.01.ova The download may take some time depending on the internet speed and the mirror selected. Once complete, proceed to the next step below. Step 2 – Create the BlackArch Linux Virtual Machine The BlackArch OVA file contains all the required BlackArch Linux Virtual Machine configurations. All you need to do is import the OVA file to VirtualBox / VMWare Workstation. 1. On VirtualBox To import the BlackArch OVA file on VirtualBox, click on Tools>Import. Proceed and load the downloaded OVA file from your local storage. Once loaded, all the preconfigured settings will be displayed as below. Proceed and import the OVA file. Next, agree to the License Terms. The OVA will be imported as below. Sit back and wait for the process to complete. Once done, you will have the BlackArch Linux VM created as below: You can customize the settings for your VM before you start it. 2. On VMWare Workstation VMWare Workstation also allows one to import a Virtual machine from OVA files. To achieve this, click on Open a Virtual Machine Now load the BlackArch OVA file and agree to the License Terms. Proceed and set the VM name and the preferred storage location. Sit back and wait for the importation process to complete. Once complete, the BlackArch Linux VM will be ready. Step 3 – Launch the BlackArch Linux Virtual Machine. At this point, you should have the BlackArch Linux Virtual Machine ready to be started/powered on. Start the Virtual Machine and proceed as below. Before you log in to your system, you can set the preferred desktop and language.
For this guide, I will keep the defaults. Login to BlackArch Linux using the default credentials: Username: root Password: blackarch Fill in the credentials as shown below: On successful login, you will see the below BlackArch Linux desktop. Launch tools by right-clicking on the desktop. For example, launching the terminal, I will proceed as below. Once the terminal has been launched, you can run the desired commands. To update the system, issue the command: pacman -Syu Sample output: Install a Package on BlackArch Linux List the available software categories pacman -Sg | grep blackarch Sample Output: You can as well list packages in a category, say in the blackarch-firmware as below: pacman -Sgg | grep blackarch-firmware Output: Installing a package on BlackArch Linux can be achieved in the following two ways: Install all the packages in a category It is possible to install all the packages in a category with a single command. For example, to install packages in the blackarch-firmware category, we will issue the command: pacman -S blackarch-firmware Output: Install an individual package with its name. You can also install a single package in a category by specifying the name, For example, to install the firmwalker offered in the blackarch-firmware category, use the command: pacman -S firmwalker Output: The end! We have successfully installed BlackArch Linux on VirtualBox / VMWare Workstation using the OVA image. You can now proceed and explore the amazing features offered by this Linux distribution. I hope you enjoyed it.
0 notes
Text
Vmware workstation 14 os support 無料ダウンロード.【無料の仮想環境】VMWare Workstation Playerをインストールしてみる。
Vmware workstation 14 os support 無料ダウンロード.VMware Workstation Player

VMware Workstation Playerとは.VMware Workstation 16 Player
Nov 21, · VMware Workstation PlayerはOSを仮想化するためのソフトウェアで、1 台のPC上で別のオペレーティングシステムを分離して実行することができる。この記事では、「VMware Workstation Player」のインストール方法(バージョンを使用)を詳細に解説す VMware Tools の新しいバージョンを含め、ソフトウェア更新を自動的にダウンロードするよう Workstation Player を構成できます。自動ソフトウェア更新を有効にすると、 Workstation Player のゲスト OS に対するサポートを常に最新状態に保てます。また、仮想マシンで VMware Workstation Playerとは、無料で使える仮想化用ソフトウェアです。Windows上でLinuxなどほかのOSを動作させることができます。この記事では、VMwareのインストール方法と使い方をご紹介し Missing: support
Vmware workstation 14 os support 無料ダウンロード.VMware Workstation Playerのインストール方法(年最新版)
Oct 25, · VMware Workstation Player 15のインストール. ダウンロードしたファイルを実行します。. 「次へ」を選択します。. 「使用許諾契約書に同意します」にチェックを付け、「次へ」を選択します。. 仮想環境に対して、キーボードから「Ctrl」+「Alt」+「Del」を有効にし VMware Workstation Playerとは、無料で使える仮想化用ソフトウェアです。Windows上でLinuxなどほかのOSを動作させることができます。この記事では、VMwareのインストール方法と使い方をご紹介します。 Nov 09, · VMware Workstation Playerのダウンロードはこちら 仮想PCの作成・実行ソフト「VMware」シリーズの一つ。WindowsなどのOS上に仮想的なPCを作成し、別のOSを
JavaScript seems to be disabled in your browser. For the best experience on our site, be sure to turn on Javascript in your browser. VMware Workstation Pro は、幅広いオペレーティング システムのサポート、優れたユーザー使用環境、包括的な機能セット、優れたパフォーマンスによって仮想化を次のレベルに推進します。VMware Workstation Pro は業務で仮想マシンを使用するプロフェッショナル向けに設計されています。. プロダクション サポートを追加. ご購入のすべての製品には、E メールによる 30 日間のサポートが含まれています。 年2月以降は英語のみ). サポートされているホスト OS およびゲスト OS の完全なリストについては、 VMware 互換性ガイド を参照してください。. 最新のオペレーティング システム サポートについては、 こちらのナレッジベースの記事 を参照してください。. Skip to the end of the images gallery.
Skip to the beginning of the images gallery. パーソナル デスクトップの仮想化 VMware Workstation 16 Pro. 標準価格: 24, 円 価格 税込み : 24, 円. Buy Now. 今すぐ購入 今すぐ購入 標準価格: 24, 円 価格 税込み : 24, 円. サポート レベル VMware Workstation Pro を 1 ライセンス以上お買い上げのお客様は、サポートおよびサブスクリプション(SnS)サービス(オプション)をご購入いただけます。 SnS は、サブスクリプション期間中、バージョンのメジャー アップグレードとテクニカル サポートを提供することでお客様の投資を保護します。 E メールによる 30 日間の無償サポート テクニカル サポート: 月曜日から 金曜日まで、1 日 9 時間 (公開されている営業時間内)。 Basic Support (ベーシック サポート) の詳細については、 ここをクリックしてください VMware Basic Support (ベーシック サポート) は、クリティカルではないアプリケーションとプラットフォームを対象としており、平日 9 時 ~ 18 時の時間帯にサポートを提供します。.
VMware Production Support (プロダクション サポート) は、本番環境を対象としており、重要度1の事象の場合 24 時間 日サポートを提供します。. E メールによる 30 日間の無償サポートが含まれます。 年2月以降は英語のみ) その他の有償サポートをご希望の場合は、カートに追加してください。. support 無制限のサポート リクエスト リモート サポート オンライン リソース サポート受付時間 目標応答時間(重要度 1 の問題) サポート期間.
basic 午前9 時 ~ 午後 6 時 月曜日 ~ 金曜日 4 営業時間. production 1 日 24 時間 週 7 日 年中無休 30 分以内 (24 時間 日). 主な機能 システム要件 オペレーティング システムの要件 キットの比較 複数の仮想マシン、コンテナ、Kubernetes クラスタを 1 台の PC で実行 メジャーな Linux ディストリビューションおよび Windows 10 の最新リリースに対応 DirectX 11 と最大 8 GB の vGPU メモリをサポートする強化された 3D グラフィックス 仮想マシン スナップショット、クローン、仮想ネットワークを活用して最大限の効率を実現 VMware インフラストラクチャ全体で仮想マシンの移動と利用が容易 新しい CLI ツール「vctl」を使って、OCI コンテナ イメージをビルド、プッシュ、プル、実行 制限付き仮想マシンまたは期限付き仮想マシンを暗号化、構築 Windows 上で WSL2 と Hyper-V とともに Workstation の仮想マシンとコンテナを実行.
X Windows 7 Windows XP Ubuntu Red Hat SUSE Oracle Linux Debian Fedora openSUSE Mint CentOS サポートされているホスト OS およびゲスト OS の完全なリストについては、 VMware 互換性ガイド を参照してください。. 複数の仮想マシン、コンテナ、Kubernetes クラスタを 1 台の PC で実行 メジャーな Linux ディストリビューションおよび Windows 10 の最新リリースに対応 DirectX 11 と最大 8 GB の vGPU メモリをサポートする強化された 3D グラフィックス 仮想マシン スナップショット、クローン、仮想ネットワークを活用して最大限の効率を実現 VMware インフラストラクチャ全体で仮想マシンの移動と利用が容易 新しい CLI ツール「vctl」を使って、OCI コンテナ イメージをビルド、プッシュ、プル、実行 制限付き仮想マシンまたは期限付き仮想マシンを暗号化、構築 Windows 上で WSL2 と Hyper-V とともに Workstation の仮想マシンとコンテナを実行.
オペレーティング システムの要件.
0 notes
Text
Vmware workstation 10 upgrade to 14 無料ダウンロード.簡単10分で終わる 無償VMwarePlayerインストール方法と複数OS起動
Vmware workstation 10 upgrade to 14 無料ダウンロード.【追記】無料で出来る!既存のOS上でWindows 10を楽しむ方法【VMware Player】

[ワテ推薦]レンタルサーバー.【追記】無料で出来る!既存のOS上でWindows 10を楽しむ方法【VMware Player】 - PCまなぶ
おすぎやんです。 サーバ屋の便利ツールVMware Workstation 14 Player for Windows についてです。 OSのインストール手順書を作成するために手順を確認したい! 本番環境ではテストできないから影響がない環境でテストしたい! Windows Update等 1回やったら後戻りできない手順を何回も確認したい!Estimated Reading Time: 1 min Dec 15, · 製品のダウンロードが選べますので、「無償製品のダウンロード」から「WorkStation Player」を選択しましょう。 パソコンの32ビットか64ビット環境に合わせて”自動的”にインストールするプログラム候補が表示されます。 Workstation 16 Pro へのアップグレード. 標準価格: 11, 円. 価格 (税込み): 11, 円. VMware Workstation Pro は、幅広いオペレーティング システムのサポート、優れたユーザー使用環境、包括的な機能セット、優れたパフォーマンスによって仮想化を次のレベルに推進し
Vmware workstation 10 upgrade to 14 無料ダウンロード.VMware Workstation 14 Player for Windows (無償バージョン) のインストール手順|No IT No Life - おすぎやん サーバの設計・構築
Workstation 16 Pro へのアップグレード. 標準価格: 11, 円. 価格 (税込み): 11, 円. VMware Workstation Pro は、幅広いオペレーティング ��ステムのサポート、優れたユーザー使用環境、包括的な機能セット、優れたパフォーマンスによって仮想化を次のレベルに推進し VMware Workstation Player をダウンロードして試用してみてください。Windows または Linux PC 上で 1 台の仮想マシンを実行して、さまざまな機能をご利用いただけます。 | VMware JP Dec 15, · 製品のダウンロードが選べますので、「無償製品のダウンロード」から「WorkStation Player」を選択しましょう。 パソコンの32ビットか64ビット環境に合わせて”自動的”にインストールするプログラム候補が表示されます。
JavaScript seems to be disabled in your browser. For the best experience on our site, be sure to turn on Javascript in your browser.
VMware Workstation Pro は、幅広いオペレーティング システムのサポート、優れたユーザー使用環境、包括的な機能セット、優れたパフォーマンスによって仮想化を次のレベルに推進します。VMware Workstation Pro は業務で仮想マシンを使用するプロフェッショナル向けに設計されています。. プロダクション サポートを追加. ご購入のすべての製品には、E メールによる 30 日間のサポートが含まれています。 年2月以降は英語のみ). サポートされているホスト OS およびゲスト OS の完全なリストについては、 VMware 互換性ガイド を参照してください。.
最新のオペレーティング システム サポートについては、 こちらのナレッジベースの記事 を参照してください。. Skip to the end of the images gallery. Skip to the beginning of the images gallery. ローカル デスクトップの仮想化 Workstation 16 Pro へのアップグレード. 標準価格: 11, 円 価格 税込み : 11, 円. 今すぐ購入 今すぐ購入 標準価格: 11, 円 価格 税込み : 11, 円.
サポート レベル VMware Workstation Pro を 1 ライセンス以上お買い上げのお客様は、サポートおよびサブスクリプション(SnS)サービス(オプション)をご購入いただけます。 SnS は、サブスクリプション期間中、バージョンのメジャー アップグレードとテクニカル サポートを提供することでお客様の投資を保護します。 E メールによる 30 日間の無償サポート テクニカル サポート: 月曜日から 金曜日まで、1 日 9 時間 (公開されている営業時間内)。 Basic Support (ベーシック サポート) の詳細については、 ここをクリックしてください VMware Basic Support (ベーシック サポート) は、クリティカルではないアプリケーションとプラットフォームを対象としており、平日 9 時 ~ 18 時の時間帯にサポートを提供します。.
VMware Production Support (プロダクション サポート) は、本番環境を対象としており、重要度1の事象の場合 24 時間 日サポートを提供します。. E メールによる 30 日間の無償サポートが含まれます。 年2月以降は英語のみ) その他の有償サポートをご希望の場合は、カートに追加してください。. support 無制限のサポート リクエスト リモート サポート オンライン リソース サポート受付時間 目標応答時間(重要度 1 の問題) サポート期間. basic 午前9 時 ~ 午後 6 時 月曜日 ~ 金曜日 4 営業時間. production 1 日 24 時間 週 7 日 年中無休 30 分以内 (24 時間 日). 主な機能 システム要件 オペレーティング システムの要件 キットの比較 複数の仮想マシン、コンテナ、Kubernetes クラスタを 1 台の PC で実行 メジャーな Linux ディストリビューションおよび Windows 10 の最新リリースに対応 DirectX 11 と最大 8 GB の vGPU メモリをサポートする強化された 3D グラフィックス 仮想マシン スナップショット、クローン、仮想ネットワークを活用して最大限の効率を実現 VMware インフラストラクチャ全体で仮想マシンの移動と利用が容易 新しい CLI ツール「vctl」を使って、OCI コンテナ イメージをビルド、プッシュ、プル、実行 制限付き仮想マシンまたは期限付き仮想マシンを暗号化、構築 Windows 上で WSL2 と Hyper-V とともに Workstation の仮想マシンとコンテナを実行.
X Windows 7 Windows XP Ubuntu Red Hat SUSE Oracle Linux Debian Fedora openSUSE Mint CentOS サポートされているホスト OS およびゲスト OS の完全なリストについては、 VMware 互換性ガイド を参照してください。. 複数の仮想マシン、コンテナ、Kubernetes クラスタを 1 台の PC で実行 メジャーな Linux ディストリビューションおよび Windows 10 の最新リリースに対応 DirectX 11 と最大 8 GB の vGPU メモリをサポートする強化された 3D グラフィックス 仮想マシン スナップショット、クローン、仮想ネットワークを活用して最大限の効率を実現 VMware インフラストラクチャ全体で仮想マシンの移動と利用が容易 新しい CLI ツール「vctl」を使って、OCI コンテナ イメージをビルド、プッシュ、プル、実行 制限付き仮想マシンまたは期限付き仮想マシンを暗号化、構築 Windows 上で WSL2 と Hyper-V とともに Workstation の仮想マシンとコンテナを実行.
オペレーティング システムの要件.
0 notes
Text
Setting Up A Windows 10 Virtual Machine on Linux Mint 19.2
In this post, I’ll be setting up a Windows 10 virtual machine running in Linux Mint 19.2. A virtual machine lets you run software from one operating system on another operating system by emulating a hardware environment for an operating system to work in. You install an operating system to the virtual machine. This can give you better software compatibility than software emulation as, in a sense, the software will be running on it’s native operating system.
To run a virtual machine, you need virtualization software, and for this I’ve chosen VirtualBox. If you’re running Linux Mint, it’s available from the Software Manager app. If you need to download it from the web, it’s freely available at https://www.virtualbox.org.

This is Linux Mint, so start the Software Manager, located in the Administration submenu of the Mint menu at the bottom left of the desktop.

The Software Manager has a search feature, which I used to locate VirtualBox. There are quite a few related packages, so I chose the very first one listed. The Software Manager may prompt you for your password, and advise you that additional packages will have to be installed to get VirtualBox working. Enter your password, OK the installation of the additional packages, and VirtualBox will begin to, well, install.

Software Manager in thrilling static 2D action...

Once the installation is complete, exit Software Manager and launch VirtualBox from the Administration submenu of the Mint menu. There are currently no virtual machines to load, so click the New button in the top left corner of the application window.

This opens the Create Virtual Machine dialog. Give this a virtual machine a meaningful name that will help you remember exactly what it is. I chose a fairly specific name here – “Win 10 64-Bit”, but pick a name that works for you. Next, you select the OS type – linux, windows, etc. Finally, you select the specific version of the OS you are installing, in this case, Window 10 (64-bit).

The next step is to allocate how much of the computer’s memory to allocate to running the virtual machine. My computer has 24 GB of ram installed, and I’ve allocated 16 GB of this to running the virtual machine. I know this is overkill. VirtualBox itself suggests 2 gigs. Maybe I’ll adjust this later, but for now, moving on.

The next step is to create a virtual hard disk to install a virtual machine to. So, make sure the option to Create a virtual hard disk now option is selected and click Create.

Next, select the format of the hard disk file. This really only matters if you’re going to need to use this virtual machine with other virtualization software, such as VMware Fusion or Hyper-V. The VDI format is VirtualBox’s native format. VHD seems to be included for compatibility with Hyper-V, while VMDK would be the way to go for VMware Fusion. I only plan on using this on VirtualBox, so for this example, select VDI, then click Next.

The next step is to determine how you want storage for your virtual machine allocated: Dynamically allocated or Fixed size.
Dynamic allocation means that more storage space is allocated as needed. The only limit is the amount of space on the physical hard disk where the virtual disk resides. You should note that the virtual disk will never shrink. It never gives space back to the physical disk.
Fixed size means that the size of the virtual disk is set once by you never and changes. It’s ...fixed. VirtualBox advises that performance can be noticeably slower with virtual allocation, so I selected Fixed size and clicked Next.

You’ll then be prompted to select how much physical drive space to allocate for your virtual machine (assuming you chose fixed size), and a folder to save it to. It’s probably best to choose a file location you can easily remember in case you ever have to find it again, say if you want to delete it or copy it to another computer. VirtualBox suggests a file size of 50 GB. I went with 100 GB and clicked Create.

You’re returned to the main app window. In the list on the left side of the window, you’ll see the virtual machine we’ve setup listed. Except it won’t really do anything yet. It’s just like a brand new computer with all the hardware but no operating system installed. I have a Windows 10 installation disk, so I’ve got that ready to go in the computer’s optical drive. If you don’t have such a disk, you can download an image for one at
https://www.microsoft.com/en-us/software-download/windows10ISO. Once you’ve downloaded the image, use DVD burning software to create a bootable disk from it. Please note that if you don’t already have a valid software license for Windows 10 from Microsoft, you will, at some point, need to purchase one. You can use the software temporarily without a license, but there is a time limit. Once the time limit expires, you have to buy a license to continue using the software. Anyway, once you’ve got the disk into the optical drive, click the Start button in the app window above the virtual machine list.

VirtualBox will prompt you to select a start up disk. If you’re computer only has one optical drive, this should already be selected. Otherwise, you may have to tell the program where to find the installation disk by clicking the folder icon to the right of the text field and navigating to the location of the Windows installation media. Anyway, once VirtualBox knows where to find things, click the Start button.

The installation is under way. You will be prompted for a license key. If you don’t have one yet, you’ll be able to skip this step for now.

The Windows 10 installer does it’s thing...

The Windows 10 Virtual Machine is up and running!
0 notes
Text
Kali Linux for Vagrant: Hands-on
I recently saw the announcement for Kali Linux on Vagrant. I have been a huge fan of Kali Linux for a very long time, and I am interested in virtualization (and currently using VirtualBox in an educational environment), so this was a very interesting combination to me. I have now installed it on a few of my systems, and so far I am quite impressed with it.
The logical place to start is with a brief overview of Vagrant itself. What is Vagrant? According to their web page:
Vagrant is a tool for building and managing virtual machine environments in a single workflow
What Vagrant actually does is provide a way of automating the building of virtualized development environments using a variety of the most popular providers, such as VirtualBox, VMware, AWS and others. It not only handles the initial setup of the virtual machine, it can also provision the virtual machine based on your specifications, so it provides a consistent environment which can be shared and distributed to others.
The first step, obviously, is to get Vagrant itself installed and working — and as it turns out, doing that requires getting at least one of the virtual machine providers installed and working. In the case of the Kali distribution for Vagrant, this means getting VirtualBox installed.
Fortunately, both VirtualBox and Vagrant are available in the repositories of most of the popular Linux distributions. I typically work on openSUSE Tumbleweed, and I was able to install both of them from the YAST Software Management tool. I have also checked that both are available on Manjaro, Debian Testing and Linux Mint. I didn’t find Vagrant on Fedora, but there are several articles in the Fedora Developer Portal which describe installing and using it.
SEE: 20 quick tips to make Linux networking easier (free PDF)
If you are not able to find Vagrant in the software sources of whatever operating system you are using, you can go to the Vagrant Downloads page, and you will find installation images for various Linux distributions (and a generic Linux image), macOS and Windows.
Once you have them both installed, you should give some thought to disk space. The Vagrant “box” file will require about 4GB for each virtual machine, and the actual Kali VM will be at least 10GB and possibly more depending on how you configure and provision it (other VMs may be much smaller, of course; the Vagrant precise64 image comes in at about 5GB, for example). Both of these will land in your home directory by default, so if you don’t have that much free disk space, or you just prefer to keep data in some other specific place (/data in my case), you need to configure that first.
Image: J.A. Watson
For VirtualBox this is done using the File/Preferences dialog, as shown here. The first item is the default machine location, and you can see that I have mine set to “/data/VirtualBox VMs”.
For Vagrant it is a bit less obvious; you have to set the environment variable VAGRANT_HOME. The typical way to do this on Linux is in your .bashrc file, by adding this statement:
export VAGRANT_HOME=/data/jw/.vagrant.d
Once you have made these two adjustments, you are ready to download the Kali Vagrant image. When you initialize a Vagrant configuration, it will create a text file containing the specifications of that image (creatively named Vagrantfile). You can only have one Vagrantfile in a directory, so the simplest way to do this is to make an empty directory for each image (or project) that you want to install, and then change to that directory before running the command:
$ vagrant init offensive-security/kali-linux
Note that this command does not require root privileges.
This will fetch the necessary information from the Vagrant Cloud, and create a default configuration file (Vagrantfile). Oh, a quick note about the Vagrant Cloud; if you are curious about what other images and versions are available, just follow that link and have a look around. There are all sorts of other Linux images (Debian, CentOS, Arch, more Ubuntu versions than you can shake a stick at, Oracle Enterprise Linux, and plenty of others), and a variety of pre-configured and provisioned development environments for both general development and specific applications.
The next step is to let Vagrant actually download and install the VM image, and start it up. This is done with the command:
$ vagrant up
This command checks to see if the necessary files have already been downloaded. If they have not (this is the first time you have started this VM), it will fetch everything it needs from the Vagrant Cloud website.
That will take some time (typically 10-15 minutes if you have a reasonable Internet connection; something measured in hours or days if you are doing it on Airport Free Wi-Fi…), and will produce a lot of text to keep you informed of what it is doing and how much progress is made on the downloads.
Image: J.A. Watson
When the download is complete you will see the VM GUI pop up, and the normal Kali Linux boot process will run in that window. After about a minute or so, you will get the Kali login window shown here.
Image: J.A. Watson
You can then login using the usual default account (root/toor), and you will get the standard Kali (Gnome 3) desktop. The Kali VM has a NAT interface configured, so you have internet access (as shown in the browser window within the screen shot).
One other small but very useful feature; Vagrant configures a shared directory between the host and the Kali guest, by mounting the current working directory of the host (the one containing the Vagrantfile) on the /vagrant directory of the Kali guest. This is particularly convenient because it allows you to keep data in the guest which will survive a reset of the Vagrant machine.
Let me expand on that a bit further. One of the biggest advantages of Vagrant is that it is very easy to reload a machine from scratch, and return to the original “clean” condition. This includes re-initializing the disk of the VM, so anything that you have stored there will be gone. Any files that you want to keep across such a reset can simply be placed in the /vagrant directory, and they will once again be there in the new system.
Vagrant also configures ssh access to the VM for you, without you having to figure out the IP address or port number; you just have to use vagrant ssh to connect.
SEE: How to find files in Linux with grep: 10 examples (free PDF)
There are a number of ways that you can manage your running Kali Vagrant system:
vagrant reload reboots the VM
vagrant suspend saves the current state of the VM and then stops it. This allows you to return to exactly the same state at a later time with vagrant up. Note that this uses even more disk space, because it stores the state of the VM RAM to disk as well, but it is faster than a vagrant halt / vagrant up sequence
vagrant halt stops the VM, performing a normal shutdown of Kali
vagrant destroy removes the VM from your system. If the VM is currently running, it will simply be killed — there’s no sense in bothering with a graceful shutdown, because the machine is toast anyway. Everything except the Vagrantfile will be deleted, so you will recover the disk space from that.
So there you have it. Vagrant provides an easy way to create, run and manage a virtual Linux system, and Kali now provides a distribution image for Vagrant. Together, this means that you can have Kali up and running in 30 minutes or less. Nice. In addition, if you get interested in Vagrant itself there are lots of other distributions available in the Vagrant Cloud. Extra nice.
RECENT AND RELATED COVERAGE
Hands-on with MX Linux: A pleasant, easy-to-install Linux distribution
MX Linux is a descendant/spin-off from Antix and MEPIS Linux. I want to see what it is like to install and run on both UEFI and MBR laptops.
Hands-on with Linux Mint Debian Edition 3 Beta
The long-awaited LMDE update is finally (really) on the way!
Linux phone battery bug: Purism’s Librem 5 delayed until April 2019
Purism gave its Librem 5 phone an updated SoC, but found it has a battery-draining bug that’s delayed production.
Even Linus Torvalds doesn’t completely understand the Linux kernel
In a wide-ranging interview at Open Source Summit, Torvalds talked about programmers, Linux, and open-source development.
Linux distribution comparison chart (Tech Pro Research)
If you’re new to the world of Linux and trying to figure out which distribution is right for your needs, this chart can help.
Microsoft’s obsession with Windows is ending, and I couldn’t be happier (CNET)
Commentary: It’s all about AI and the web now.
How to expose an internal Linux server to the internet with PageKite (TechRepublic)
Jack Wallen shows you how to easily expose an internal Ubuntu server to the outside world with the help of PageKite.
Source: https://bloghyped.com/kali-linux-for-vagrant-hands-on/
1 note
·
View note
Text
The Vagrant Podman Provisioner can be used to automatically install Podman which is a daemon-less container engine used to develop, manage and run OCI containers. Podman built and officially supported by RedHat, acts as a drop-in replacement for Docker. Just like Docker, Podman has the ability to pull container images and configure containers to run automatically on boot. Podman is highly preferred when running containers since it allows one to run containers from Kubernetes as long as the images are OCI-compliant. Podman can also be used along with other provisioners such as the puppet provisioner e.t.c. In this setup, we will use Vagrant to set up the best working environment for the Podman provisioner. This guide takes a deep dive into how to manage Podman Containers With Vagrant. Getting Started. For this guide, you need to have Vagrant installed on your system. Below are dedicated guides to help you install Vagrant on your system. On Debian/Ubuntu/Kali Linux Install Vagrant on Ubuntu / Debian / Kali Linux On RHEL 8/CentOS 8 /Rocky Linux 8/Alma Linux How To Install Vagrant on CentOS 8 / RHEL 8 On Fedora Install Vagrant and VirtualBox on Fedora On Ubuntu, you will have to install the below package. sudo apt-get install libarchive-tools For this guide, I will use VirtualBox as my hypervisor. You can install it on your system using the guides below On Debian Install VirtualBox on Debian On Ubuntu/Kali Linux/Linux mint How To Install VirtualBox on Kali Linux / Linux Mint On RHEL/CentOS/Rocky Linux How To Install VirtualBox on CentOS 8 / RHEL 8 With Vagrant and Virtualbox successfully installed using the aid of the above guides, now you are set to proceed as below. Step 1 – Create a Vagrant Box For this guide, we will create a CentOS 7 vagrant box using VirtualBox as the provider. $ vagrant box add centos/7 --provider=virtualbox You can as well use other Hypervisors as below. ##For KVM vagrant box add centos/7 --provider=libvirt ##For VMware vagrant box add generic/centos7 --provider=vmware_desktop ##For Docker vagrant box add generic/centos7 --provider=docker ##For Parallels vagrant box add generic/centos7 --provider=parallels Create a Vagrant file for CentOS 7 as below mkdir ~/vagrant-vms cd ~/vagrant-vms touch ~/vagrant-vms/Vagrantfile Now we are set to edit the vagrant file depending on our preferences as below. Step 2 – Manage Podman Containers With Vagrant Now manage your Podman containers with Vagrant as below. Stop the running instance: $ vagrant halt ==> default: Attempting graceful shutdown of VM... 1. Build Podman Images with Vagrant The Vagrant Podman provisioner can be used to automatically build images. Container images can be built before running them or prior to any configured containers as below. $ vim ~/vagrant-vms/Vagrantfile Vagrant.configure("2") do |config| config.vm.box = "centos/7" config.vm.provision "podman" do |d| d.build_image "~/vagrant-vms/app" end end Above is a sample code on how to build an image from a Docker file and remember the path ~/vagrant/app must exist on your guest machine. vagrant ssh mkdir ~/vagrant-vms/app chmod 755 ~/vagrant-vms/app Stop the running instance as below vagrant halt Start Vagrant as below. vagrant up --provision 2. Pull Podman Images with Vagrant Images can also be pulled from Docker registries. There are two methods you can use to specify the Docker image to be pulled. The first method is by using the argument images: For example, to pull an Ubuntu image use: $ vim ~/vagrant-vms/Vagrantfile Vagrant.configure("2") do |config| config.vm.box = "centos/7" config.vm.provision "podman", images: ["ubuntu"] end The second option is by using the pull_images function as below. Vagrant.configure("2") do |config| config.vm.box = "centos/7" config.vm.provision "podman" do |d| d.pull_images "ubuntu"
d.pull_images "alpine" end end Sample output: $ vagrant up --provision ......... ==> default: Rsyncing folder: /home/thor/vagrant-vms/ => /vagrant ==> default: Running provisioner: podman... default: Podman installing ==> default: Pulling Docker images... ==> default: -- Image: ubuntu ==> default: Trying to pull registry.access.redhat.com/ubuntu... ==> default: name unknown: Repo not found ==> default: Trying to pull registry.redhat.io/ubuntu... ==> default: unable to retrieve auth token: invalid username/password: unauthorized: Please login to the Red Hat Registry using your Customer Portal credentials. Further instructions can be found here: https://access.redhat.com/RegistryAuthentication ==> default: Trying to pull docker.io/library/ubuntu... ==> default: Getting image source signatures ==> default: Copying blob sha256:7b1a6ab2e44dbac178598dabe7cff59bd67233dba0b27e4fbd1f9d4b3c877a54 ==> default: Copying config sha256:ba6acccedd2923aee4c2acc6a23780b14ed4b8a5fa4e14e252a23b846df9b6c1 ==> default: Writing manifest to image destination ==> default: Storing signatures ==> default: ba6acccedd2923aee4c2acc6a23780b14ed4b8a5fa4e14e252a23b846df9b6c1 3. Run Podman Containers with Vagrant In addition to building and pulling Podman images, Vagrant can as well be used to run Podman containers. Running containers can be done using the Ruby block syntax normally with do…end blocks. For example to run a Rabbitmq Podman container, use the below syntax. $ vim ~/vagrant-vms/Vagrantfile Vagrant.configure("2") do |config| config.vm.box = "centos/7" config.vm.provision "podman" do |d| d.run "rabbitmq" end end Start the instance $ vagrant up --provision ........ ==> default: Rsyncing folder: /home/thor/vagrant-vms/ => /vagrant ==> default: Running provisioner: podman... ==> default: Starting Docker containers... ==> default: -- Container: rabbitmq Verify that the container has been started. $ vagrant ssh $ podman ps CONTAINER ID IMAGE COMMAND CREATED STATUS PORTS NAMES 245e7d8cf138 docker.io/library/rabbitmq:latest rabbitmq-server About a minute ago Up About a minute ago rabbitmq You can as well run multiple containers using the same image. Here, you have to specify the name of each container. For example, running multiple MySQL instances, you can use the code as below. $ vim ~/vagrant-vms/Vagrantfile Vagrant.configure("2") do |config| config.vm.box = "centos/7" config.vm.provision "podman" do |d| d.run "db-1", image: "mariadb" d.run "db-2", image: "mariadb" end end $ vagrant up --provision ==> default: Rsyncing folder: /home/thor/vagrant-vms/ => /vagrant ==> default: Running provisioner: podman... default: Podman installing ==> default: Starting Docker containers... ==> default: -- Container: db-1 ==> default: -- Container: db-2 Furthermore, a container can be configured to run with a shared directory mounted in it. For example, running an Ubuntu container with a shared directory /var/www use the below code; $ vim ~/vagrant-vms/Vagrantfile Vagrant.configure("2") do |config| config.vm.box = "centos/7" config.vm.provision "podman" do |d| d.run "ubuntu", cmd: "bash -l", args: "-v '/vagrant:/var/www'" end end Sample output: $ vagrant up --provision ==> default: Rsyncing folder: /home/thor/vagrant-vms/ => /vagrant ==> default: Running provisioner: podman... default: Podman installing ==> default: Starting Docker containers... ==> default: -- Container: ubuntu You can verify your created Podman containers as below: $ vagrant ssh $ podman ps -a CONTAINER ID IMAGE COMMAND CREATED STATUS PORTS NAMES ec976aa0ae53 docker.io/library/ubuntu:latest bash -l 2 minutes ago Exited (0) Less than a second ago ubuntu You can pause/hibernate the vagrant instance as below.
vagrant suspend Delete the Vagrant instance: vagrant destroy Conclusion. That marks the end of this guide! We have successfully gone through how to manage Podman Containers With Vagrant. I hope you found this guide important.
0 notes