#Mageguides
Explore tagged Tumblr posts
Visit Tumblr Blog
Explore Tumblr blogs with no restrictions, modern design and the best experience.
Last Seen Tumblr Blogs


Fun Fact
Tumblr’s reach among the 26-to-35-year-olds in the US is 11%.
Text
How to Install Extensions from Magento 2 Marketplace
Extensions for Magento 2 with continuously updated features provide an easy way to improve your E-commerce website. Search on the Magento 2 marketplace, and you will find out whatever extensions you require. And this article will show you how to install extensions from the marketplace without any difficulties.
The process includes three steps, and it should be implemented during off-peak time. However, several actions must be taken before and after this process.
1. Preparation
Access to the latest extensions
– Sign in to your Magento store admin with your user account with the entire administrator rights and make sure that Cron is configured to run every minute for the easiest and quickest installation. – On the Admin sidebar, click System > Tools > Web Setup Wizard
– Go to Extension Manager > Sign In
– When announced, take the Public Access Key and Private Access Key from your account and paste.
You have to go to the Magento Marketplace account page link, locate the keys from the Access keys page, and add them to the Admin page in case you need your access keys.
And then, click Submit.
– A list of latest updates and latest bought and installed extensions, as well as sample data, will be created within minutes.
– Choose Review and Install in Extensions Ready to Install to see a summary of all extensions that are currently available.
– Decide on the version you like to install in the column Latest version.
Readiness Check
Before starting the installation, a readiness check must be run.
– Click Start Readiness Check
– Click Next when the process is finished.
Create Backup
The maintenance mode of the website must be enabled during backup creation. The code, media, and the database are by default included in the backup. So get rid of any of them if you want.
– Click Create Backup, and the process will take a few minutes to be finished. Then, click Next.
2. During the installation
The website will be off to the customers for protection during the process.
– Click Install. How much time the installation takes depends much on the Cron setting. You can follow the progress in the Console Log.
– When the process completes, click Back to Setup Tool > System Configuration.
– Then, choose Reset to log out.
3. After the installation
Flush Caches
This stage is indispensable after the installation is completed.
– Sign in to your store Admin.
– Click System > Tools > Cache Management on the Admin sidebar, or click the Cache Management link in the message above the workspace.
– Choose the checkbox at the beginning of the row to refresh all caches
– Set Actions to Refresh, and then click Submit.
Configure the Extension for Your Store
– Sign in your store Admin.
– Click Stores > Settings > Configuration on the Admin sidebar
– You will see the new tab for the installed extension in the panel on the left. Next, abide by the instructions from the extension developer to finish the configuration.
– Seek for any new commands added to the Admin menu.
Above is a tutorial on how to install extensions from the Magento 2 marketplace. We hope that it is informative and helpful to you. If you have any suggestions on editing the tutorial, any questions about the article, or any requests for other tutorials, feel free to leave a comment or contact us directly.
Read more:
An Insight Into Product Reports In Magento 2
How to use New Relic Reporting in Magento 2
The post How to Install Extensions from Magento 2 Marketplace appeared first on Mageguides.
from Mageguides https://ift.tt/2QFngng via IFTTT
1 note
·
View note
Text
Services to Expect From Mageguide - Magento Extensions Builder Partner

The idea of offering the best services or goods through the online stage is very essential. Today, most customers will be quick to order what they need through the said stage. Your job as an investor is to make everything work out well for them. You can begin by ensuring your online systems are excellent. This is possible with the use of the best software which will be provided by a competent company. When you search for the correct service providers, your online services should be perfect. There are countless reasons why people need to include the expected magento developer company. In this article, you will learn a few of these benefits.
First, you will be getting the most efficient technical support you can ask for in your store. This one will include lots of services. It is very likely for your workers to present great services due to high-speed connections. In case you require having good backup support for your shop, this ought to be perfect for you. The supposed service providers are set to realize your needs before installing any software. The other good thing here is the ability to have updated security services. This means it is hard for any of the client's data to go into the wrong hands with secured systems.
If you are operating more than one store, it is important to have things done in one location. It is here the thought of having the best magento hosting services will matter a lot. This is recognized to come in handy if you need to secure everything in a single place. For all your emails and other communication services, they can be handled in here. The work of the professionals here is to take your personal requirements into consideration while doing this. This ensures your online stores will operate well to present more sales.
If your store is offering the best to the customers, it is easy to enjoy some good revenues. For this to come into reality, you will necessitate hiring real gurus. They are supposed to meet online demand from you and the customers in mind. This is not something to worry because the mentioned service providers are highly regarded in this field. Just make sure you comprehend what you need first. From here, learn how their services will go well with business ideas. For any additional information on these services, it is necessary to contact the company. Get more facts about web hosting, go to https://www.encyclopedia.com/entrepreneurs/news-wires-white-papers-and-books/internet-services-portal-site.
0 notes
Text
Importance of MageGuide- Magento Extensions Builder Partner

It is important for the people to know what they are supposed to do so that they can always get high sales which will give them more income. It is important for the people to ensure that they have used the new technology which has brought the use of internet. Internet can be used in many ways and it is important for the people to ensure that they have used it in a ways that is going to benefit them. A person should be able to make money through the online platform by looking for clients who will always buy their products and services.
It is important for the people to have a website which they will use to market their goods and services. Sometimes the people might not have the knowledge that is required to manage the website. Therefore, the people will need to look for a qualified builder partner who will always manage their website. It is important for the people to ensure that the website is working properly and also they have responded to all the clients who might be asking for something. The people must be qualified so that a person can be sure that they are going to get the best results from them. Learn more details here about magento Greece.
Also it is important for a person to engage with a good company which is going to assist them to be able to achieve their objectives. They should always provide all the technical support that is required for the website to continue working properly. The company should have skilled people who will be able to do the hosting so that the site can be accessible to the people who will always be in the internet. It is important for one to be able to know how their business is doing and they will be able to know all those things when their website is managed properly.
It is important for a person to ensure that the data is always safe. Therefore the people must provide maintenance which will make the system to work in the best way possible. Magento maintenance will make the system to last for long and it will always execute the best results which the people want to have at the end of the day after they have conducted their business. It is important for the people to study the market properly so that they can always know how it is doing and the things that are needed by the clients.
For further details, visit - https://www.huffingtonpost.com/kali-kasprzyk/a-new-era-of-commerce-inn_b_9431500.html
0 notes
Text
How to Install Magento 2 Via XAMPP | Magento Tutorial 2020
Creating a localhost environment is one of the essentials for running a website. When running the localhost, your Magento 2 XAMPP site will run faster and the system will be more secure.
It also provides an ideal testing environment on your computer, keeping you away from the prying eyes of hackers. This article will give you useful information about Magento 2 XAMPP and how to use it effectively.
What is XAMPP?

In the technical aspect, Magento XAMPP software is standard software and is often used by developers to create and develop Websites.
XAMPP is often used to create Website servers with Apache, PHP, MySQL/MariaDB (XAMPP 5.5.30 and 5.6.14, XAMPP ship MariaDB instead of MySQL but the commands and tools are the same for both), FTP Server, Mail Server built-in and tools such as phpMyAdmin.
Magento XAMPP Pros

XAMPP can run on all operating systems such as Windows, macOS, Cross-platform, and Linux.
XAMPP has a simple configuration and many useful functions for users, such as server emulation, Mail Server emulation, and SSL support on Localhost.
Instead of installing each of the above components, now you need to use XAMPP to get a complete Website server.
Open source: XAMPP has a convenient open setting for you to freely edit following your reference.
PWA feature: The Web App (or PWA) brings more people to your business, to increase conversions and generate more leads.
However, you need the GraphQL Language feature in Magento 2.3 to run the PWA settings.
Higher security:
With support for PHP 7.2x, Magento will be enhanced performance and security. The equipment of reCAPTCHA and 2FA (two-factor authentication) adds many layers of protection against malicious access when someone attempts to break into your Magento admin panel.
Magento XAMPP Cons

In contrast to its simple configuration, XAMPP has a complicated admin setting system to adjust, followed by a lot of very complex tuning system commands.
XAMPP’s capacity is also relatively massive due to its installation file size, which is 141Mb.
Ways To Install Magento 2 XAMPP
More details:
Some Magento Extension reviews
Other Magento product guides

Install Magento XAMPP
Step 1: Download XAMPP
Download the newest XAMPP version on Apache Friends Website:
https://www.apachefriends.org/index.html

Step 2: Install XAMPP
Double-click on the file to install XAMPP.
Click Next.

Afterward, please follow the guide and select the most suitable selections for you.

After finishing the installation, the setup will now install XAMPP on your computer. Please wait for a while.
Besides, you will see the option “Do you want to start the Control Panel now?”. Keep it selected and click Finish to exit setup and enter XAMPP Control Panel.
Step 3: Configure XAMPP
In XAMPP Control Panel, click the “Config” button on Apache row and click “PHP (php.ini).”
In the PHP, find these rows:
extension=php_curl.dll extension=php_pdo_sqlite.dll extension=php_pdo_mysql.dll extension=php_soap.dll
After the installation, remember to turn on the Apache and MySQL/MariaDB by clicking the “Start” button.
Step 4: Configure the host file
Open file:
“C:\Windows\System32\drivers\etc\hosts”.
Add the following line to the last row of the file:
127.0.0.1 www.localhost.com
Download & install Magento 2
Note: There are 2 versions of Magento settings:
Simple Data: customer information, product, quantity, promotion included…
No Simple Data: will be blank after installation.
Step 1: Download Magento 2 from the following:
https://magento.com/tech-resources/download

Source: Blankapham.com
Sign in to your account to choose the downloading format and download it.
Step 2: Extract the archive file
After completing the download process, create a folder inside “xampp\htdocs” and extract the downloaded archive file into that folder.
Step 3: Generate a new empty database for Magento 2 XAMPP
Browse the URL “http://localhost/phpmyadmin/” to access the phpMyAdmin page.
Create a database name (“Magento 2”, for example).

Source: Blankapham.com
Step 4: Install Magento 2
In your browser, enter the URL “http://localhost/your_database_name” to start installing Magento 2. (for example “http://localhost/Magento2”)
Read all the terms & agreements if it’s in need and then click “Agree and Setup Magento “
Click “Start Readiness Check “
Step 5: Save php.ini file and restart XAMPP
Click “Try Again” to refresh Magento 2 Installation page
Step 6: Fill in the blank
Fill in the information fields based on the database names that you set in the previous step

Enter the URL for your Website address. You can leave these by default or edit as you wish

Edit your Website’s time zone, default currency, and language
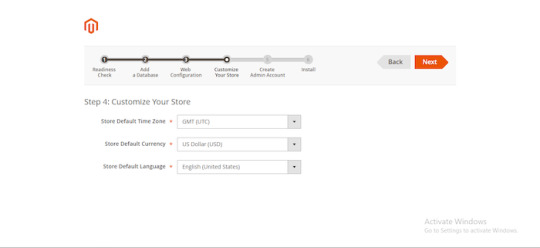
Create an admin account
Note:

During the installation of XAMPP software, you should turn off every other programs and software to avoid application conflicts to ensure that the installation process becomes successful.
For instance, in case the Windows 10 server has IIS installed, it can not install XAMPP, which will be a conflict with each other.
In case your computer is using Skype, open Skype -> Tools -> Connection Options -> and uncheck “Use port 80 and 443 … ..”. Without doing this, XAMPP would not be able to run because Skype used the network port 80.
Besides, it would be best if you also uninstalled all other Antivirus software, as these may block port 80 or Website server applications, making XAMPP inoperable.
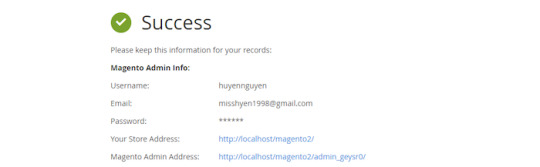
Step 7: Finish installation
After completing all the information about your Website, you have reached the final stage.
Some Must-know Query Answers

#1. Where are the main XAMPP configuration files?
MySQL configuration file:
\xampp\mysql\bin\my.ini
PHP configuration file:
\xampp\php\php.ini
FileZilla Server configuration file:
\xampp\FileZillaFTP\FileZilla Server.xml
Apache main configuration files:
\xampp\apache\conf\httpd.conf \xampp\apache\conf\extra\httpd-xampp.conf
Apache Tomcat configuration file:
\xampp\tomcat\conf\server.xml
\xampp\sendmail\sendmail.ini
Mercury Mail configuration file:
\xampp\MercuryMail\MERCURY.INI
#2. Why are pictures and style-sheets not available?
There are some problems displaying pictures and style-sheets.
To solve this, you need to enable one of the following lines in the file “\xampp\apache\conf\httpd.conf”:
EnableSendfile off
EnableMMAP off
#3. Can you delete the “install” directory after the installation?
The answer is you had better not do that because those scripts are still needed for all additional packages (add-ons) and upgrades of XAMPP.
#4. Why some PHP open source applications do not work with XAMPP on Windows?

We regret to announce that XAMPP generated some PHP applications and extensions for Linux, which haven’t been ported to Windows.
#5. Ways to configure the antivirus application

All dependencies and servers required for running website applications are included below.
Windows operating system with an antivirus application enabled may slow down the installation remarkably, and one of the servers (website server, database server) may be blocked too by the antivirus software.
If you have an antivirus tool enabled, the following settings are for running XAMPP with no performance issues:
Add exceptions in the firewall: for Apache, MySQL, or the other servers.
Scan files when executing: Having the antivirus scanned for all data, you would slow down the executable files for the servers.
Scan the traffic for different URLs: Exclude “localhost” traffic in the Antivirus settings if you are developing with XAMPP on your machine.
Conclusion
Although XAMPP still has some defects, all the great features that Magento 2 XAMPP brings are undeniable. Please feel free to experience the utility or shortcomings of XAMPP yourself!
Besides, if you found this informative, there are still many other interesting articles:
How to Install Magento 2 Via Composer | Magento Tutorial 2020
5 Minutes to Master in Using Magento 2 Business Intelligence Tools
How to Configure Download Options in Magento 2
The post How to Install Magento 2 Via XAMPP | Magento Tutorial 2020 appeared first on Mageguides.
from Mageguides https://ift.tt/2UaCann via IFTTT
0 notes
Text
All Things You Should Know about Magento 2 Media Folder
Magento 2 media folder (also called Magento 2 media storage) is a useful tool that helps you arrange and approach media files stored on the server. However, some people are still unfamiliar with this term. That’s why we’re here to help you.
This article will give you all the things related to the main topic, including:
An overview of Magento 2 media folder
An easy guide to upload image in Magento 2 from media storage
How to upload file in Magento 2
How to configure static Magento media URL
A Clear Overview of Magento 2 Media Folder
>>> Check It Out: Magento PWA Studio Tutorial – Step by Step to Get Maximum Customers!
Magento 2 media folder or media storage is regularly placed in the file system on the same server as the Magento program files. The base URL configuration elects the link to the location of media files, and the editor can gain access to data when working on pages or immobile blocks.
In addition, media files can be controlled in a dataset, set on a divided server or content delivery network. We can adjust the editor to utilize either static or dynamic media URLs for the content of the catalog in a category or product description.
So, what can we do with the Magento 2 media folder?
In media storage, you can upload images from the storage and upload files to it, which we will give a clear guide in the next sections. And also, we will provide step-by-step instructions to configure static media URLs as well. So, let’s stay tuned with us!
How to Upload Image in Magento 2 from Media Folder?
There are several simple steps to add an image, which will be presented as follows:
First of all, you need to open the page or block to be edited by choosing Content from Admin Sidebar then tapping Pages or Blocks under Elements.
Then, please select one of the following methods to add an image:
Method #1: Using WYSIWYG Mode
>>> Have A Look Here: Magento Frontend Developer Guide – The Key to Business Success!
STEP 1: Click on the Insert Image tab on the toolbar of the WYSIWYG editor
STEP 2: Choose Browse after the Image URL section
STEP 3: In the bibliography on the left, select the Magento media folder storing the image
STEP 4: Click on Insert File after determining the title of the image
Method #2: Using HTML Mode
Using HTML mode is not as complicated as the previous method.
STEP 1: Place the cursor in the code containing the <img> tag
STEP 2: Click on Insert Image
How to Upload Files in Magento 2?
The initial two steps are equivalent to the way that you add an image:
STEP 1: On the toolbar of the WYSIWYG editor, tap Insert Image
STEP 2: Select Browse after the Image URL part.
STEP 3: Do one of the following in the left directory:
Go to the Magento media folder that you choose to keep the uploaded image.
Go to the location where you want to add a new folder > Click on Create Folder > Type the folder name > Choose OK
STEP 4: Use Choose Files to upload files and do the following:
Move to the place of the images in the index of your local computer
Choose each image that is to be uploaded
Click Open and the images are uploaded to the current media storage file
What Is Magento Media URL & How to Adjust The Static URL?
Introduction to Dynamic Media URL
>>> Read Later: All about URL Rewrites in Magento 2 You Should Know!
A dynamic media URL is defined as a relative reference to an image or other media resource. Dynamic media URLs can be utilized to connect straightforwardly to resources on your server, or files stored on a content delivery network.
Besides, dynamic media URLs can affect catalog performance, and as we have mentioned in the overview, either static or dynamic media URLs can be used to adjust the editor.
Like all markup tags, the command is located in double curly braces. Here below is a specific example of a format of dynamic media URL:
When rendering the page, dynamic URL directives are processed from HTML content. And every time the page is rendered, the content is scanned for and the corresponding media URL will replace each command.
However, we have to note that inserting many directives will have adverse effects when loading the first page, and the page is not cached. Therefore, you should use it with caution or discuss it with professional developers.
Dynamic Media URL vs. Static Media URL
The main difference between static media URL and dynamic media URL is that while static media URL is a fixed URL, the other will change whenever you store content in a database and pull for display on pages.
Besides, 2 types of URL will look like this:
Static URL: http://www.abc.com/xyz/magento.htm
Dynamic URL: http://abc.com/p/magento-php-sample-code/issues/detail?id=31
We can see the difference between those 2 types. Also, a dynamic URL is easily recognized as its link contains some special characters like: “?” “=” “&”.
Additionally, people sometimes prefer a static URL for several reasons. But the main reason is that with the dynamic URL, your page will display the same content but different URLs over time. So that users can hardly find the link they are looking for.
And how to switch to a static URL or dynamic URL? Check it out in the next part.
How to Configure Magento Media URL?
The steps to configure the media URL is relatively simple. You just have to change the configuration setting.
STEP 1: Go to Store > Setting > Configuration on the Admin Sidebar
STEP 2: Click on Content Management in the left panel
STEP 3: Expand the WYSIWYG Options, and it will be displayed as the following image
STEP 4: Set Use Static URLs for Media Content in WYSIWYG to:
Yes: If you want to use static media URL
No: If you want to use dynamic media URL
STEP 5: When everything is all done, click on Save Config to finish
BONUS: How to Create A Magento File System Owner?
Security is one of the most worrying issues in e-commerce. Understanding people’s concerns, we give this as a bonus part that you can set access permission to prevent strangers from editing content on your website.
You can create Magento file system with a strong password with these 3 steps:
STEP 1: Run the command below to create the Magento file system owner:
adduser <username>
STEP 2: Enter the following command to give it a password:
passwd <username>
STEP 3: Follow the notification displayed on your screen to set a password
Conclusion
>>> Cannot Overlook: More Magento tutorial blogs for better e-commerce sites!
In this article, you must have had details about the Magento 2 media folder and some related things. And we hope that you are satisfied with all the information we have given in this tutorial blog. Therefore, you can easily optimize your e-commerce website.
If you need any help, please feel free to contact us. We’re 24/7 available.
Thanks a lot for reading!
The post All Things You Should Know about Magento 2 Media Folder appeared first on Mageguides.
from Mageguides https://ift.tt/2WYsIG1 via IFTTT
0 notes
Text
How to Use the WYSIWYG Editor in Magento 2?
Have you ever heard of Magento WYSIWYG Editor? Let’s find out what WYSIWYG Editor is and how can we use it in this post!
Magento 2 provides you with enormous useful tools for setting up and controlling the content of the website.
In this article, you will get a brief introduction of how to utilizing the WYSIWYG Editor in Magento 2 (Magento WYSIWYG editor tutorial).
Let’s get started!
An Overview
When working with the content displayed by the WYSIWYG editor, you can easily open and format it and all you have edited will appear in the final published form.
However, it is possible for you to change modes if you want to work with the HTML code directly. In the product catalog, you can approach the WYSIWYG editor for the purpose of building content for pages, blocks, or product descriptions by a tap on the WYSIWYG Editor button.
How to Utilize Magento WYSIWYG Editor?
>>> Read Later: A Complete Guideline of Magento RSS Feeds!
This main section will suggest several useful tips for Magento WYSIWYG Editor, especially in Magento 2, that you cannot miss.
Editing Devices
>>> Have A Look Here: How to Configure Magento Wish List? – A Comprehensive Guideline!
Besides familiar tools like Cut, Copy and Paste, we can see other devices such as Paste as Plain Text or Paste from Word, Find and Replace, Undo/Redo, Citation, Abbreviation, Acronym, Mark as Insertion and Mark as Deletion.
Styles and Fonts
>>> Check Right Now: A Detailed Magento Cron Job Tutorial Everyone Must Know!
The editor also provides Styles, Paragraph, Font Family, and Font Size for constructing the content of websites.
Character Format
Formatting characters in the WYSIWYG editor is quite easy with various choices including Bold, Italic, Underline, Strikeout, Subscript, Superscript.
Special Characters
Some special options can be added like Insert Symbol, Insert Non-Breaking Space and Insert Page Break in the editor.
Color
In terms of Color, the editor can allow you to Select Text Color or Select Background Color.
Paragraph Format
To format content paragraphs, you can choose any among Align Left, Align Center, Align Right, Align Full, Increase Outdent/Indent, or Block Quote options.
Lists
When creating lists in the editor, you can be supported by Inserting and Removing Bulleted (Unordered) List/Numbered (Ordered) List tool.
Rules
In terms of rules, Inserting Simple Horizontal Rule and Inserting Formatted Horizontal Rule can be useful selections for users in the WYSIWYG editor.
Links and Anchors
With the WYSIWYG editor, you can carry out activities involving Inserting or Editing Link/Anchor, Removing Link.
Images and Media
Insert/Edit Image and Insert Media tools help you diversify the content of the website.
Tables
About the table, the editor allows you to use tools including Inserting/Modifying Table, Table Row Properties, Table Cell Properties, Inserting Row Above, Inserting Row Below, Removing Column, Removing Row, Splitting Merged Table Cells, Merging Table Cells.
Layers
In layer field, the editor supports Inserting New Layer, Moving Layer Forward/Backward, Toggling Absolute Positioning.
Coding Tools
Coding tools consisting of Removing Formatting and Cleanup Messy Code make you feel more convenient in building content.
Variables, Attributes & Widgets
In this area, you can easily Insert or Edit Attributes as well as Add Variable/Widget.
Workspace Preferences
Toggling Fullscreen Mode, Displaying Visual Control Characters (On/Off), Toggling Guidelines / Invisible Elements, Setting Typing Direction Left-to-Right or Right-to-Left are tools supported in workspace preferences part.
Conclusion
>>> Don’t Miss This: More Magento tutorials for better e-commerce sites!
We hope that you have had a brief overview of using the WYSIWYG editor in Magento 2. You can search for more detailed Magento WYSIWYG editor tutorial for better content on your pages.
If you need any help, please feel free to contact us. Thanks a lot for reading!
The post How to Use the WYSIWYG Editor in Magento 2? appeared first on Mageguides.
from Mageguides https://ift.tt/3hhOL23 via IFTTT
0 notes
Text
Magento Framework Tutorial: Initial Step to Be A Magento Master
Today, we are going to give you a Magento framework tutorial.
As you may know, Magento is an e-commerce platform written in PHP, created using the Zend framework. Initially released in 2008, Magento has become a popular platform that owners can experience advanced technology to run their businesses smoothly.
Among Magento’s concepts, the Magento framework may be difficult to understand, even for skillful developers. Therefore, this article provides information about the Magento framework, specially written for beginners who are getting used to Magento.
Don’t overlook this tutorial as you can know about:
An overview of the framework: What it is & its role in a website
Introduction to Magento framework
Magento framework tutorial
Let’s get started!
What Is Framework?
Overview of Framework
>>> Read Later: Magento 2 Testing Framework to Cover All Parts of Your Website!
Simply saying, a framework is a kind of software creating an environment for developers to build applications. Frameworks are evaluated to be flexible, powerful, and effective as they are usually tested, customized, optimized, and built by skilled programmers.
Developing applications via software frameworks enables you to concentrate on advanced functionality rather than low-level ones, which are taken care of by the framework itself.
Why Does Framework Matter?
To build software or a website is extremely complicated because the process includes various challenging tasks that require professional, namely, coding, designing, testing, etc.
Each task contains many smaller skills.
For that reason, the framework makes it easier to manage the whole process.
There are many benefits when using the framework:
Better programming practices are supported
The framework helps to enhance the level of security while coding
Developers can avoid repetitive and unnecessary codes
Save time developing applications
Reduce bugs happening when coding
Applications are more reliable
More comfortable to test and debug code
Easier to deal with advanced technologies
Types of Framework
There are many types of frameworks. Here below are some trending choices that may meet your demands.
#1. Web Application Framework
Source: ScienceSoft
Web application framework, so-called web framework, is a framework type that is specifically designed to support web applications such as web resources, web services, and web APIs.
You can develop your applications more easily, quickly, and smartly with this type of framework. Some particular examples are Django, Laravel, Angular, to name but a few.
#2. DataScience Framework
>>> Check It Out: Magento Sample Data – Install, Update & Remove Guide!
This kind of framework is for those who need to process large-scale data, especially for online marketplaces like Amazon, eBay, Alibaba, etc.
DataScience frameworks usually contain advanced technologies in statistic analytics that store owners can manage their data more effectively. Apache Spark, PyTorch, Tensor Flow are some specific examples.
#3. Mobile Development Framework
In this modern world, where people tend to move from using desktops to using mobile devices for shopping, the mobile development framework has a role to play.
The framework helps to develop mobile applications; hence, online businesses can quickly approach their target customers to boost sales.
Some mobile development frameworks we can mention are Iconic, Xamarin, Flutter, etc.
What to Do Before Using Software Framework?
>>> Have A Look Here: More Magento Tutorials to Optimize Your Website!
First things first, you need to improve your professional skills in website development such as coding, testing as dealing with the framework is a challenging task.
If your ability is not enough, it is necessary to at least have a good understanding of codes that power the framework. Then, you may find it more straightforward when running into difficult tasks.
Magento Framework Tutorial
Now, we’re done with the general understanding of the framework. Let’s continue with our main topic today, Magento framework tutorial.
In this section, we will give you a clear explanation of the Magento Framework and some important factors.
Introduction to Magento Framework
>>> Cannot Overlook: How to Install Magento 2 Via Xampp – 2020 Updated!
In definition, the Magento framework manages the connection between application components, namely, request flow, routing, indexing, caching, and exception handling.
Magento framework provides services to effortlessly create modules that contain business logic to make Magento code more modular and reduce dependencies.
In this concept, you need to pay attention to a term called “libraries”. “Libraries” are logical groups where essentially PHP software components are organized into. The framework does contain libraries, even though there is no resource model included in the framework.
Magento Framework’s Roles
Magento framework has several responsibilities in operations that are effective for all modules:
Handling HTTP protocols
Interacting with the database and filesystem
Rendering content
Structure
This is a basic organization of Magento framework folder:
vendor/ ../magento ../framework lib/ ../internal ../LinLibertineFont ../web
In which:
/vendor/magento/framework: contains only PHP code.
/lib/internal: contains several non-PHP and PHP components.
/lib/web: contains JavaScript and CSS/LESS files.
Essential Functionalities
The Magento framework has a large number of powerful functionalities. In this part, we will give you explanations of the most important ones.
#1. DataObject
DataObject is a standard function of the Magento framework, which provides the ability to store and retrieve data through magic methods, which are functions starting with 2 underscores. For example, __construct(), __set(), __call(), and some similar things are magic methods.
Among Magento classes, DataObject is the base for many others.
#2. Controller
In the Magento framework, the controller contains classes to help return some distinctive outcomes; for instance, JSON (JavaScript Object Notation) or redirection.
There are 2 different types of controller: Front-end controller and back-end controller. The controller, in general, receives requests from users, and then route controllers through execute() method.
#3. App
App includes system code that related to the Magento application. The functionality is used for many purposes in Magento:
Boots the application and reads in the early configuration
Contains entry point to the command line tools, the web application, and cron job
Routes requests while deploying
#4. API
API is another standard functionality in Magento. It is useful for advanced features of extendable objects, objects that can be extended to add new data through Magento extensions.
In other words, API is an effective method for developers to optimize web services to communicate well with the Magento system. Key features of API is support for REST (Representational State Transfer) and SOAP (Simple Object Access Protocol).
#5. Other Functionalities
Those 4 above are the most common that we want to explain clearly. However, there are many more, including Model, AbstractModel, Config, Filesystem, etc.
You can click HERE for more information.
Wrapping Up
To summarize, dealing with the Magento framework is not easy at all. It requires many specialized skills.
This article provides the initial step to get to know Magento Framework. If you want more tutorials on the Magento framework, please let us know! We will respond as soon as possible.
Thanks a lot for reading!
The post Magento Framework Tutorial: Initial Step to Be A Magento Master appeared first on Mageguides.
from Mageguides https://ift.tt/2BzfZSa via IFTTT
0 notes
Text
Magento PWA Studio Tutorial: Step by Step to Get Maximum Customers
Are you familiar with Magento PWA Studio Tutorial?
Or do you even know what PWA is?
This article will answer all related questions.
If you are looking for a way to leverage your online store, create a much better mobile experience on your website, you cannot overlook this blog.
In this blog, we will provide:
A clear overview of Progressive Web Application (PWA) in general and its benefits
An introduction to Magento PWA Studio Project
Basic concepts of Magento PWA
Magento PWA Studio Tutorial
Now, let’s get started!
What Is Progressive Web Application?
>>> Read Later: How to Optimize Magento 2 Order Management?
Progressive Web Application (PWA in short) is simply a web application applying modern web technologies to bring about a reliable, fast, and engaging customer experience.
Also, PWA can perform like a native app on smartphones. Therefore, it is extremely useful when customers tend to shop online by using phones, especially using available applications.
PWA’s Benefits
As PWA applies advanced web technologies, many online stores nowadays develop their web applications to attract more engaged customers:
Fast: Various performance optimization techniques are applied to improve the fast-loading functionality.
Mobile-friendly: As PWA is designed for smartphones, it is clear that those applications are fit in any size of any device.
Security & Reliable: PWA sites use HTTPS connections to improve security.
Installable: It is more convenient for customers to install the apps and access an online store with just one click.
Offline usable: As the apps are installed on mobile devices, customers can use it even when it is not connected to the Internet. All the actions will be updated as soon as the Internet is available.
Shareable: In any application, there is a button that enables you to share the content on social media with one click.
Easily keep customers engaged: The comfortability of PWA sites can make customers stay longer in your store. Also, the feature of sending notifications directly to their phones can keep them updated as well.
PWA Basic Concepts
>>> Have A Look Here: Magento Sample Data – Install, Update, Remove Guide (2020 Updated)!
Before going in-depth with the tutorial, let’s look over these following basic concepts and make sure that you understand it well to work with PWA tools.
Application Shell
An application shell provides a fundamental structure of the user interface for a progressive web application. The structure is used in Magento PWA Studio to reduce the time spent loading a branded experience in the UI.
This approach involves heavily caching the minimal amount of HTML, CSS, and JS to load the basic UI of the page before fetching the rest through an API.
Service Worker
A service worker is a script that runs in the background. It is used for caching and resource recovery.
Component Data Binding
Component data binding is the way data move between the source and a UI component. PWA uses component data binding to connect dynamic data with the user interface.
GraphQL
Similar to REST, GraphQL is a query language on a server. It is used in PWA to push data.
In comparison with REST, GraphQL is more powerful, flexible, and effective.
Advantages:
Predictable results from the query
A single request for many results
Organized data with typed schema
Client State, Reducers & Actions
Client State, Reducers & Actions are Redux concepts that are used to manage and update the status of a web application.
Loading & Offline States
Both loading and offline states are concepts that must be dealt with by PWA.
Container Extensibility
A Container is an HTML element that contains 0 or more Containers Child components. It acts as the target for Magento-loader-layout operations.
With container extensibility, you can reuse and modify your container with no adjustment of the source.
CSS Modules
CSS modules are reusable CSS styles that enable you to develop components with styles but still compatible with external styles.
Performance Patterns
This is an essential concept in PWA, which includes many strategies and patterns available to enhance PWA performance.
Root Components & Routing
A root component of an app is the DOM node under which all other nodes are managed by React.
Routing is the ability to arrange a URL pattern to a suitable handler.
Critical Path
To display a website, we need a critical path, which are steps required to process the HTML, CSS, and JavaScript files. If you want the best performance of your web application, you need to optimize the critical path.
What Is Magento PWA Studio Project?
>>> Don’t Miss This: Magento 2 Testing Framework to Cover All Parts of Your Website!
Magento PWA Studio Project is a set of tools that allows developers to develop, deploy, and maintain the PWA storefront on top of Magento 2.
Advanced tools and libraries are used to create a build system and framework that follow the Magento principles of extensibility.
The Magento PWA Studio Project provides the following tools:
pwa-buildpack CLI tools: Core constructing and development tools.
Peregrine hooks & components: A collection of parts and React hooks.
Venia store & visual components: A proof of concept Magento 2 storefront & visual elements can be used in Magento stores.
UPWARD: A specification of a file that determines the behavior of the server.
pwastudio.io: Magento PWA documentation that guides developers to build Magento 2 storefront.
Shared Magento server: Sample data, make sure that the version of Magento is updated.
Magento PWA Studio Tutorial – Project Setup Guide
>>> Check It Our: More Magento tutorials to optimize e-commerce sites!
This comprehensive tutorial provides several best practices of Magento PWA Studio that help to integrate PWA into Magento.
Besides, in this blog, we just provide tutorials of setting-up step, which is a fundamental step of the whole process.
Getting Started
If you haven’t installed Yarn, Node.js, please install it to setup Magento PWA Storefront.
In case you have it, you need to check the versions by running the 2 following commands:
node -v
yarn -v
STEP 1: Run The Scaffolding Tool
In the terminal, you need to navigate to the directory where you want to install your storefront project and run the scaffolding tool:
yarn create @magento/pwa
Alternative commands:
npx @magento/create-pwa
npm init @magento/pwa
Then, please answer the following questions from the interactive questionnaire:
Run this command to navigate to your project’s root directory:
cd pwa-studio-fundamentals
STEP 2: Start The Storefront Application
In the second step of the Magento PWA tutorial, you need to execute the below command to start the dev server at http://0.0.0.0:10000/:
yarn watch
After that, it will detect whether there is any change or not. If a change is identified, the application running in the browser will update the change.
To stop the dev server, please press the key combination of Ctrl+C in the running terminal window.
STEP 3: Add A Custom Hostname & SSL Certificate
This step is necessary, especially when working on many storefront projects, as each project needs a custom hostname to avoid conflict with service workers or ports.
You can simply create a custom hostname and SSL certificate by using create-custom-origin sub-command as followed:
yarn buildpack create-custom-origin ./
Update Environment Variables (Optional)
You can choose to perform this step or not since the scaffolding command already adds the required environment variables to the environment file.
In case you want to, you can update your project’s .env file and change the property values.
You can find more Magento PWA Studio Tutorials in Magento PWA documentation.
Troubleshooting
Because it is kind of complicated to set up the project, errors can happen anytime. Let’s see some common faults and how to fix it.
Node Version Error
This fault may happen because you are using the wrong node version. Specifically, the node v12 is not compatible with early versions of the PWA studio.
To solve this problem, you should use a node version manager, for example, n or nvm, to switch to different versions.
Caching Problems
In case you face a caching problem, just simply empty the full application storage and start over.
Let us give you a specific example of using Chrome:
Open the Developer Tools
In the Application tab, select Clear Storage
Press the “Clear site data” button to finish
Unable to Get The Data from Magento
If you are running into a problem that your storefront does not get the data from Magento, you should verify the MAGENTO_BACKEND_URL in your .env file, which is accessible from your dev server.
Privacy Error
This issue is quite common while visiting a website.
The reason is that your project has an invalid or expired certificate. As a result, the browser doesn’t trust the generated SSL certificate.
Some users have suggested deleting the devcert folder to trigger certification regeneration.
Such a folder is found at different places in different operating systems.
In MacOS:
~/Library/Application Support/devcert
In Window system:
${User}\AppData\Local\devcert
Conclusion
In conclusion, PWA is so useful that we highly recommend online store owners to set up to gain more customers.
We hope that this Magento PWA Studio Tutorial is helpful to start working on Magento PWA. If you want us to deliver more Magento PWA tutorials, don’t hesitate to comment in the section below.
Thanks a lot for reading!
The post Magento PWA Studio Tutorial: Step by Step to Get Maximum Customers appeared first on Mageguides.
from Mageguides https://ift.tt/2zt4RFO via IFTTT
0 notes
Text
Magento 2 Migration Guide: What Is Migration & How to Perform?
Are you looking for a detailed Magento 2 migration guide?
Then, you come to the right place.
Understanding the difficulties that Magento 1 users have to face when performing the migration, we decided to deliver this article.
This tutorial blog will help you understand:
The overview of Magento 2 migration
Benefits of migrating from Magento 1 to Magento 2
A detailed Magento 2 migration guide
Let’s get started!
What Is Magento 2 Migration?
>>> Check It Out: How to Install Magento 2 Xampp – Magento Tutorial 2020!
Magento 2 migration, in other words, is moving from Magento 1 to Magento 2.
In 2015, when Magento 2.0 was officially launched, Magento users found ways to migrate all the related from their existing version to the new version.
When doing Magento 2 migration, there are 4 components you need to move: Data, extensions and custom code, themes, and customizations.
Data Migration
>>> Don’t Miss It: Magento Sample Data – Install, Update, Remove Guide!
Data creates the most difficulties that admins run into due to its complication and a vast amount. It includes all your products, customers��� information, store configuration, sales programs, etc.
The new Magento 2 Migration Tool has been developed to migrate data successfully, and we will go in detail later.
Extensions & Custom Code
When using Magento, store owners have to purchase many supported extensions to optimize various functionalities.
And if you want to migrate, you don’t have to repurchase extensions as we have a tool that you can use Magento 1 extensions in the second version.
Besides, you can save time by transferring your extensions and custom code to Magento 2 with Code Migration Toolkit.
Themes & Customizations
>>> Have A Look Here: Why & How to Change Magento 2 Themes?
As in Magento 2, new approaches and technologies are developed to help customers create the best purchasing experience and leverage the online store. Therefore, migrating themes and customizations are necessary.
Why Should Users Migrate from Magento 1 to Magento 2?
Although Magento 1 is not eliminated at the moment, and users can still use Magento 1 as long as they want, we always highly recommend performing Magento 2 migration for several reasons.
The End of Life of Magento 1
Magento has officially announced that Magento 1 will no longer be supported by the end of June 2020. That means updates for plugins and modules of the first version will not be released.
No More Security Patches for Magento 1
As Magento 1 supports will be ended, there will be no security patches updates released. Therefore, you need to migrate from Magento 1 to Magento 2 before the deadline of 30th June 2020, or otherwise, your business might be easy to breach the security.
Benefits of Magento 2
Besides the disadvantages of Magento 1 itself, Magento 2 also has many significant benefits over the first version.
Fast-loading: Magento 2 websites are reported to run 20% faster than Magento 1 on average; hence, results in better performance.
Better customer experience: Especially in the checkout, customers can avoid lengthy and complicated checkout processes as instant purchases feature, and payment gateways (Braintree, PayPal, etc.) are integrated.
Mobile-friendly: In these modern days, mobile-friendly is indispensable, as customers tend to use smartphones to shopping. Compared to Magento 1, Magento 2 themes are responsive by default.
Detailed Magento 2 Migration Guide
>>> Read Later: More Magento instructions for the best e-commerce sites!
In this section, we will only focus on the most complicated migration process, data migration. However, we will still go over the whole process.
Planning The Migration
Migration is always a complicated process. So, careful planning is necessary to avoid unexpected troubles.
The plan will generally look like this:
Check whether your site is ready to make changes
Check all installed extensions
Build and prepare Magento 2 Migration
Go through all the migration steps on the testing environment
Start the migration
Change the data after the migration
Update incremental data
Eliminate the old version
Magento 2 Migration Guide Using Data Migration Tool
Data Migration Tool is a command-line interface (CLI) used to migrate data from Magento 1 to Magento 2. To install the tool, please click HERE for more detailed instructions.
Getting Started
Before anything, you need to prepare first by the following 2 steps:
Log in to the Magento server, or switch to the Magento file system owner by either of the following:
su <Magento file system owner> -s /bin/bash -c <command>
sudo -u <Magento file system owner> <command>
Add <magento_root>/bin to your system PATH to enable running commands from any directory. For example:
export PATH=$PATH:/var/www/html/magento2/bin
And now, you can start the process.
STEP 1: Migrate Settings
Run this command to start migrating settings:
bin/magento migrate:settings [-r|--reset] [-a|--auto] {<path to config.xml>}
Configure custom migration rules:
Log in to the server or switch to the Magento file system owner
Change to the following directory:
cd <your Magento 2 install dir>/vendor/magento/data-migration-tool/etc/<edition-to-edition>
Create a settings.xml file:
cp settings.xml.dist settings.xml
Make changes in settings.xml
Change the <settings_map_file> tag in the path/to/config.xml file
STEP 2: Migrate Data
Run this command to start migrating data:
bin/magento migrate:data [-r|--reset] [-a|--auto] {<path to config.xml>}
In this step, the Data Migration Tool creates additional tables and triggers for the migration tables in the Magento 1 database. When we run an incremental/delta process, the tool will check these tables to migrate the necessary data to Magento 2.
STEP 3: Migrate Changes
Run this command to migrate incremental changes:
bin/magento migrate:delta [-r|--reset] [-a|--auto] {<path to config.xml>}
Migrate data created by 3rd-party extensions: Although the Data Migration Tool only used to transfer data by Magento’s modules, you still can migrate data from 3rd-party extensions:
Add the tables to be tracked to the deltalog.xml file
Create an additional delta class
Add the name of the newly created class to the delta mode section of config.xml
For more information about Magento 2 Migration, you can check HERE.
Conclusion
In conclusion, Magento 2 Migration is an extremely complicated process that needs to be performed by professionals. However, if you don’t want to hire developers, you can do it on your own with our instruction.
We hope that this Magento 2 Migration Guide will help you successfully move to the new platform.
If you have any questions or want us to provide more detailed information, don’t hesitate to contact us. We’re glad to answer at any time.
Thanks for reading!
The post Magento 2 Migration Guide: What Is Migration & How to Perform? appeared first on Mageguides.
from Mageguides https://ift.tt/3f90ezJ via IFTTT
0 notes
Text
For All Developers: Magento 2 Certification – Questions & Answers
Looking for guides of Magento 2 Certification with questions and answers?
Don’t worry as you have us!
After working for about a year, developers will try to get a certification to prove their skills in the company. But they might get lost when starting to study for certification as they don’t know where to begin.
Understanding such problems, we decided to develop instruction for all Magento developers out there, with the hope that this may help them achieve their goals.
In this article, we will clarify:
An overview of Magento 2 certification
Magento 2 certified professional developer: Common questions with answers
Magento 2 Solution Specialist Certification: Study guide
Now, let’s get started!
Overview of Magento 2 certification
What Is Magento 2 Certification Examination?
>>> Check Right Now: A Detailed Article about Magento Developer Certification!
Simply, Magento 2 certification examination is a method to test Magento developers’ knowledge and practical skills in developing on the Magento platform.
Usually, 1-year and above developers will want to get a certification to differentiate themselves from freshers and other competitors. Successfully pass the exams, developers can not only gain more opportunities in their career but also improve their reliability to their customers.
For this reason, Magento certification is quite essential for a Magento developer.
9 Types of Magento 2 Certifications
Time allowed: 90 minutes
Structure: 60 multiple-choice questions
No materials allowed during exams
>>> Don’t Miss This: Magento Frontend Developer Guide – The Key to Business Success!
Magento 2 certifications have 9 types in total, each of which represents different purposes.
Magento 2 Certified Solution Specialist: Solution Specialist is an expert user of the Magento 2 platform. It is designed for developers to customize the business goals by using Magento 2; hence, it requires knowledge of techniques and business.
Magento 2 Certified Professional Front-end Developer: This certification is mainly used to qualify the skills and knowledge needed for theming and modifying the interface.
Magento 2 Certified Associate Developer: You cannot overlook this certification if you are a beginner of Magento developer. It will certify your skills and knowledge in various essential perspective in Magento 2.
Magento 2 Certified Professional Developer: This type of certification is to test the knowledge and skills of Magento 2 developers in various aspects, whether they have a deep understanding of Magento 2 development or not.
Magento 2 Certified Order Management Developer: This certification is designed for those to deploy Magento Order Management, focusing on integrating and accurately utilizing the Magento Commerce Connector.
Magento 2 Certified Professional Cloud Developer: If you have experience in developing Magento Commerce Cloud, this certification, which is to test your ability to develop, test, troubleshoot in Magento Cloud, is for you.
Magento 2 Certified Professional JavaScript Developer: The certification requires you to have skills in developing and customizing JavaScript modules in Magento 2. Especially, examinees can choose to take the test remotely or at the center.
Magento 2 Certified Professional Developer Plus: This exam is suitable for senior developers who have at least 2 years of experience in customizing various perspectives in Magento 2, including working with clients to develop projects.
Magento 2 Certified Full-stack Developer: You can get this certification if you pass all 3 exams of Magento 2 Certified Professional Developer, Front-end Developer, and JavaScript Developer.
Get Ready for Exams
>>> Have A Look Here: Top 6 Killer Performance Tips for Magento 2 Developers!
To pass the Magento 2 certification exams, you need to work hard to gain enough experience.
At Magento U, several courses are highly recommended before taking any exam. You can look over the table below for details.
Magento 2 CertificationsSuggested CoursesDescription Magento 2 Certified Professional Front-end Developer
Core principles for theming in Magento 2
Learn the basics of Magento theming system and how to customize it Magento 2 Certified Solution Specialist
Managing Your Magento 2 Store
Learn all essential information to manage Magento 2 stores in various perspectives Magento 2 Certified Associate Developer
Magento 2 Development Essentials
(5-day instructor-led classroom) Learn to perform simple Magento customizations Magento 2 Certified Professional Developer
Magento 2 Certified Developer Study Group
Focus on different topic sections appeared in the exam Magento 2 Certified Order Management Developer
Magento 2 Order Management for Developersor Developers
Develop necessary skills and knowledge to manage the order in Magento Magento 2 Certified Professional Cloud Developer
Magento Commerce Cloud for Developers
Get practical knowledge and skills required to work with Magento 2 Cloud offering Magento 2 Certified Professional JavaScript Developer
JavaScript Development in Magento 2
Learn the necessary techniques to implement and customize solutions using Magento 2 JavaScript-related features Magento 2 Certified Professional Developer Plus
Responsive Web Design in Magento 2
Learn about responsive designs and how it can function in built-in themes
However, there are more training courses available for Magento developers. Please click HERE to find out.
Magento 2 Certification Process
The last part of this overview is to let you know how to take part in a Magento 2 certification exam.
There are 6 simple steps, as clearly described in the picture above.
Magento 2 Certification – Questions & Answers
>>> Check It Out: More Magento guides to optimize your Magento store!
In this section, we will give you some example questions and answers of Magento 2 Certifications. However, we won’t go in detail of all types.
This part is for those who have interests in 2 types:
Magento 2 Certified Professional Developer
Magento 2 Certified Solution Specialist
The remainings will be clarified in other blogs. So, stay updated on this site.
Magento 2 Certified Professional Developer – Common Questions with Explanations
This certification is for developers with at least 1,5 years of experience in implementing the Magento 2 platform.
The exam will test skills and knowledge in various fields, for example, UI modifications, admin modifications, checkout process modifications, etc.
In terms of the structure, these below are topics covered with its percentage:
Magento Architecture & Customization Techniques: 18%
Request Flow Processing: 12%
Customizing the Magento UI: 10%
Working with Databases in Magento: 7%
Using the Entity-Attribute-Value (EAV) Model: 8%
Developing with Adminhtml: 10%
Customizing the Catalog: 12%
Customizing the Checkout Process: 13%
Sales Operations: 5%
Customer Management: 5%
Each main topic consists of several smaller subjects; hence, you must understand a lot of information to pass the exam.
4 Example Questions with Answers
So now, we will give you some most common questions that appear in the real test. Before checking the answers, you should answer on your own and then compare your results.
Question 1: You create a module that can process URLs with a custom structure containing any combination of a product type code, a partial name, and a 4-digit year in any order.
The request path will look like this: /product/:type-code/:name-part/:year
Which layer in the Magento request processing flow is suited for this kind of customization?
Front controller
Router
Action controller
HTTP Response
Answer: B. The answer is based on the knowledge of Routing in Magento.
Question 2: While integrating a merchant’s product information management system with Magento, you create a module MyCompany_MerchantPim that adds a catalog product EAV attribute pim_entity_id programmatically.
In which type of setup script do you create the EAV attribute?
Setup/InstallSchema.php
Setup/UpgradeSchema.php
Setup/InstallEntity.php
Setup/UpgradeData.php
Answer: D. /Magento\Eav\Setup\EavSetup::addAttribute() fails if the reference entity_type_id does not exist. Click for more details.
Question 3: You are facing a bug that is supposedly caused by the customization of \Magento\Catalog\Api\ProductRepositoryInterface::save(). You decide to find all logic that customizes this method to solve the problem.
Which two places do you search for customization declarations? (2 answers)
*/di.xml
*/config.xml
*/events.xml
*/plugins.xml
Answer: A & C. While di.xml file in your module declares a plugin for a class object, in the events. xml file, the observer element can be configured to watch specific events.
Question 4: In a custom module you implement the interface
\Magento\Framework\App\Config\DataInterface.
/**
* Configuration data storage
*
* @api
*/
interface DataInterface
{
public function getValue($path);
public function setValue($path, $value);
}
What version constraint for magento/framework do you add to your module’s composer.json file?
major
minor
patch
stable
Answer: B. The solution is based on the knowledge of module version dependencies.
You can click to view more questions & answers of Magento 2 certification, pdf file.
Magento 2 Certified Solution Specialist – Exam Study Guide
For this exam, you need to have a deep understanding of Magento 2 Open Source and Magento 2 Commerce. Besides, at least 1,5-year practical experience is highly recommended.
Magento 2 Solution Specialist Certification is suitable for several positions: business analysts, account managers, web designers, e-commerce consultants, etc.
Areas covered:
E-commerce: 23%
Magento 2 architecture: 24%
Magento 2 features & functionality: 30%
Application of Magento knowledge to business objectives: 23%
Each area contains various aspects that you need to learn to be qualified.
E-commerce
This perspective accounts for 23% in the test. It consists of:
Online merchandising
Security
User experience
Laws and regulations
System development
Omnichannel
Data analytics and testing
Taxes
Magento 2 Architecture
In this content, you should understand the basic concepts, Magento API, solutions, infrastructure requirements, cookies, to name but a few.
Besides, distinguishing differences between 2 Magento editions (Commerce & Open Source) is necessary.
Magento 2 Features
In Magento 2, there are a lot of features available to optimize an online store. We can name some, for example, catalog, shopping cart, payment, checkout, navigation, CMS, reporting, and some similar aspects.
Your work is to know all of those functionalities well.
Application of Magento 2 Knowledge
The last content is indispensable as some beginners may be good at theories; however, applying to reality is another story.
To satisfy your clients, you cannot overlook this area. The included knowledge is, namely, requirements gathering, third-party integration, promotions, management, customer experience, etc.
For more details, you can click for questions and answers of Magento 2 certification in pdf.
Final Thoughts
To get a Magento 2 certification is not easy at all. You need to learn a considerable volume of knowledge, as well as gain practical experience in reality.
We hope that this article, with examples of Magento 2 certifications with questions and answers, will help you achieve goals in your career.
If you want us to deliver more blogs on other types, please don’t hesitate to comment below. We will provide other guides as soon as possible.
Thanks a lot for reading!
The post For All Developers: Magento 2 Certification – Questions & Answers appeared first on Mageguides.
from Mageguides https://ift.tt/2zhoGQm via IFTTT
0 notes
Text
Magento Frontend Developer Guide – The Key To Business Success
Why should you read this Magento frontend developer guide?
The reason is that it will provide you with useful skills and knowledge to become a professional developer in creating a perfect front website.
The more accessible customers find product information on your frontend site, the quicker they make a purchase. As a result, you can boost sales and revenues significantly.
Keep reading to figure out.
The Importance of Frontend Development for Business Success
>>>Have a look at Here Is Magento 2 Extension Tutorial to Customize Your Site!
Frontend development can create intuitive and business concentric user experiences for a website or web application. Your business success can be defined by improving web performance.
So, in this part, we will highlight the necessity of frontend development via its significant benefits.
Drive performance
Customers always get irritated when they visit slow web pages and applications and they will leave those pages immediately.
As a result, speedy and fast pages can improve customer engagement, and boost sales as well as conversation rates.
Thus, improved performance is one of the most considerable business advantages of frontend development.
Optimize navigation
Excellent navigation includes a well-structured and clean site layout, which can help customers find what they are looking for without difficulty.
Furthermore, it also gives customers a quick walk around, and this builds their trust and loyalty.
>>> Also read: Magento 2 PHP Unit Testing: Every Developers & QAs Should Know!
Build brand
With suitable and familiar content and media, you can target the right customers and make them remember your brand naturally.
Moreover, if you use critical design considerations, such as the use of the logo, unique layout, etc, you can receive positive feedback from customers.
Interface design
Your website is one of the most important marketing tools as if customers visit your site and feel impressed and useful, they will introduce it to many other people.
The usability of your website should contain seamless communication for user functionality.
Visitor retention
Well-designed interfaces and responsive design can build trust and confidence in your brand.
Apart from that, they also help achieve your communication goals leading to higher traffic and conversion rate.
Easy Magento Frontend Developer Guide for Beginners
>>>Also check: Here Is Magento 2 Layout Tutorial To Customise Your Frontend Store!
Magento developers can use this Magento front end tutorial to make a custom theme to drive Magento storefront to a particular customer.
Preparation
To carry out perfectly what is discussed in this Magento frontend development guide, you need a working Magento installation and the below browser versions installed on your device:
Chrome latest, latest–1 (any operating system)
Internet Explorer 11 or later version, Microsoft Edge, latest–1
Safari Mobile for iPad Mini,iPad 2, iPad with Retina Display (iOS 12 or later), for desktop frontend.
Chrome for the mobile latest–1 (Android 4 or later version) for mobile storefront
Moreover, you also have basic knowledge about CSS, CSS3, HTML, and HTML 5, LESS, XML, Javascript, PHP, Responsive Web Design.
Magento frontend tutorial
>>>Pay a visit Best place to Know about All Mage Guides !
The following Magento 2 frontend guide is for different levels with various development skills, and you can use them to customize your website.
Using cascading style sheets (CSS) can make simple changes to your site, such as color change, the feel and look of various interface components, replacing images, and other relatively cosmetic changes.
If you want to make more advanced styling, LESS and XML may be helpful.
In this Magento front end tutorial; you can change your site structure, you need to accept the default structure of your site when you load the module.
Existing modules can generate the HTML, which makes changes CSS and images on your site.
If you want to do this, rudimentary PHP skills are required to adjust PHTML template files.
PHP coding is involved in the process, you can copy and paste small sections of PHP code from old template files into a new one with differently structured HTML.
This can be useful if the existing HTML generated does not have sufficient CSS class names or HTML elements to gain the presentation adjustment you prefer to achieve.
The next level of Magento 2 frontend guide is moving functionality between places on a page or to entirely different pages, you can change your structure quickly and simply.
You can use the Magento layout engine to achieve it, and there is no PHP coding required.
Thanks to existing Magento or third-party, you can develop new modules to add new custom functionality to your site or to extend it.
This is the end of the Magento front end tutorial for beginners; however, the third level of customization is not solved in this guide.
If you think this guide is easy and want to more complicated instructions, keeping reading as we will provide you in the following part.
Professional Magento Frontend Developer Guide to Create A New Storefront Theme
Prerequisites
Using this Magento frontend tutorial to create a new storefront theme, you can customize your Magento store design.
Keep in mind that you mustn’t modify the out of the box Magento themes for the sake of compatibility, upgradability, and easy maintenance.
The developer module should have your Magento application. The application mode influences the way Magento caches static files.
The Magento frontend developer guides we recommend below are developer/default-mode specific.
Let’s go!
Create a new storefront theme
Create a new frontend them: Walkthrough
You can create a directory for the theme under app/design/frontend/<your_vendor_name>/<your_theme_name>.
Add a declaration file theme.xml while you create an etc directory and create a file named view.xml to the theme directory.
Add a composer.json file.
Add registration.php.
Create directories for CSS, JavaScript, fronts, and images.
You can configure your theme in your admin panel.
Create a theme directory
Go to <magento_root>/app/design/frontend.
According to your vendor name, you can create a new directory: /app/design/frontend/<Vendor>.
Create a directory theme depending on your theme under the <vendor> directory.
app/design/frontend/
├── <Vendor>/
│ │ ├──…<theme>/
│ │ │ ├── …
│ │ │ ├── …
Declare the themes
After you generate a directory for your theme, the next step of the Magento frontend developer guide is to generate theme.xml, including the theme name.
Furthermore, you can indicate the parent theme name and, if needed, where the theme preview image is stored.
Add or duplicate from an existing theme.xml file to your theme directory app/design/frontend/<Vendor>/<theme>.
Configure it using the below instance
<?<theme xmlns:xsi="http://www.w3.org/2001/XMLSchema-instance" xsi:noNamespaceSchemaLocation="urn:magento:framework:Config/etc/theme.xsd"> <title>New theme</title> <!-- your theme's name --> <parent>Magento/blank</parent> <!-- the parent theme, in case your theme inherits from an existing theme --> <media> <preview_image>media/preview.jpg</preview_image> <!-- the path to your theme's preview image --> </media> </theme>
Remove the <media> node if you don’t see any preview images for your theme:
<?<theme xmlns:xsi="http://www.w3.org/2001/XMLSchema-instance" xsi:noNamespaceSchemaLocation="urn:magento:framework:Config/etc/theme.xsd"> <title>New theme</title> <!-- your theme's name --> <parent>Magento/blank</parent> <!-- the parent theme, in case your theme inherits from an existing theme --> </theme>
Before you change the theme title or parent theme information in theme.xml, a theme was already registered, you should open or reload any Magento admin page to ensure that your changes be saved in the database.
Make a Composer Package
Add a composer.json file to your theme directory and then register the package on a packaging server ì you want to distribute them as a package.
The composer.json file provides theme dependent information related to a current theme.xml file for the correct dependencies and their versions.
For instance, a theme composer.json file:
<?{ "name": "magento/theme-frontend-luma", "description": "N/A", "config": { "sort-packages": true }, "require": { "php": "~7.1.3||~7.2.0", "magento/framework": "*", "magento/theme-frontend-blank": "*" }, "type": "magento2-theme", "license": [ "OSL-3.0", "AFL-3.0" ], "autoload": { "files": [ "registration.php" ] } }
Add registration.php
You can register your theme in the system by adding a registration.php file in your theme directory with content as a follow:
<?<?php /** * Copyright © Magento, Inc. All rights reserved. * See COPYING.txt for license details. */ use \Magento\Framework\Component\ComponentRegistrar; ComponentRegistrar::register(ComponentRegistrar::THEME, 'frontend/<Vendor>/<theme>', __DIR__);
Configure images
With Magento frontend developer guide, you can configure product image sizes and other prosperities in a view.xml configuration file.
Add view.xml file via following simple steps:
Log in to your Magento server with the role of user with permissions to generate directories and files in the Magento installation directory.
Make the etc directory in the theme folder.
Copy the view.xml file from the etc directory of the parent theme or copy it from the Blank theme.
Configure all storefront product image sizes in the view.xml file. For example:
<?... <image id="category_page_grid" type="small_image"> <width>250</width> <height>250</height> </image> …
Create the directories for static files
Your theme may contain these files like fronts, Javascript, styles, images.
Each type should be stored in a different subdirectory of the web in your theme folder:
app/design/<area>/<Vendor>/<theme>/
├── web/
│ ├── css/
│ │ ├── source/
│ ├── fonts/
│ ├── images/
│ ├── js/
To clear the pub/ static directory:
<?rm -rf <magento_root>/pub/static/*
To clear the var/ view-preprocessed directory:
<?rm -rf <magento_root>/var/view_preprocessed/*
Declaring theme logo
You can declare a theme logo by adding an extending <theme_dir>/Magento_Theme/layout/default.xml layout.
For instance:
<?page xmlns:xsi="http://www.w3.org/2001/XMLSchema-instance" xsi:noNamespaceSchemaLocation="urn:magento:framework:View/Layout/etc/page_configuration.xsd"> <body> <referenceBlock name="logo"> <arguments> <argument name="logo_src" xsi:type="string">images/my_logo.png</argument> <argument name="logo_width" xsi:type="number">300</argument> <argument name="logo_height" xsi:type="number">300</argument> <argument name="logo_alt" xsi:type="string">Logo name</argument> </arguments> </referenceBlock> </body> </page>
Frontend Troubleshooting And Solution
The frontend problem and solution below are based on Algolia’s instructions. Thanks for their sharing.
Frontend issues
Unexpected results
It is possible to see unexpected results when you search for products. The best way to figure out where it’s coming from is that you should compare them to the results you get with the same search in your dashboard:
Go to Indices then do search for your default product index via default magento_default_products.
If you see the same result on the dashboard and on the frontend and you don’t want it, this probably means that there’s an issue on how you configured your index.
No images
The search results may give you information without images as the resized images can be used in the Magento’s cache, and they only exist in the pub/media/catalog/product/cache directory.
Furthermore, each time you clean the image cache of Magento, this directory is emptied. If you do so, the indexed images will no longer exist.
Solution
Checking the source code
To display the source code, please press Ctrl+U ( or Command +U for Mac).
You may:
If you didn’t turn on the JavaScript appearing in the Magento configuration, you could check if the 3 JavaScript embedded by the extension is loaded in the <head> div (common.js, instantsearch.js, and autocomplete.js). These three files are mandatory for the search to work.
Check your code in case the native search input on the header has been replaced by the search input.
In the products listing pages, search for the DOM selector defined in the back-office in Stores => Search => Instant Search Results Page > DOM selector (by default, it’s .columns). This selector needs to be on the page for the results to be injected in the page.
Using the console
In the console tab, you can type “Config” then press Enter button, and then you can see all the configuration included in the object (coming from your Magento configuration).
It is useful to help you test whether your front end is up to date with the latest modifications or not. Besides, it reminds you to clear the cache.
Investigate the autocomplete HTML code
You can activate the debug mode in Stores => Search => Autocomplete Menu => Enable autocomplete menu’s debug mode to investigate autocomplete HTML code menu with the developer tools.
If you do so when you click outside the menu, the dropdown won’t disappear anymore, and this is very useful for a closer look at the HTML generated by the extension.
Wrapping Up
With the Magento frontend developer guide mentioned above, we hope you have a better understanding and skills to create a frontend.
If you have any questions, feel free to let us know.
You will receive dedicated support.
The post Magento Frontend Developer Guide – The Key To Business Success appeared first on Mageguides.
from Mageguides https://ift.tt/2ZiKZjb via IFTTT
0 notes
Text
Here Is Magento 2 Extension Tutorial to Customize Your Site
Magento 2 extension tutorial is a prestigious document if you are a developer or a merchant having a command of a PHP program, and you want to improve your online store via Magento extension.
But you don’t know how to carry out this?
Look no further! This article will help you have a more unobstructed view of Magento.
Get started!
Why Is Magento 2 Extension Needed?
>>>How to Install Extensions to Magento 2 via Marketplace ? Interested?!
As an online merchant, you need to do everything to save costs for your online store. Or your Magento default is working ineffectively, and you want to update it to be more productive.
At that time, a Magento 2 extension will help.
As a Magento extension tutorial developer, we can see multiple benefits of Magento extensions as we mention below:
>>>Also read: How to Install Magento 2 Via XAMPP (Magento Tutorial 2020)!
Inventory management:
By using Magento create extension tutorial to create Magento extension, you can have useful assistance to manage your products, support your multi-store, and boost sales as well as orders.
On-time delivery and tracking
With the Magento extension tutorial, you can take advantage of Delivery Date Scheduling to help customers to choose what time they want to receive the items.
As an administrator, you can create your time and date format.
Saving cost
This is one of the most significant benefits you can gain as it helps your platform be more mobile-friendly and comfortable.
As a result, you don’t have to worry about building a site or access more customers.
>>>Pay a visit: The Best Place to Know About Mage Guides!
Greater Performance And Scalability
Although there are many available Magento extension tutorial developer packages and install codes that can help you to design and develop or purchase and install extensions from the Magento Marketplace or third-party providers, knowing you should learn how to create Magento 2 extensions is more economical.
With a few Magento 2 extension tutorial steps, you can add the extension on your shop and customize your store quickly, whatever you want.
Then, you will have a better performance to increase your query speed, and enormous merchant data used for indexing includes stores, users, prices, catalog data, and so on.
Apart from that, by using an HTTP accelerator, you also have the chance to get cache requests.
Useful Magento 2 Extension Tutorial for Beginners
>>>Have a look at Learn How to Master in Using Magento 2 Admin Grid In 5 Minutes!
After reading all advantages brought for your Magento store as we have mentioned, you must be interested in creating a Magento extension for your online store.
If you have just known about these extensions, don’t miss this section since we will give you a simple and easy Magento create extension tutorial to create a Magento extension.
Preparation
>>>Also check: How to Install Magento 2 Extension Effectively? (2020 Instructions)!
Computer HardwareSoftware - CPU: Many sources can be used from CPU recommended Intel 8th Gen Core i3 to make debugging code. - Hard drive: To increase durability and code speed, you should use 120Gb SSD. - Ram: 12 - 16 GB is essential. In case you don’t have, you can use 8 Gb. - Display: Full HD (1920×1080 pixels) is recommended.- Text editor: Manage the code source is easier with PHPStorm IDE - Composer: It can be built with PHP code to make Magento 2 component more familiar. - Git: To manage code, up-dated changes, fix bugs, and constant updates. - Xampp: a software to host PHP easily for beginners. - Magento 2 platform: Using the latest version to have enormous benefits.
Creating a Magento extension with 5 steps
In this part, we will give you 5 simple steps of the Magento 2 extension tutorial to create a Magento extension without difficulty.
To make you have a better understanding of instructions, we will give an example of Magento 2 module development, to be detailed, Magento 2 hello world module.
Step 1: Create Magento 2 Hello World Module Folder
In the root folder of Magento 2, create the code folder: /app/code/[Provider Name]/[Module Name] to store all the resource code.
For instance: app/code/Bss/HelloWorld.
Step 2: Use module XML to declare the module
At the following app/code/Bss/HelloWorld/etc/module.xml, in the module.xml file, add the code like the following:
<?<?xml version="1.0"?> <configxmlns:xsi="http://www.w3.org/2001/XMLSchema-instance" xsi:noNamespaceSchemaLocation="urn:magento:framework:Module/etc/module.xsd"> <module name="Bss_HelloWorld" setup_version="1.0.0"> </module> </config>
In app/code/Bss/HelloWorld/registration.php, you can create the file by adding the code: “Remember to register the created Magento 2 hello world module”.
Then, when Magento is scanning, it will be automatically able to recognize the registered module.
<?<?php \Magento\Framework\Component\ComponentRegistrar::register( \Magento\Framework\Component\ComponentRegistrar::MODULE, 'Bss_HelloWorld', __DIR__ );
In the next following, you can open the Terminal window or Window PowerShell and type the command: php bin/magento setup: update to test the result in the Magento root folder.
Step 3: Create a Magento module controller
In the app/code/Bss/HelloWorld/etc/frontend/routes.xml, define the router using the following code.
<?<?xml version="1.0"?> <config xmlns:xsi="http://www.w3.org/2001/XMLSchema-instance" xsi:noNamespaceSchemaLocation="urn:magento:framework:App/etc/routes.xsd"> <router id="standard"> <route id="helloworld" frontName="helloworld"> <module name="Bss_HelloWorld" /> </route> </router> </config>
Next, in the app/code/Bss/HelloWorld/Controller/Index/Index.php, you can create the Index.php controller file with the code as follow:
<?<?php namespace Bss\HelloWorld\Controller\Index; use Magento\Framework\App\Action\Context; class Index extends \Magento\Framework\App\Action\Action { /** * @var \Magento\Framework\View\Result\PageFactory */ protected $_resultPageFactory; /** * Index constructor. * @param Context $context * @param \Magento\Framework\View\Result\PageFactory $resultPageFactory */ public function __construct(Context $context, \Magento\Framework\View\Result\PageFactory $resultPageFactory) { $this->_resultPageFactory = $resultPageFactory; parent::__construct($context); } /** * @return \Magento\Framework\App\ResponseInterface|\Magento\Framework\Controller\ResultInterface * |\Magento\Framework\View\Result\Page */ public function execute() { $resultPage = $this->_resultPageFactory->create(); return $resultPage; } }
Step 4: Create a Magento 2 module block
As our example, the completed controller link will like this: helloworld/index/index
Magento 2 use the MVC model (Model – View – Controller), in which block is used to store data. There are two basic steps to create a Magento module block during Magento 2 extensions development
Firstly, generate a file in the app/code/Bss/HelloWorld/Block/HelloWorld.php and insert the code.
<?<?php namespace Bss\HelloWorld\Block; class HelloWorld extends \Magento\Framework\View\Element\Template { /** * @var \Magento\Framework\App\Config\ScopeConfigInterface */ protected $scopeConfig; /** * Helloworld constructor. * @param \Magento\Framework\View\Element\Template\Context $context * @param \Magento\Framework\App\Config\ScopeConfigInterface $scopeConfig */ public function __construct( \Magento\Framework\View\Element\Template\Context $context, \Magento\Framework\App\Config\ScopeConfigInterface $scopeConfig ) { parent::__construct( $context ); $this->scopeConfig = $scopeConfig; } /** * @return mixed|string */ public function getHelloWorldTxt() { $text = $this->getText(); if (!isset($text)) { $text = 'Hello World'; } else { $text = 'Hello '.$text; } return $text; } /** * @return mixed */ public function getText() { return $this->scopeConfig ->getValue('helloworld/general/text_content', \Magento\Store\Model\ScopeInterface::SCOPE_STORE); } }
Secondly, you can create the data enviroment by creating a file in the app/code/Bss/HelloWorld/etc/adminhtml/system.xml
<?<?xml version=“1.0”?> <config xmlns:xsi="http://www.w3.org/2001/XMLSchema-instance" xsi:noNamespaceSchemaLocation="urn:magento:module:Magento_Config:etc/system_file.xsd"> <system> <tab id="bss" translate="label" sortOrder="300"> <label><![CDATA[Bss Commerce]]></label> </tab> <section id="helloworld" translate="label" sortOrder="130" showInDefault="1" showInWebsite="1" showInStore="1"> <class>separator-top</class> <label>Bss Hello World Setting</label> <tab>bss</tab> <resource>Bss_HelloWorld::helloworld_config</resource> <group id="general" translate="label" type="text" sortOrder="10" showInDefault="1" showInWebsite="1" showInStore="1"> <field id="text_content" translate="label comment" type="text" showInDefault="1" showInWebsite="1" showInStore="1" > <label>Content goes here</label> </field> </group> </section> </system> </config>
Step 5: Create layouts and templates
In the app/code/Bss/HelloWorld/view/frontend/layout/helloworld_index_index.xml, create the layout file as follow:
<?<?xml version="1.0"?> <?xml version="1.0"?> <page xmlns:xsi="http://www.w3.org/2001/XMLSchema-instance" xsi:noNamespaceSchemaLocation="urn:magento:framework:View/Layout/etc/page_configuration.xsd" layout="1column"> <body> <referenceContainer name="content"> <block class="Bss\HelloWorld\Block\HelloWorld" name="helloworld" template="helloworld.phtml" /> </referenceContainer> </body> </page>
Accordingly, create file in the app/code/Bss/HelloWorld/view/frontend/templates/helloworld.phtml with the code below.Here you see the created block is declared with a set template.
This template is generated to display data of the next block.
<?<?php /** * Product list template * * @var $block \Bss\HelloWorld\Block\Helloworld */ ?> <h1><?php echo $block->getHelloWorldTxt(); ?></h1>
This variable is referencing our block class, so-called the method getHelloWorldTxt().
In the frontend, you should get the result like this:
In the admin of this example, we will go to Store ⇒ Configuration ⇒ BSS Commerce ⇒ BSS Hello Word Setting. Here, there is a data field declared in the system.xml.
You can type new input, save and flush Magento cache to get a similar result.
Simple 5-step instruction, which we mentioned above, will help you to create Magento 2 hello world module with ease.
However, have you not had a chance to create Magento extensions?
Let’s scroll down and collect the best practices to make sure of the quality of your created module.
Best tips to create a Magento extension
In this Magento 2 extension tutorial, we will give you both the detailed instructions to build your extensions quickly and pro practices to ensure that your Magento 2 extensions are well-coded and high quality in the marketplace.
Step 1: Get to know Magento coding standard
Bear in mind that when you start creating a Magento 2 extension, you need to know about the PHP coding standard. This will help you to publish and get paid for your module.
To automatically enforce these standards, the Magento team recommends using PHP_CodeSniffer where possible or ensure that the extension has already been under a rigorous code review.
Step 2: PHP_CodeSniffer Installation
Follow the attached and useful guide in PHP_CodeSniffer to install it. On completing, please go to File ⇒ Setting. In the Popup, navigate your way through Language and Frameworks => PHP => Code Sniffer.
In Configuration, select Local and click on “…” then Open File in the popup as below:
Find the path magento2\vendor\squizlabs\php_codesniffer\bin\phpcs.bat in the root folder of Magento and select OK. To check, click the Validate button.
Note: This PHP_CodeSniffer Validation setup should be done when PHPStorm is installed.
Then, go to Editor=>Inspections => PHP => Quality tools => PHP Code Sniffer validation and tick on enable box.
In Coding Standard, select Custom and click on “…”.
Here you see a popup be displayed, please open file. In Magento root folder, navigate to the following path: magento2\dev\tests\static\framework\Magento\ruleset.xml.
Hit OK to have the path automatically filled in the popup.
Finally, click Ok and turn off the Setting box. PHP_CodeSniffer is ready to check the code entered continuously. If there is something wrong with your code, messages will be.
Recommendations:
Always enable the CodeSniffer, even if the code is simple and easy to fix so that you can detect the errors quickly without wasting time to check the code later.
Setup Git as soon as you have created the code folder to create Magento 2 module. That way, you can keep your eyes on the code development process, avoid loss, meanwhile saving resources.
We will give an example by checking the app/code/Bss/HelloWorld/Block/HelloWorld.php
Step 3: Prepare MEOP Tools To Check Magento 2 Extension
EMEQP (Magento Marketplace Extension Quality Program) is a set of coding standards that are applied by Magento to make sure the quality specifications of the Magento 2 extension before putting it on sales on the Magento Marketplace.
In this section, we will introduce to you a helpful toolkit that supports the validation of MEQP violations during the Magento 2 module development.
Installation:
Download the archive or clone from GitHub EMQP link toolkit
Unzip and save the folder
The tool can:
Advise to fix bugs
Check the Magento coding standard errors in the PHP files of the extension
Notify the type of errors and their places
Important to note: The error with the severity = 8 and above is required to fix
Terminal and command line
In the root folder of Magento, open the CMD/Window PowerShell by holding Shift + Right Click, then select Open Window PowerShell.
Command line:
vendor/bin/phpcs
C:\xampp\htdocs\magento\magento2\magento2.2.x\magento2.2.5\app\code\Bss\HelloWorld –
standard=MEQP2 –severity=8
In which, vendor/bin/phpcs is the command, C: \ … is the path to your extension code folder. Press enter to see results:
For example, let’s break down into the error with the severity=8
MEQP toolkit reports a bug at the 38th line in the \app\code\Bss\HelloWorld\Block\HelloWorld.php, along with a specific message: “The direct use of ObjectManager is discouraged, Inject necessary dependencies via a constructor.”
It is important to note that using Object Manager to call the functions directly will affect the quality of the extension as well as Magento 2 logic and software architecture.
With such a common error, MEQP suggests using Dependencies Injection on the __construct() function rather than use Object Manager directly.
Wrapping up
This is all Magento 2 extension tutorial for creating Magento extensions you need to know if you are interested in it.
We hope that after reading this, you have more knowledge to become a Magento extension tutorial developer in the near future.
If you have any questions, feel free to let us know!
The post Here Is Magento 2 Extension Tutorial to Customize Your Site appeared first on Mageguides.
from Mageguides https://ift.tt/3dIZAZj via IFTTT
0 notes
Text
Learn How to Master in Using Magento 2 Admin Grid In 5 Minutes
Magento 2 admin grid tutorial is such a good document that can provide for you a clear vision about Magento 2 admin grid. For example, you can record all orders in a table so that you can take control of all of them easily.
Sometimes, you even desire to change the appearance of your page according to your preference. You have tried many ways to carry out such things but failed!
Fortunately, we will give you all the information to do it.
Get started!
What Is Magento 2 Admin Grid?
>>>Have a look at How to Optimize Magento 2 Order Management!
Magento 2 admin grid, so-called admin workspace, is a kind of table that lists the items in your database table and provides access to all tools, data, and content that you need to run your store.
Many Admin pages have a grid that lists the data for the section, with a set of tools to search, sort, filter, select, and apply actions.
The default start-up page can be set in the configuration and by default, the dashboard is a startup page for admin.
However, you can choose any other page to appear as the startup page when you log in. If you want to return the Admin startup page, just tap the Magento logo in the Admin sidebar.
>>>Pay a visit for All about Mage Guides to Improve your Business!
Magento 2 Admin Grid Tutorials for Beginners
In this section, we will give you detailed instructions about using the admin workspace effectively and quickly.
Change the admin startup page
On the admin sidebar, go to Stores => Settings => Configuration
In the left side panel under Advanced, choose Admin
Expand the Startup Page section
Set the startup page you want to appear first when you log in the Admin
When complete, click Save Configuration
Grid controls
Admin pages that manage data display a collection of records in a grid.
Furthermore, the controls at the top of each column can be used to sort the data.
The current sort order is indicated by an ascending or descending arrow in the column header.
Moreover, you can specify which columns appear in the grid, and drag them into different positions and also save different column arrangements as views that can be used later.
The Action column lists operations that can be applied to an individual record.
In addition, the date from the current view of most grids can be exported to a CSV or XML file.
>>>Don’t miss this: Learn All About Magento 2 Shopping Cart Here!!
Stort the list
Click any column header and then the arrow indicates the current order as either ascending or descending.
Use the pagination controls to view additional pages in the collection.
Paginate list
Set the Pagination control to the number of records that you want to view per page.
Click Next and Previous to page through the list, or enter a specific Page Number.
Filter the list
>>>Here Is Magento 2 Layout Tutorial To Customise Your Frontend Store. Interested?!
Click filters.
Complete as many filters as necessary to describe the record you want to look for.
Click Apply filters.
Export data
>>>Also read: Magento Sample Data: Install, Update, Remove Guide [Updated 2020]!
Select the records that you want to export.
2. In the Export menu in the up-right corner, choose one of the following file formats: one is CVS and the other is Excel XML.
Click export
Look for the downloaded file of exported data at the location used for downloads by your browser.
Grid layout
You can change the selection of columns and their order in the grid simply and easily according to your preference and then save as a view.
Keep in mind that only nine of twenty available columns are visible in the grid.
With the Magento 2 admin grid tutorial below, you can adjust the grid quickly without difficulty.
Change the selection of columns
In the upper right corner, click the Columns control.
Change the column selections:
Select the checkbox of any column you want to add to the grid.
Clear the checkbox of any column you want to remove from the grid.
Make sure to scroll down to see all available columns.
Move a column
Click the header of the column and hold.
Drag the column to the new position and release.
Save a grid view
Click the view control
Click Save Current View
Enter a name for the view
Click the arrow to save all changes
The name of the view now appears as the current view.
Change the grid view
Click the view control
Do of the following:
To use a different view, click the name of the view.
To change the name of a view, click the Edit () icon and update the name.
Actions control
This part of the Magento 2 admin grid tutorial you should not miss because when working with a collection of records in the grid, you can use the Actions control to apply an operation to one or more records.
The Actions control lists each operation that is available for the specific type of data.
For example, you can use the Actions control to update the attributes of selected products, to change the status from Disabled to Enabled, or to delete records from the database.
Apart from that, you can make as many changes as necessary, and then update the records in a single step. It is much more efficient than changing the settings individually for each product.
Applying edits to a batch of records is an asynchronous operation, which executes in the background so that you can continue working in the Admin without waiting for the operation to finish. The system displays a message when the task is complete.
The selection of available actions varies by list, and additional options might appear, depending on the action selected. For example, when changing the status of a group of records, a Status box appears next to the Actions control with additional options.
There are two steps in this part to complete the actions control process.
Step 1: Select records
The checkbox in the first column of the list identifies each record that is a target for the action.
The filter controls can be used to narrow the list to the records you want to target for the action.
Select the checkbox of each record that is a target for the action. Or, you can use one of the following Actions to select a group of records:
Select all / unselect all
Select all on this page / Deselect all on this page
If you want to include any records, set the filters at the top of each column to show only ones.
Step 2: Apply an action to selected records
Set the Actions control to the operation that you want to apply
For example, update attributes
In the list, select the checkbox of each record to be updated.
Set the Actions control to Update Attributes and click Submit.
The Update Attributes page lists all the available attributes, organized by the group in the panel on the left.
Select the Change checkbox next to each attribute and make the necessary changes.
Click Save to update the attributes for the group of selected records.
When complete, click Submit.
This is all Magento 2 admin grid tutorials for beginners. If these instructions above are too easy to your level, keep reading the next section as we will show you how to create the Admin grid in Magento 2.
A Guide on How to Create Magento 2 Admin Grid Programmatically
In the next part of the Magento 2 admin grid tutorial, we will show you how to create an admin grid effectively and shortly so that you can do it by yourself without difficulty.
Thanks, MageDirect for this useful piece of code that we will mention below.
Create ACL
When you create an ACL ( Access control list rules) file to control access to our faq grid
You can use this code below to carry out it:
<?<!-- app/code/[VendorName]/[ModuleName]/etc/acl.xml --> <?xml version="1.0"?> <config xmlns:xsi="http://www.w3.org/2001/XMLSchema-instance" xsi:noNamespaceSchemaLocation="urn:magento:framework:Acl/etc/acl.xsd"> <acl> <resources> <resource id="Magento_Backend::admin"> <resource id="Magento_Backend::content"> <resource id="Magento_Backend::content_elements"> <resource id="MageDirect_Faq::faq" title="Faqs" translate="title" sortOrder="100"/> </resource> </resource> </resource> </resources> </acl> </config>
Add new menu item
Add new menu item by editing etc/adminhtml/menu.xml inside the module. In this case, we will add an item under Content > Elements:
<?<!-- app/code/[VendorName]/[ModuleName]/etc/adminhtml/menu.xml --> <?xml version="1.0"?> <configxmlns:xsi="http://www.w3.org/2001/XMLSchema-instance" xsi:noNamespaceSchemaLocation="urn:magento:module:Magento_Backend:etc/menu.xsd"> <menu> <add id="MageDirect_Faq::faqs" title="Faqs" translate="title" module="MageDirect_Faq" sortOrder="100 parent="Magento_Backend::content_elements"action="faq/faq" resource="MageDirect_Faq::faq"/> </menu> </config>
“Add” directive has next attributes:
the id attribute is the unique name in format VendorName_ModuleName::menu_name;
the title attribute will be visible in the menu bar;
the module attribute specifies the module which this menu item belongs to;
the action attribute contains the url of the page on which our admin grid will be shown;
the resource attribute is used to define the ACL rule which the admin user must have in order to access this menu item;
the parent attribute defines parent menu item;
the sortOrder attribute defines menu item position inside menu bar.
Add routes.xml
To etc/adminhtml folder add routes.xml file with the next content:
<?<!-- app/code/[VendorName]/[ModuleName]/etc/adminhtml/routes.xml --> <?xml version="1.0"?> <configxmlns:xsi="http://www.w3.org/2001/XMLSchema-instance" xsi:noNamespaceSchemaLocation="urn:magento:framework:App/etc/routes.xsd"> <router id="admin"> <route id="faq" frontName="faq"> <module name="MageDirect_Faq" /> </route> </router> </config>
Create admin controller class
<?<?php // app/code/[VendorName]/[ModuleName]/Controller/Adminhtml/Faq/Index.php namespace Magedirect\Faq\Controller\Adminhtml\Faq; use Magento\Backend\App\Action\Context; use Magento\Framework\View\Result\PageFactory; class Index extends \Magento\Backend\App\Action { /** * Authorization level of a basic admin session * * @see _isAllowed() */ const ADMIN_RESOURCE = 'MageDirect_Faq::faq'; /** * @var PageFactory */ protected $resultPageFactory; /** * @param Context $context * @param PageFactory $resultPageFactory */ public function __construct(Context $context, PageFactory $resultPageFactory) { $this->resultPageFactory = $resultPageFactory; parent::__construct($context); } /** * @return \Magento\Framework\Controller\ResultInterface */ public function execute() { /** @var \Magento\Backend\Model\View\Result\Page $resultPage */ $resultPage = $this->resultPageFactory->create(); $resultPage->setActiveMenu('MageDirect_Faq::faqs') ->getConfig()->getTitle()->prepend(__('Faqs')); return $resultPage; } }
Clean cache
Clean cache and we will see the new empty page in the admin panel:
<?<span style="font-weight: 400;">php bin/magento cache:clean</span>
Now we can add a simple grid to this page by using UI Component. Let’s do it
Create layout files
<?<!-- app/code/[VendorName]/[ModuleName]/view/adminhtml/layout/faq_faq_index.xml --> <?xml version="1.0"?> <pagexmlns:xsi="http://www.w3.org/2001/XMLSchema-instance" xsi:noNamespaceSchemaLocation="urn:magento:framework:View/Layout/etc/page_configuration.xsd"> <body> <referenceContainer name="content"> <uiComponent name="faq_listing"/> </referenceContainer> </body> </page>
Final Thoughts
This is the end of Magento 2 admin grid tutorial, we hope that you have more knowledge after reading this.
If you have any questions or trouble, feel free to contact us.
We will give you full support and solve your problem.
The post Learn How to Master in Using Magento 2 Admin Grid In 5 Minutes appeared first on Mageguides.
from Mageguides https://ift.tt/2YGMp6B via IFTTT
0 notes
Text
Here Is Magento 2 Layout Tutorial To Customise Your Frontend Store
One of the common tasks in the Magento is changing the appearance and structure of the site to make your store more stunning and run smoothly.
In Magento, three path structures determine your front-store are: layout, block, and container.
The page structure looks the same as the XML (Extensible Markup Language) file that is much like the HTML (HyperText Markup Language) structure to create one or several columns.
In this article, I’ll represent to you how to create and customize the layout. Let’s read all our Magento 2 Layout Tutorials to create your template and upscale visitors.
Let’s go now!
What Is Magento Layouts File?
A Layout file is a file that shows the appearance of your front-store to customers. The layout file is .xml file which resides in app > design > frontend > your interface > your theme > layout.
Each layout file contains a block and a container. A container is a package including code, configuration, and system libraries to make your website run smoothly.
It helps the layout to build a website appearance, for example, header, left column, main column, and footer.
Meanwhile, a block creates a link between the layouts and templates to design your website, including a category list such as a cart, product tags, and product listing.
More about Magento layout files
First, you go to app > design > frontend > base > layout and open the customer.xml file. You can see the different <tag> containing different blocks for your site.
<?lt;!-- New customer registration --> <customer_account_create translate="label"> <label>Customer Account Registration Form</label> <!-- Mage_Customer --> <remove name="right"/> <remove name="left"/> <reference name="root"> <action method="setTemplate"><template>page/1column.phtml</template></action> </reference> <reference name="content"> <block type="customer/form_register" name="customer_form_register" template="customer/form/register.phtml"> <block type="page/html_wrapper" name="customer.form.register.fields.before" as="form_fields_before" translate="label"> <label>Form Fields Before</label> </block> </block> </reference> </customer_account_create>
Handle and Block
Handles are the main entity through which Magento determines which block to load when a particular module is being called. <customer_account_create> is the module-specific handle. When someone accesses the Consumer Registration tab, this handle is activated.
Block has 2 types, there are structure blocks and content blocks. A content block is used when you want to add a specific type of “content” to a “Section” of the template or proposal.
While structural blocks are the structure of the content of the pages. They don’t have any actual content to display, however, they display the content blocks at the end.
For example, “Header”, “Footer”, “Left” and “Right” are structural blocks in Magento.
How to Create A New Magento 2 Layout?
In this Magento 2 Layout Tutorial, I’m going to represent you how to create a new Magento Layout as you don’t want to use a free theme.
We’ve already known that Magento’s default has a column, 2 columns with left bar, and 2 columns with right bar.
So, if you want to create it, first, you have to create a custom page.XML file following to this: app/design/frontend/<VendorName>/<ThemeName>/Magento_Theme/page_layout/3-columns-double-footer.xml.
<?lt;?xml version="1.0"?> <layout xmlns:xsi="http://www.w3.org/2001/XMLSchema-instance" xsi:noNamespaceSchemaLocation="urn:magento:framework:View/Layout/etc/page_layout.xsd"> <update handle="3columns"/> <referenceContainer name="page.wrapper"> <container name="footer-bottom" as="footer-bottom" after="-" label="Footer Bottom" htmlTag="footer" htmlClass="page-footer-bottom"/> </referenceContainer> </layout>
Secondly, you add a new page layout to the layouts.xml following to app/design/frontend/<VendorName>/<ThemeName>/Magento_Theme/layouts.xml.
<?lt;?xml version="1.0" encoding="UTF-8"?> <page_layouts xmlns:xsi="http://www.w3.org/2001/XMLSchema-instance" xsi:noNamespaceSchemaLocation="urn:magento:framework:View/PageLayout/etc/layouts.xsd"> <layout id="3-columns-double-footer"> <label translate="true">3 Columns Double Footer</label> </layout> </page_layouts>
As a result, your new page layout will display below:
You can check on your Admin Panel Configuration Setting to test Magento 2 Theme Layout.
Magento Layouts
>>> Don’t miss this: Best Magento Tutorials to rocket your sales in 2020!
How To Create Magento Layout XML?
I’m also telling you how to create the layout .xml in this Magento Layout XML Tutorial.
Go to app > design > frontend > default > default > layout and create the mymodule.xml.
Then, copy the code below:
<?lt;?xml version="1.0"?> <layout version="0.1.0"> <mymodule_index_index> <reference name="content"> <block type="mymodule/mymodule" name="mymodule" template="mymodule/mymodule.phtml" /> </reference> </mymodule_index_index> </layout>
How To Customise Layout in Magento 2 Layout Tutorial?
#1. Set the page layout
Following to Magento Layout Tutorial, if you want to change the Search page from 1 column to 2 column, you can just extend catalogsearch_advanced_index.xml in your theme by adding the following layout:
<?lt;page layout="2columns-left" xmlns:xsi="http://www.w3.org/2001/XMLSchema-instance" xsi:noNamespaceSchemaLocation="urn:magento:framework:View/Layout/etc/page_configuration.xsd"> ... </page>
>>> Don’t forget: Magento 2 Elasticsearch to upgrade your searching page!
#2. Include static resources (JavaScript, CSS, fonts)
Do you want to change the <head> of your site? Magento 2 Layout Tutorial will help you to change it. The default look of a Magento store page <head> is defined by app/code/Magento/Theme/view/frontend/layout/default_head_blocks.xml. Therefore, you can add CSS and JavaScript is to extend this file in your custom theme, and add the assets there. So, add the code below:
<?lt;page xmlns:xsi="http://www.w3.org/2001/XMLSchema-instance" xsi:noNamespaceSchemaLocation="urn:magento:framework:View/Layout/etc/page_configuration.xsd"> <head> <!-- Add local resources --> <css src="css/my-styles.css"/> <!-- The following two ways to add local JavaScript files are equal --> <script src="Magento_Catalog::js/sample1.js"/> <link src="js/sample.js"/> <!-- Add external resources --> <css src="https://maxcdn.bootstrapcdn.com/bootstrap/3.3.4/css/bootstrap-theme.min.css" src_type="url" /> <script src="https://maxcdn.bootstrapcdn.com/bootstrap/3.3.4/js/bootstrap.min.js" src_type="url" /> <link rel="stylesheet" type="text/css" src="http://fonts.googleapis.com/css?family=Montserrat" src_type="url" /> </head> </page>
Magento Layout XML Tutorial
>>> Interested? Learn about Magento 2 Shopping Cart to satisfy your customers!
That is about Magento 2 Layout XML Tutorial. But what if you want to add the conditional comments for Microsoft Internet Explorer?
#3. Remove static resources (JavaScript, CSS, fonts)
To remove the static resources, linked in a page <head>, make a change similar to the following in a theme extending app/design/frontend/<Vendor>/<theme>/Magento_Theme/layout/default_head_blocks.xml:
<?lt;page xmlns:xsi="http://www.w3.org/2001/XMLSchema-instance" xsi:noNamespaceSchemaLocation="urn:magento:framework:View/Layout/etc/page_configuration.xsd"> <head> <!-- Remove local resources --> <remove src="css/styles-m.css" /> <remove src="my-js.js"/> <remove src="Magento_Catalog::js/compare.js" /> <!-- Remove external resources --> <remove src="https://maxcdn.bootstrapcdn.com/bootstrap/3.3.4/css/bootstrap-theme.min.css"/> <remove src="https://maxcdn.bootstrapcdn.com/bootstrap/3.3.4/js/bootstrap.min.js"/> <remove src="http://fonts.googleapis.com/css?family=Montserrat" /> </head> </page>
#4. Set Conditional Comments
Some of your customers use Microsoft Internet Explorer to access your website. In terms of adding assets, you can add CSS files to be included for a specific version of Internet Explorer. A sample follows:
<?lt;page xmlns:xsi="http://www.w3.org/2001/XMLSchema-instance" xsi:noNamespaceSchemaLocation="urn:magento:framework:View/Layout/etc/page_configuration.xsd"> <head> <css src="css/ie-9.css" ie_condition="IE 9" /> </head> </page>
#5. Set Body Attribute of Blocks
To add a new tag, you just follow the code:
<?lt;body> <attribute name="class" value="my-new-body-class"/> </body>
>>> Check out: 5 Basic Samples of Magento Newsletter Template for your store! !
Conclusion
So, here is all about Magento 2 Layout Tutorial for your Magento website. In this article, I introduced you to how to customize Magento 2 layout XML tutorial, Magento layout tutorial, and Magento layouts.
If you have any questions, don’t hesitate to comment below. We’re 24/7 to answer your questions.
Thank you for your time!
The post Here Is Magento 2 Layout Tutorial To Customise Your Frontend Store appeared first on Mageguides.
from Mageguides https://ift.tt/2Y1tl2A via IFTTT
0 notes
Text
How To Customise Magento 2 Email Templates For Your Store?
Magento 2 comes with a lot of functionalities. Among the best features, I’m going to present Magento 2 Email Templates for merchants, which can send an email such as new orders, customers’ information, newsletters, and more.
Merchants can start their Magento store and receive various orders from customers; however, after launching the store for a while, store owners also want to communicate with their customers to retain them back to the store.
Therefore, Magento 2 Transactional Email can help you to interact with shoppers and to increase customer retention through the default Magento Email Template.
However, the default one maybe not fulfill some requirements. It is a reason why I’ll introduce how to customize Magento transactional email templates to meet all your demands.
Let’s go!
Customize Magento 2 Email Templates By Admin Panel
First, clicking MARKETING > Communications > Email Templates in Magento Admin.
Then, clicking Add New Template.
You will see Load default template section > Load Template > Currently Used For.
>>> Don’t miss this: Magento Tutorials for your store in 2020!
You enter a clear name in Template Name.
Plain text to use as the Subject of the emails sent using the template you create in Template Subject. It is the Magento email templates variables.
Customize the content.
In Template Styles, optionally add CSS styles for the template. These styles are added inside of a <style> tag in the <head> of the email.
Click Save Template.
Now that you have created a template, you must configure that template to be used:
If you haven’t done so already, log in to the Magento Admin as an administrator.
Click STORES > Settings > Configuration > SALES > Sales Emails.
Locate the section that contains the template you want to override.
What is the Magento 2 Footer Email Template?
The Footer Email Template is the ending part of the Email Template in Magento 2, the closing and signature line of the email message are included in this template.
Furthermore, the closing can be changed to fit your style, and the admin can add additional information such as the store name and address below the store name.
Configure the Magento 2 Footer Email Template
Step 1: Load the Default Template
On the Admin Sidebar, click Marketing. In the Communications section, click Email Templates.
Click Add New Templates. Follow these steps:
In the Load default template, open the Template list under Magento_Email, select “Footer.”
Click the Load Template.
Step 2: Customize and Preview the Template
Input the Template Name.
Input a Template Subject so you can arrange the template later. In the grid, you can sort and filter the templates by using the Subject column.
>>> Dont’ forget: Magento 2 Template Hints to identify your store structure!
You can edit the HTML code in the Template Content box, remember not to overwrite anything that is enclosed in double braces.
If you want to insert a variable, place the cursor in the code where the variable will be displayed, click Insert Variable. After that, select the variable you want to insert. When you selected a variable, a markup tag for the variable is inserted in the code.
Input the CSS code in the Template Style box to change CSS declarations.
Step 3: Update the configuration
On the Admin sidebar, click the content. After that, in the Design section, click Configuration.
In the grid, choose the store view that you want to edit. Click Edit.
Scroll down and open the Transactions Email.
Select the default Header Template for email notifications.
Click Save Config after completed.
Field Descriptions
FIELD DESCRIPTION LOAD DEFAULT TEMPLATE Template The choice of available templates will be listed and recognizes the template to be customized TEMPLATE INFORMATION Template Name The name of your custom template. Insert Variable a Store Contact Information variable can be inserted into the template at the cursor location. Template Subject In the Subject column, the Template Subject displayed to sort and filter the templates in the list. Template Content The HTML content of the template. Template Styles In the Template Styles box, you can enter any CSS style declarations to format the template header.
What is Magento Header Template?
Magento header is the content on the top of the email template, which is sent automatically as a message from your Magento 2 web store.
Moreover, Magento Email Logo and store contact are usually included in the email header template, and of course, you can add Magento email templates variables to the Header to add store contact information.
Configure Magento Header Template
Step 1: Load the default template
On the Admin sidebar, click Marketing. In the Communications section, select Email Templates.
Click Add New Template, follow these steps:
In Load Default Template, open the Template list under Magento_Email, click Header.
>>> Interested? Check out Magento 2 Shopping Cart to get your customers better!
Then, click Load Template to display the template HTML code and variables in the form.
Step 2: Customize the Template
In the Template Information section, follow these steps.
Input the Template Name for your email header template
Input the Template Subject so you can arrange the templates later. The subject column can filter and sort the list of templates in the grid.
Edit the HTML code as needed in the Template Content box, remember not to overwrite anything that is enclosed in double braces.
If you want to insert a variable, place the cursor in the code in the same place that the variable will display, click Insert Variable. Then select the variable you want to insert. After that, the markup tag for the variable is inserted in the code.
Click Preview Template to review your header template. If you need any adjustments, just edit the template as needed.
Click Save Template when you’re done. Now you can see the custom header displays in the list of available Email templates.
Step 3: Update the configuration.
Admin Sidebar > Content. In the grid, choose the store view that you want to edit. Click Edit
Scroll down and open the Transactions Email.
Select the default Header Template for email notifications.
Click Save Config after completed.
>>> Check it out: Secure your eCommerce store with Magento 2 SSH Key!
Field Descriptions
FIELD DESCRIPTION LOAD DEFAULT TEMPLATE Template The choice of available templates will be listed and recognizes the template to be customized TEMPLATE INFORMATION Template Name The name of your custom template. Insert Variable a Store Contact Information variable can be inserted into the template at the cursor location. Template Subject In the Subject column, the Template Subject displayed to sort and filter the templates in the list. Template Content The HTML content of the template. Template Styles In the Template Styles box, you can enter any CSS style declarations to format the template header.
How To Customise Magento Email Content?
To add Magento 2 transactional email template content, you should follow some steps below.
Clicking MARKETING > Communications > Email Templates in Magento Admin.
Create a new template or edit an existing template.
Click to place the cursor in the text in which to insert the variable.
Click Insert Variable. Choosing a variable that is suitable for your requirements in the pop-up.
Customize Styles for Magento 2 Email Templates
#1. Magento 2 email templates Inline styles
Some emails are supported by CSS style, which has been applied as “inline” styles on the style attribute of HTML tags.
Therefore, to create and customize Inline styles, you can follow the code:
<Magento_Email_module_dir>/view/frontend/email/header.html it is the location of the Inline Styles.
<?
So, the Inline CSS directive will tell Magento which files to apply as inline styles on the email template.
#2. Magento 2 Transactional Emails Non-inline styles
Global non-inline styles
Although the majority of Inline Styles are applied, many CSS styles cannot be applied by Inline Styles, for example, media queries.
The styles of this Magento transactional email template can be in a <style type=”text/css”></style>
The <Magento_Email_module_dir>/view/frontend/email/header.html file contains a css directive inside of a <style> tag:
<style type="text/css"> </style>
Magento transactional email template-specific non-inline styles
The header .html file outputs the variable. So, the value can come from any of the following:
<!--@styles .example-style { color: green; } @-->
It will help you customize Magento transactional email templates and add CSS style.
How to Customize Magento Email Logo?
#1. Using a theme
The email logo image format is JPG, GIF, or PNG, and the image should be 3x the size that you want it to display.
For example, your email has a 500px × 200px area for the logo. The logo image should be 1000px × 600px.
Therefore, to customize your logo, you need to add file logo_email.png to a Magento_Email/web.
Then, copy the <Magento_Email_module_dir>/view/frontend/email/header.html file into a Magento_Email/email directory in your theme.
And, edit the width and the height of the <img>
<? width="" width="200" height="" height="100"
#2. Using the Admin Panel
Clicking to CONTENT > Design > Configuration > Edit.
Under Transactional Emails in the Logo, the Image field uploads your logo and specifies the alternative text for it.
Enter values for Logo Width and Logo Height. Based on the preceding example, you would enter 1000 and 600, respectively.
Click the Save Configuration button.
Wrapping Up
These are all about the customization of Magento 2 Email Templates for your store from A-Z. If you have any questions, don’t hesitate to contact or write a comment.
We’re 24/7 support you.
Thank you for reading!
The post How To Customise Magento 2 Email Templates For Your Store? appeared first on Mageguides.
from Mageguides https://ift.tt/3azrk08 via IFTTT
0 notes
Text
Why Should You Use Magento 2 Template Hints For Your Store?
Magento 2 includes 3 structures to present your website to customers that are layout, block, and container.
The page structure looks the same as the XML (Extensible Markup Language) file that is much like the HTML (HyperText Markup Language) structure to create one or several columns.
Do you ever wonder how to identify each structure to design your website?
Magento 2 Template Hints are a useful tool to help you identify each block added to each page. Moreover, if you want to make a change, you need to know where that block is generated.
Let’s go to check with us how to enable this Magento Template hints!
Why Should You Use Magento 2 Template Hints For Your Store?
>>> Don’t miss this: The Best Magento Tutorials for eCommerce Store in 2020!
Debug is a crucial part of processing development in building an eCommerce store. The developer always knows what they should do when creating a website to ensure that it runs smoothly.
Magento 2 Template Hints is the part of this Debug process. It is a debugging tool that applies notions with a path on each template of the Magento 2 platform.
This mode displays the errors directly on the screen. In fact, it is a convenient way to debug even failed modules that show a blank page or 500 errors on the screen.
Here is the default Magento homepage with the images and banners installed.
And here is the thing you see at the backend store.
>>> Read more: Magento 2 MFTF to improve your eCommerce Store!
You can also check out Xdebug combination with PHP to help you with debugging and developing the website.
It helps you to establish breakpoints in your code and interrupt the PHP interpreter for displaying the application data on each executed line at such breakpoints.
So, do you know how to enable the Template Path of Magento? Let’s scroll down to check how to turn it on to help you manage your site faster.
How To Enable Magento Template Path Hints?
#1. Enabling Magento 2 Template Path Hints via Admin Panel
First, you log in to your Magento 2 account and go to Dashboard -> Stores -> Configuration.
Secondly, in tab Advanced, you click Developer.
>>> Don’t miss this: Elasticsearch Magento 2 to support your store performing!
Allowed IPs: fills your IP.
Template Path Hints: choose Yes
Add Block Names to Hints: choose Yes
After doing all the steps, your website will look like this in the storefront:
#2. Enabling Magento 2 Template Hints via Command Line
At first, you have to connect your Magento 2 store with SSH terminal and then go to your Magento 2 store file.
Enable Magento template path hints for frontend:
<?php bin/magento dev:template-hints:enable
Disable Magento template hints for frontend:
<?php bin/magento dev:template-hints:enable
Clean and flush cache:
<?bin/magento cache:clean
bin/magento cache:flush
However, you cannot enable or disable Magento 2 Template Hints for the Admin if you use this method.
#3. Enabling Magento 2 Template Hints via Source Code
Opening your file following the address below:
Vendor\magento\module-developer\Model\TemplateEngine\Plugin\DebugHints.php
Then, you copy this code on your file:
<?public function afterCreate( TemplateEngineFactory $subject, TemplateEngineInterface $invocationResult ) { $storeCode = $this->storeManager->getStore()->getCode(); // if ($this->scopeConfig->getValue($this->debugHintsPath, ScopeInterface::SCOPE_STORE, $storeCode) // && $this->devHelper->isDevAllowed()) { $showBlockHints = $this->scopeConfig->getValue( self::XML_PATH_DEBUG_TEMPLATE_HINTS_BLOCKS, ScopeInterface::SCOPE_STORE, $storeCode ); return $this->debugHintsFactory->create([ 'subject' => $invocationResult, 'showBlockHints' => $showBlockHints, ]); //} return $invocationResult; }
#4. Enabling Magento 2 Template Hints via MySQL
First, you log into your Magento account and go to System > Configuration > Developer page, switch to Website view.
Next, you can copy this code to enable the template:
<?SET @template_hints = 1; INSERT INTO `core_config_data` ( `scope`, `scope_id`, `path`, `value`) VALUES ('websites','1','dev/debug/template_hints', @template_hints) ON DUPLICATE KEY UPDATE `value`=@template_hints; -- Enable block hints SET @template_hints_blocks = 1; INSERT INTO `core_config_data` ( `scope`, `scope_id`, `path`, `value`) VALUES ('websites','1','dev/debug/template_hints_blocks', @template_hints_blocks) ON DUPLICATE KEY UPDATE `value`=@template_hints_blocks;
If you want to disable Magento 2 Template Hints, you can copy and paste the code below:
<?SET @template_hints = 0; INSERT INTO `core_config_data` ( `scope`, `scope_id`, `path`, `value`) VALUES ('websites','1','dev/debug/template_hints', @template_hints) ON DUPLICATE KEY UPDATE `value`=@template_hints; -- Enable block hints SET @template_hints_blocks = 0; INSERT INTO `core_config_data` ( `scope`, `scope_id`, `path`, `value`) VALUES ('websites','1','dev/debug/template_hints_blocks', @template_hints_blocks) ON DUPLICATE KEY UPDATE `value`=@template_hints_blocks;
However, there are many developers/users after following all steps that they still cannot enable from magento2 back-end section, it’s not showing.
>>> Interested? Check more TOP 6 Magento 2 Performance Tips to rocket your store!
We’re going to help you solve the problems after this part.
#5. Enabling Template Path Hints via env.php file
If you cannot change the value through the Admin Panel, you can search for the value on app/etc/env.php
In this file, you can check template_hints_storefront and template_hints_admin to change the value.
<?<?php return array( ... 'system' => array( 'default' => array( 'dev' => array( 'debug' => array( 'template_hints_storefront' => '1', 'template_hints_admin' => '1' ), ), ), ), ); Run the following command after the changes: php bin/magento setup:upgrade
How To Fix Magento 2 Template Hints Not Showing?
Firstly, you go to Dashboard -> Stores -> Configuration -> Advanced -> Developer.
And, next, you need to set Main Website in your Default store view.
Then, you can check your Configuration again whether Magento Template Hints working or not.
If still, your Magento 2 Template Hints not showing, you can open vendor/magento/module-developer/Model/TemplateEngine/Plugin/DebugHints.php
write this code inside afterCreate function : (at the start, above the storecode line)
<?if(isset($_GET['shreyasPathHints']) && $_GET['shreyasPathHints'] == 'on'){ return $this->debugHintsFactory->create([ 'subject' => $invocationResult, 'showBlockHints' => 1, ]); }
Now, you can open any Magento page and append
??shreyasPathHints=on
to the URL.
Conclusion
That is the way how to deal with Magento Template Path Hints for your store. In this article, I’ve shown you the benefits of Magento 2 Template Path Hints, how to enable and disable it, and how to solve if you cannot enable the Template Hints Path.
Again, Magento Template Path Hints is very important for your store because it shows the errors for you on the backend and helps you save your time to fix errors.
If you have any questions, you can comment on the comment section below.
We’re 24/7 support you!
Thank you for reading!
The post Why Should You Use Magento 2 Template Hints For Your Store? appeared first on Mageguides.
from Mageguides https://ift.tt/2Vhm4tT via IFTTT
0 notes