#Microprocessor Flame Photometer
Explore tagged Tumblr posts
Visit Tumblr Blog
Explore Tumblr blogs with no restrictions, modern design and the best experience.
Last Seen Tumblr Blogs


Fun Fact
Tumblr was acquired by Yahoo for $1.1B in 2013.
Text
Microprocessor Flame Photometer
Discover unparalleled accuracy and efficiency with the Microprocessor Flame Photometer from Laboidasia. Designed for the precise determination of alkali and alkaline metals, this advanced instrument is essential for laboratories in agriculture, biochemistry, clinical research, and environmental science. Featuring state-of-the-art microprocessor technology, it ensures rapid, reliable results with user-friendly operation. Optimize your analysis with customizable calibration, automatic ignition, and robust safety features. Experience innovation and precision combined—choose the Microprocessor Flame Photometer for your laboratory needs.
0 notes
Text
0 notes
Link
0 notes
Text
Flame Photometer Manufacturers In india
We are manufacturers and suppliers of flame photometer in variation of device like Digital Flame Photometers, Microprocessor Flame Photometer. Learn procedure and process for accurate measurement. Send Enquiry and Get Live Demo.
#Aggregate testing equipment#aggregate testing equipment distributors#aggregate testing equipment manufacturer
0 notes
Text
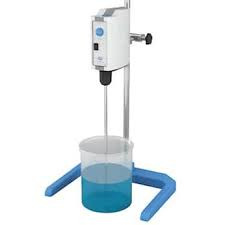
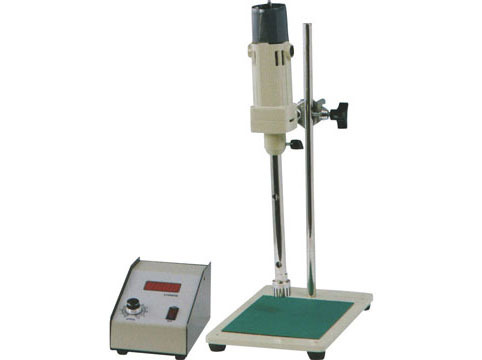
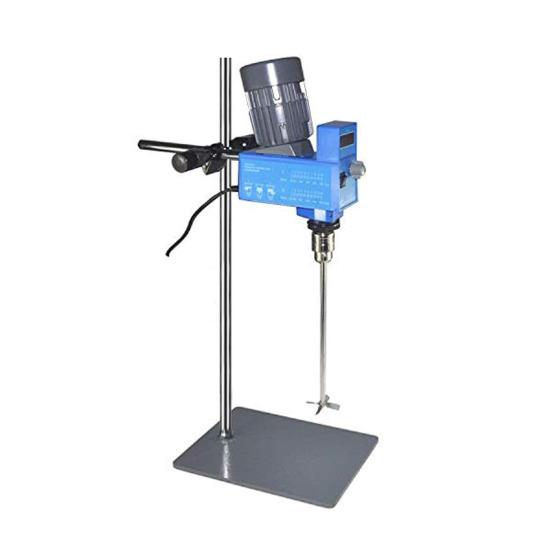
How to Properly Clean Your Laboratory Mixer
Laboratory Mixer play a crucial role in scientific research and experimentation, aiding in the precise blending of liquids and powders. To ensure optimal performance and maintain the integrity of your samples, it is vital to keep your laboratory mixer clean and well-maintained. In this guide, we will explore the importance of cleaning your mixer, the potential risks of neglect, and the step-by-step process for proper cleaning.
Why Cleaning Your Laboratory Mixer is Essential
1. Prevent Contamination
One of the primary reasons for cleaning your laboratory mixer is to prevent cross-contamination. Residue from previous experiments can contaminate new samples, leading to inaccurate results and compromised data integrity. This is especially critical in sensitive experiments, such as those involving cell cultures, pharmaceuticals, or toxicology studies.
2. Extend Equipment Lifespan
Regular cleaning not only ensures the quality of your experiments but also helps extend the lifespan of your Laboratory Shaker & Mixer. Buildup of substances can lead to wear and tear, affecting motor function and overall performance. By maintaining cleanliness, you minimize the risk of mechanical failures and the need for costly repairs or replacements.
3. Compliance with Safety Standards
Laboratories must adhere to strict safety and hygiene regulations. Failing to clean your equipment can lead to violations of these standards, potentially resulting in penalties, project delays, or reputational damage. A clean laboratory environment is crucial for ensuring the safety of all personnel and maintaining a productive workspace.
Risks of Neglecting Cleaning Procedures
Neglecting proper cleaning protocols can result in several risks, including:
Biological Contamination: In microbiology or biochemistry labs, leftover residues can promote bacterial growth, leading to unsafe working conditions.
Chemical Reactions: Residual chemicals may react with new samples, creating unexpected and potentially hazardous outcomes.
Data Integrity Issues: Contamination can skew results, leading to false conclusions and wasted time and resources.
Equipment Failure: Dirty mixers may overheat or malfunction due to buildup, leading to costly repairs and downtime.
Step-by-Step Cleaning Process for Your Laboratory Mixer
Materials Needed:
Mild detergent or cleaning solution
Distilled water
Soft cloth or sponge
Brush with soft bristles (optional)
Gloves
Safety goggles
Cleaning Procedure:
Step 1: Preparation
Before cleaning, ensure the mixer is unplugged and turned off. This is a crucial safety step to avoid any accidents while cleaning. Wear gloves and safety goggles to protect yourself from potential chemical exposure.
Step 2: Disassemble the Mixer
Carefully disassemble the mixer according to the manufacturer’s instructions. This usually involves removing the mixing vessel, blades, or paddles. Take care not to damage any components during this process. If you’re unsure, consult the user manual for specific disassembly instructions.
Step 3: Rinse Components
Rinse the disassembled parts under warm running water to remove any loose debris or residue. This initial rinse helps to loosen stubborn contaminants. Avoid using high-pressure water, as it may damage sensitive components.
Step 4: Clean with Detergent
Prepare a solution of mild detergent and distilled water, following the manufacturer’s recommended dilution. Using a soft cloth or sponge, apply the cleaning solution to the mixer components, ensuring to clean all surfaces, including hard-to-reach areas. For stubborn residues, a soft-bristle brush can be used to scrub gently without scratching the surfaces.
Step 5: Rinse Thoroughly
After scrubbing, rinse all components thoroughly under running water to ensure no detergent residue remains. Detergents left on the surfaces can contaminate future samples, so this step is essential for cleanliness.
Step 6: Dry Components
Dry all components with a soft, lint-free cloth or allow them to air dry completely before reassembling the mixer. Avoid using paper towels, as they may leave lint or fibers behind.
Step 7: Clean the Base Unit
While the removable parts are drying, clean the base unit of the mixer. Wipe down the exterior with a damp cloth and a mild cleaning solution, avoiding any openings or electrical components. Use a soft brush to clean around any buttons or crevices.
Step 8: Reassemble the Mixer
Once all components are dry, reassemble the mixer according to the manufacturer's instructions. Ensure that all parts are securely attached and in their correct positions to avoid operational issues.
Step 9: Final Inspection
Perform a final inspection to ensure that the mixer is clean, reassembled properly, and functioning correctly. Check for any signs of wear or damage that may need addressing.
Additional Tips for Maintenance
Regular Cleaning Schedule: Establish a regular cleaning schedule based on usage frequency. For high-use mixers, daily cleaning may be necessary, while less frequently used mixers may require weekly cleaning.
Use Appropriate Cleaning Solutions: Always use cleaning agents recommended by the manufacturer to avoid damaging the mixer.
Monitor for Wear and Tear: Regularly check for signs of wear on blades and components, replacing them as necessary to maintain optimal performance.
Store Properly: When not in use, store the mixer in a clean, dry area to prevent dust and contaminants from settling on it.
Conclusion
Maintaining a clean laboratory mixer is essential for ensuring the accuracy of your experiments and prolonging the life of your equipment. By following the proper cleaning procedures and adhering to regular maintenance schedules, you can help prevent contamination, avoid equipment failures, and comply with safety regulations. A well-maintained mixer not only supports your research but also contributes to a safe and productive laboratory environment.
#Laboratory Mixer#Laboratory Shaker & Mixer.#Microprocessor Flame Photometer#Slide Staining Machine#Semi-Automatic Rotary Microtome
0 notes