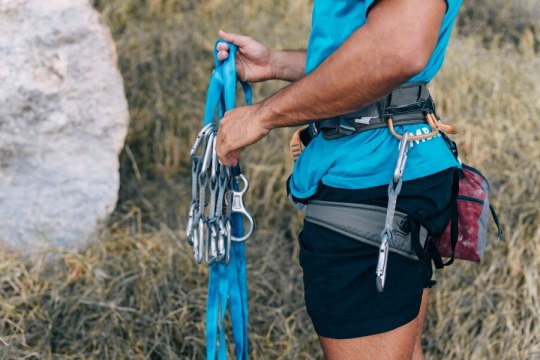
#Occy straps
Text
Embracing the Thrill - The Undeniable Role of Bungee Cords in Zipline Adventures
Ziplining, with its heart-pounding descents and panoramic views, has become a quintessential adventure for those seeking an adrenaline rush. Amidst the excitement and scenic beauty, there's a vital component that often goes unnoticed – the humble yet indispensable bungee cord. In this exploration of the skies, let's unravel the crucial role played by these elastic wonders in ensuring a safe and thrilling zipline adventure.
Dynamic Tethering
At the core of every zipline adventure lies the dynamic connection between the adventurer and the zipline itself. Bungee cords act as the tether, ensuring a secure link that adapts to the changing dynamics of the ride. This dynamic nature allows for a smooth and controlled descent, adding an extra layer of safety to the exhilarating journey.
Shock Absorption
The thrill of ziplining often involves rapid accelerations and sudden stops. Bungee cords serve as shock absorbers, absorbing the impact and preventing abrupt jolts that could compromise the safety and enjoyment of the experience. This feature is particularly crucial in ensuring a comfortable and controlled descent for participants.
Freedom of Movement
Unlike rigid connections, bungee cords provide a degree of flexibility that allows participants to enjoy a sense of freedom during their zipline adventure. The cords stretch and contract, accommodating the natural movements of the rider. This not only enhances the thrill but also contributes to a more immersive and enjoyable experience.
Safety Redefined
Safety is paramount in any adventure activity, and ziplining is no exception. Bungee cords are engineered with durability and strength in mind, offering a reliable connection that adventurers can trust. The combination of elasticity and robust construction ensures a secure and safe ziplining experience for thrill-seekers of all levels.
Innovation and Advancements
As technology advances, so does the world of ziplining. Innovations in bungee cord design continue to enhance the ziplining experience. Modern materials and engineering techniques contribute to lighter yet stronger cords, pushing the boundaries of what's possible in aerial adventures.
In the world of zipline adventures, where the thrill of the ride meets the beauty of the surroundings, bungee cords emerge as unsung heroes. Their dynamic and adaptable nature ensures that every descent is not just an adventure but a secure and enjoyable escapade. As you gear up for your next zipline experience, take a moment to appreciate the role of these elastic marvels, working tirelessly to make your journey through the air an unforgettable and safe adventure. So, with bungee cords as your trusted companions, get ready to embrace the thrill and let the skies be your playground.
0 notes
Text
Securing Thrills - The Essential Role of Bungee Cords in Sunnybank Hills' Zipline Adventures

Welcome to the heart-pounding world of ziplining in Sunnybank Hills, where adventure seekers embark on a journey that combines adrenaline rushes with breathtaking views. While the excitement of soaring through the air is unmatched, it's the behind-the-scenes heroes, the bungee cords, that ensure your zipline adventure is not only thrilling but also safe. In this blog post, we'll explore the crucial role of bungee cords in creating an unforgettable and secure ziplining experience.
The Foundation of Safety
At the core of every zipline adventure is the commitment to safety. Bungee cords serve as the backbone of this commitment, providing a reliable and robust mechanism for securing participants during their high-flying escapades. These cords are meticulously designed to withstand intense forces, ensuring that adventurers are firmly tethered to the zipline, minimizing the risk of accidents and enhancing overall safety.
Dynamic Flexibility
One of the key advantages of using bungee cords in ziplining is their dynamic flexibility. Ziplines often span varying distances and terrains, and the elasticity of bungee cords allows for seamless adjustments. Whether you're navigating through dense foliage or crossing a wide ravine, the bungee cords adapt to the changing conditions, maintaining a consistent tension that keeps participants securely on course.
Comfort and Enjoyment
While safety is paramount, the use of bungee cords also enhances the comfort and enjoyment of the zipline experience. The elasticity of the cords acts as a shock absorber, reducing the impact of sudden stops or starts. This not only adds an element of comfort for participants but also allows them to fully immerse themselves in the exhilarating experience without unnecessary jolts or discomfort.
Reliable Construction
Bungee cords used in ziplining are constructed with precision and durability in mind. Made from high-quality materials that are resistant to wear and tear, these cords undergo rigorous testing to ensure they meet stringent safety standards. The reliability of bungee cords contributes to the overall stability of the zipline adventure, instilling confidence in both participants and operators alike.
Environmental Considerations
Sunnybank Hills, known for its sunny weather and lush landscapes, is an ideal backdrop for ziplining adventures. Bungee cords play a role not only in the safety and enjoyment of the experience but also in environmental sustainability. Their durable construction means fewer replacements, reducing the overall impact on the environment and contributing to the longevity of zipline structures.
As you gear up for your next zipline adventure in Sunnybank Hills, take a moment to appreciate the unsung heroes that make it all possible – the bungee cords. These unassuming yet crucial components ensure that your high-flying escapades are not only thrilling but also safe, comfortable, and environmentally responsible. So, buckle up, embrace the adrenaline, and let the bungee cords secure your journey through the skies of Sunnybank Hills.
0 notes
Text
Securing Thrills: The Vital Role of Occy Straps in Zipline Adventures in Sunnybank Hills

Nestled in the heart of Sunnybank Hills lies a thrilling adventure that promises an adrenaline rush like no other—the Zipline experience. As you gear up for an unforgettable journey through treetops and across scenic landscapes, there's one unsung hero that plays a pivotal role in ensuring your safety and enjoyment: the humble Occy strap.
Unveiling the Occy Strap
While ziplining is an exhilarating and visually stunning activity, safety should always be the top priority. Occy straps, short for octopus straps, are versatile and robust elastic cords that have found a crucial role in the world of adventure sports. Originating from the marine industry, these straps are designed to secure loads on boats, making them ideal for withstanding the forces encountered in high-speed and high-impact activities like ziplining.
Safety First: Harnessing the Power of Occy Straps
Shock Absorption
Occy straps are renowned for their ability to absorb shock and distribute forces evenly. As you soar through the air on a zipline, these elastic wonders act as a buffer, cushioning the impact of sudden stops or changes in velocity. This feature is particularly crucial during abrupt braking, providing a smoother and safer experience for thrill-seekers.
Customizable Tension
Ziplining adventures in Sunnybank Hills cater to a diverse range of participants, each with varying weights and preferences. Occy straps can be easily adjusted to accommodate different body types and weights, ensuring a customized and secure fit. This adaptability enhances the overall safety of the adventure, making it accessible to a broad audience.
Durability in the Elements
Sunnybank Hills boasts a sunny climate, but occasional weather surprises can't be ruled out. Occy straps, designed to withstand the harsh conditions of marine environments, are resistant to UV rays and moisture. This durability ensures that your zipline adventure remains safe and enjoyable, regardless of the weather conditions.
The Occy Strap Advantage in Action
Imagine soaring above the lush landscapes of Sunnybank Hills, secured by the reliable embrace of Occy straps. As you navigate from platform to platform, the straps effortlessly stretch and contract, providing a dynamic and secure connection to the zipline. This dynamic tension adds an extra layer of excitement to your adventure, accentuating the feeling of being one with the elements.
Ziplining in Sunnybank Hills is not just an adventure; it's a holistic experience that blends excitement with safety. The often-overlooked Occy strap serves as the unsung hero, ensuring that your zipline journey is not only exhilarating but also secure and reliable. So, the next time you gear up for a zipline adventure in Sunnybank Hills, take a moment to appreciate the vital role played by Occy straps—your reliable companions in the sky.
As you embark on this unforgettable experience, remember that safety is key, and the unassuming Occy strap is there to make sure your journey through the treetops is not only thrilling but also worry-free.
0 notes
Note
Occy straps where everyone else calls them bungee cords, thongs where most people call them flip-flops and kiwis call them jandals...why do you Strayans have to go making up your own words for everything?
convergent evolution, like marsupial mammals
7 notes
·
View notes
Photo

If you get the feeling you are playing Tetris when it comes to packing your 4WD, you’re not alone. Getting it just right can be tricky. But, hopefully, this article helps you make it easier.
The two primary issues with packing a 4WD for a camping trip are space and weight capacity. Did you know your 4WD comes with a maximum load carrying capacity? You need to be under this at all times, and no matter how good you are at Tetris there’s only so much space available.
Over the years, we’ve learned a few tricks in packing our 80 Series Toyota Land Cruiser for long trips. Last year, we spent three weeks on the Gibb River Road, and aside from water and fuel pickups, had to be 100% self-sufficient.
So, how can you make packing your 4WD for a camping trip easier?
1. Pack the important stuff first
It’s not possible to take everything you might want to use when heading away on a long camping trip. There has to be a selection process where you prioritise what’s essential and what’s not. First and foremost, you should carry gear that is essential to your travel. Then, if there’s room, anything else you might want to take.
We have a spreadsheet that lists our essentials and we remove anything from the 4WD that isn’t required. What you pack in your vehicle should be personalised to where you are going, who you are going with, and the time frame you are away for.
But, what’s essential?
The right clothing and personal hygiene
Yeah, it might seem obvious, but I’ve lost count of the number of people who don’t look at the weather forecast and take the wrong clothes. We always take at least one set of clothes to suit an unlikely extreme – so a set for if it is really cold and wet, and a set for if it is really hot. Personal hygiene items come down to personal need – toilet paper, soap, shampoo, towels, toothpaste and toothbrush, a shovel, deodorant, and so on.
Quality sleeping and cooking gear
When you are camping, quality sleeping and cooking gear are some of the most important bits of gear you’ll carry. A tent that isn’t going to blow over or leak water, a comfortable mattress and pillow, and a warm sleeping bag, are non-negotiable. Likewise your cooking equipment. Being able to cook and heat food is important. We always carry a spare burner, which screws directly onto an LPG bottle, should our stove fail, which it has in the past.
Our neat and organised campsite at Mt Elizabeth Station on the Gibb River Road in Western Australia.
Tools and spare parts
No matter what you drive, you should have a basic tool kit and spare parts. These should be personalised to your mechanical knowledge, how far you are travelling, and what you know is likely to go wrong. Most cars have their quirks. I have a drawer in our Land Cruiser that is full of filters, tools, bearings, nuts and bolts, electrical cable, fuses, tape, WD-40, grease, brake fluid, cable ties, tie wire, and several types of oil.
If you break down remotely, you can be in pretty big trouble! Having some tools and spares will get you out of trouble in most instances, and could well save your special trip.
Recovery gear, first aid kit, maps, PLB
Recovery gear, rated recovery points, and an understanding of how to use them safely is vital. 4WDs by nature allow you to get away from the crowds but getting stuck can happen. We carry a huge range of recovery gear, and it does get used. Again, personalise it to where you are going, what is likely to happen, and who you are with.
A first aid kit is really important too and should be set up specifically for your given trip. They start at about $40 and work their way up, and are worth their weight in gold should anything go wrong.
Maps, in both electronic and paper format, are important if you are heading anywhere you might get lost. Which is anywhere, really.
It’s also worth packing a PLB for extra safety. You never know what might happen and whether you’ll have mobile coverage should you need it to call for help. A PLB is a worthwhile investment for anybody heading off the beaten track, for your own sake and to help your rescuers.
We keep our tools and spares in one of the built-in drawers in the back of the Land Cruiser. Easily accessible, and low to the floor for good weight balance.
Water, food, fuel
You won’t get very far without water, food, and fuel. We usually factor in about a 30% reduction in fuel efficiency when four-wheel driving, and take 10% more fuel than we need. Fuel includes LPG for your cooking. A 4kg gas bottle lasts us at least three weeks cooking every day.
As for water, there are hundreds of variables. The usual guide is anywhere from 5-10 litres of water per person per day, but it entirely depends on how warm it’s going to be, what you intend on doing on a daily basis, and whether you have access to other water for personal hygiene and dishes. Water is a massive priority, if you do get stranded, it’s the thing you will need most. Don’t skimp on water.
Food is relatively simple – you add up the number of breakfasts, lunches and dinners, and you arrive at the right number of meals. Adjust what you eat each day based on what you feel like, but this way you know you have enough food for the trip. Here’s a bit of menu planning advice, and some pointers on eating without having to lug heaps of fresh ingredients. Some excess tinned food (such as baked beans and spaghetti) are brilliant to have in the back of the car just in case.
Other important gear
A tarp, matches, fire starters, quality rope, sunscreen, a hat, insect repellent, medication, and cash are all equally important. If it affects your safety, you should consider taking it!
From there, we take our fishing and diving gear, photography equipment, electronics, and anything else that is going to be used regularly when away and that enhances our enjoyment. If you’re not sure it will be used (unless its safety-related), don’t take it!
2. Ensure the essentials are easy to access
Items that you use on a regular basis need to be easily accessible. If you’ve got to stop and empty half of the car just to open your fridge, the appeal of travel soon fades. Quick stops should be just that – quick, easy, and fuss-free.
Organisation is imperative
You can tell a lot about how organised someone is by the time it takes them to set up camp. A well-organised vehicle means you can access what you need quickly and easily. You know what they say – a place for everything and everything in its place.
Remember, if you’re going to use a roof rack only store lightweight equipment on it. You’ll see here we have our Oztent RV, solar panels, fishing rods, and recovery boards.
I try to organise our gear in sections, so nothing has to come out of the car that isn’t going to be used immediately. Our camp chairs, mattresses, sleeping bags, clothes, and tent are all easily removed from the vehicle without having to pull out jerry cans, solar panels, tools, and everything else that isn’t immediately needed.
The easiest way to get organised is to have tubs and a drawer system. Being able to put your gear away in drawers is fantastic, especially things that live in the back of the vehicle (tools, spare parts, and those emergency rations).
The order in which you pack is very important too. Not only do you need to be able to fit everything in, but it should be packed in a way that items you need often are easy to get out, and those that you may use once in the trip, are stowed away.
Use the nook and crannies
There are stacks of little areas inside your 4WD that can be used for storage. Under each seat, above the wheel wells, roof consoles, and behind the seats are all spots where you can store appropriately sized gear. I keep occy straps under my seat, old shoes under the passenger seat, rain jackets and rope in the wheel wells, and anywhere else there is a bit of unused space.
Rubbish bin bag
I’ll make a special note of this, as it’s one of our favourite mods to our Land Cruiser. You can purchase bin bags that mount to your spare tyre, which make brilliant rubbish bins. It keeps the smelly stuff out of your vehicle and works well for wet clothes and recovery gear too. Ours is a Bushranger branded one and has been faultless.
All packed and ready to roll at Israelite Bay, Esperance, Western Australia. Note the type bin bag on the spare.
3. Safety is paramount
I’ve seen some pretty foolishly packed 4WDs over the years. If you don’t pack with a bit of thought, you put the lives of those around you in danger. When packing your 4WD, keep safety at the front of your mind.
Fit a cargo barrier
If you have gear behind the driver or passengers, you need a cargo barrier. These are designed to stop your gear coming forward and injuring people if you find yourself in an accident. Even lightweight gear can kill someone if the vehicle is involved in an accident.
These also help with packing – you can push your tubs and gear up against them, and be confident that it isn’t going to move. Cargo barriers are usually steel with mesh, but you can get net versions as well.
Tie any heavy items down
If you have heavy items in your 4WD, they should be restrained. Things like jerry cans, tubs, recovery boards, and water tanks are very dangerous in the event of an accident when unrestrained.
I often carry a couple of jerry cans of water in front of the cargo barrier, and just use a ratchet strap around the seat mounting points. That way, if something does go wrong, you aren’t going to have a 20kg chunk of plastic smash into the back of your head.
Make sure your car fridge is accessible.
Don’t overload your vehicle
I’ll touch on this a little more below, but the basics are pretty simple. A 4WD that is carrying more than it is designed and rated to is dangerous for both you and those on the tracks around you.
4. Keep the weight down
The number of 4WDs that are out and about every day with weight issues is staggering. Two things to consider – you need to keep your weight down low in your 4WD, and also ensure that you aren’t overloading your vehicle.
This is not only important from a reliability perspective, but if your 4WD is overweight, your insurance company can decline the claims you make, and you can get in serious trouble with the law if you hurt anyone.
Centre of gravity
The more weight you put up high in a 4WD, the higher your centre of gravity. This, in turn, means the chance of your 4WD tipping over is dramatically increased along with the more obvious handling issues.
Roof racks are probably the number one misused bit of gear when it comes to weight. Most 4WDs have a roof capacity of 100kg (a few go to 150kg). This is due to the design of the 4WD the roof is only designed to carry 100kg. Some steel roof racks weigh up to 65kg, which would give you a capacity of just 35kg on the roof racks.
Roof racks should be used for lightweight gear, like tents, camping chairs, tables, solar panels, fishing gear and the sorts. To find out your roof loading capacity, have a look at your owner’s manual.
It’s important to consider where the heavy items are located in your vehicle. Things like water tanks, jerry cans, tools and anything else heavy should be as close to the floor as possible, and as close to the rear axle (or in front of it). The further the weight hangs over the back of your 4WD, the more likely you are to do chassis damage (just look up ‘bent 4WD chassis’ on Google!).
A closer look at what’s in my built-in drawer. Spares, tyre compressor, first aid kit…
Overweight 4WDs
Every vehicle has a given payload, which is the maximum amount of weight you can add to the car. This is specified by the manufacturer and is based on safety and reliability of your vehicle.
Have a look at your owner’s manual (or jump on Redbook and look up your model) to check your payload. Most 4WDs range from 600kg to 1000kg. Any weight you add to your 4WD takes away from the payload. This includes passengers, fuel, vehicle accessories, additional tyres and anything else you put inside (or outside).
If you have access to a weighbridge, this is the best, and the most accurate way to work out what you are dealing with. If you don’t, sit down and work out an estimate of the weight of everything in and on your 4WD. You’ll be surprised, I bet. It’s very easy to be overweight!
Remember also, if you are towing something, this needs to be deducted from your payload.
Camping in the Collie River, Western Australia.
Share the load
If you are travelling with other vehicles, plan ahead, and share the load. Anything you can share with another vehicle (where appropriate) is weight and space saved. There’s no need to carry a comprehensive toolkit in every vehicle.
Our tool and spares kit for remote travel would easily weigh 40kg. Obviously, your spares may not be interchangeable, but tools and basic repair items are. Things like gazebos, gas cookers, portable toilets, showers, fish smokers and a whole range of other things can be shared among groups of people. The more space, and lighter the vehicles, the better!
You’ll get better fuel economy, reduce the strain on your 4WD, and have less to pack and unpack!
5. Practice really does makes perfect
Above all, the best way to learn to pack your 4WD is to do it over and over again. When I started camping, I’d often jot a list down, when I was sitting around the campfire, of things that I should have taken along, and things that I’d rather have left at home.
The more you do it, the better your packing becomes, and the easier it is. Sarah and I were a bit rusty at the start of our five weeks in the Kimberley last year, but after 32 nights of camping, we got pretty good at packing and unpacking.
I can sit here and write about different techniques, but the bottom line is you need to practise as much as possible, and that’s best done by just getting out there and going camping!
Do you have any packing tips or tricks to add? Comment below.
The post 5 Tips for Packing Your 4WD for a Camping Trip appeared first on Snowys Blog.
0 notes
Text
HAS IT BEEN AN OCCY STRAP THIS ENTIRE TIME??? I THOUGHT IT WAS A HOCKEY STRAP!! WHY DID NO ONE TELL ME???
0 notes
Text
Diving the Similan Islands with Sea Bees Diving
We took a 6-day trip aboard the Sea Bees Diving Liveaboard – the Marco Polo into the Similans National Park and Richelieu Rock.
The adventure starts at check-in where you are kitted out with your gear at the Sea Bees dive centre in down town Chalong.
You get a named crate which is very methodically packed with: a wetsuit (- we choose shorties – it’s really all you need in 29°C of water), BCD, regs with occy, depth and pressure gauge, mask, snorkel and fins (and booties if required) all strapped in using your own weight belt.
You can leave your gear at the dive shop and just take your dry clothes and knick-knacks in a separate bag. Dry towels are provided on board, and there is soft soap in all the showers and toilets. (So for the six days you only really need six T-shirts, three sets of boardies and a toothbrush; but of course, we all have a two column, 8 pt font checklist of all the other crap we need from contact lens fluid to spare battery charger!)
The dive gear and dive guests’ bags are taken down to the boat first – which is literally a 5 minute walk away. This enables the guests to enjoy a beer at the bar and begin to mellow into the experience.
On arrival at the boat you take your shoes off for six days! Yippee – now were really on holidays!
The Marco Polo has two main decks and a sundeck. The dive deck at the rear of the lower deck houses all the gear and has inside and outside showers. All the dive gear is left on the dive deck where it is stored securely and in a drying atmosphere. The guest cabins and three bathrooms are also on this deck, so from leaving the water fully kitted, to being de-fitted, showered and changed is about 6 minutes tops.
On the rear of the middle deck is the main guest area: a covered area with tables and benches open to the ocean breeze where you can do everything from eating, to writing up your dives, to reviewing photos. The all-important drinks fridge is in this area to.
Forward on this area is the enclosed saloon where the food buffets are laid out for each meal. It also houses a water station, hot and chilled, the all-important coffee machine, the library and the entertainment area: which is a mobile radio into which you can plug your MP3 player or USB stick.
Forward of the saloon on the crews quarters and the bridge, with a pleasant little area just in front of the bridge where you can sit, looking straight ahead and watch the bow plough gently through the waves of the open sea as the Marco Polo pushes on to the next dive site.
The top deck is for sunbathing, though it has shade too, and getting great and unobscured shots of the surrounding islands
First, there’s a general boat brief, then we are shown individually to our cabins, and their facilities; air conditioning, bar fridge, firm bunks, and that’s pretty much it apart from the mirror and clothes rack and towel rail.
The air temperature is 28 to 30°C and the cabins open onto a narrow walkway (which runs around the boat) with the ocean beyond. Many guests choose to leave their cabin door open 24 x 7. We chose air-con because of the cameras. You can also hang your towels and swimmers on the hand rail outside your door; pegs are provided and they usually dry within the interval between dives.
We quickly unpack and set up our camera gear before returning back to the lounge deck for dinner, which is only served when everyone is assembled. Each evening there is a choice of a main Thai and a Western dish (or both if it was a big dive day), and plenty of beer and soft drinks in the cabinet. Shortly after dinner, the Marco Polo sets out for the Similans, and as we hit the slightly wavy waters of the Andaman Sea, the guests start to wander off to bed, after grabbing a handful of seasickness tablets that are complementary.
By morning we are moored in a sheltered bay in the middle of the Similans, and knocked awake just after dawn to attend the first dive brief whilst enjoying some light breakfast. This first briefing is a little longer than the rest is it covers the dive protocols, rather than just the dive site. This includes how and when to check your nitrox and where to record it; how the boat will collect you after a dive; entry and exit protocols; and all the usual stuff then it’s good to be reminded of.
After being assigned a dive guide, next comes dive site brief. The words seem a little superfluous as we have a full-scale, relief map on the wall, with hard and soft coral areas shown. The only thing that is missing is where the critters will be hiding – but even that is attempted to be covered by the dive brief. Actually we’re all not listening any more, the water is beckoning and we’re desperate to get in.
Finally, finally we all go down to the dive deck and start to kit up. There are two deckhands to help and they seem to pre-empt your every move making sure that you put your weight belt on before your BCD, that your bungee cord is around the pillar tap and not the pillar neck, and that your air is on, etc etc. They also quickly learn which camera belongs to which diver and will be ready to hand it to you after your dry giant stride into the water.
On many dives it’s possible, indeed sensible to descend and ascend on the mooring line; on others the captain will take us close in and drop us directly on the site, then wait a little further out until the safety sausages appear. The boat is deceptively small and manoeuvrable on the outside. The deckhands also throw out mermaid lines so that you can quickly pull yourself in. Twin ladders at the rear ensure that the 12 guests and three guides can be whisked out of the water quite quickly.
There are two deck showers and two shower cubicles to sluice off the salt water between dives. The wetsuits hang on the dive deck and dry well between dives. Everyone’s gear is stored in their crate under their bench where their tanks reside – everything has its place.
After the first dive, the real breakfast is served which invariably includes bacon, eggs, as well as a selection of cereals, yoghurt, fruit and Thai options; there’s also toast with spreads from apricot preserve to peanut butter, or with freshly brewed coffee, tea or cocoa.
After that, there’s about an hour before the next dive brief. Just enough time to write up your dive and check through your photos. Most of the guides can name most of the critters you’ll see. If they can’t there’s a full reference library on board to double check that it was indeed the porcelain crab, the ornate ghost pipefish, and the trigger-tailed seahorse.
The surface interval intervals tend to be about 3 1/2 hours apart so if the first time is at 7:30 am, the mid-morning dive is 11 am, and it follows the same: dive brief and dive protocol as the first.
After a similarly varied lunch, the mid-afternoon dive is around 3 pm with the dusk or night dive between six and 7 pm. With the exception of Richelieu Rock which is just that, a rock shows itself only at low tide, the Similan Islands and Koh Bon and Koh Tachai are islands, so there is usually one lea shore, to moor up in overnight, but no guarantee that any particular dive site will be protected. The night dives usually take place directly beneath the both in these sheltered moorings.
The timing also depends on the motoring: with conditions able to change rapidly, you are in the middle of the Andaman Sea remember, sometimes plans change on dive by dive basis as the cruise director weighs up the desirability of hitting certain sites versus conditions at that site.
The boat steadily makes its way north, stopping at Koh Bon and Koh Tachai and then making a sprint up to the Richelieu Rock for a full day before wending its way back down through the Similan Islands.
Four dives are offered each day, with just two on the last day, as the trip back to Chalong takes a good four hours.
An overview of, and four of the dive sites of, the Similans, are featured on this website; they are Similans Overview, Richelieu Rock; Koh Bon; Hin Pusa and Similan #9 Koh Bangu North Point. Here is some great footage of a couple of turtles that come and visit if you’re chilling in Donald Duck Bay (Koh Similan) between dives.
youtube
The post Diving the Similan Islands with Sea Bees Diving appeared first on Diveplanit.
from Diveplanit https://ift.tt/2ri5ZV0
0 notes
Text
Melbourne police trawl cold-case records as they investigate body stuck in bin for 15 years
Melbourne police trawl cold-case records as they investigate body stuck in bin for 15 years
Police will continue to search a storage facility in Melbourne’s southeast for clues as to how a decomposed body came to be stuffed inside a wheelie bin for at least 15 years.
Investigators will trawl through missing persons records and cold-case suspected murders in a bid to identify the remains which were found with dirt and straw in a bin tied with Occy straps in Oakleigh South about 11am on…
View On WordPress
0 notes
Text
Creek crossings tips and tricks!
4WDing is fast becoming one of Australia’s favorite pastimes, with more 4WD’s being sold than any other type of vehicle. This rate of popularity increasing is due to the affordability, safety features like curtain airbags and reversing cameras plus with increased fuel economy rivalling other family cars, the lower running costs are more appealing than ever to young families!
These tips and tricks are all about making sure that when you encounter obstacles off-road you know exactly what to do!
We all know about letting your tyres down for driving on sandy tracks, but what about all of those potentially hazardous creek crossings and washouts you may encounter on the beaches and winding mountain tracks.
We’re going to go over some pro tips on how to make sure you’re 4WD makes it to the other side without any stress or dramas. There are rules of thumb for everything when you head off-road, but it is up to you, the driver to make decisions on the best course of action, and how you are going to proceed whilst you are off the beaten path.
Preparation
There are a few things you may need to do before you even consider tackling a creek crossing, depending on the water depth and your vehicle.
Firstly you may need to pull out a can of WD40, CRC, or RP7 to spray all of the electrical connections underneath your bonnet including distributer caps, and injector connectors and plug lead connections. This will prevent your motor cutting out in the middle of the creek and causing you strife, and whilst it is out, give your door seals a quick squirt, this will make them seal a lot better.
No matter what your user manual recommends, your vehicles ‘fording depth’ can be taken with a handful of bull-dust and solid preparations should be made before any water crossing deeper than 30cm. Even with a lift kit and snorkel water can make its way all the way to the top of your engine bay.
If you have been driving for a while, it is a good idea to let your brakes cool down before entering the water to prevent your discs warping when they hit the cool water.
Also if you aren’t running an electric fan or a fan that uses a viscous coupling to stop it spinning you may cause damage to your radiator as the fan blades bite into the water they can start to chop against your radiator core.
There is an easy solution to this, a 2 dollar poly tarp and some occy straps simply cover up the front of your vehicle with the tarp and use the occy straps to fasten the tarp in place, this will stop the water from flowing through your radiator and allow it to wash past your engine bay minimizing the risk of water damage, particularly if you haven’t fitted a snorkel to your vehicle.
Also if you have a Domin8r X winch fitted, a wise move would be to connect your winch controller, unspool all of your rope and coil it up on your bullbar and engage the winch clutch mechanism before you enter the water, this means you are ready for a rescue no matter what happens.
2.Navigation
When getting ready to navigate a crossing, it’s a good idea to walk the creek first, with golden rule being, if you cannot walk it, you shouldn’t drive it, there are 5 main factors to consider;
Depth of the water – You don’t want water coming up over the bonnet, if you are any deeper than waist depth, you may end up getting yourself into trouble and we wouldn’t recommend it, specially if you haven’t got a snorkel fitted, particularly if you find any deep drop offs.
Flow speed – Depending on the depth of the water even a seemingly slow flow can carry a vehicle away due to the large surface area, so extra caution should be taken. Particularly
The driving surface – the surface of a creek can change dramatically so even if you have driven it before it is good practice to walk it again, this will help you identify boulders you may get hung up on, you will also be able to check for unexpected drop offs, and the condition of the creek bed.
Just like with tracks, a sandy bottom may need you to deflate your tyres, using a Kwiky tyre deflator, or a 3 in 1 tyre gauge.
The track width – Depending on your 4WDs width, the crossing width may have more or less underwater surface to support your vehicle, this is another reason why walking the course can help to determine, whether or not you should cross.
The water exit – there is no stopping once you have entered the water. So double checking you have a good place to exit the water is a good idea, you don’t want the exit to be too steep, or get your vehicle in a situation where you cannot climb out the other side, so make sure you have a good exit strategy!
3. Driving tips
Now you are prepped and have a strategy to get across the creek, you should pay attention to these tips for driving through deep water, to make sure you get to the other side!
We recommend driving in second gear, low range. This will allow you to maintain momentum without needing to change gears whilst in the water. If you engage your clutch pedal, you may let water enter between your friction plates and render your 4WD dead in the water. Keeping a steady speed will allow your vehicle to create a bow wave, leaving much of the rear of your vehicle in the trough of the wave, keeping dry, the steady speed will also allow your tyres to maintain traction on the riverbed.
If you have a convoy, don’t all enter the water at the same time, if you aren’t first you can watch for hazards, and if things go wrong you can help recover your mates whilst safe and sound on solid ground, wait for them to get across fully before attempting your crossing!
By all means this is not a conclusive list of everything you need to consider for creek crossings, but will give you a good guide for getting it right the first time. Please use caution, and never drive across flood waters, as the surface can be unpredictable and doing this regularly results in dangerous situations and possible death, particularly with flowing water.
from 4WD Supacentre via 4WD Supacentre on Inoreader https://www.4wdsupacentre.com.au/news/creek-crossings-tips-and-tricks/
0 notes
Text
Securing Thrills: The Vital Role of Occy Straps in Zipline Adventures in Sunnybank Hills

Nestled in the heart of Sunnybank Hills lies a thrilling adventure that promises an adrenaline rush like no other—the Zipline experience. As you gear up for an unforgettable journey through treetops and across scenic landscapes, there's one unsung hero that plays a pivotal role in ensuring your safety and enjoyment: the humble Occy strap.
Unveiling the Occy Strap
While ziplining is an exhilarating and visually stunning activity, safety should always be the top priority. Occy straps, short for octopus straps, are versatile and robust elastic cords that have found a crucial role in the world of adventure sports. Originating from the marine industry, these straps are designed to secure loads on boats, making them ideal for withstanding the forces encountered in high-speed and high-impact activities like ziplining.
Safety First: Harnessing the Power of Occy Straps
Shock Absorption
Occy straps are renowned for their ability to absorb shock and distribute forces evenly. As you soar through the air on a zipline, these elastic wonders act as a buffer, cushioning the impact of sudden stops or changes in velocity. This feature is particularly crucial during abrupt braking, providing a smoother and safer experience for thrill-seekers.
Customizable Tension
Ziplining adventures in Sunnybank Hills cater to a diverse range of participants, each with varying weights and preferences. Occy straps can be easily adjusted to accommodate different body types and weights, ensuring a customized and secure fit. This adaptability enhances the overall safety of the adventure, making it accessible to a broad audience.
Durability in the Elements
Sunnybank Hills boasts a sunny climate, but occasional weather surprises can't be ruled out. Occy straps, designed to withstand the harsh conditions of marine environments, are resistant to UV rays and moisture. This durability ensures that your zipline adventure remains safe and enjoyable, regardless of the weather conditions.
The Occy Strap Advantage in Action
Imagine soaring above the lush landscapes of Sunnybank Hills, secured by the reliable embrace of Occy straps. As you navigate from platform to platform, the straps effortlessly stretch and contract, providing a dynamic and secure connection to the zipline. This dynamic tension adds an extra layer of excitement to your adventure, accentuating the feeling of being one with the elements.
Ziplining in Sunnybank Hills is not just an adventure; it's a holistic experience that blends excitement with safety. The often-overlooked Occy strap serves as the unsung hero, ensuring that your zipline journey is not only exhilarating but also secure and reliable. So, the next time you gear up for a zipline adventure in Sunnybank Hills, take a moment to appreciate the vital role played by Occy straps—your reliable companions in the sky.
As you embark on this unforgettable experience, remember that safety is key, and the unassuming Occy strap is there to make sure your journey through the treetops is not only thrilling but also worry-free.
0 notes
Text
Correct use of wire toaster while free camping.
Place toaster on caravan stove, light stove.
Watch spouse remove toaster from stove and replace right-way-up.
Place bread on toaster bars.
Turn your back for 20 seconds to make a coffee.
Remove toast from toaster bars.
Open windows and disable smoke alarm.
Place second piece of bread on toaster bars. Watch like a hawk for next 15 seconds. Get distracted for half a second by your kid trying to climb into the fridge.
Remove toast from toaster bars.
Gather up fire blanket and place aside for cleaning and refolding after breakfast.
Secure child to high chair with ratchet and occy straps and place in corner.
Relight stove and place next piece of bread on toaster bars.
Turn toast over precisely at the 15.5 second mark. Wait a further 10.25 seconds exactly.
Finally collect one piece of golden brown toast.
Remove any visible metal and wire fragments from toast.
Butter toast and place a new piece of bread on the toaster bars.
Sit down and enjoy two bites of delicious toast.
Turn off stove.
Remove fire extinguisher from mounting bracket, hold upright and tug sharply on safety locking pin.
#Free camping#Travelling family#Crude jokes#Aussie humour#Australia#Parenting#Rampant immaturity#Caravan park#Caravan#Parenthood#Dad jokes#Educational
0 notes
Text
I reading something for an online quiz thing and one of the written parts said:
A young part time trolley collector collected five trolleys in a line. He connected them with an 'occy strap' (an elastic strap with a metal hook at each end) and began pushing them down a ramp. The front three trolleys separated going down the ramp, stretching the occy strap. The hook nearest the worker straightened out and the strap recoiled upwards, striking the worker in the throat and killing him.
Don’t became a trolley collector
0 notes
Text
Vic police investigate body in wheelie bin
Vic police investigate body in wheelie bin
Police will continue to search a storage facility in Melbourne’s southeast for clues as to how a decomposed body came to be stuffed inside a wheelie bin for at least 15 years.
Investigators will trawl through missing persons records and cold-case suspected murders in a bid to identify the remains which were found with dirt and straw in a bin tied with Occy straps in Oakleigh South about 11am on…
View On WordPress
0 notes
Last Seen Blogs


threexfourhumans
Three and Four as humans

sadovaia
sympathy for the Devil

all-out-emotion-blog
Little damned wretch

marcus-de-freitas-photography
Marcus De Freitas